sanding

Craft Beer Flight : Part 6

Today was all about prepping for finish and applying finish to the flights. I chose to use a Oil based Polyurethane finish because of its properties to protect from moisture since we are adding beer glasses into the mix.

TODAY’S ACTIVITIES INCLUDED

  • Finish Sanding

  • Prep for finish

  • Before & After

FINISH SANDING

So before I could head into applying the first coat of the finish I needed to smooth all surfaces down so I used my miscellaneous sanding equipment which included:

  • Belt & Disc Sander

  • Random Orbital sander

  • Oscillating spindle sander

I used all these machines to get every surface smooth to about 320 grit.

I used Varathane Oil Based poly on the flights, I usually thin this out but because I need all the protective properties I didn’t this time.

I used Varathane Oil Based poly on the flights, I usually thin this out but because I need all the protective properties I didn’t this time.

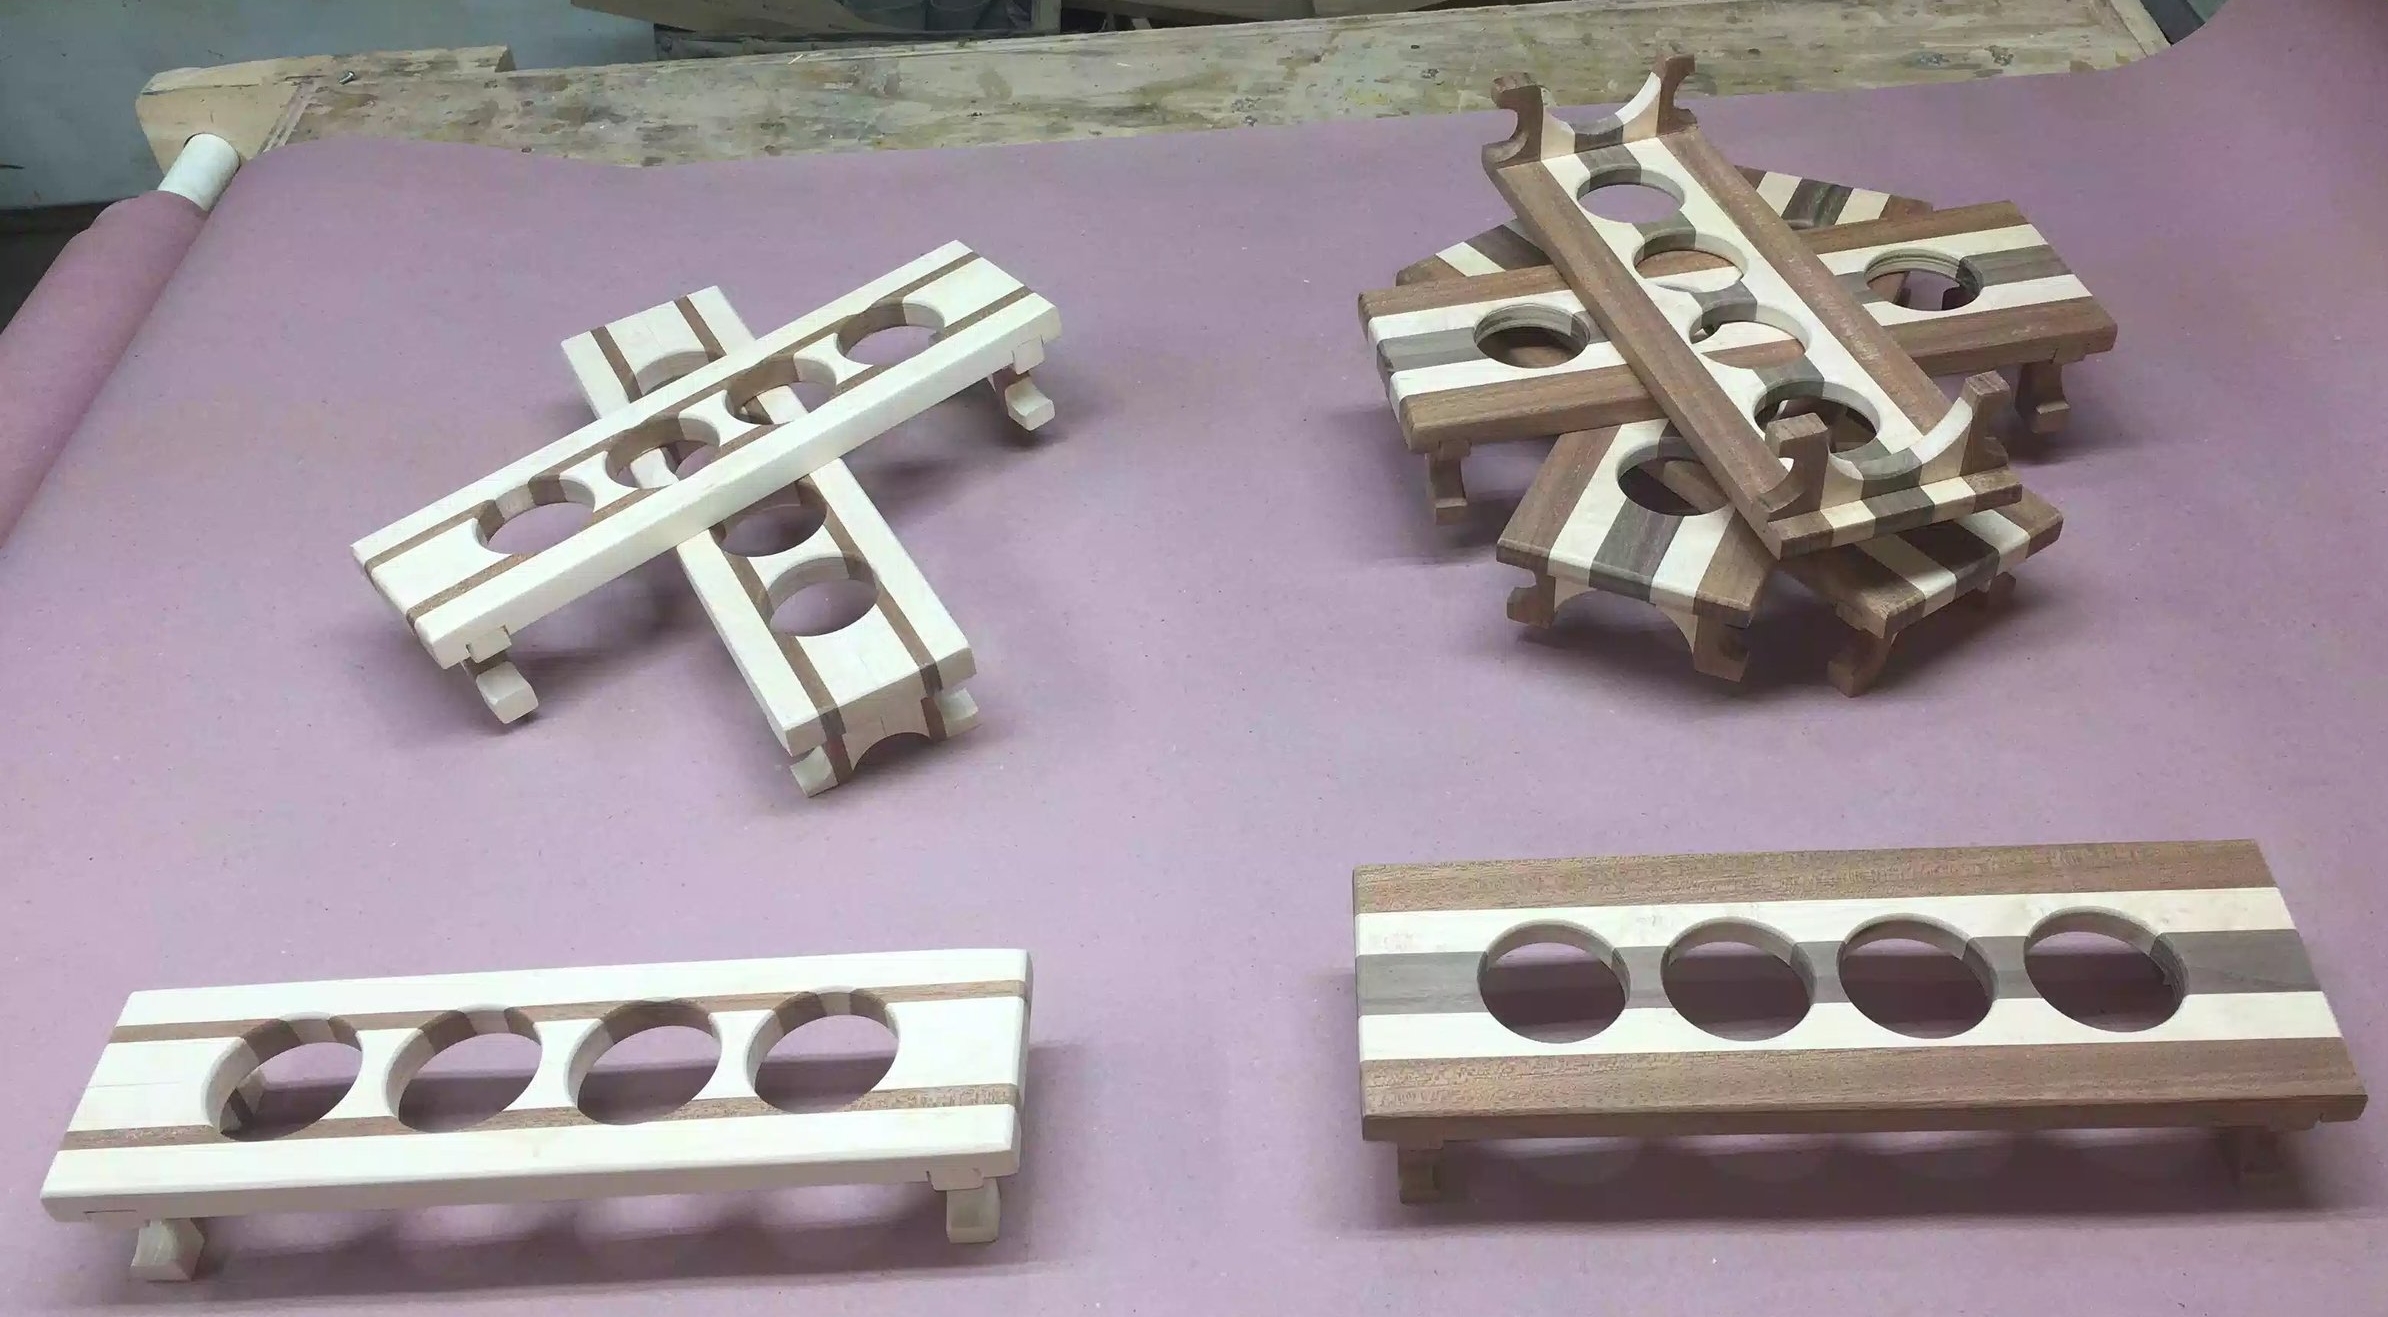
Here are both styles of flights all sanded I have to say that I really love both and especially love all the contrasting woods I used.

Here are both styles of flights all sanded I have to say that I really love both and especially love all the contrasting woods I used.

Here is a close up the Maple & Sapele style

Here is a close up the Maple & Sapele style

Here is the other style of flight with Sapele, Maple & Walnut

Here is the other style of flight with Sapele, Maple & Walnut

PREP FOR FINISH

So now that all my sanding was completed I needed to ready my work bench for some finishing work. I made my own finishing stands as the store bought ones were a little expensive, so I used some scrap plywood and and screws. They are super easy to make and whats also handy about them is that you can make a lot of different sized stands and they can be stacked as well. I have put some pictures below.

Here is a few stacked, makes storage easy. As you can see on one I have screws protruding through the top, this is what your work piece sits on while applying the finish.

Here is a few stacked, makes storage easy. As you can see on one I have screws protruding through the top, this is what your work piece sits on while applying the finish.

Here is the top side of the stand, I used a forstner bit to drill a recess into the top that way the screw protrudes and allows each stand to sit onto each other.

Here is the top side of the stand, I used a forstner bit to drill a recess into the top that way the screw protrudes and allows each stand to sit onto each other.

Here are the stands in action, these are cheap and can be batched out how many you need and all you need is some scrap plywood and screws.

Here are the stands in action, these are cheap and can be batched out how many you need and all you need is some scrap plywood and screws.

Next I needed to lay out all my flights onto their respective stands and go about applying the finish, as I said before I used an oil base polyurethane but I also used a foam disposable brush as I feel I get really nice finish using them.

Here are all the flights laid out on the rosin paper that I use to protect the work surface.

Here are all the flights laid out on the rosin paper that I use to protect the work surface.

BEFORE & AFTER FINISH

Next I needed to add the finish and below you can see a few before and after pictures of the flights.

Before Finish

Before Finish

After finish, although the finish is still wet in this picture I really like how the finish brings the flight to life. I will probably use 2/3 coats sanding between each coat.

After finish, although the finish is still wet in this picture I really like how the finish brings the flight to life. I will probably use 2/3 coats sanding between each coat.


BEFORE FINISH

BEFORE FINISH

AFTER FINISH WOW… the finish as you can probably tell is still wet but really love the 3 contrasting woods especially the Sapelle on the outside edges.

AFTER FINISH WOW… the finish as you can probably tell is still wet but really love the 3 contrasting woods especially the Sapelle on the outside edges.


Here is the how I left the flights today.

Here is the how I left the flights today.

NEXT

  • I need to apply at least one more coat of poly and then I need to determine whether to add any more coats, I don’t want the wood to feel like plastic

  • Then they will be ready for sale.

Well that’s all I have for today, to be honest I am not going to document every coat I apply to the flights so the next post regarding this project will be the wrap up post, until then

Take Care & Thanks for reading

PS: I do need to start my monthly newsletter for November so if you would like to be added to the subscribers list please click here

New Project: Trivets

So I needed a little project to keep me busy and I needed to use up some scrap wood that I had lying around. I was sitting at dinner one night and noticed that all the trivets looked terrible and some were even broken, so I went on YouTube and finally found an easy way to make them using a table-saw and dado stack.

THE PROCESS

  • The Wood

  • Miter Saw

  • The Trivet blanks

  • A little Layout

  • Cutting the Grooves

  • Adding a Round-Over on the Router Table

  • A lot of sanding

  • All finished

THE WOOD

Since I wanted to use up some scrap that I had around I used a piece of 1x8 poplar that I could get about 9 trivets out of. I wish I had some 1x8 oak as that would of been a nicer trivet, but maybe in the near future I will make some trivets for Christmas presents.

Here is the piece of poplar that I used.

Here is the piece of poplar that I used.

THE MITER SAW

Usually I use the miter saw a lot for a project but I only wanted to cross-cut the board to around 18” as I wanted to do a trial run making 3 trivets and see how they turned out.

Crosscutting the board at my miter saw station.

Crosscutting the board at my miter saw station.

TRIVET BLANKS

  • So after cutting the piece I took it from the miter saw to the table-saw and ripped the board to its final width.

  • I took out my cross-cutting sled because I usually get more accurate cuts from it and set-up a stop block and cross-cut the board into 3 blanks that were exactly 6”x6” square

Here is my cross-cutting sled is not fancy but it’s dead on accurate. You can also see the stop-block which is nothing more than a scrap of plywood clamped with the sled fence.

Here is my cross-cutting sled is not fancy but it’s dead on accurate. You can also see the stop-block which is nothing more than a scrap of plywood clamped with the sled fence.

Here is the 3 blanks all dimension-ed and ready to be turned into trivets.

Here is the 3 blanks all dimension-ed and ready to be turned into trivets.

A LITTLE LAYOUT

I needed to do a little layout on one of the trivets to make sure all my dimensions were correct, so I took it to my bench and drew some layout lines where I was removing wood.

  • Measure over 3” to find the center of the blank and strike a line, then measure 3/16” to the left & right of that line so as to center the 3/8” dado stack to the work-piece.

  • Finally measure 3/8” on the wood thickness (as it is half of 3/4”wood thickness) so as that I new where to position the dado stack in the table-saw

  • Now that I had marked up one face I needed to turn the board 90° and do the same on that side that is what creates the waffle pattern I am going for.

Here are my layout lines on one of the edges. All the “x” represent where the grooves will be run.

Here are my layout lines on one of the edges. All the “x” represent where the grooves will be run.

Here you can see the dado stack measuring up-to the 3/8” line on the blank edge.

Here you can see the dado stack measuring up-to the 3/8” line on the blank edge.

CUTTING THE GROOVES

Here is where it will get tricky in how to explain this process. Using a 3/8” thick dado stack in the table-saw I needed to cut the 7 grooves on each of the marked faces which will give me the waffle pattern design that I want. This is my first time making trivets lets alone doing repetitive groove cuts in such a small pirce of wood, but I am happy with the results, practice makes perfect. One more thing I experience a lot of tear-out doing this and it left a decent amount of sanding after.

Here is my attempt at detailing the step by step process.

STEP 1. With my 3/8’ wide dado stack center on the work-piece I run it through the blade, which results in a centered groove. As you see in the following pictures some of the cuts are made with the grain and others against it which is what makes the waffle pattern.

Using my center-line I ran the stock through the 3/8” wide dado stack

Using my center-line I ran the stock through the 3/8” wide dado stack

Here is the center groove

Here is the center groove

STEP 2: The goal of the next couple of steps is make grooves on one side of the blank with equal spaces between each groove.

  • Using the groove that I just made in the center, I re position that groove on the blade and use a spacer block which is 3/4” and position it beside the cut groove and line my table-saw fence against the spacer block and then move the work-piece over until it reached the rip fence. This step can gut 2 groves either side of the center by simply turning the workpiece 90° after each cut.


Here is the spacer block against the fence, when I remove the spacer block and move the work-piece against the fence it will center the next 2 grooves.

Here is the spacer block against the fence, when I remove the spacer block and move the work-piece against the fence it will center the next 2 grooves.

Here you can see the work-piece butted up to the fence and ran through the blade, once this is done I rotate the piece 90° to get the other groove.

Here you can see the work-piece butted up to the fence and ran through the blade, once this is done I rotate the piece 90° to get the other groove.

This is what you should have, 3 grooves equally spaced.

This is what you should have, 3 grooves equally spaced.

REPEAT STEP 2 UNTIL YOU GET ALL 7 GROOVES DONE ON ONE SIDE OF THE WORK-PIECE.

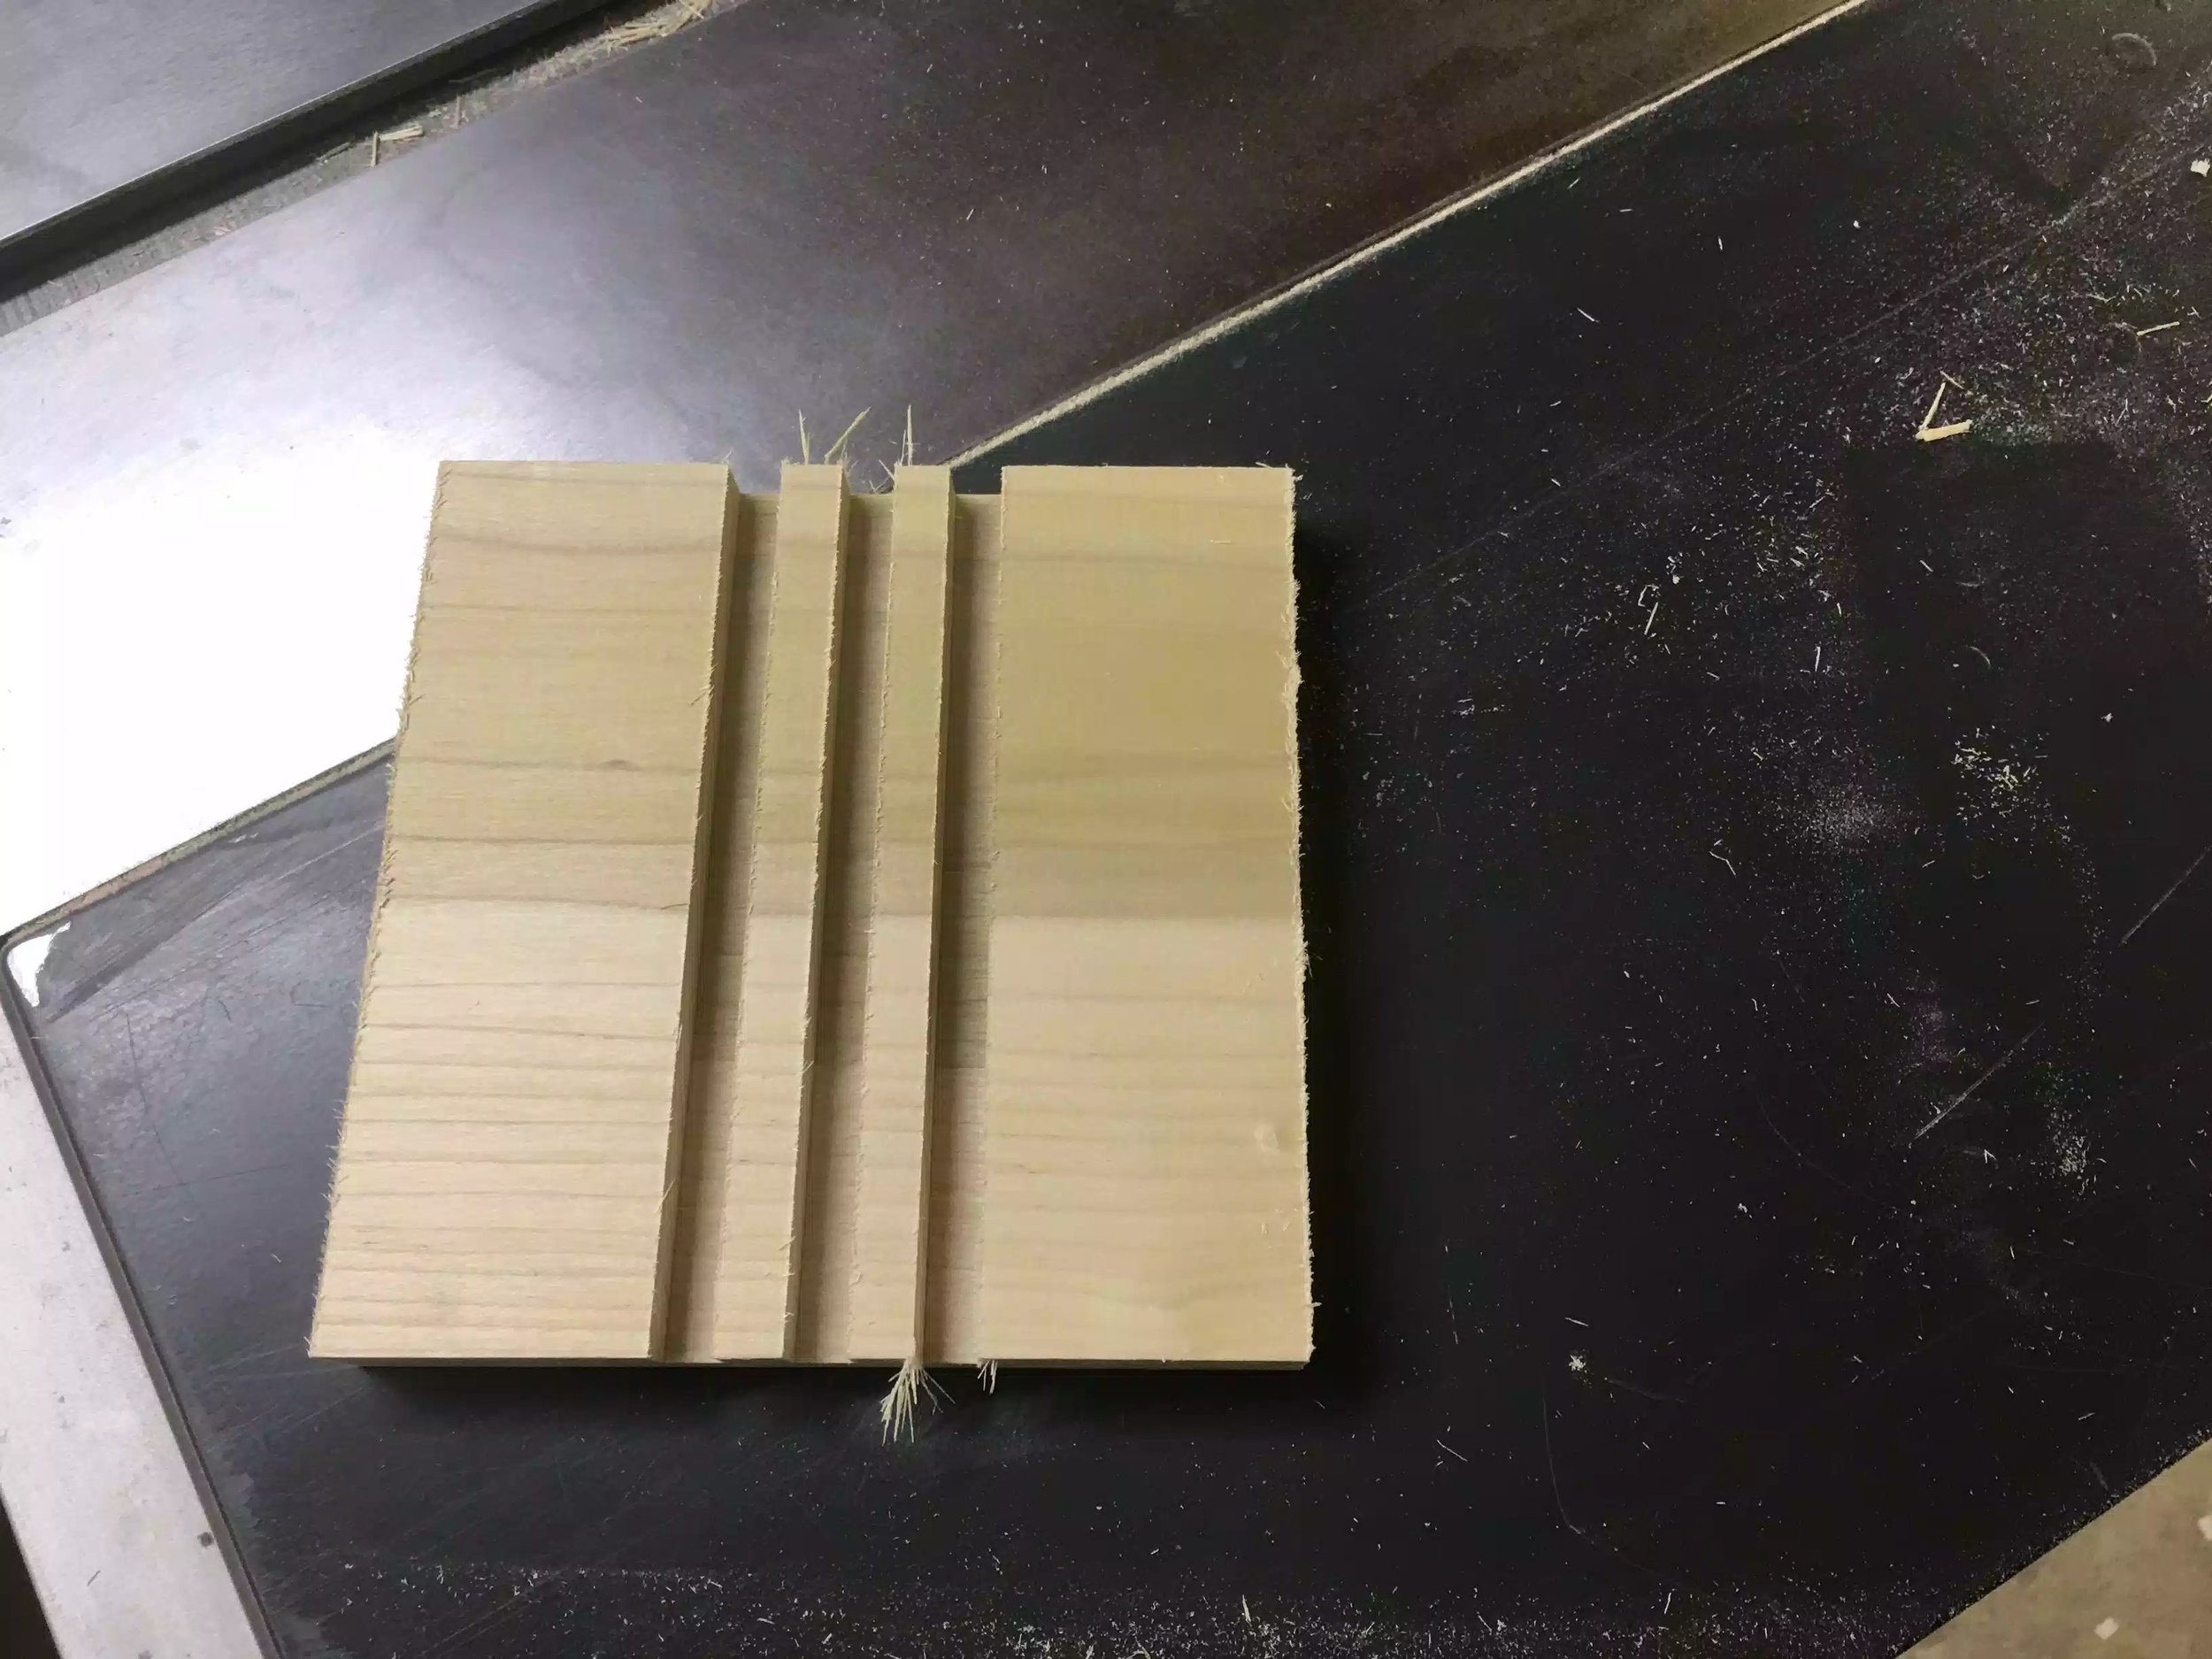
After repeating step 2, two more times you should have this. 7 grooves all running in the same direction, and for the most part equally spaced.

After repeating step 2, two more times you should have this. 7 grooves all running in the same direction, and for the most part equally spaced.

Here is a edge view of what your work-piece should look like.

Here is a edge view of what your work-piece should look like.

STEP 3: Now we turn our attention to the other side of the work-piece and create 7 grooves that go in from the other side than the ones we just did, this will reveal the waffle pattern.

  • Using the center line on this side, run it through the blade which is still at 3/8” wide & 3/8” high, you might need to make a couple of passes until you remove enough material to reveal one groove where you can see the waffle pattern below. After this step you should have what looks like below

Waffle pattern coming to life after cutting the center groove.

Waffle pattern coming to life after cutting the center groove.

As we did in Step 2 above we need to repeat that process to define all remaining 6 grooves using the spacer block and the rip fence method I used in Step 2. You should now have a work-piece with the waffle pattern visible, although in rough shape because of all the tear-out.

With 3 grooves cut, your piece should look like this, only 4 more cuts to make.

With 3 grooves cut, your piece should look like this, only 4 more cuts to make.

Here is the final waffle pattern, there was so much tear-out that I thought that I was doing something wrong or my dado stack wasn’t sharp. Anyway we clean this up later.

Here is the final waffle pattern, there was so much tear-out that I thought that I was doing something wrong or my dado stack wasn’t sharp. Anyway we clean this up later.

ROUND-OVER AT THE ROUTER TABLE

To remove all the sharp edges on the outside edges of the trivet I used a 1/4” round-over bit in my router at the router table and eased some of the edges.

1/4” round-over profile bit in the router table.

1/4” round-over profile bit in the router table.

I’m not sure if you can see the round-over profile as it is very small, but it did the trick. I will also be using several grits of sand paper to clean it up more, especially on the inner grooves that the router table cant reach.

I’m not sure if you can see the round-over profile as it is very small, but it did the trick. I will also be using several grits of sand paper to clean it up more, especially on the inner grooves that the router table cant reach.

A LOT OF SANDING

To be honest the most time consuming part of this project is all the sanding that needed to be done, there was so much tear-out on the inner grooves because the wood was un-supported going through the dado stack that it created a mess, so I used a piece of sand paper and wrapped it around a 1/4” thick piece of plywood to fit inside the grooves, I also used a chisel to remove some of the stubborn wood fibers.

After using the sandpaper I turned to my random orbital sander to sand the top / bottom sides of the trivet to make it inviting to the touch.

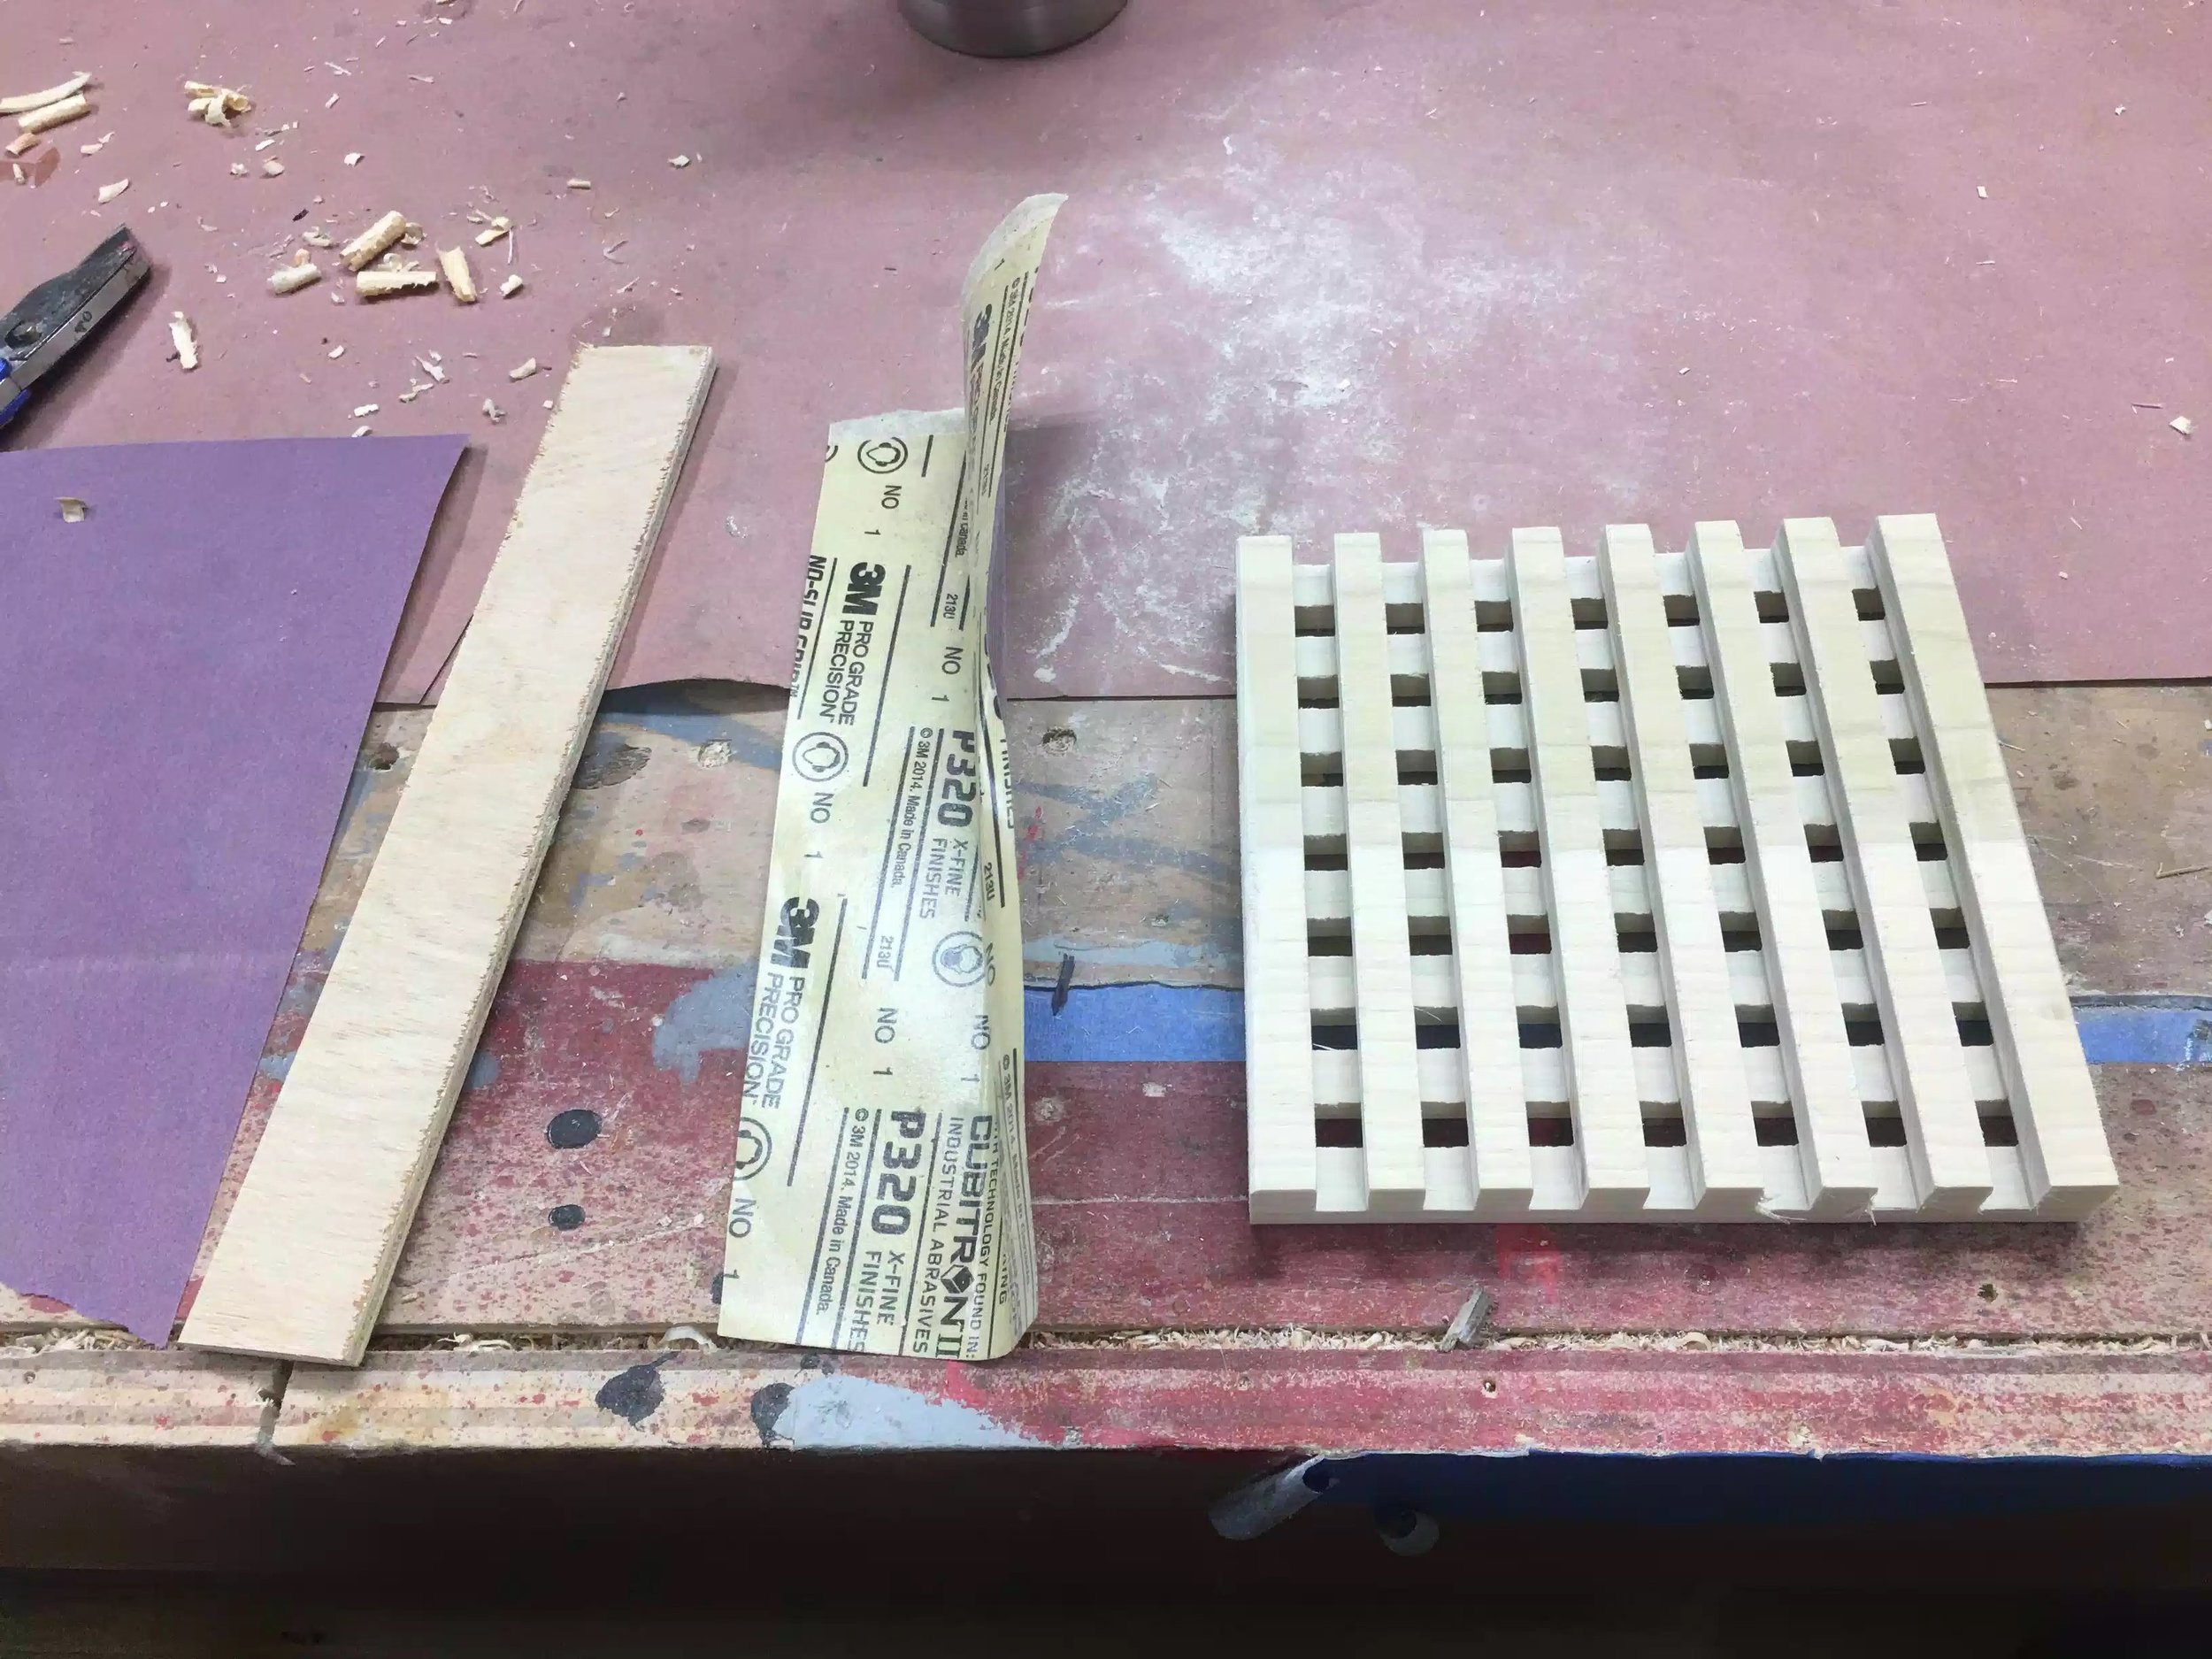
Here is what I started with when beginning to use the sandpaper.

Here is what I started with when beginning to use the sandpaper.

Here is my solution to sanding in between the grooves. Some various grits of sand paper finishing with 320 grit and a piece of 1/4” plywood scrap. I wrapped the paper around the plywood and went to town.

Here is my solution to sanding in between the grooves. Some various grits of sand paper finishing with 320 grit and a piece of 1/4” plywood scrap. I wrapped the paper around the plywood and went to town.

Here is the sandpaper doing the trick

Here is the sandpaper doing the trick

Here is the finished trivet, a great improvement over what I had started with.

Here is the finished trivet, a great improvement over what I had started with.

ALL FINISHED , FOR NOW!!!

Well I set out to make 3 and that is what I got done today, I gave the 3 to my mother in law and she was happy. These make a great little present, and the holiday season is coming up. I must say this was a fun little project and the possibilities are endless with the style options. I am actually thinking of making a jig that I can use with my router to do curved grooves, below is a few pictures of the threesome that I made.

Awesome project and a nice little item at the end.

Awesome project and a nice little item at the end.

Whats useful is that you can group them together if you have a large item that your table-top needs protection from.

Whats useful is that you can group them together if you have a large item that your table-top needs protection from.

image-2674.jpeg

Well thanks for reading and I hope to catch you again soon. I am in the process of making plans for these exact trivets and I will post them in my store as soon as they are completed.

Portable Sharpening Station: Day II

I returned to the project today after the weekend and I had the following steps to do.

  • Sand down the box frame after the glue-up

  • Make & Install the base

  • Cut the top to its final dimensions

  • Add some round-overs

SANDING

The glue had set and I think I used a bit too much as the squeeze out was on the excessive side, so I took my random orbital sander and went through 120 - 220 grit sandpaper to clean it up. The finger joints look OK there was a few tiny spaces in between the fingers but I will need to fill them in later.

Anytime I get inconsistent spacing between joinery methods I usually use the saw dust and glue trick. All this is is the mixing of a little glue and sawdust from the same species of wood I use for a project in this case is poplar and rub it into the spacing let the glue set for about 30 minutes and then return to sand it down and magically the gaps disappear. I will do this towards the end of the project.

This picture shows the state of the piece after removing the clamps but before sanding it down.

This picture shows the state of the piece after removing the clamps but before sanding it down.

Here is the box after sanding, need to fill in some little gaps around the finger joints but other than that it looks fine.

Here is the box after sanding, need to fill in some little gaps around the finger joints but other than that it looks fine.

THE BASE

The base is nothing special , I am using a piece of 3/4” plywood as it will not be seen and then using the counter-sunk holes I already made around the bottom of the box parts I will use 1-1/4” screws to secure the base. I am not gluing it just in case I need to replace it in the future. I also needed to resolve a problem with keeping tools and accessories in position in the box an not be bumping into each other and possibly damaging them. To solve this issue I decided create a recess for the accessories I will be storing in the box, so I used my palm router and free handed the recesses to hold the tools. I will be using a similar process for the top but that is a much more precise recess and I will need to adapt the process whilst still using the router.

I used this scrap piece of 3/4” plywood for the base. I am cutting it down to final dimensions here on the table-saw.

I used this scrap piece of 3/4” plywood for the base. I am cutting it down to final dimensions here on the table-saw.

I am layout out the lines so as that the honing guide sits inside and will not rattle around.

I am layout out the lines so as that the honing guide sits inside and will not rattle around.

I used my palm router to remove the bulk of the recess and then went back with my chisel and mallet to clean up the edges.

I used my palm router to remove the bulk of the recess and then went back with my chisel and mallet to clean up the edges.

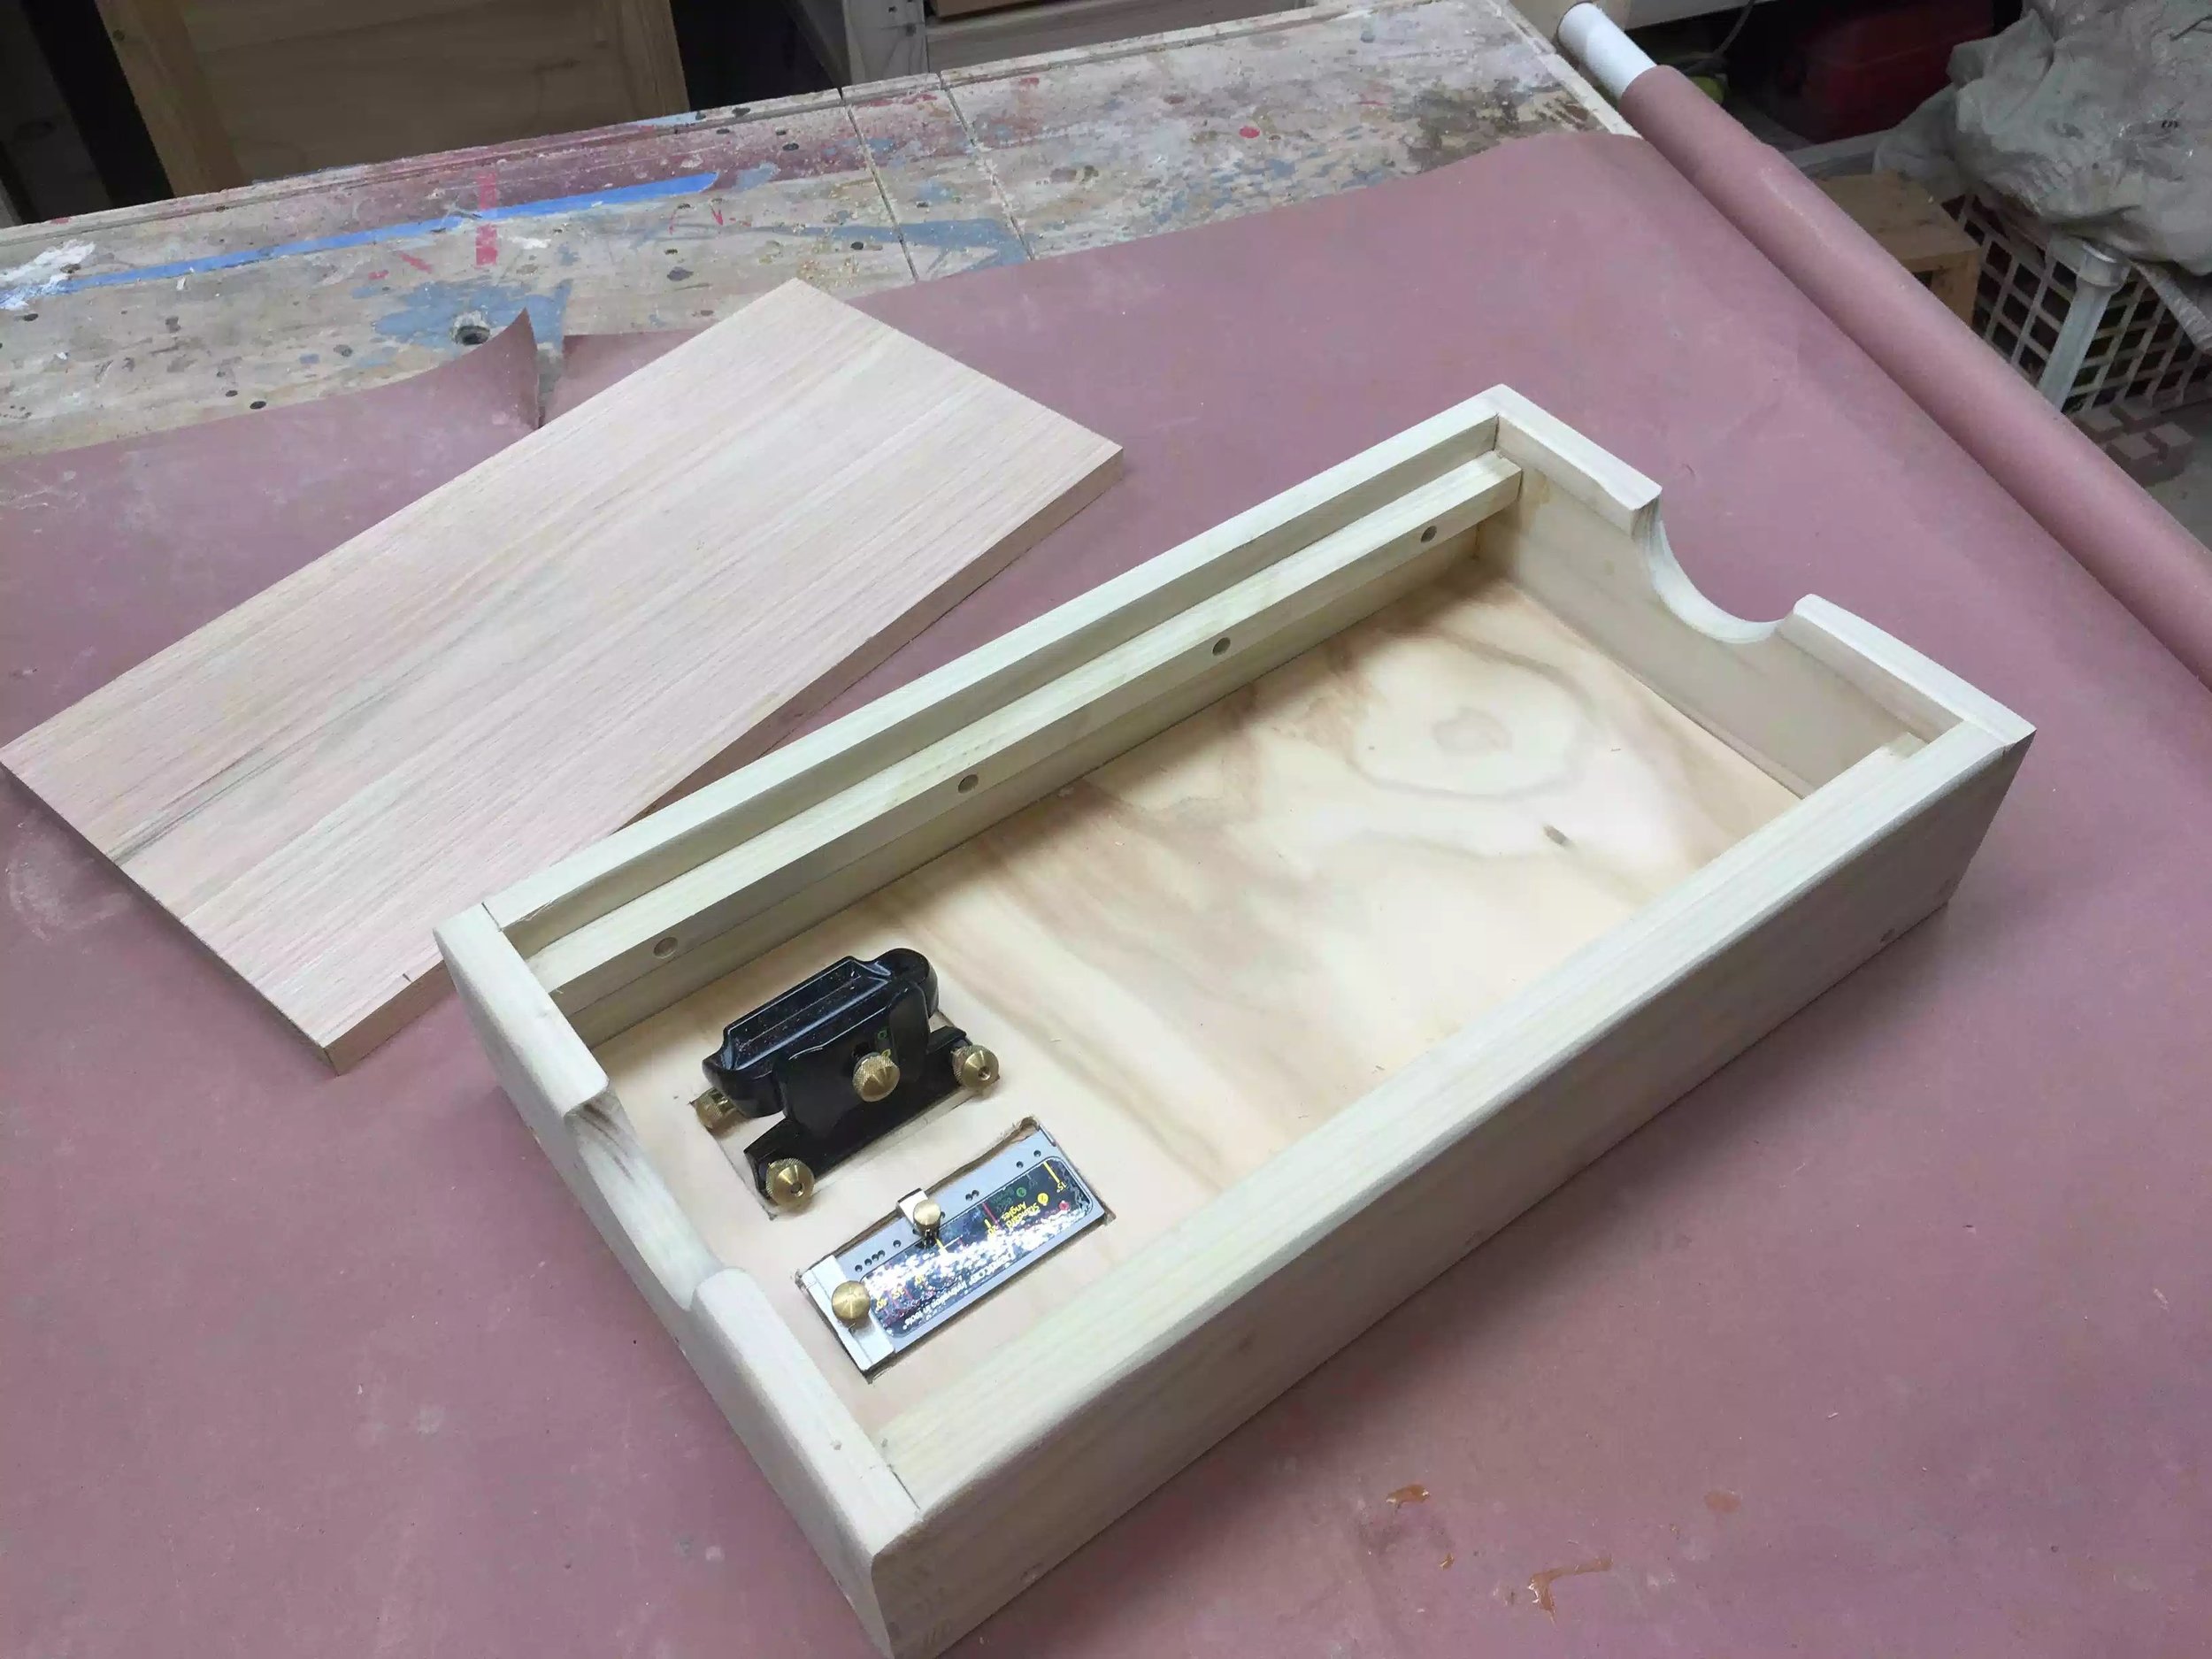
Here is the honing guide accessories all nice and snug, Ill leave it for now and can always remove the base when I need to add more recesses for other tools. I still need to figure out how to store my sharpening stones in the box cavity when its not…
Here is the honing guide accessories all nice and snug, Ill leave it for now and can always remove the base when I need to add more recesses for other tools. I still need to figure out how to store my sharpening stones in the box cavity when its not in use.

Another view of the base, before its secured to the frame.

Another view of the base, before its secured to the frame.

Base is all secured and looks functional.

Base is all secured and looks functional.

THE TOP

I am starting work on the top today but will need to finish it tomorrow. The top has a decent amount of work to do because it houses all my sharpening stones, I am creating recesses in the solid oak top so as that when I am using the sharpening station my stones stay stationary. To achieve this I need to use my plunge router together with a template that I need to make, I also need to use a template guide bushing on my router so as that I remove the precise amount of material for the stones to fit in, I purchased the Bosch bushing pack for my Bosch router which is the 1617 plunge router.

I will need to do a little more research on how to use a template for routing as I have never done it before. What I have so far I will show later.

TEMPLATE ROUTING

As you can see from my 3D rendering of the project below the top is to receive 5 recessed sections for the stones and a stropping plate.

3D rendering of the sharpening station.

3D rendering of the sharpening station.

USING TEMPLATES TO ROUTE RECESS

After researching online for a little while I found that I needed a couple of things before I could do this recess in the top. I needed to figure out the following:

  • Do I need tools that I don’t have for this task?

  • Do I need to make a jig of sorts?

  • Measurement considerations?

DO I NEED TOOLS?

After researching I found that I needed to buy a template bushing set for my router, a bushing is a router accessory that can be used with a jig, lettering, inlay work, even reproducing furniture parts. Here's the basic concept: A guide bushing mounts to the router's sub-base with a tube that protrudes below. A straight router bit extends through the tube. The outer surface of the tube rides against an edge guide or template, keeping the bit a set distance (offset) from the edge guide or template, see picture below.

Here is a picture that I found online to show the bushing in the router.

Here is a picture that I found online to show the bushing in the router.

In the marketplace you'll find two bushing styles. The Porter-Cable two-piece (shown below) uses a screw-on locking ring to hold the tube part to the router base. This style fits a wide range of models. The other style of guide bushing clicks into place, but only fits Bosch routers. If your router doesn't accept these common styles of guide bushings, consider buying adapters and sub-bases .

The style of bushing I needed was the one pictured on the right below.

WD321491.jpg

DO I NEED TO MAKE A JIG?

I don’t necessarily need a jig of sorts but I do need to make a template. A template is guide that I will use in conjunction with the guide bushing so as to guide the router to the shape that I need to create. I have decided to make the template because I have quite a lot of milling to do as I need to create 5 recesses and to do that free hand would be extremely difficult and would also mean a lot of clean-up when I was done with the router. Using a template negates all that clean-up probably with a chisel and also provides nice clean edges in less time.

I need to figure out how to make the template, that is tomorrow!!

Here is my router and bushing set.

Here is my router and bushing set.

MEASURING OFFSETS

To figure the offset, measure the outside diameter (OD) of the guide bushing tube and subtract the diameter of the bit. Next, divide this figure by 2 to determine the offset. In the example at below subtract the 1⁄2 " bit diameter from the bushing's 3⁄4 " OD. You get 1⁄4 ". Now divide this number by two and you arrive at a 1⁄8 " offset.

This diagram can aid in how to calculate the offset

This diagram can aid in how to calculate the offset

SO FAR!!!!!

This where I leave it for today, I had the main box, bottom and top made. Below are some pictures as to where I left off today.


The lid is on but that about it, I need to put the recess in tomorrow.

The lid is on but that about it, I need to put the recess in tomorrow.

The finger cut out fits perfectly for my fingers to fit in and pull off the top

The finger cut out fits perfectly for my fingers to fit in and pull off the top

Some accessories in there nice new recessed homes.

Some accessories in there nice new recessed homes.

NEXT!!!!!

  • Make template for routing the recesses

  • Make side handles

  • Apply finish, I usually use a poly-crylic for shop projects.

  • Start sharpening

Until the next day, take care

Ed

ROOM DIVIDER: DAY 4

WHAT I DID TODAY

  • Sanded the legs and cleaned up the miter joints
  • Cut a tenon on the leg
  • Cut a mortise on the leg base

SANDING

The last day I prepared a wood putty by mixing sawdust and glue and applying it to the miter joint to clean it up, today I finished sanding the legs down and cleaning up the miter joint below you can see a before and after picture. 

I sanded all 3 legs and also sanded the face-frames on the front and back of the black plywood panels. 

Here is a before picture of the mitered joint

Here is a before picture of the mitered joint

Here is the miter joint after the putty dried and I have sanded it.

Here is the miter joint after the putty dried and I have sanded it.

CUT THE LEG TENON

I am attaching the leg to a leg base by means of a mortise and tenon joint, the leg base will receive the castors one of each end to make it mobile.

I hand-cut the tenon with my Japanese pull saw  and then cleaned the tenon up with some chisels.

My first step in this process is to place layout lines on the leg using my marking tools and then took my time in using my saw to cut most of the waste leaving a little wood to dial in the the exact dimension of the tenon. 

When cutting my mortise and tenon joint I always cut the tenon first because its easier to change the tenon size than it is to change the mortise size.

Here are the tools i used to complete most of the tenon, I used my Incra measuring tool, machinest square, Japanese saw to define the tenon shoulders

Here are the tools i used to complete most of the tenon, I used my Incra measuring tool, machinest square, Japanese saw to define the tenon shoulders

Here you can see the layout lines for the placement of the tenon.

Here you can see the layout lines for the placement of the tenon.

Here is the cut tenon, still needed to clean it up just a little.

Here is the cut tenon, still needed to clean it up just a little.

CUTTING THE MORTISE

I wish I owned a Festool Domino to make floating mortise and tenon it would be so much quicker than do it by hand but I don't, and probably never will because they are so expensive. I have to use the means that are available to me, to that end I use my drill press with a forstner bit to dig out most of the mortise waste and then I use my mallet and chisels to square the mortise walls and corners, below you can see pictures of me do this.

Here is a closeup off the holes created to define the mortise.

Here is a closeup off the holes created to define the mortise.

Using my drill press to cut the mortise, I used my fence on the drill press to center the mortise.

Using my drill press to cut the mortise, I used my fence on the drill press to center the mortise.

After using the drill press I took the leg over to my bench to clean up the mortise with my chisels

After using the drill press I took the leg over to my bench to clean up the mortise with my chisels

Here is a close up of the foot, I will be adding 2 castors one at each end of the foot.

Here is a close up of the foot, I will be adding 2 castors one at each end of the foot.

Here is the leg in its current state.

Here is the leg in its current state.

That is all I got done today, there is a lot more to do I still need to do the following for the legs and feet;

  • Complete the other mortise and tenon leg foot
  • I also need to attach the legs to the plywood panels using biscuits and screws
  • I also need to determine size of the middle leg because I am not adding a foot, only a castor is getting attached
  • After I attach the legs I am going to add a round-over profile using my router to soften the corner edges

Until then, take care