LIVING ROOM PROJECTS
ARM CHAIR SLEEVE
(03/2019)
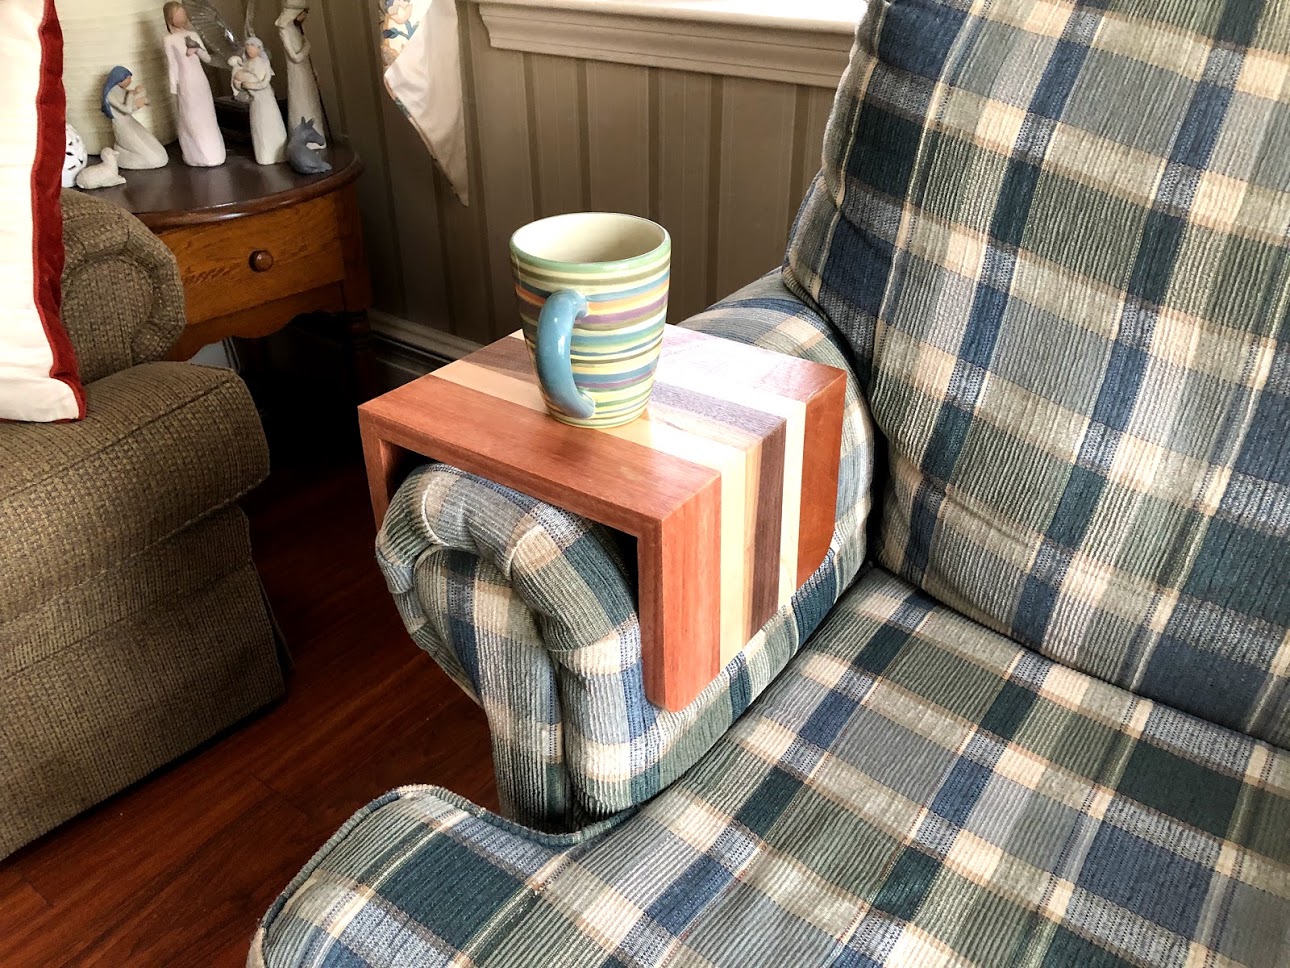
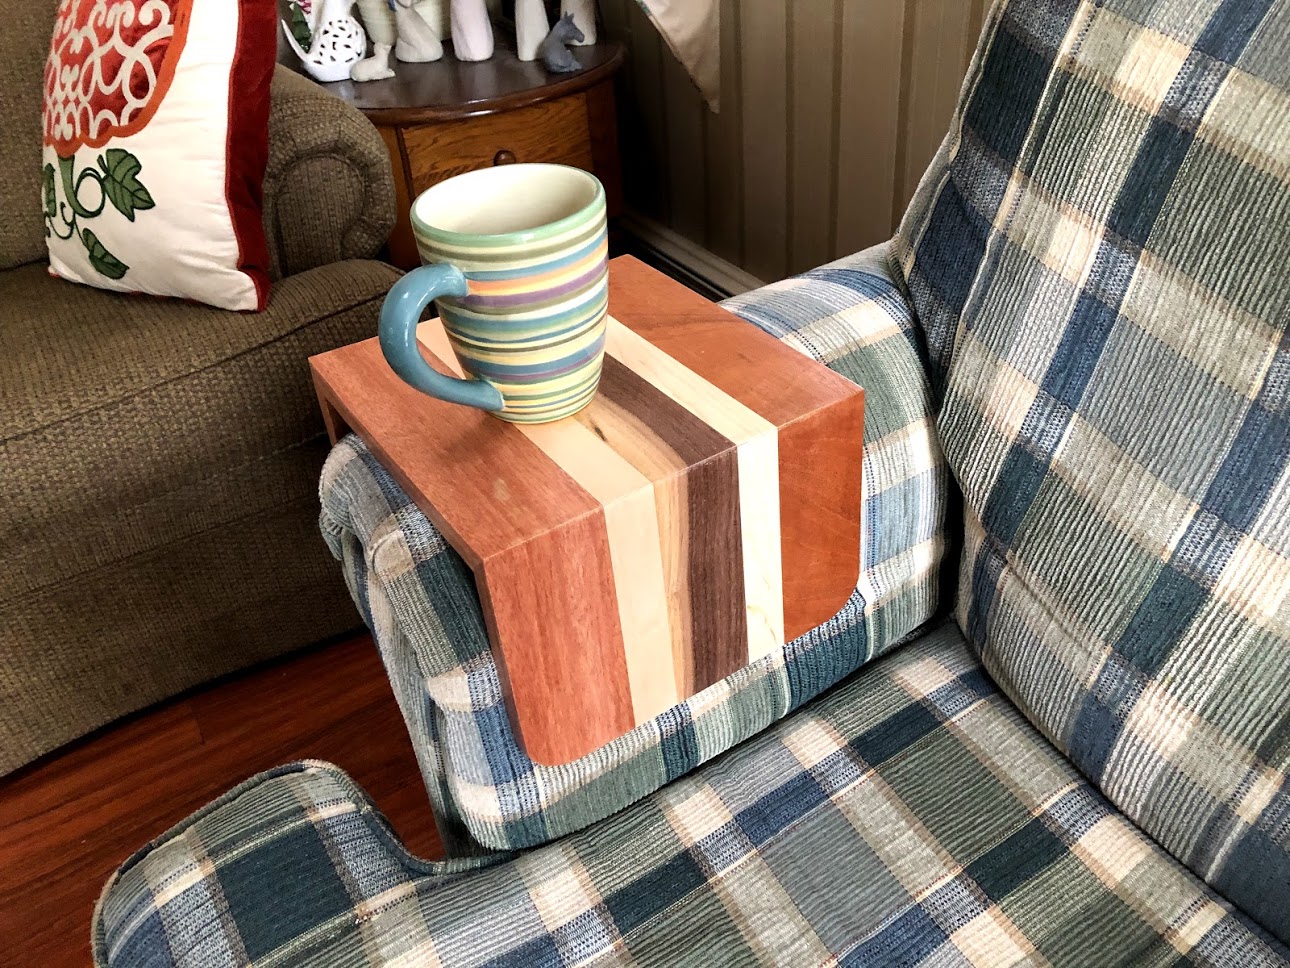
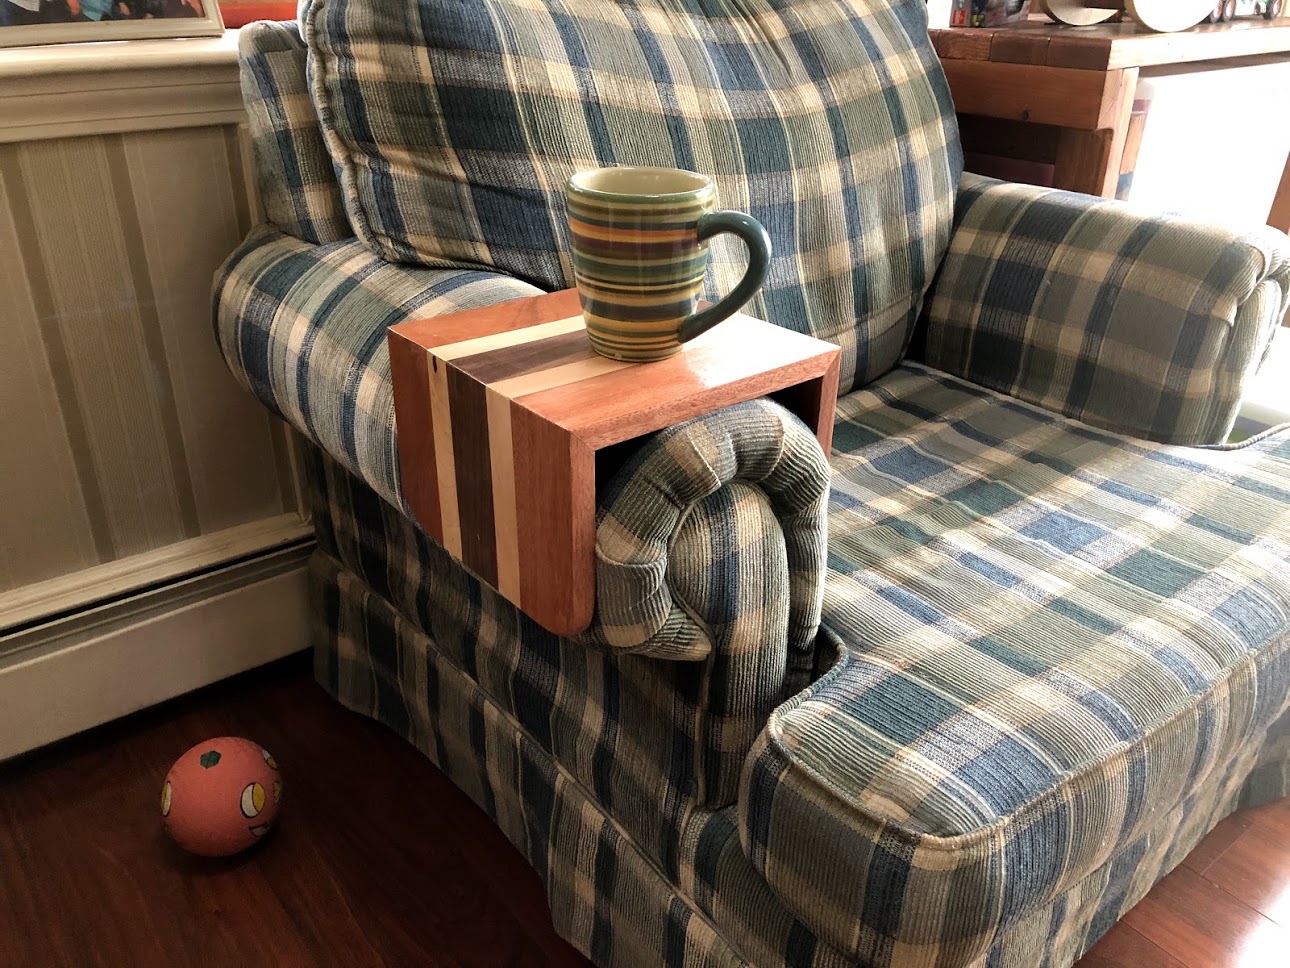
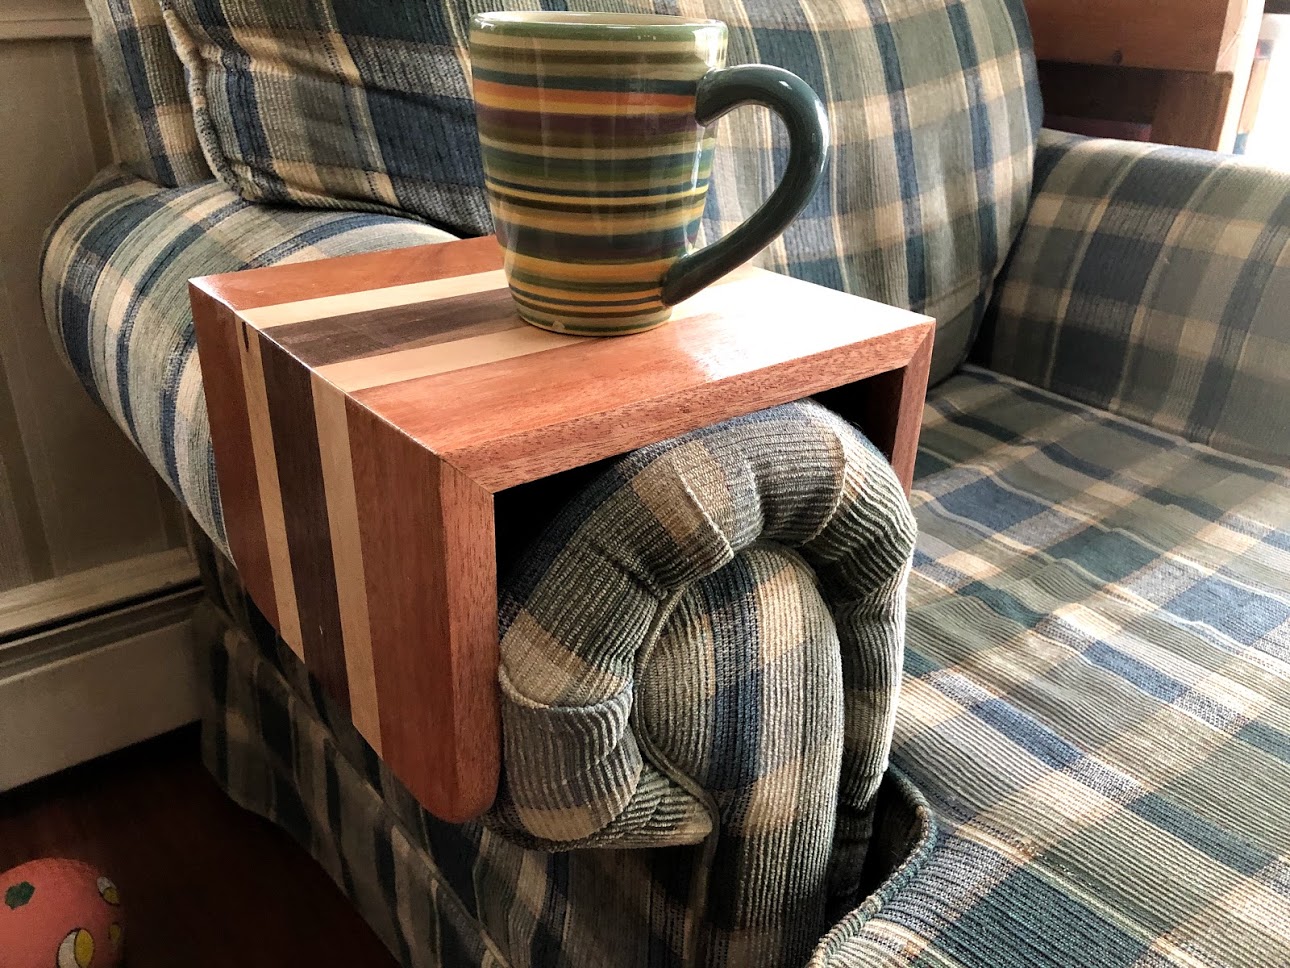
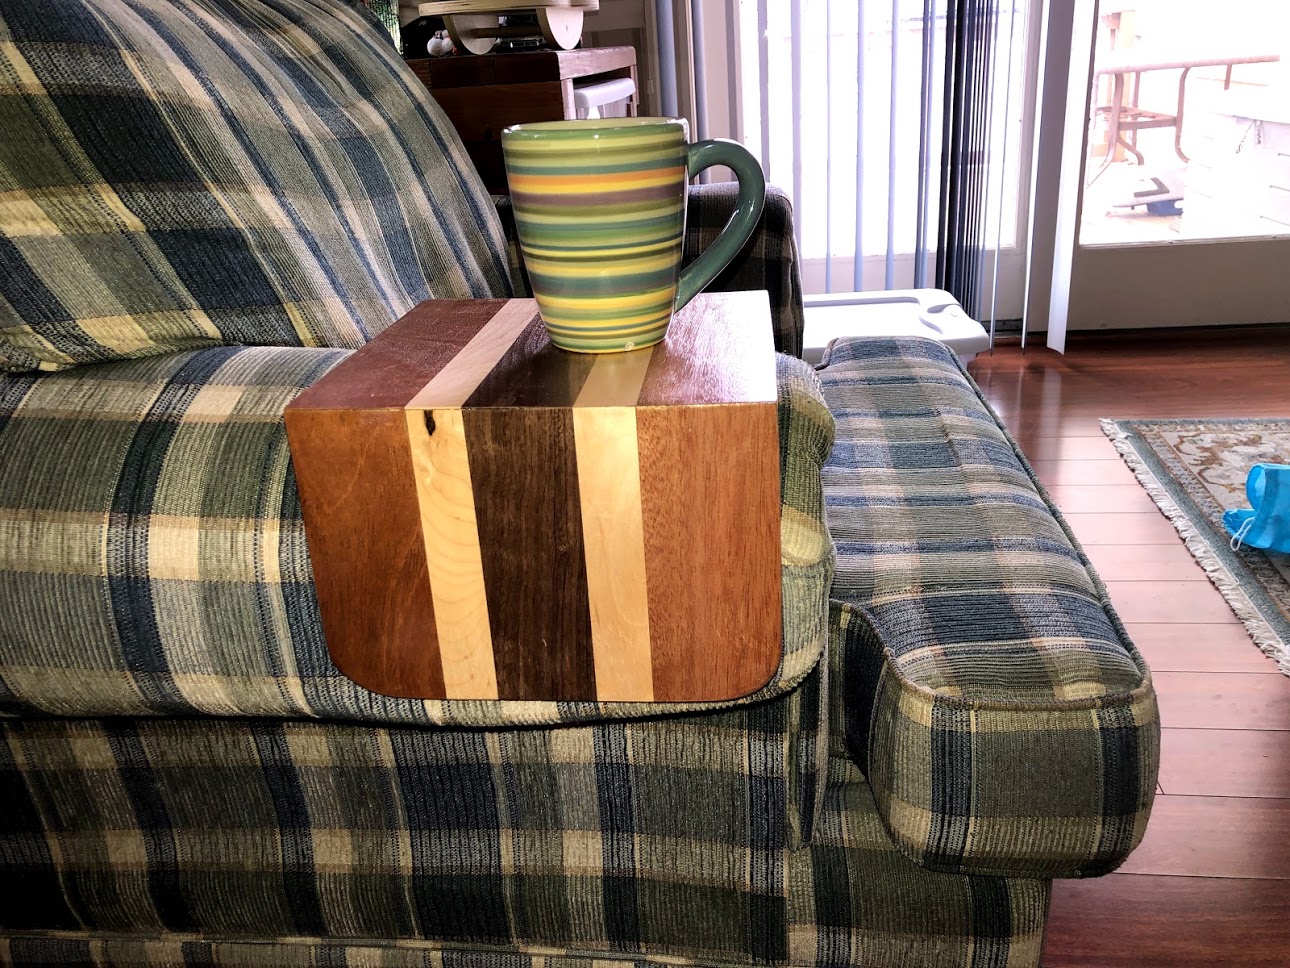


I was sitting at in one of my arm chairs in my living room drinking my morning cup of coffee and got tired of reaching for my cup of joe as there was no table near me, so I saw a project on Pinterest that basically made a table to fit around the arm of the chair and thought this was a great little project to use up some scraps and remedy my little problem.
HOW I MADE IT:
Materials Used
Panel Glue-Up
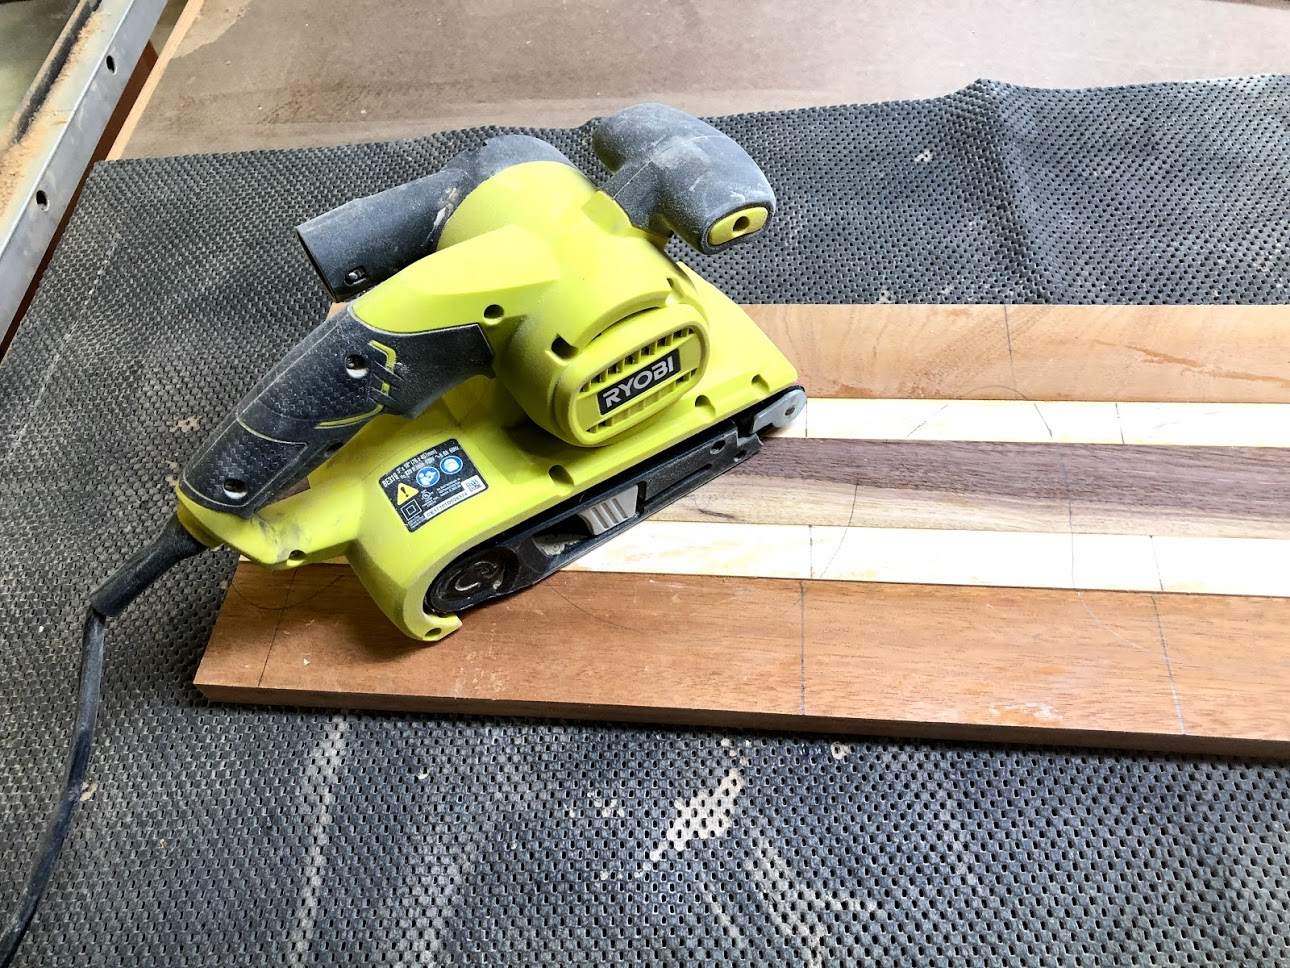
Sanding the panel
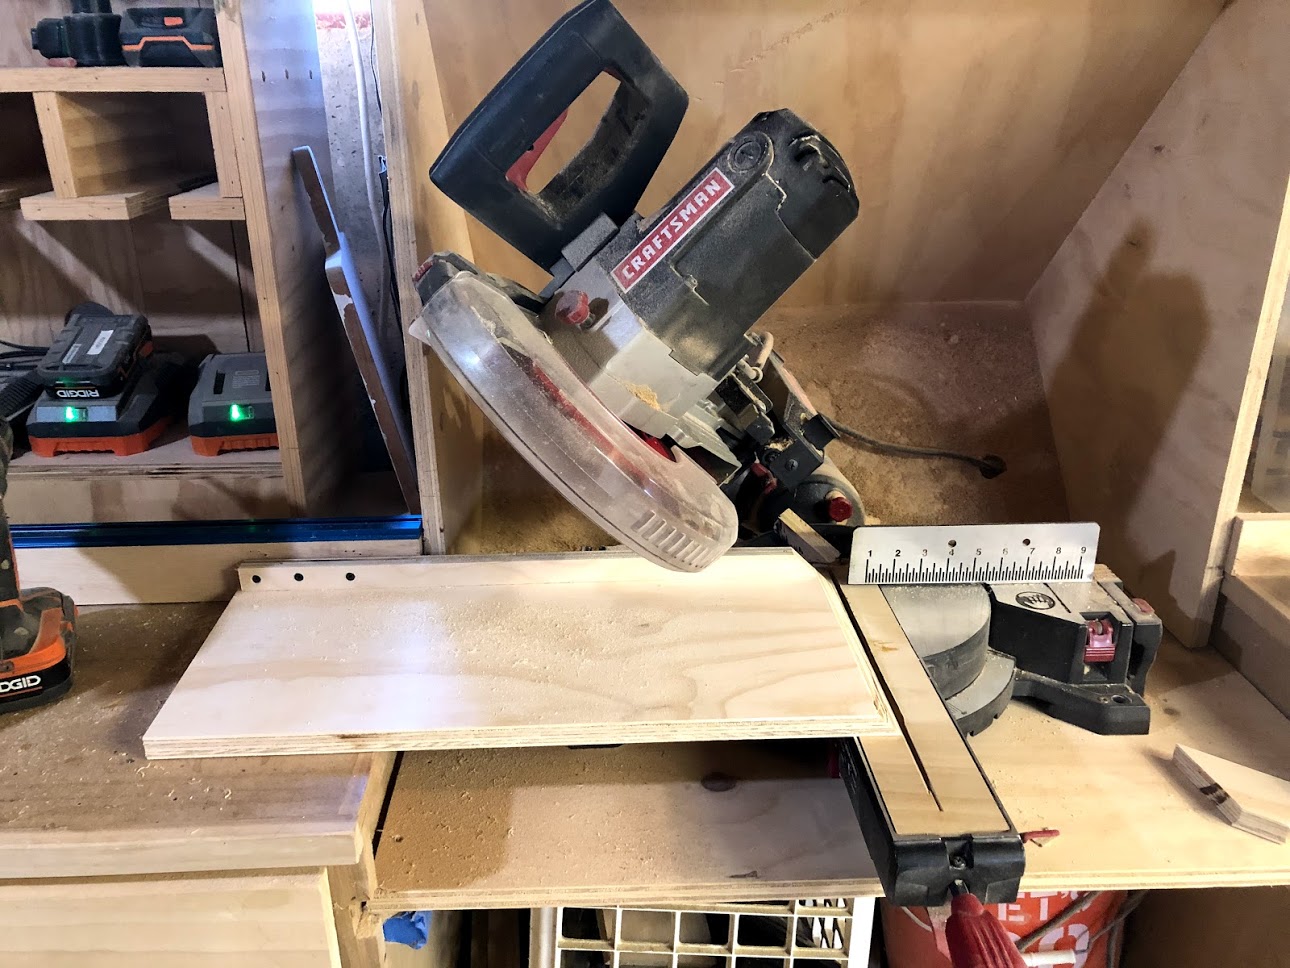
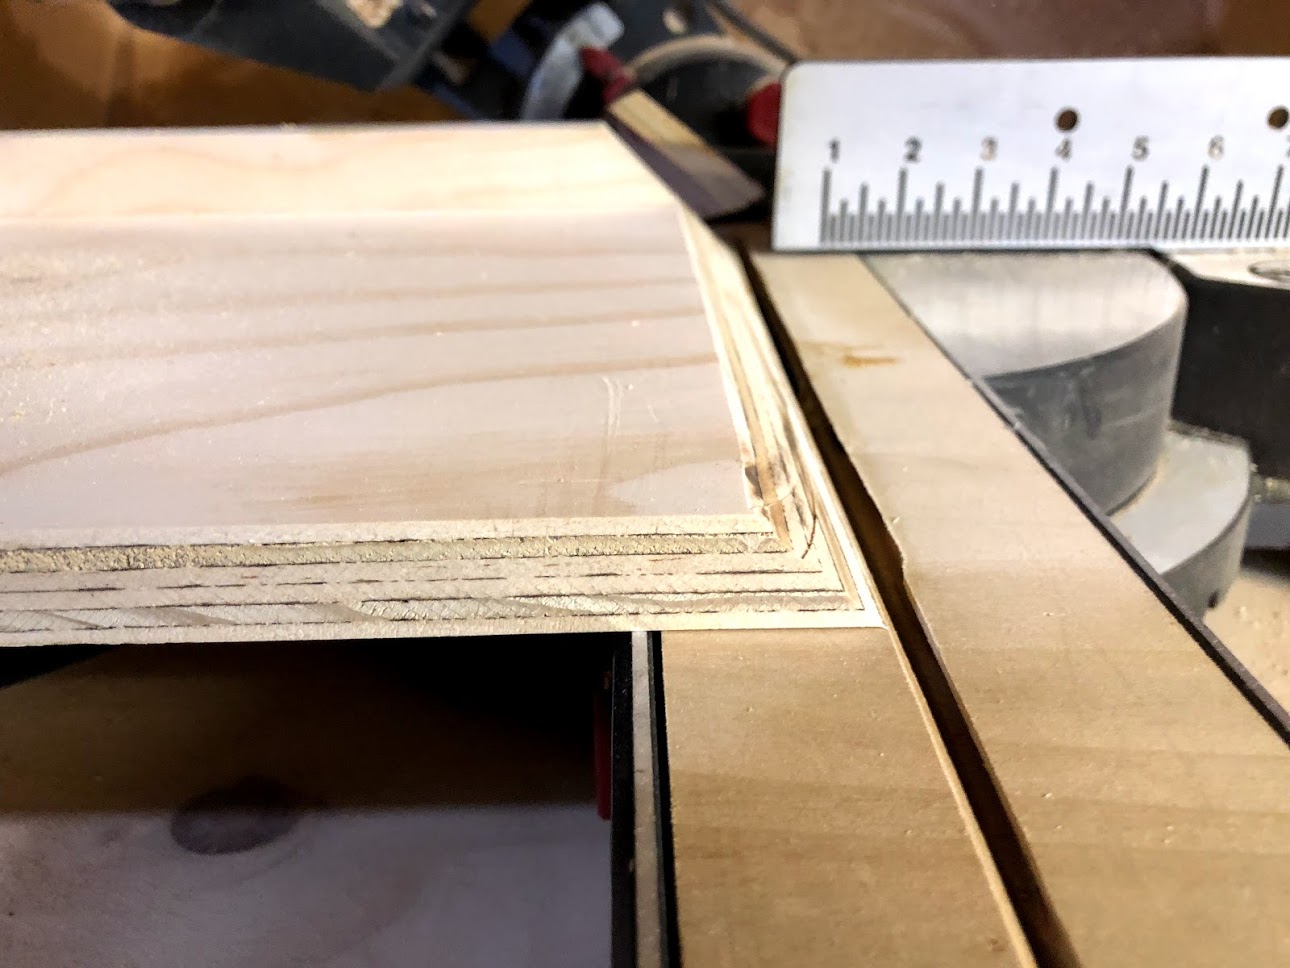
Cutting the Miters
Shaping
Another Glue-Up
Apply the finish
MATERIALS USED
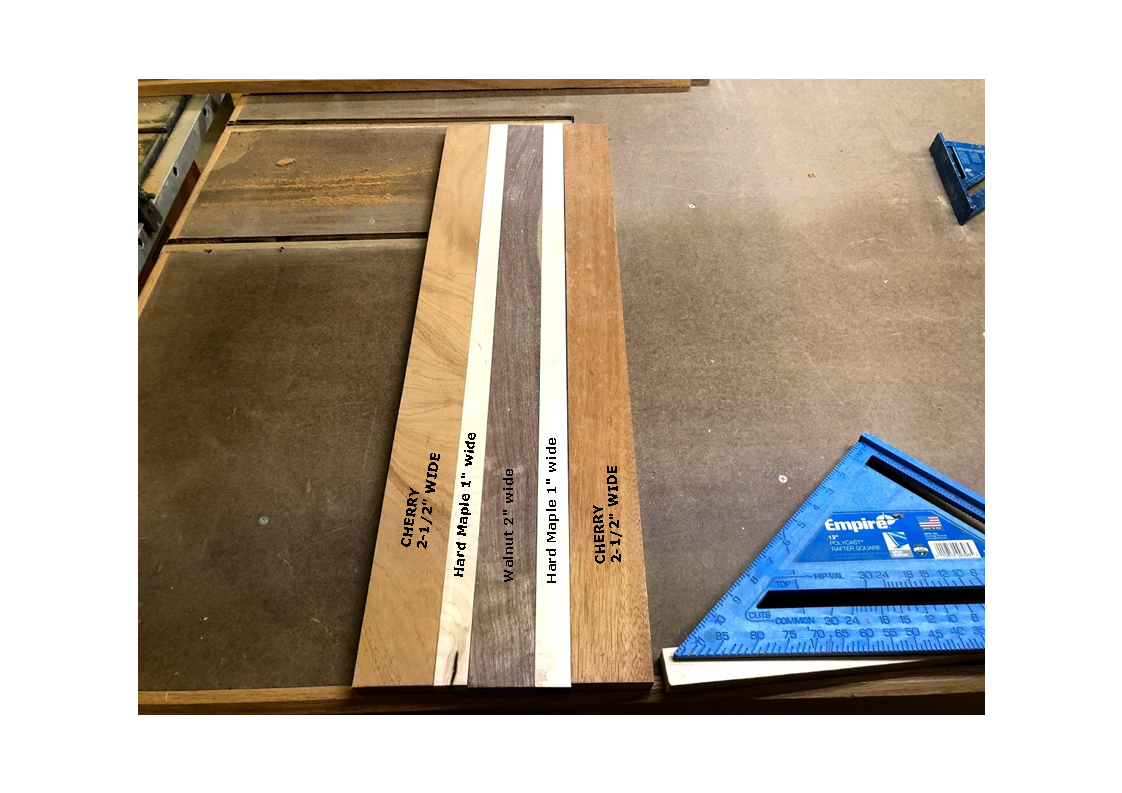
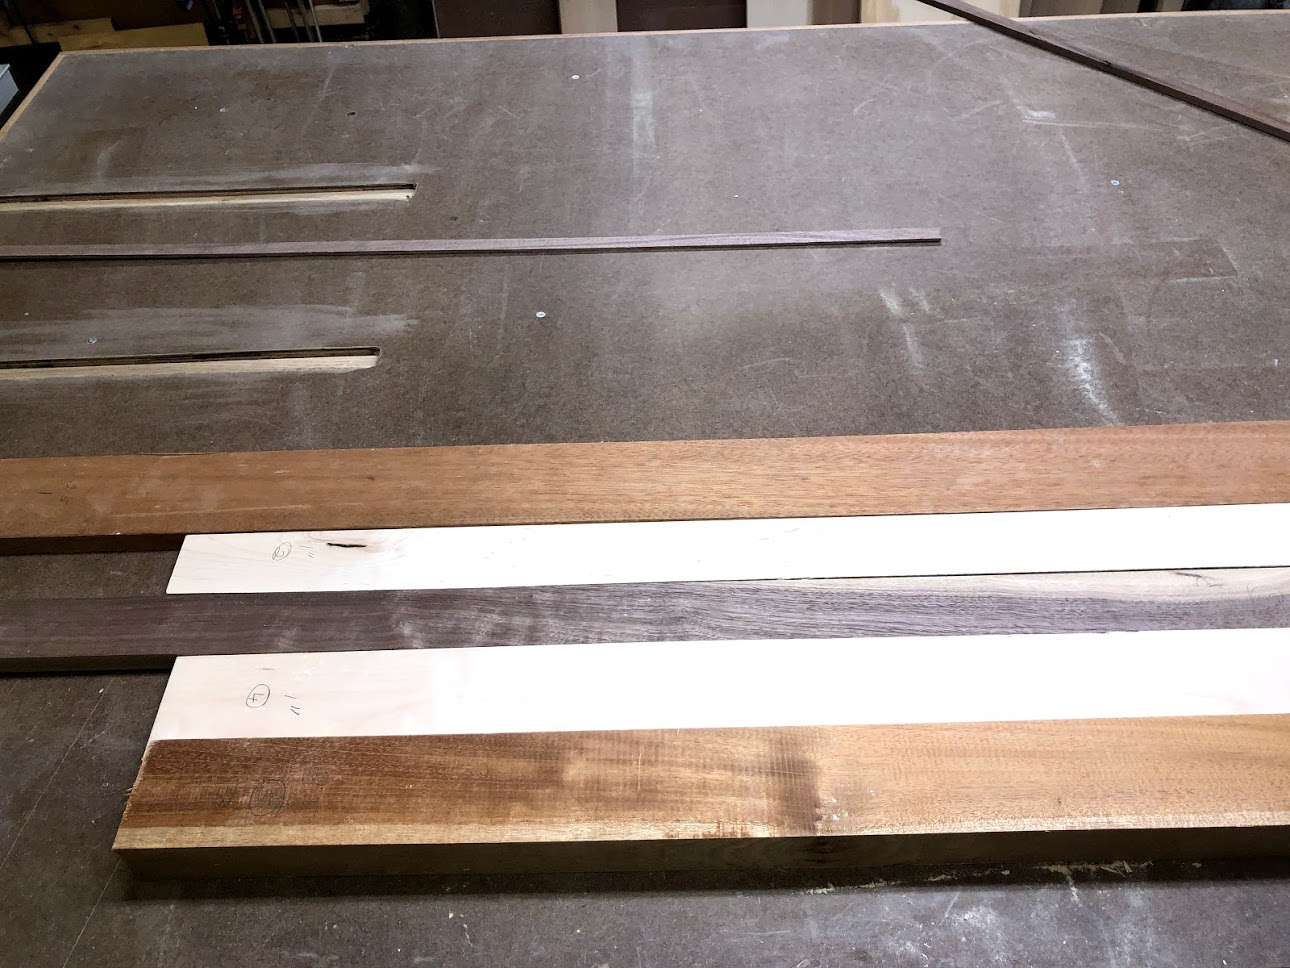
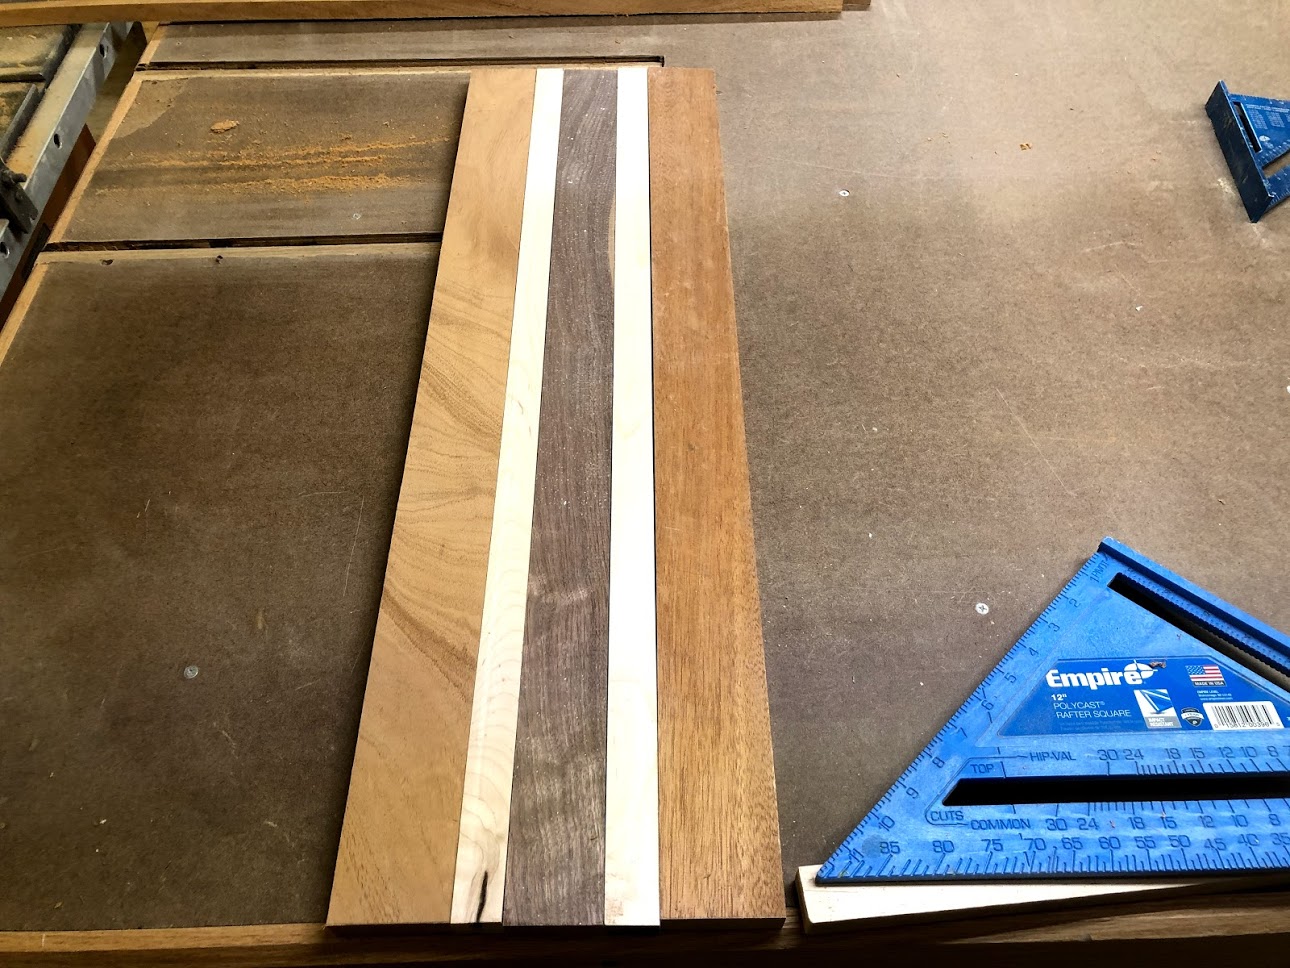
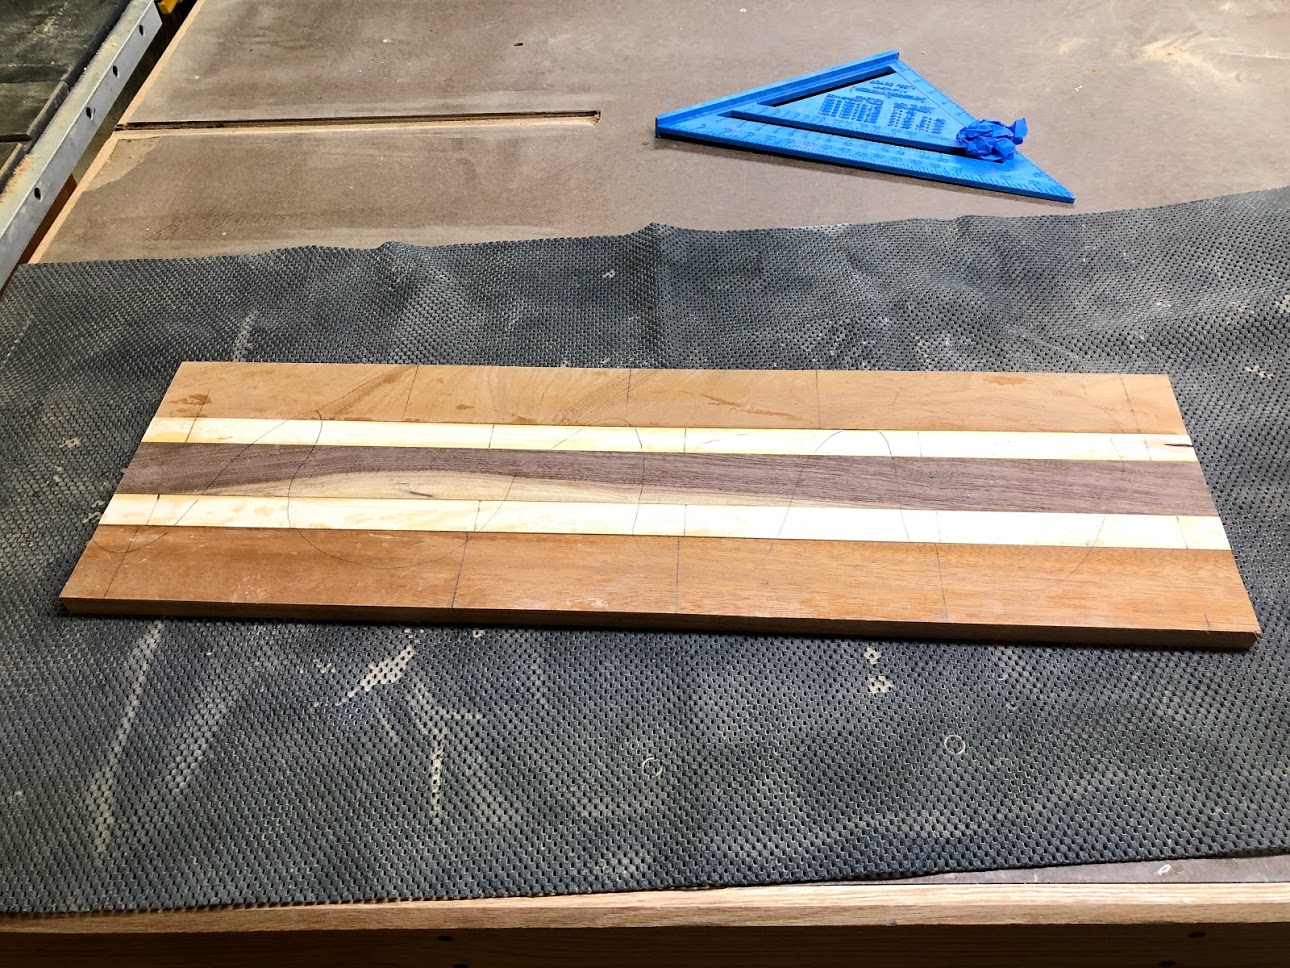
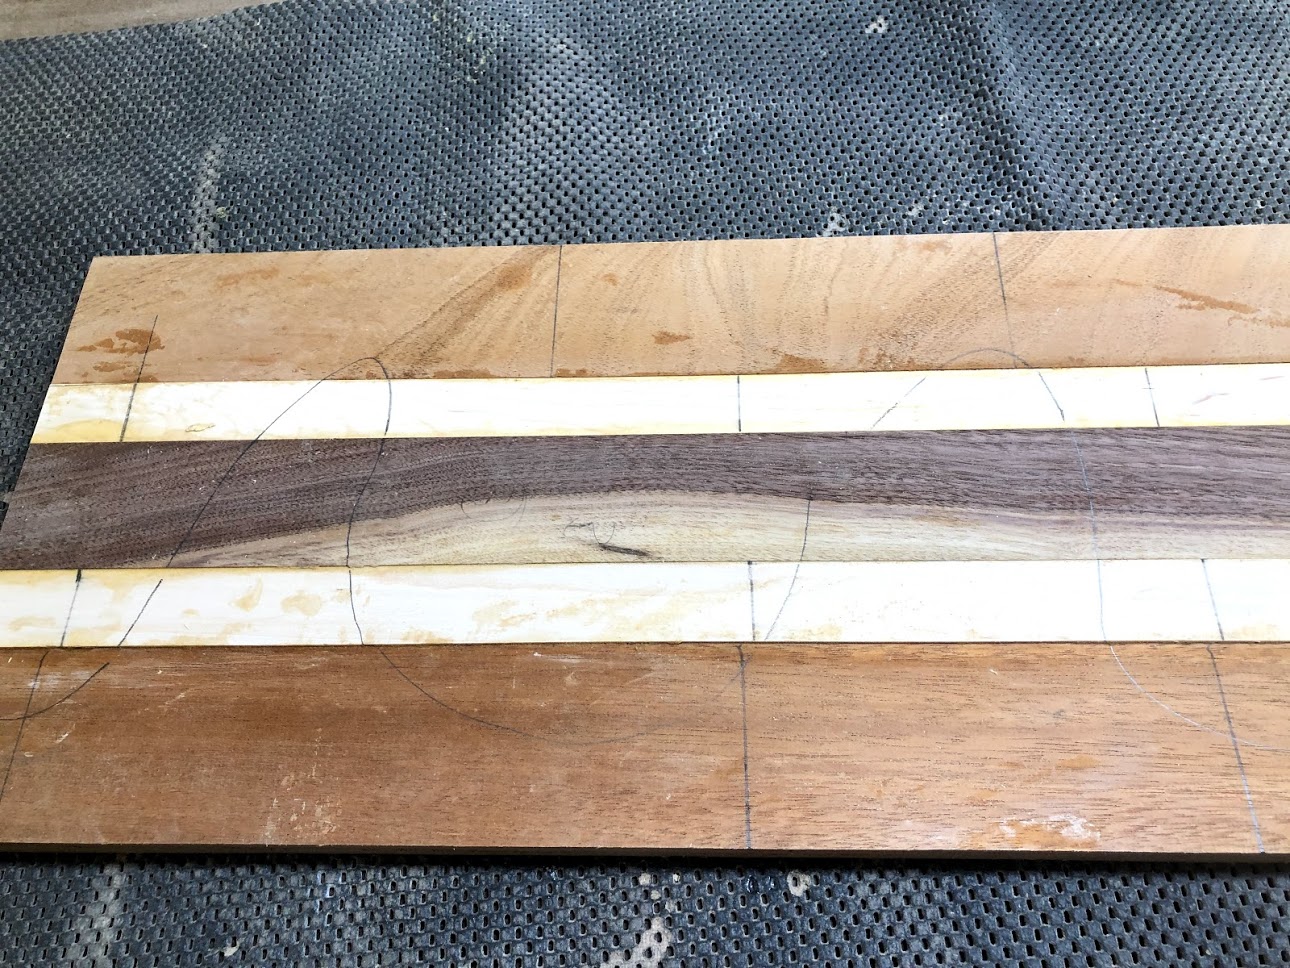
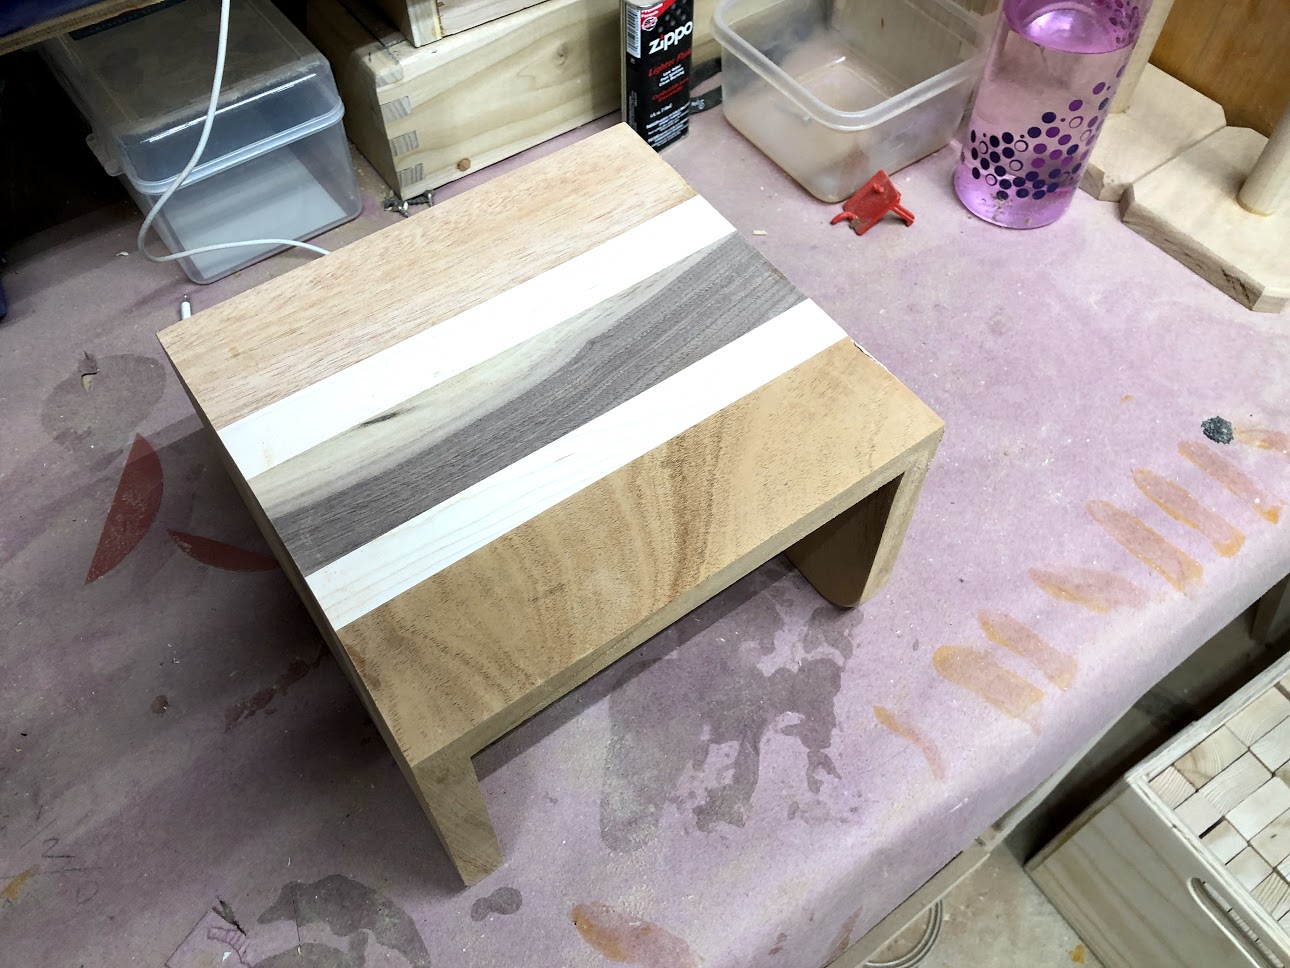
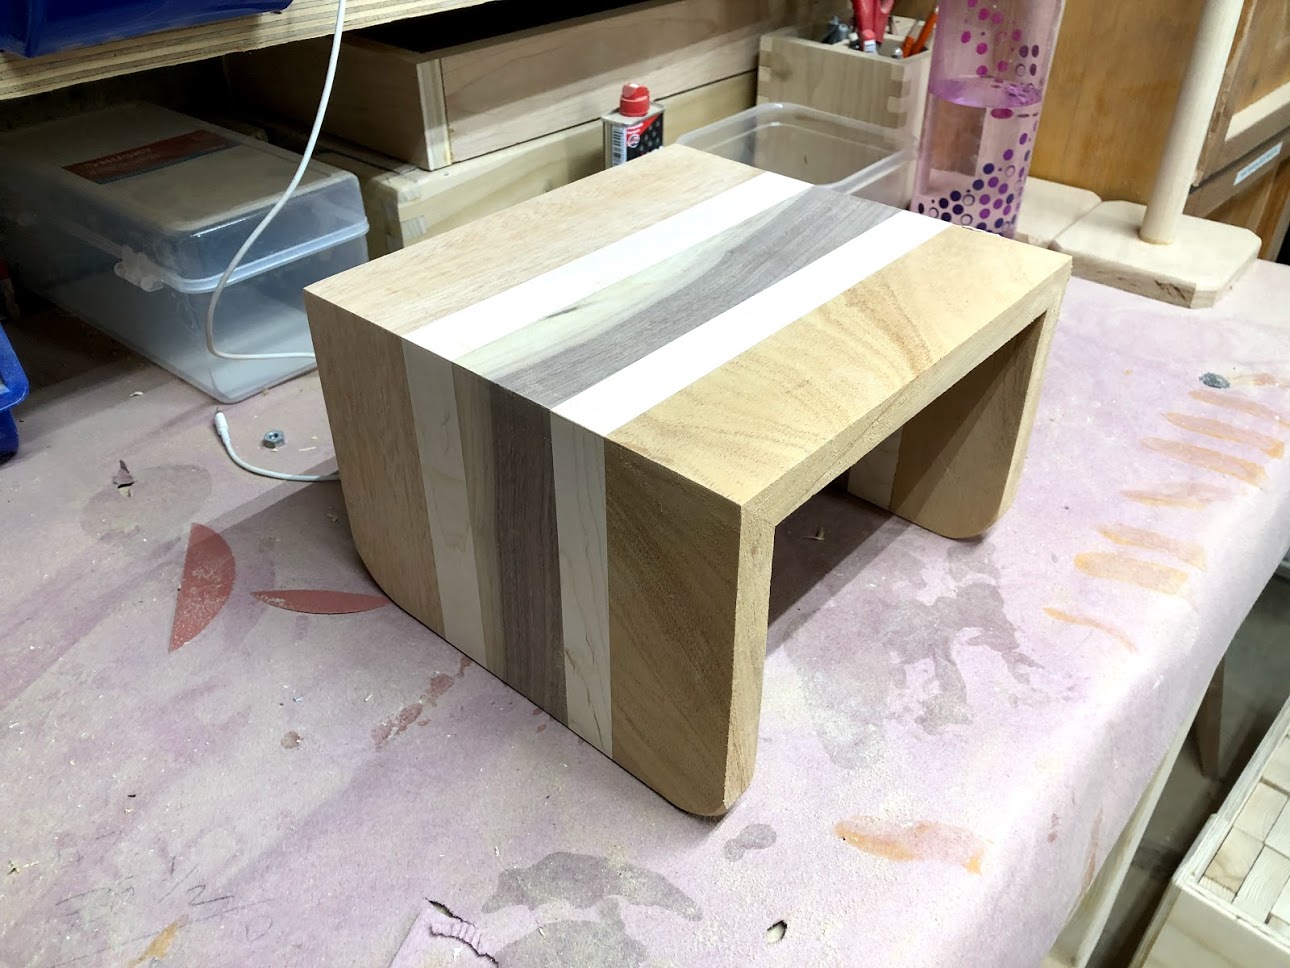
I recently had been given a bunch of scrap wood that varied in species and board size, I decided that this project would be perfect for making the sleeve. I used 3 species of wood of vary widths to make up the 9” width that I used looking for. So I used Walnut, Maple and Cherry to make up the panel I wanted.
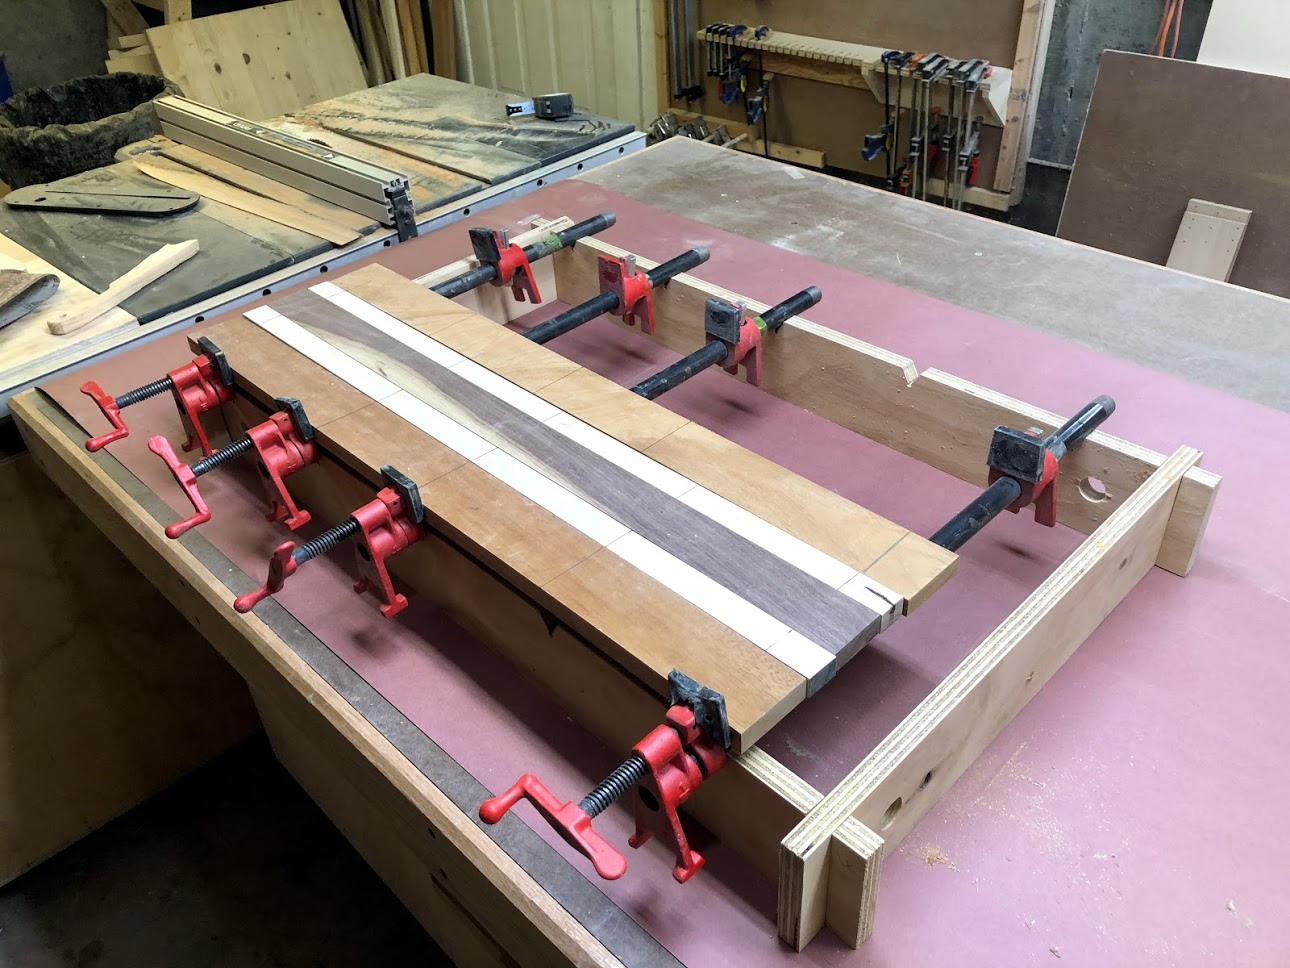
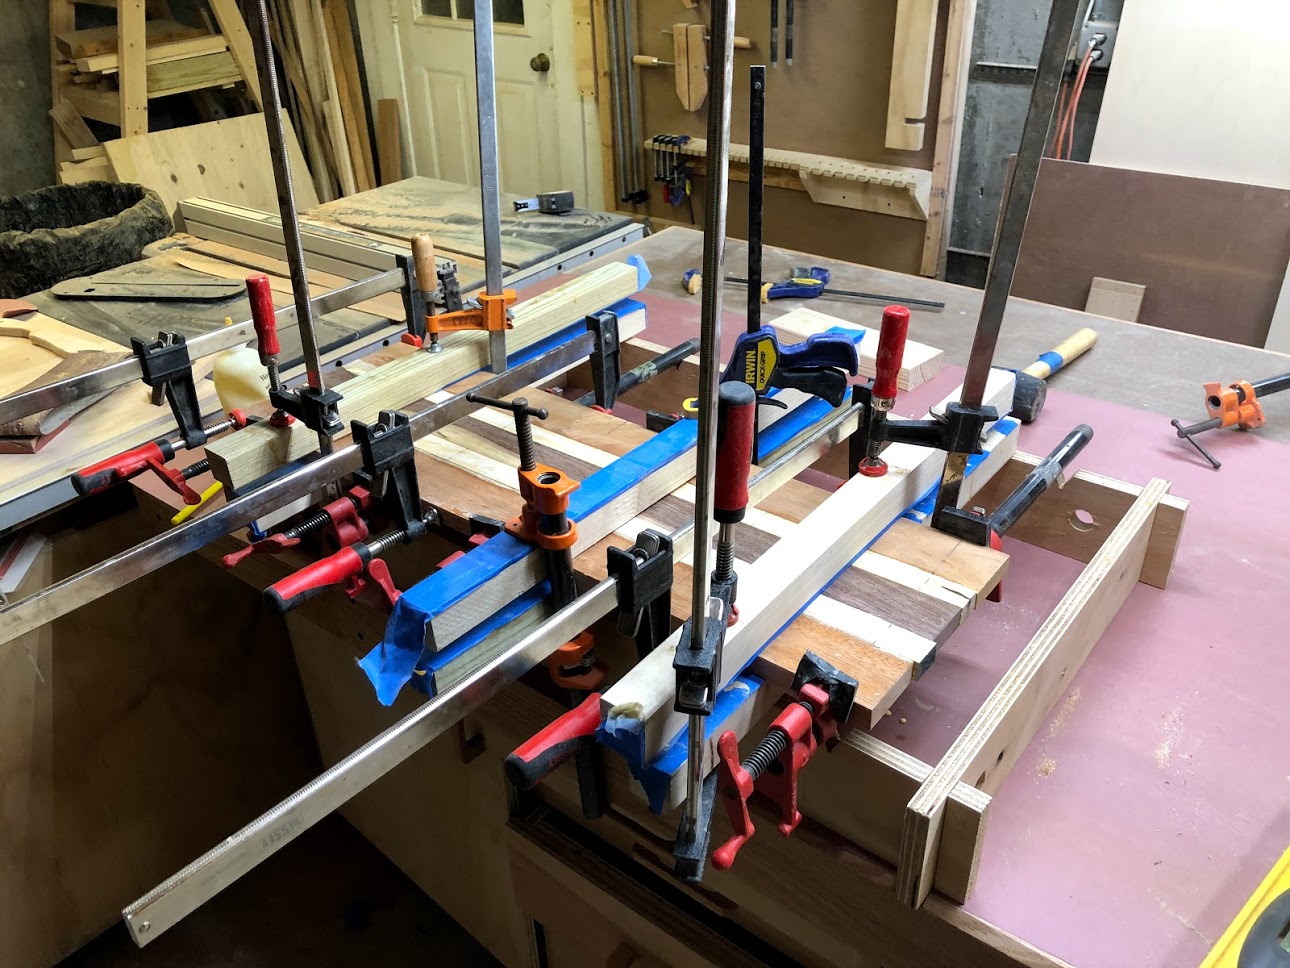
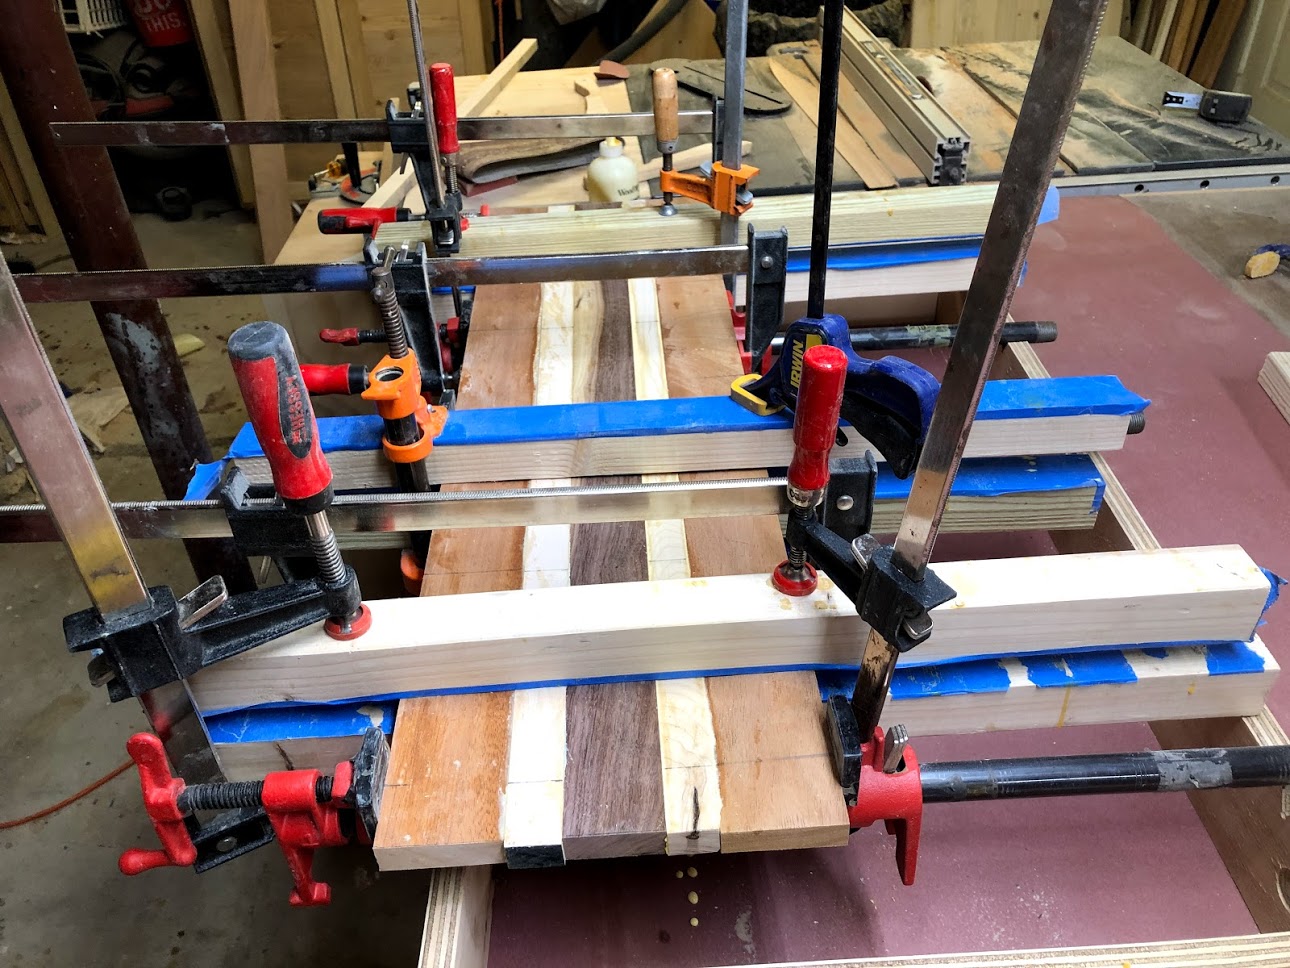
PANEL GLUE-UP
Now that I had my panel all dimensioned it was time to glue all the individual boards into one panel. I decided to use my panel glue up jig that I had made last year,
I used my pipe clamps and a few cauls in gluing up this panel, I left it overnight to set up.
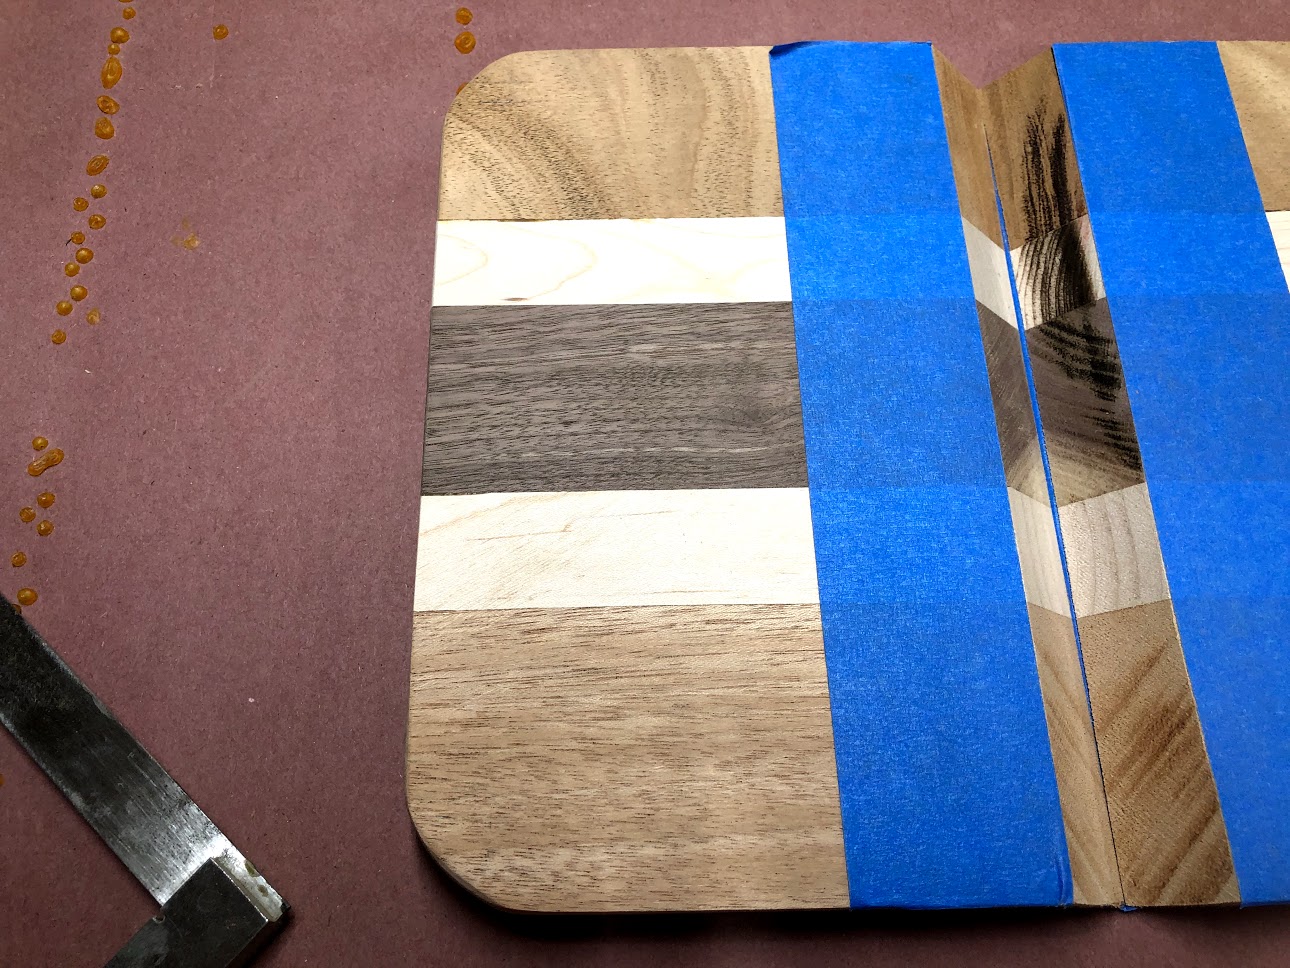
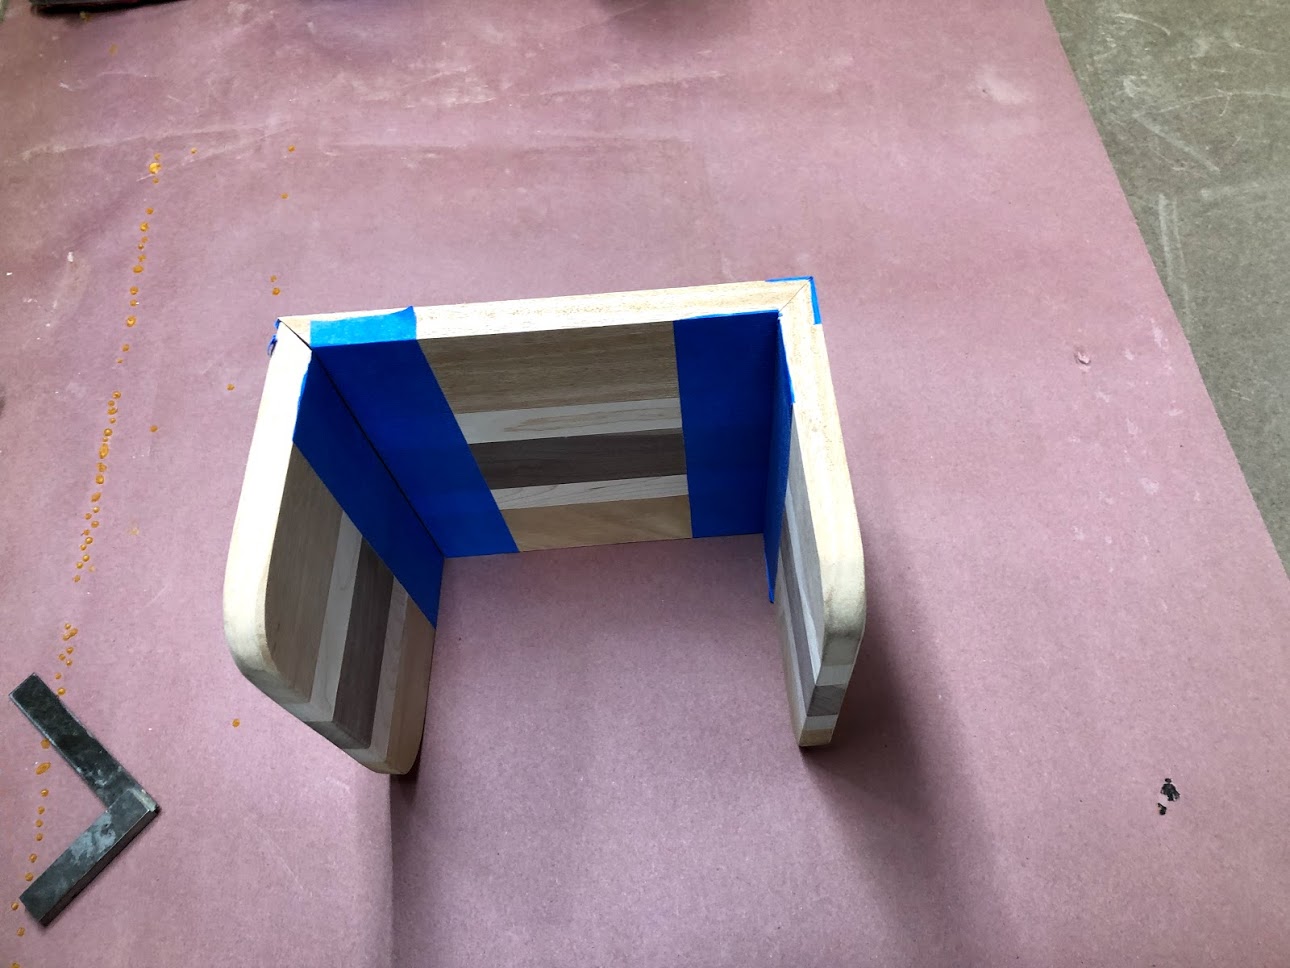
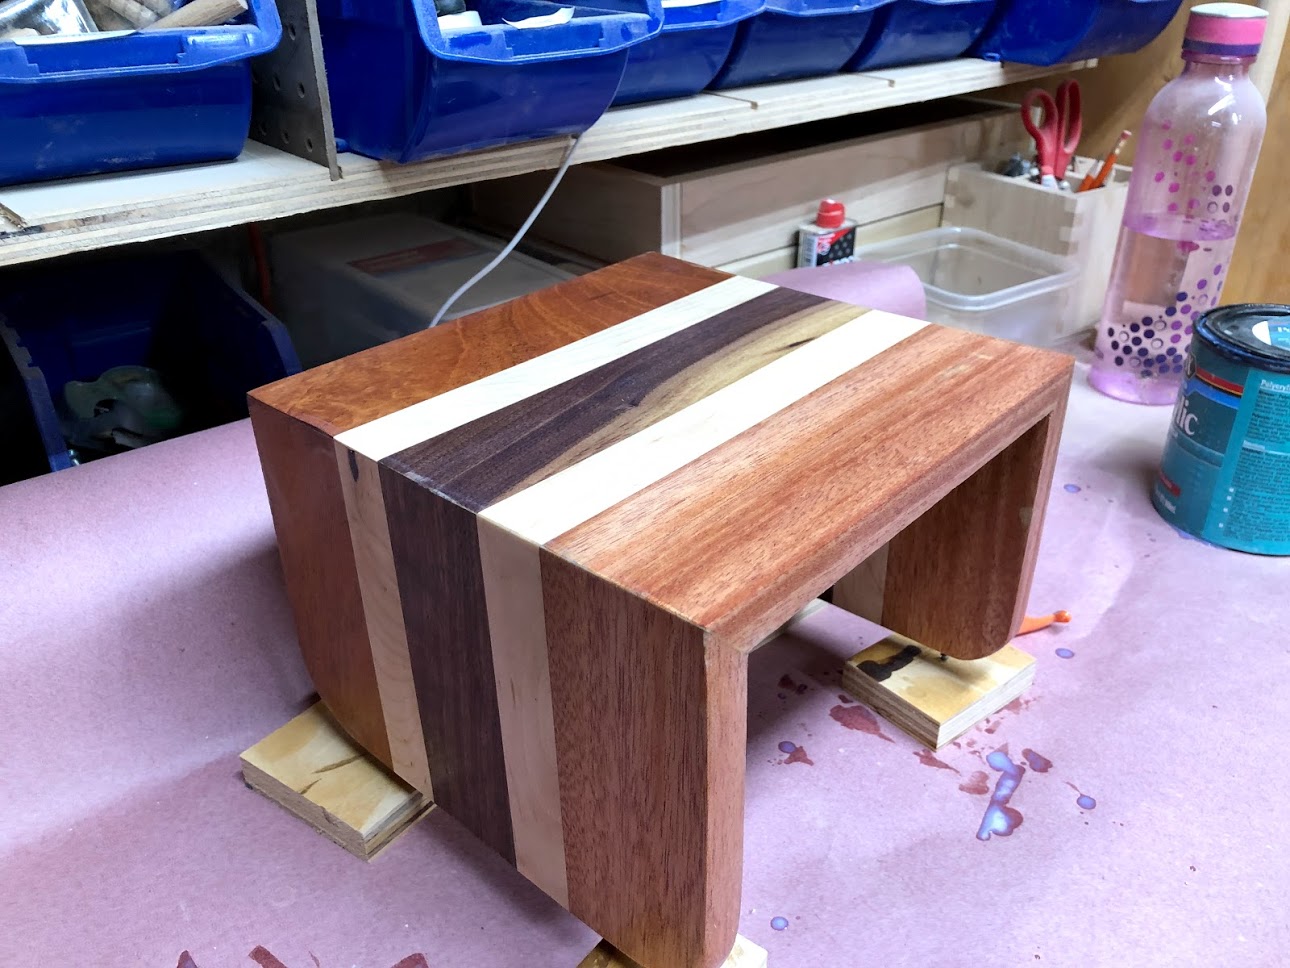
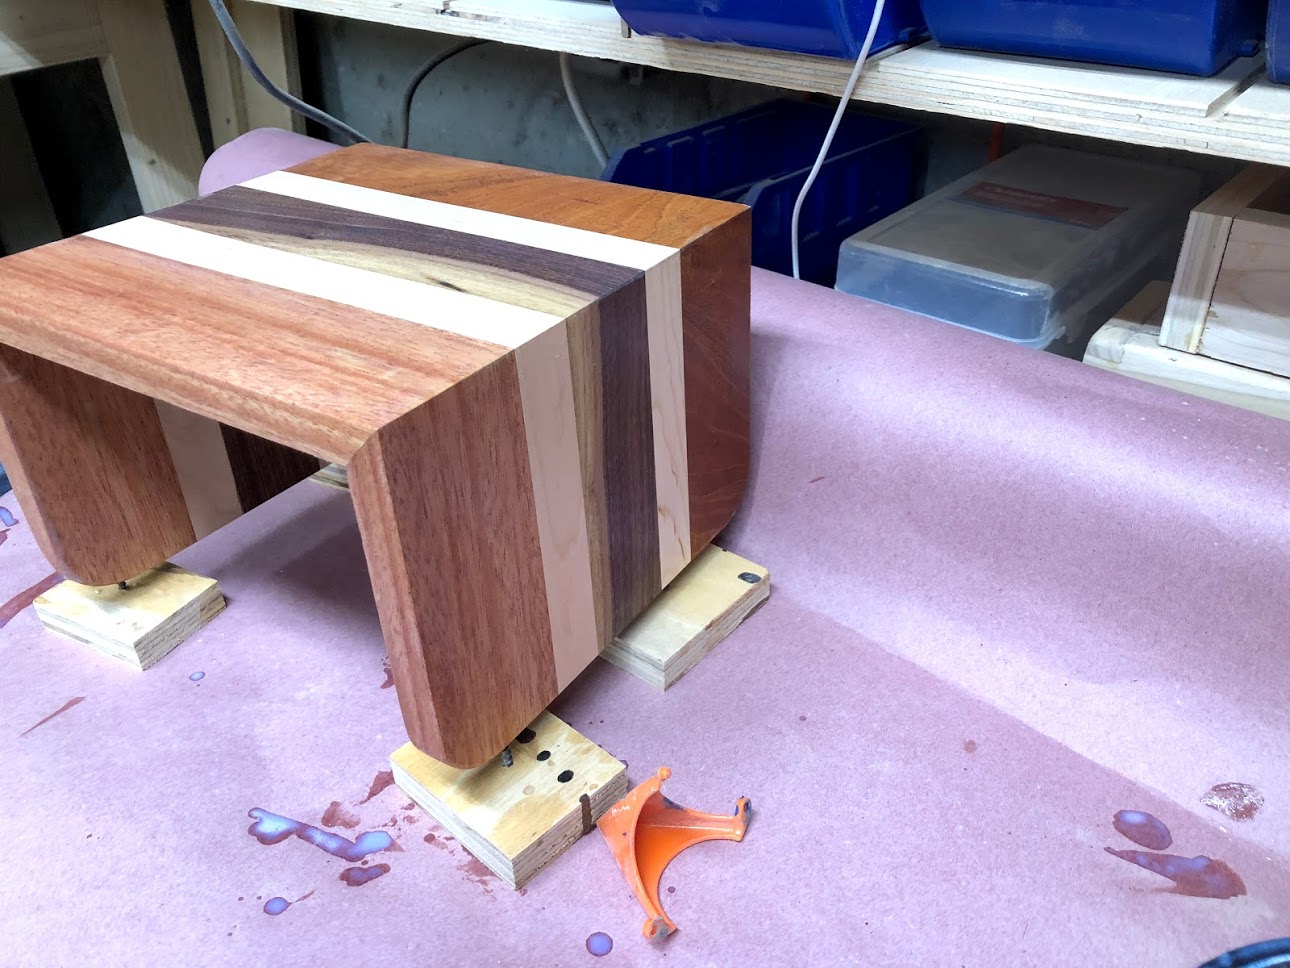
CUTTING THE MITERS
So now that I have a nice flat panel next on the list was to cut the miters on the two mating ends of the panel. I did some research online on how to do this and also achieve the effect of wrapping the grain around the entire piece so I needed to cut the panels in sequence. I found a very useful YouTube video in doing this and I have placed a video below in how to achieve it.
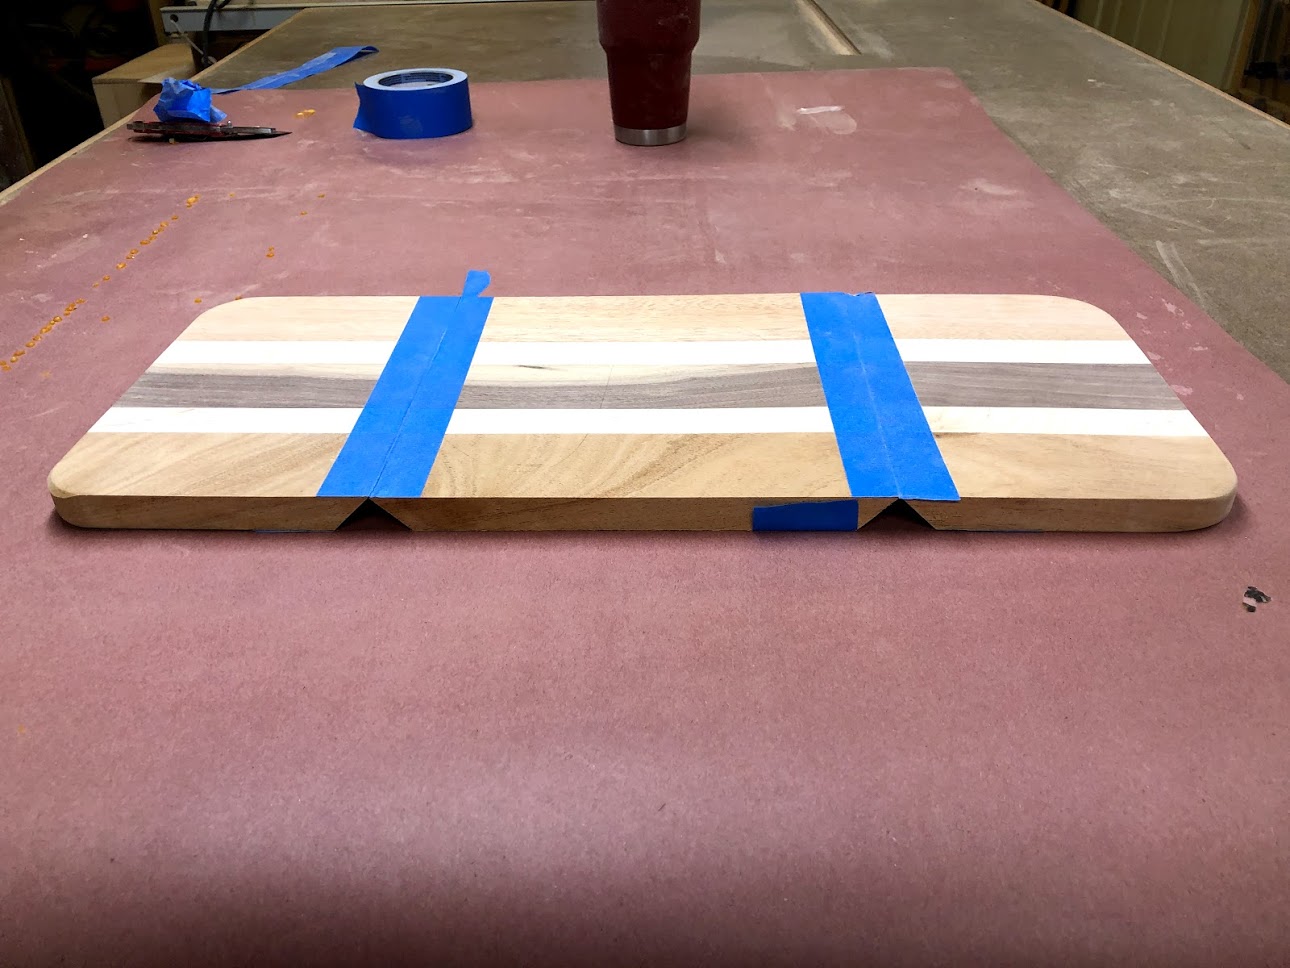
SOME SHAPING
Now that I had my 3 mitered panels to form the 3 sides of the sleeve, I decided to add some decorative and visual interest to the panel, I decided to add rounded edges to the bottom of the side panels, to do that I used my circle template guide to mark round-overs with a 3/4” radius and then I used my jigsaw to cut the rounded edges off and then to finish up the process I took the 2 panels to the spindle sander to smooth the edges and remove the milling marks left from the jigsaw. Unfortunately I lost the picture I took of this process but below you can see the finished edges.
SOLID OAK END TABLE
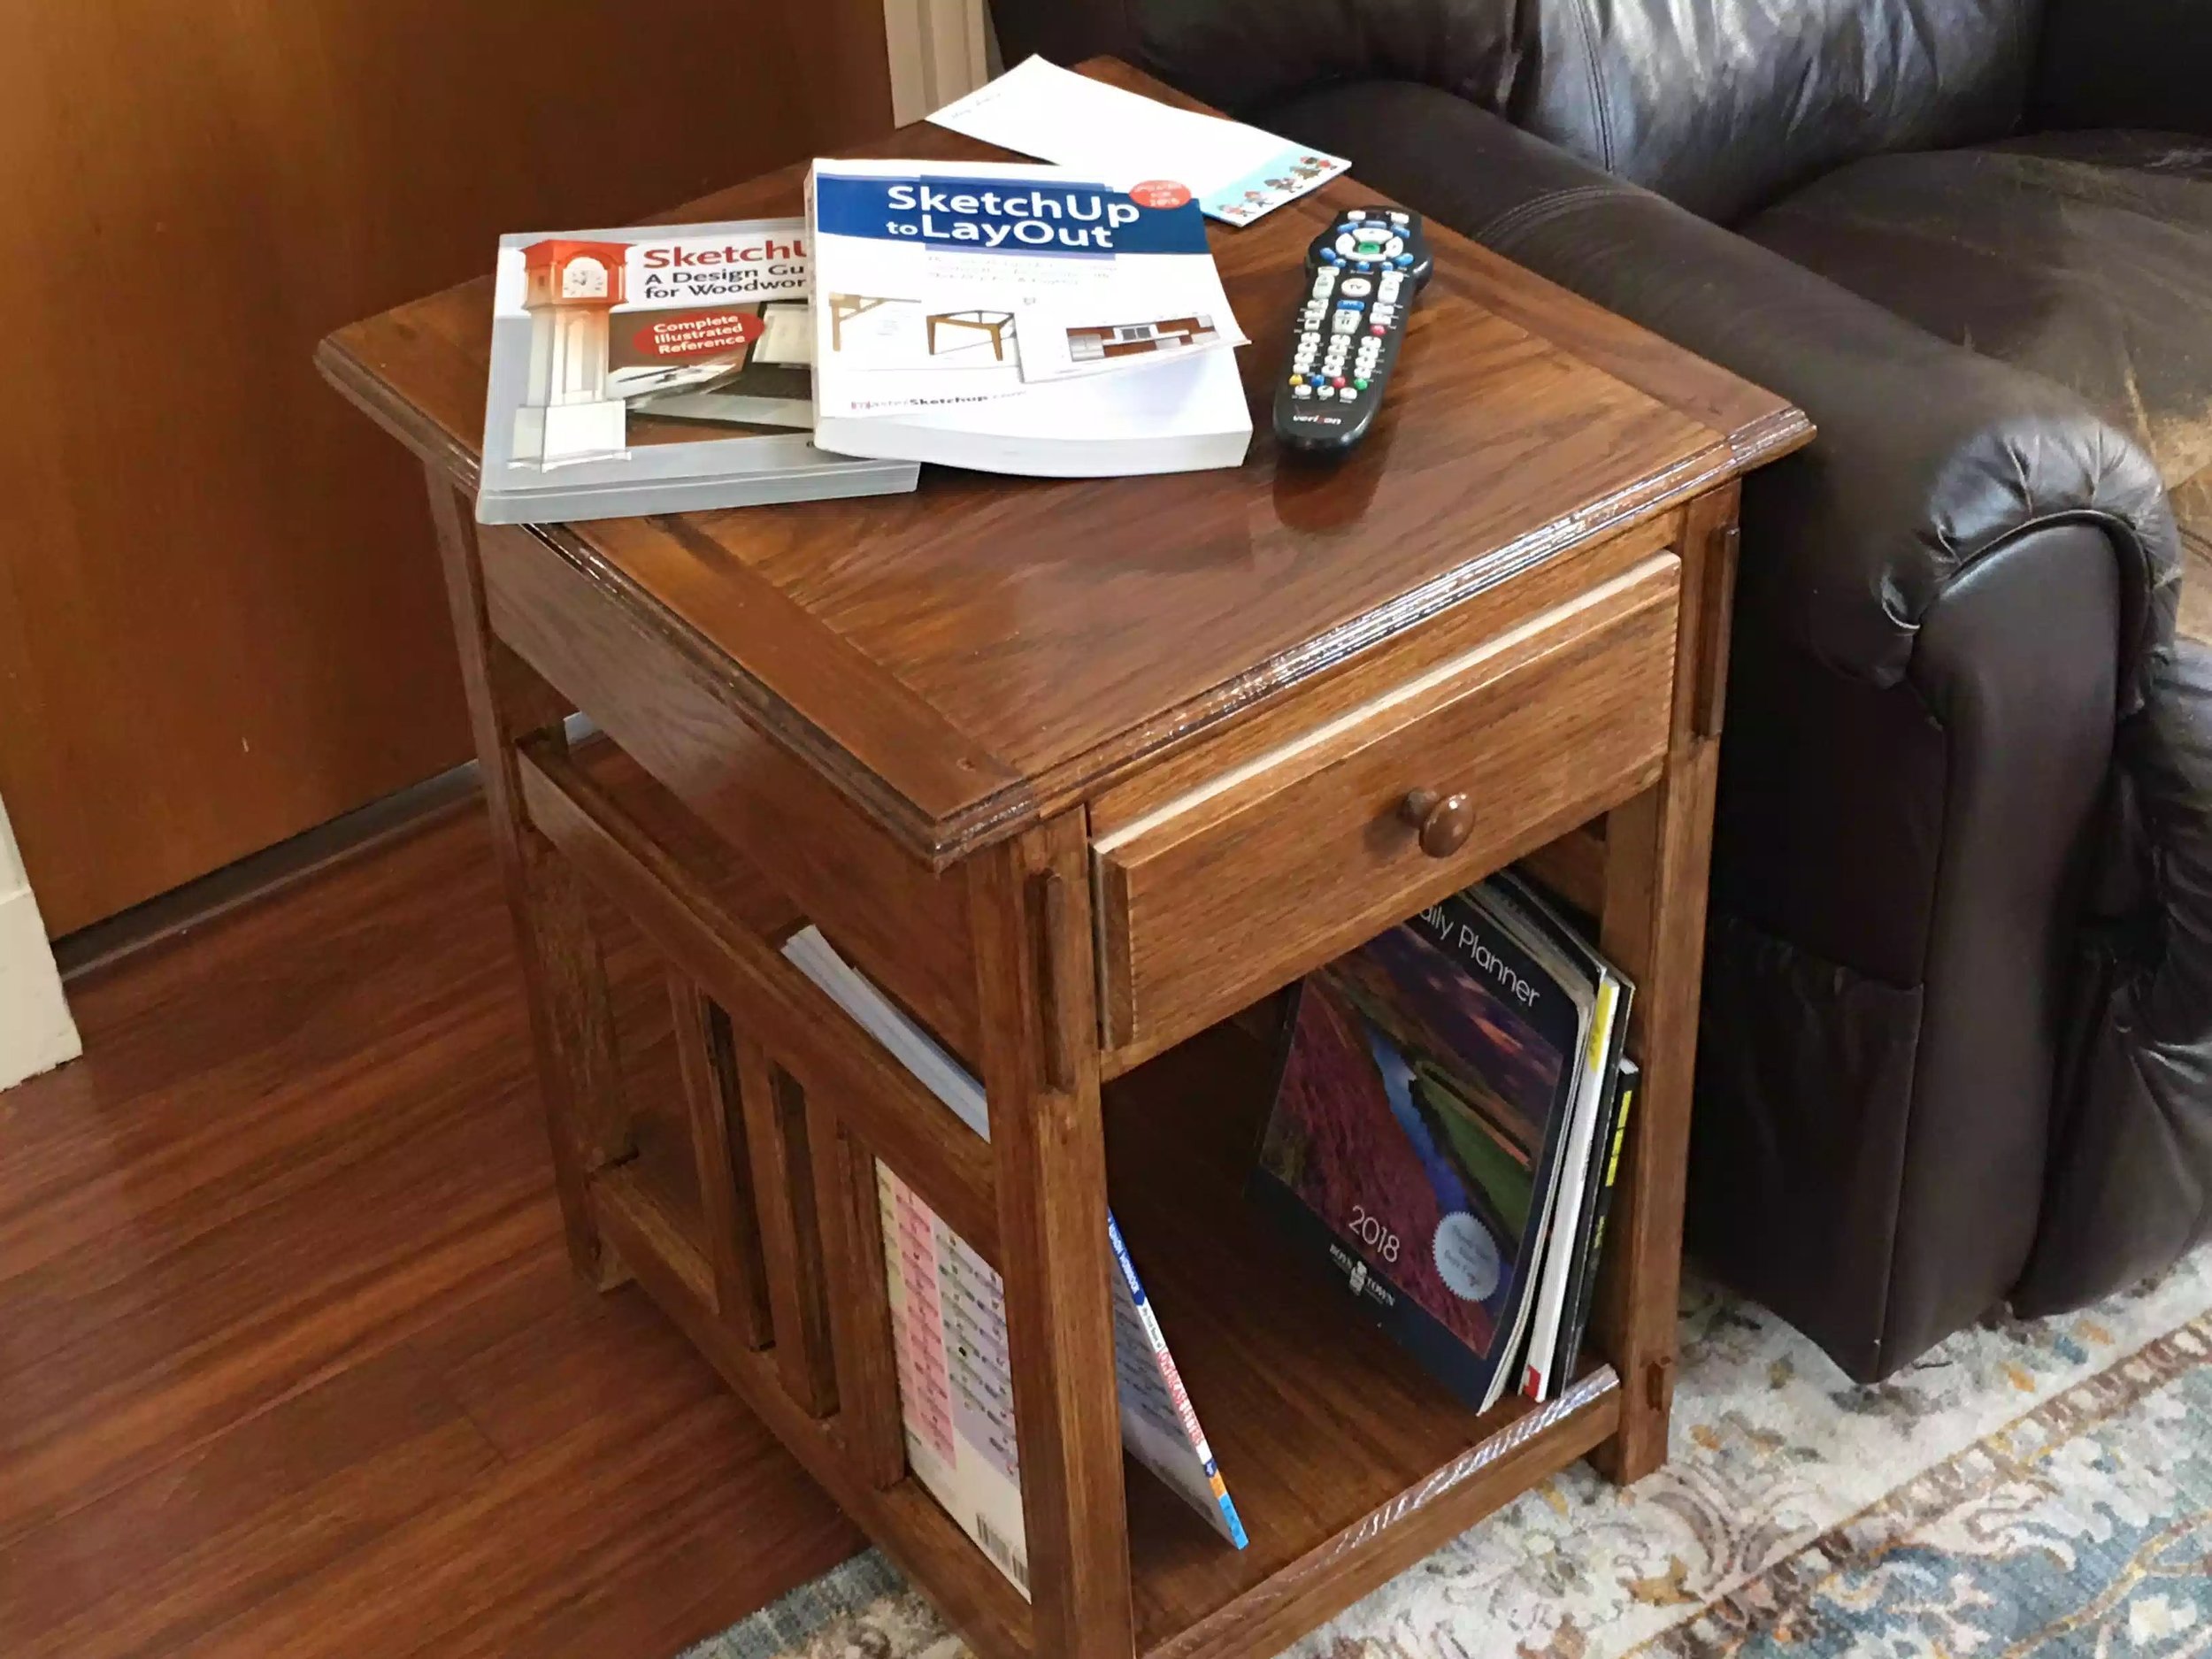

I have been wanting to make a Arts & Crafts piece of furniture for my living room and I have been researching this project for a couple of months, as usual scouring my usual sites and magazines for some inspiration when I came across this project by Chris Marshall. To be honest this looks more mission style to me especially with the spindles on the sides
I spent another month or so finalizing the dimensions for the table in Sketchup and ultimately made a set of plans in Layout, that I am selling in my Etsy shop.
If you are interested in purchasing these plans you can get them for a modest fee. Se my link at the bottom of page
Milling Through Mortise:
I have to say that the project was very tough for me because it was my first time doing a lot of the features such as through mortise and tenon joinery, and machine cut half blind -dovetails. I t was also my first doing breadboard ends. But that’s what I wanted a piece of furniture that I never made before using woodworking techniques I’ve never utilized until now. I have to say that one of the toughest jobs was making the through mortise, I used the drill press with a forstner bit and the bit kept wandering which wasn’t exactly giving perfectly parallel mortise walls to the face. I might try the router jig next time.

Hogging most of the mortise using the drill press with a 3/8” fortsner bit
Milling the tenon’s:
I used my trust dado stack and left the tenon oversize so as that I could fine tune the tenon thick and length, using a sacrificial fence on my miter gauge prevented tear-out and I also used painters tape to back the cut up, since these were through tenon’s I needed them to be clean and crisp so this took a lot of time.
Frame Assembly

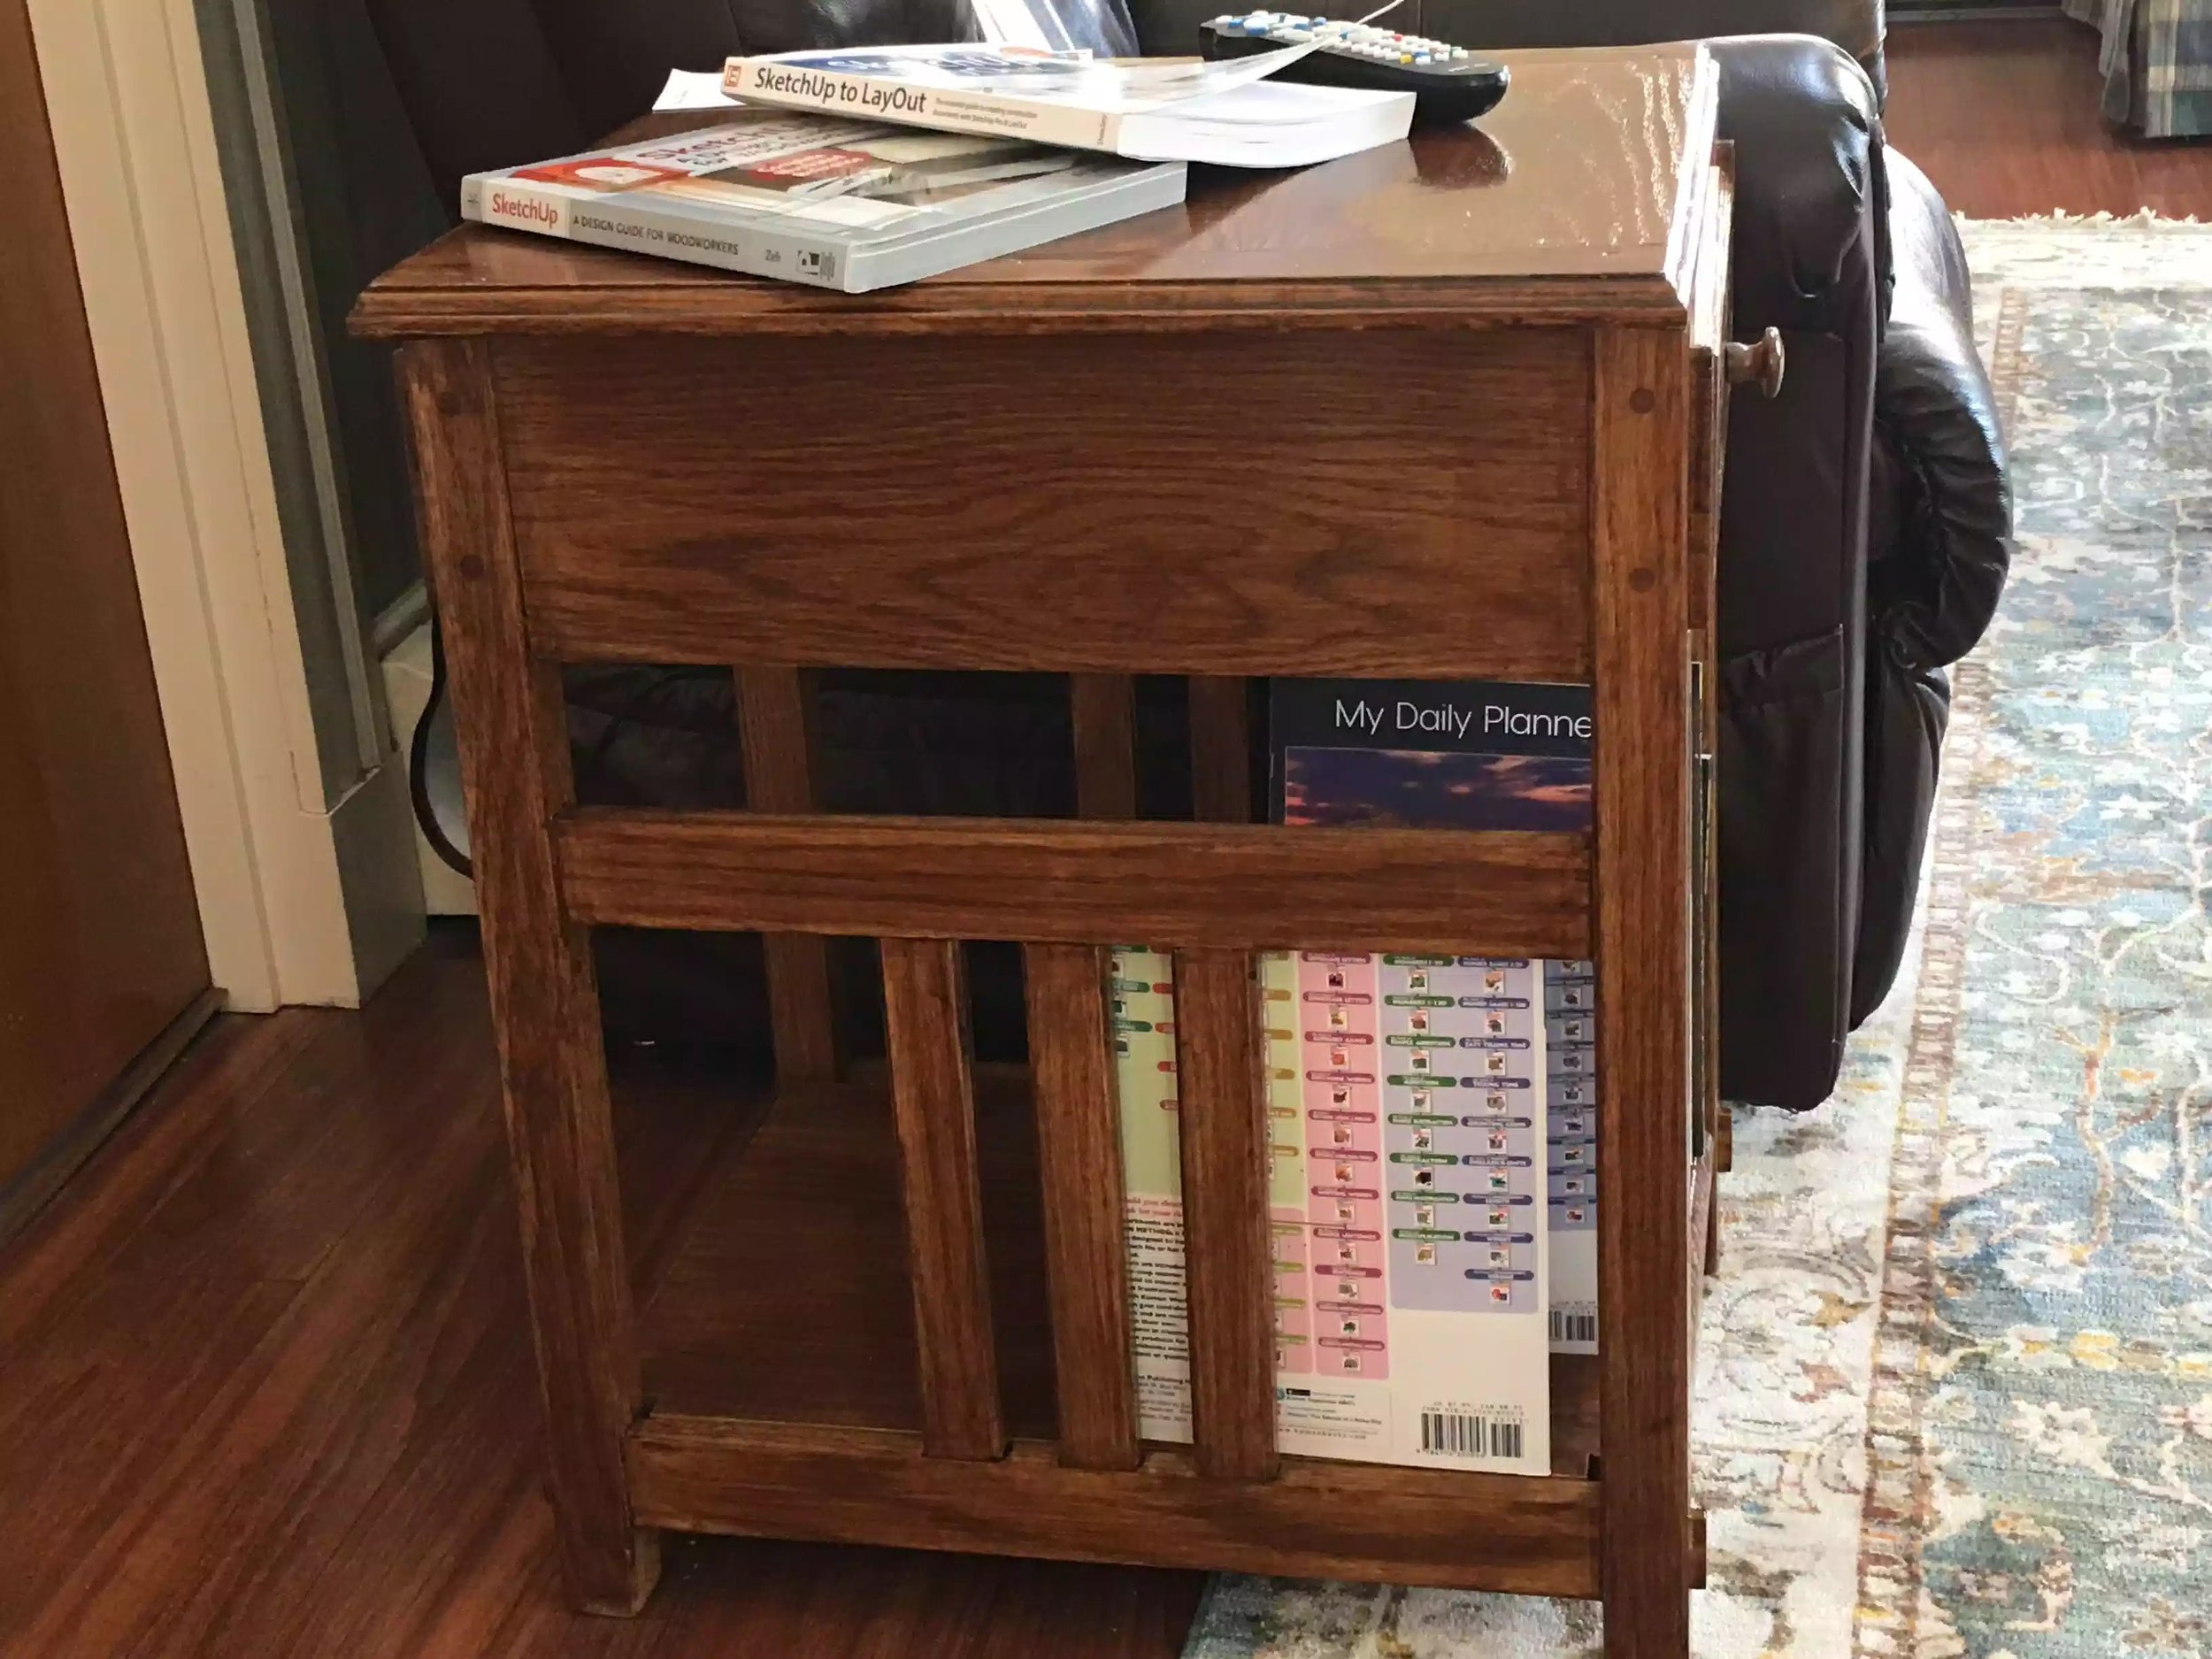
The 4 legs are all joined with upper aprons which the table-top sat on, these aprons were through mortise and tenon joinery on the sides but the back apron was a traditional mortise and tenon that didn’t come through the back legs as the side aprons did, figuring out the dimensions for back apron was very tedious because the tenons had to miss each other so as that the frame could be all joined together. That completed the upper part of the frame, I also did through M&T on the lower shelf rails this wasn’t as big a through M&T but I secured the lower rails and these rails received mortises so as that the spindles could be secured with traditional M&T.
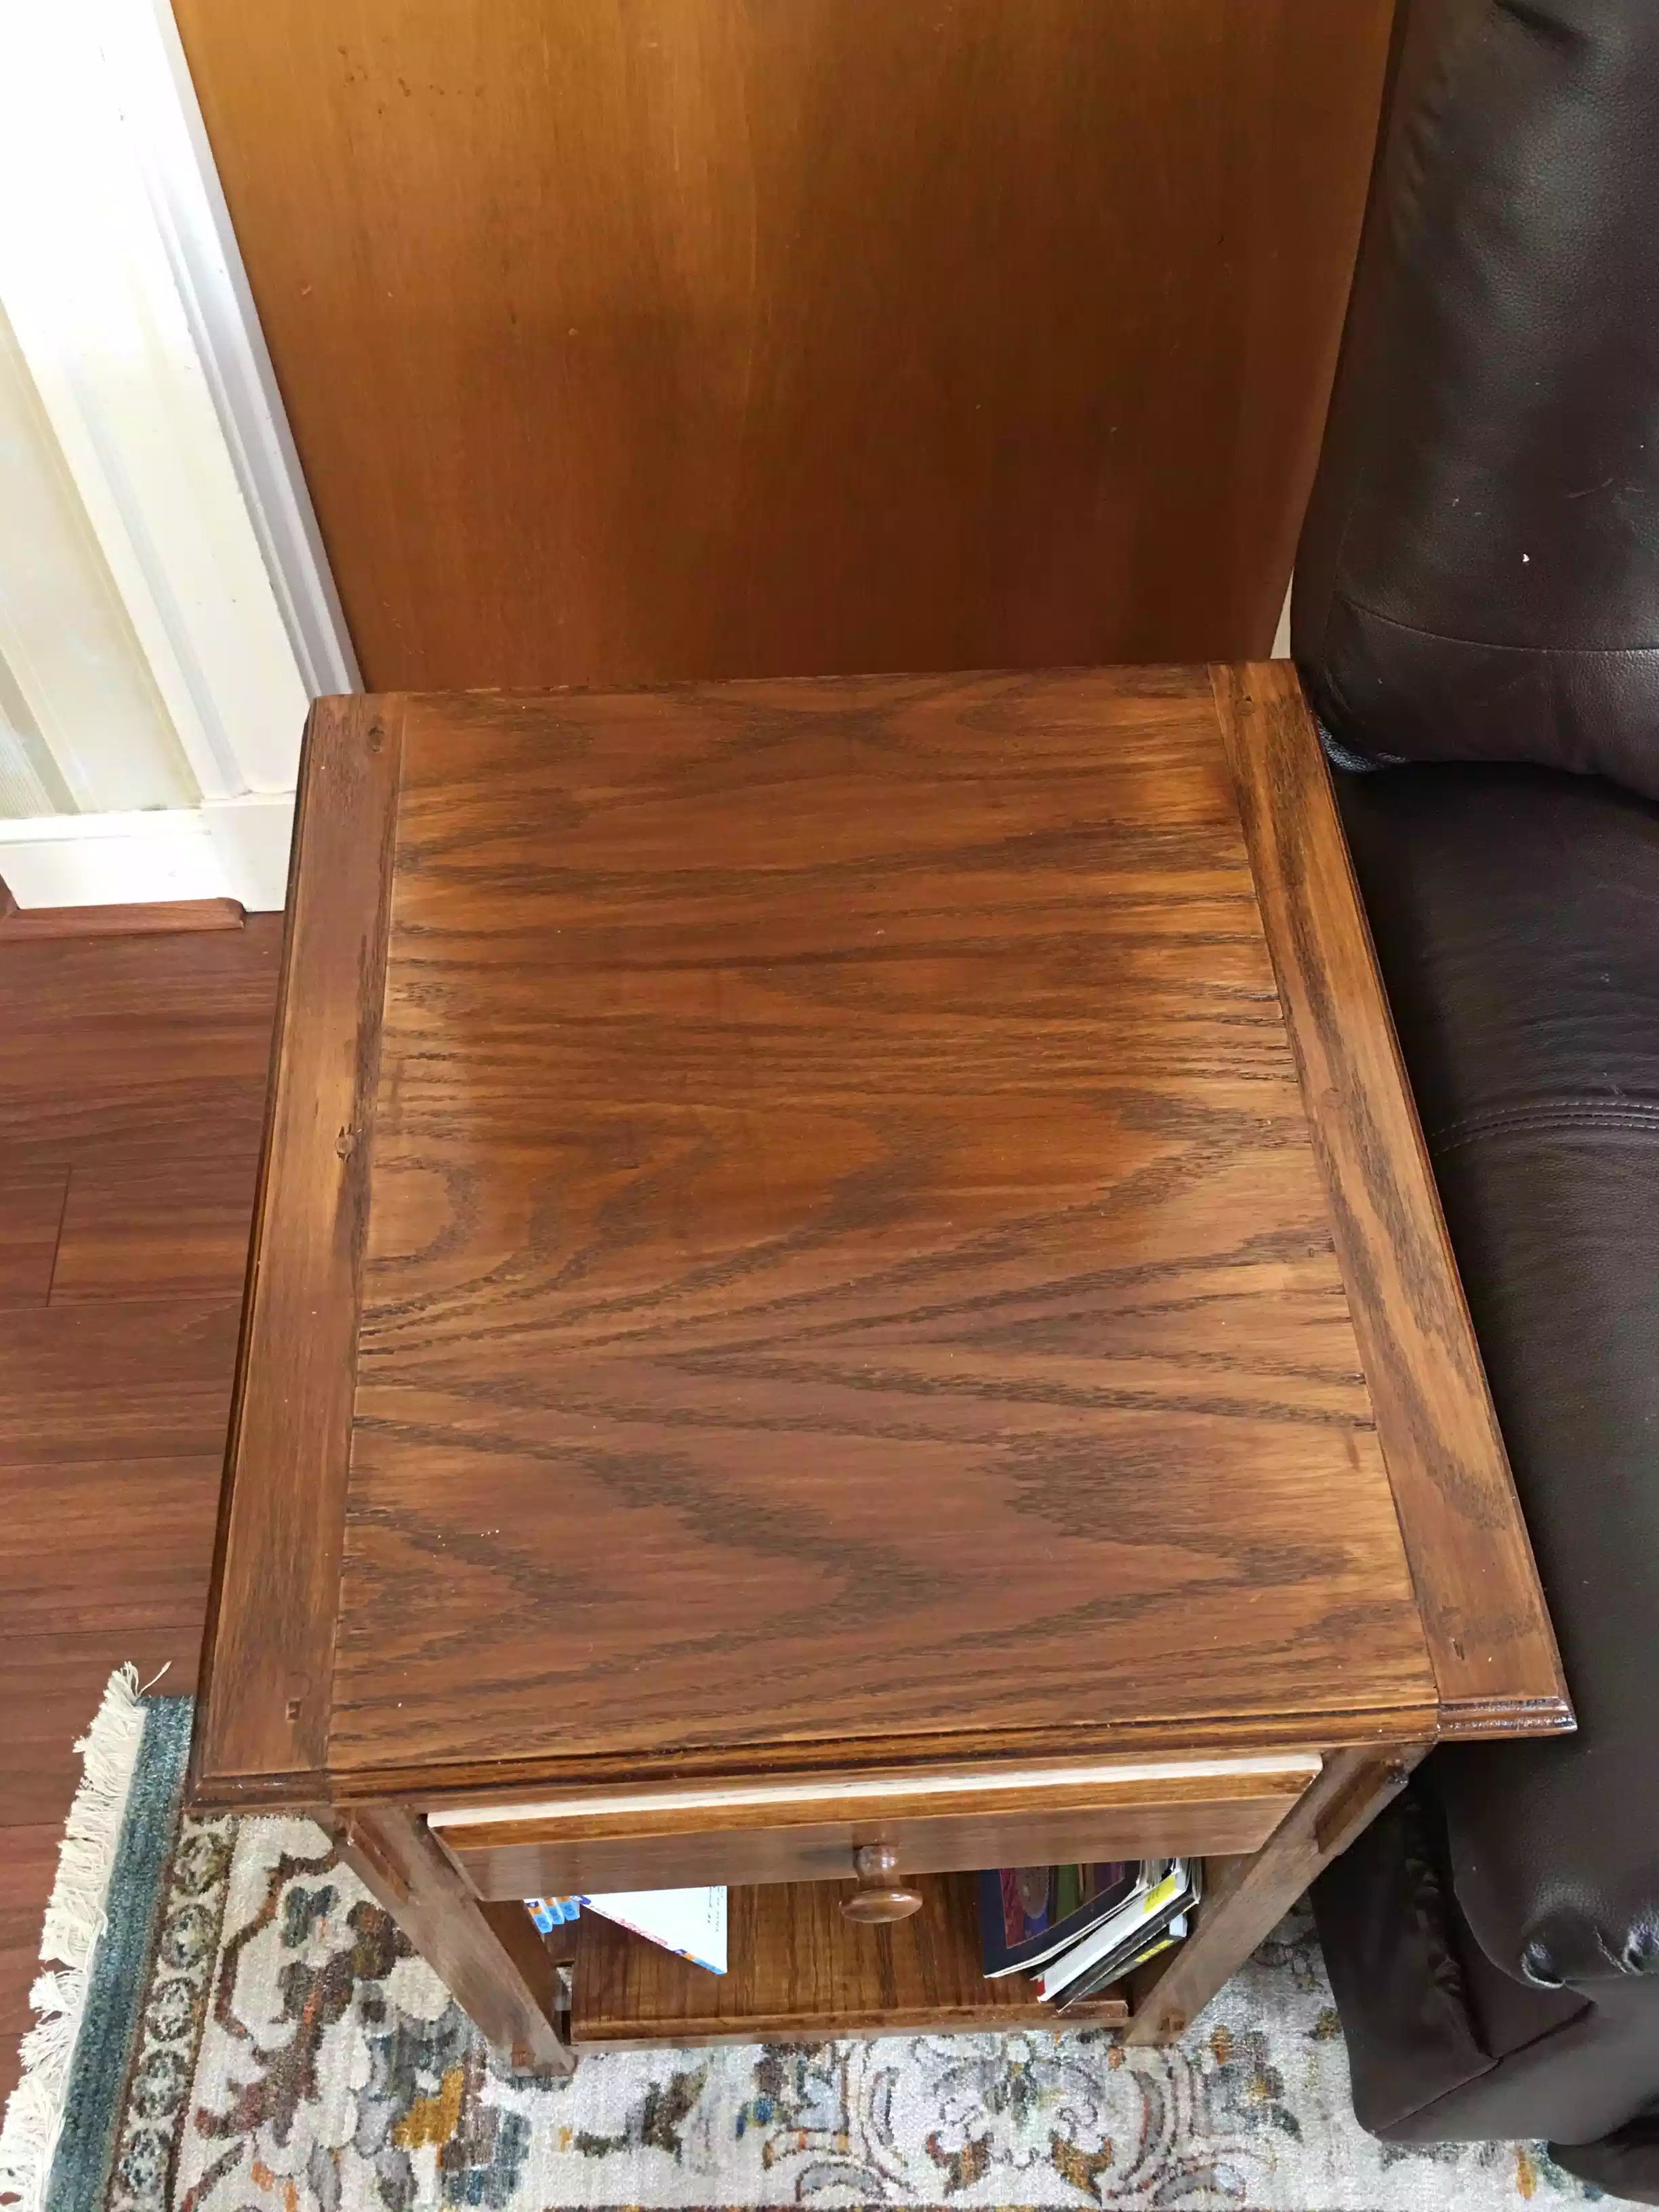
The Tabletop & Breadboard End

The table top was made of 3 (1×8) solid oak boards that I just glued up, I didn’t use any biscuits or joinery but I did use a new approach when to sand the panel, I waited about 30 minutes for the glue to set up and then I used a scraper to remove the glue, I was so tired of applying stain and them annoying white blotches on the wood, so I did it this way and it came out perfect as you can see. Sorry to say that I am not sure where all the pictures went for the breadboard ends but needless to say I think it came out ok. I cut a recessed tenon on the left and right side of the panel, I cut about 1: away from each end so as to hide the end grain, I also used dowels to reinforce the breadboard groove that fit the tenon and to also allow for seasonal wood movement especially the center panel in the table top I am happy with the outcome. To finish the table top I applied 3 coats of poly-stain and then an additional 2 coats of Poly Acrylic making it resist all the hot cups that will be placed on it.

Bottom Shelf
Is made from 2 (1×8) boards that I glued together again I didn’t use any other joinery method of fastener and I think it came out ok again the same finish was applied, but I did alter my design a little in cutting a 3/8” chamfer on the front and back edges and I am glad I did because I love the depth of the grain pattern, makes it look thicker than it is. Finally I had to cut notches out of each of the corners so as that the shelf would fit inside the legs
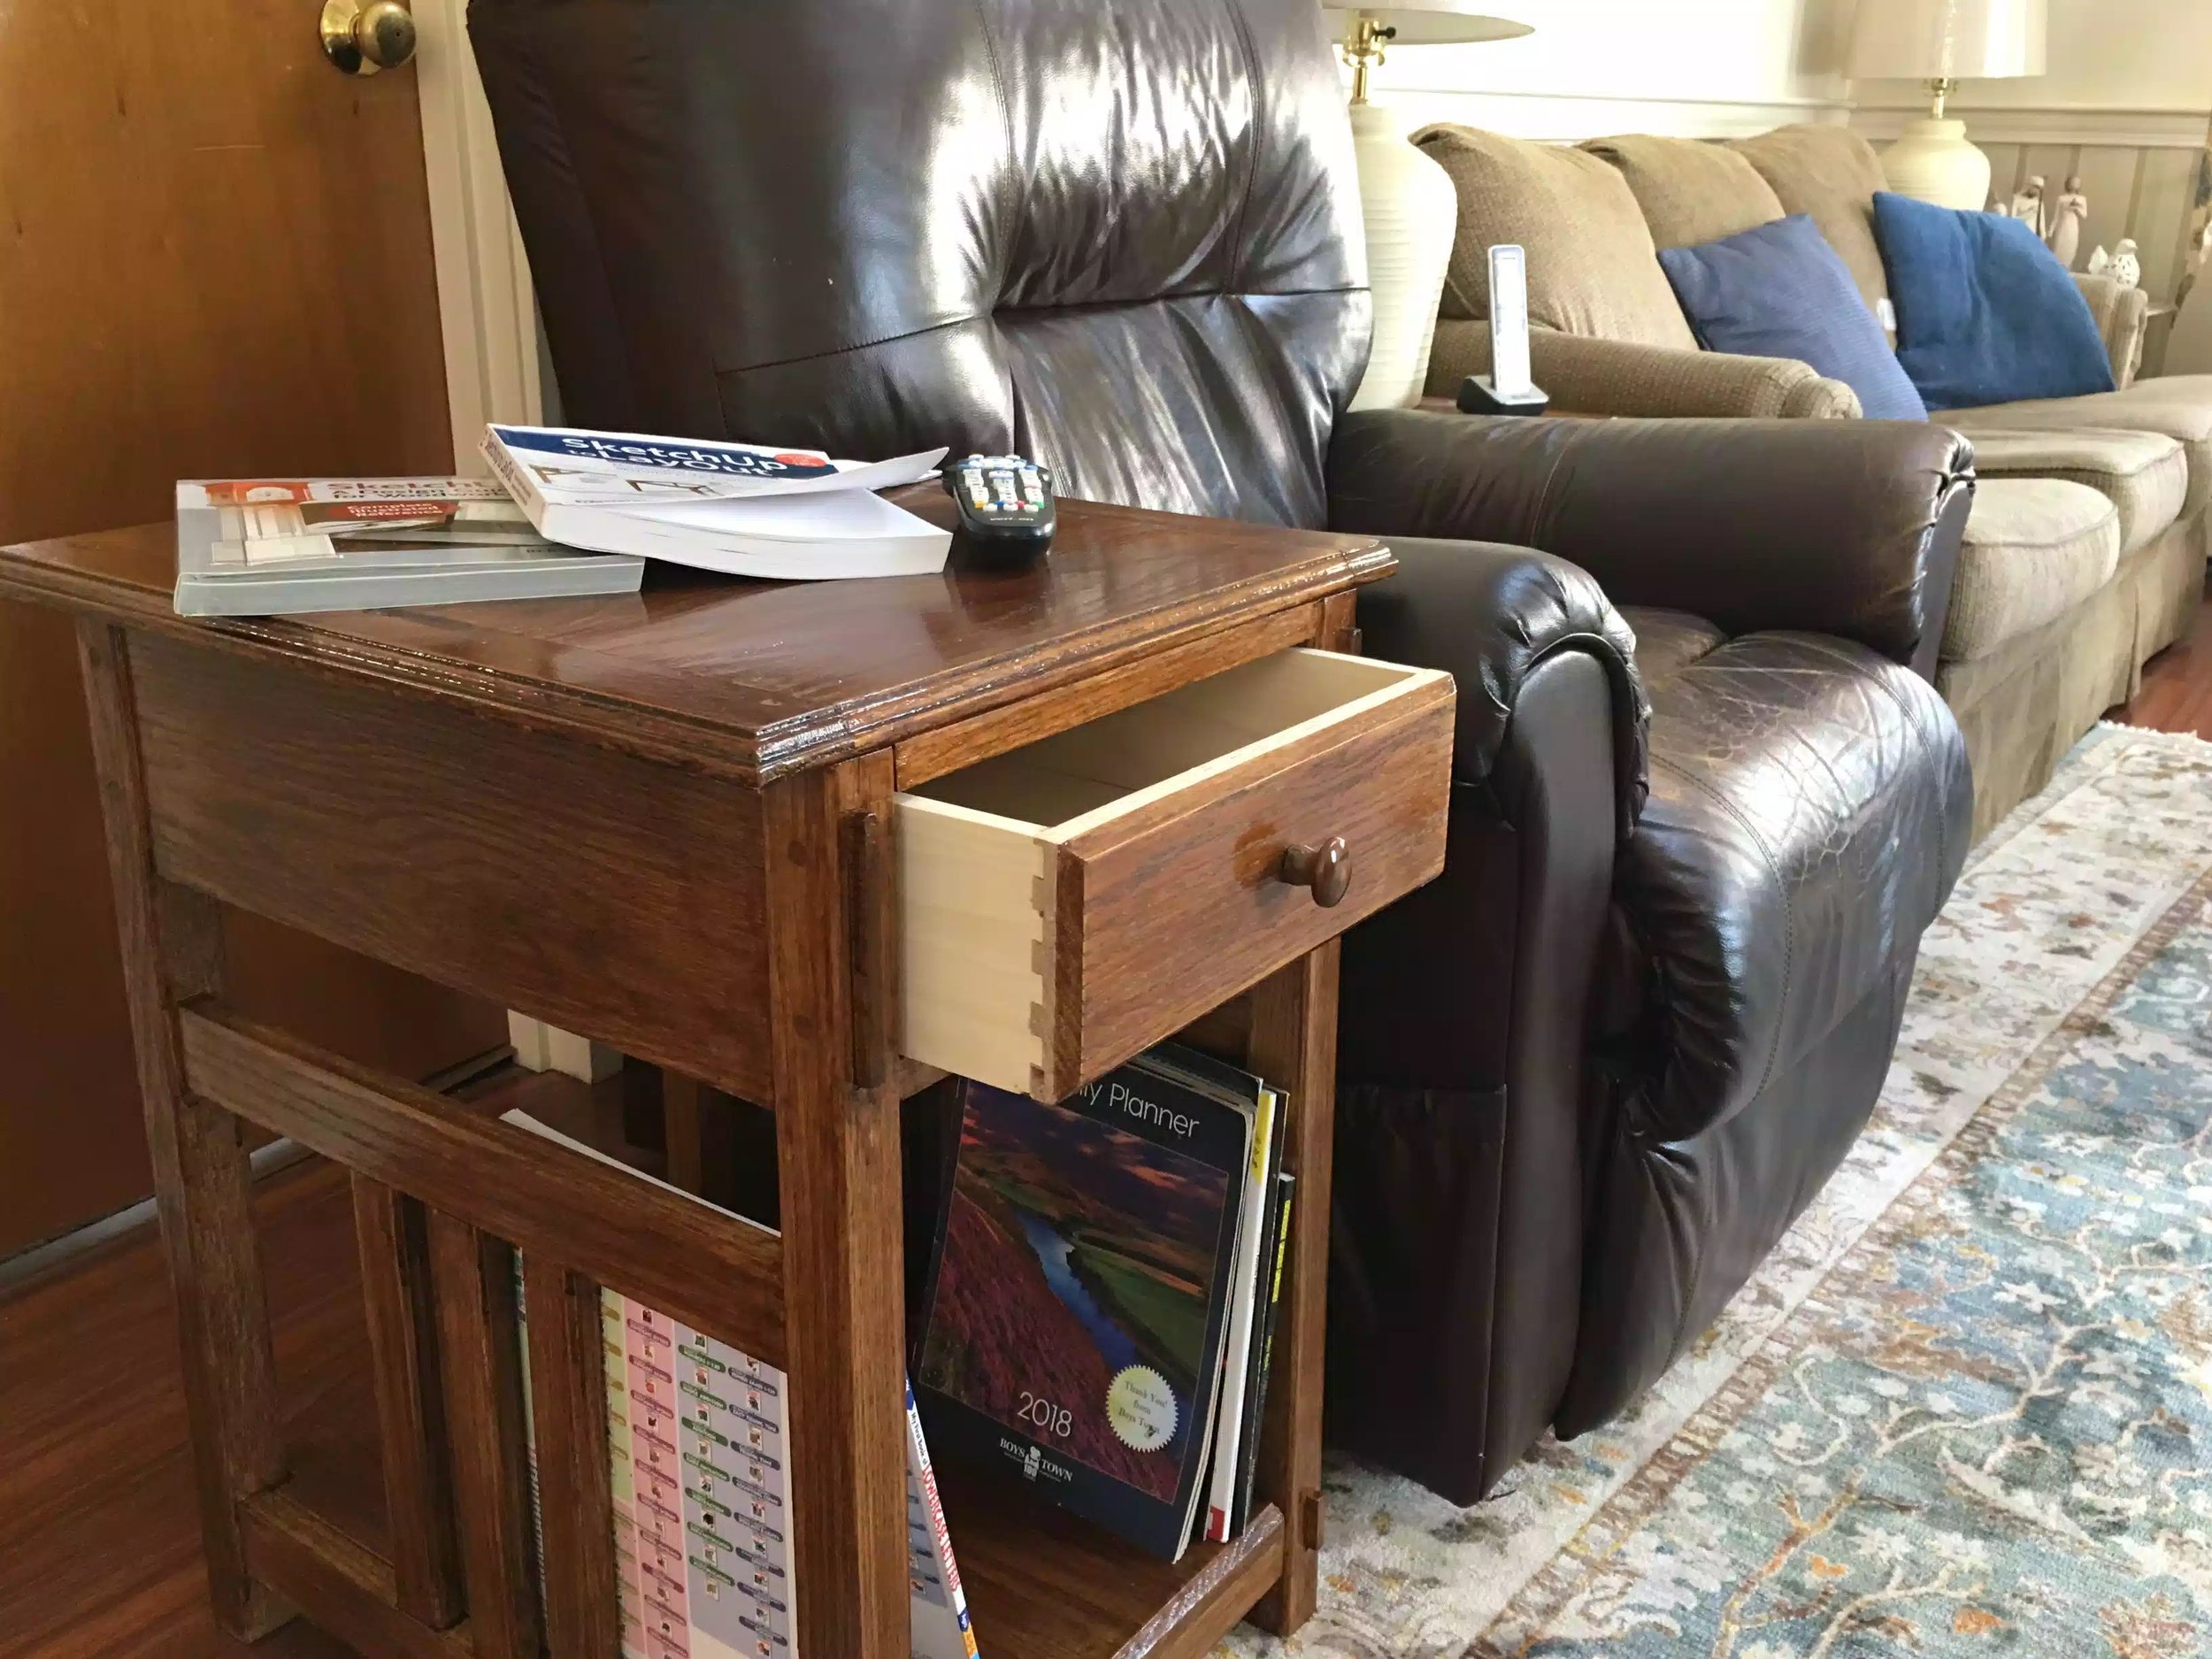
The Drawer
I used my Porter cable half blind dovetail jig to make the drawer and it I almost forgot how to use and spending the day looking for the bushing and the router bit but once I did a few trial runs and dialed the jig in it came out ok but its not perfect and I am not saying why all I can say is that the groove I had to cut to put the drawer bottom in is visible on 1 side. The front of the drawer is half-blind dovetails but the back of the drawer is a locking rabbit joint, I used oak for the front and back of the drawer but I went with poplar as a contrasting wood for the sides. It was the first time that I used different wood thicknesses on the jig but I passed maybe with a B+. Finally the drawers slide on runners that I made so as that the apron inside faces would be flush to the drawer sides so I made a pair of these

Finally the drawers slide on runners that I made so as that the apron inside faces would be flush to the drawer sides so I made a pair of these

I would love to learn how to hand cut these joints but I am not there yet and the jig bridges the technical ability of the wood worker (me!!!!!)

Locking Rabbit joint for the drawer back

All in all the project was a success and my wife and mother in-law love it, Thanks for looking!!!
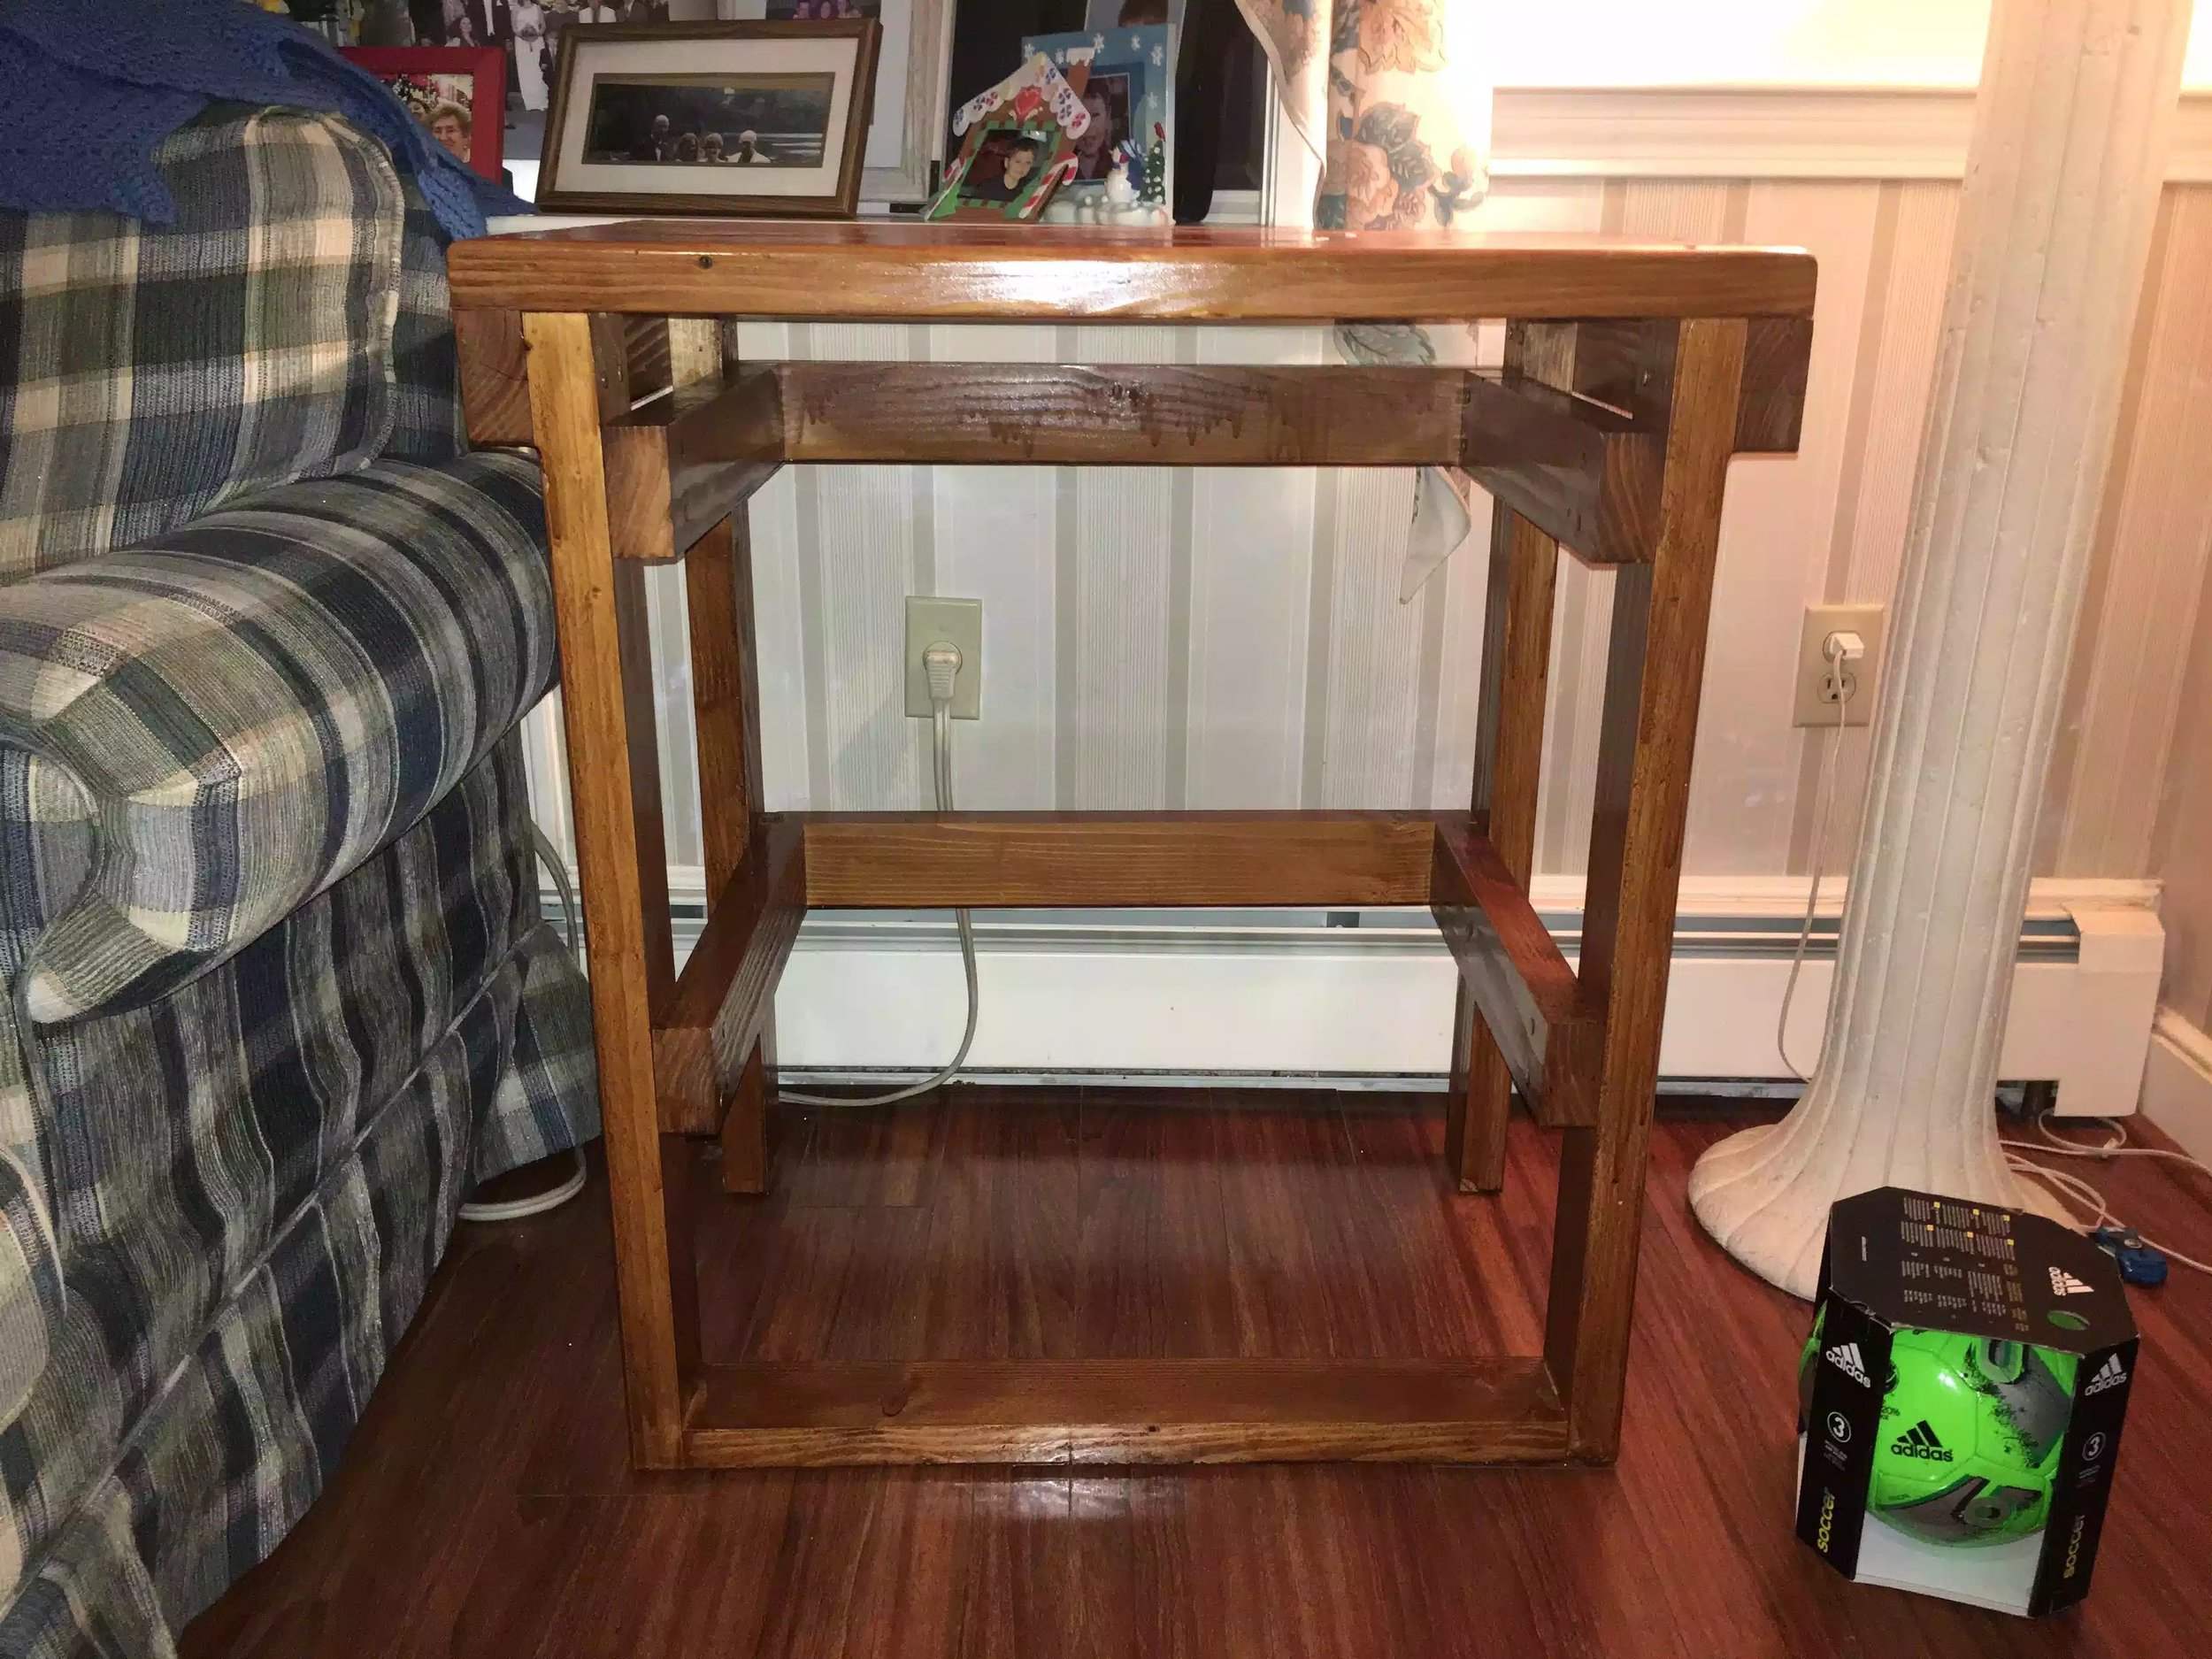
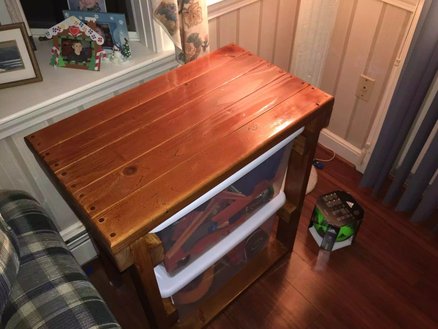
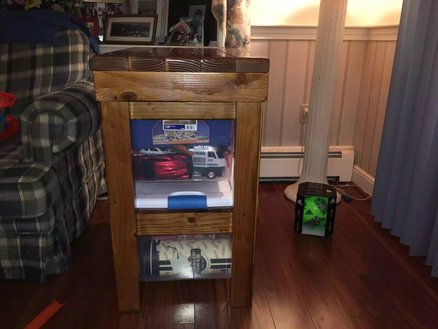
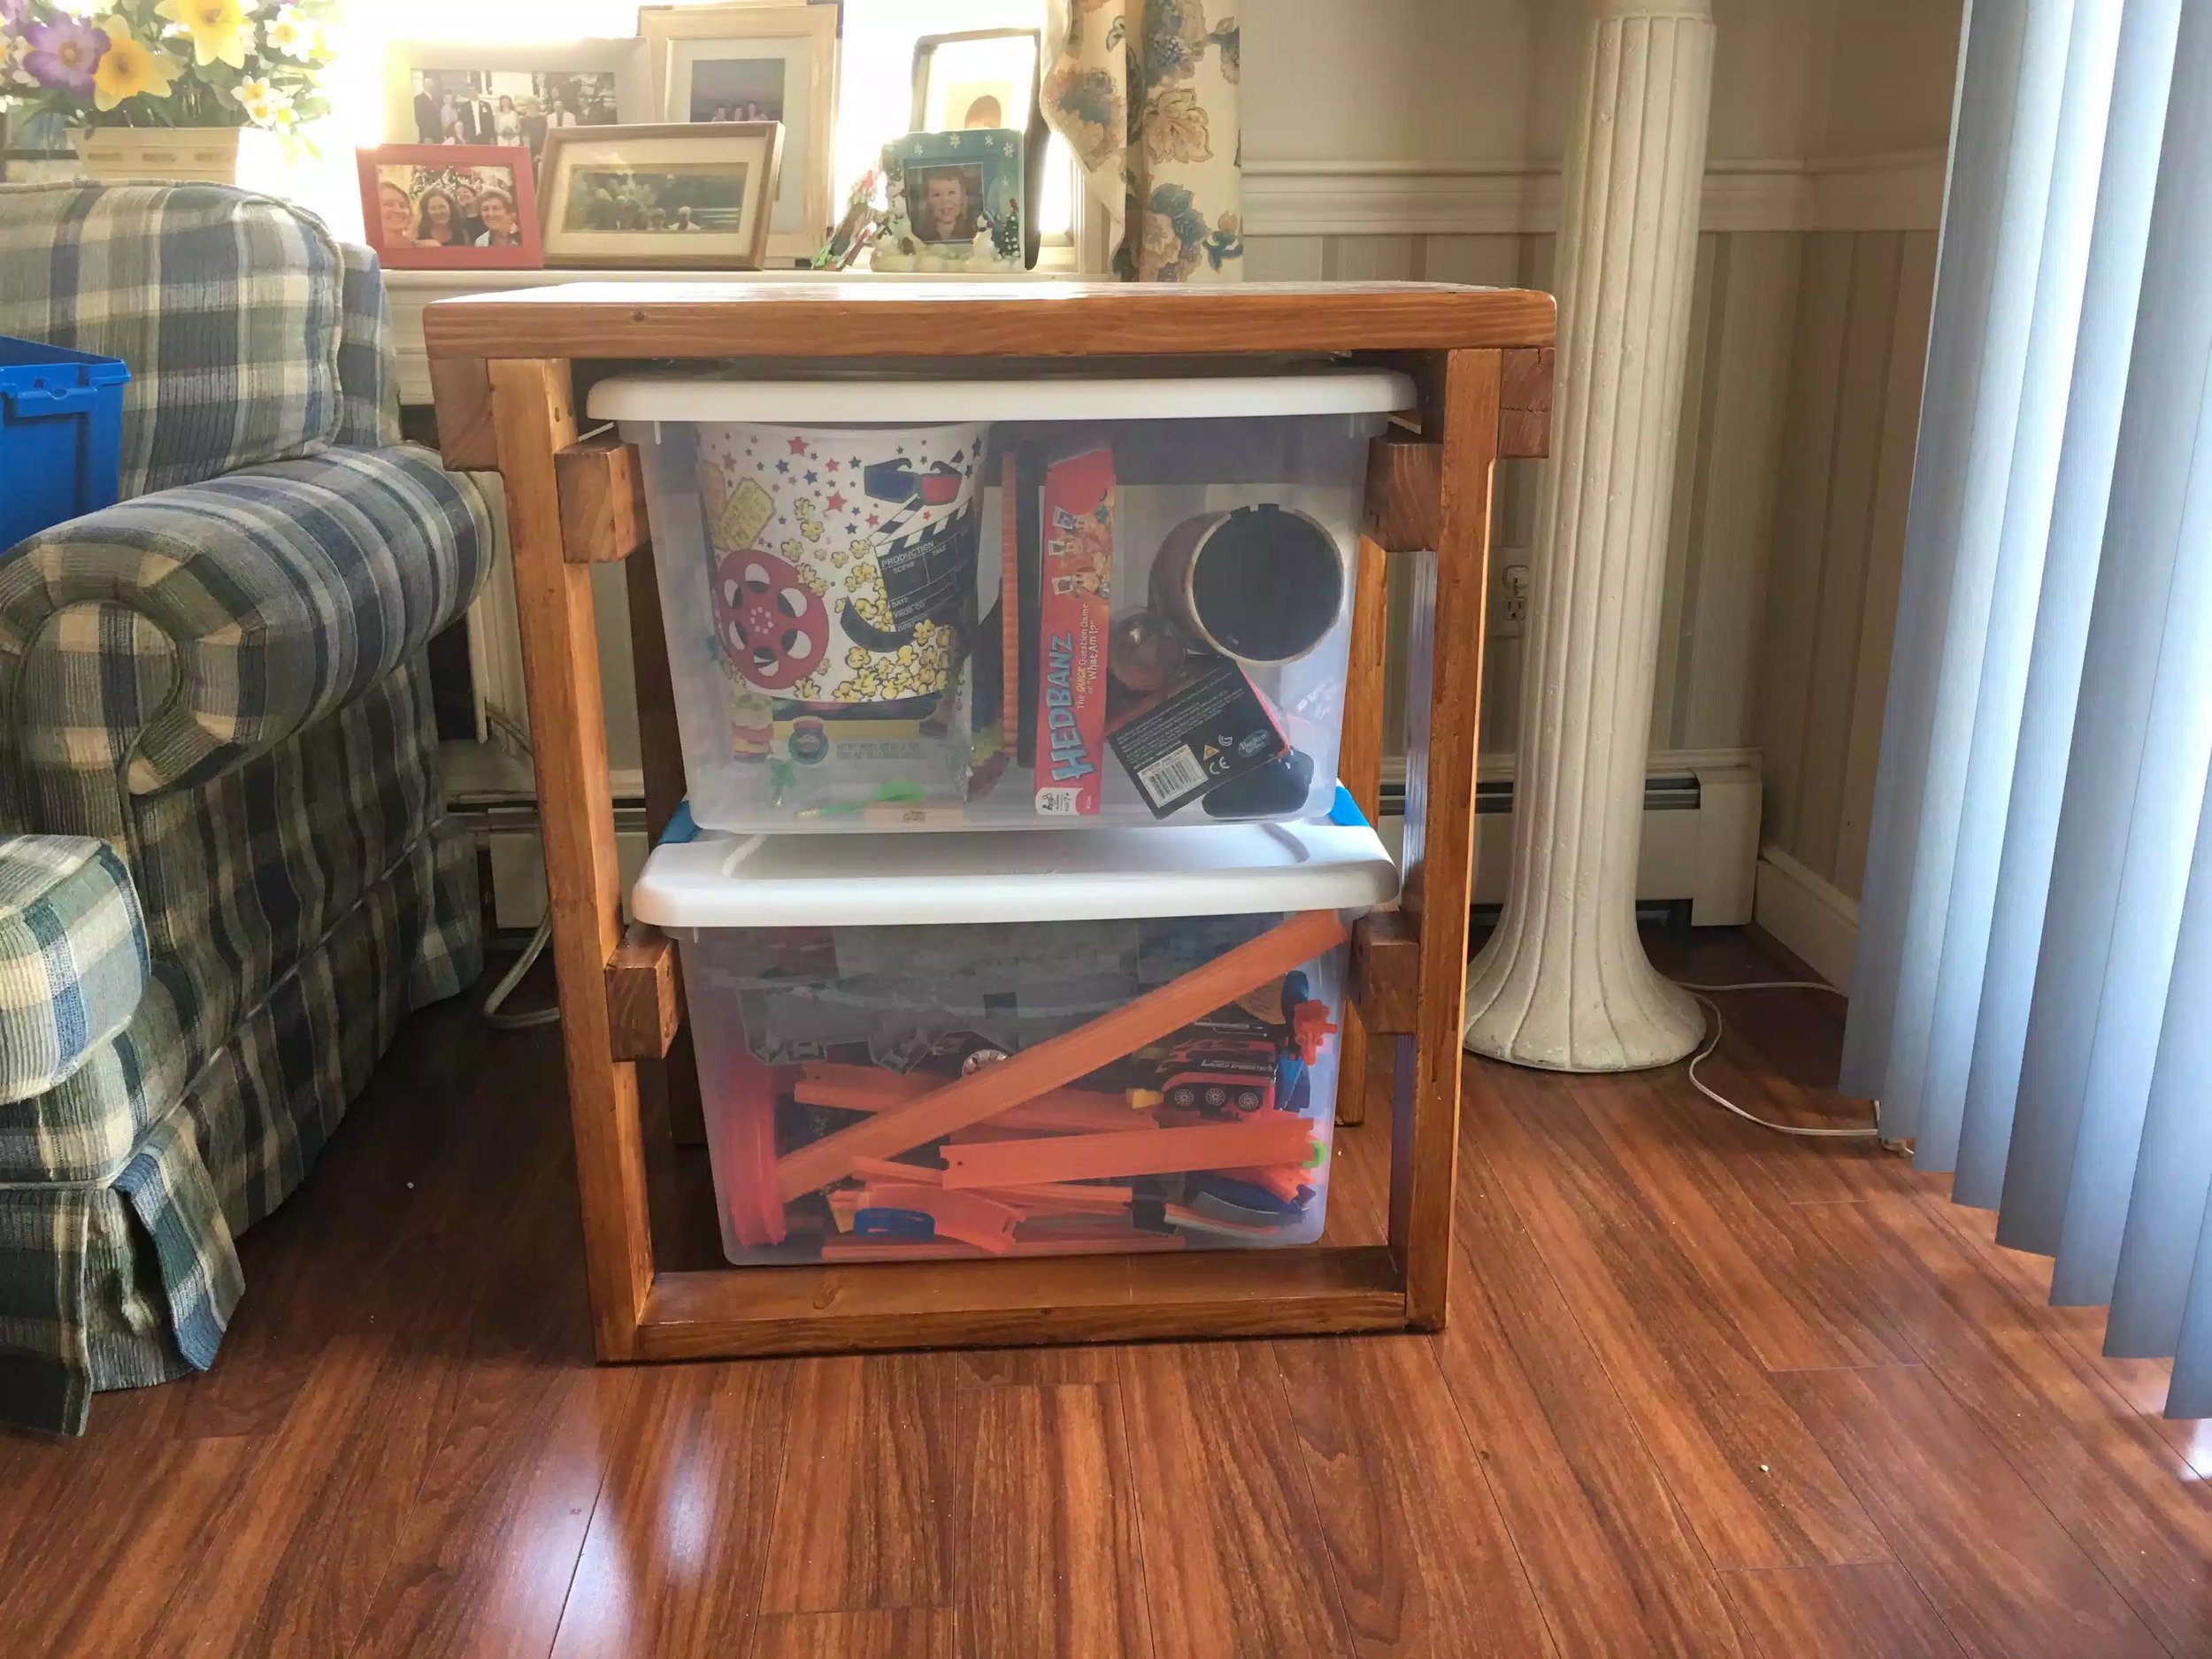
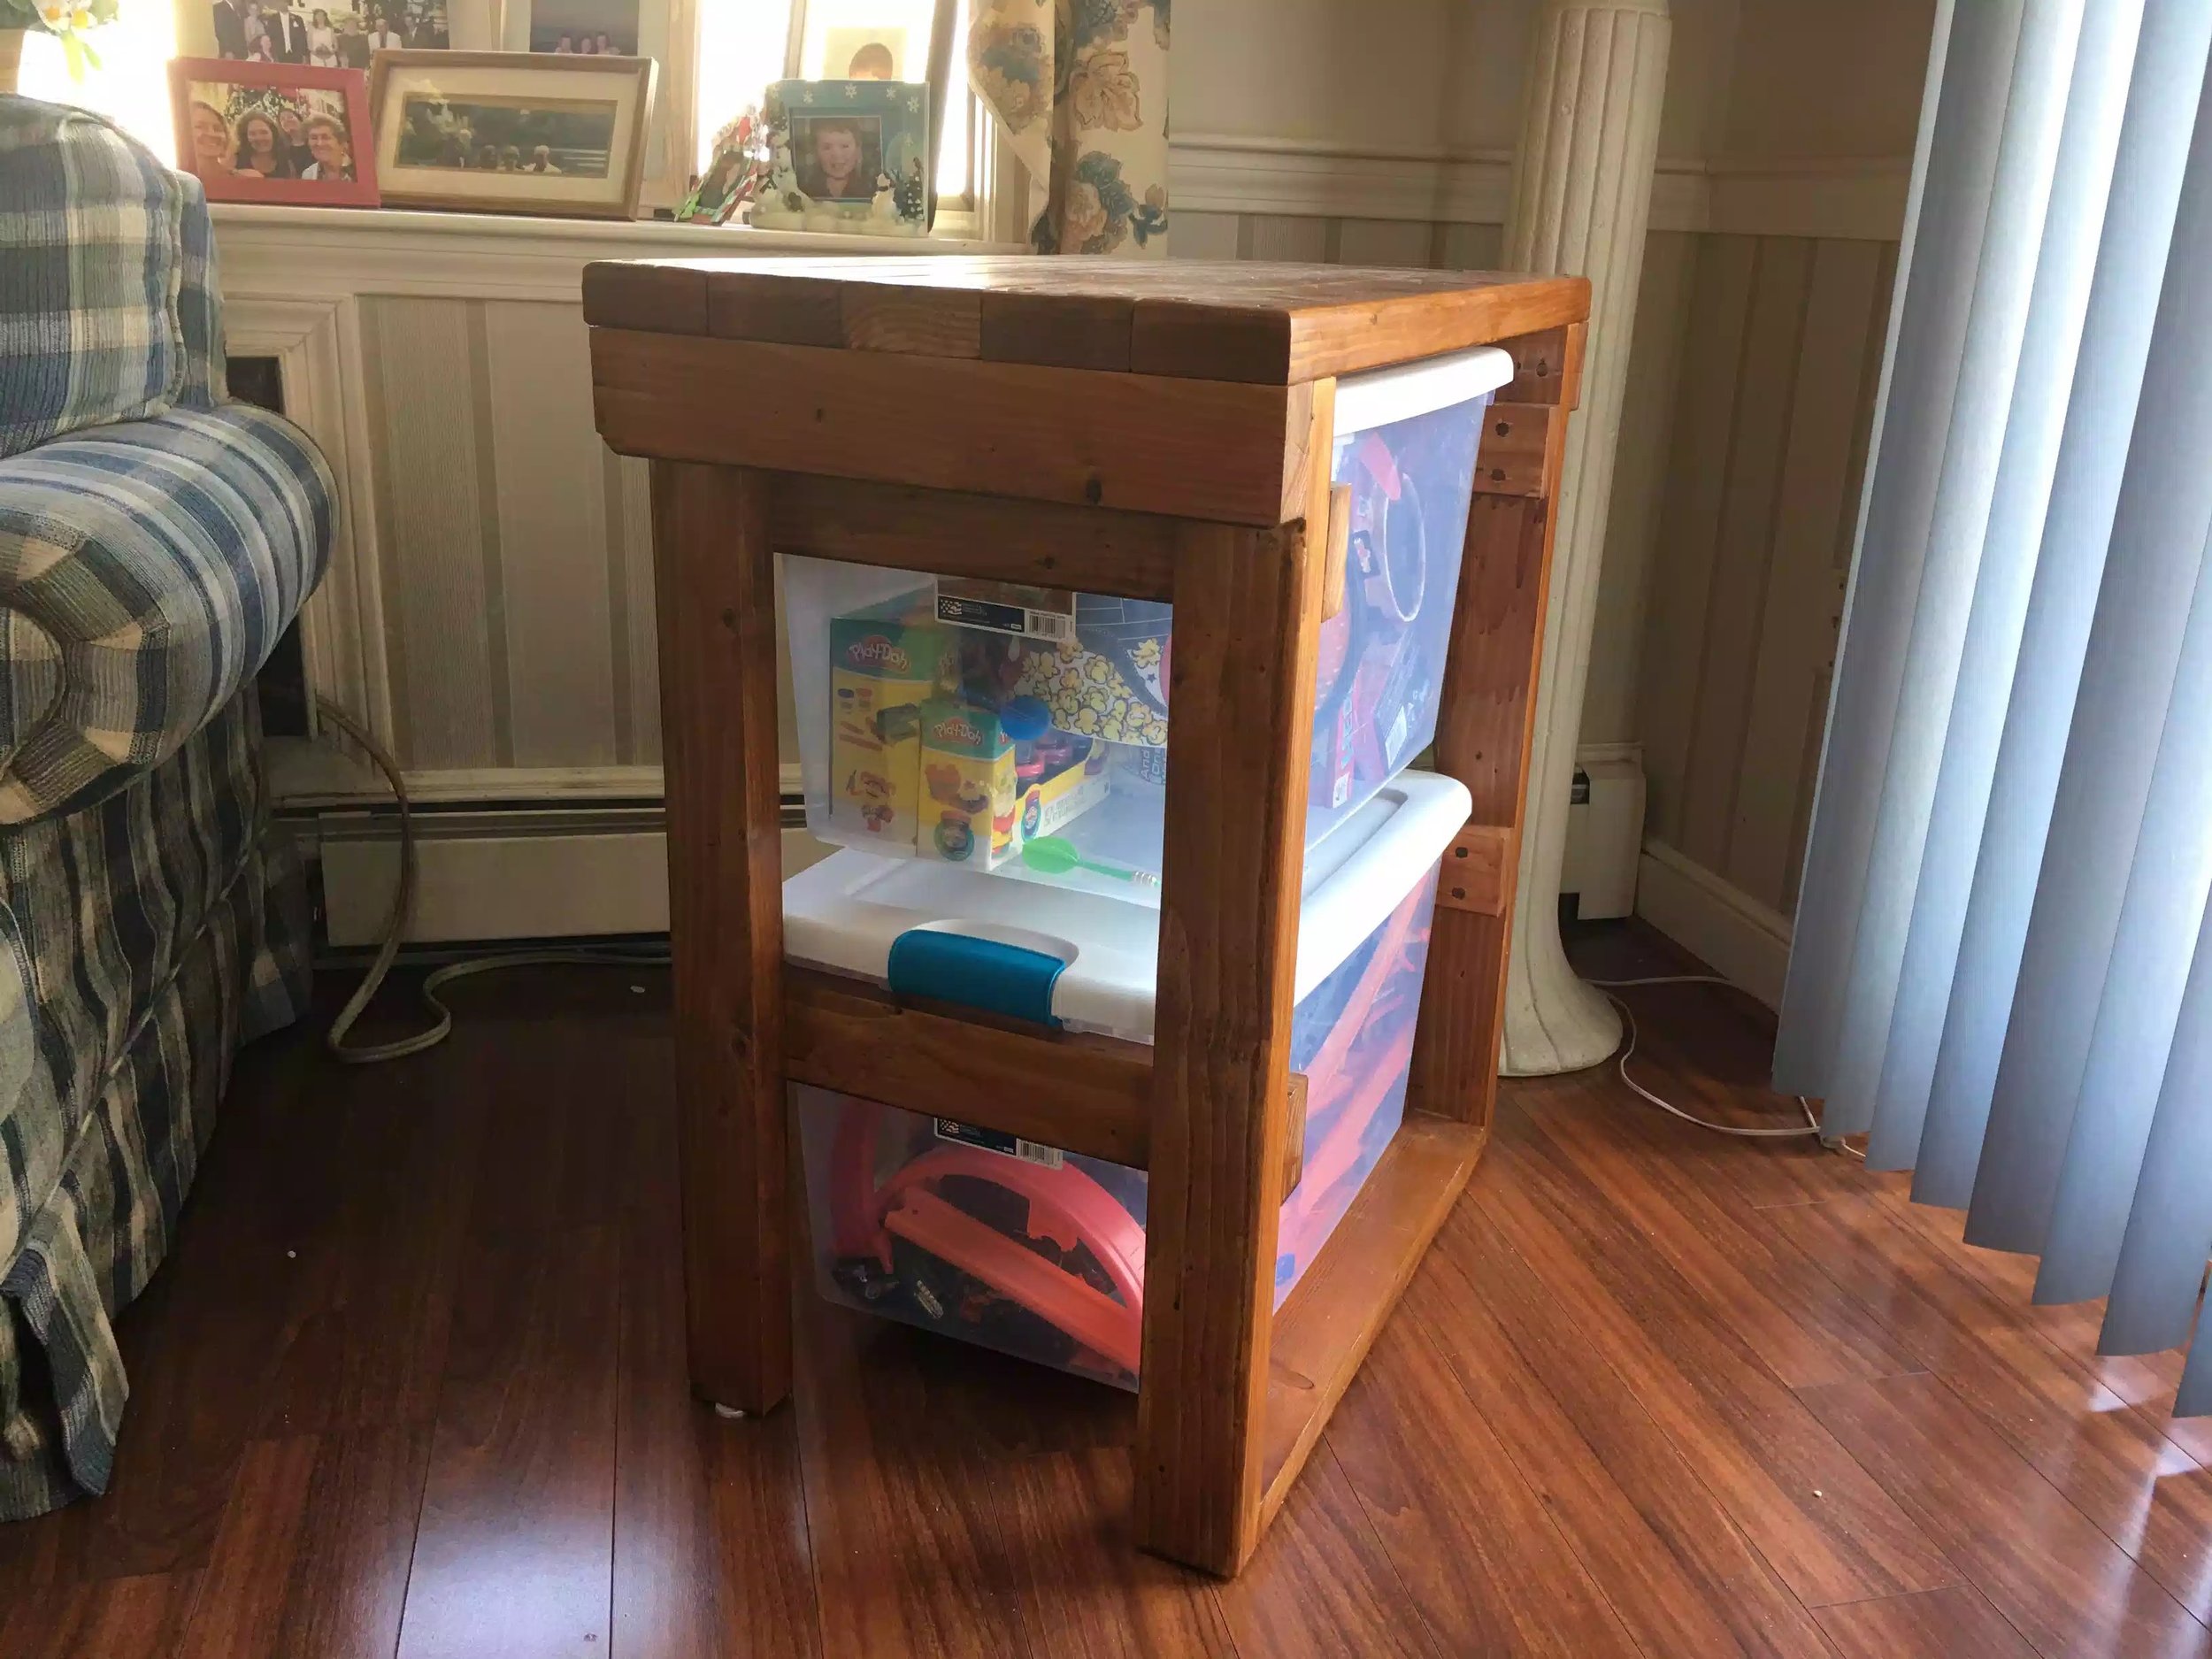
PLASTIC TOTE STORAGE UNIT
My wife said that I need you make something for all our 5 year old sons toys (and so the honey-do-list ) just became longer. So off I went to search the internet for some inspration and I came across this plastic tote storage option made out of 2×4s.
I have plans available, please click the link below this projects.
Materials:
(5) 2×4’s
(2) 64 Quart Tote
(1) Box of 2.5” drywall screws
(1) Wood plugs
Glue
I think the end result is awesome and can be applied in so many ways, you can dress it up with stain and router profiles on to it, or it can totally utilitarian and used in your shop.
Anyway
Thanks for looking