
KITCHEN PROJECTS
SERVING TRAY
(04/2019)
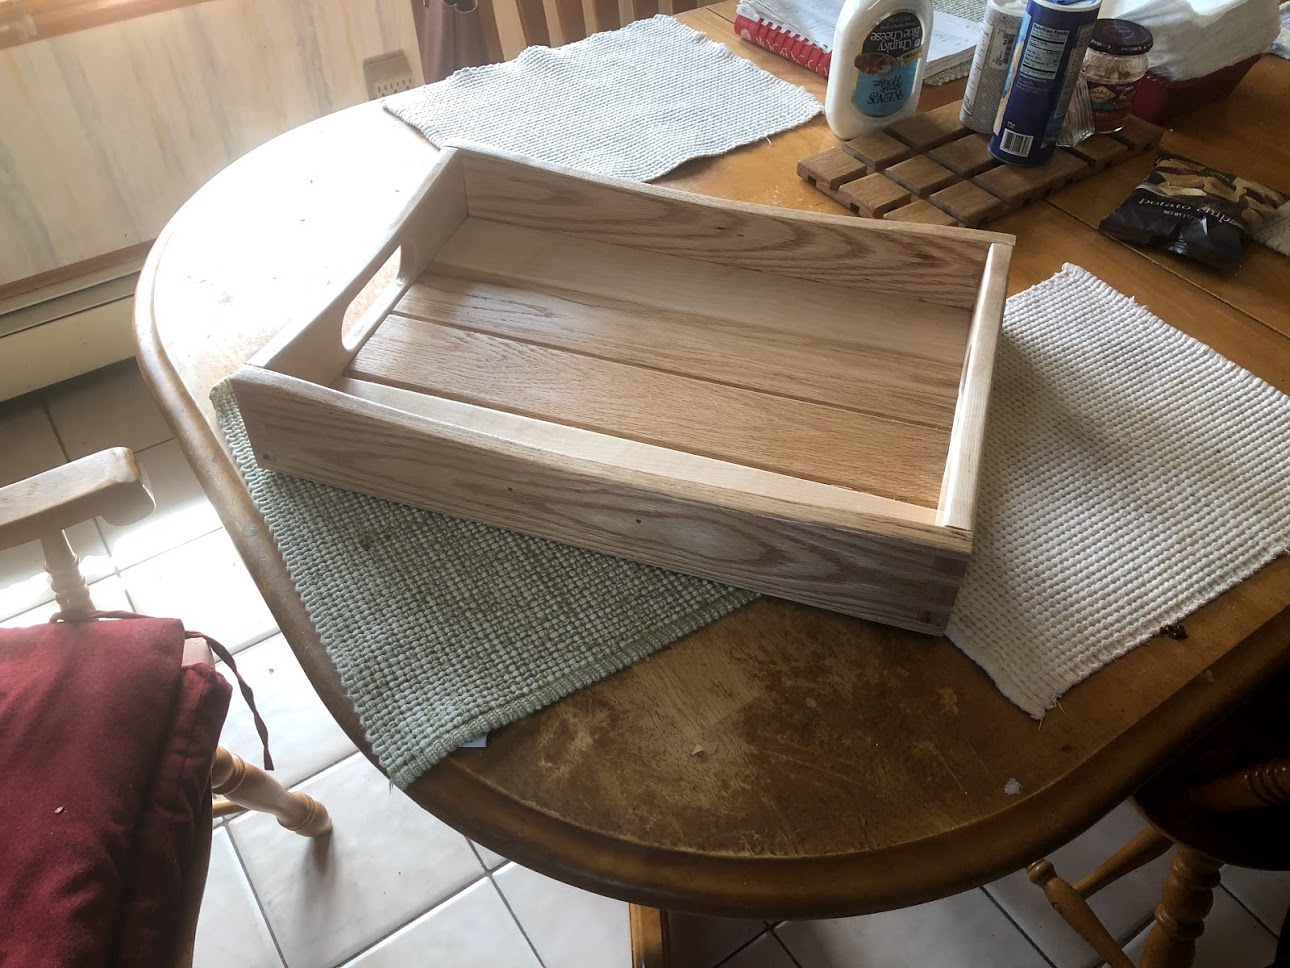
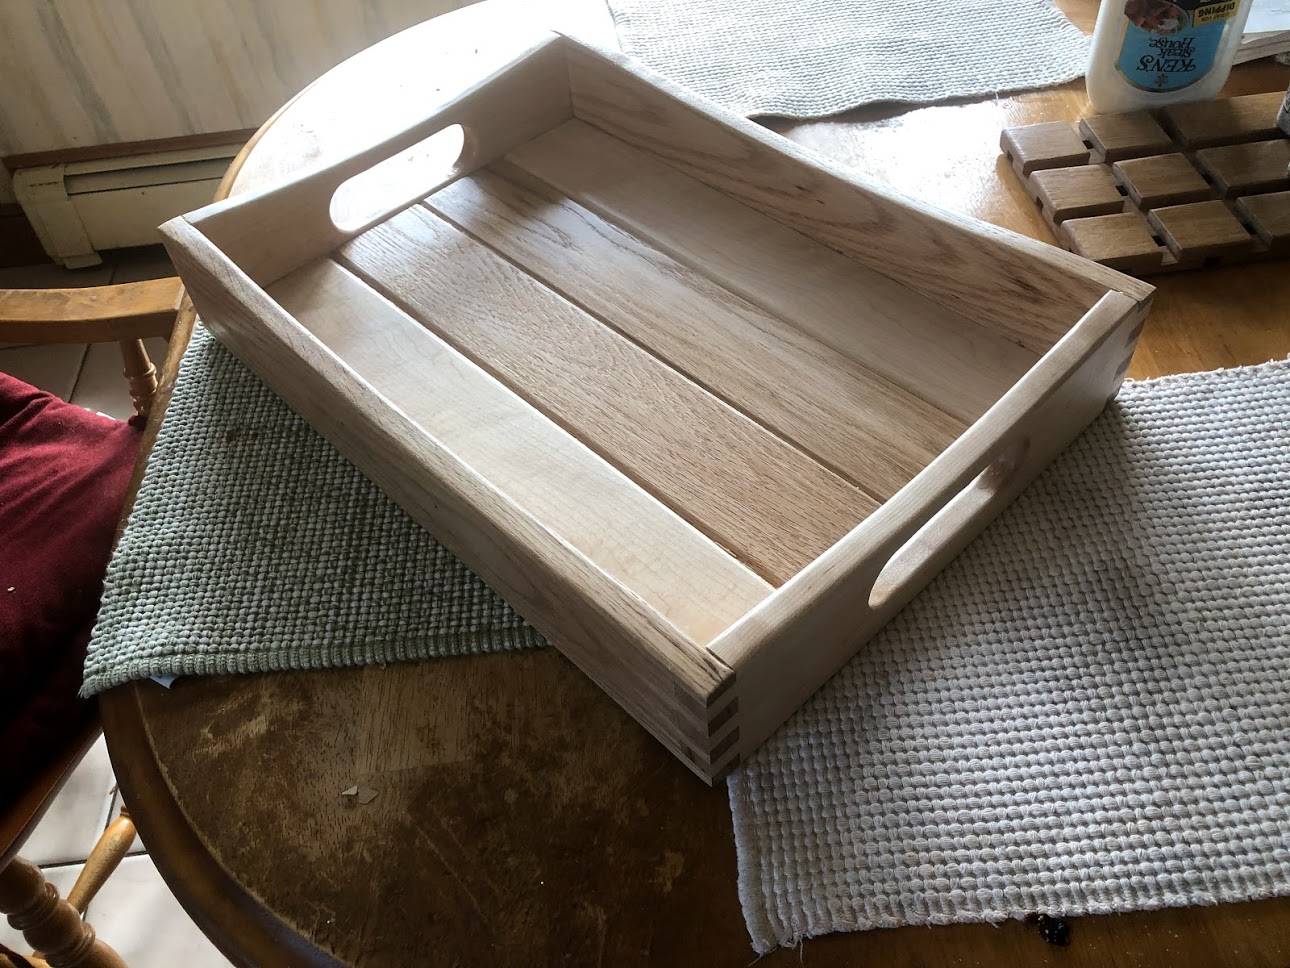
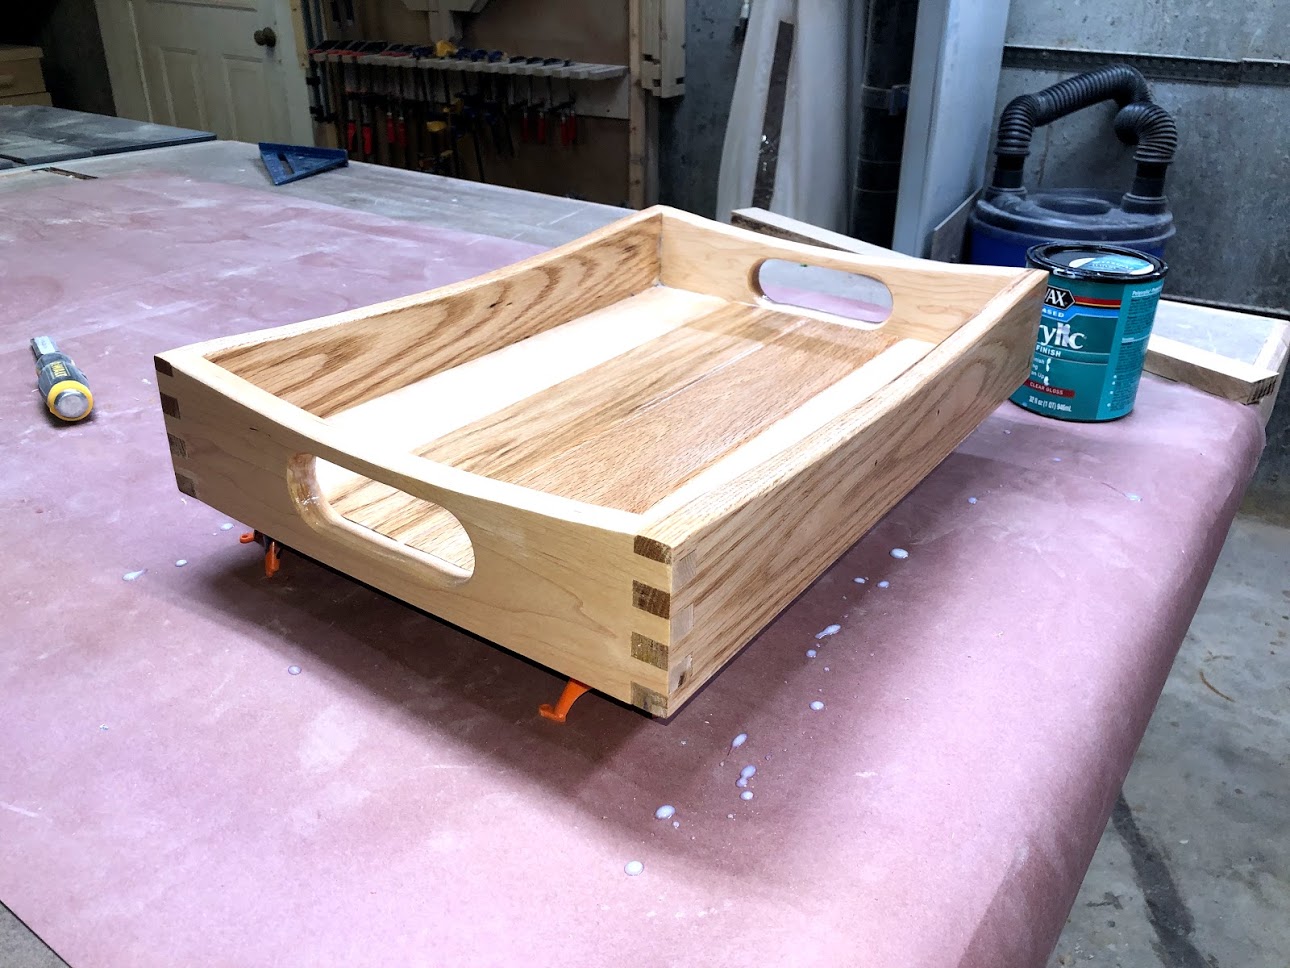
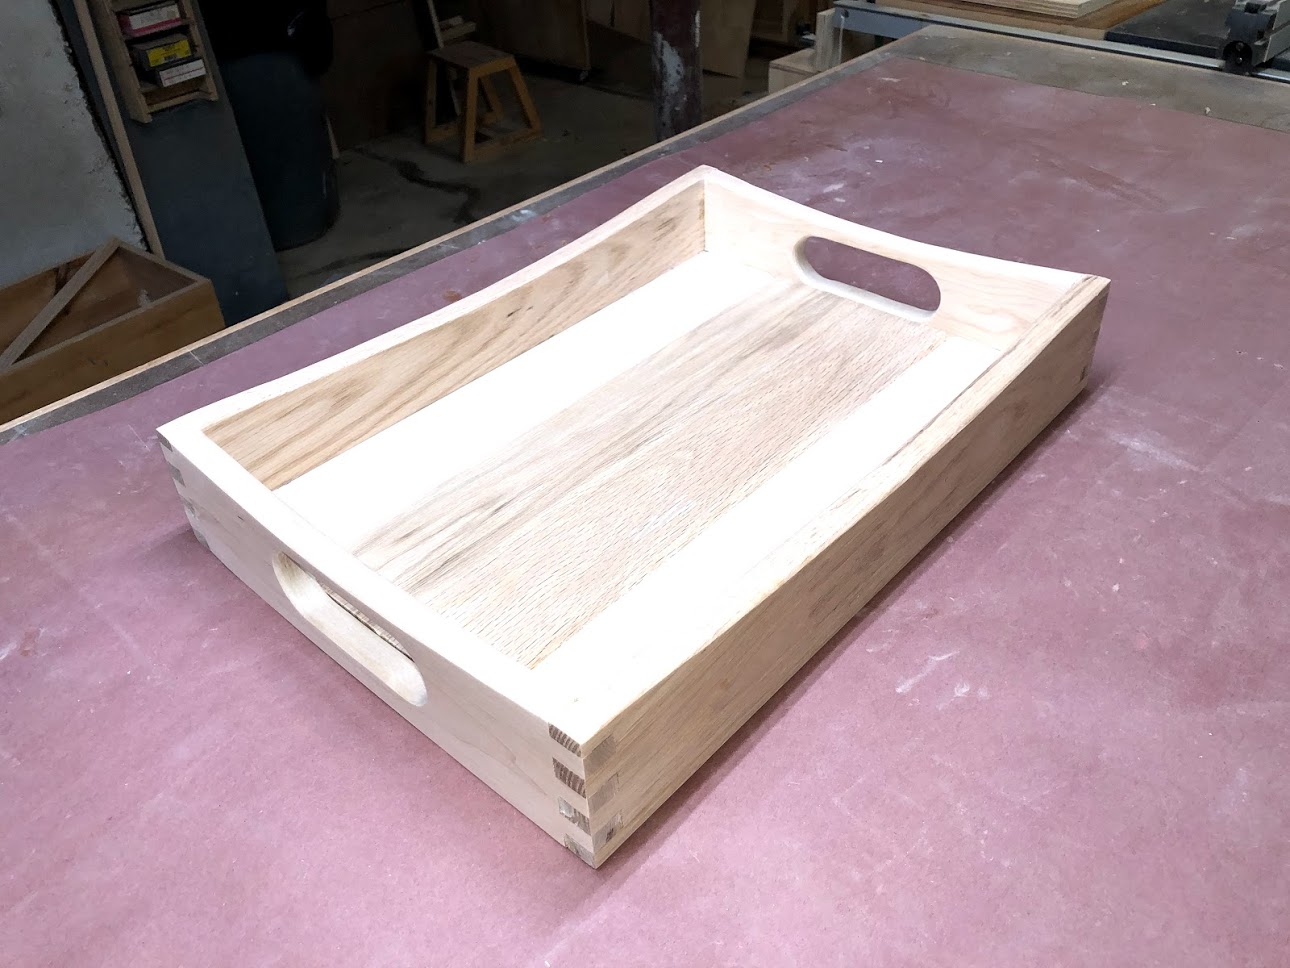
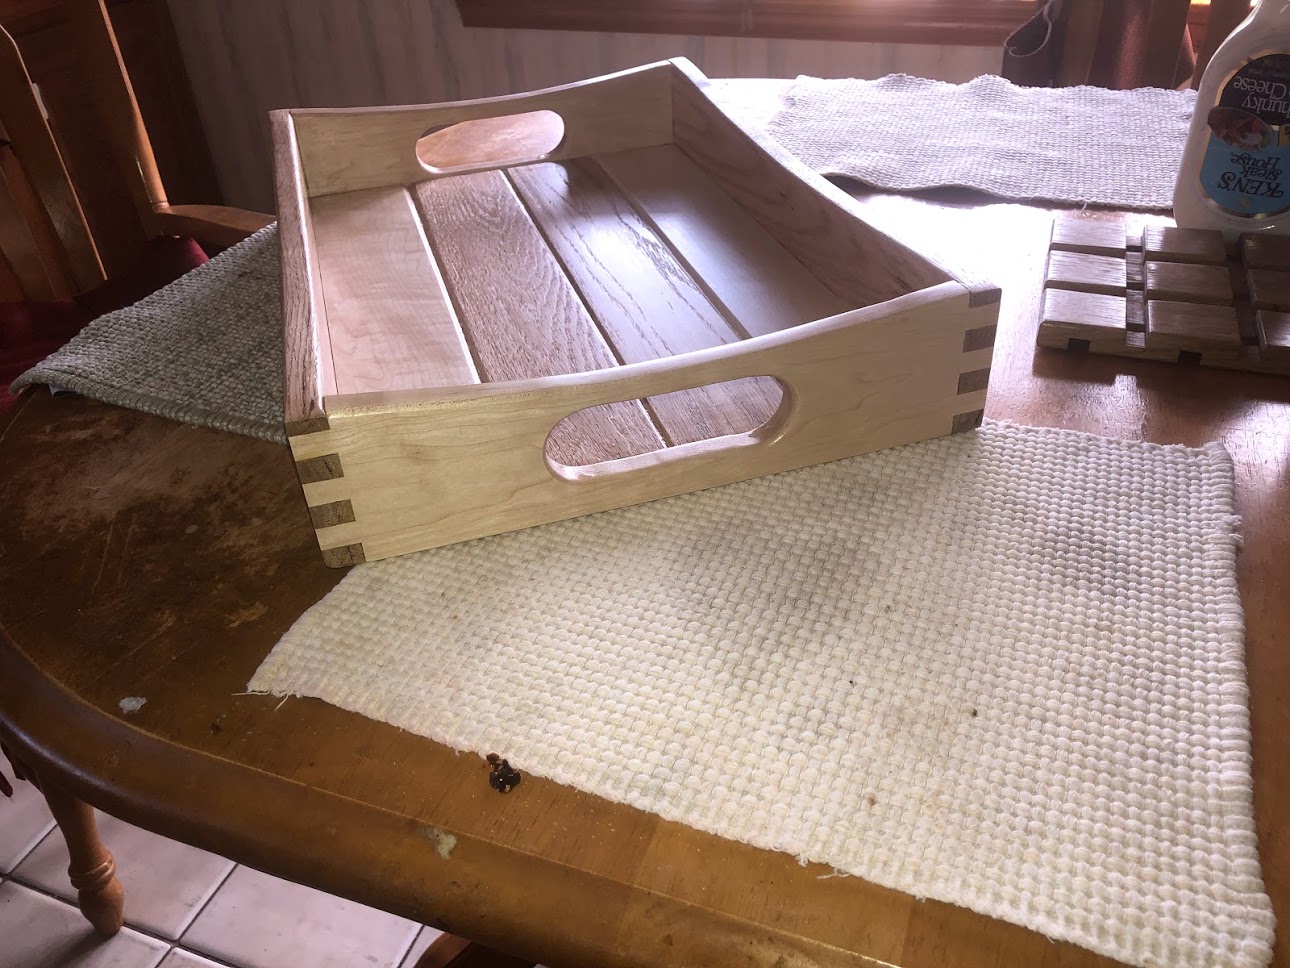
This has been a project that I have wanted to make for a while, especially every time I wanted to do Breakfast In Bed for Mothers Day.. So I decided to start researching online as to what I wanted it to look like. I have to say that I didn’t really find exactly what I was looking for in one project but I did find a lot of different features in multiple projects that I wanted in the Serving Tray which were :
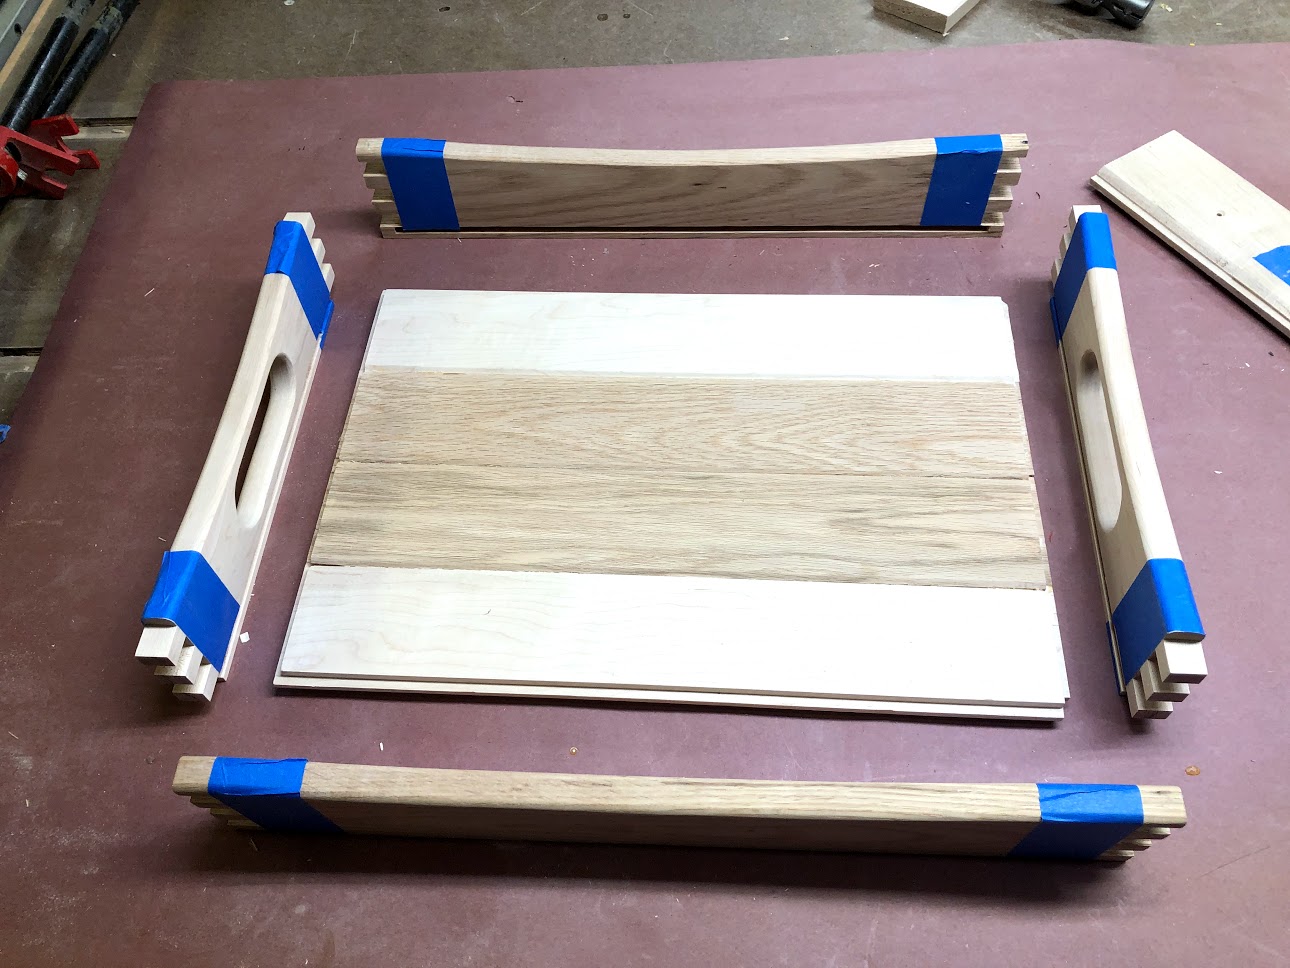
Unique Joinery something that would stand out when you would look at it, so I chose the finger joint since I already made a Finger Joint jig in my last project where I made a
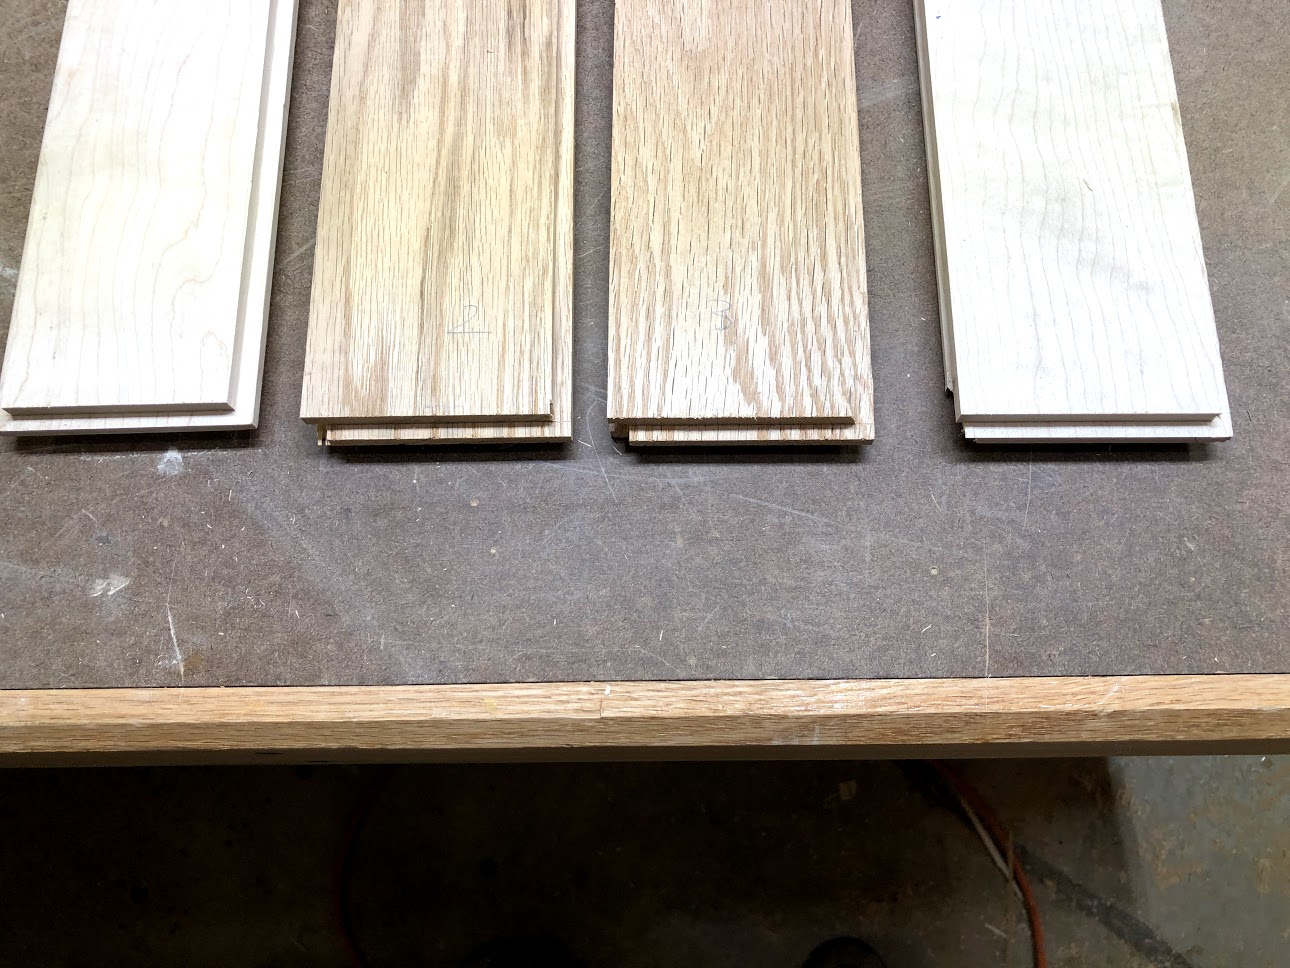
I wanted to make the Serving Tray out of 2 different woods so I chose Red Oak and Hard Maple, I wanted to use contrasting woods because I really like finger joints when there is 2 woods that come together it really makes for a interesting joint.
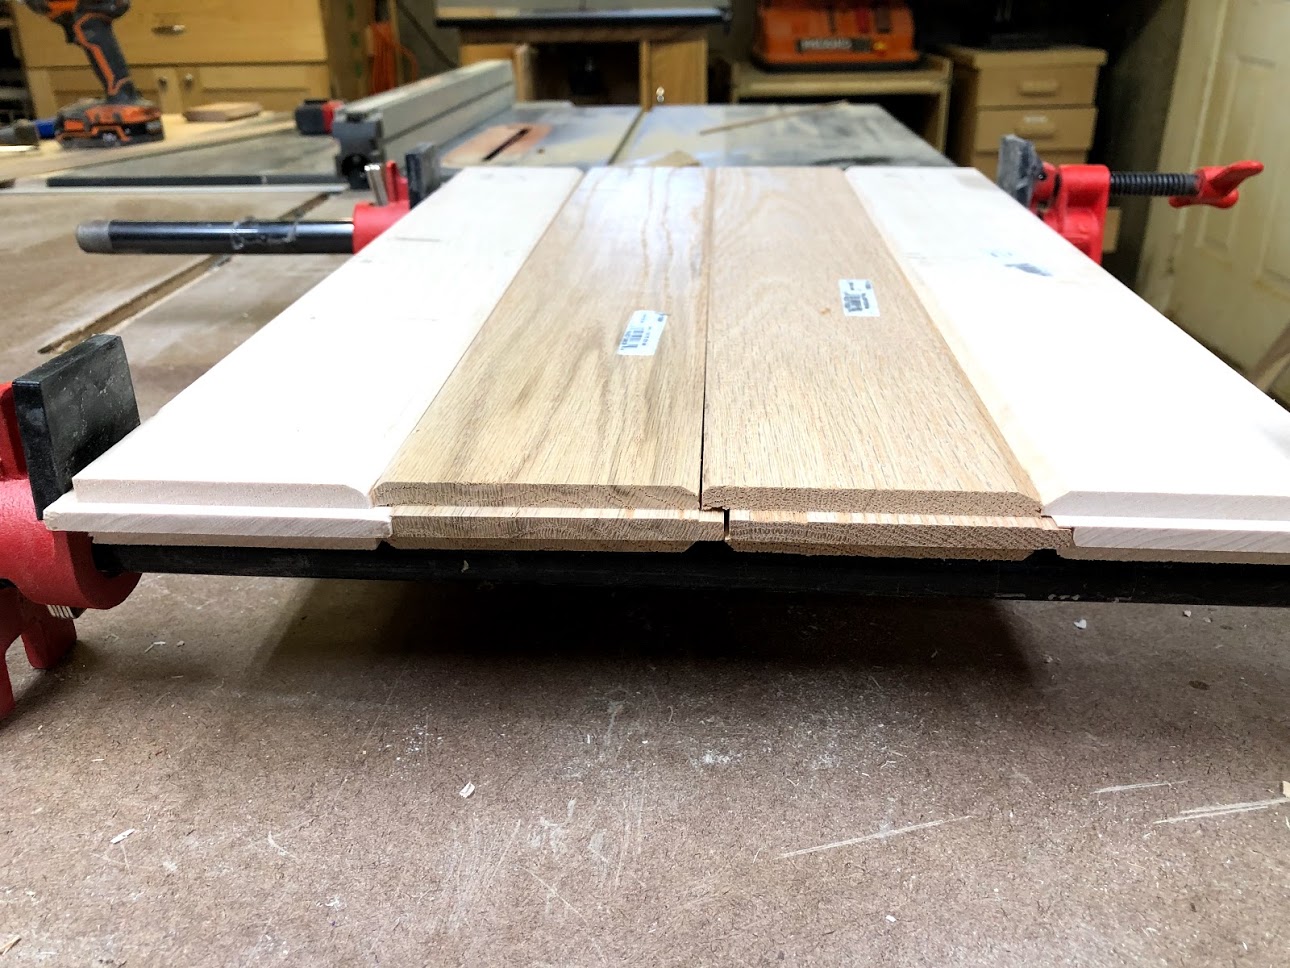
I wanted the base to me made of solid wood so I used the Maple and Oak to make the base panel and joined them to gether using Tongue & Groove Joints.
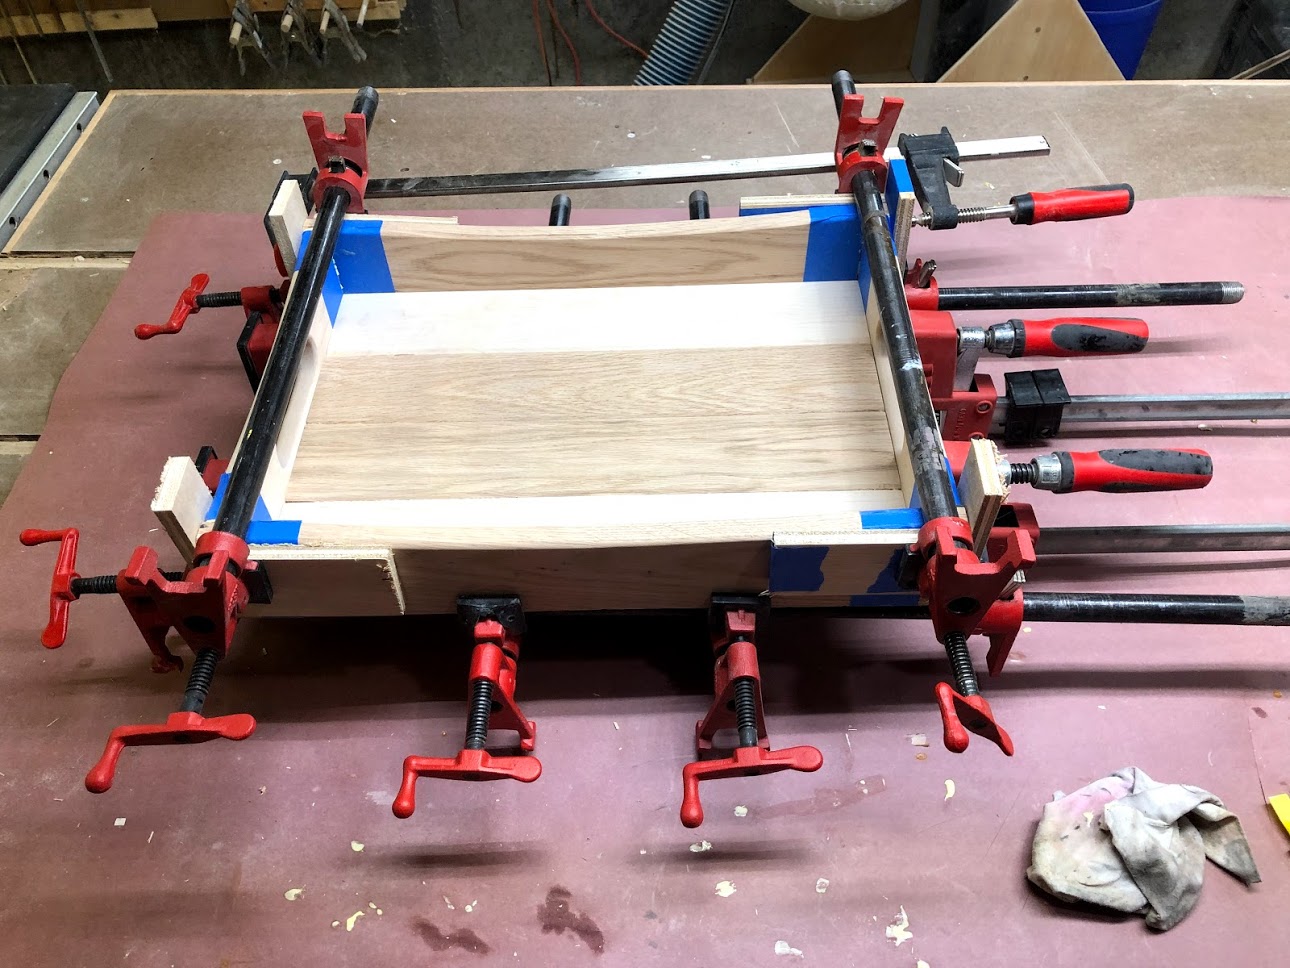
Finally I wanted to add arcs to the tray’s frame as I really liked how they look especially as they flow all the way around the tray’s frame.

More Handmade Trivets
(10/2018)
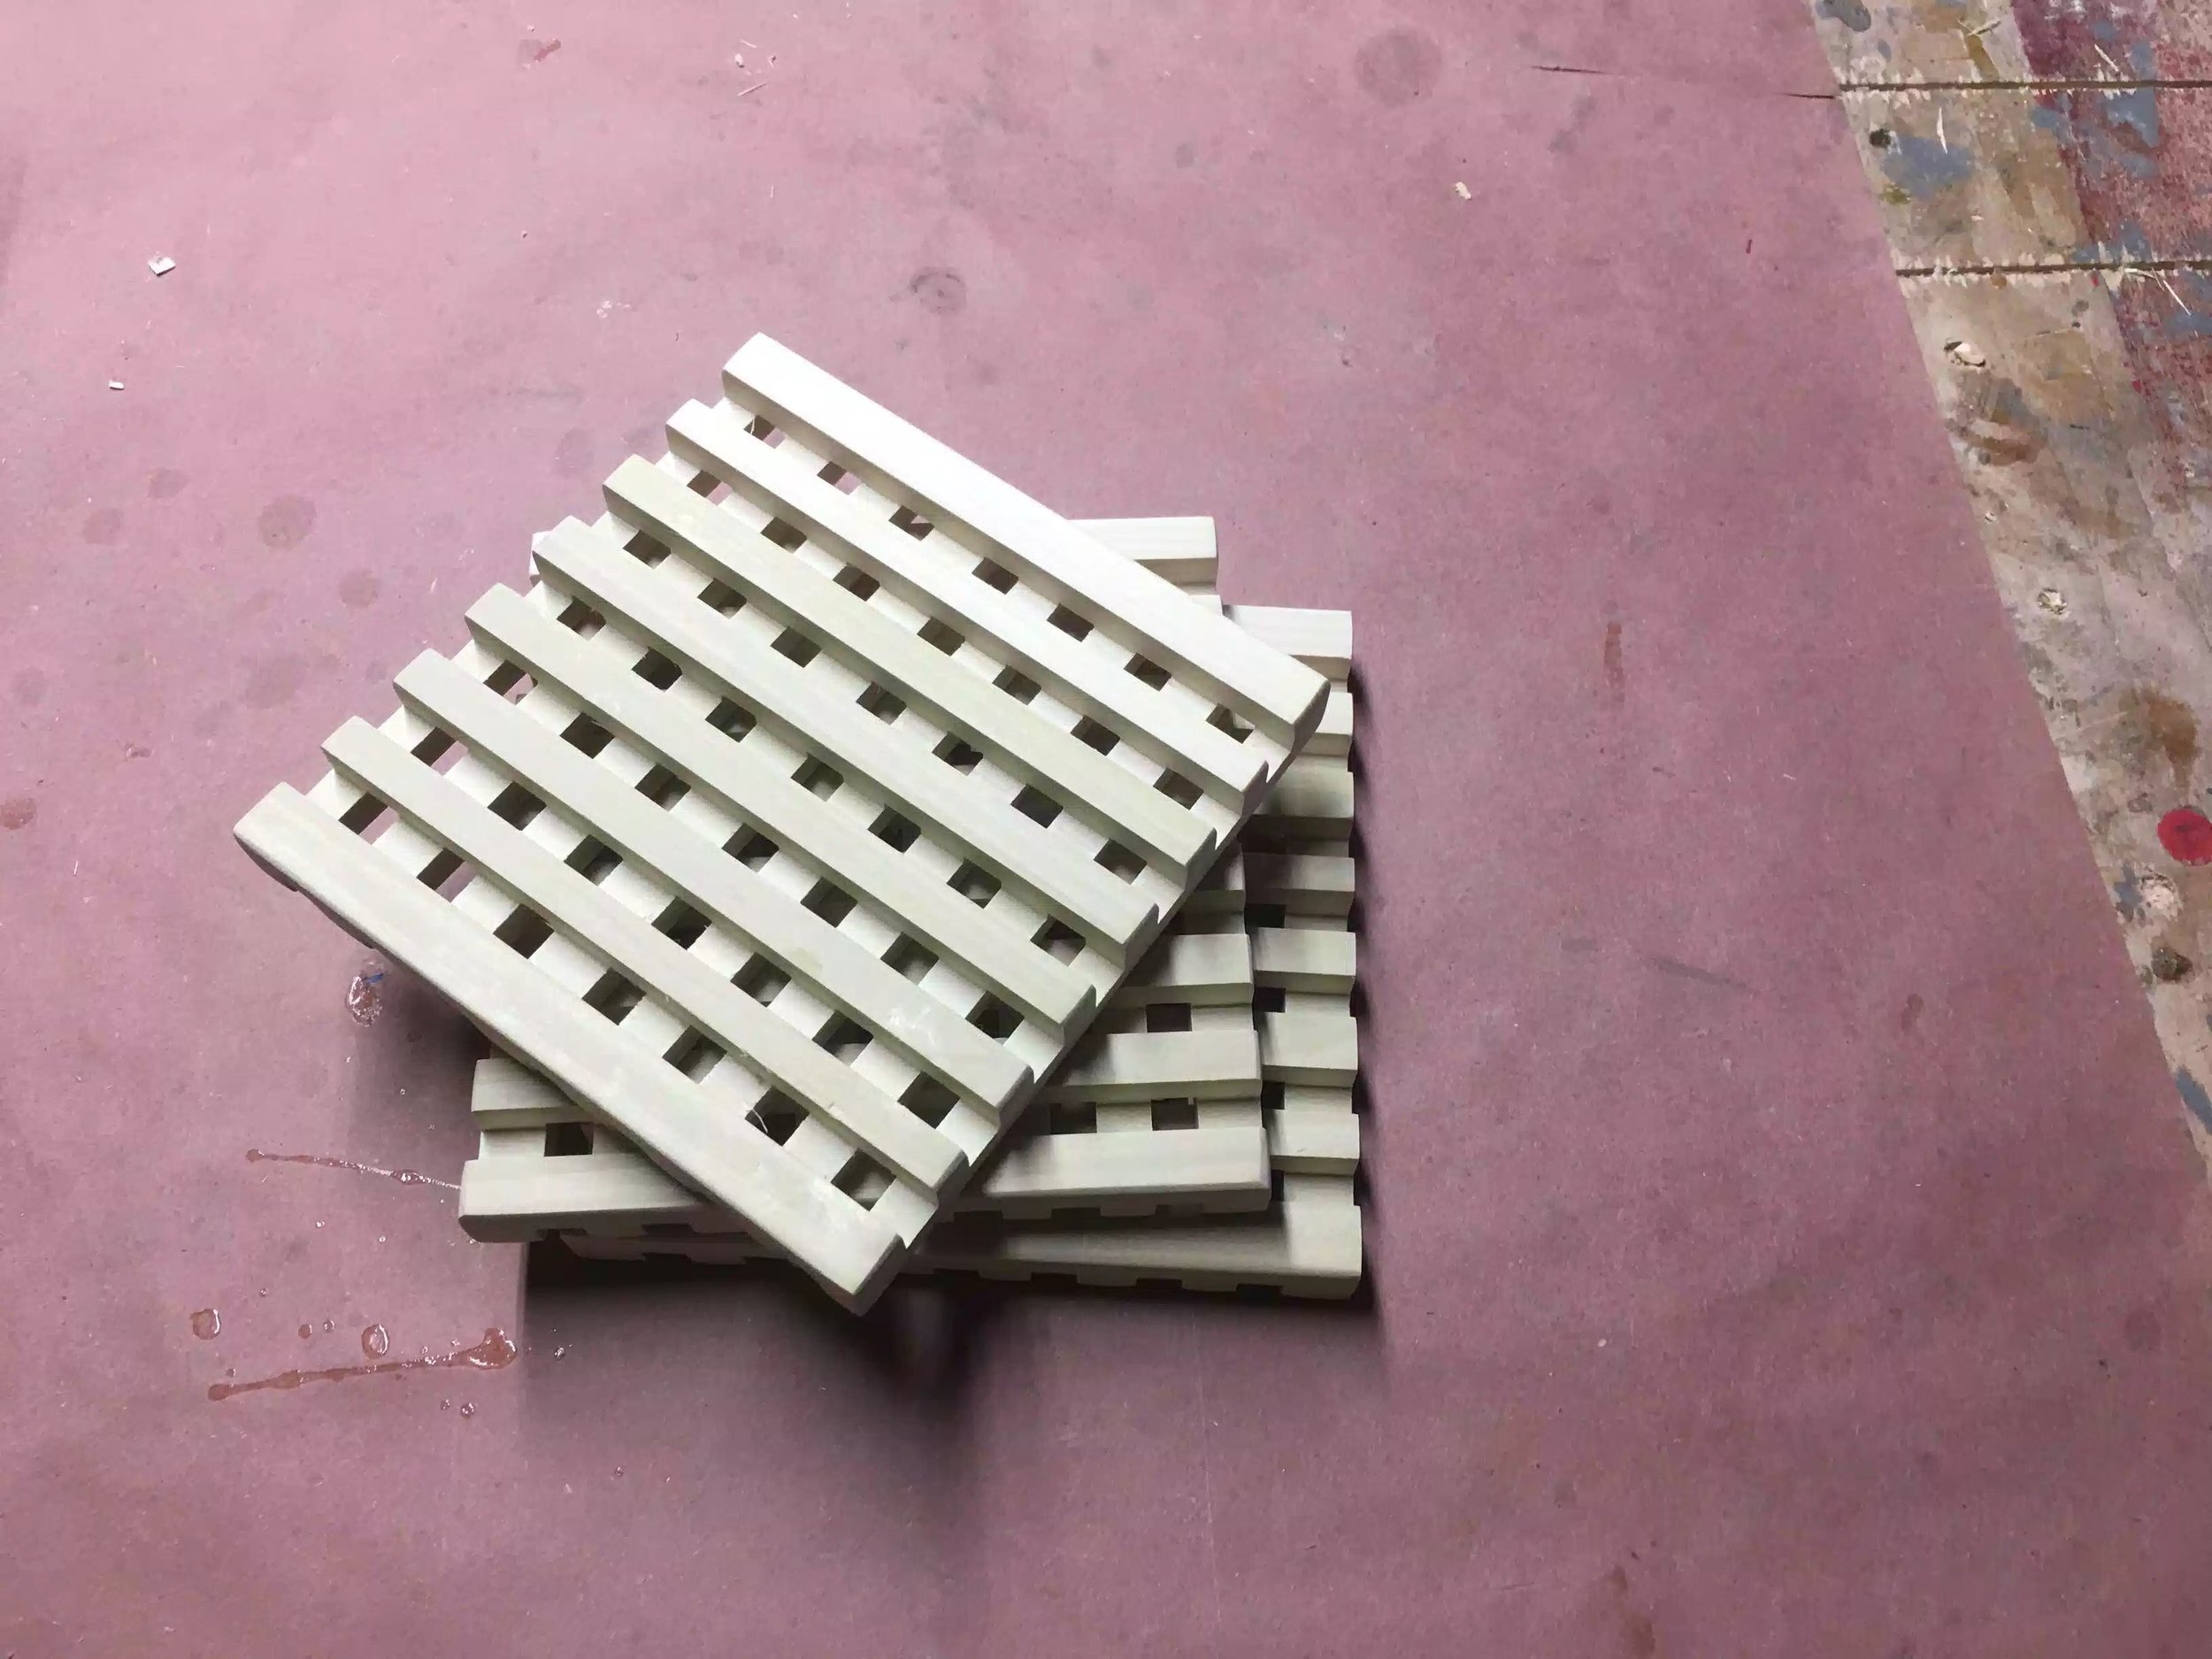
If you have been reading my blog entries of the last month or so in October 2018 I have been working on making a product that I could sell online and ship out to customers who visit either my Etsy store or my shop here.
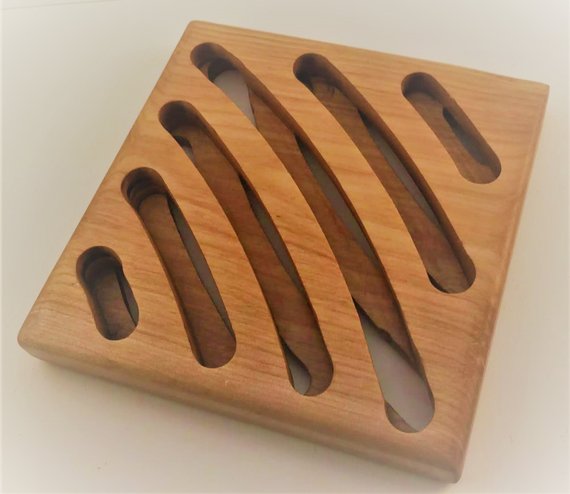
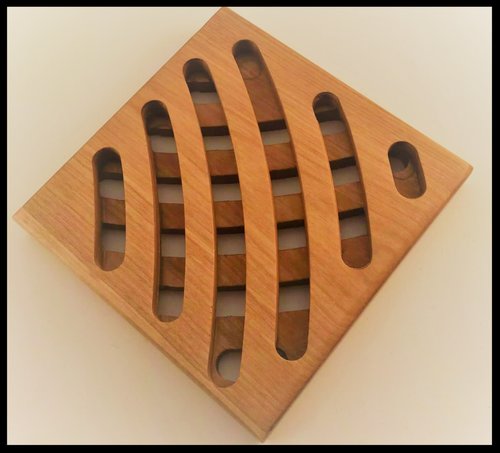
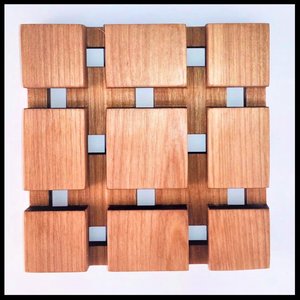
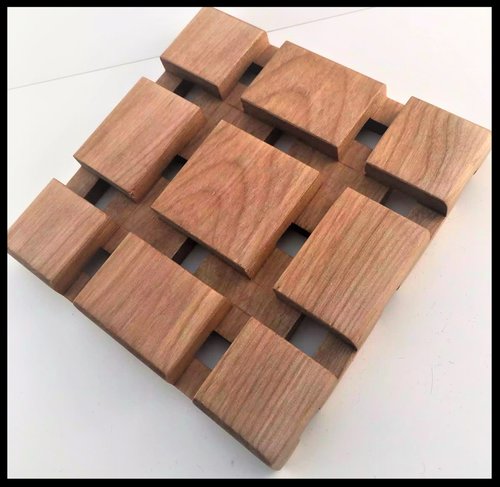
I wanted project that I could make a lot of in a short amount of time and not sacrifice quality or cost in making them. One day I was having dinner with my family and was looking at the trivet that the vegetable bowl was sitting on and it looked terrible it had cracks everywhere and the finish was peeling off and that is when it hit to make these to sell, I originally made 1 style (the one below) as it was easy to do but I thought that I could get very creative with other patterns and so using my Router Trivet Jig I made a couple of styles using it and also added my table-saw with a dado stack to make 2 more styles.
I did document the trivet jig in my blog posts and I am also giving away free plans for it in my store, I will post links to both below. If you would like purchase any of these trivets I am selling them in my Store and I will leave a link below as well.

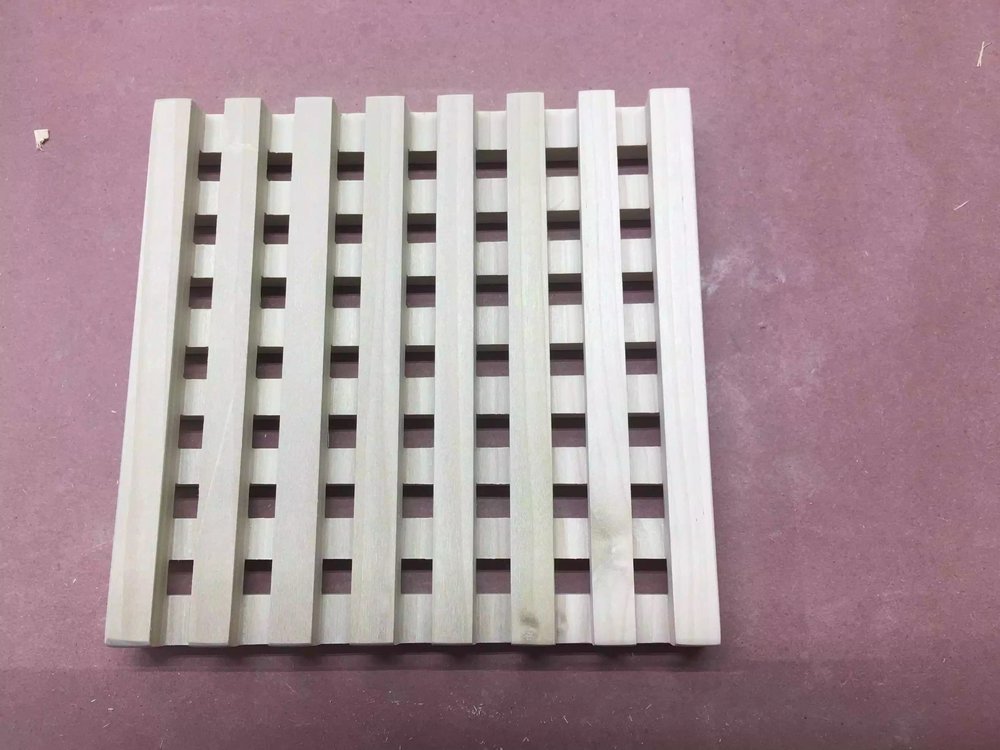
HANDMADE KITCHEN TRIVETS
(10/2018)
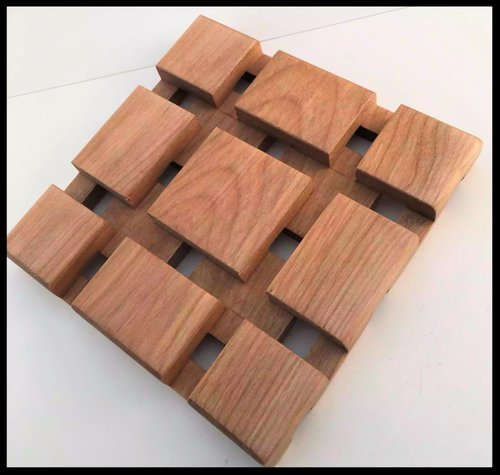
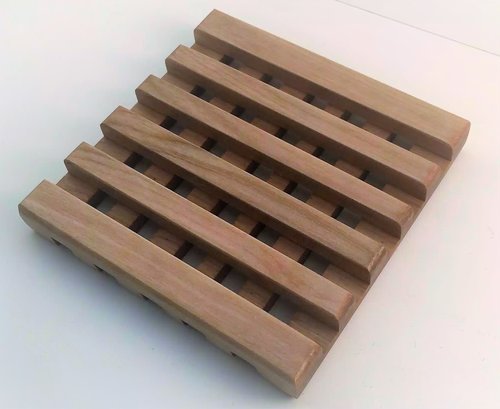
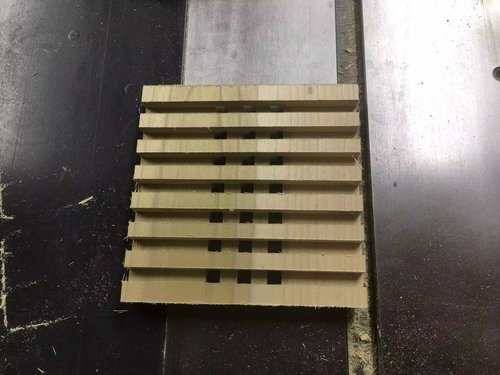
So I needed a little project to keep me busy and I needed to use up some scrap wood that I had lying around. I was sitting at dinner one night and noticed that all the trivets looked terrible and some were even broken, so I went on YouTube and finally found an easy way to make them using a table-saw and dado stack.
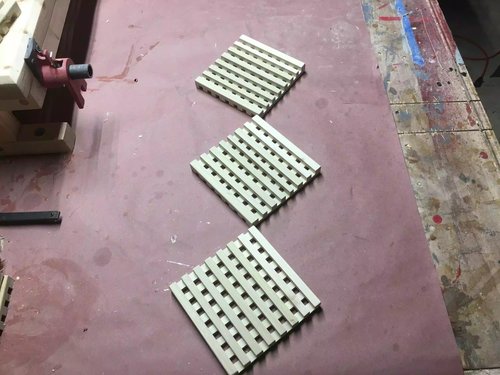
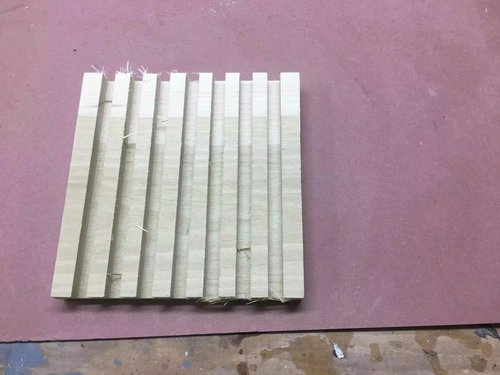
These trivets were a fun project and its not often I start and finish a project in the same day. I found a piece of poplar in my scrap heap and I decided to use that I was hoping to find enough oak to do the project but they were few and far between.
To be honest I spent more time sanding the individual trivets than actually making them because of all the nooks and cranny’s that I couldn’t reach with a sander, so I spent more than 90 minutes sanding them all down, it took me 20 minutes to make them.
I really like all the possibilities that are open to you and your imagination, although I used my table-saw on this project I feel there are way more design possibilities on the router table or perhaps even a jig.
Anyway this project gave a great idea for gifts for the in-laws at Christmas, I am actually also looking into physically selling them locally or in a craft fair (if I ever get to one). I am also looking into selling them online, just need to looking shipping possibilities as they are small enough I think it might not be too expensive in selling them that way.
As I usually do I made a blog to accompany my plans online and you can read the blog or by the plans, I have included the links below for your convenience.
So most definitely try this project.
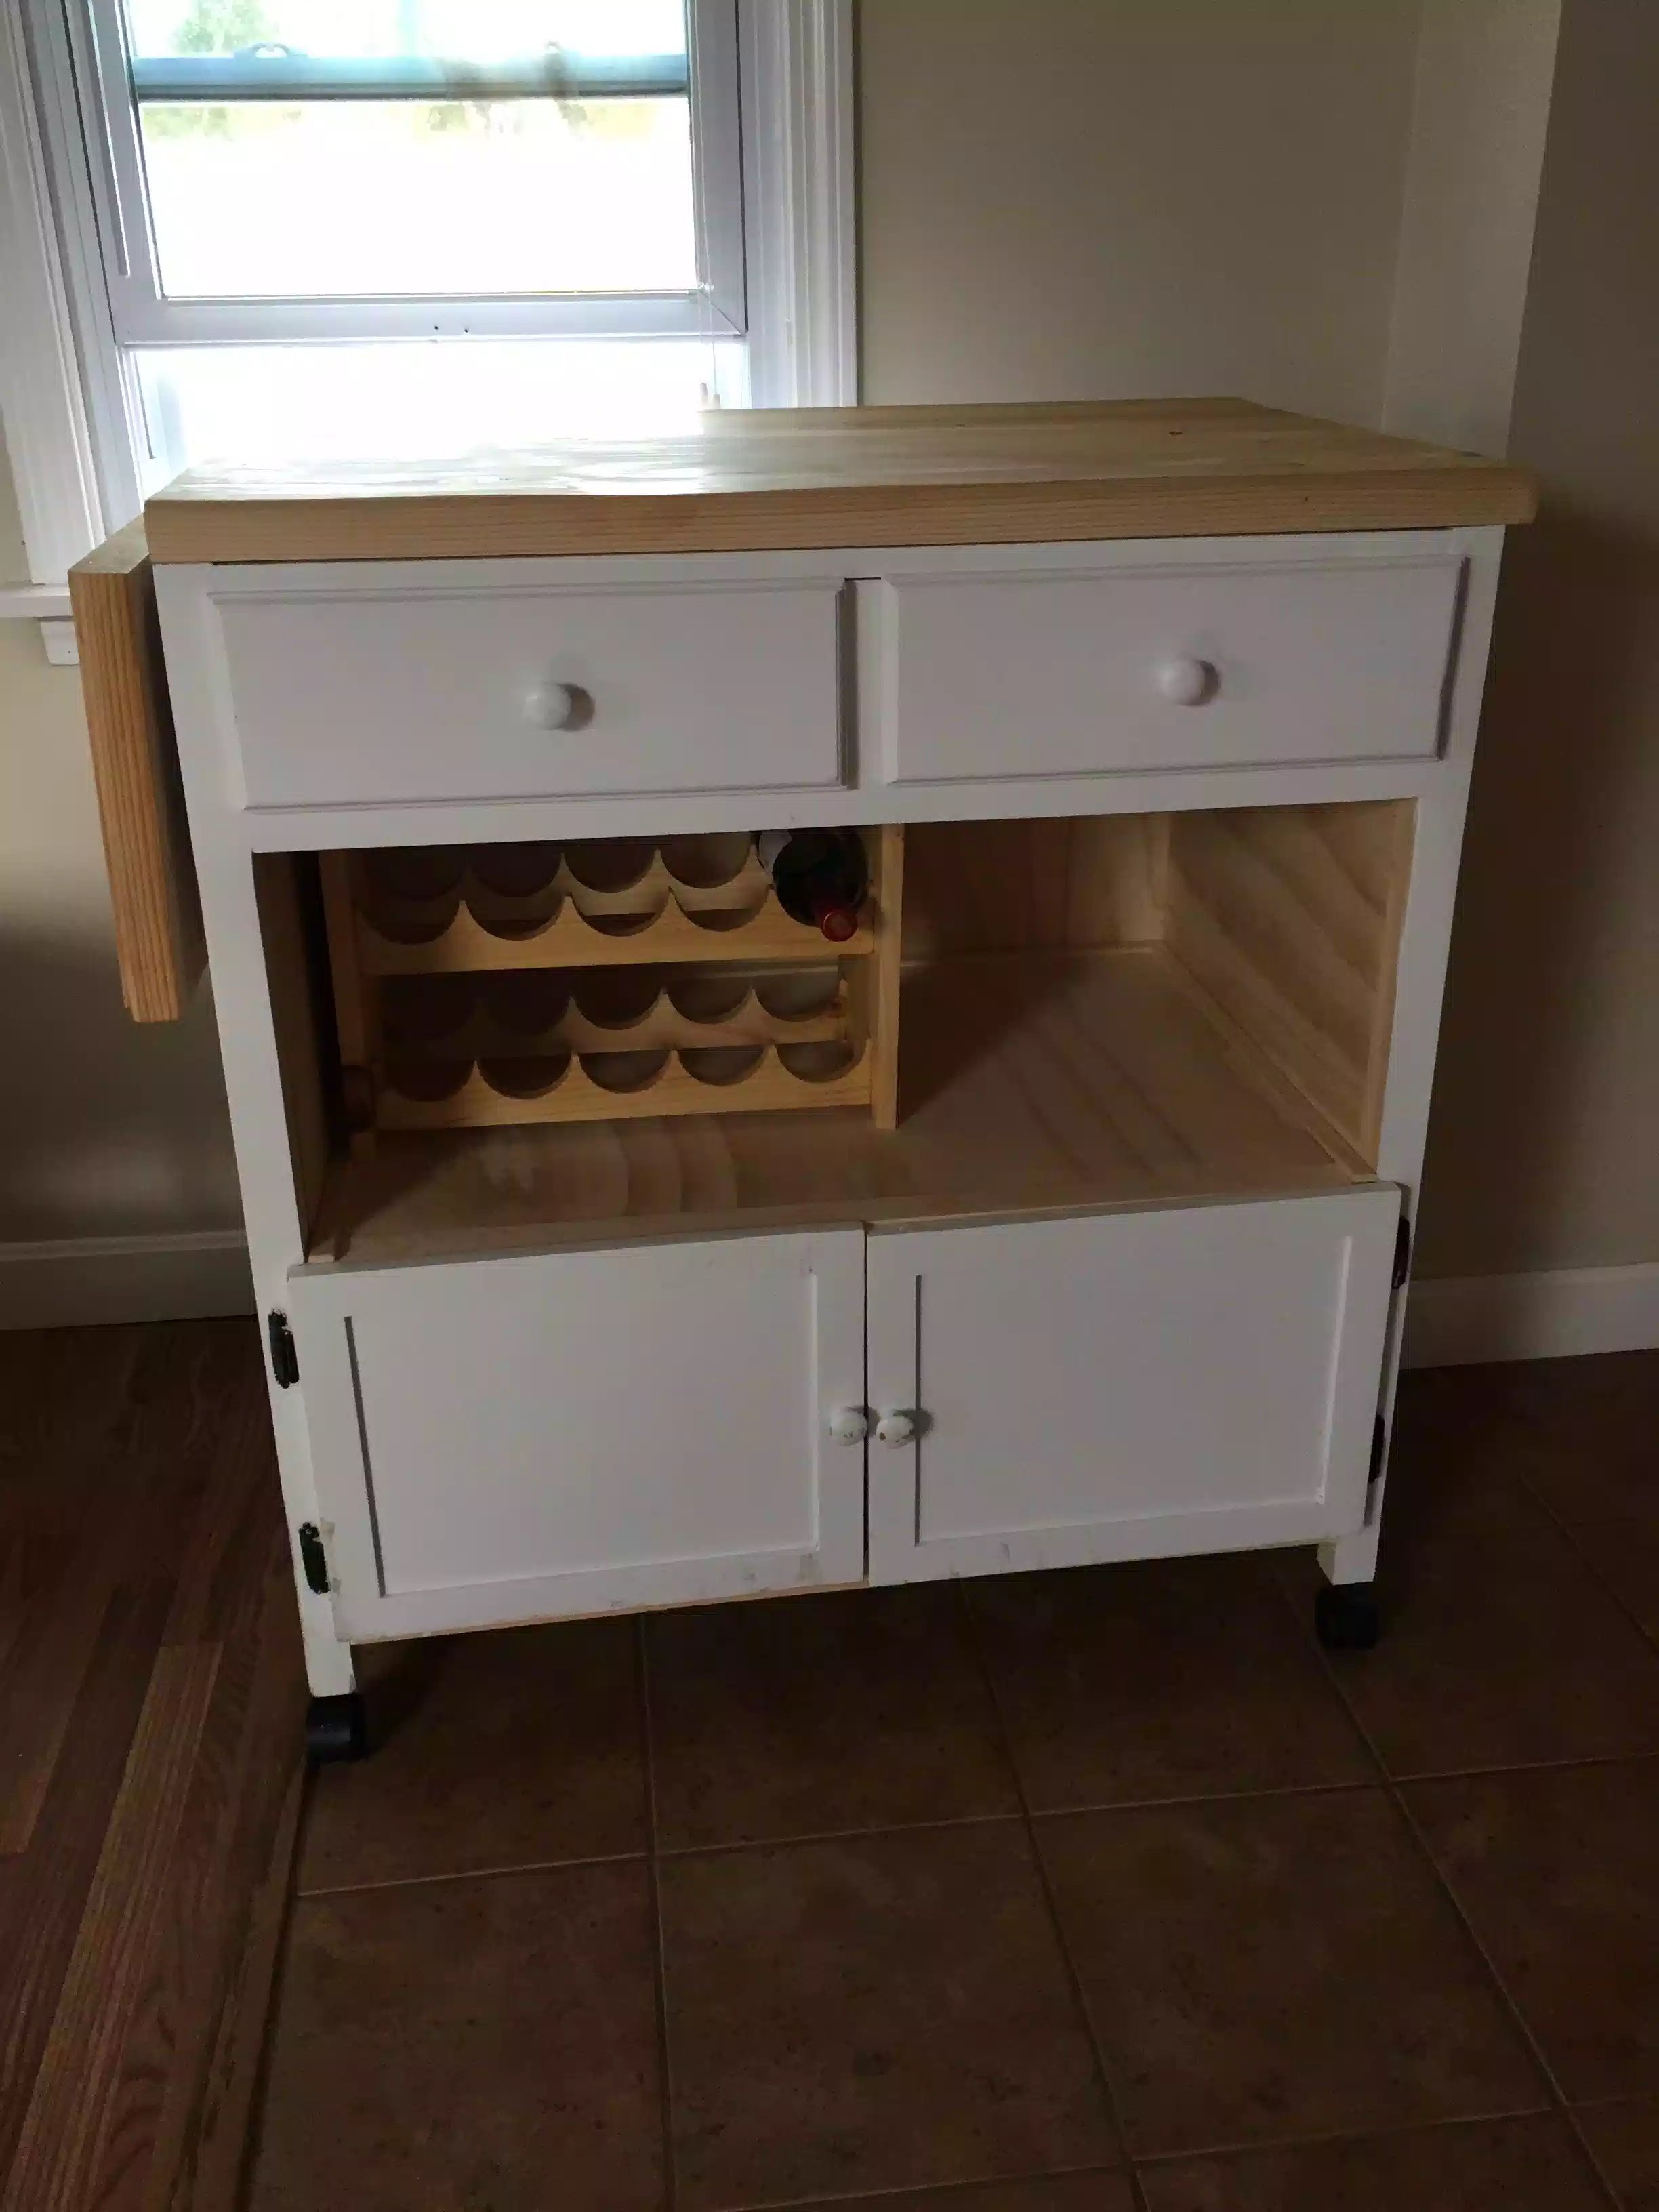
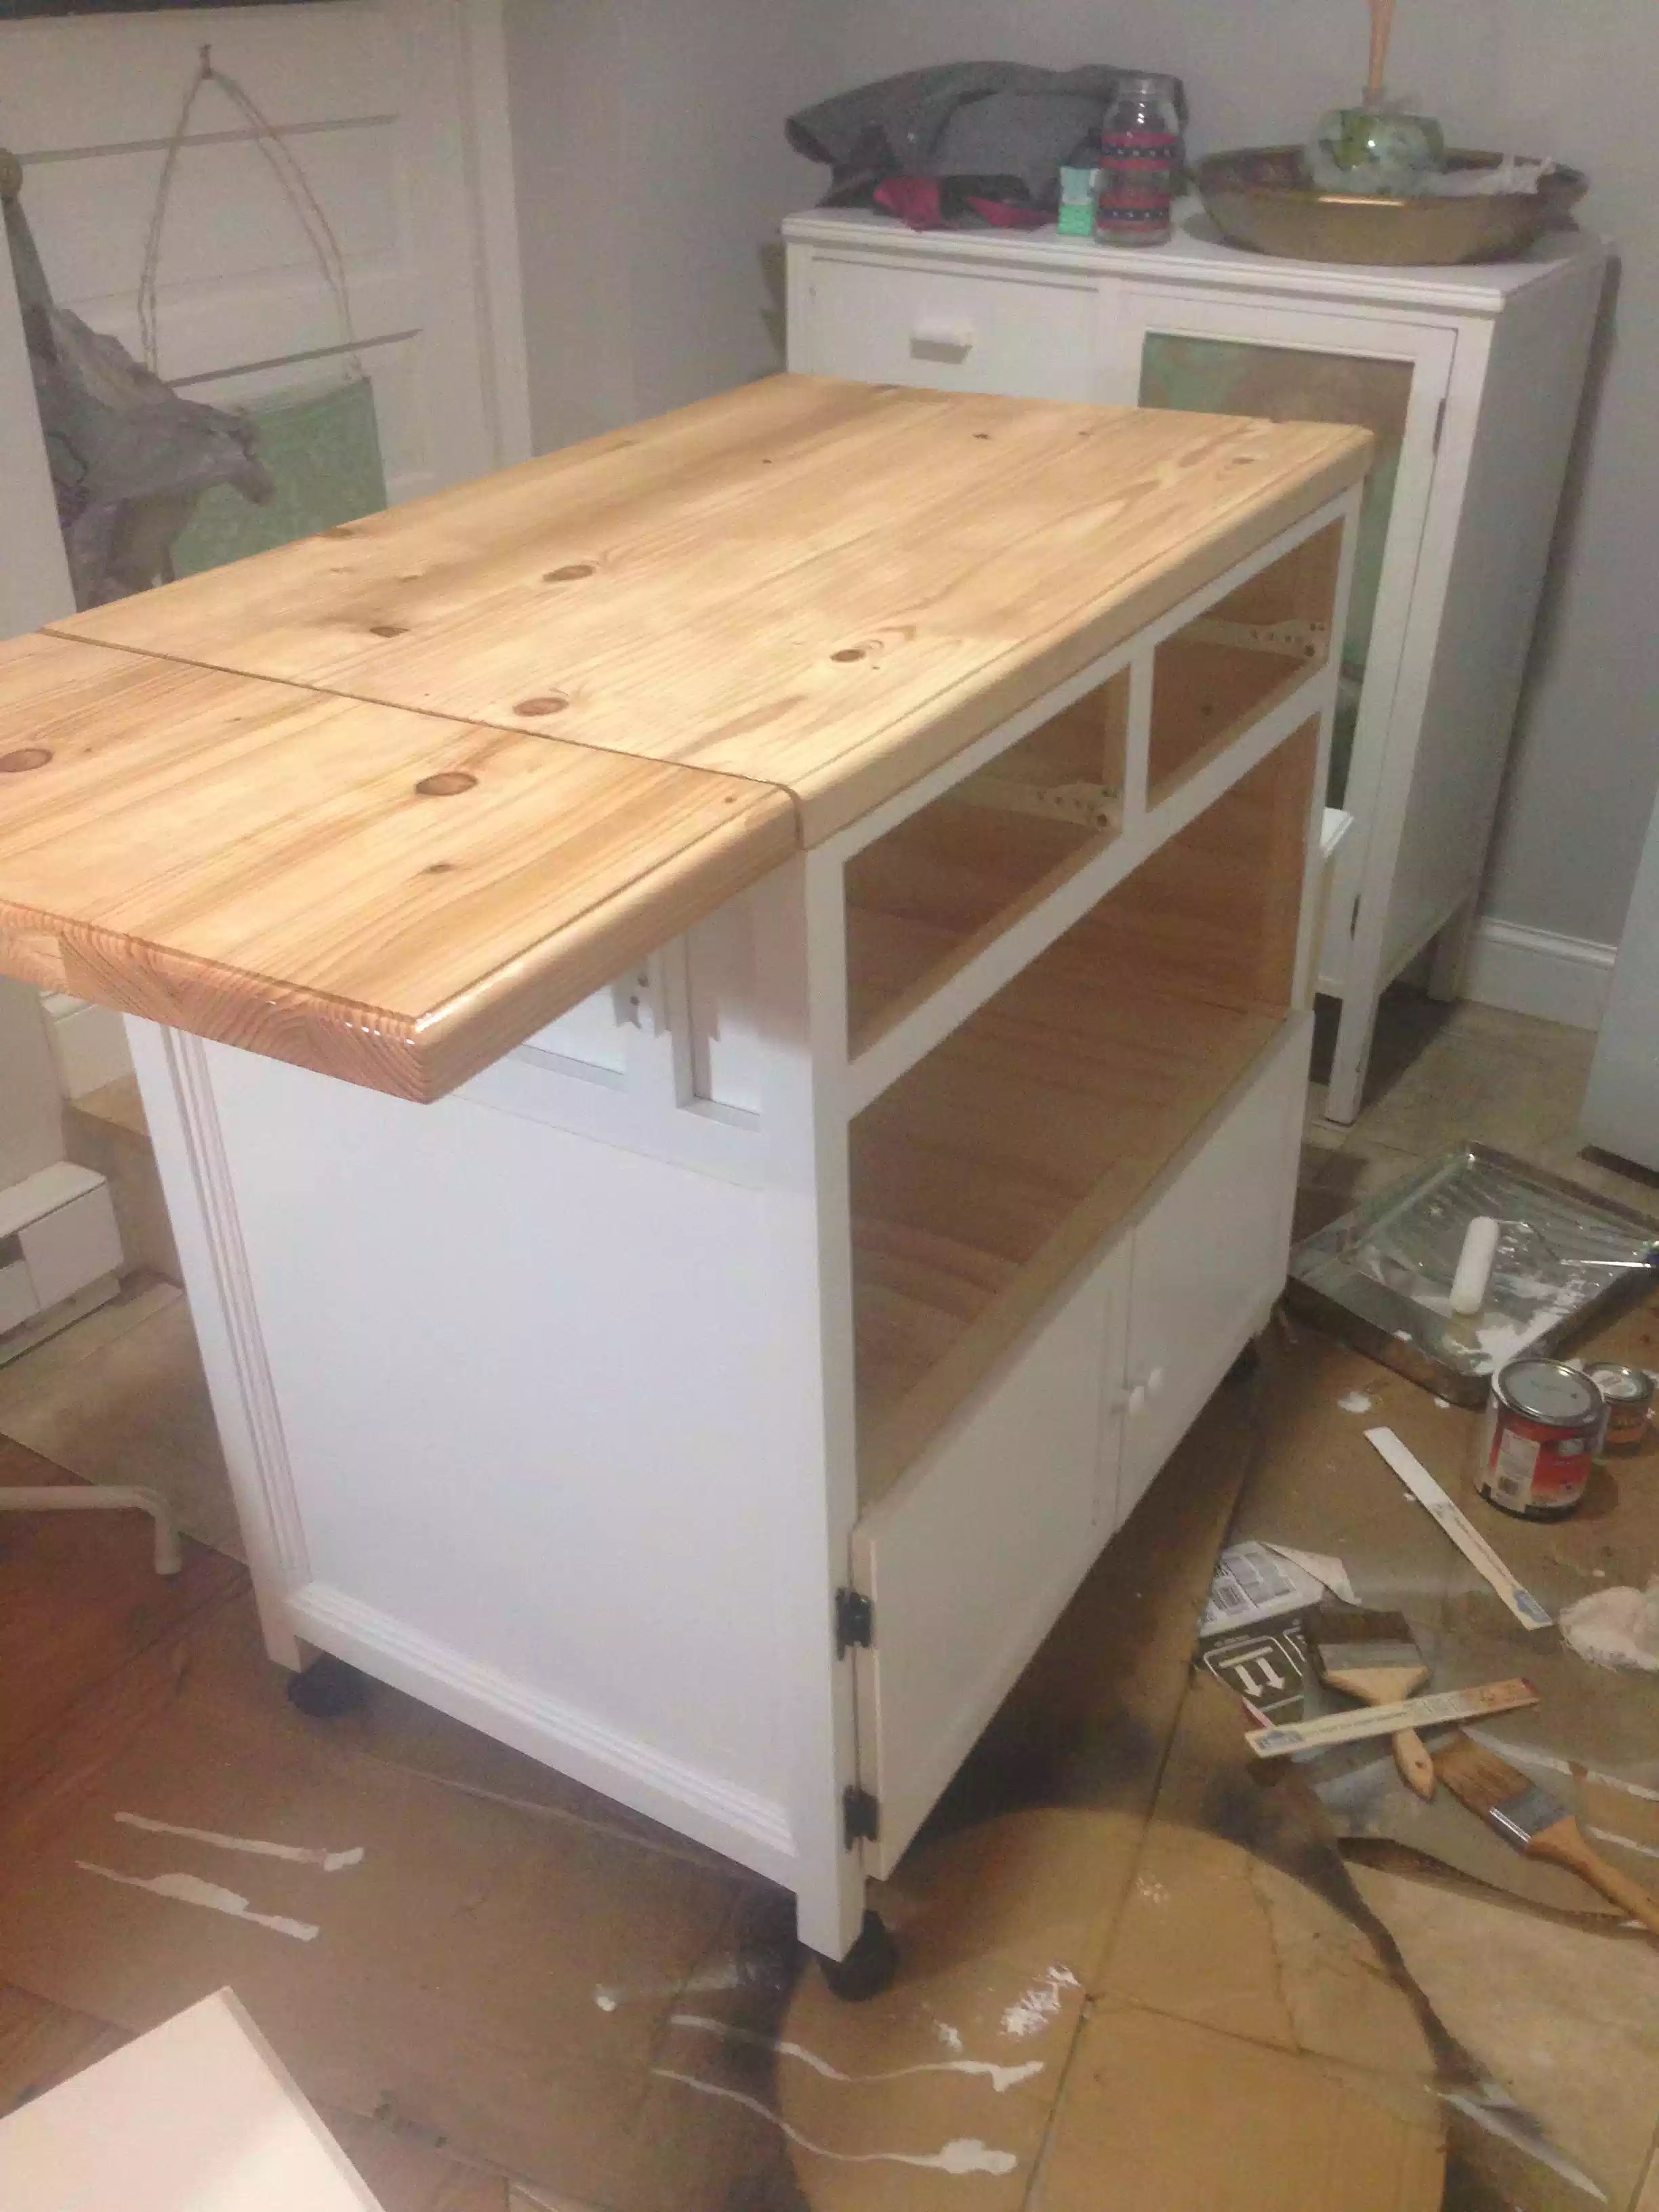
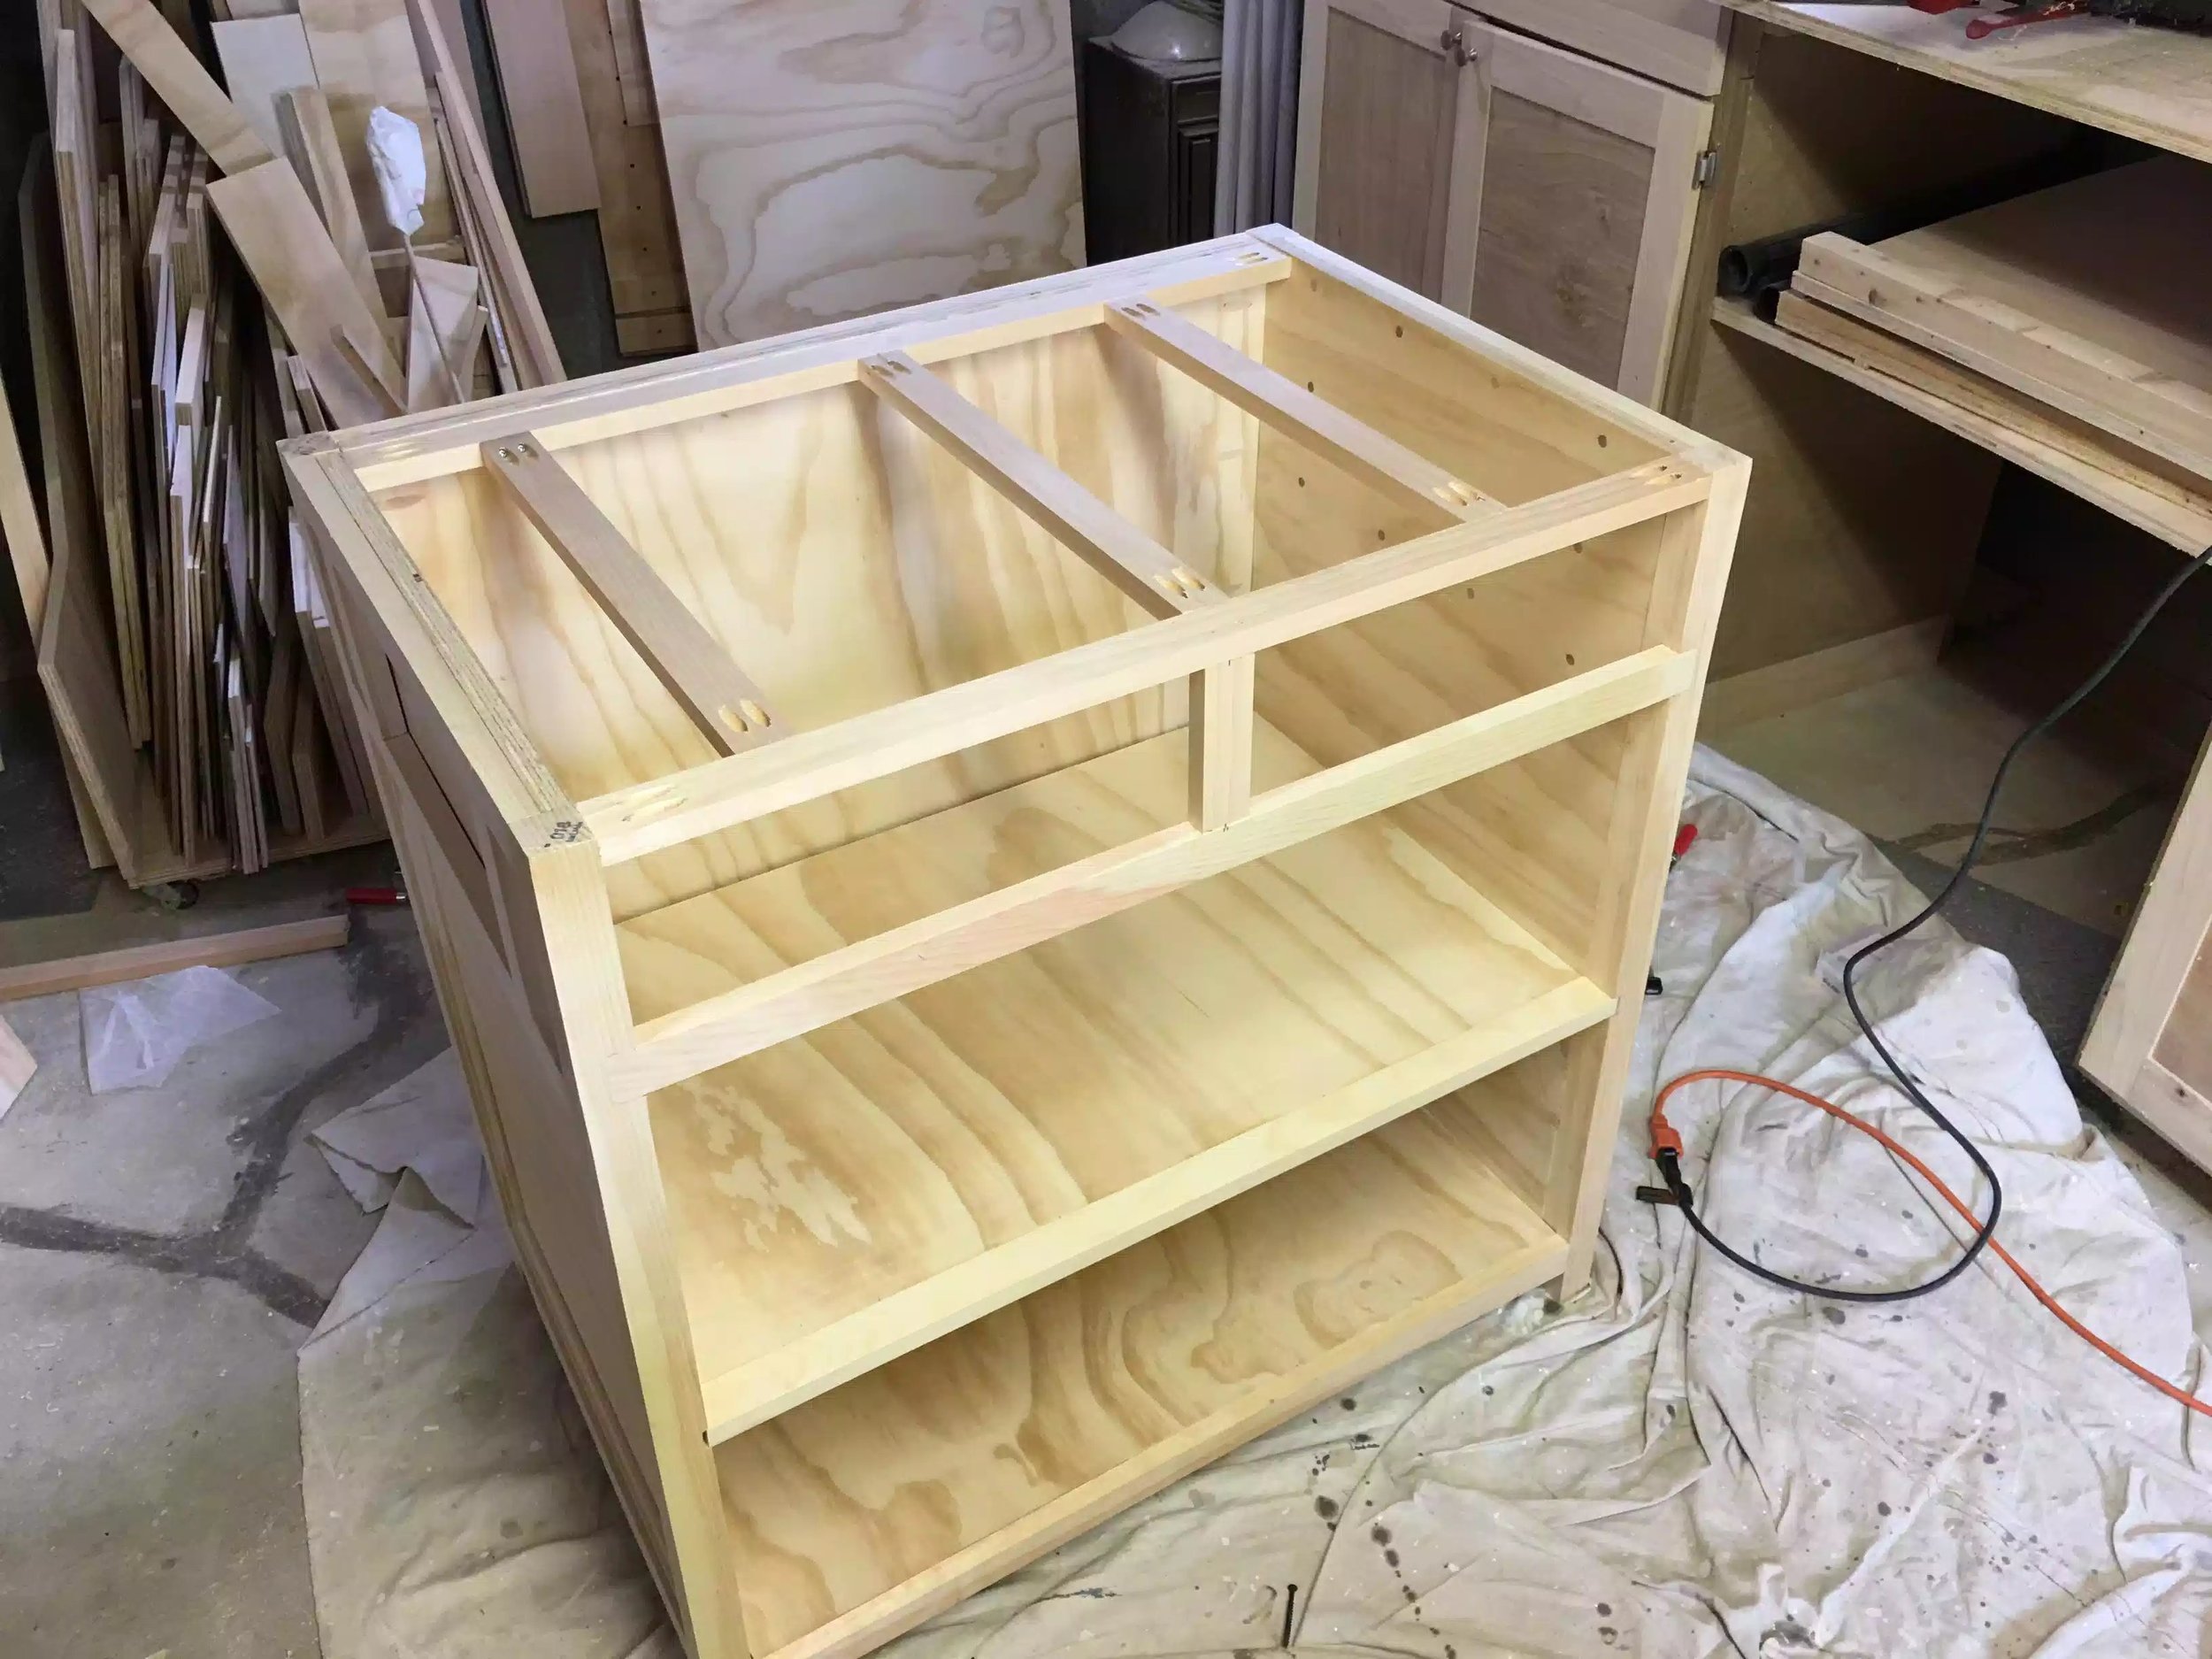
KITCHEN ISLAND (10/2017)
A colleague of mine asked me to make a Kitchen Island as they were moving into a new apartment and needed more prep space.
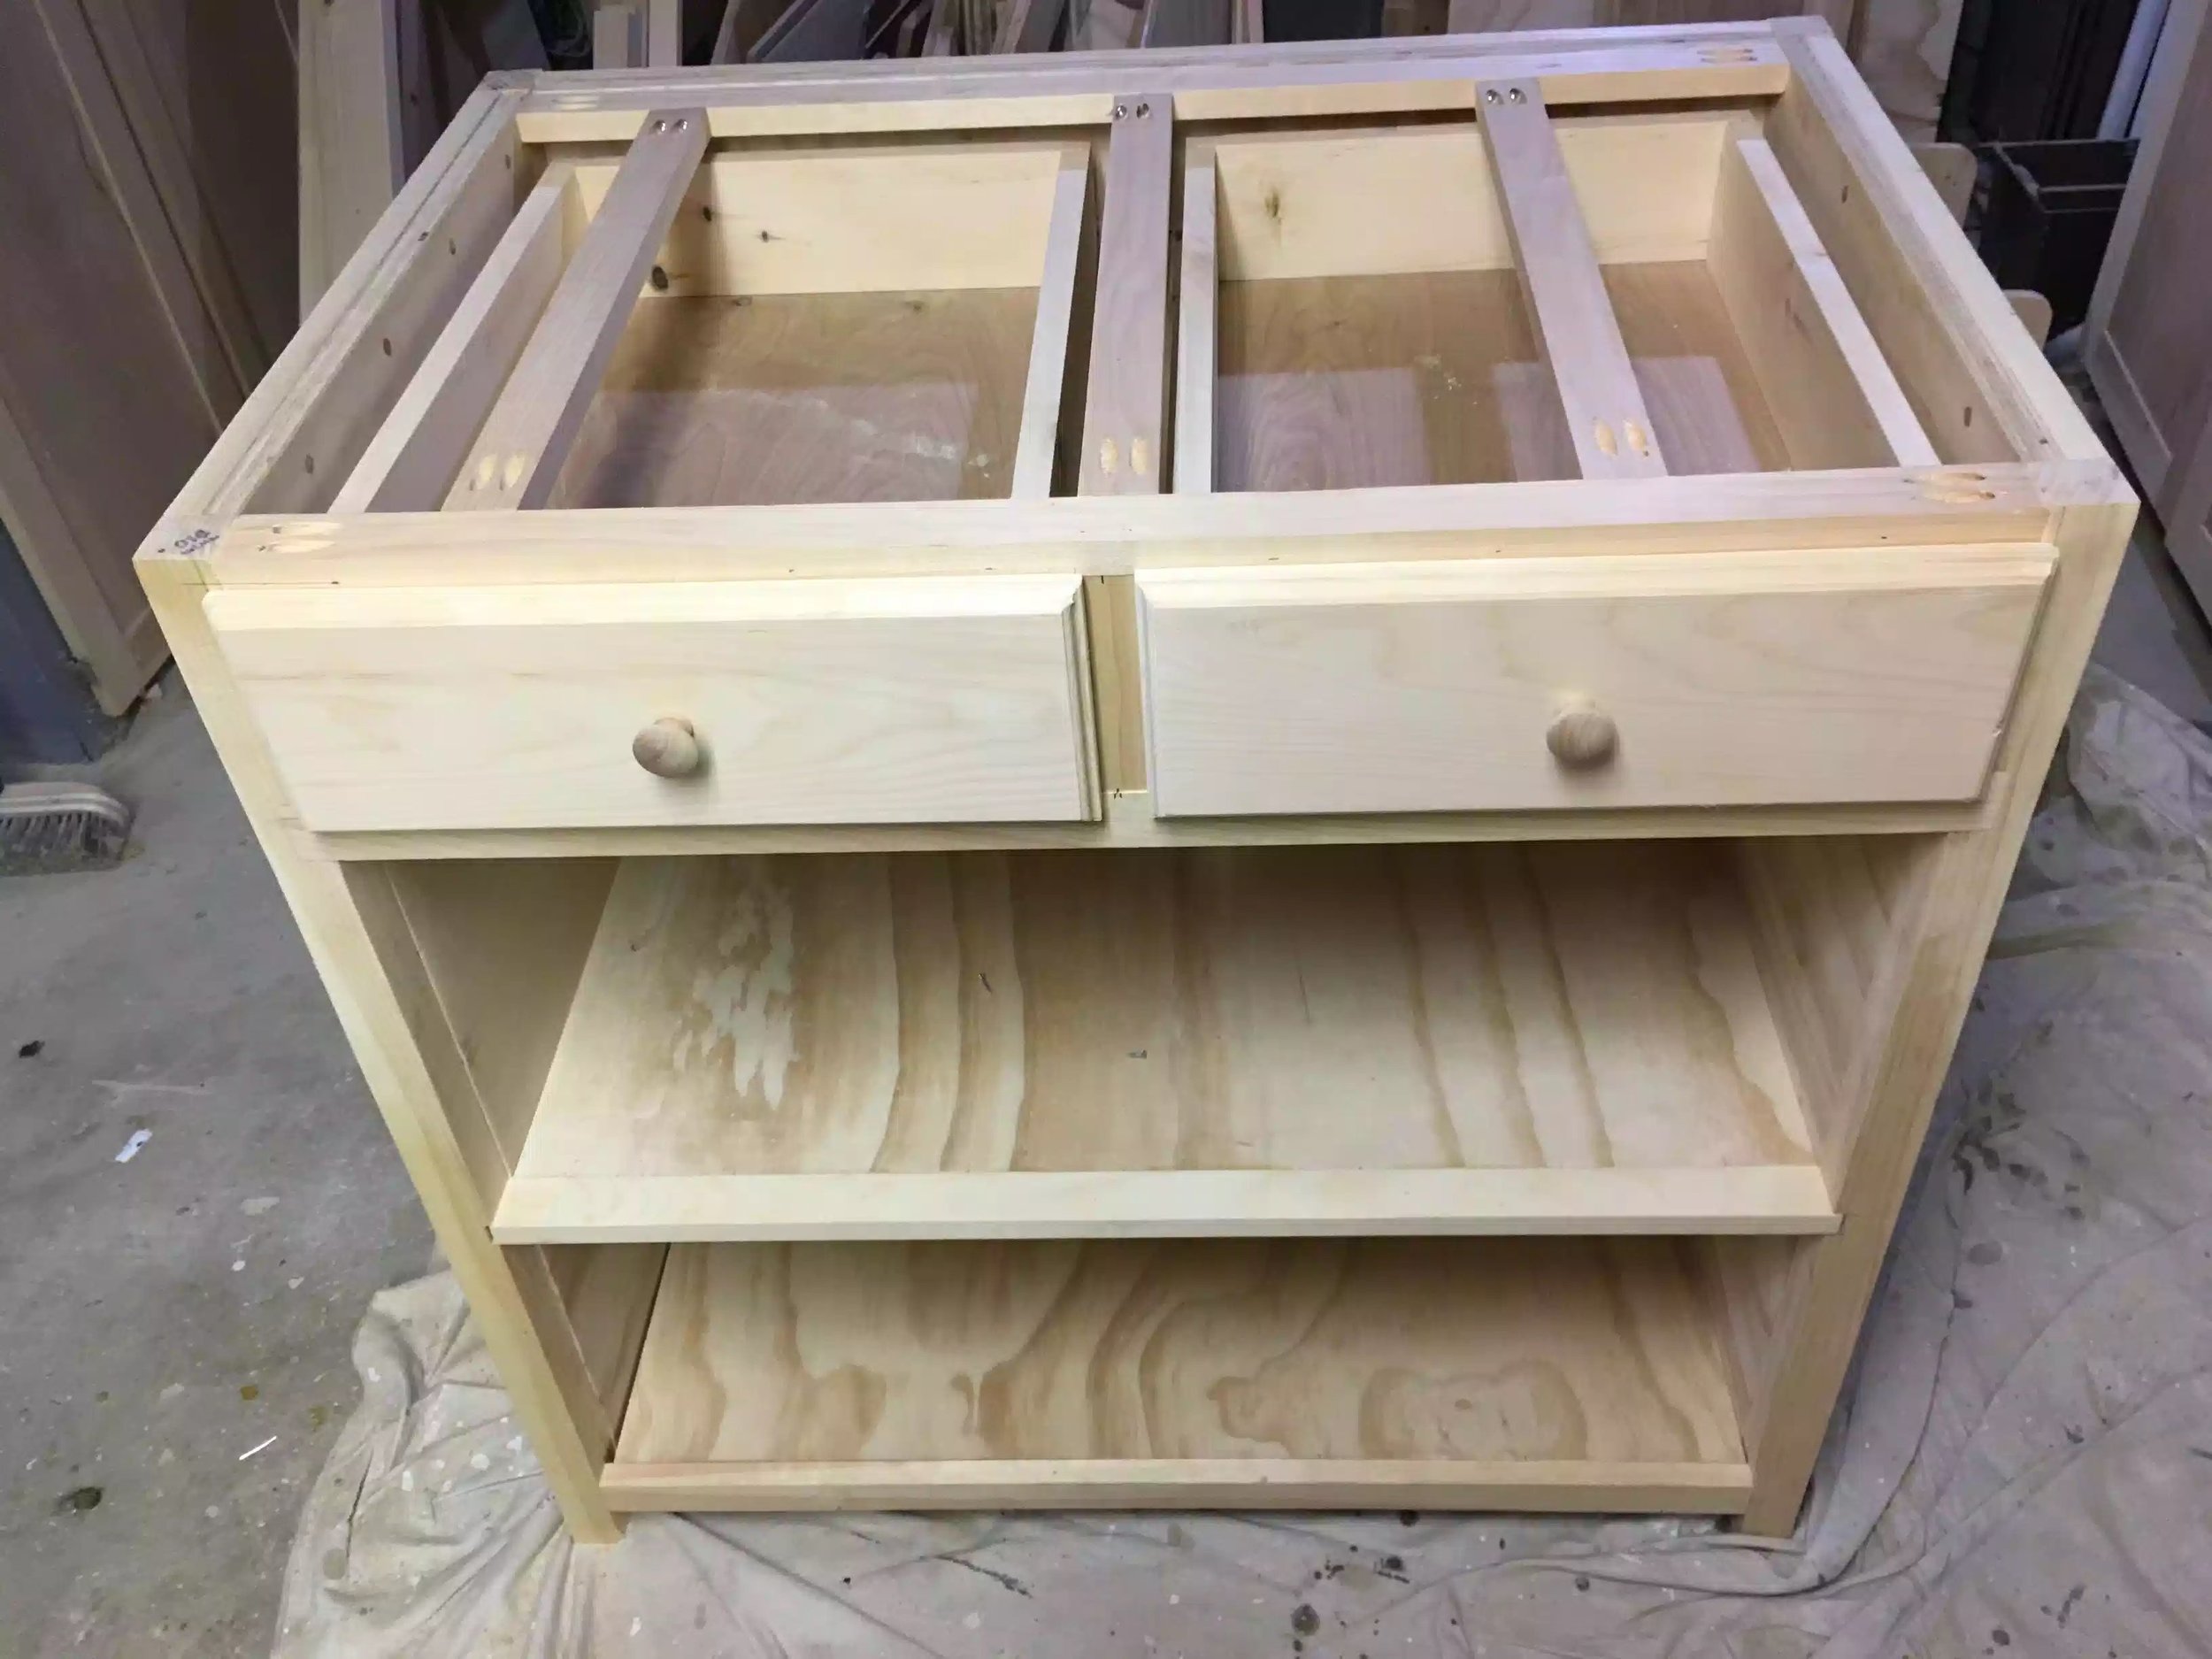
So I went to my trusty Sketch-Up Make Program and started to design I had a few design elements in mind, drop leaf, portable wine rack, on casters, 2 drawers and 2 cabinet doors.
I wont go into too much detail about the build because I made a blog and you can find it here, there are also some video entries but watch them at your peril, I have some skills but video making and editing isn’t one of them and to be honest I made these videos to communicate with the customer.
Materials:
I used basic big box store materials for the build
(2) Sheets of Plywood
(13) 1×2x8’
(2) 2×2x8’
(5) 2×4x8’
Casters
Tools Needed:
Miter Saw
Pocket Hole Jig
Biscuit Joiner
Drill / Driver
A million clamps lol
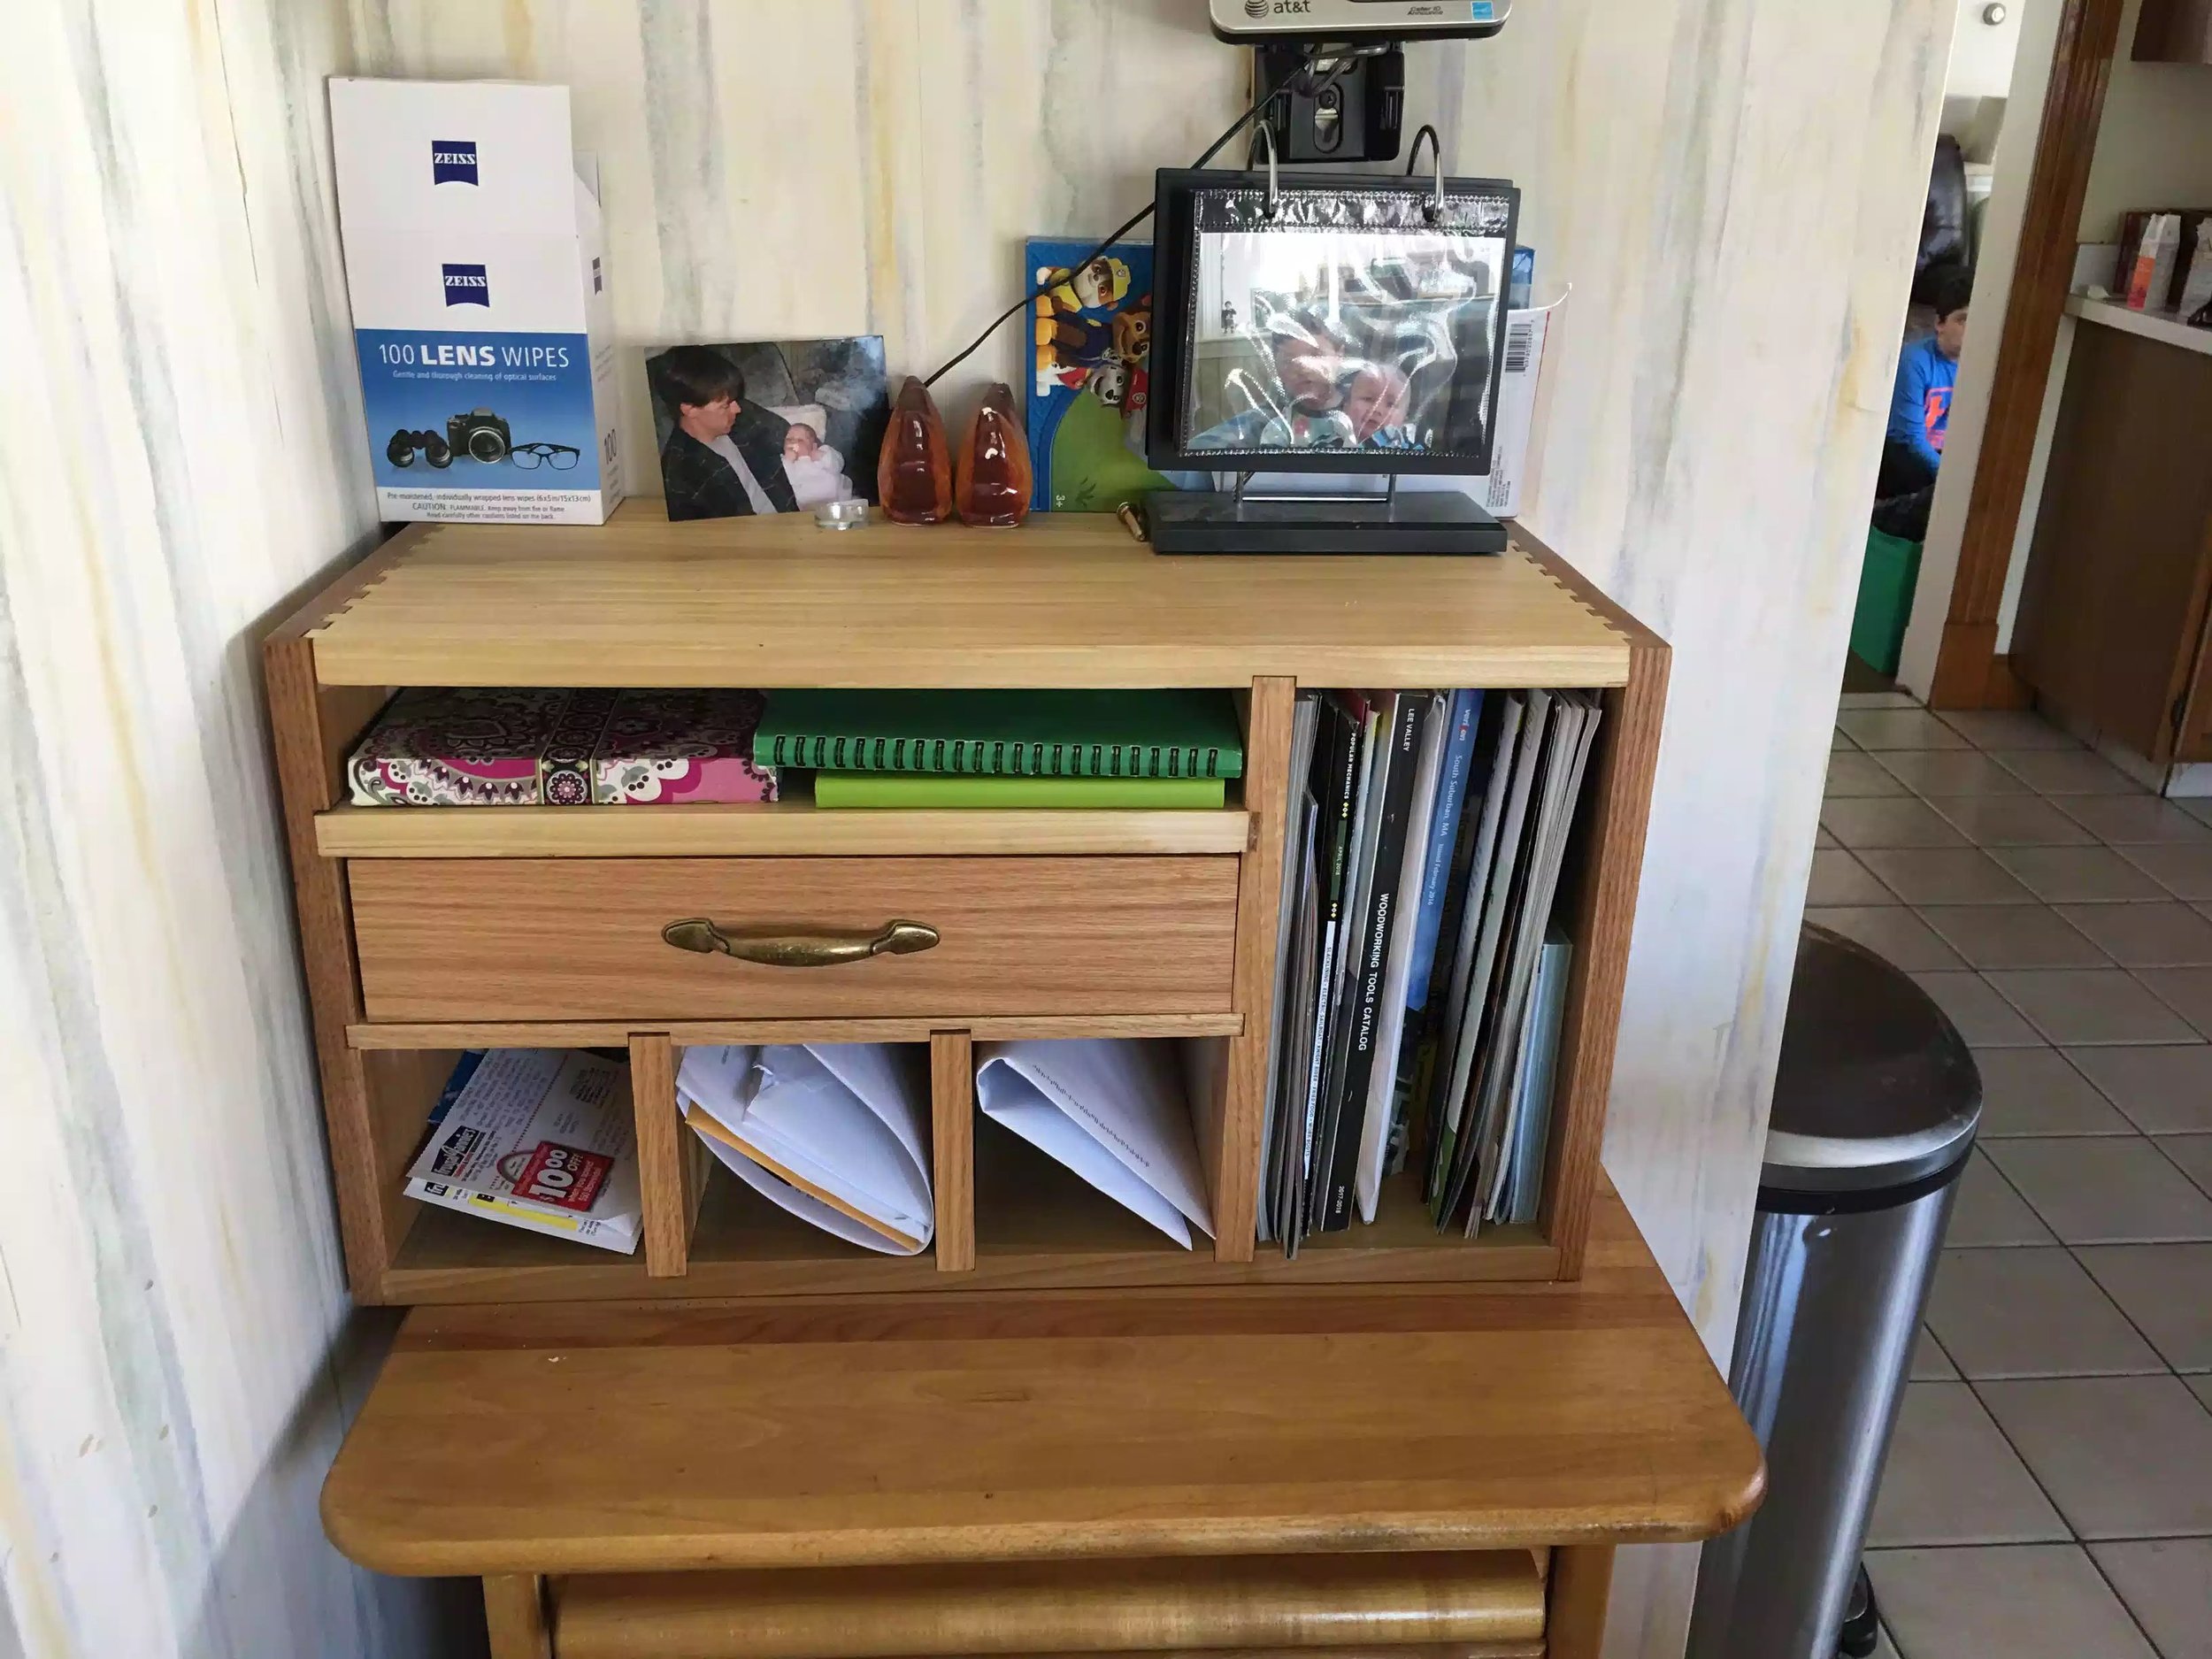
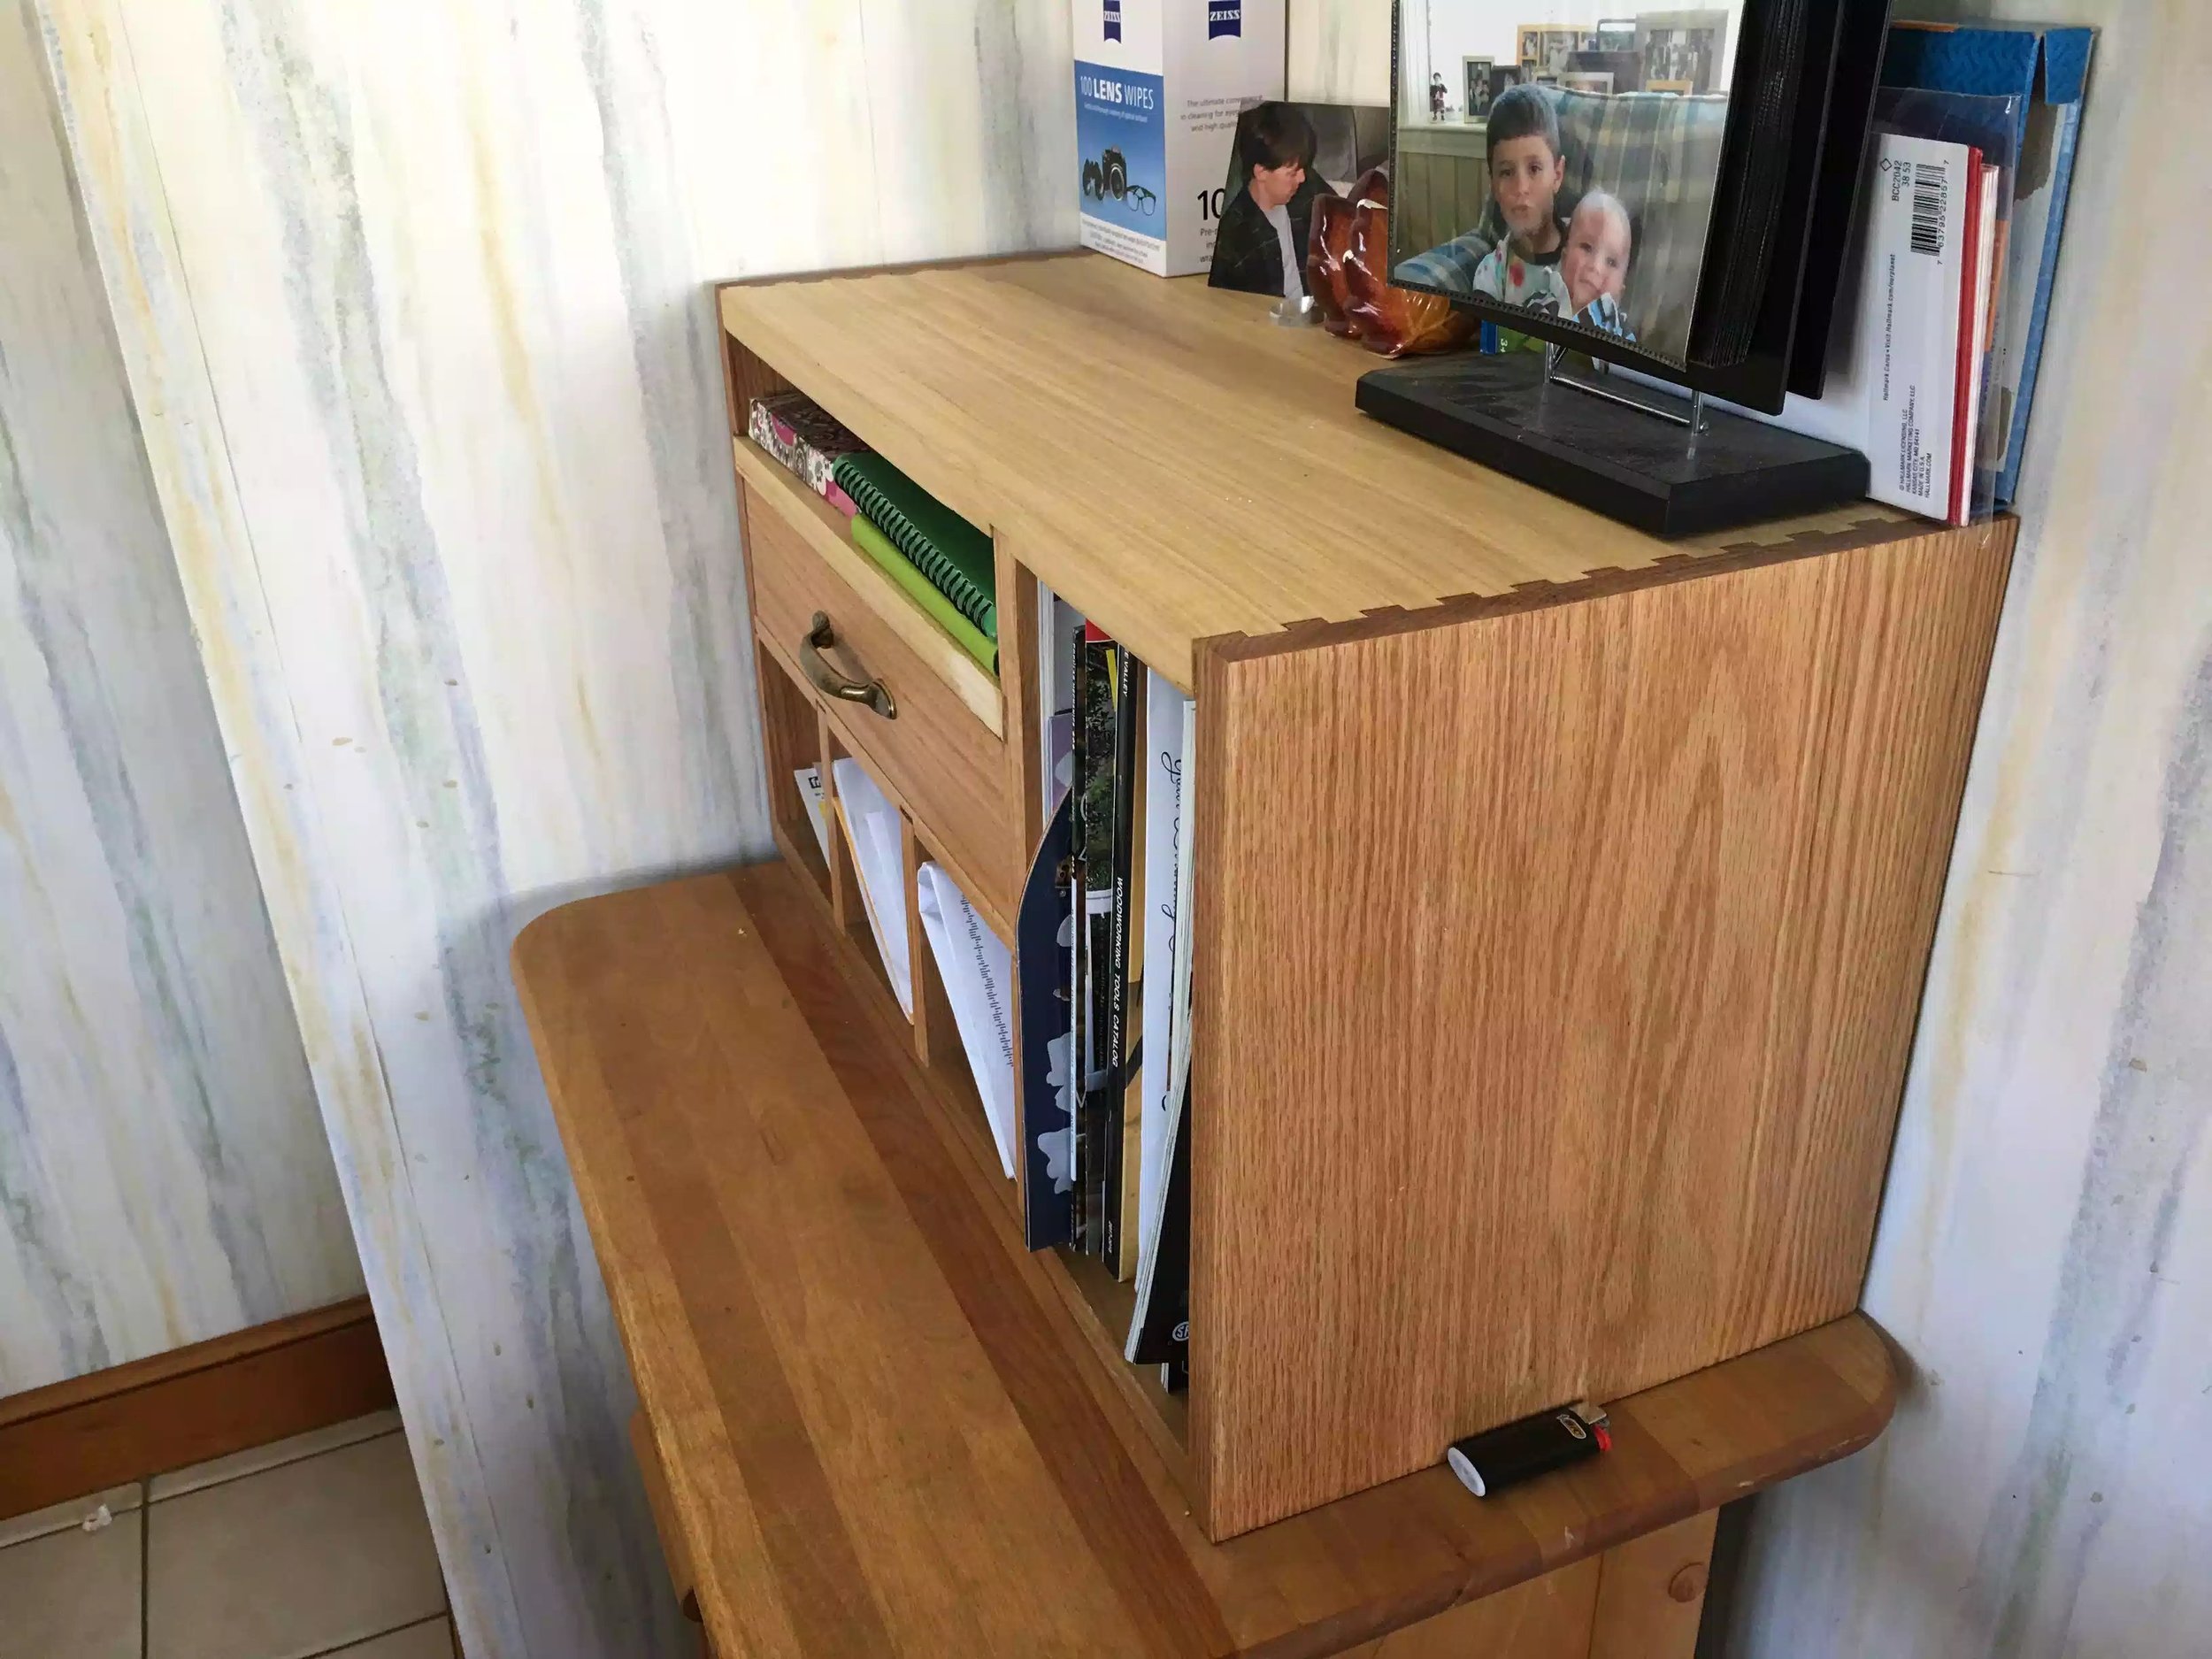
Desktop Organizer with Mail slots
I made a mail organizer last year and I felt like it didn’t showcase my best work and it was painted a horrific color so I decided to remake it.
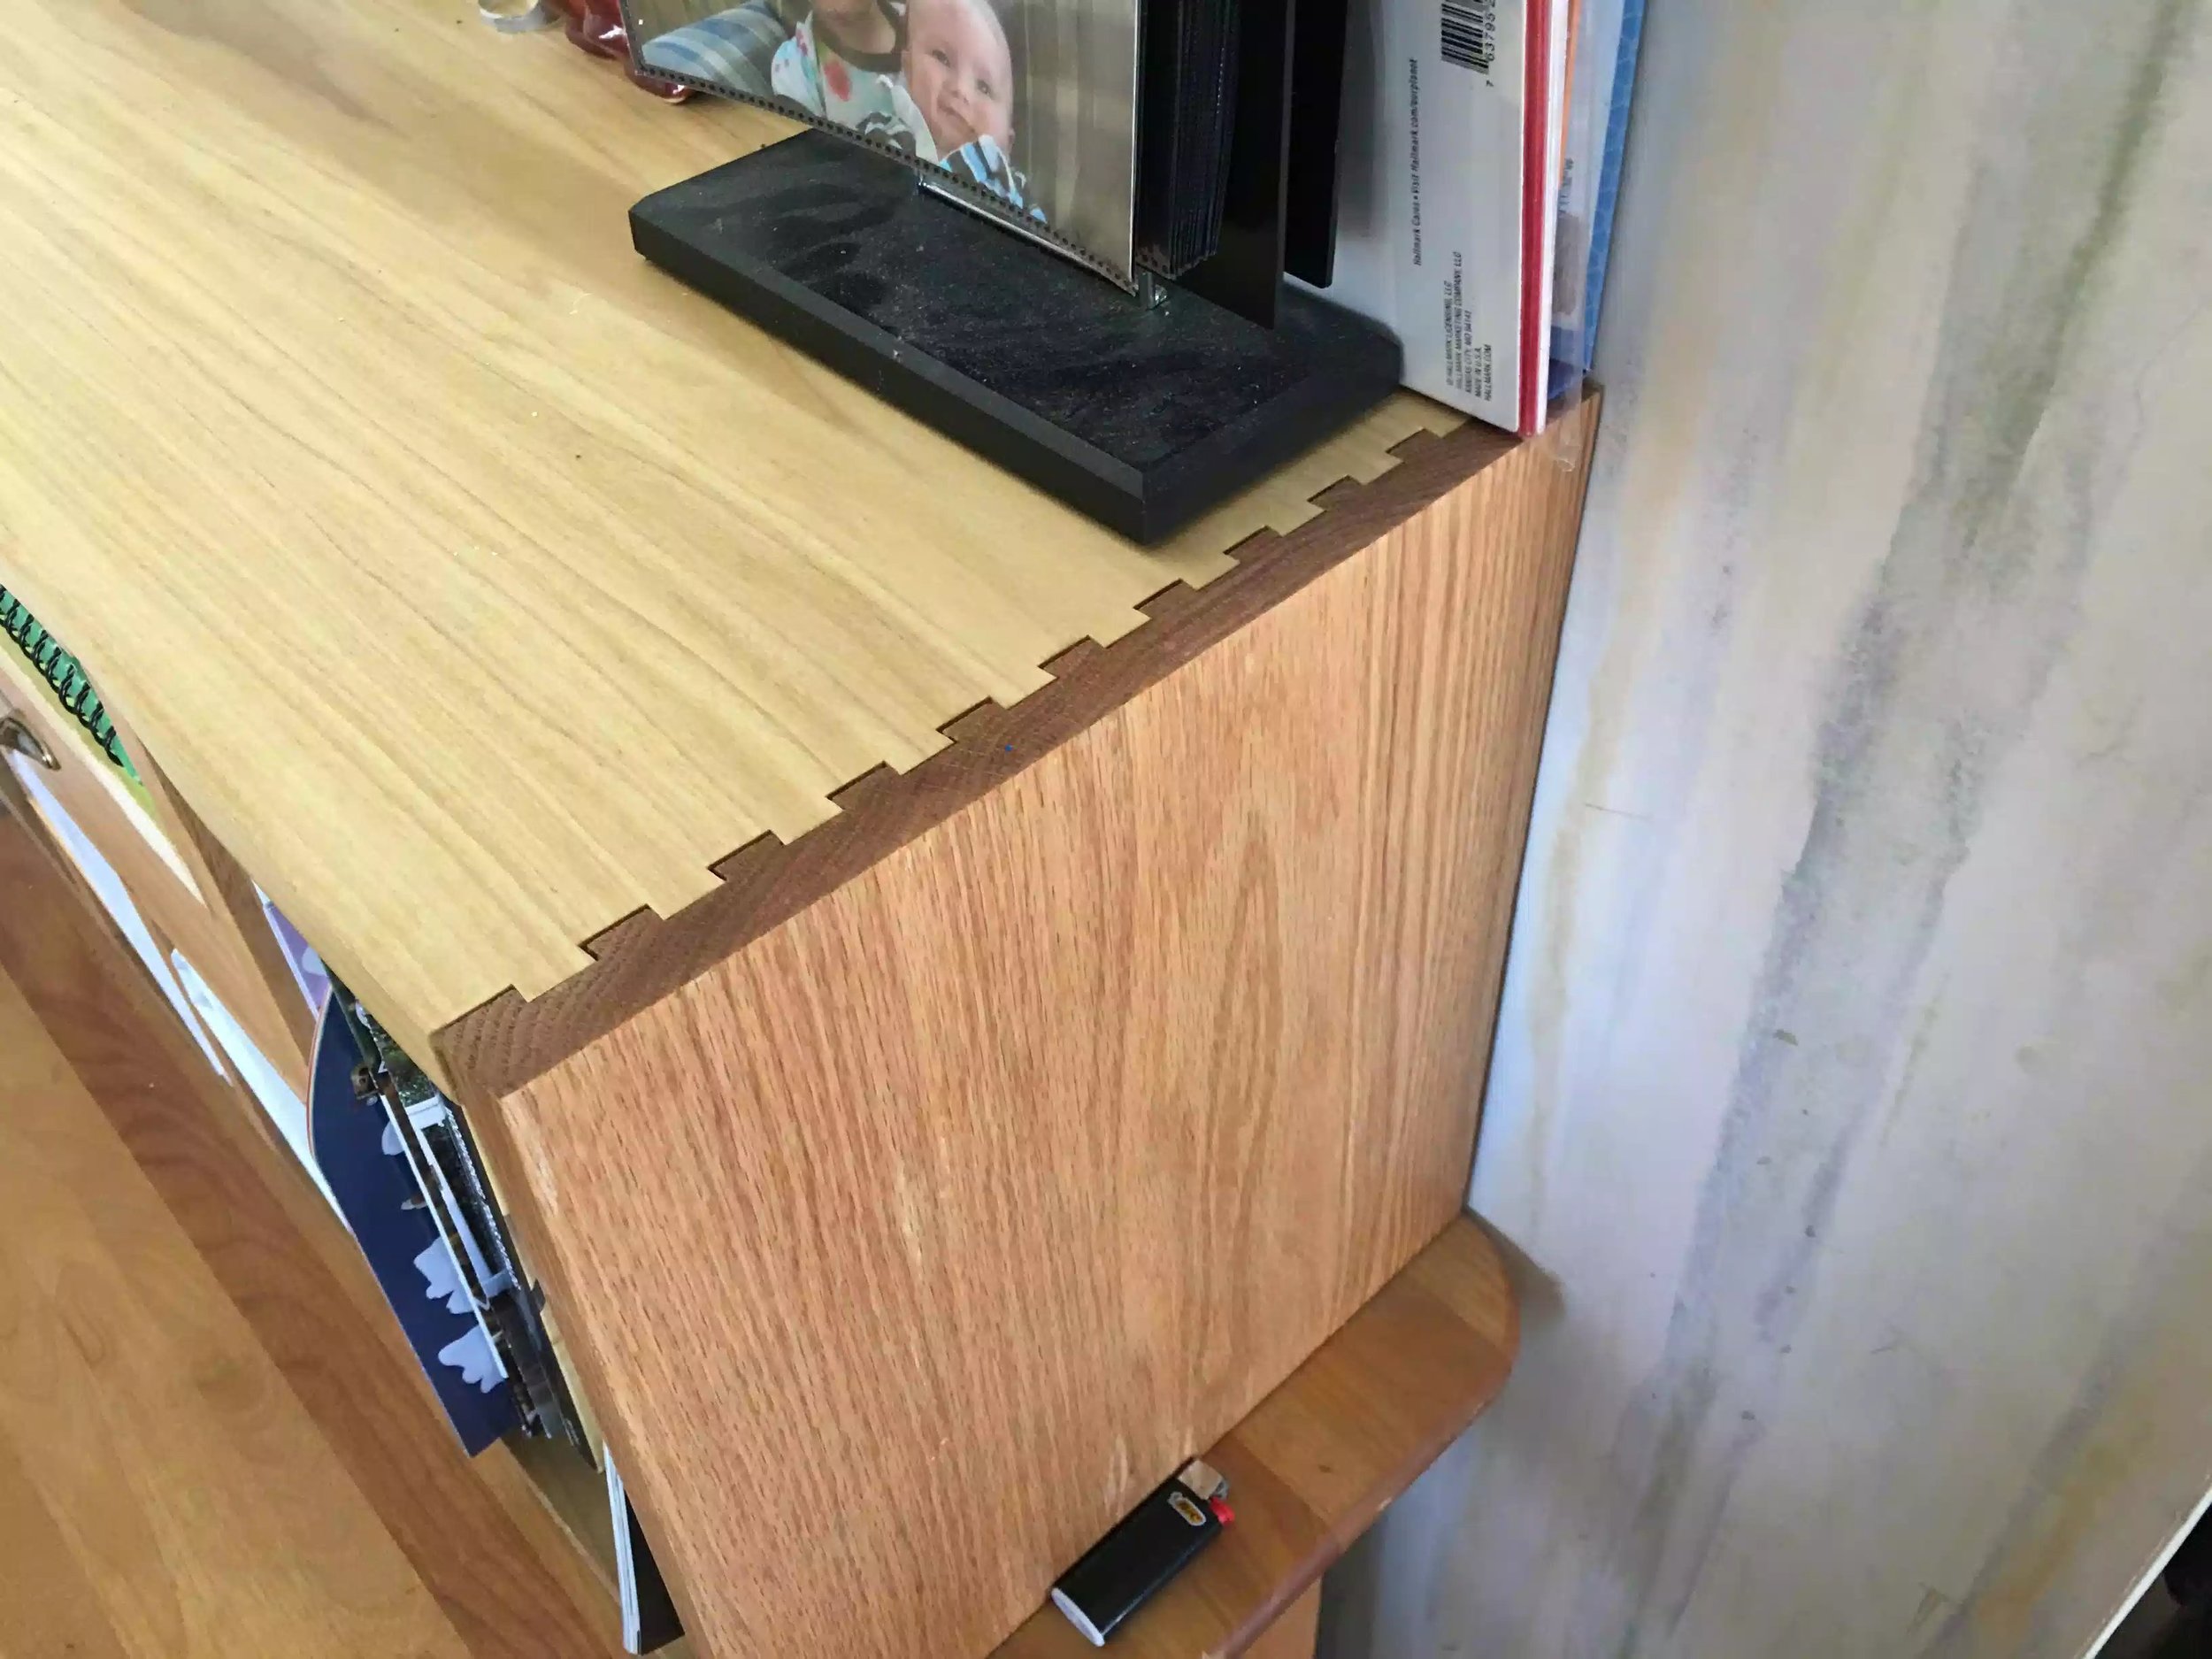
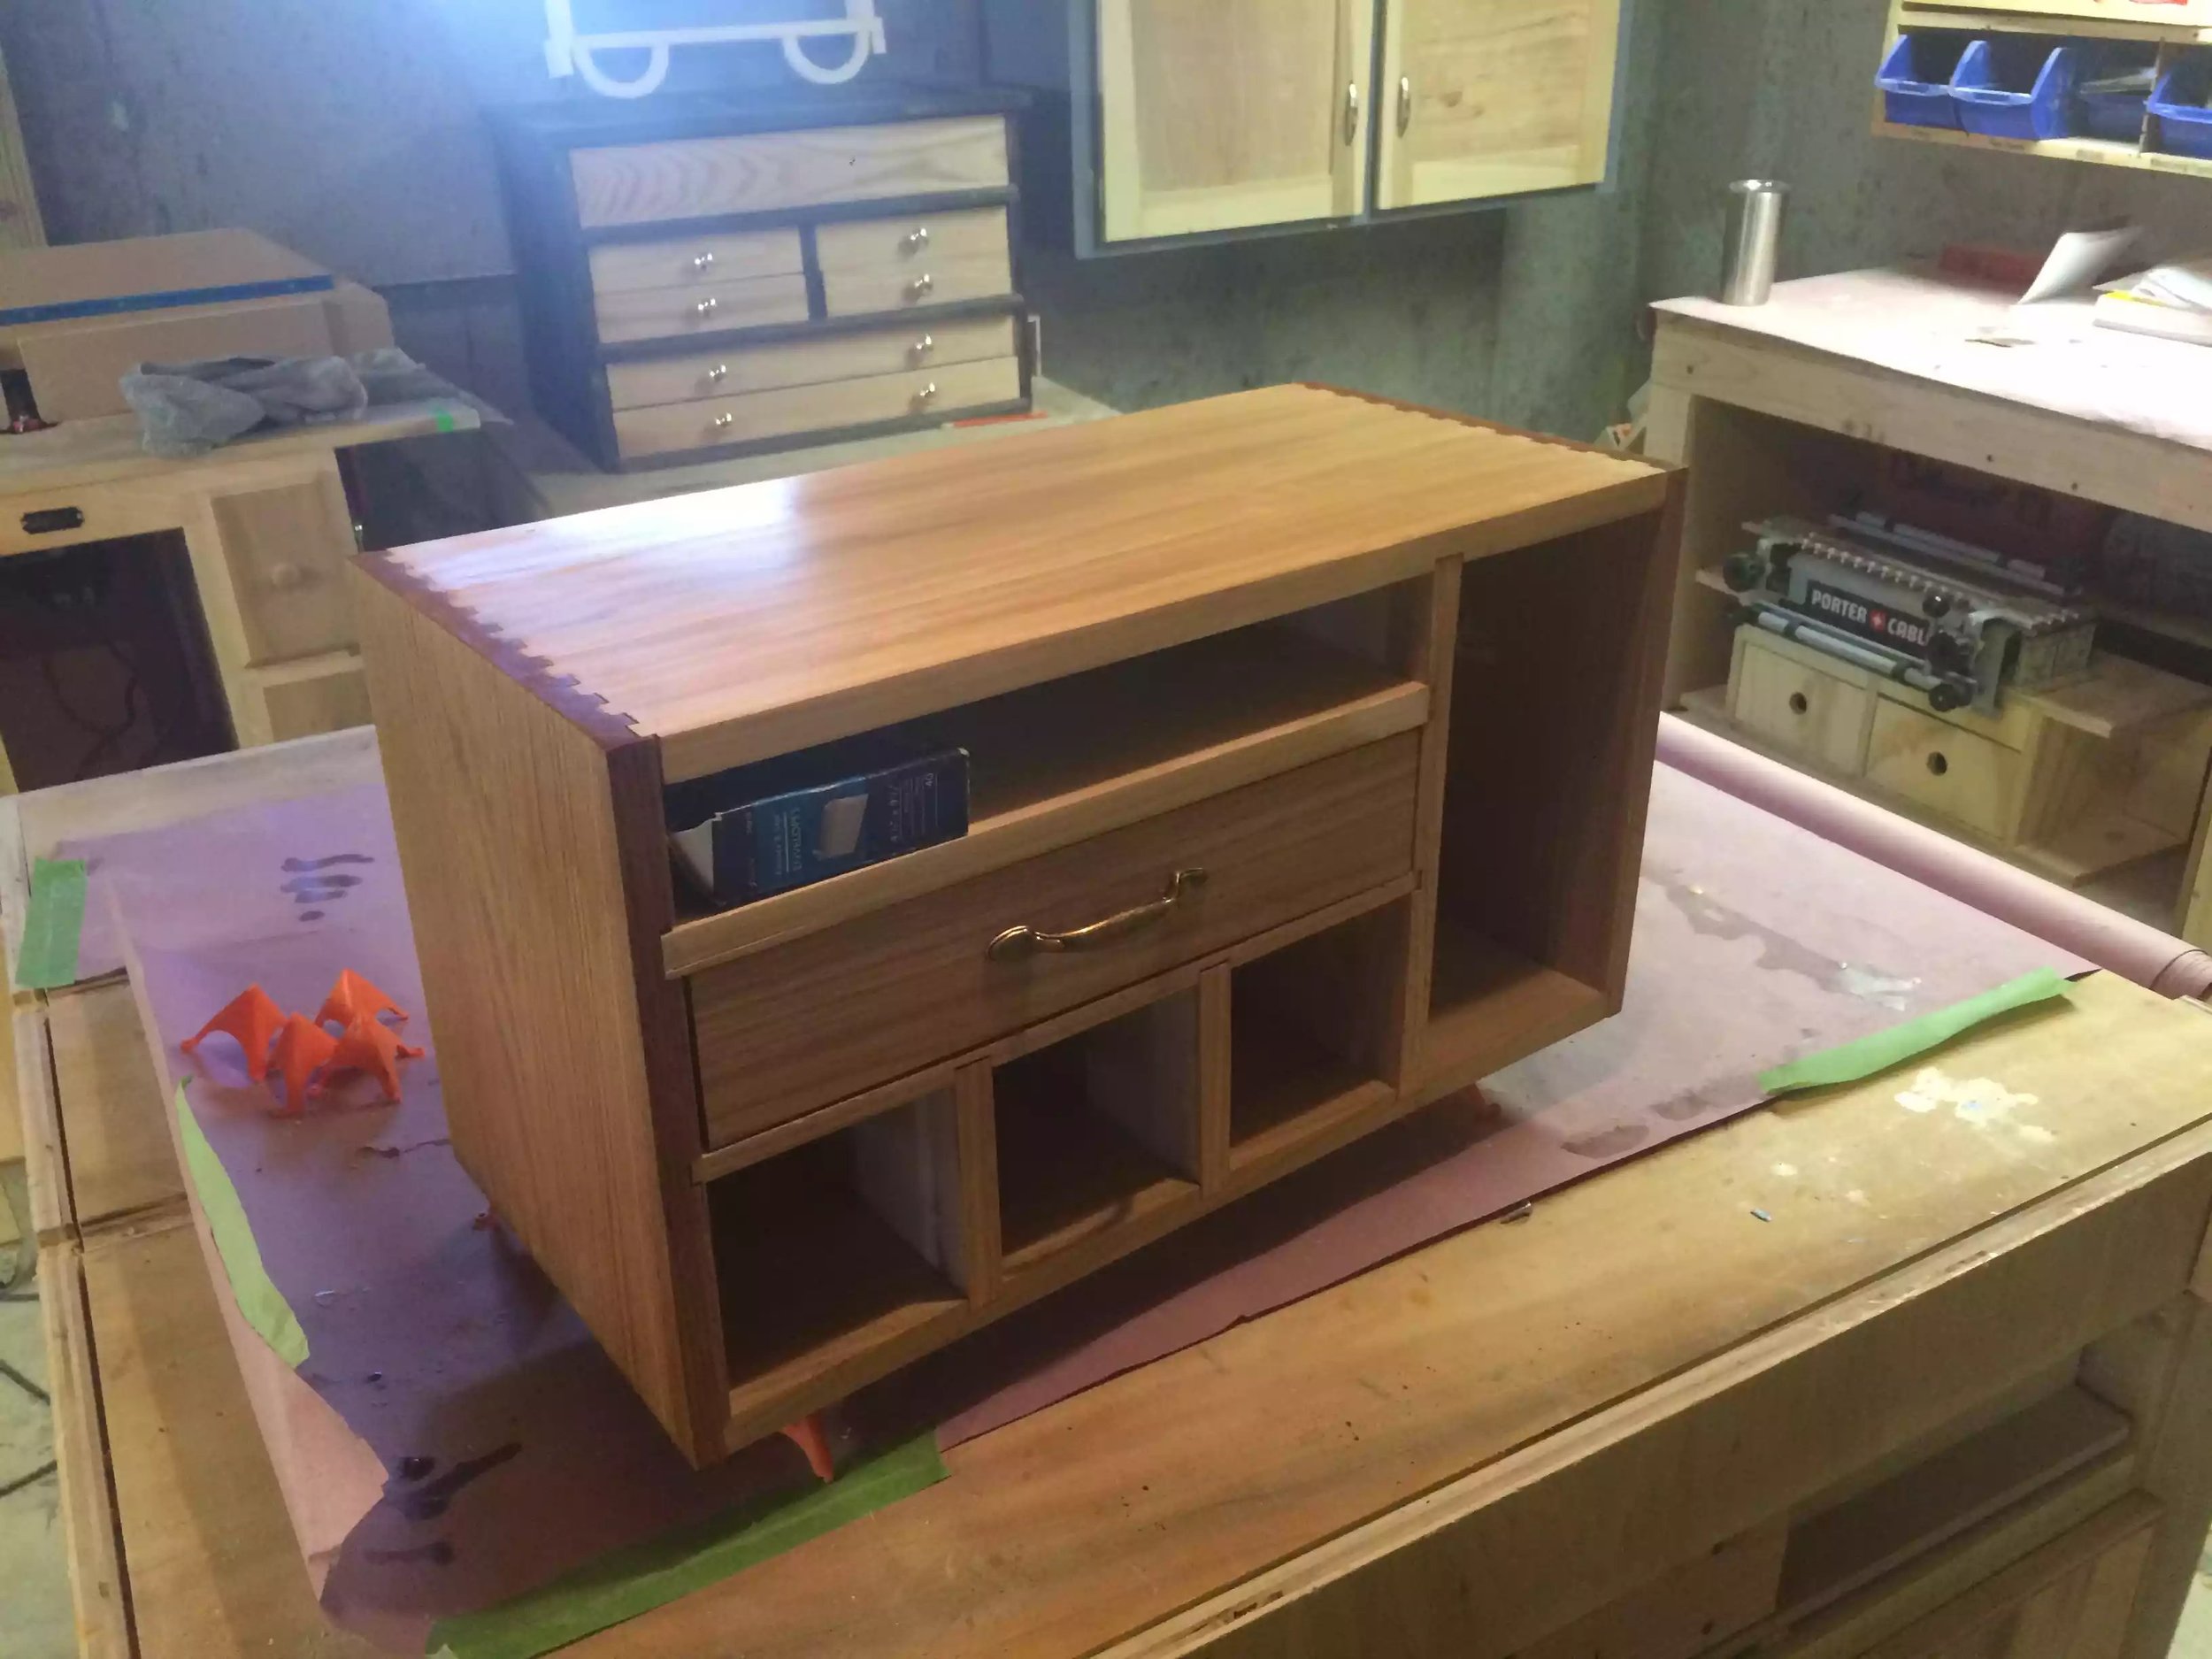
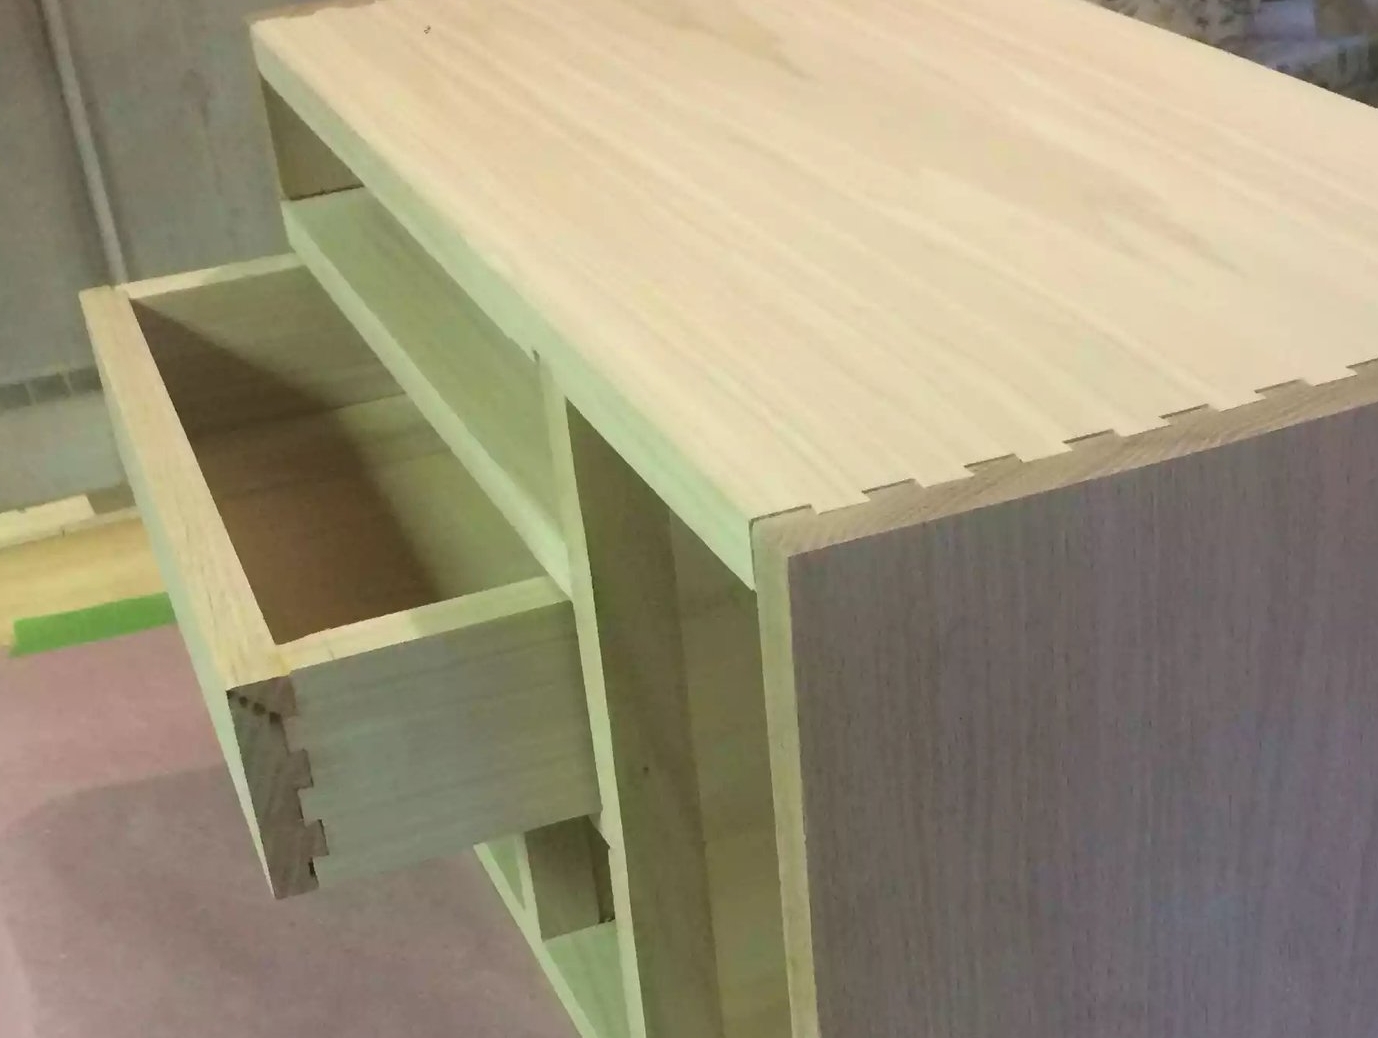
I decided to use my new porter cable dovetail jig to make the case and drawer to kind of get some practice in making machine cut dovetails and I although it did take me forever to dial in the settings for the jig once I was finished I think the joinery came of ok, more practice is need to perfect this joinery technique.
The unit is made of oak sides and poplar top and base, I also edge banded some plywood in the dividers of the case with oak, I figured why go to all the expense of buying oak and @ $10.00 bf when you don’t even see, I used by biscuit plate joiner to join the oak to the plywood and I think it came out great.
The custom dimensions at 22” wide, 11 1/4” deep and about 12” high and I think that’s ample space to do what I need it too…
I just applied 2 coats of poly and sanded between coats of 120 and 100 grit sandpaper
As always I did do a sketch up model but again my experience fell short in detailing the dovetail joinery in the case, again something I got to practice on…
But I think the unit came out better than I thought it would being a project of many first’s.
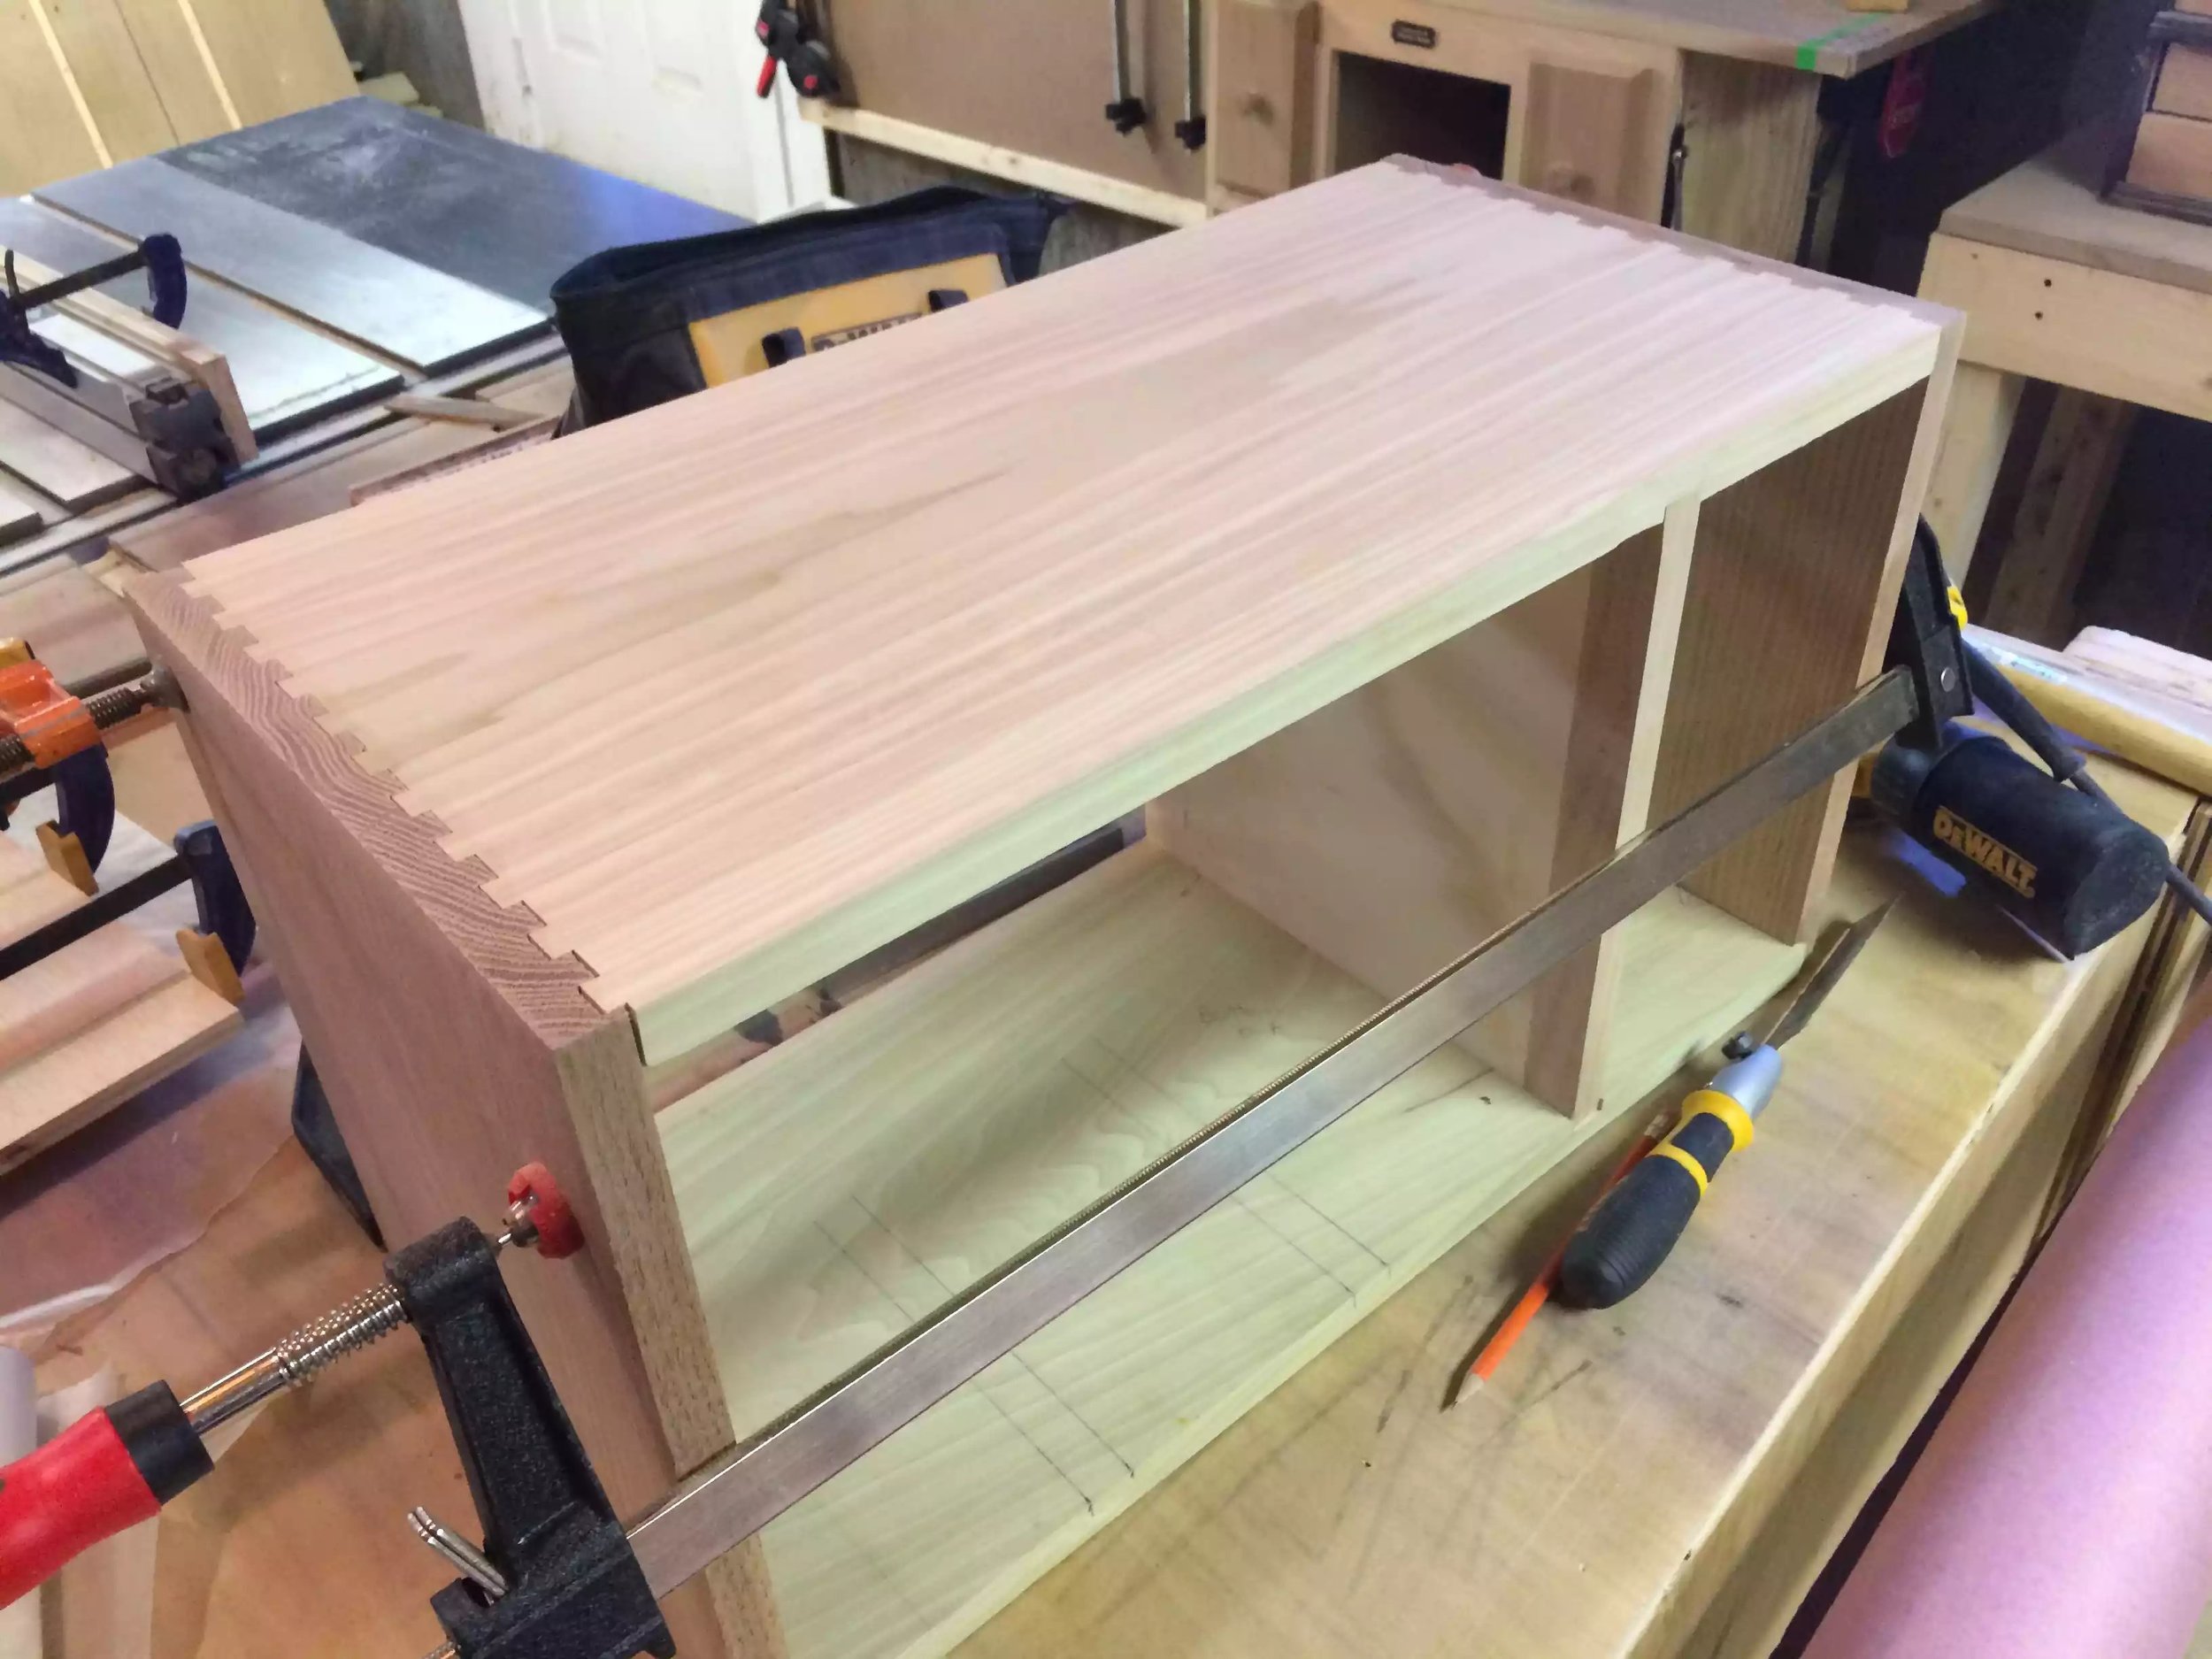
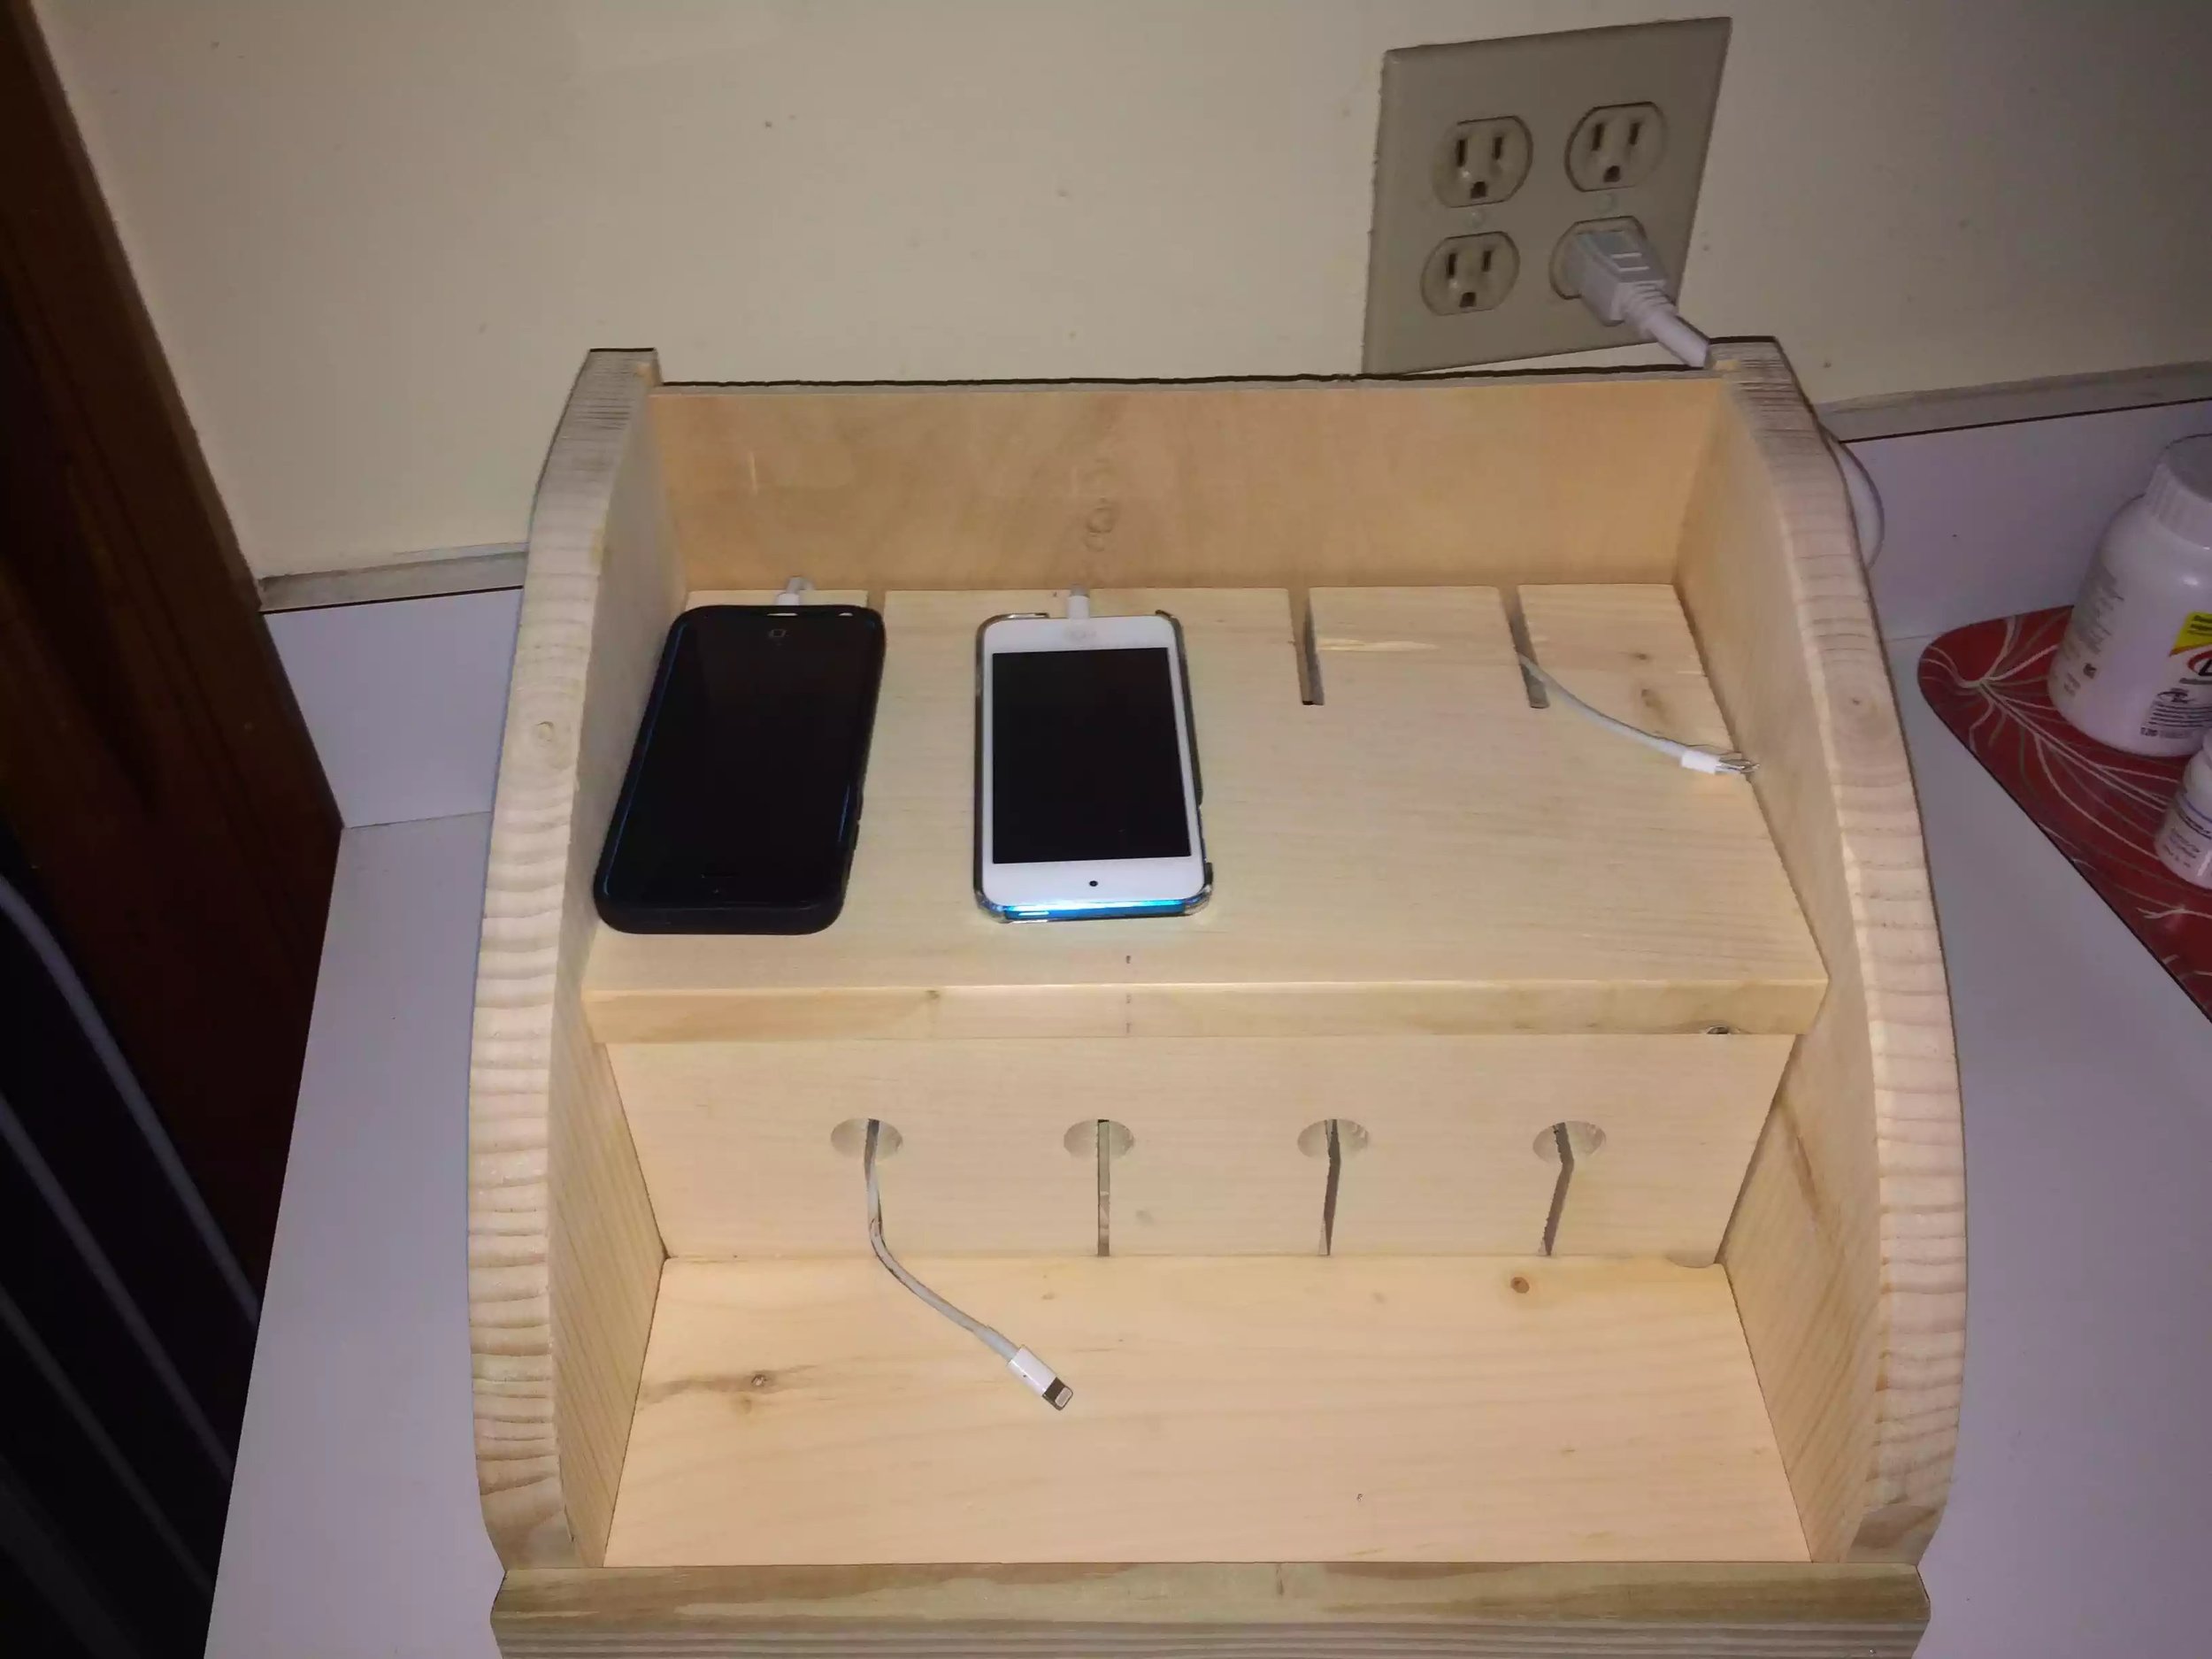
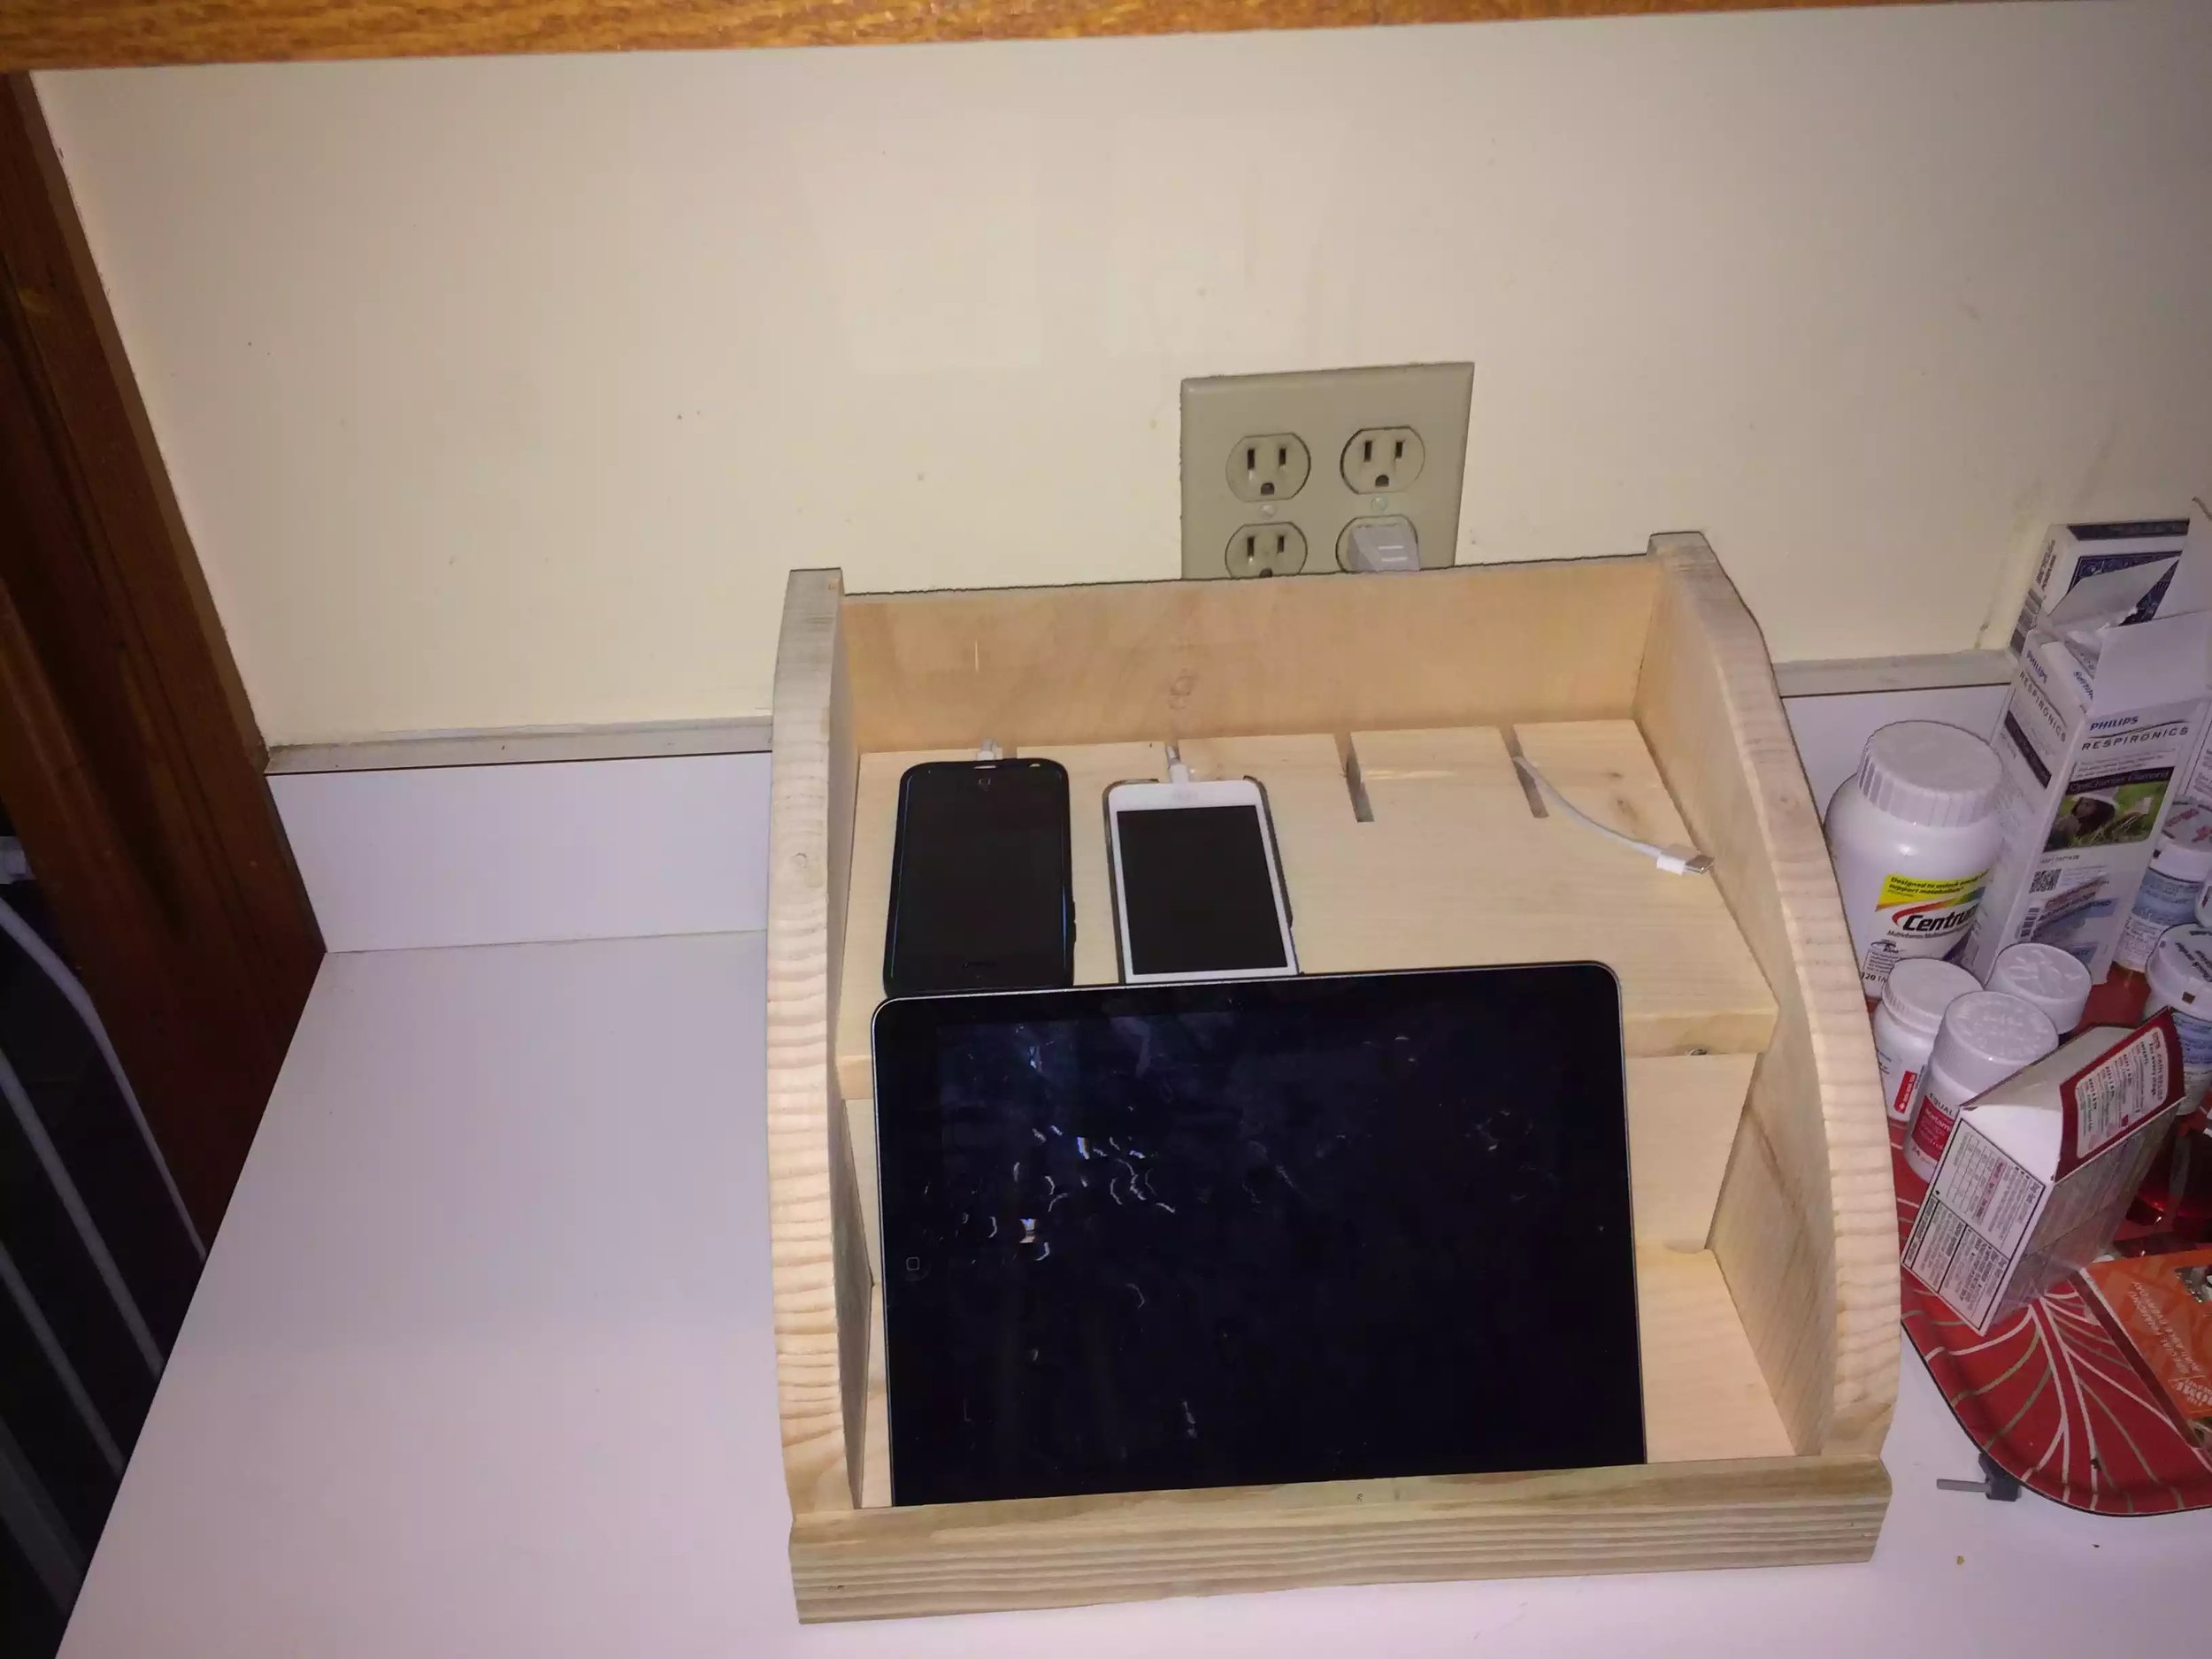
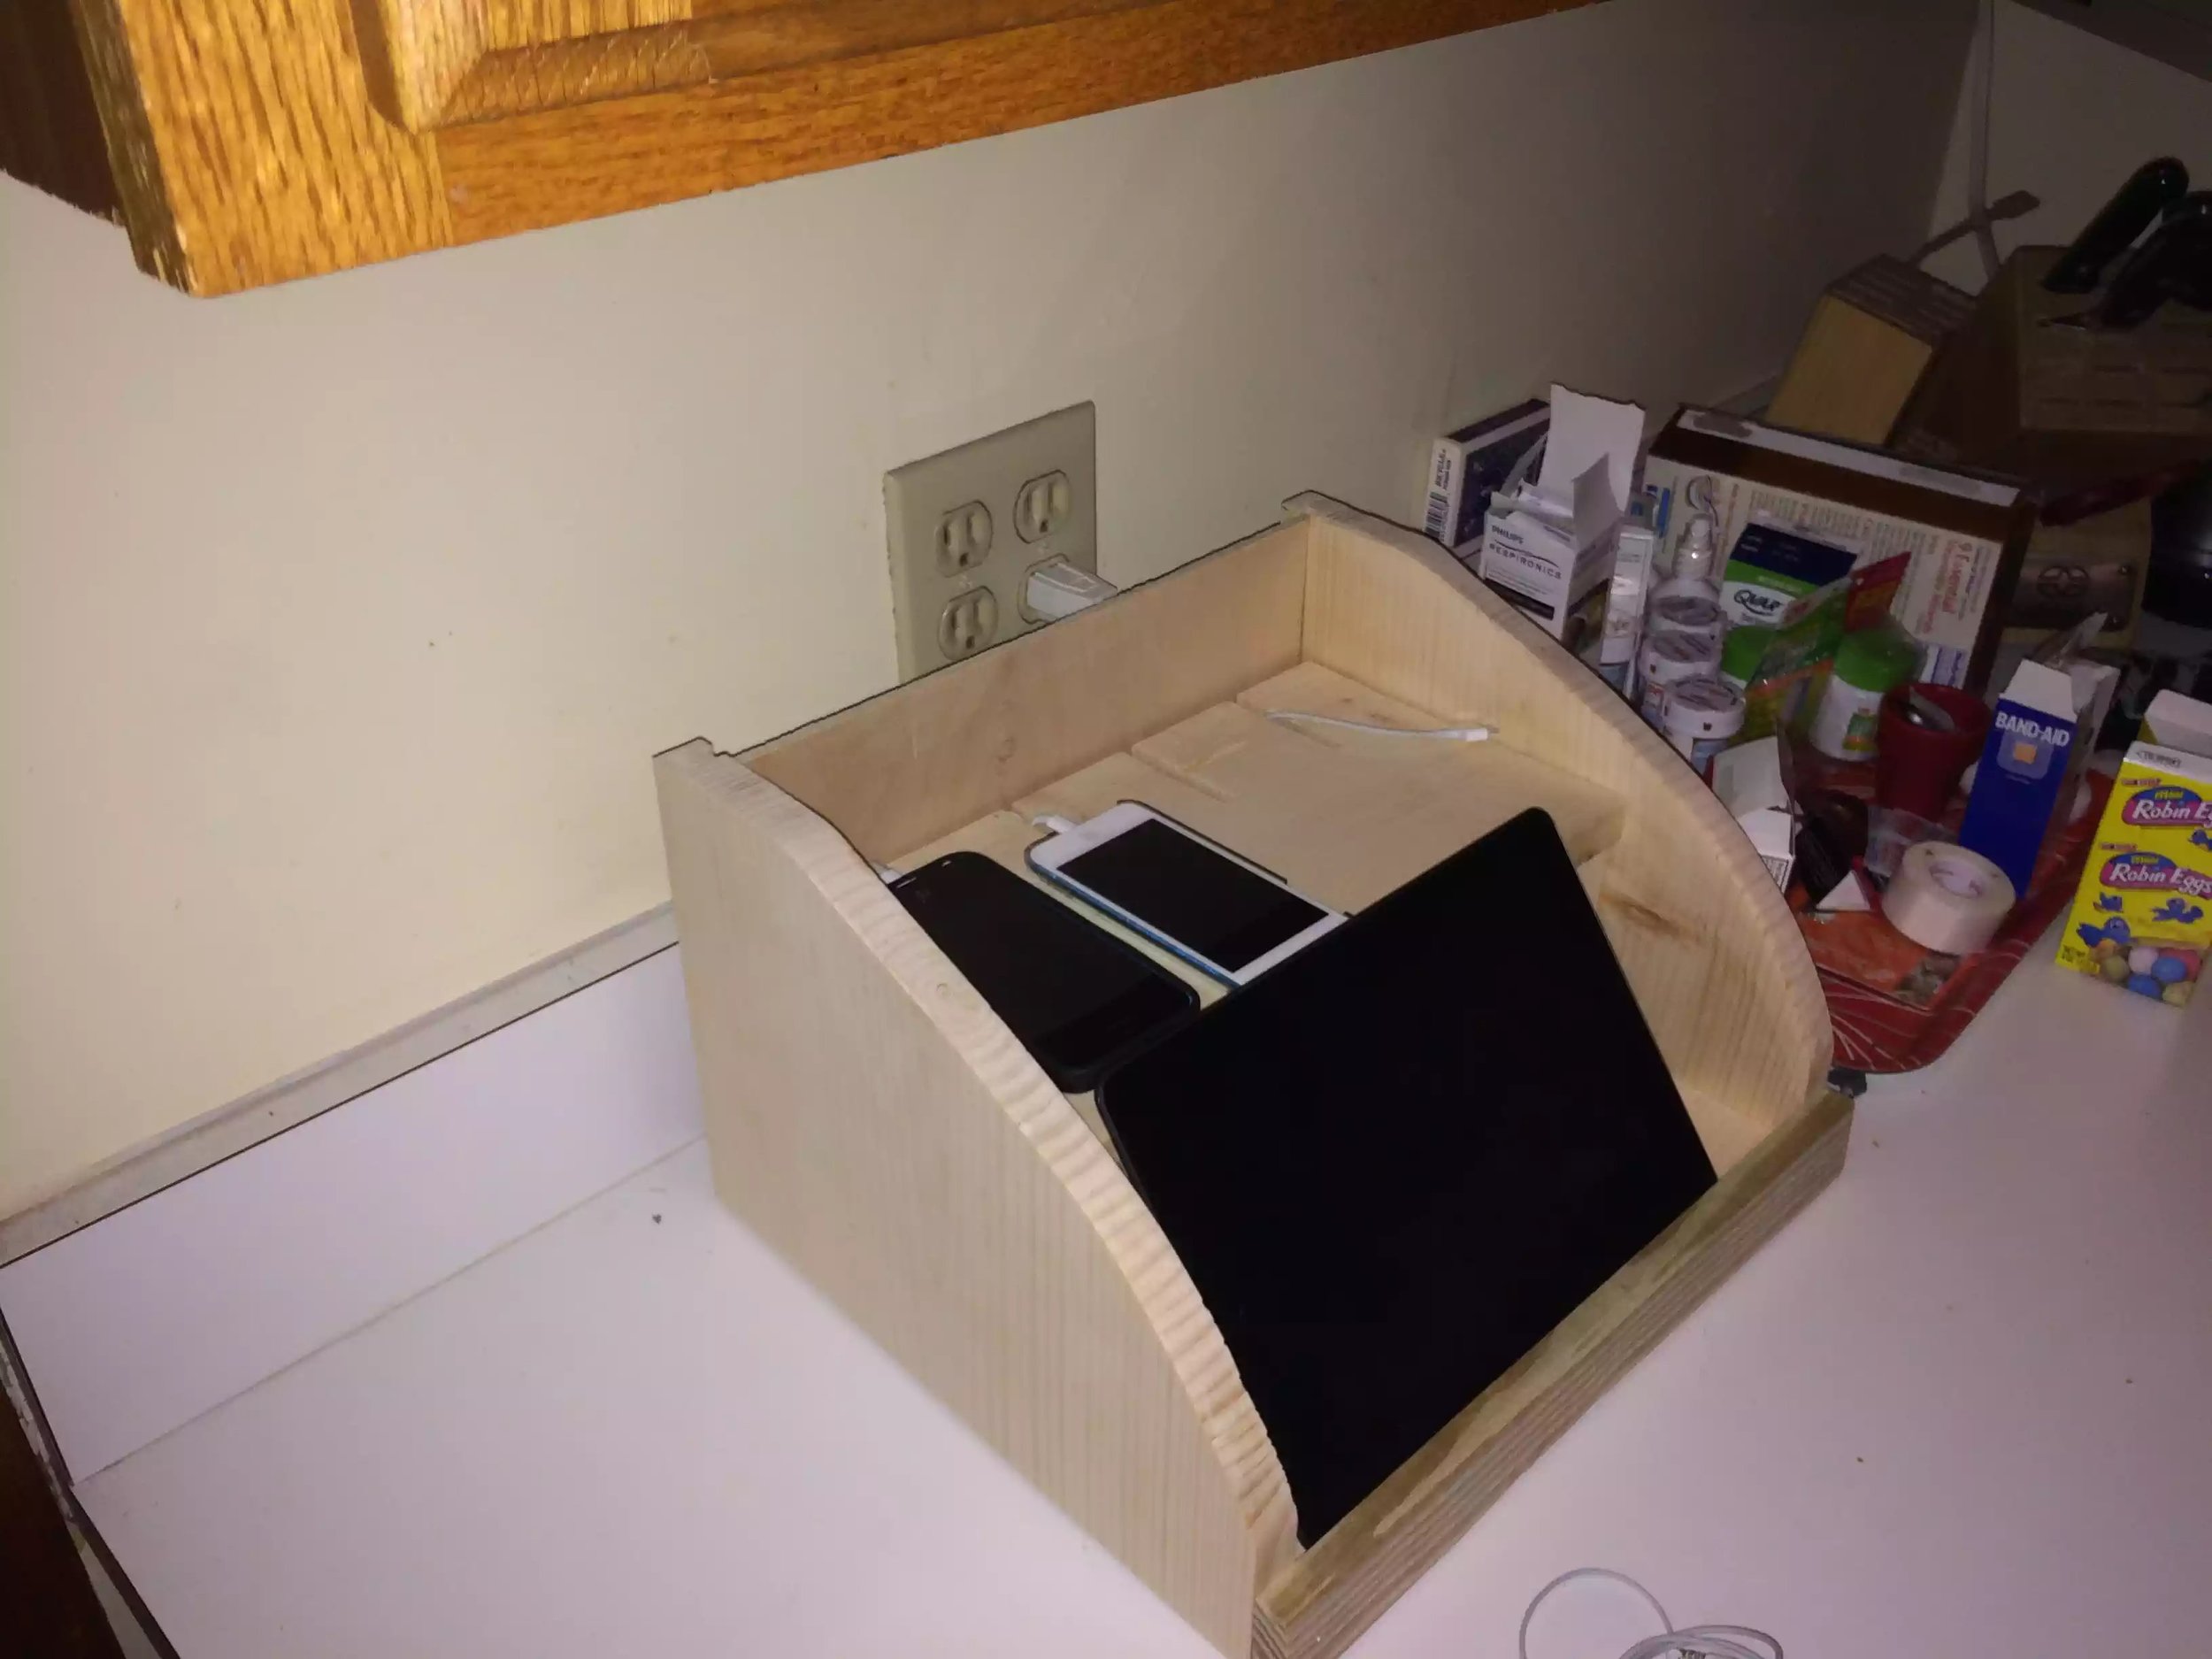
Charging Station 2.0
In 2014 I made a very good charging station and it looked great, since I made it we’ve added another iPad and iPods so I had to come with a better solution so I saw this design on a website, link below. I loosely used Wood Working for Mere Mortals design and made this.. you can find his project plans in a link on the right.
The supplies I had to get included the following:
1×12x6’ length of pine board
2’x2’x1/4” piece of finished plywood
And finally a 6 plug adapter (with dimensions less than 10.5” in length to fit in the power strip compartment.
Glue
1 1/4” pocket screws
Tools I used:
Router ( and table)
Drill press
Jigsaw
Drills
Clamps
Pocket hole jig
I think it came together very well and I’m wondering whether to finish it or leave alone…
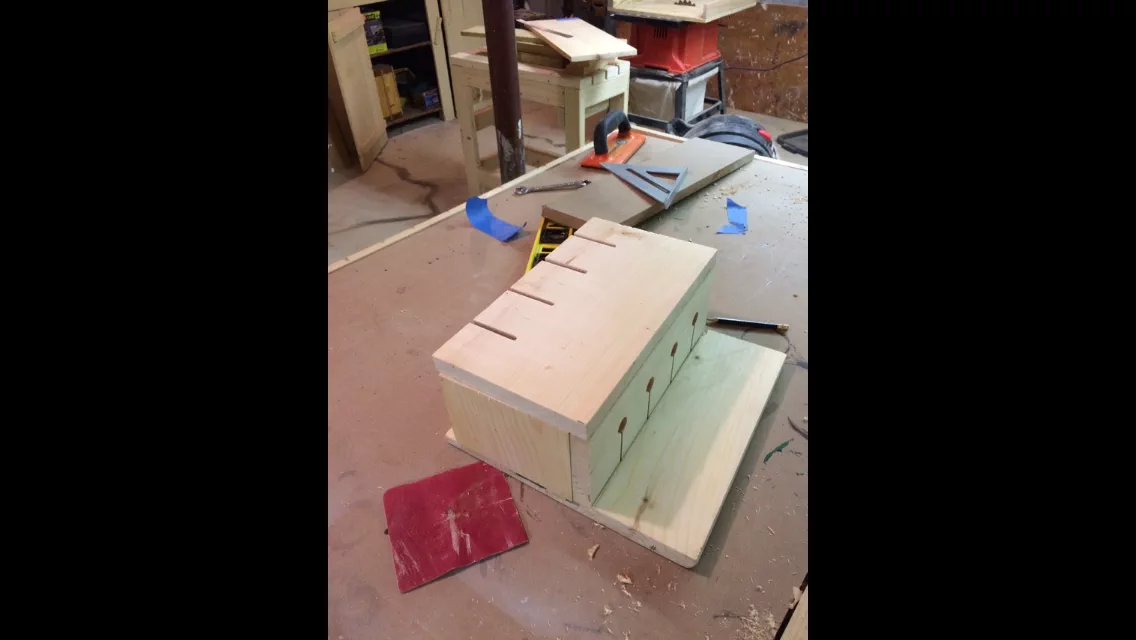
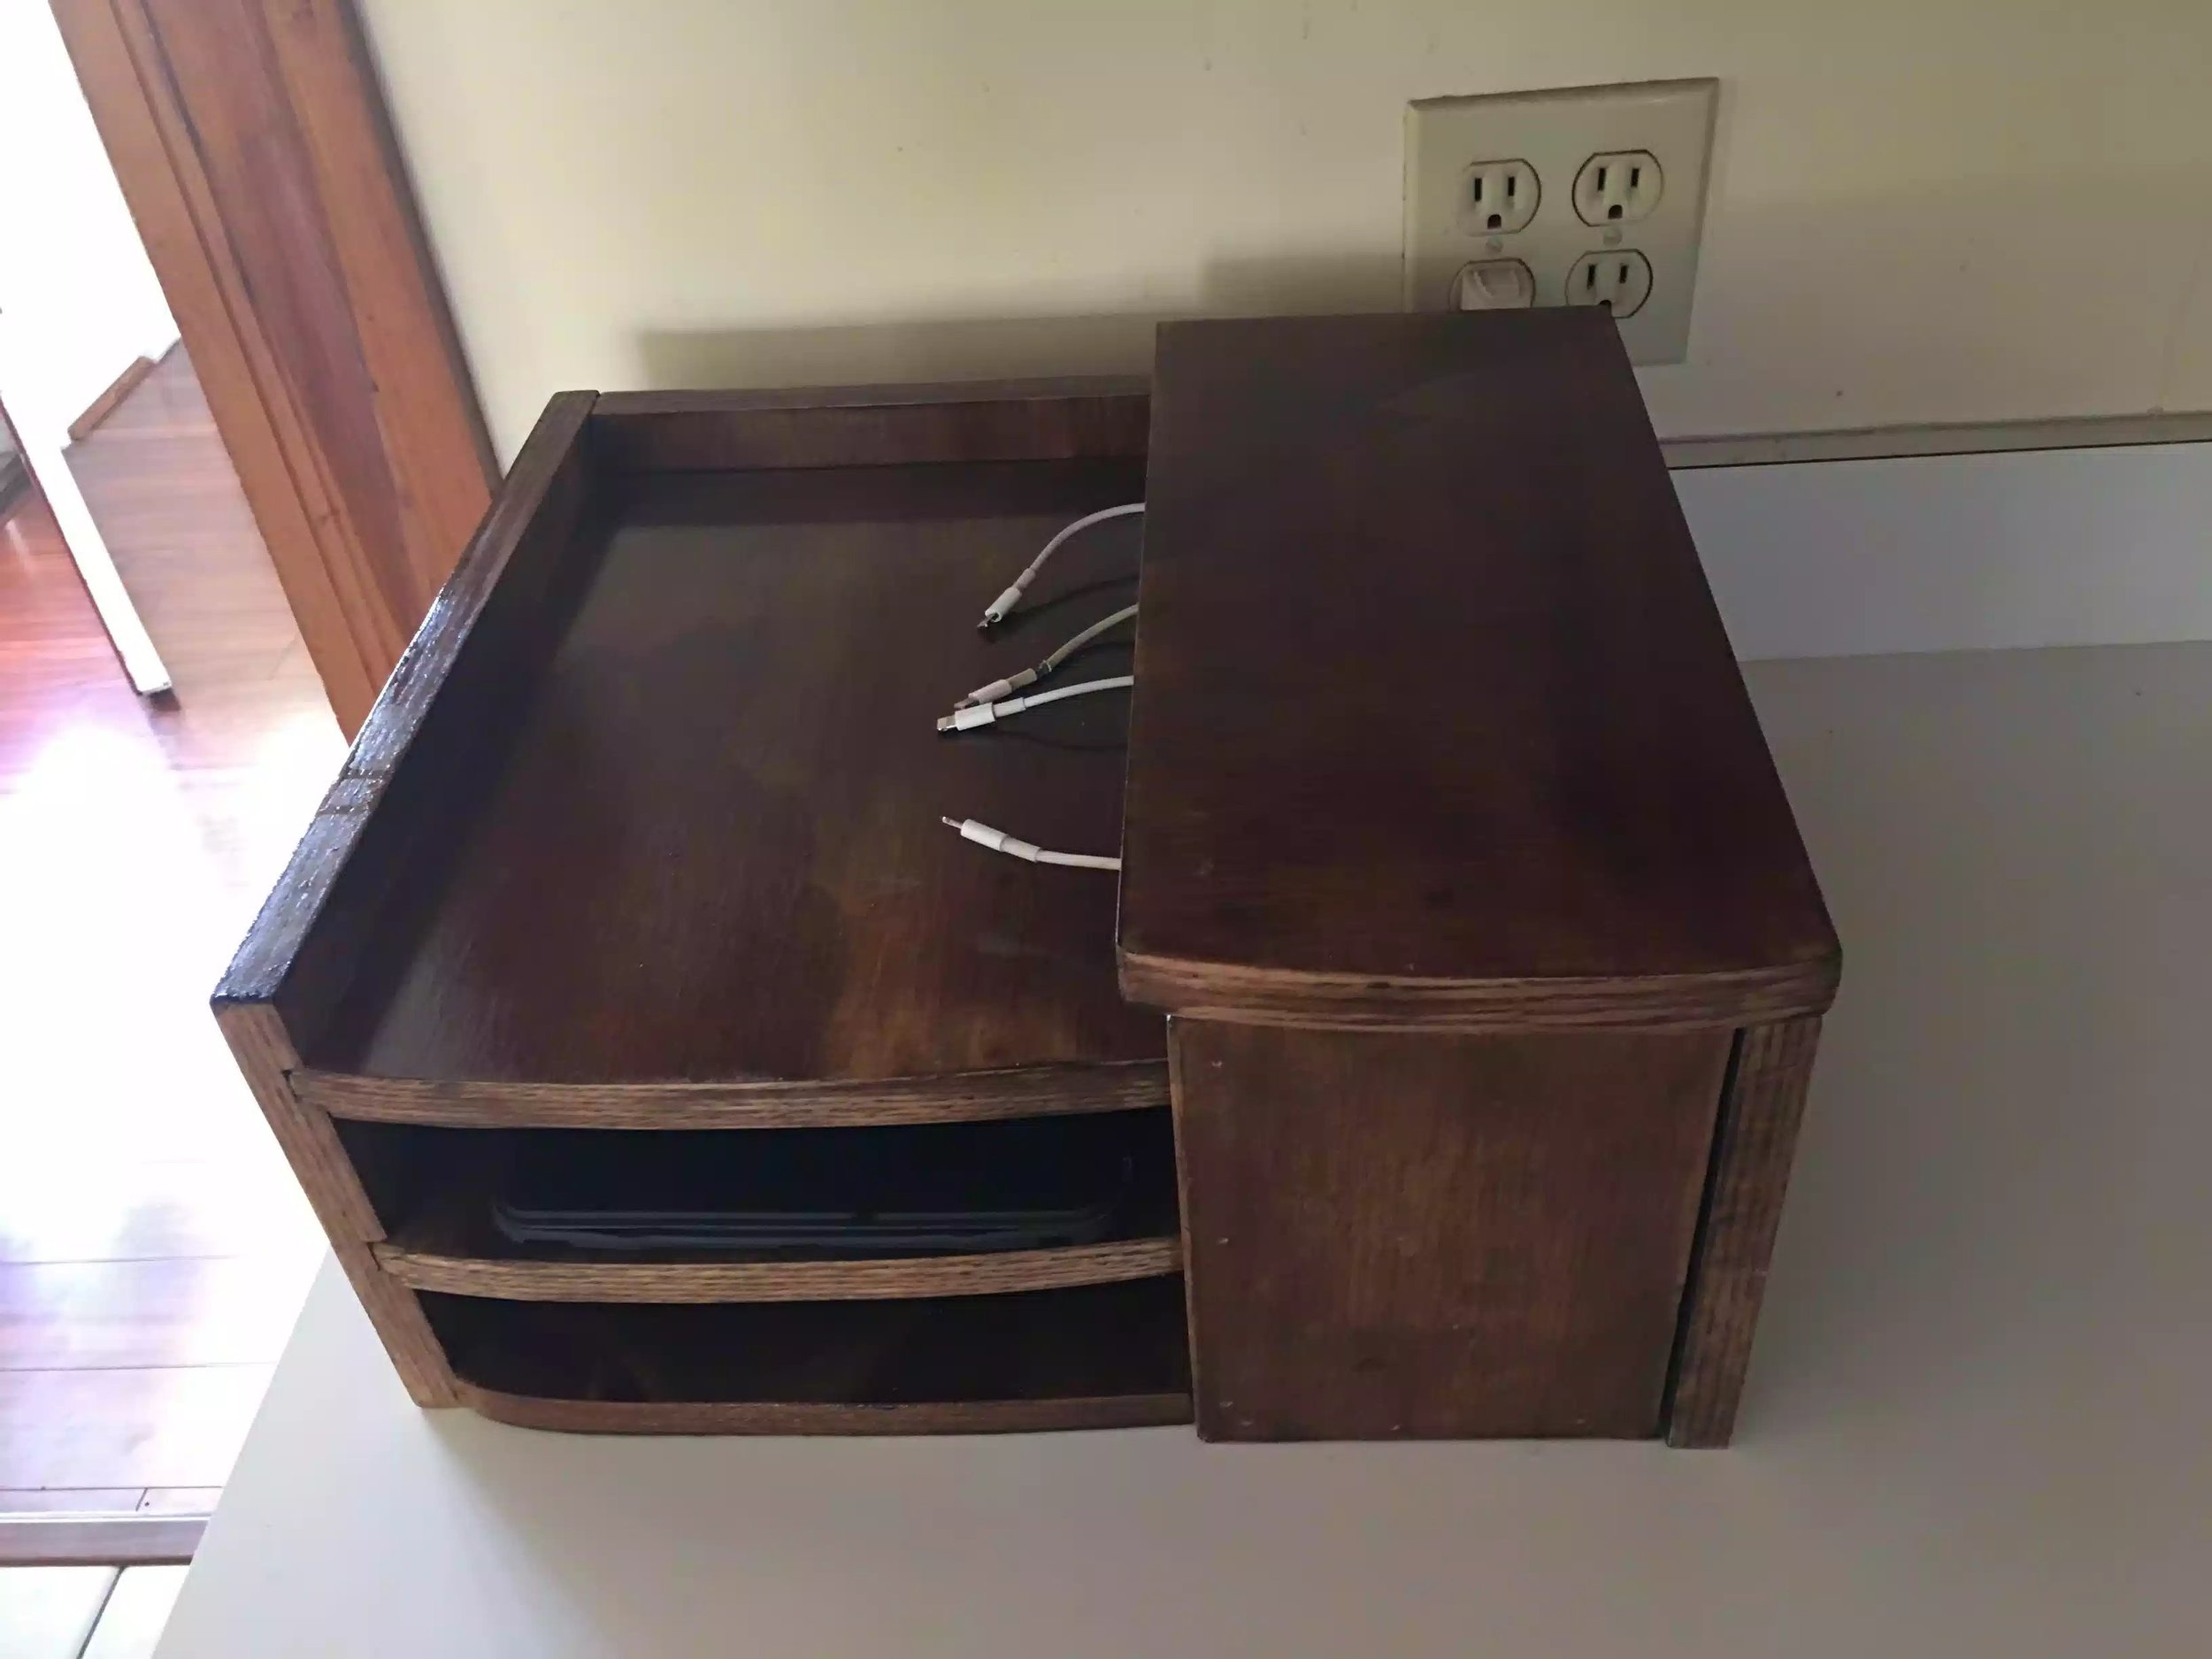
Charging station 3.0
Every couple of years I seem to remake this charging station, either because its 2 small or don't like the design or the wife asks for something that looks different.
So I scoured the internet and I found this design on Shopbot YouTube channel , you can find the video here
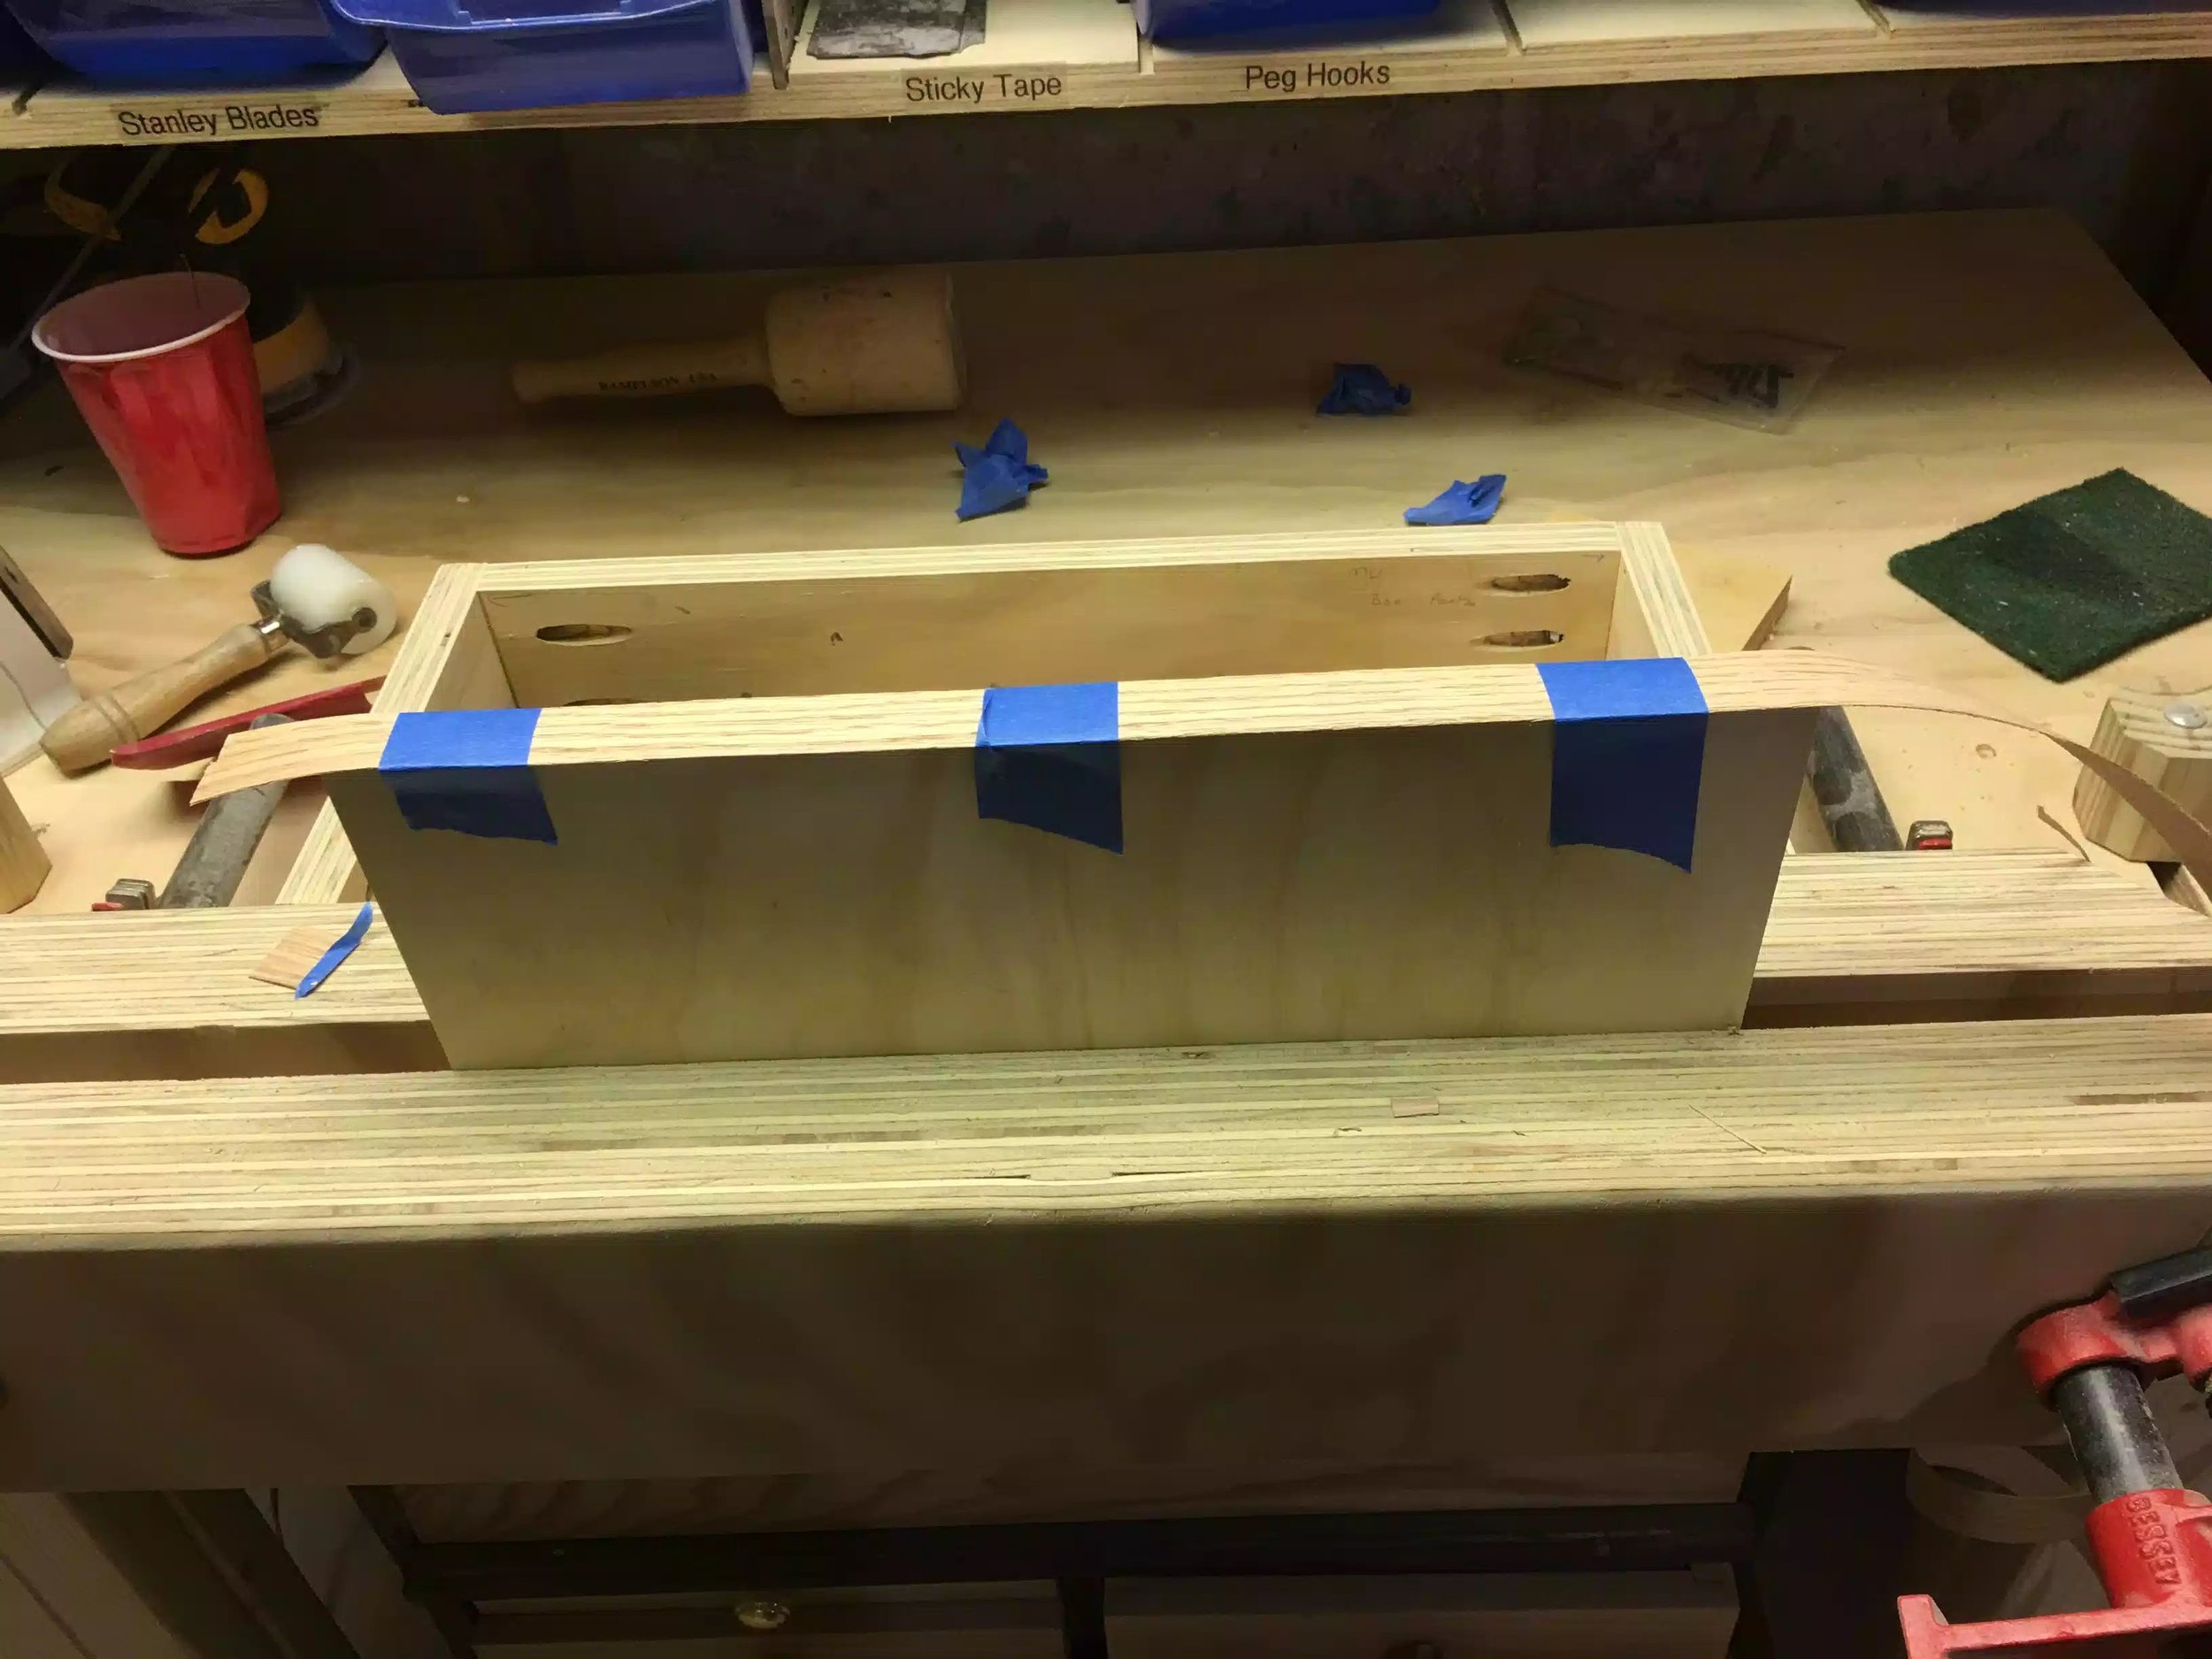
The video didn't give me any dimensions or specs to build it, all I know is that it looks like 1/2” plywood was used and he painted his, so I went to Sketch up to design my version.
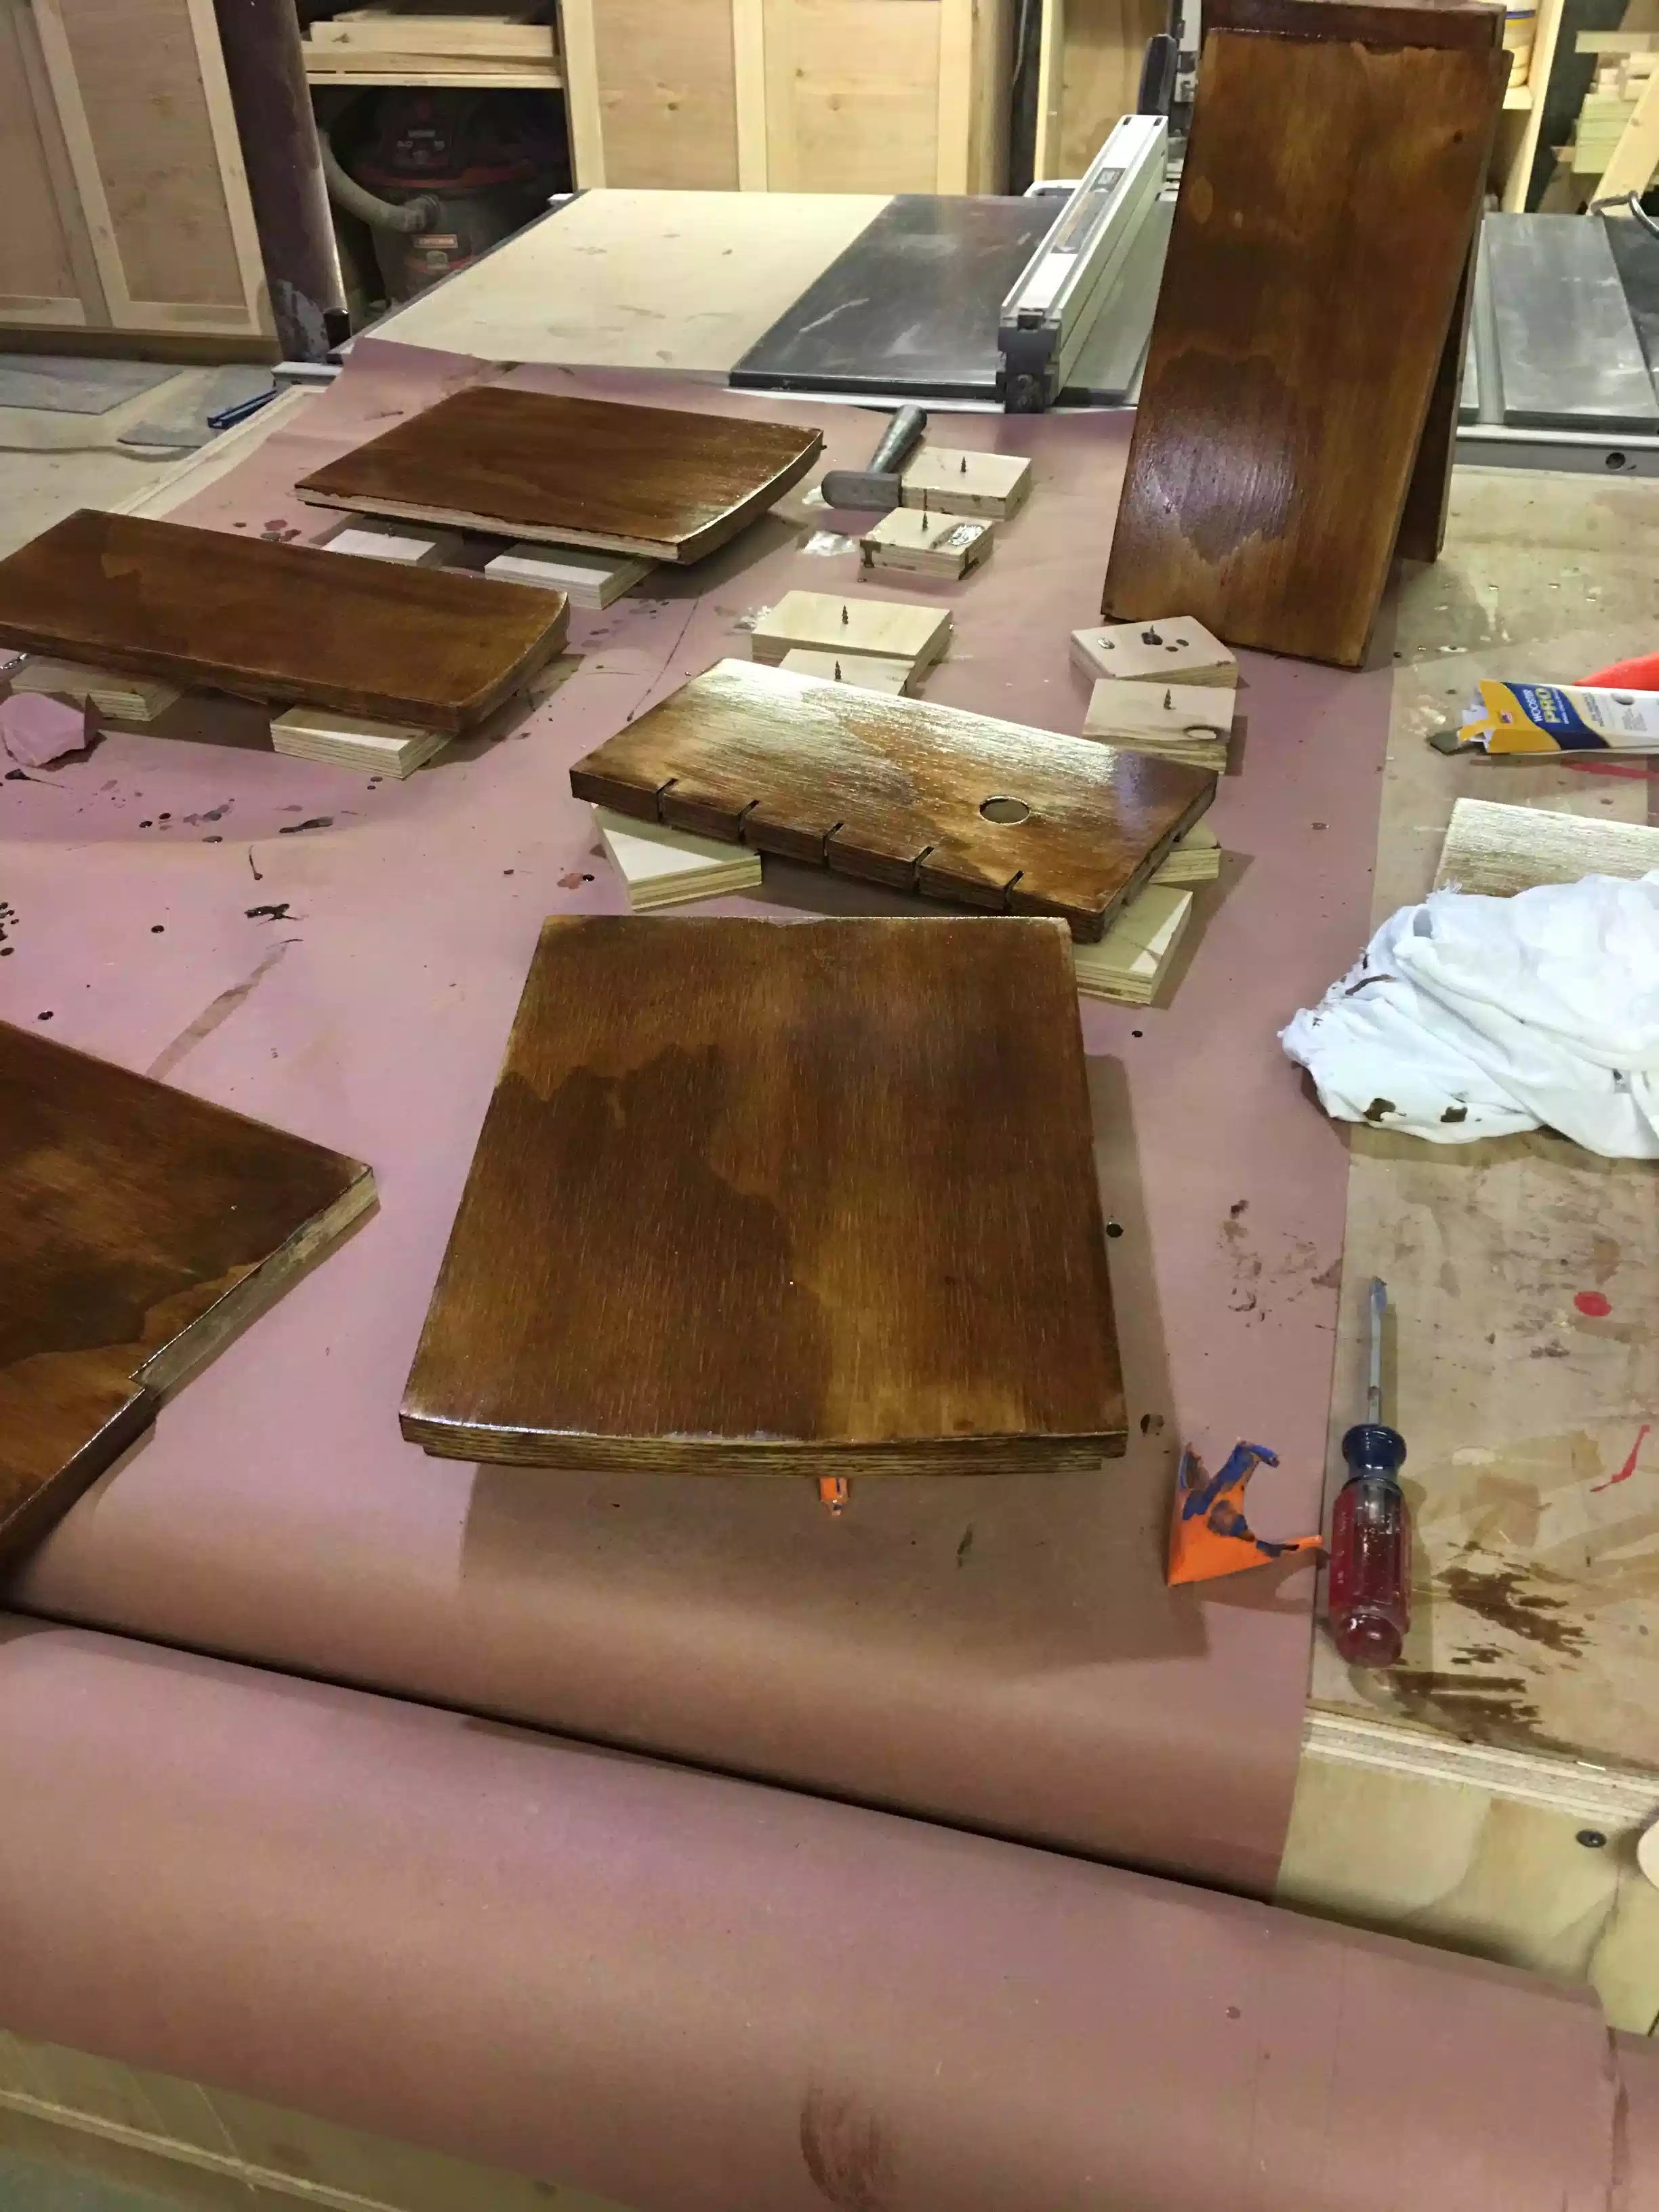
All it takes is 1/4 sheet of plywood, oak iron-on edging to hide the plywood edges and glue.
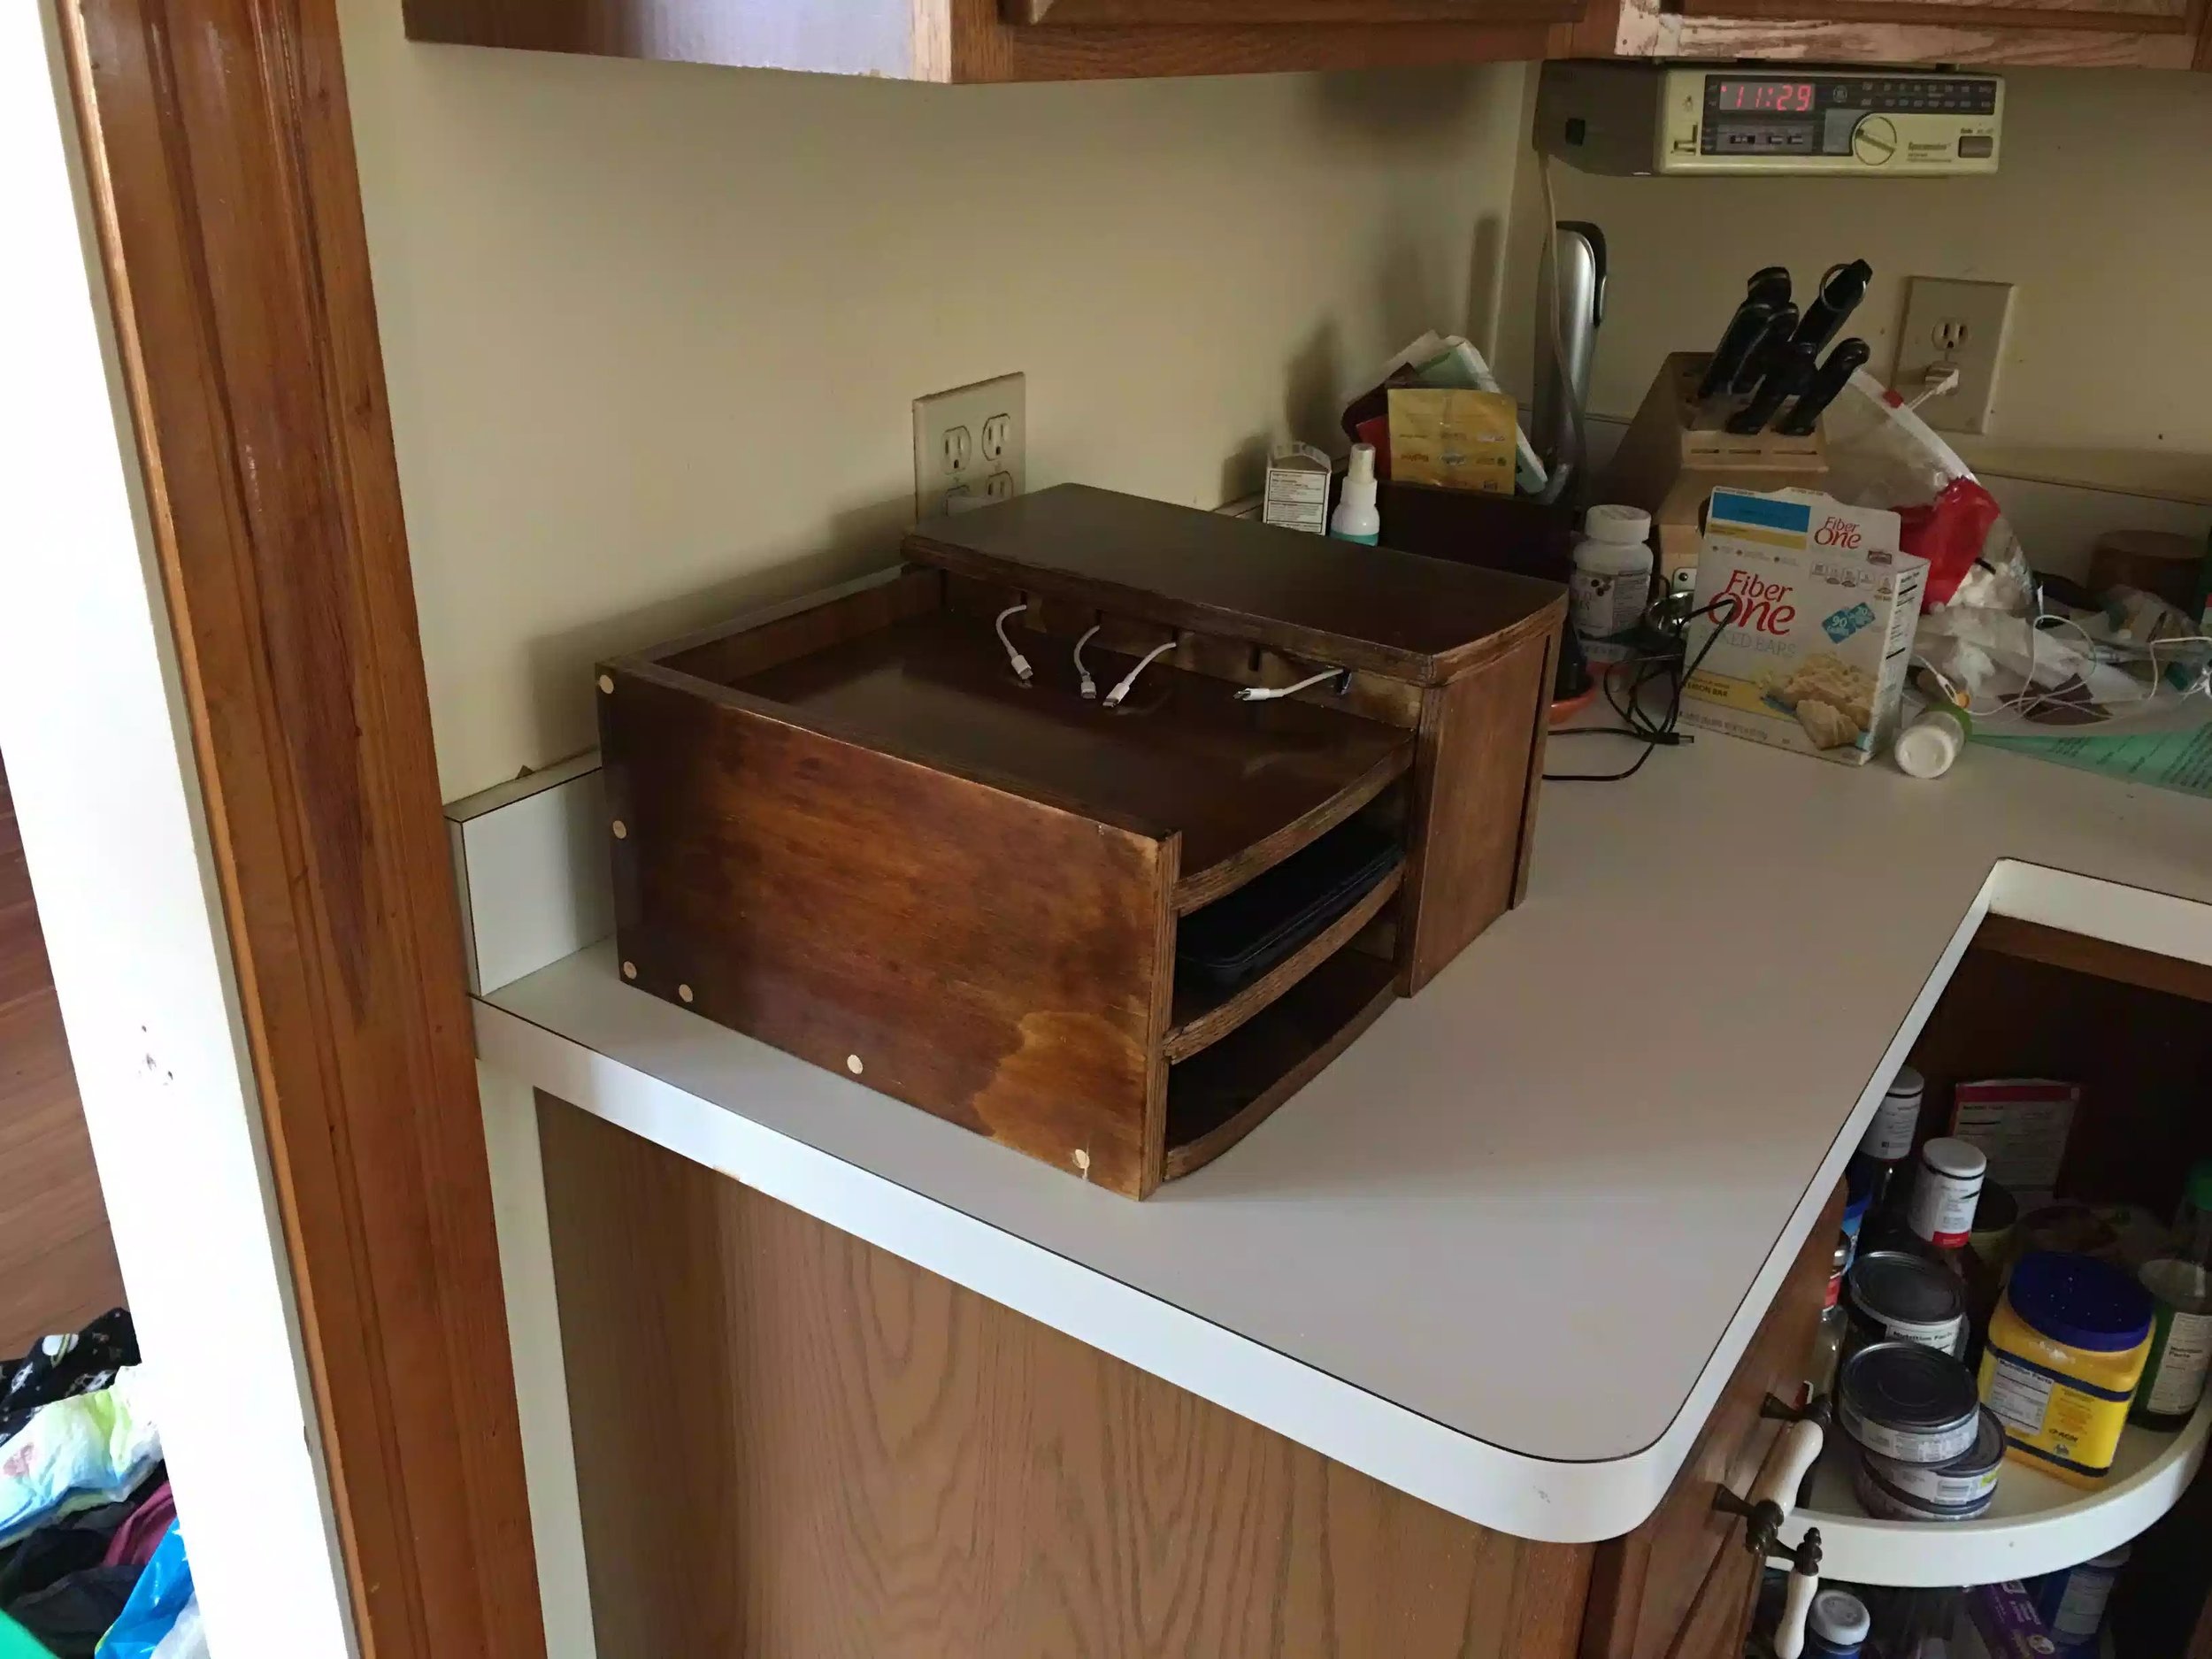
it came out ok I wasn’t happy with the sheet of plywood I had but used it anyway and stained it and applied 3 coats of Poly acrylic. I built it in about 4/5 hours taking my time I wasn’t in any rush and it probably took 3 days to stain it and apply the acrylic.
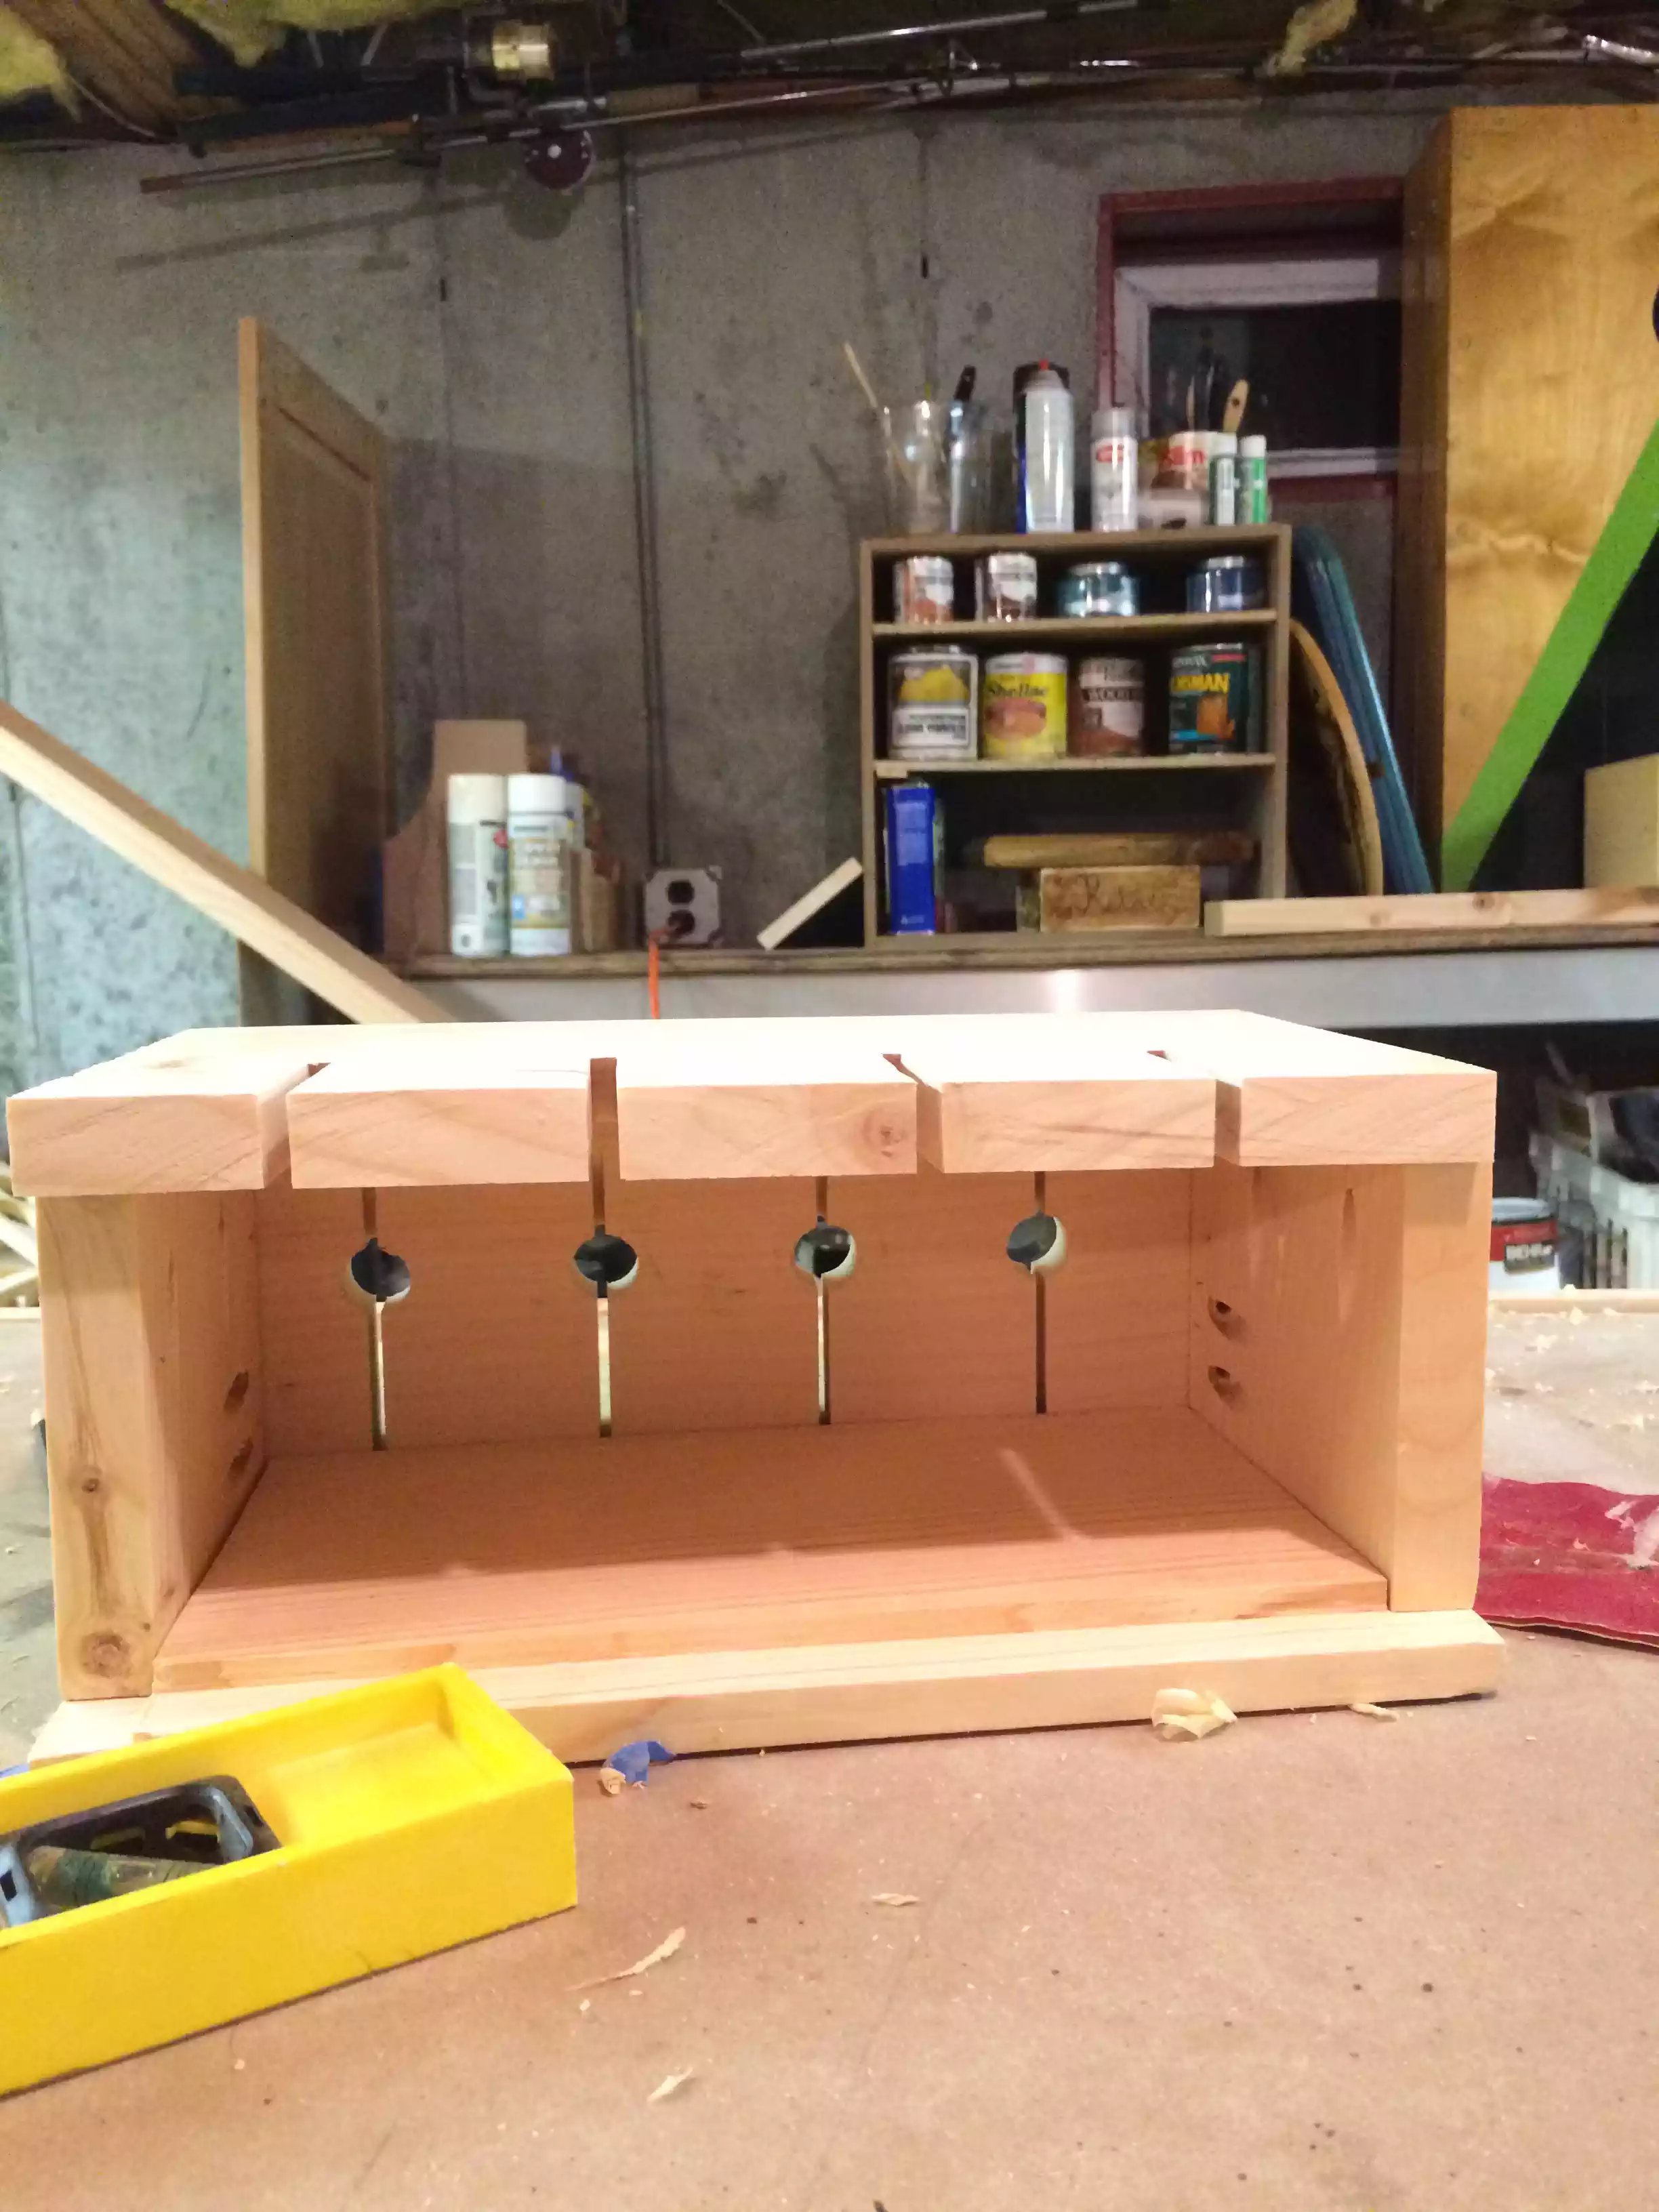
The front of the unit has a slight arc to it as I figured I need to put some design elements on it to distract from the plywood, in hindsight if I had solid wood lying around I would of built out of that.
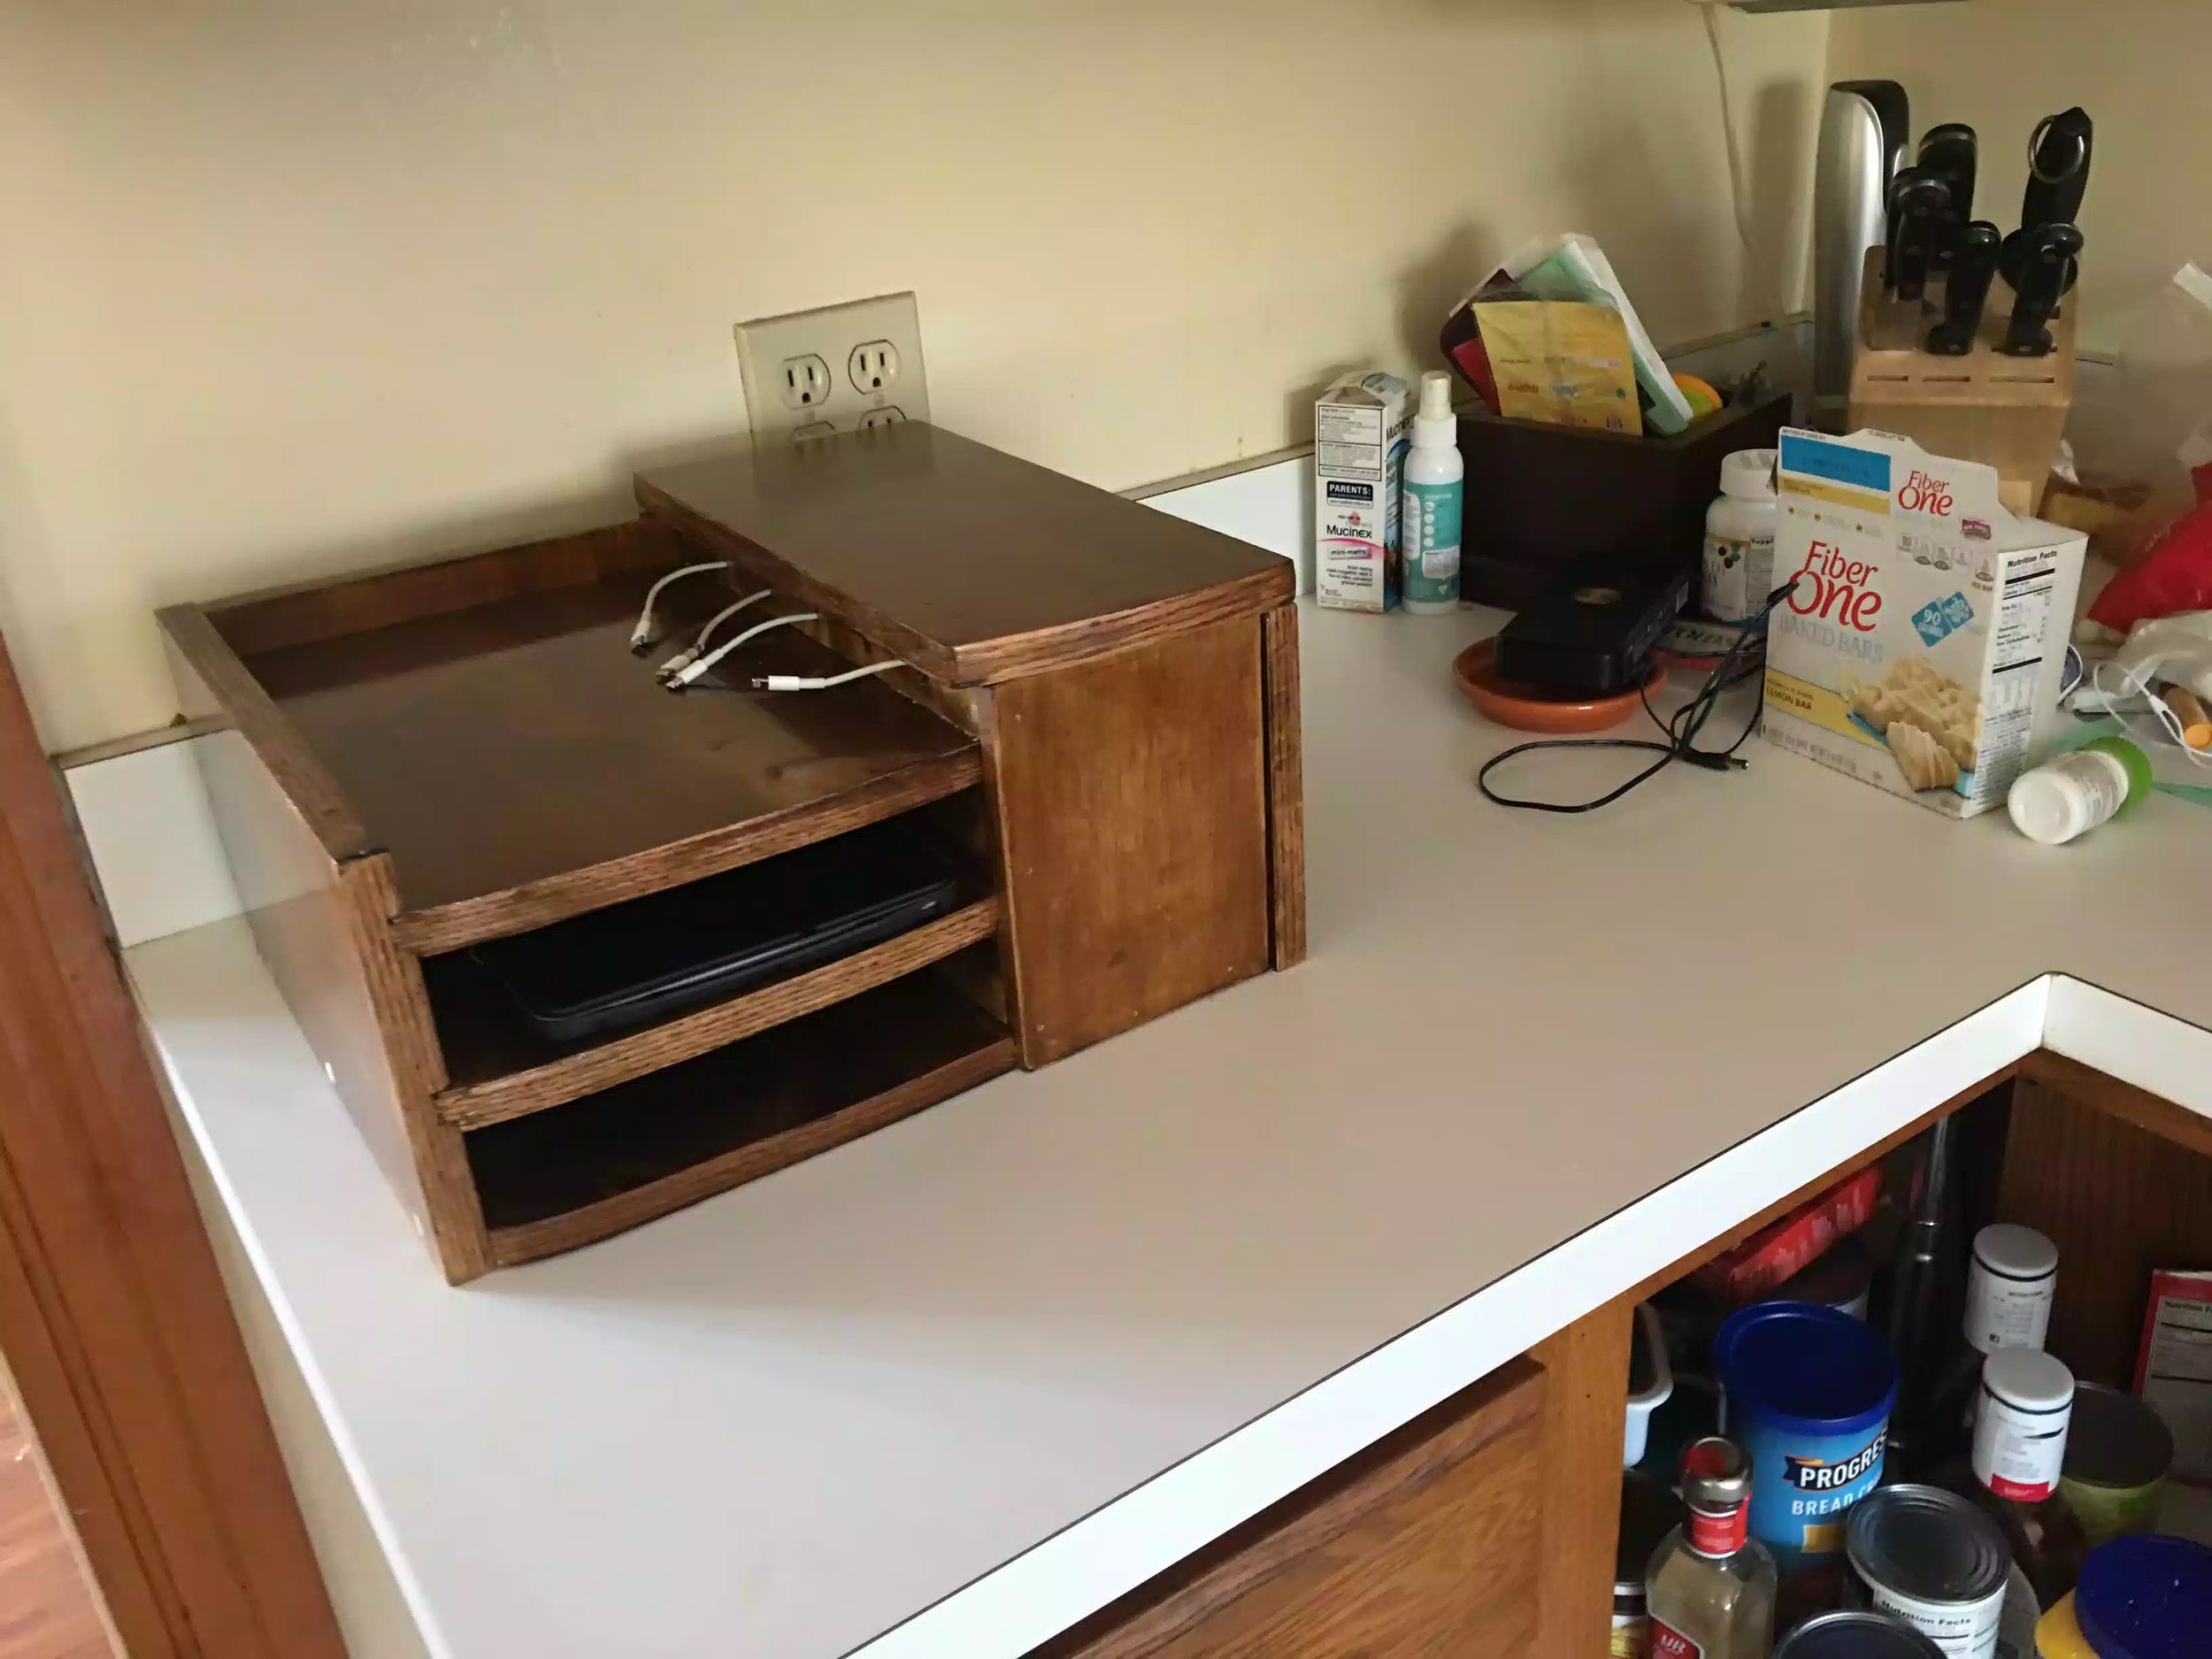
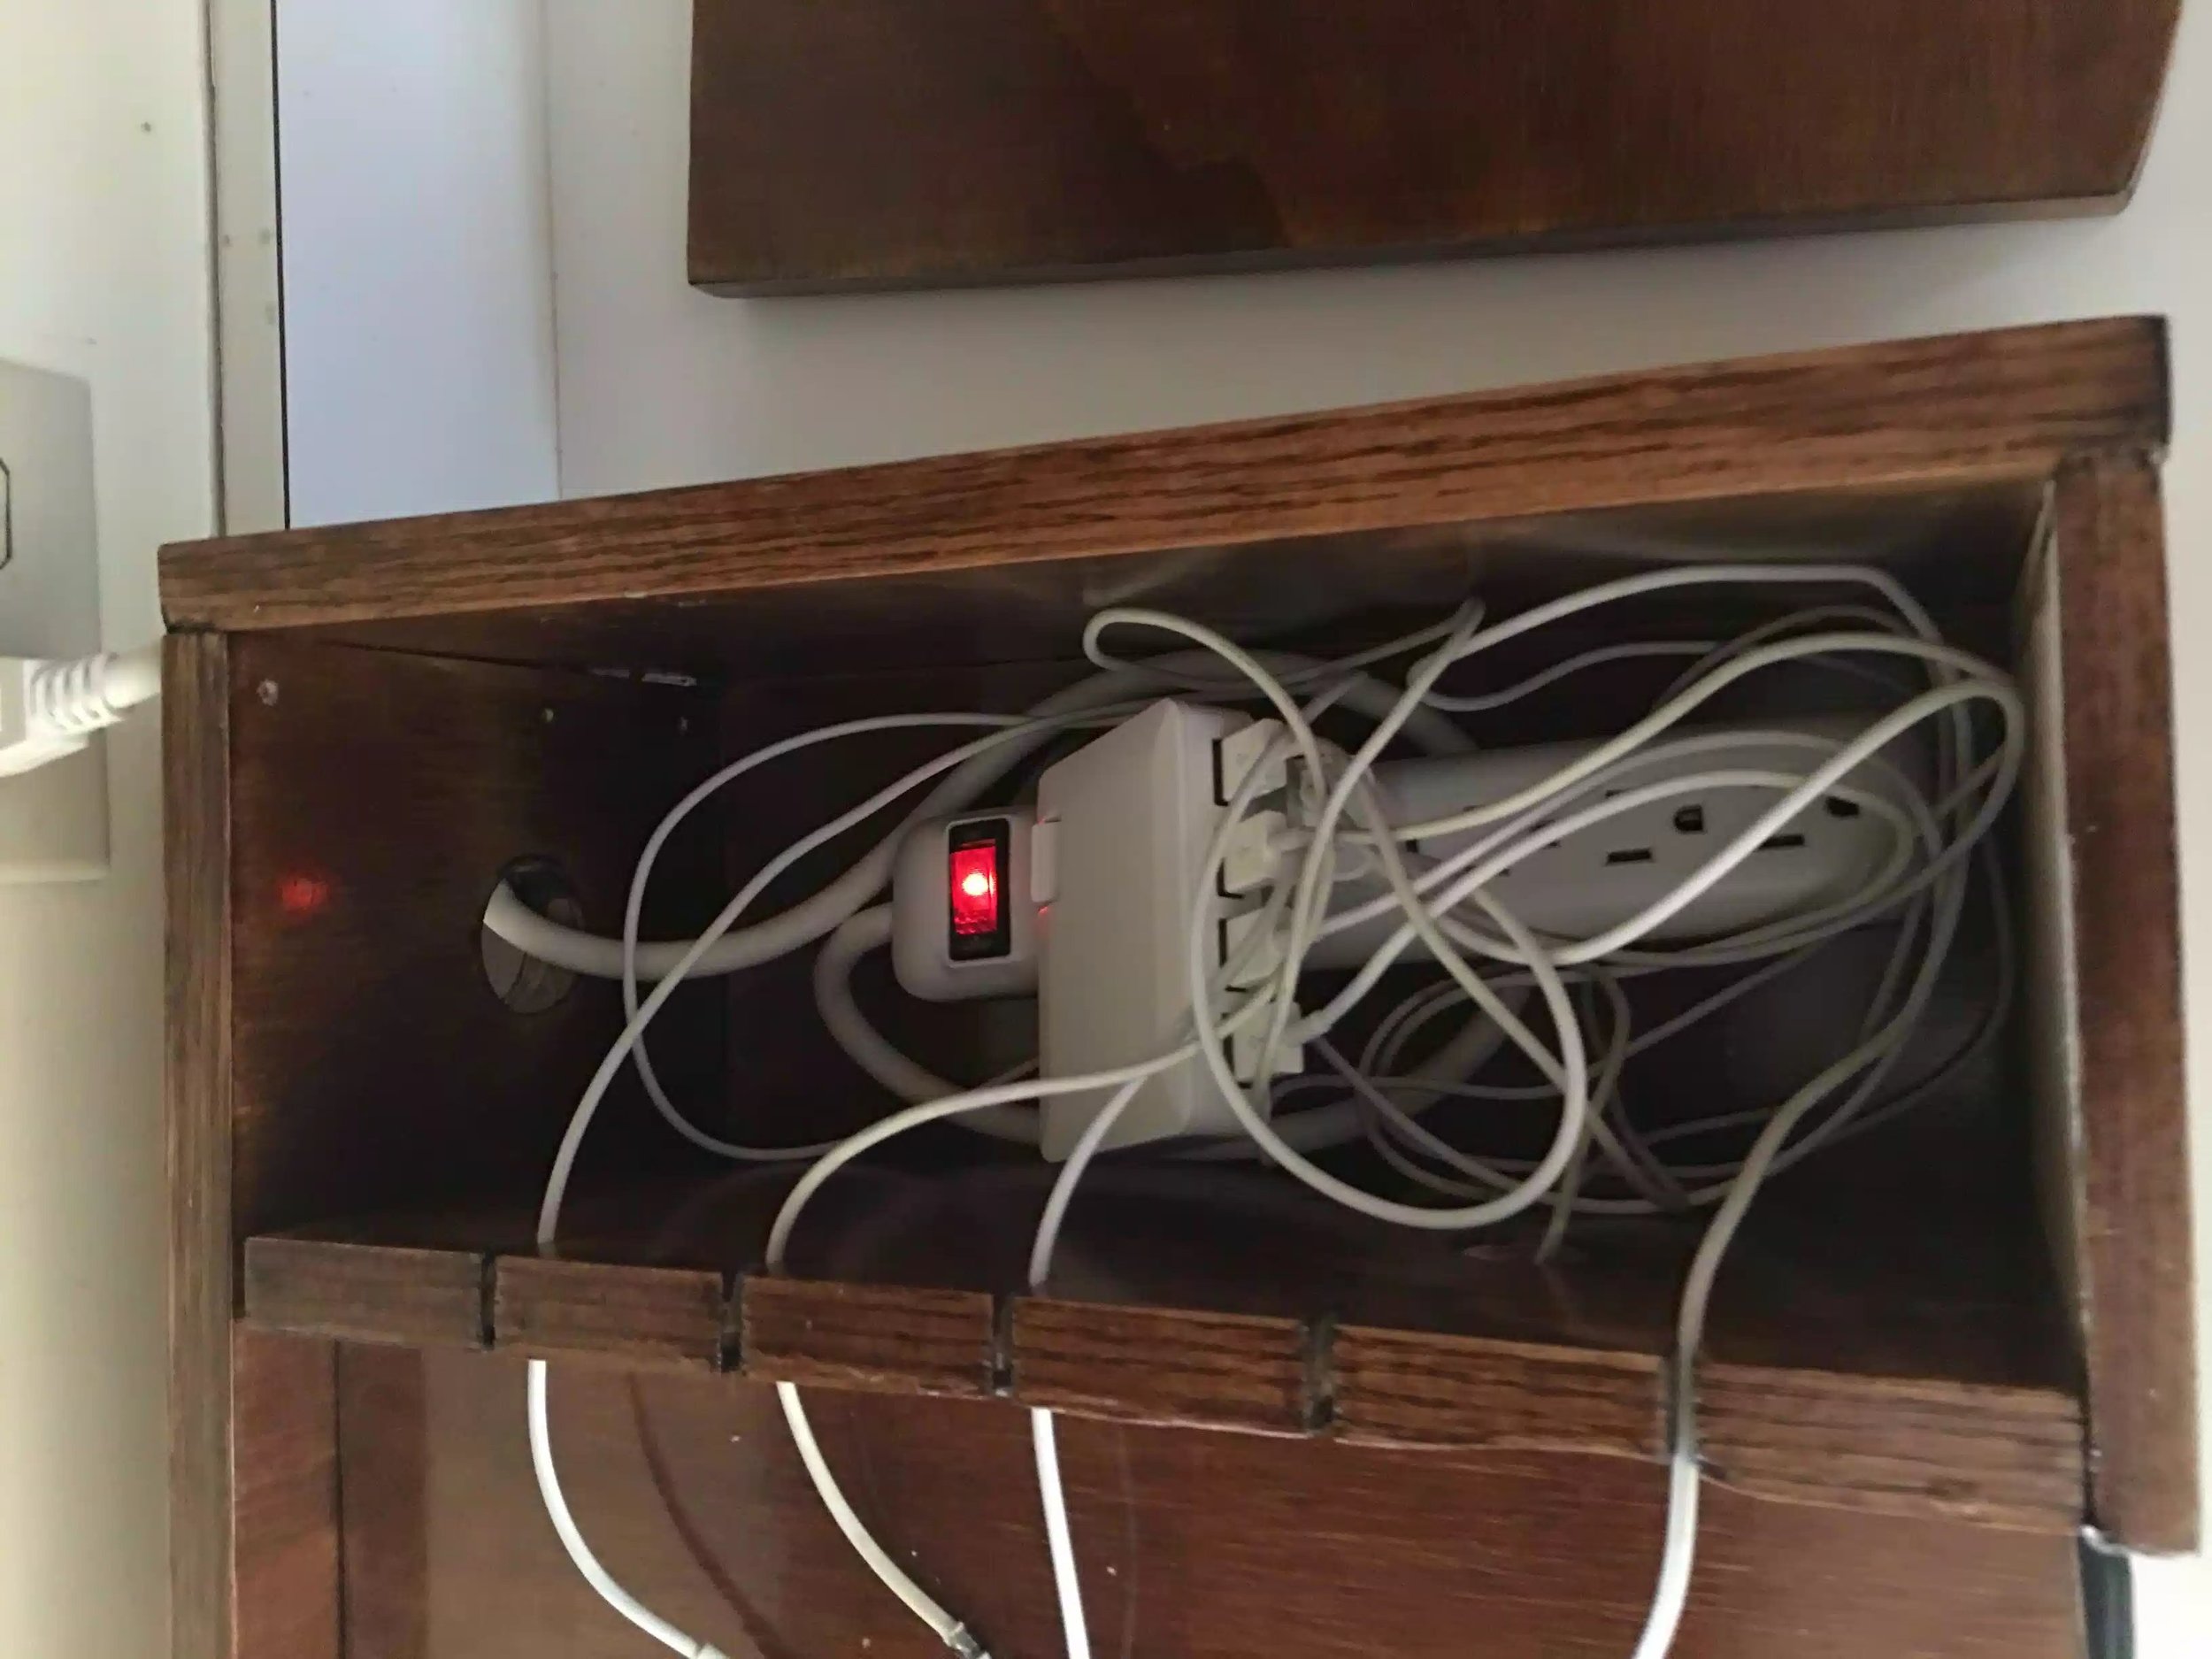
All the cords are kept contained on the right side of the unit when a power-strip is contained and an almighty mess of charging cords is in there (out of sight, out of mind) what I do like about is 2 things the last unit I made I used 1/4” plywood for the back panel and it subsequently warped inside the dado I had placed to keep the back aligned. The second thing is I can easily remove a cord if needed or when my son needs it to charge is iPod when he is on the computer, drove me insane when he went at the older model, it looked like a bomb hit the unit.
The unit can hold 4 IPhone and 2 IPad and if you don’t have 2 IPad you have a shelf to put papers in or as I do I keep the box tops for my sons schools.
What I hate doing is using the iron-edging from the home depot its such terrible quality because when I was ironing it on and then removed the tape I used to temporarily keep it in place, it ripped some of the fibers of wood.. I need to buy better quality … maybe woodcraft is better.
Anyway I hope you like it and perhaps maybe gives you some inspiration in building it or something like it.
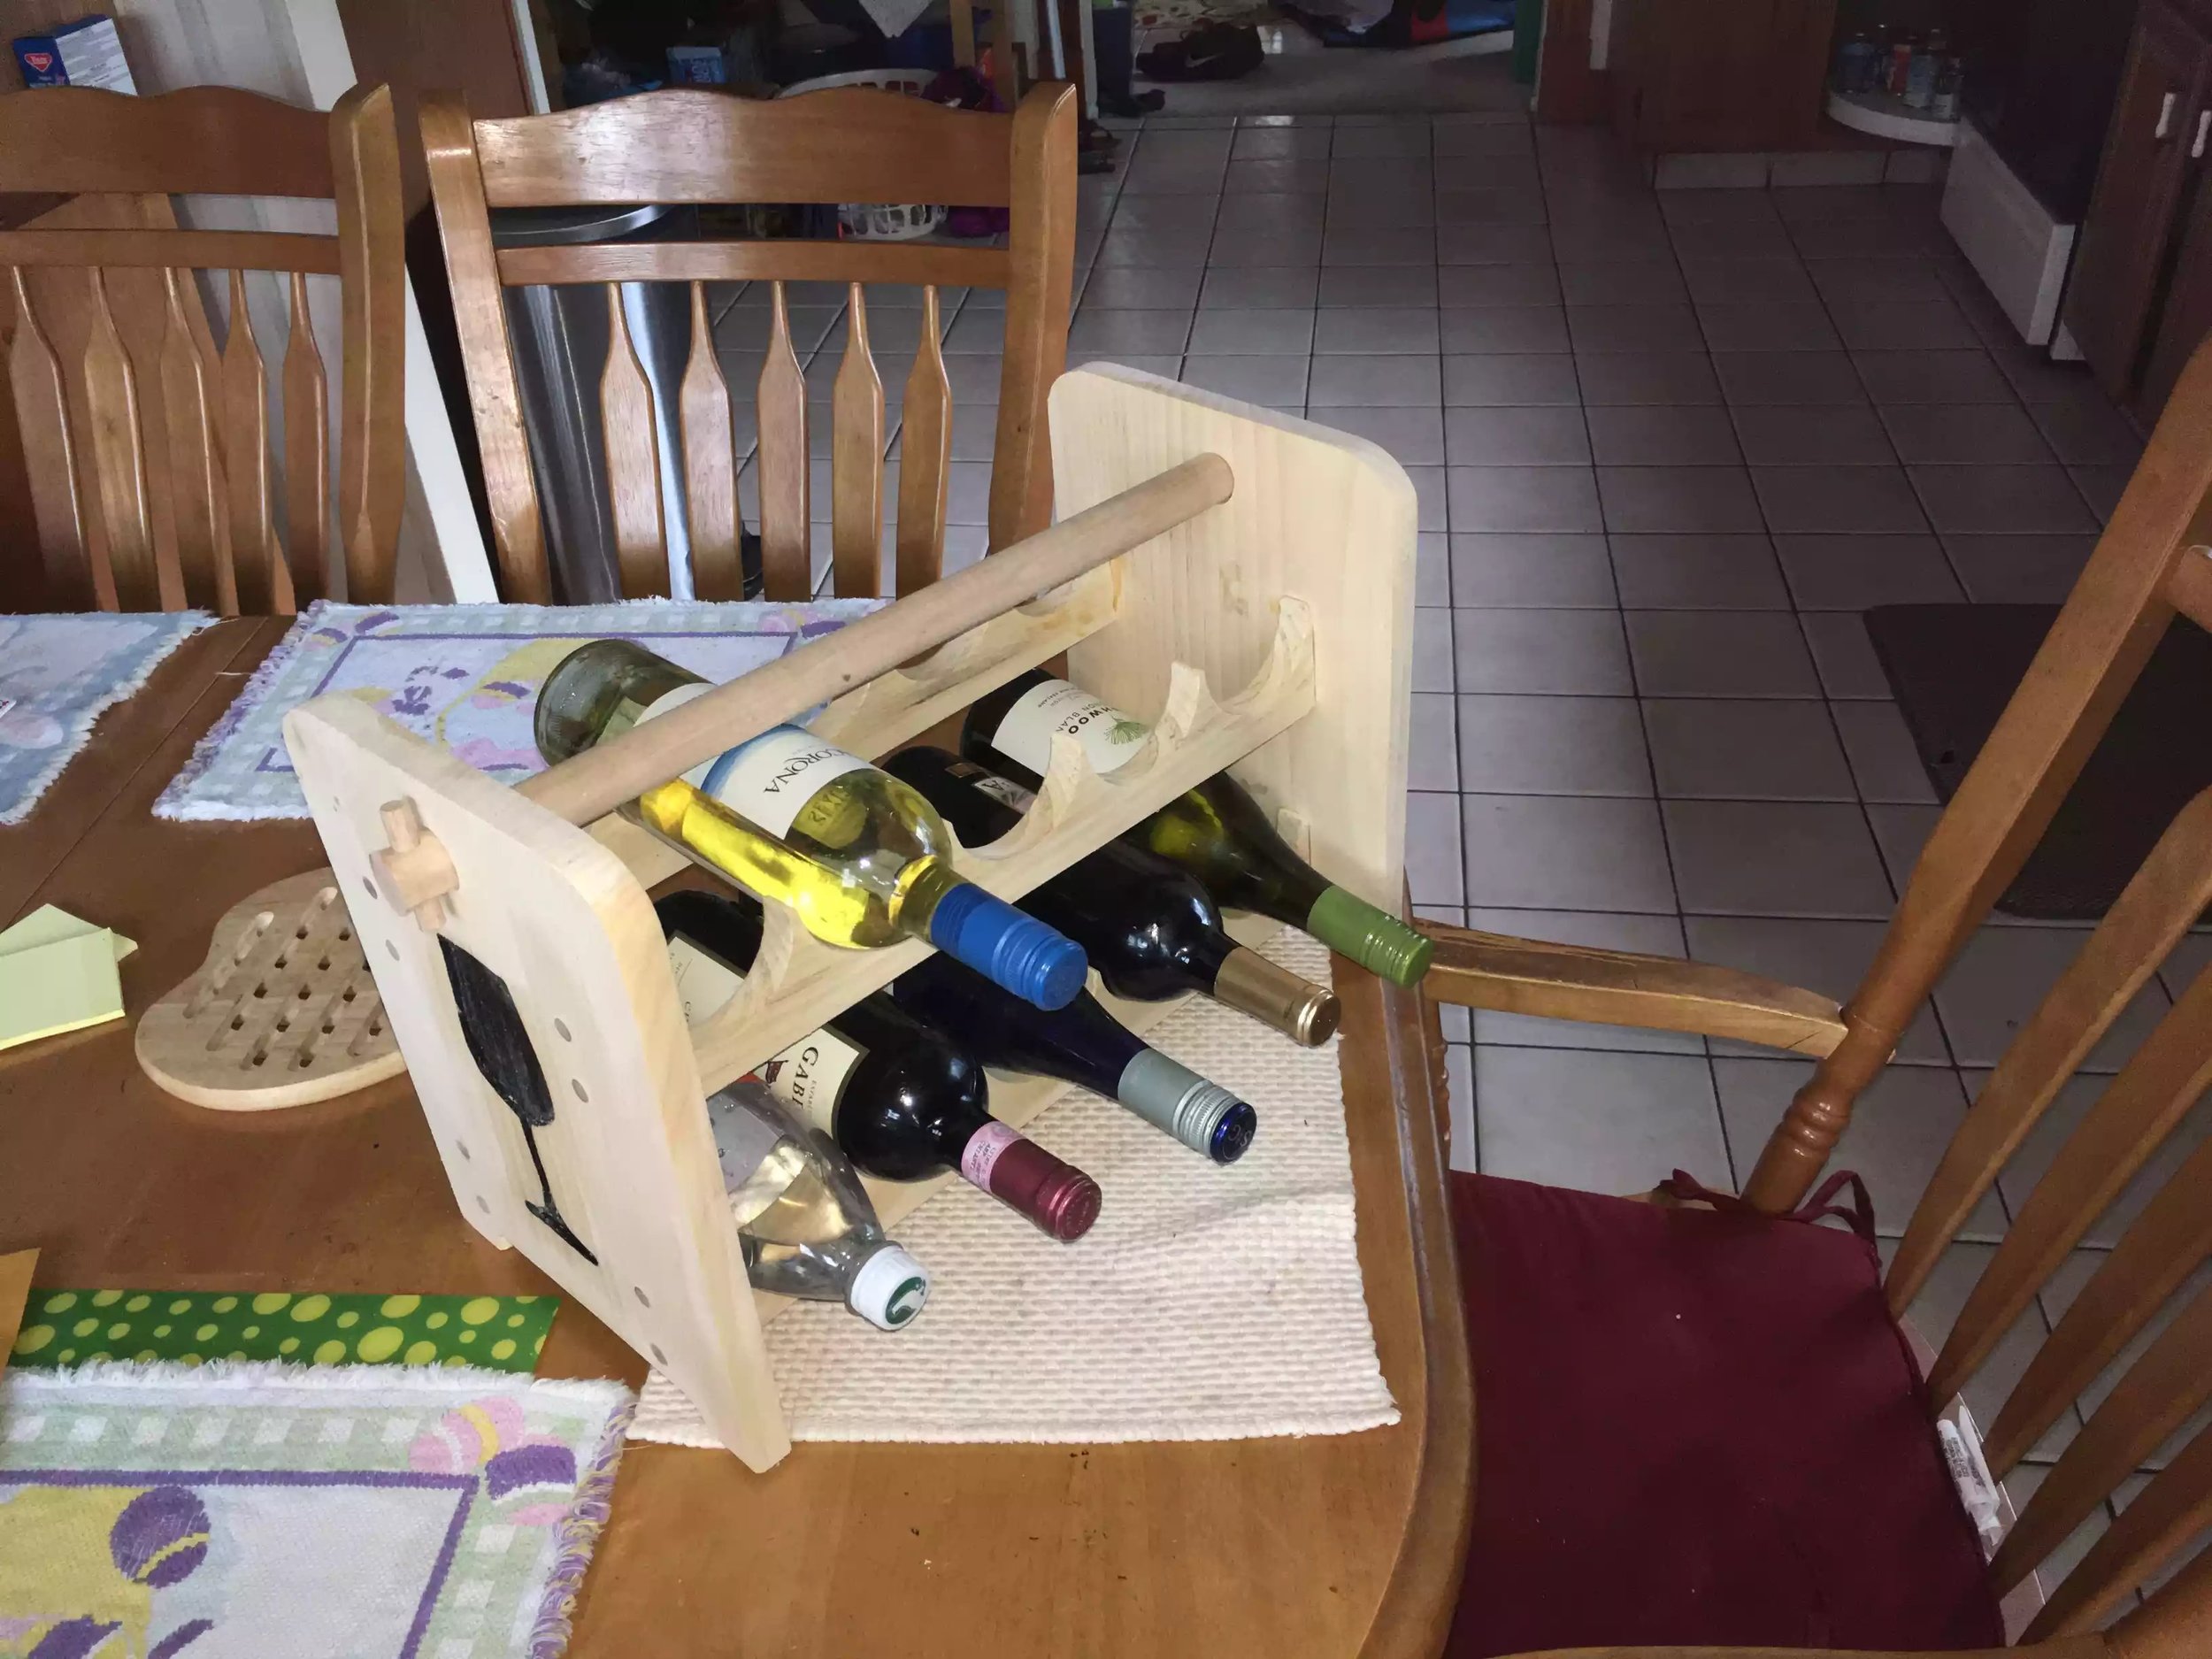
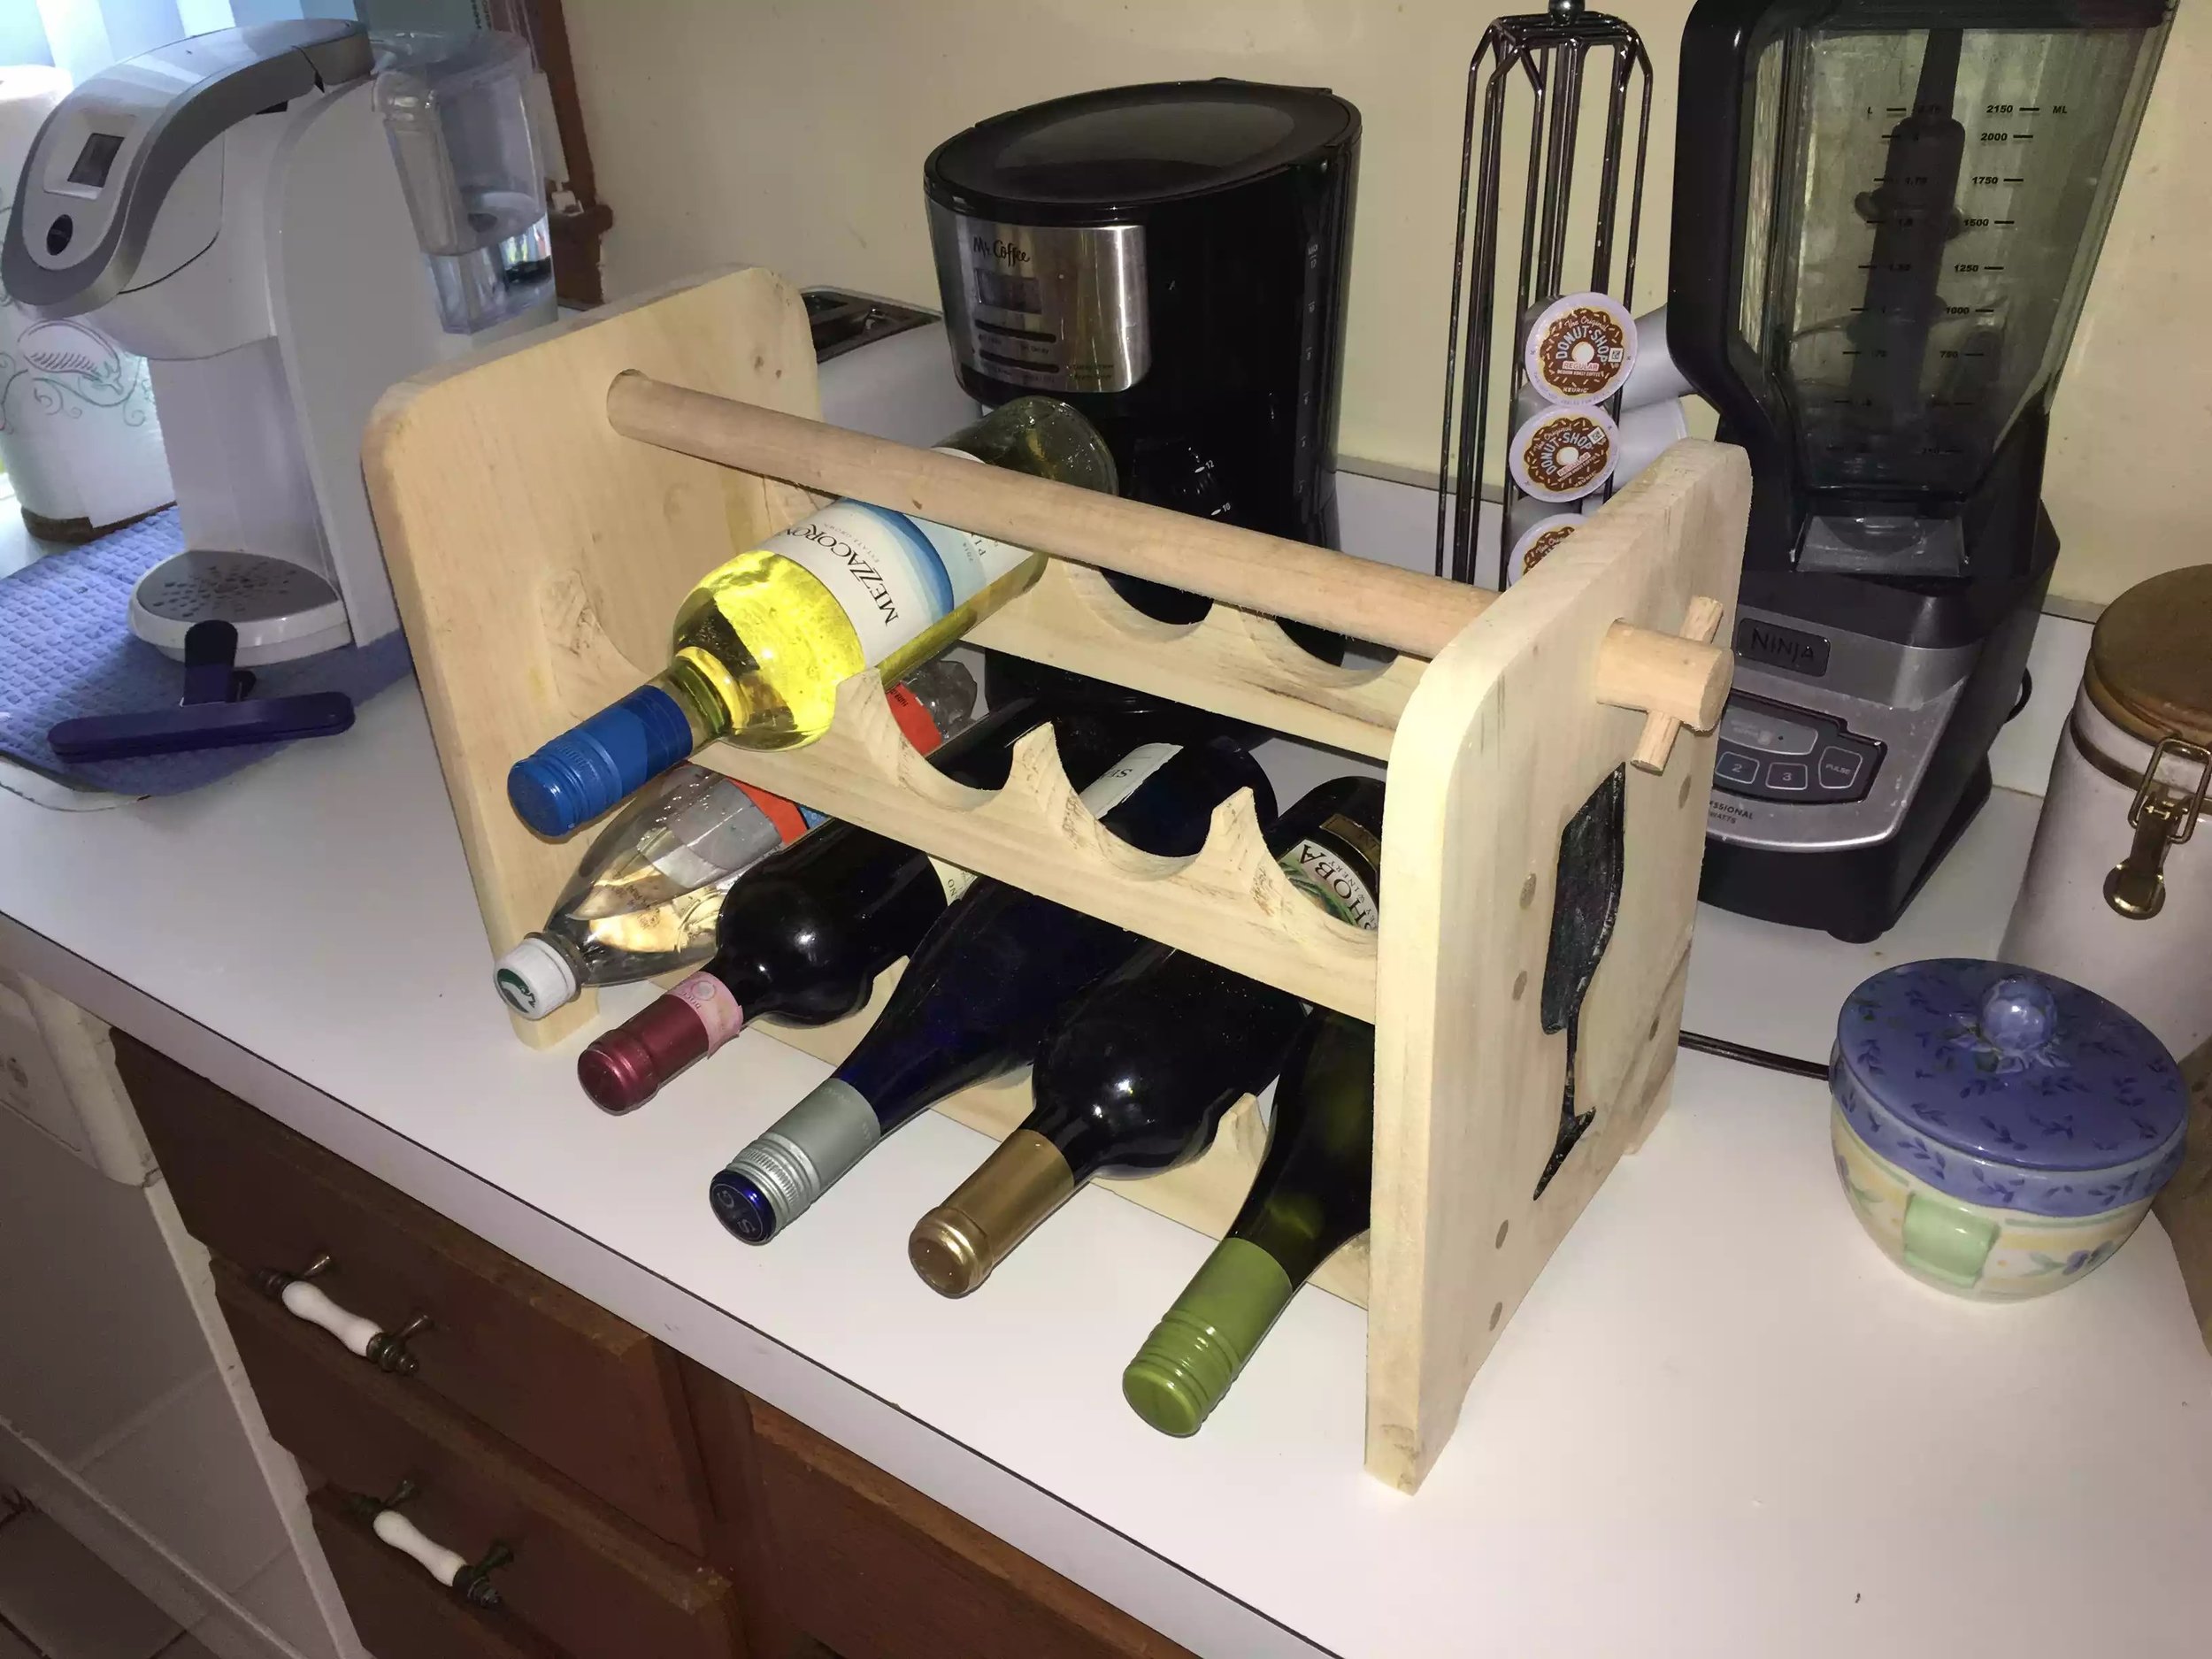
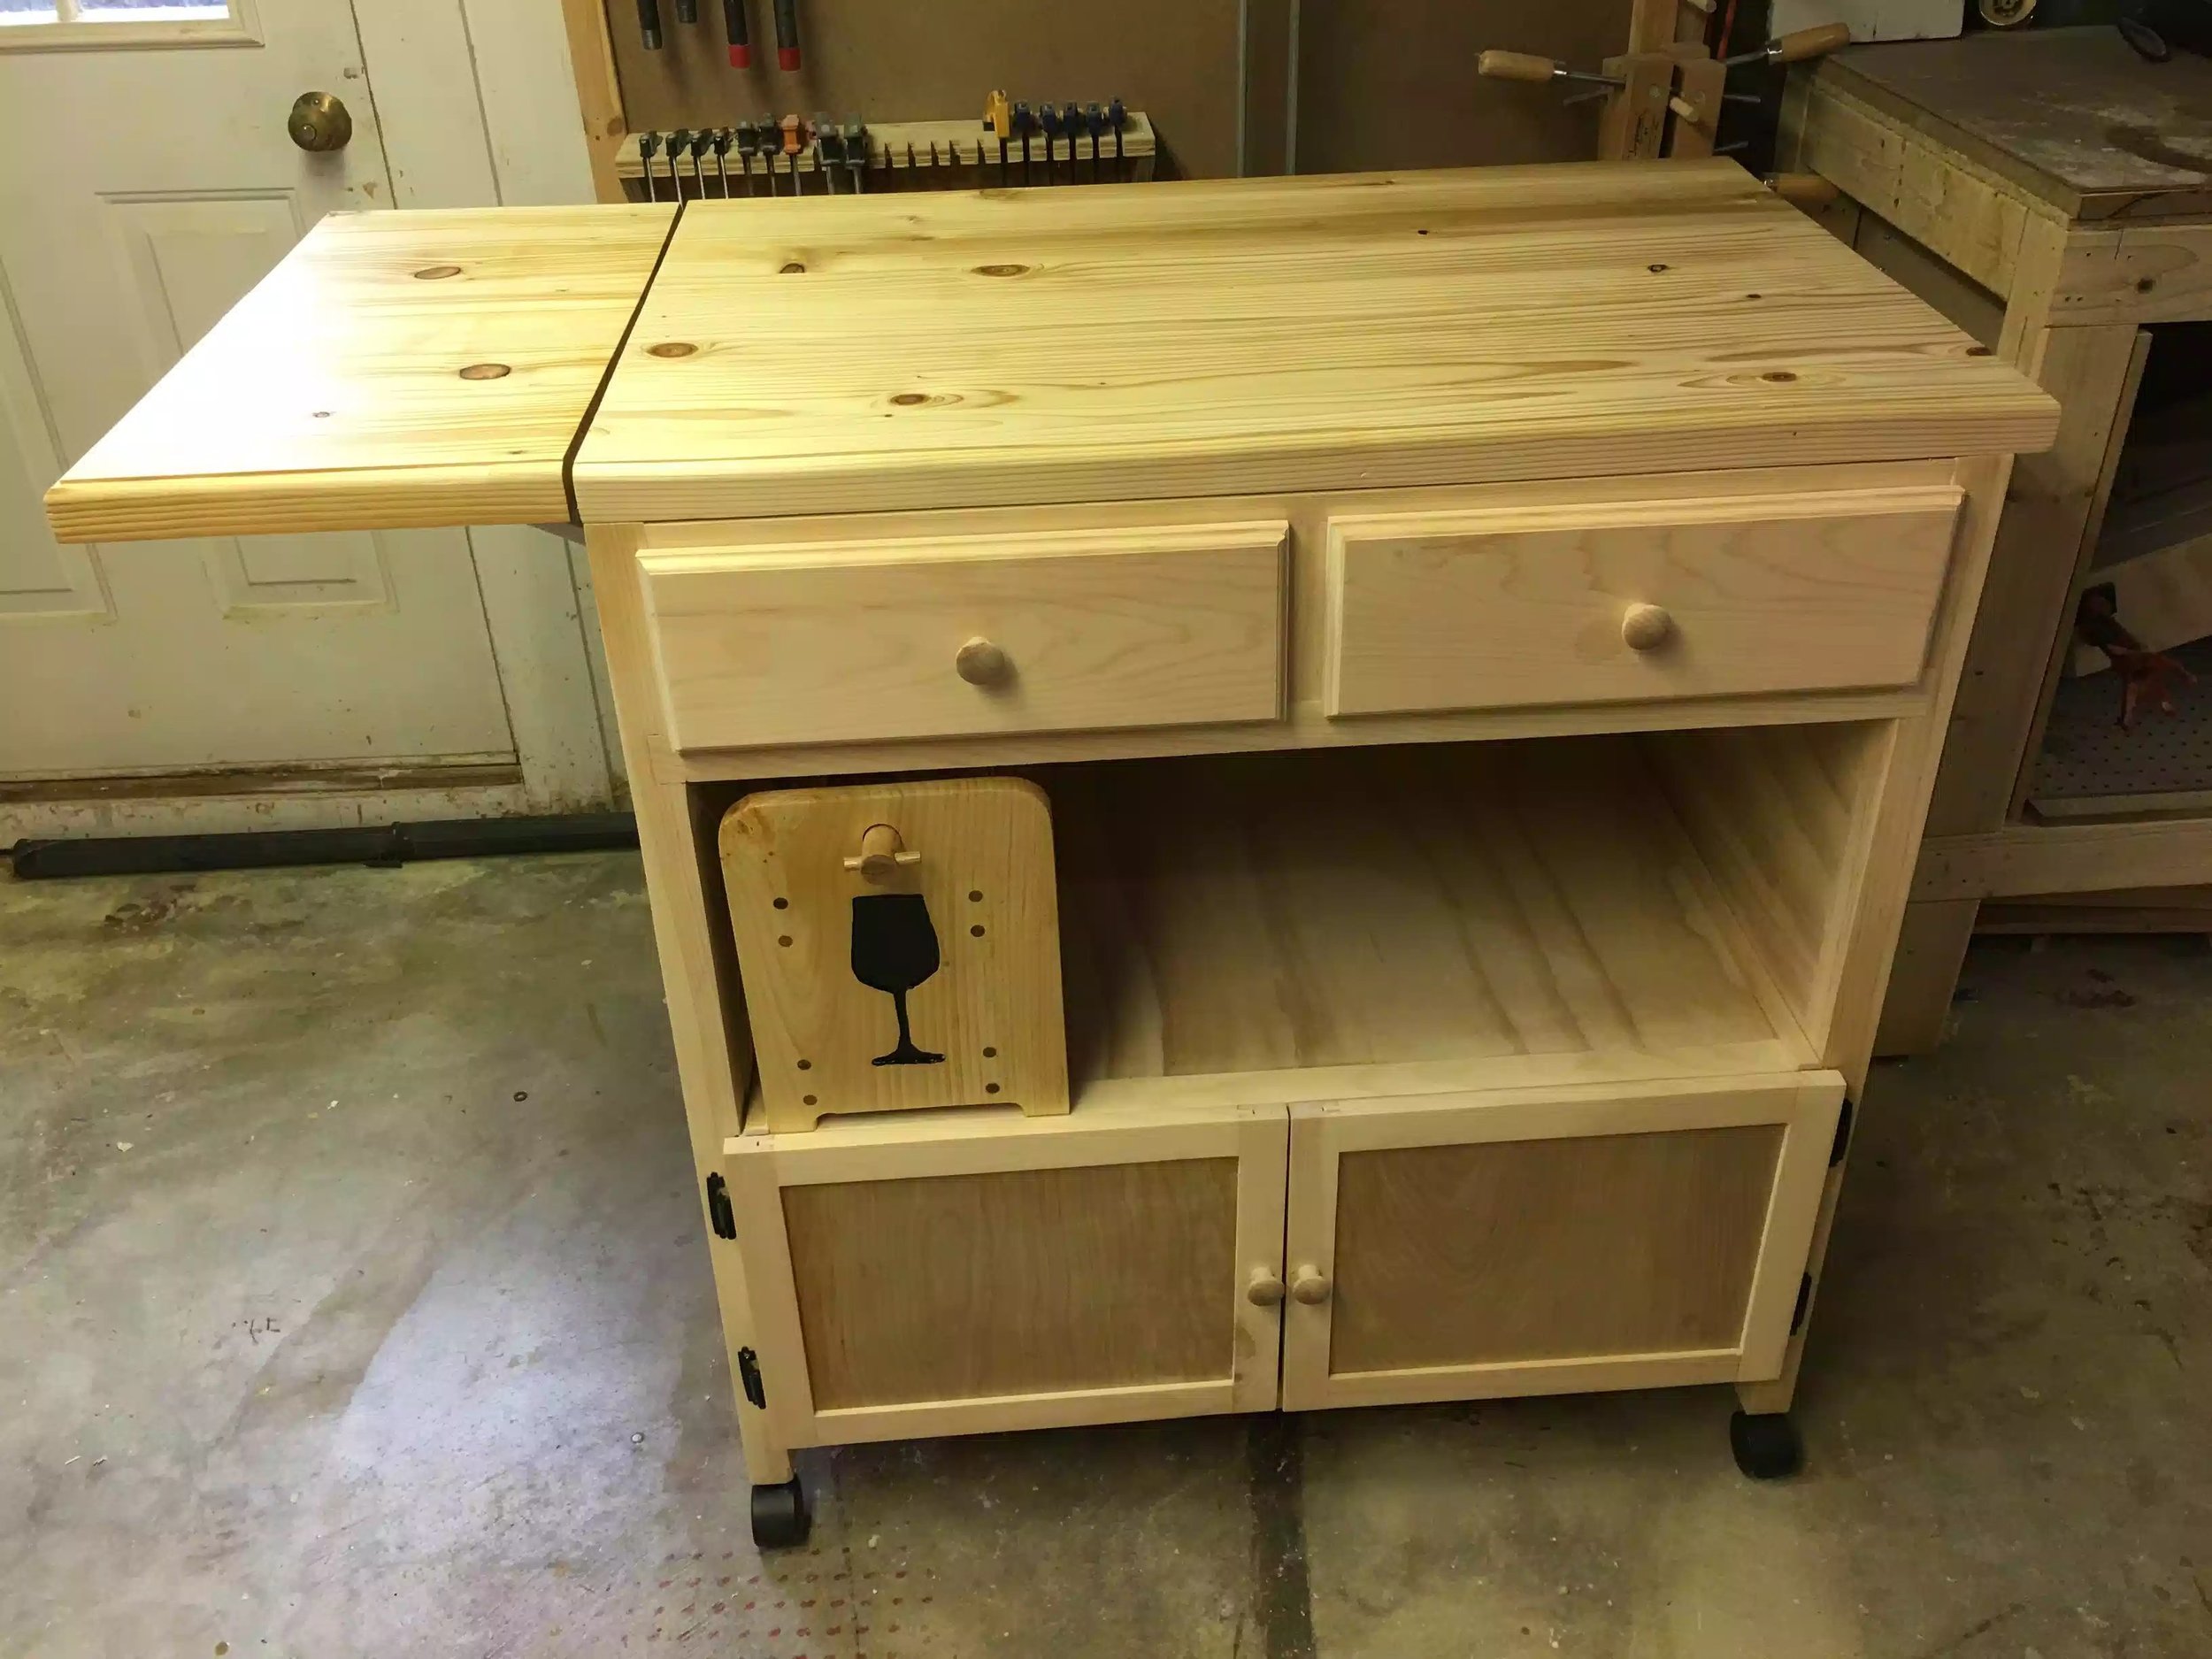
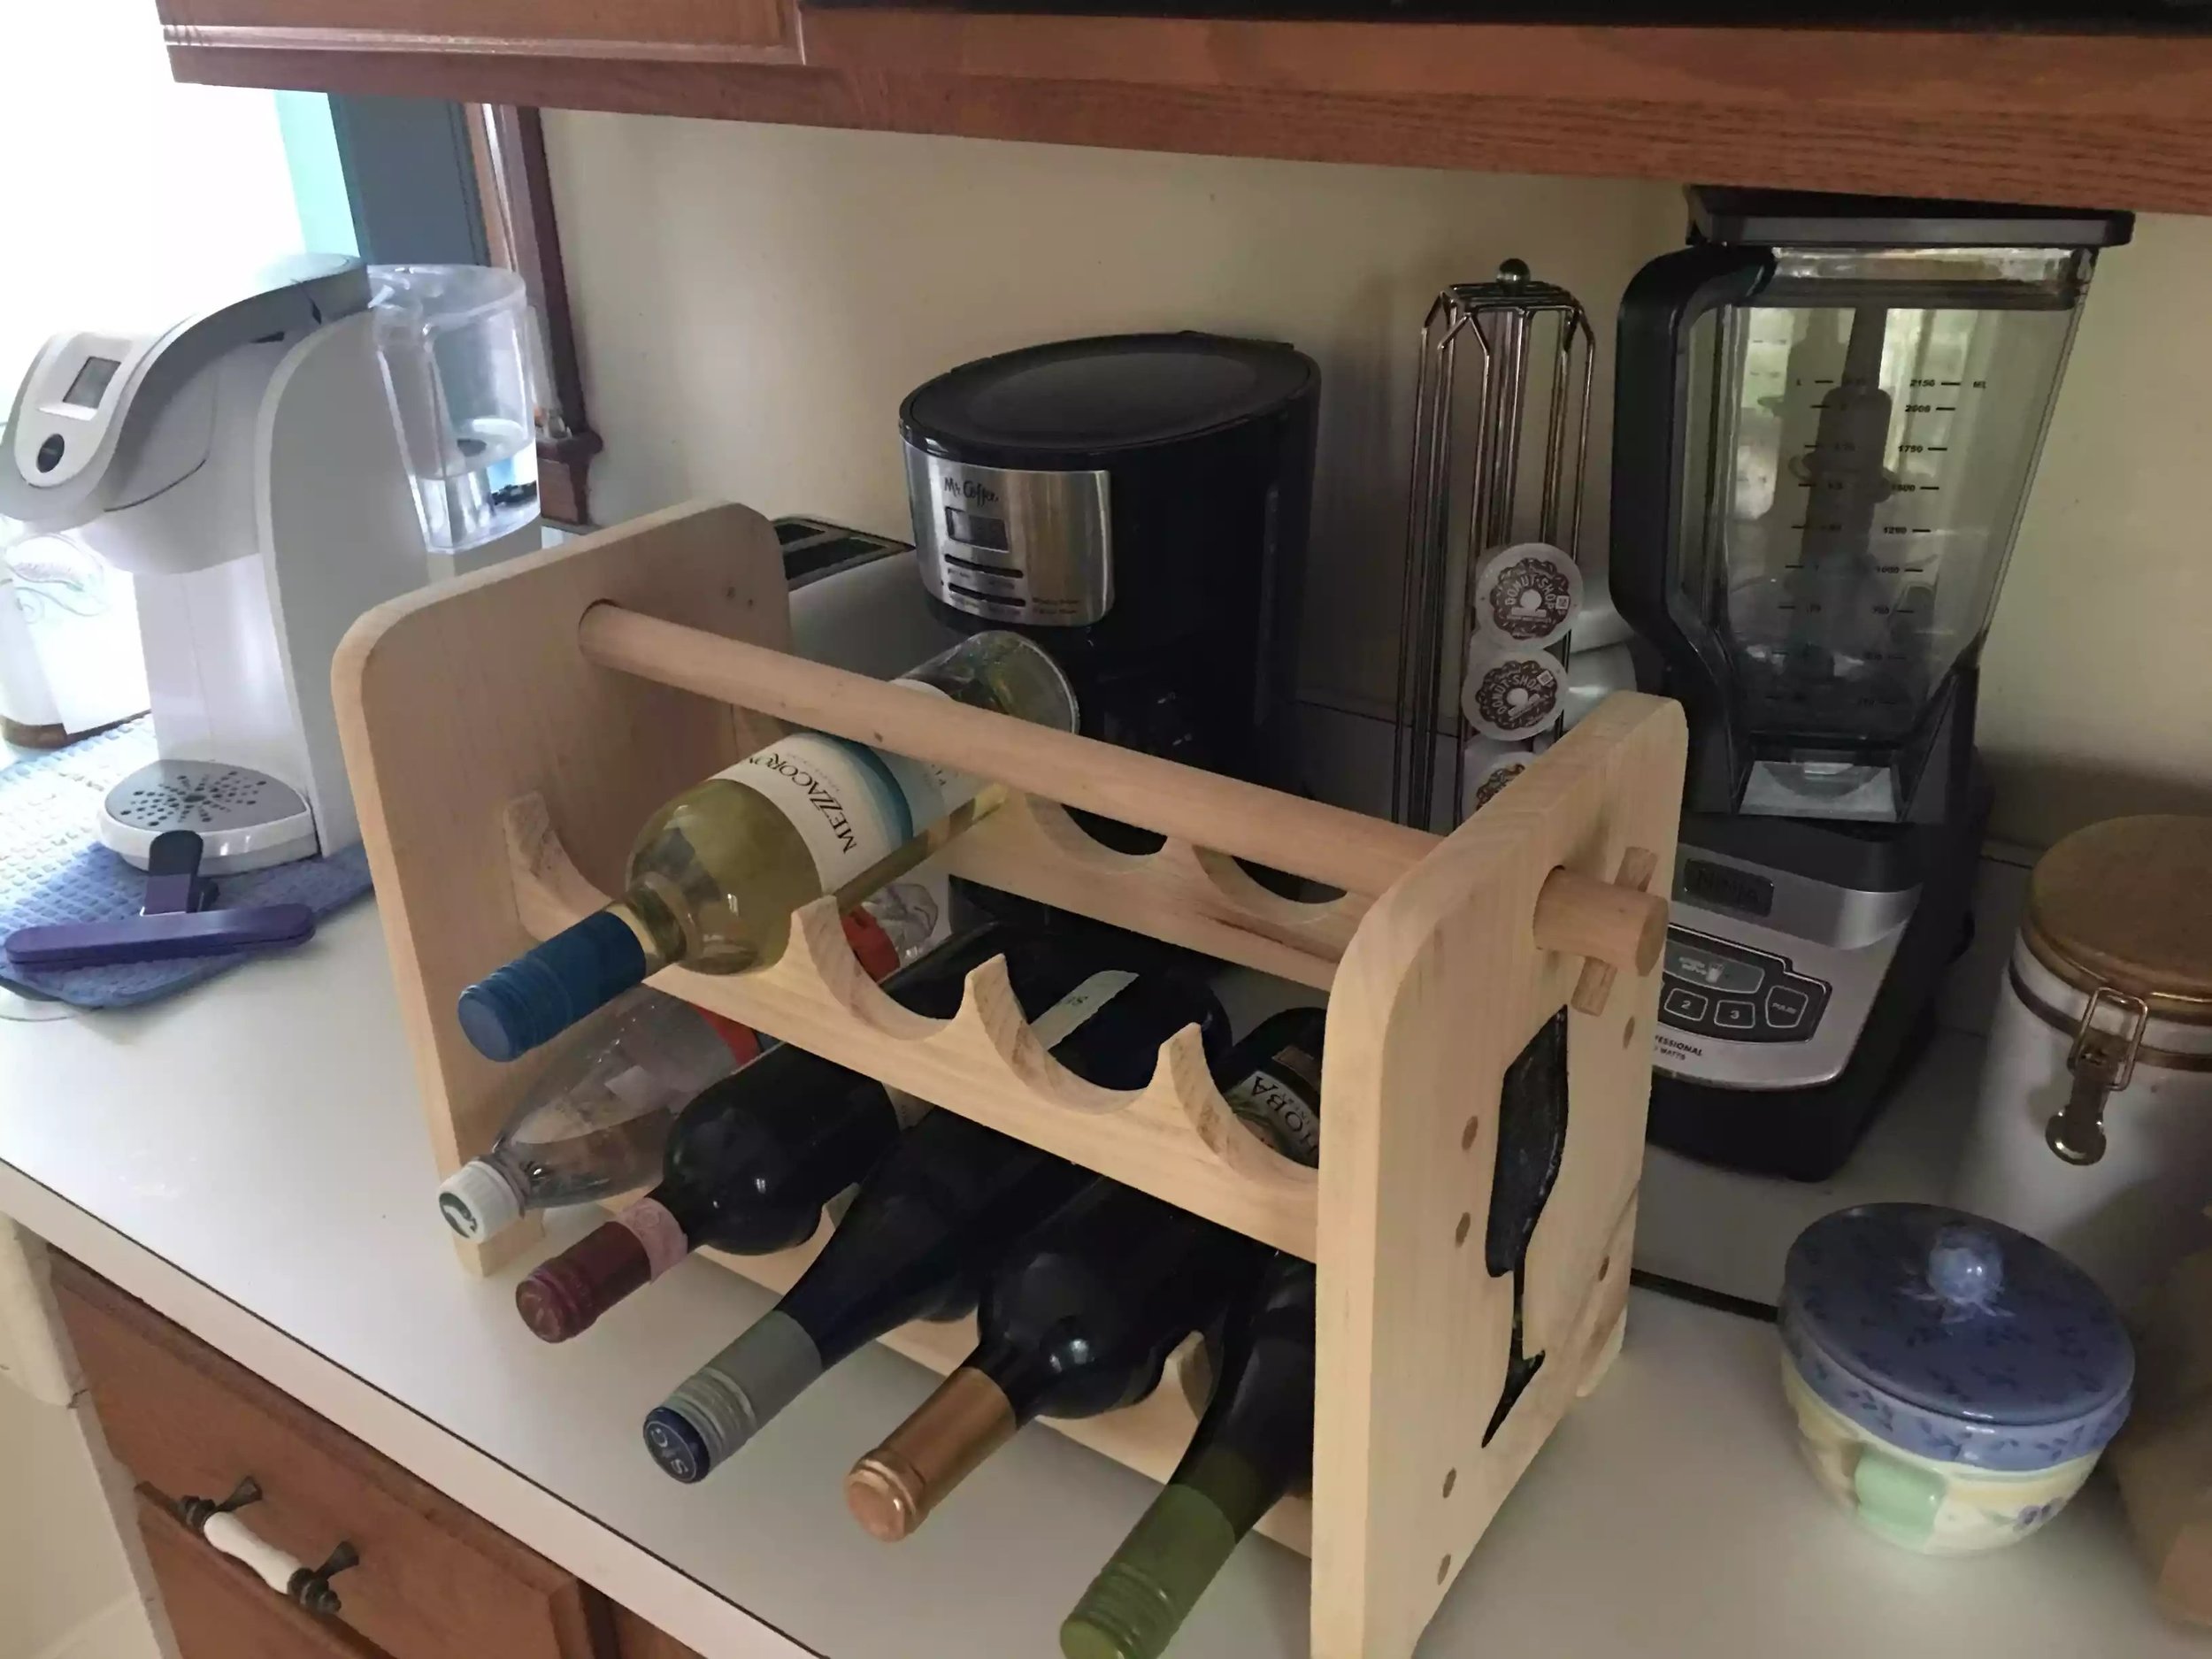
PORTABLE WINE RACK
Someone at work asked me to build a kitchen island with a wine rack .. but the wine rack needed to be portable and so this is what I came up with ..
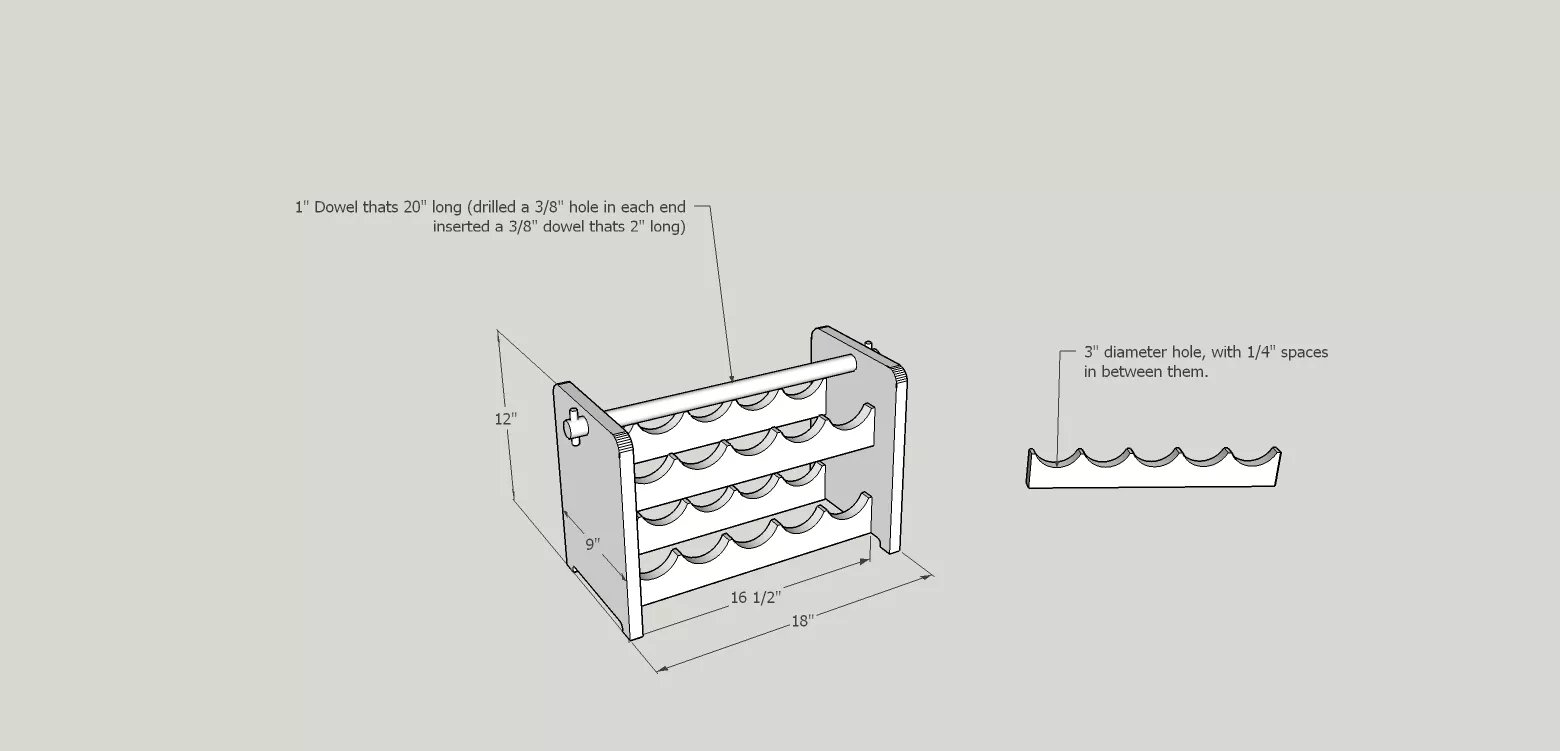
Materials
1×12x4’ of pine
4’ length of 1” dowel
2’ length of 3/8” dowel
Tools
Router ( I used a palm router, love it)
Drum sander
Drill driver
Table saw
This was a fun little project:
Step1. Was cut all pieces to size
Sides 9” wide x 12” tall, wine holder rails 2.5” x 16.5” wide
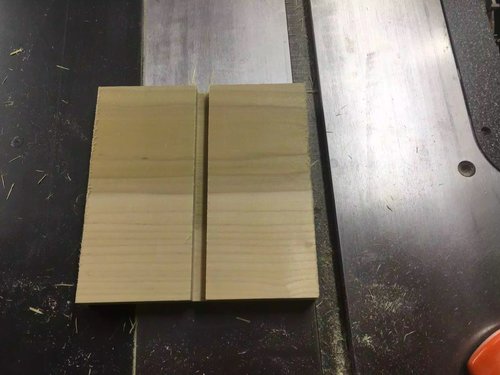
Step2: using my table-saw I ripped a a piece of 1×12 to a little over 5” wide.. then took the 1×5 to the drill press and used a 3” hole saw and then completed 5 holes on each piece 10 holes in totals and then ripped the board down the middle so as that I had even semi circles to which the wine bottles would sit on.
Step3: used my oscillating sander to smooth all edges and used my router to give a 1/8” round over of all edges
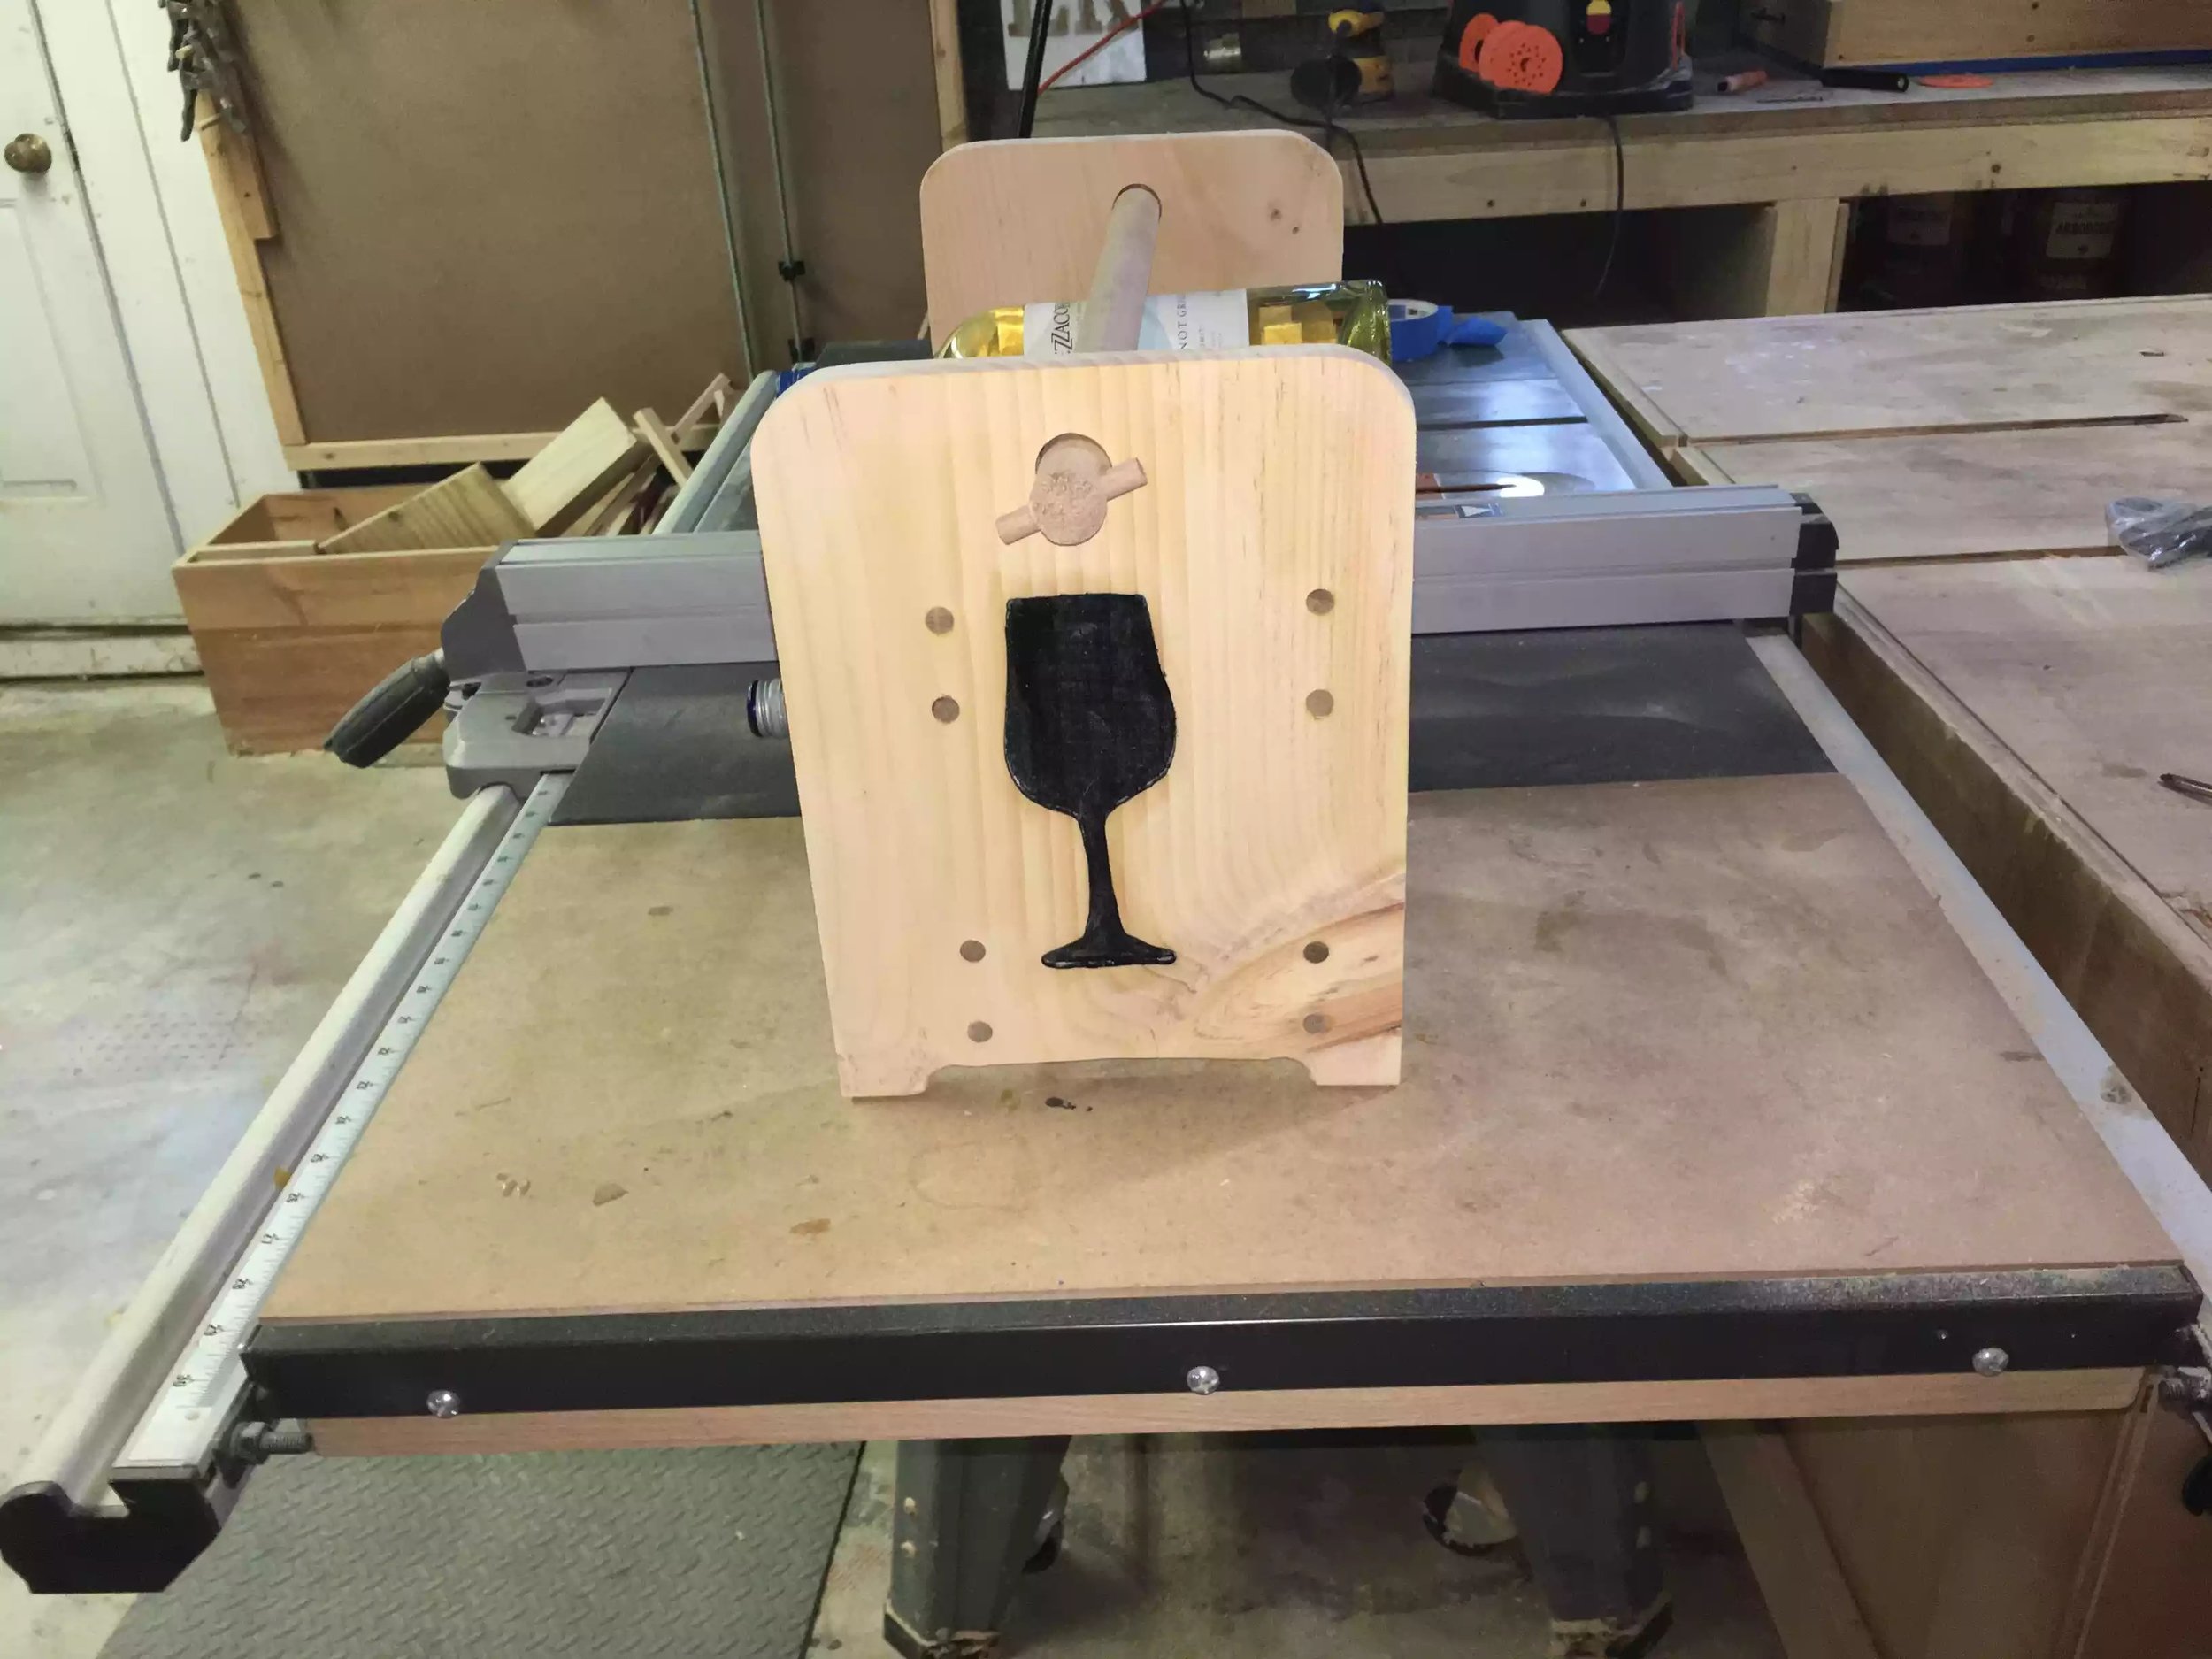
Step 4: found a wine glass templates online and drew it onto the sides and went to town with my palm router
Step 5 screwed all pieces together and plugged the holes with oak
Sanded to 120 grit and finished it with2 coats of poly-acrylic ..
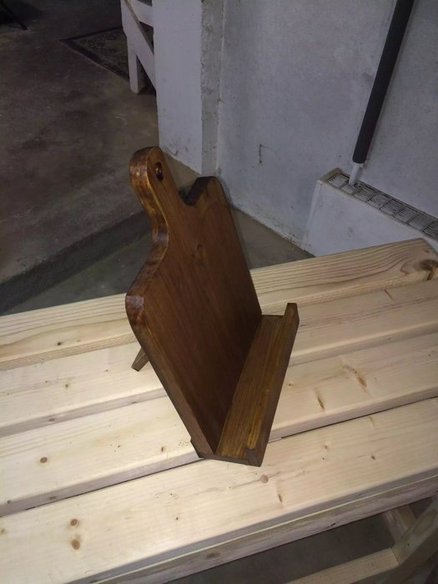
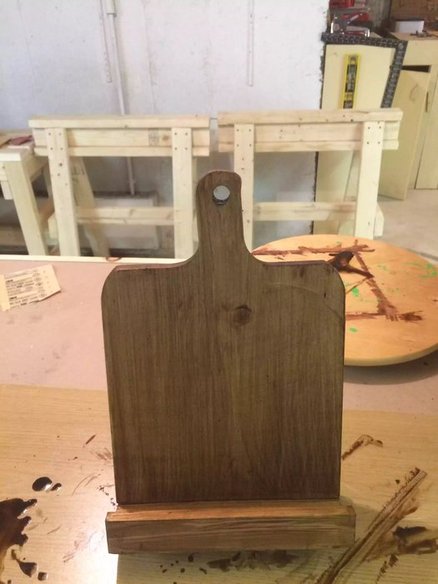
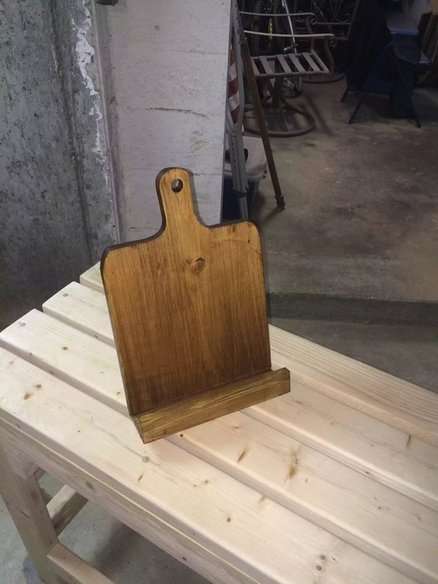
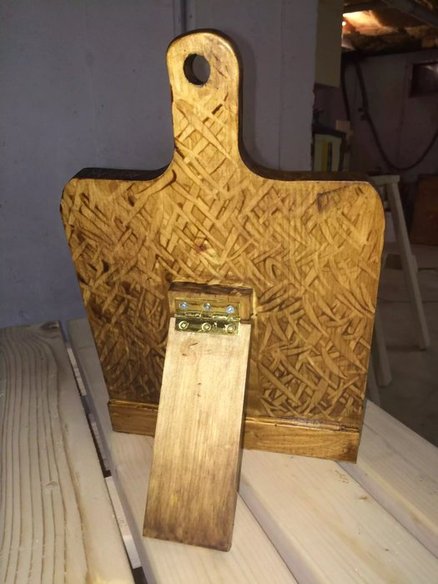
cookbook stand
I made this for my wife's birthday in 2015 and she likes to cook and is always looking for new recipes to try out and its either pages, printouts or the Ipad on the counter.. So I decided to make this for her and I have to say it was easy to build and I finally got to use my drum sander attachments for my drill press and oh my god I love to sand now…. lol..
Hope you like it.. I created a blog you can see here on my step by step progress…
RECYLCING CLOSET ORGANISATION
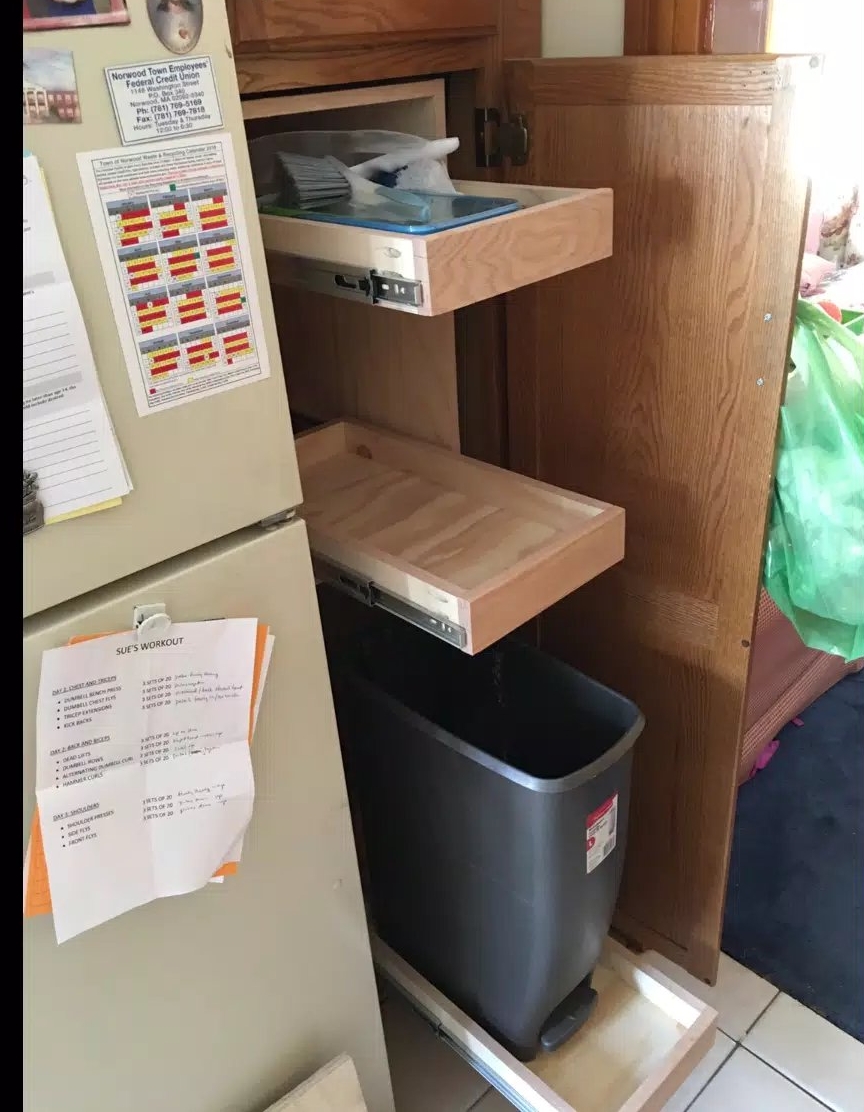
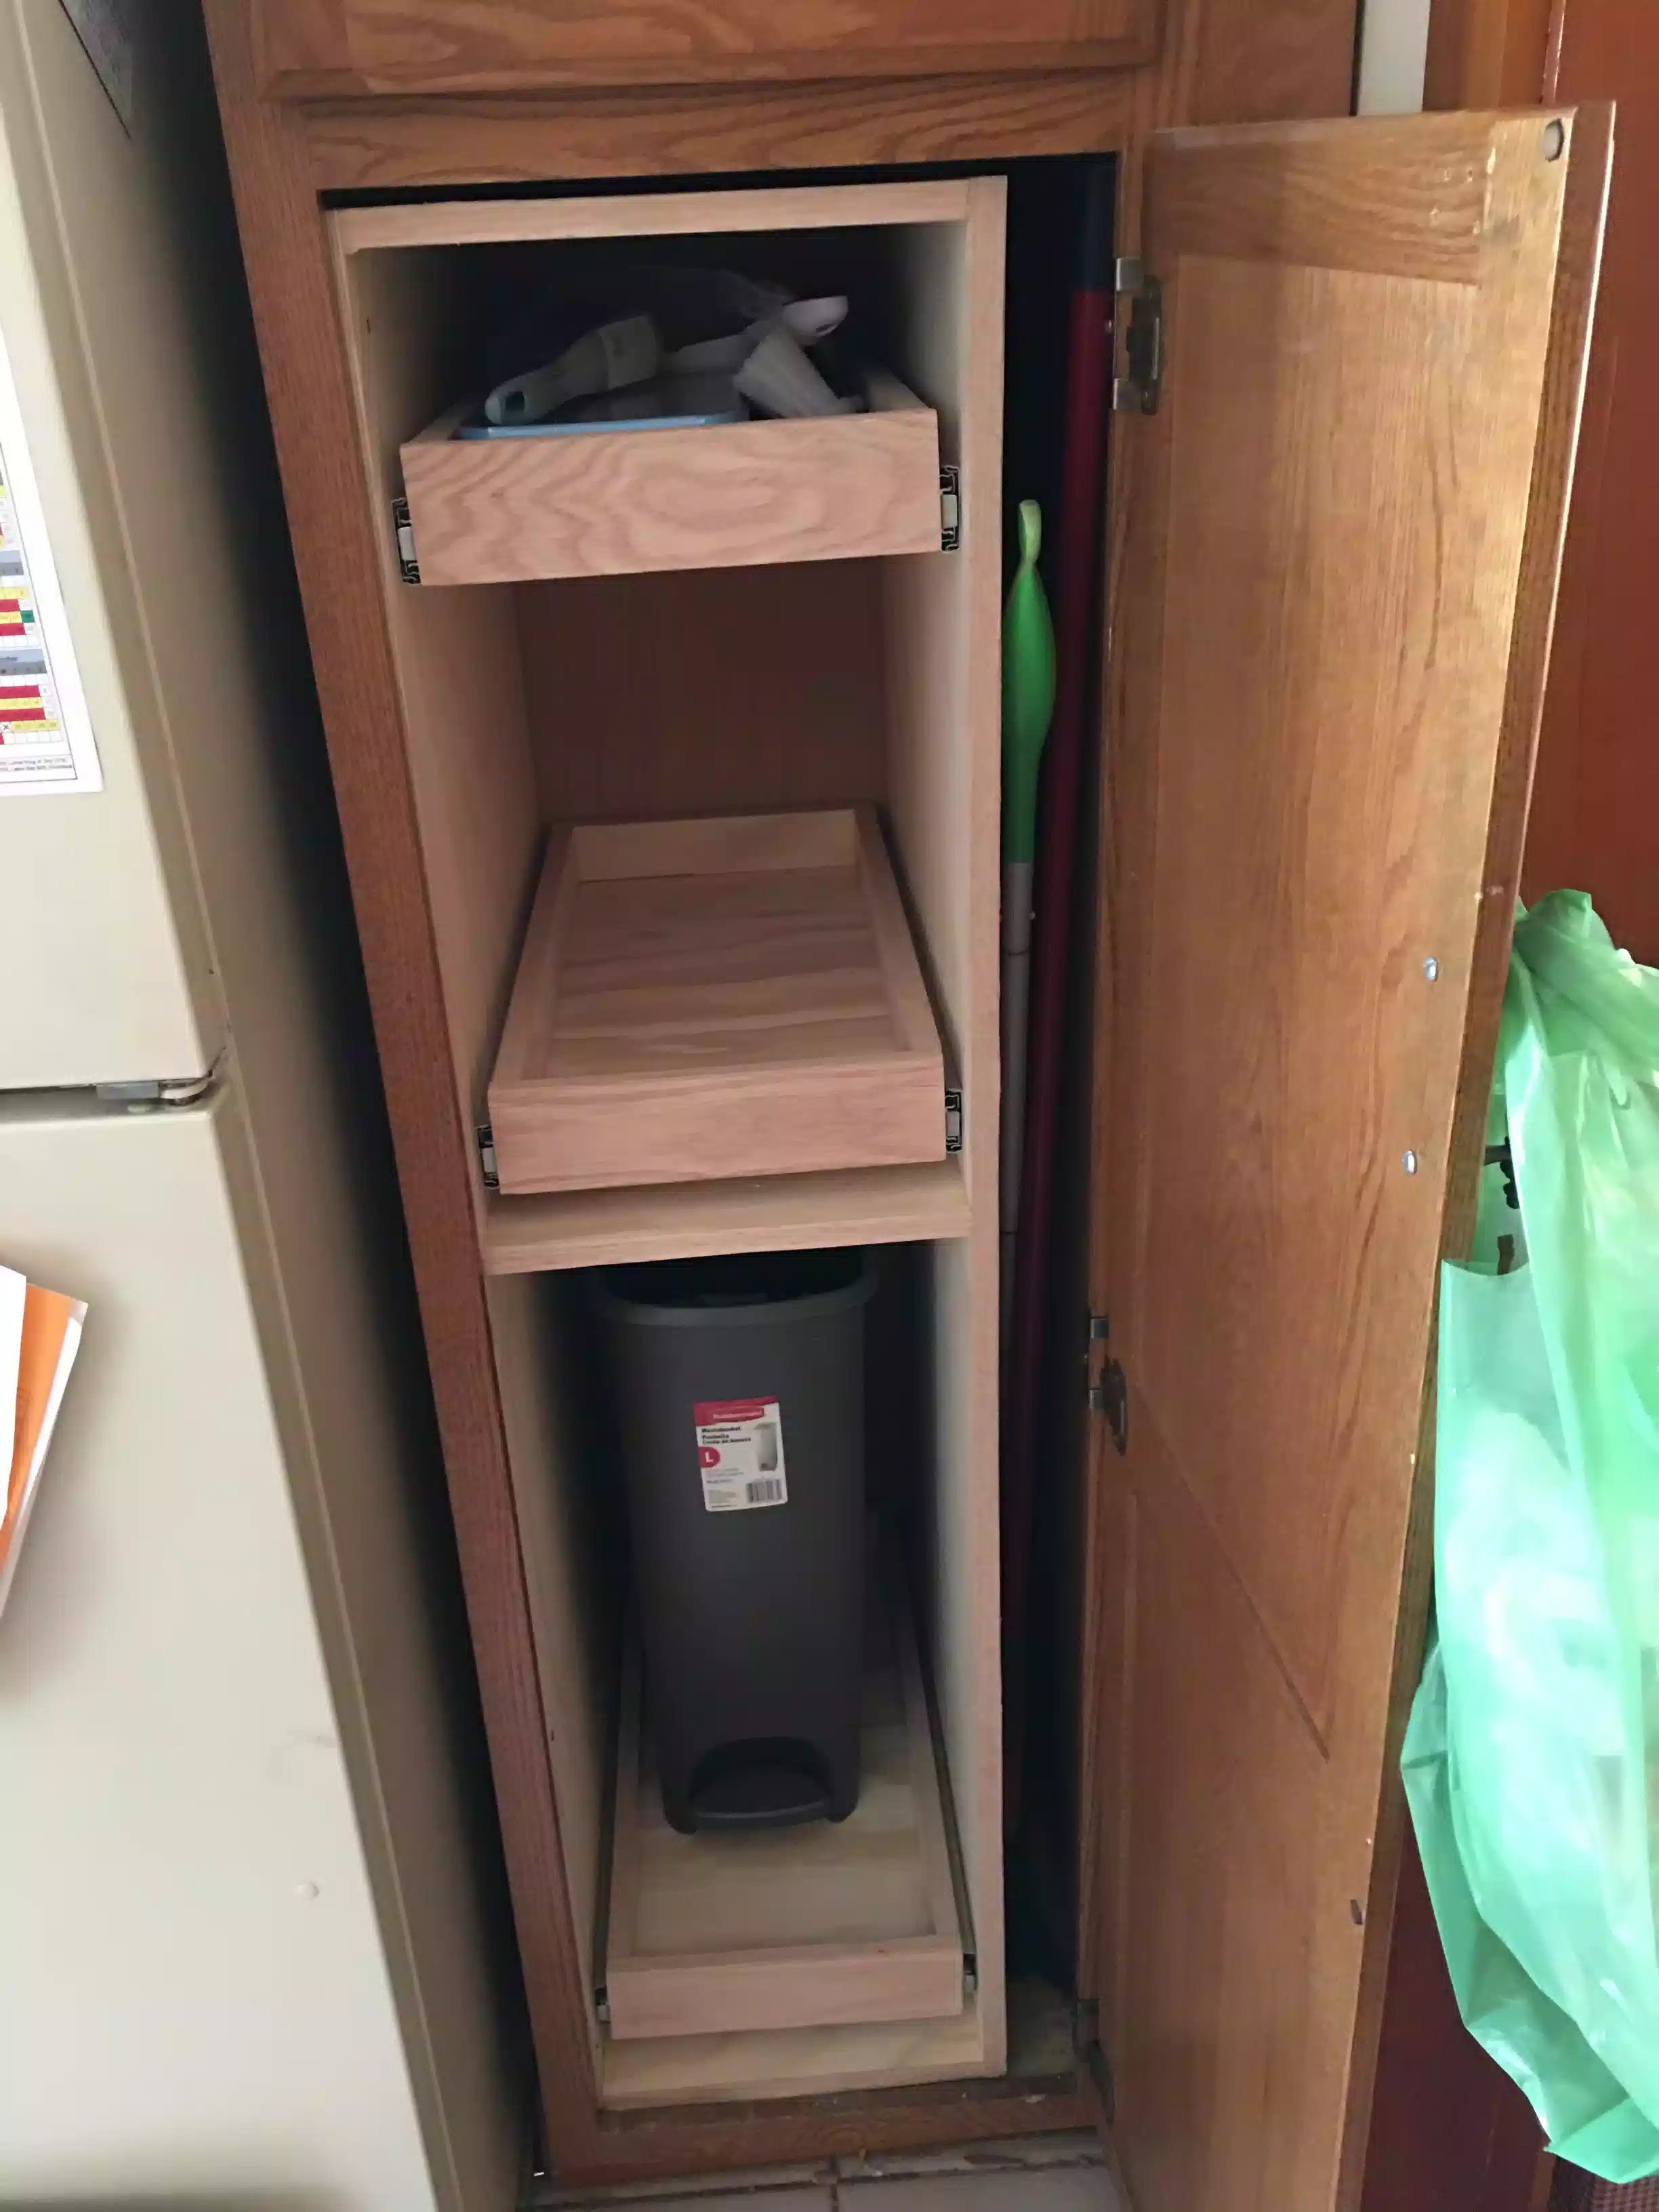
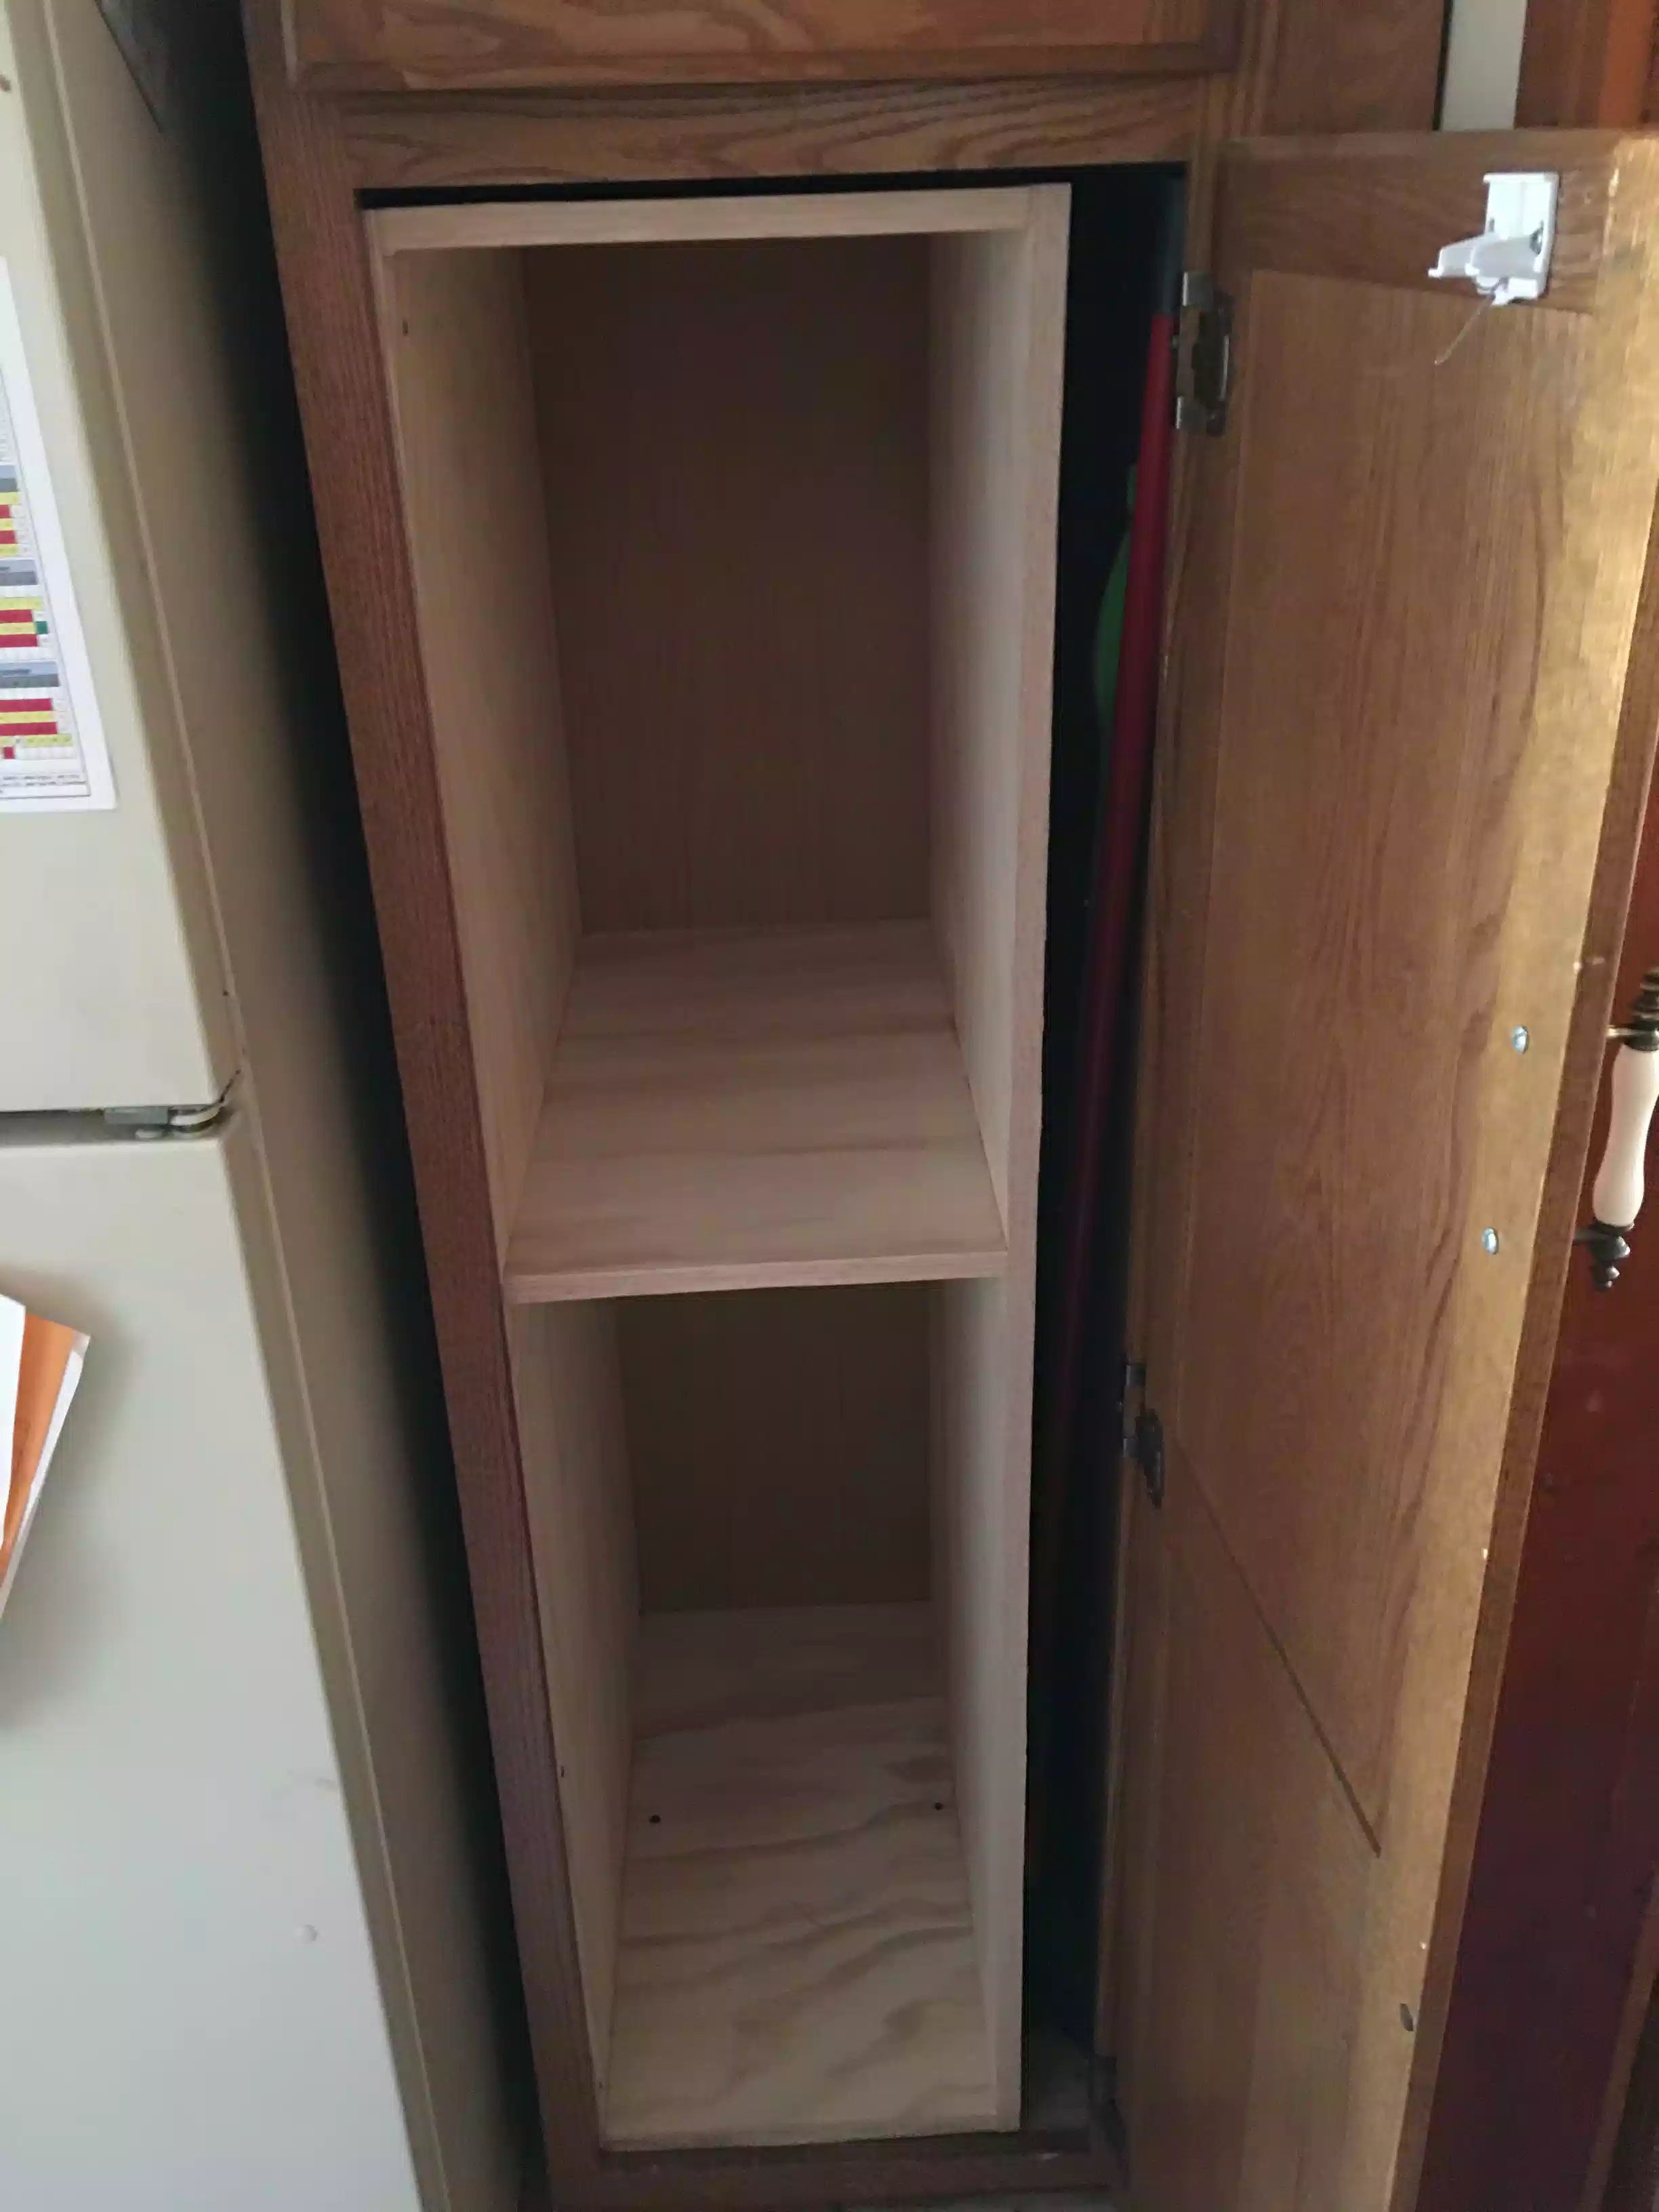
Christmas period our recycling closet basically fell apart so my wife paid for me to remake a better functional design and easy to use.. I was limited by the fact that the closet was only 14” wide if usable space because I needed to put the mop and broom in there and need to set space aside for this thus eating up almost 3” of width.
I went to Sketchup and designed a sliding drawer tray system that enabled everyone to pull out drawer to empty and it’s such s much more practical concept.
Supplies:
1. Sheet of 3/4” plywood
3. 22” full extension drawer slides
1. Box of 1 1/4” pocket hole screws
1. Roll of iron on edging
36” of solid oak 1×4
The cabinet carcass measures 54” tall by 23” deep x 14” wide.. (Specific to my cabinet, just measure your space)
I needed to make this in a hurry so I’d don’t do any fancy joinery so I went with my pocket hole jig to joint the top, middle and bottom to each of the sides and then I basically put oak iron edging on all visible surfaces to match the oak closet that it’s going into.
The drawers couldn’t be easier I put 2 pocket holes on each end of the left and right drawers side and attached them to the front and back drawer components.
I cut the right, left and back short 3/4” compared to the front front and screwed the drawer base up into these parts and the front oak board would conceal the plywood edge on the front.. I also put iron on edging on all visible plywood edges accept the drawer base sides, and finally rounded over the edges on the oak drawer front with a 1/4” round over but on my router table
All that was left was to install the full extension drawer slides and install them in the cabinet after I tediously figured out spacing for the 3 drawer trays.