
BEDROOM PROJECTS
HEXAGONAL WALL UNIT
(02/2017)
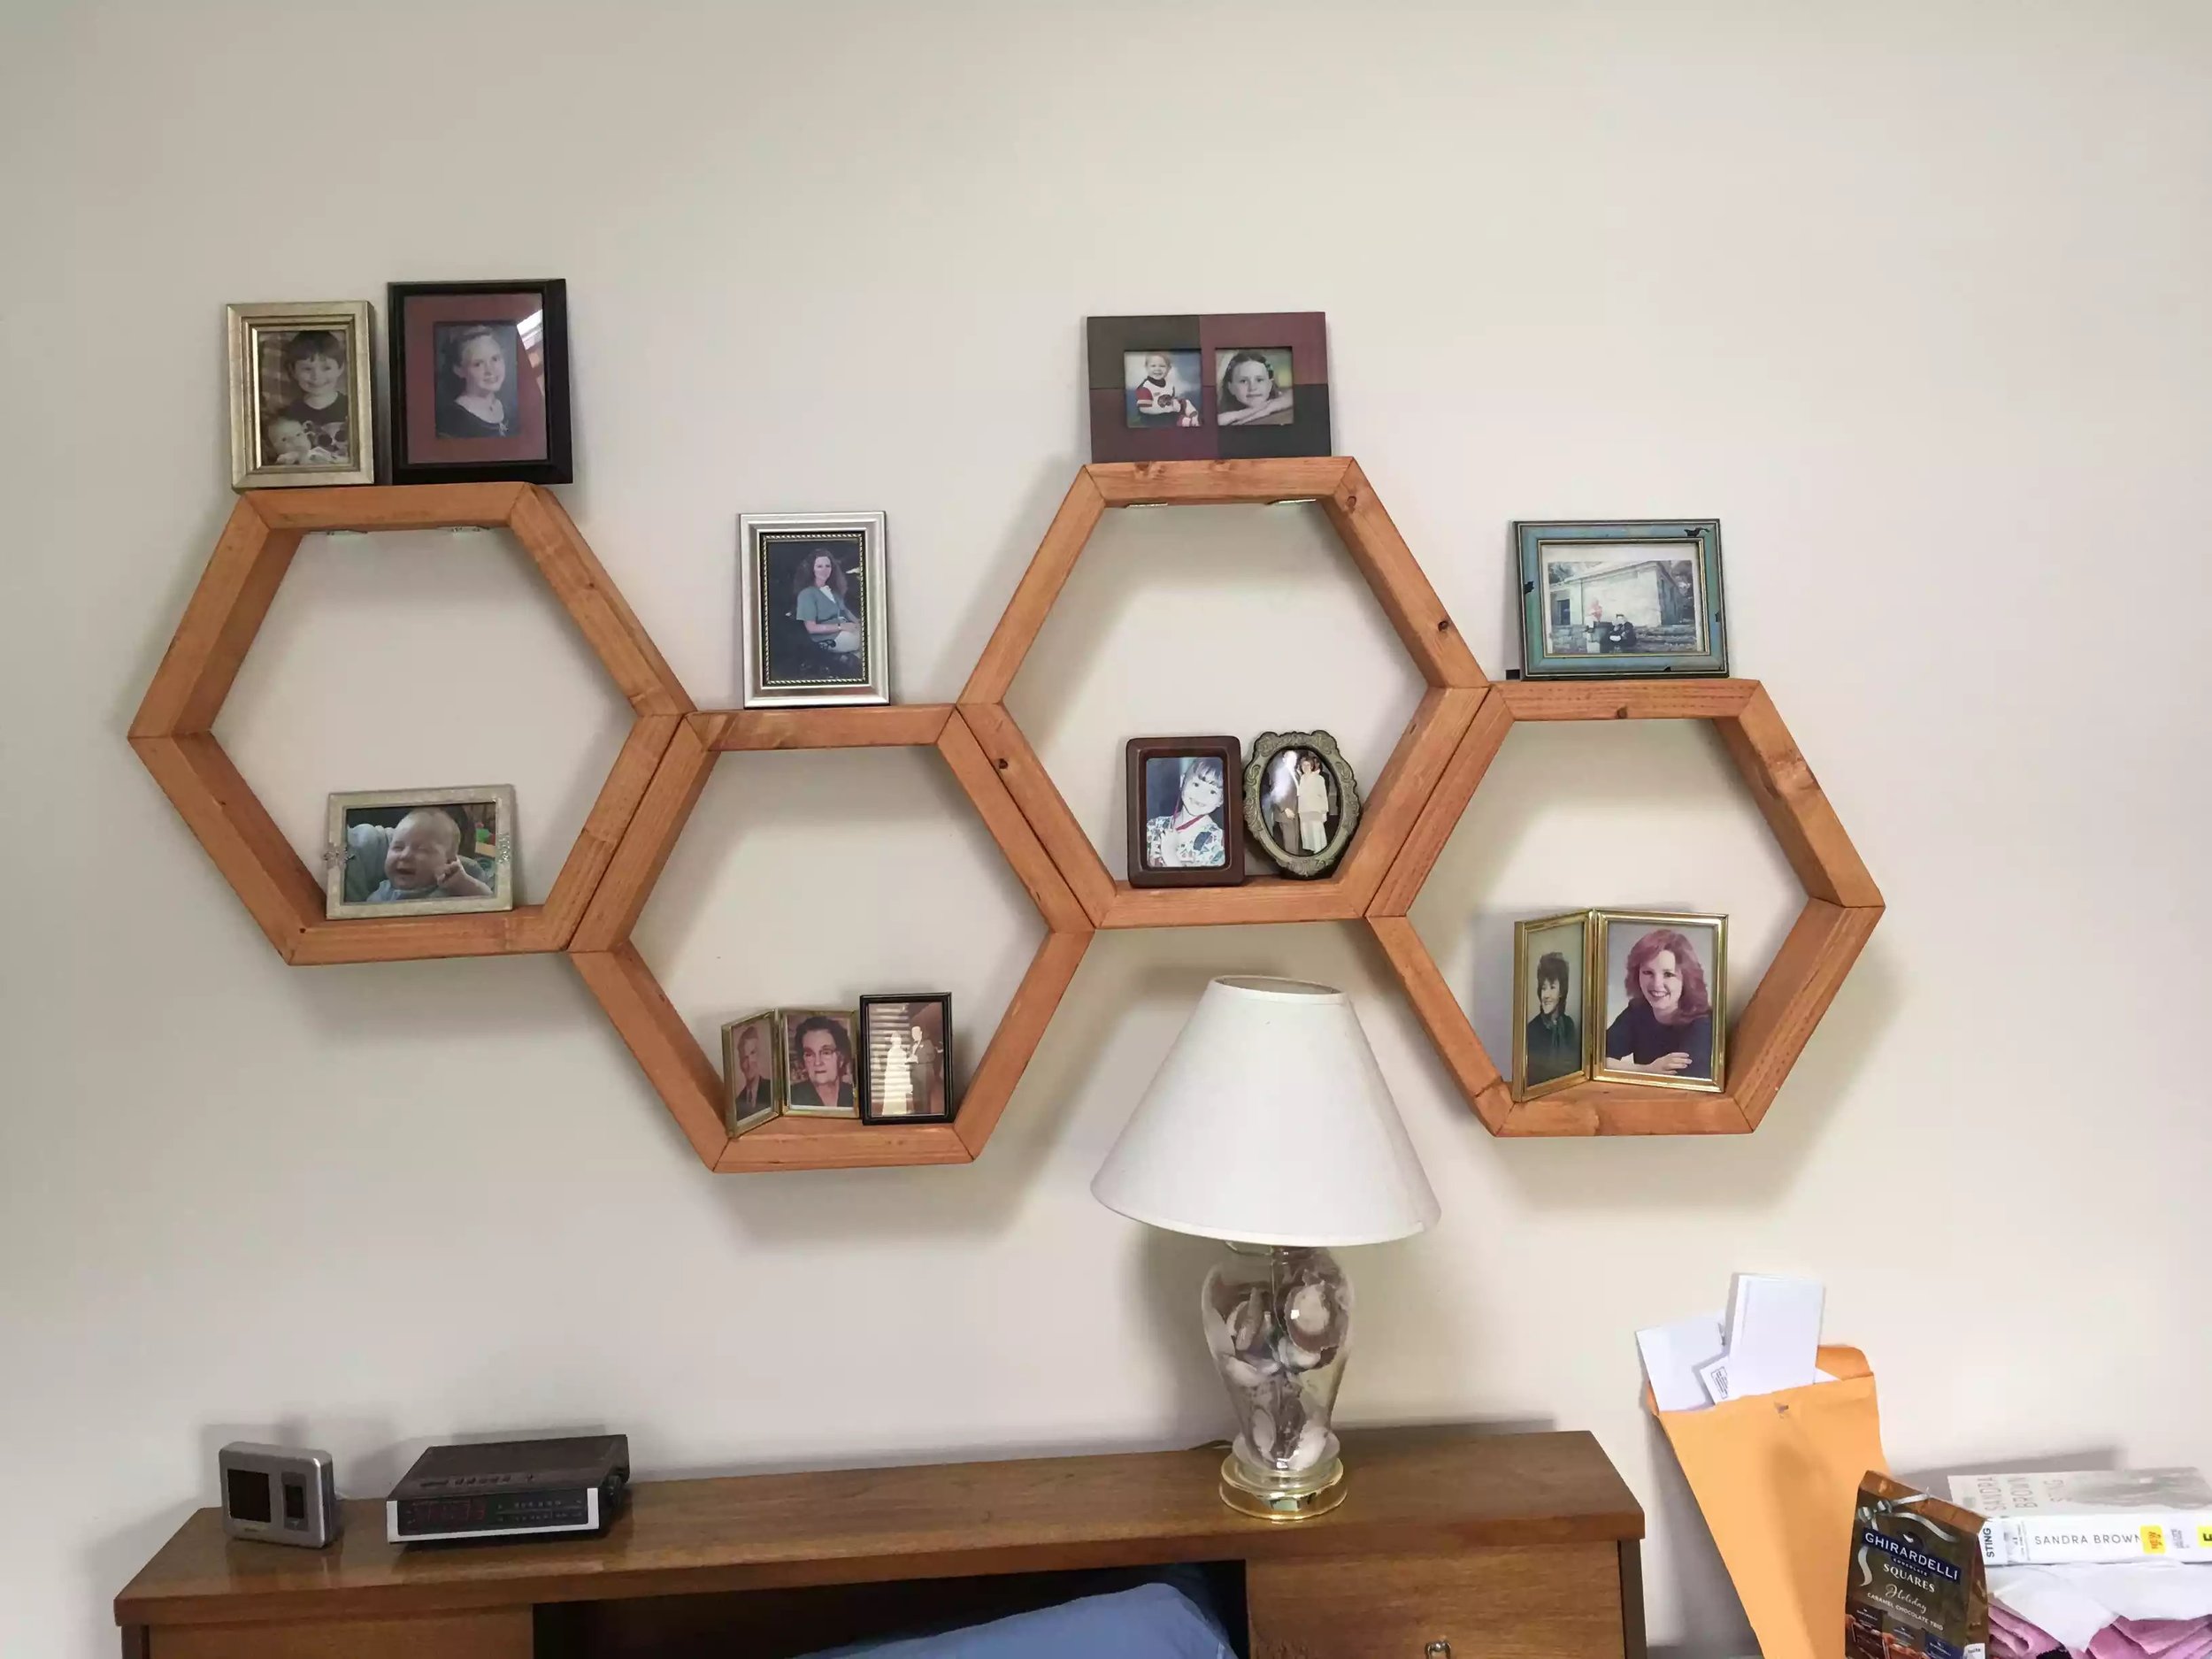
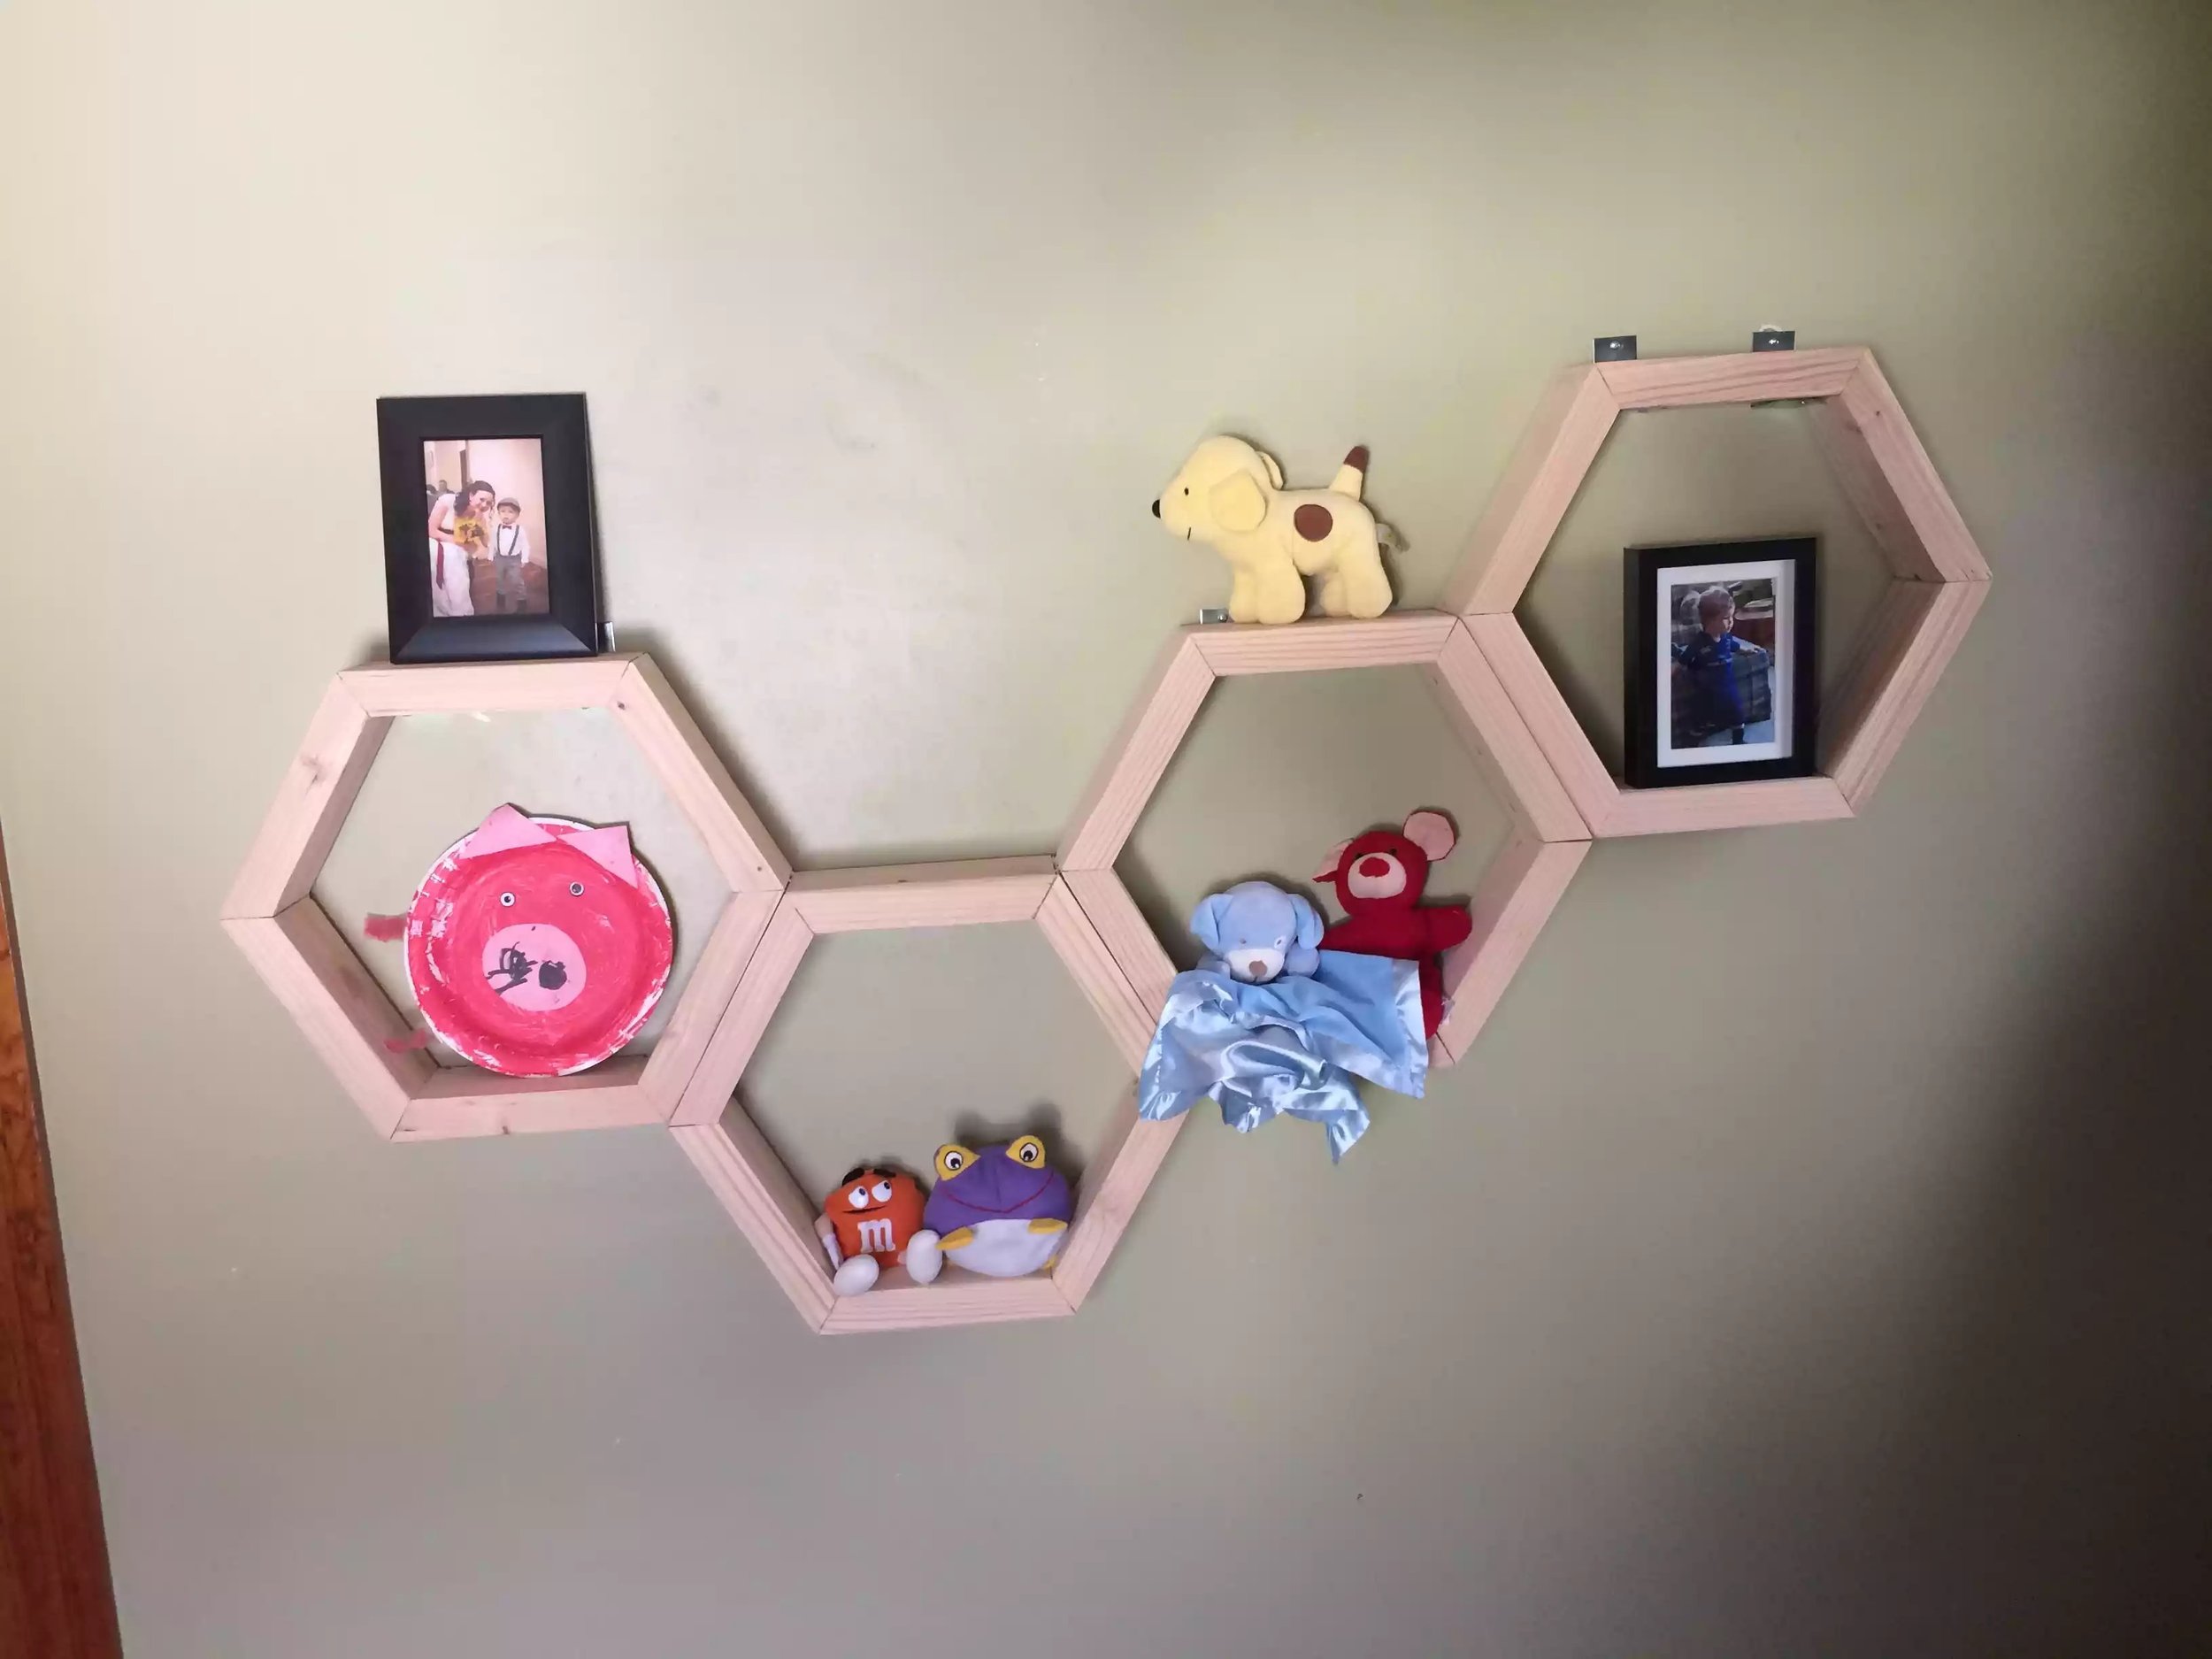
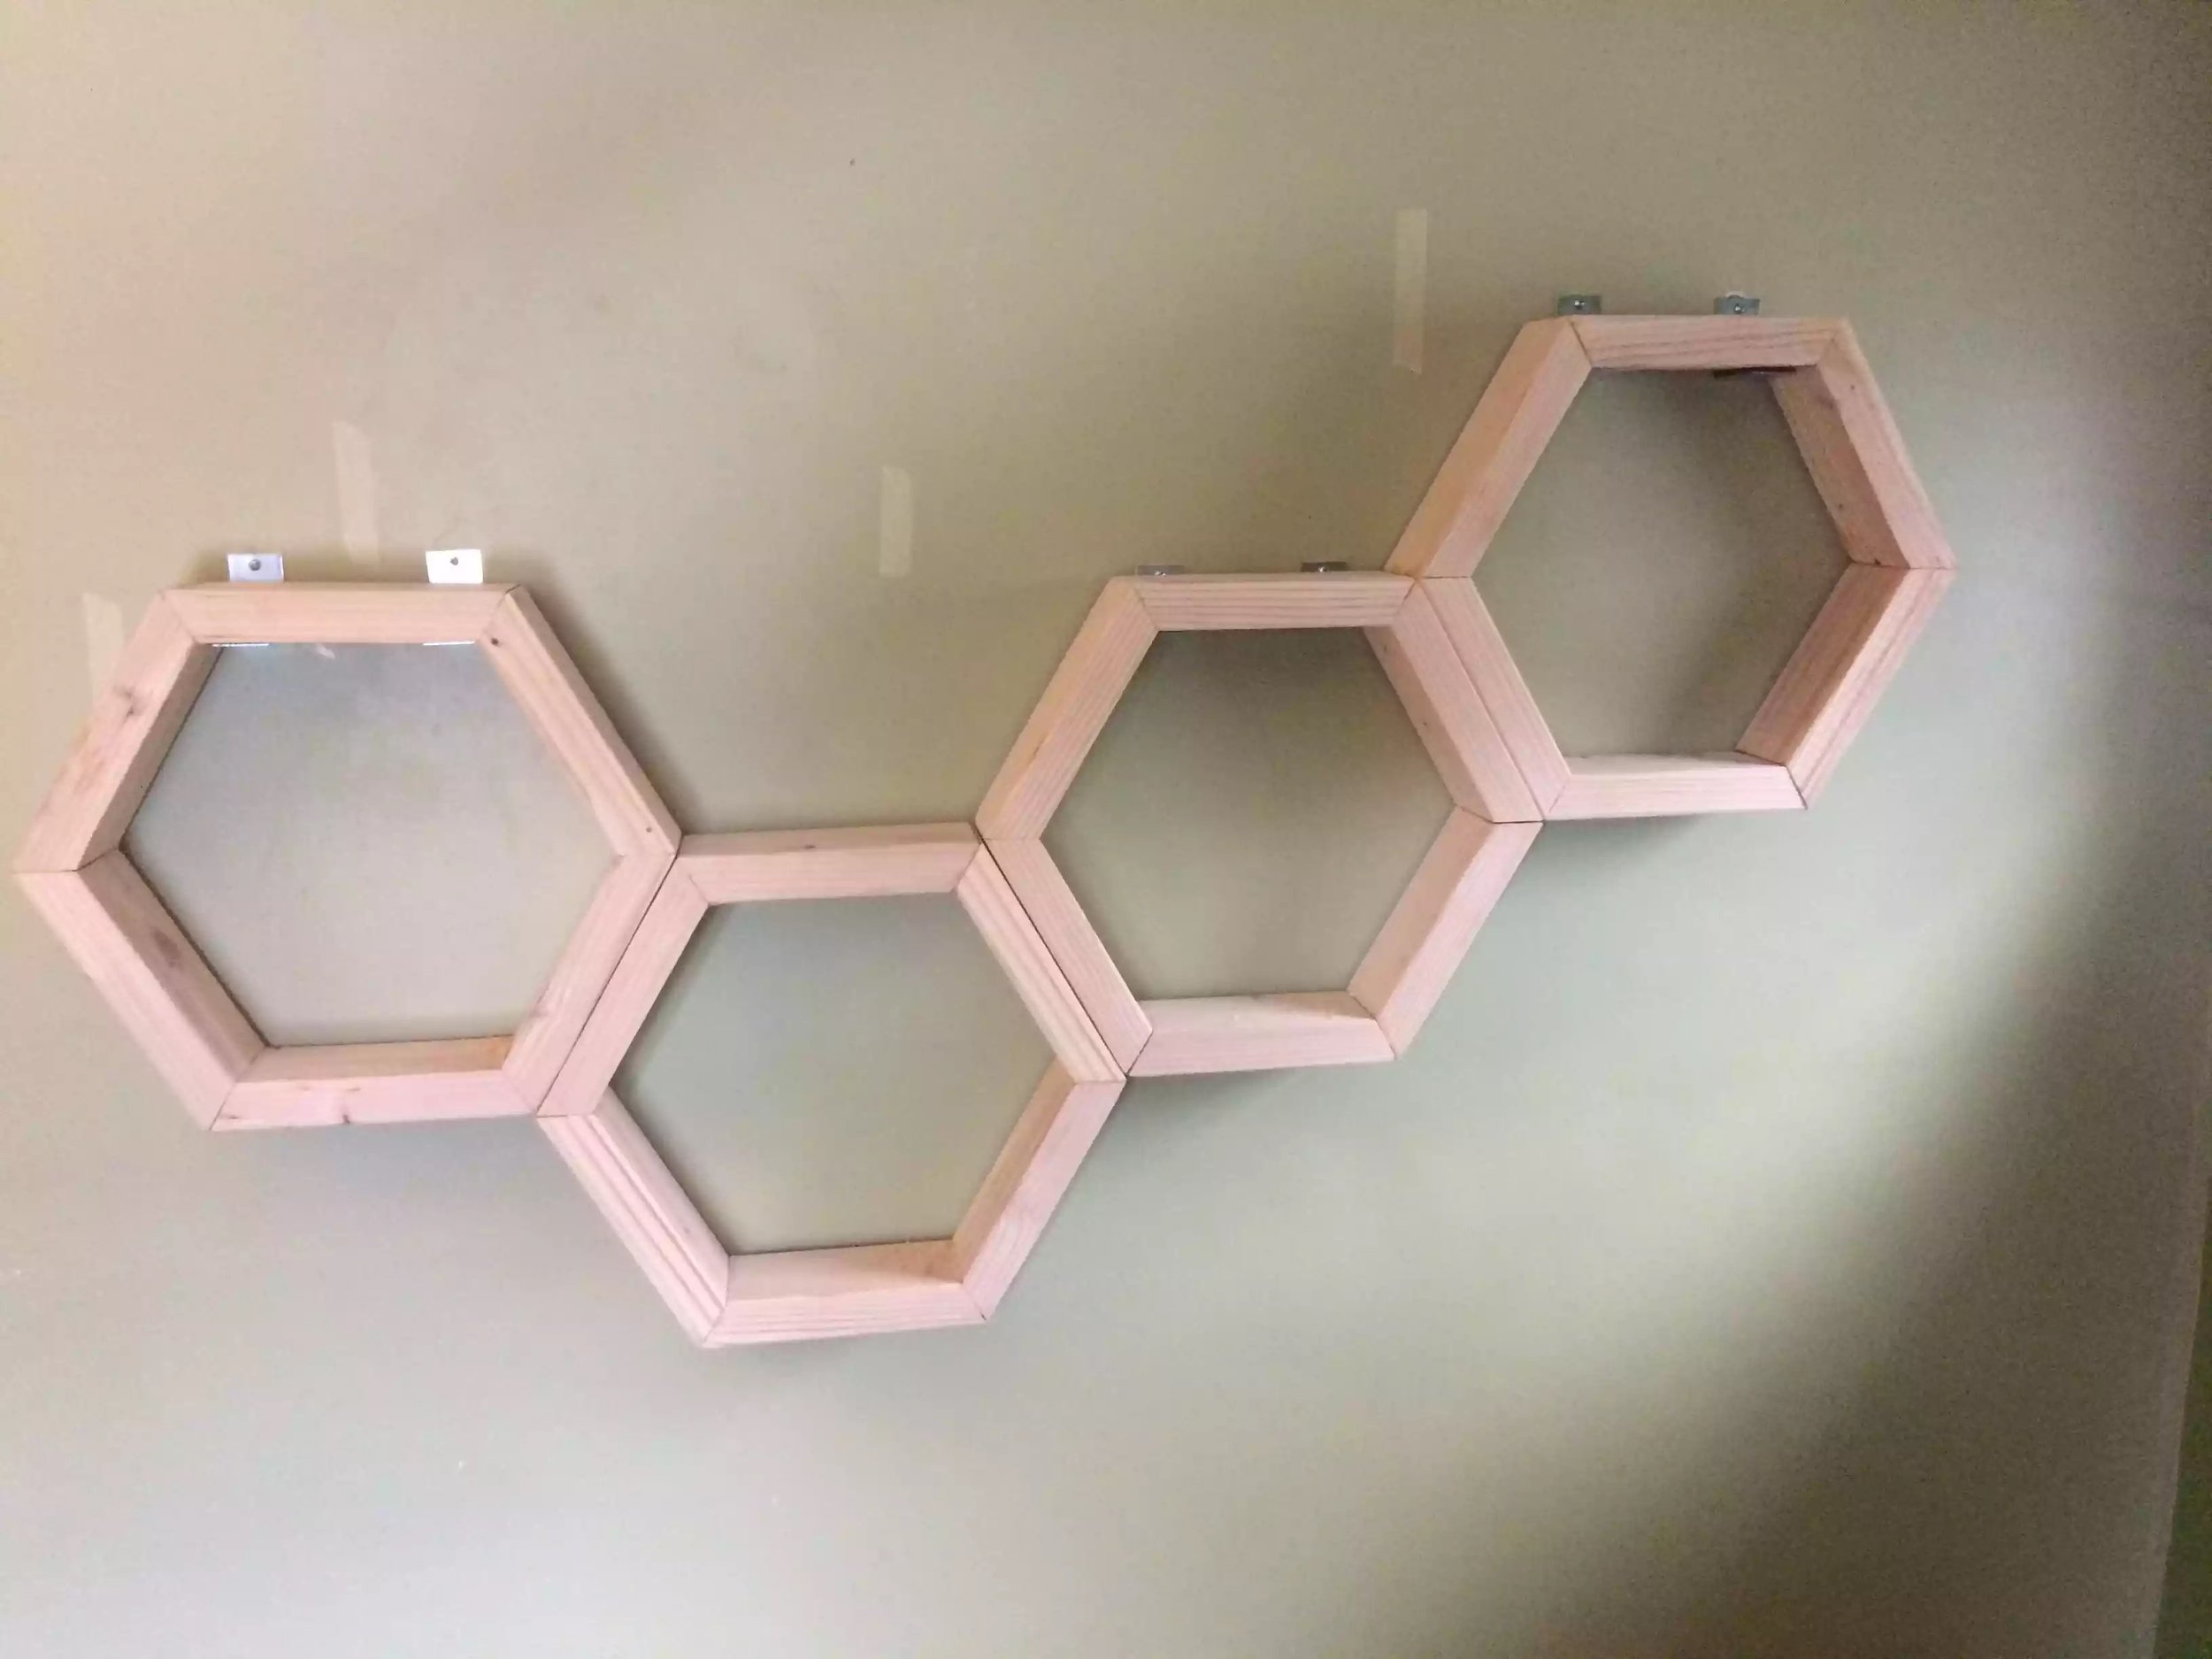
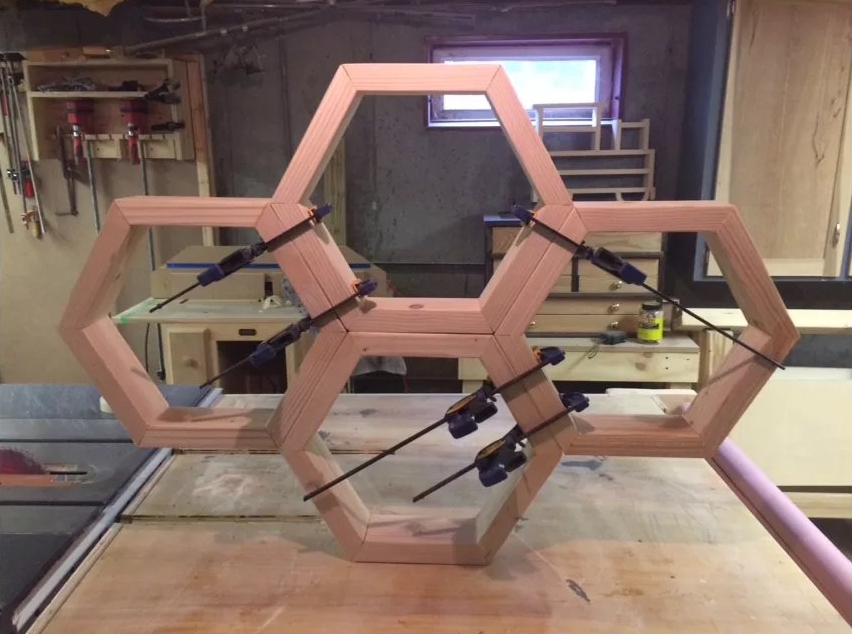
My mother-in-law love the one I made for my son so she said hey will you make me one as well
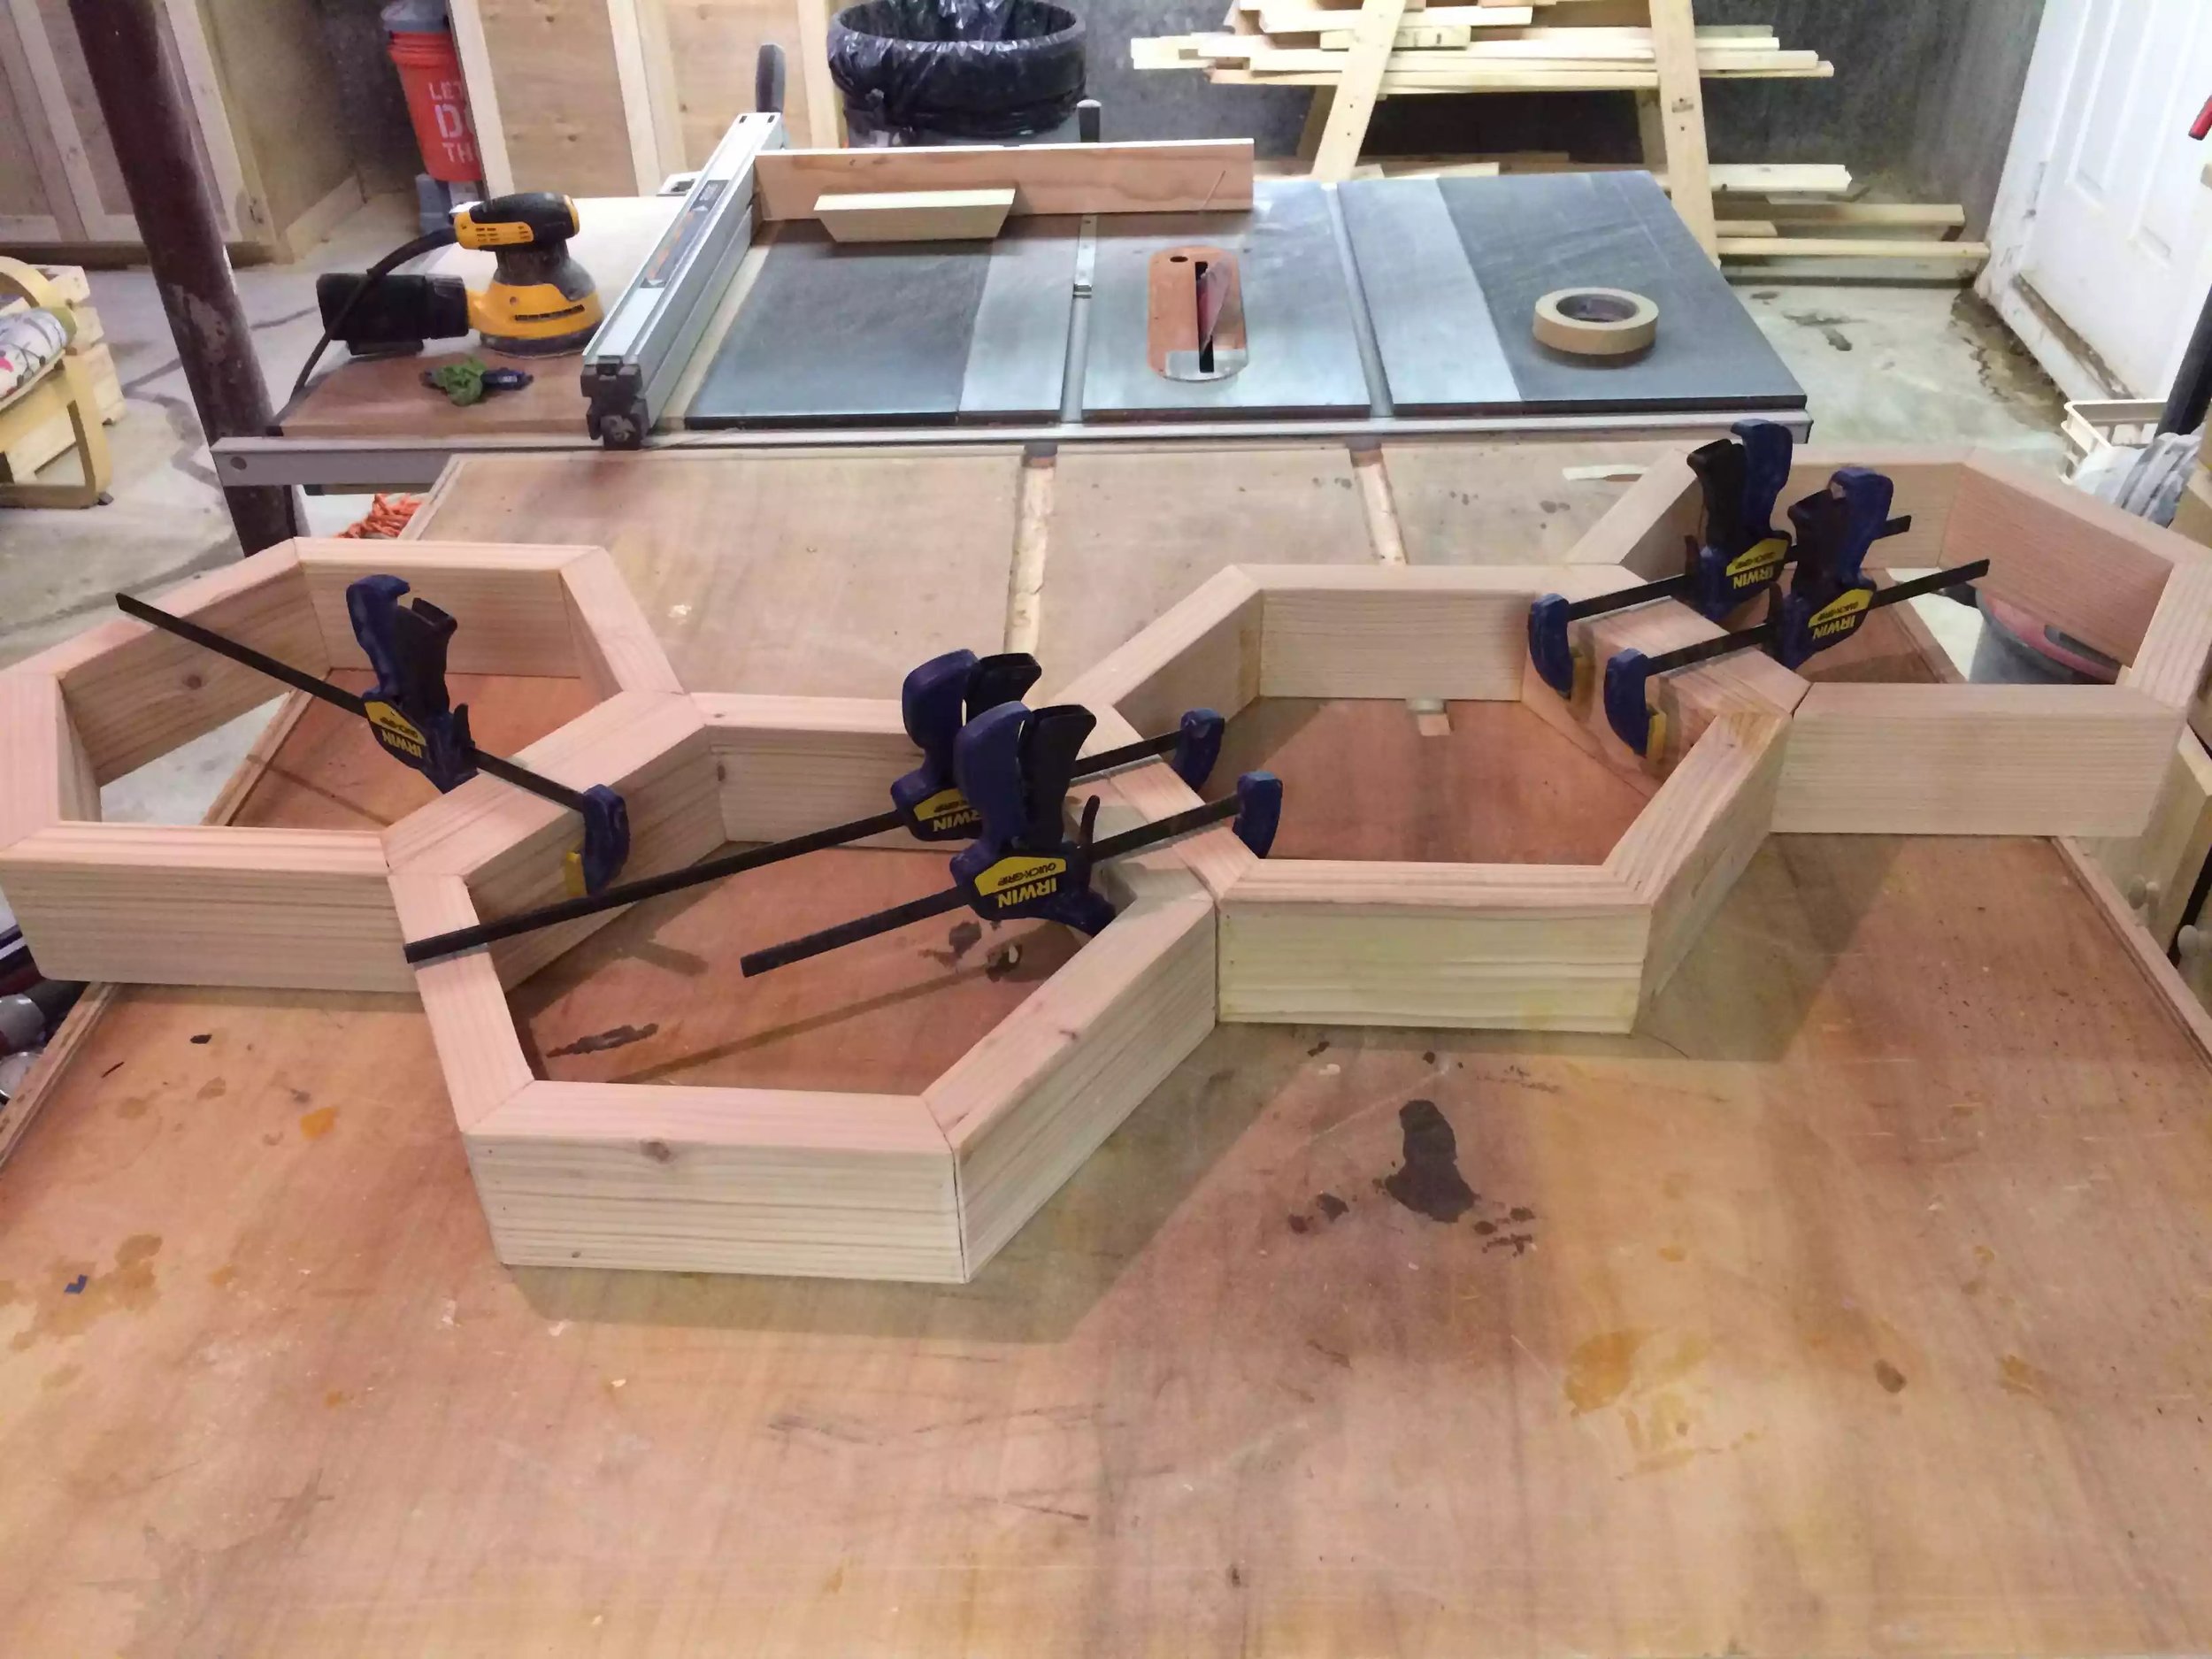
It’s basically the same construction as my original project using 2×4 and using biscuit joints and glue to secure the joint
This is a super cheap project but it is challenging if your saws and you’re cutting equipment or not true to the angles at which you need to cut them
I did rearrange the hexagons to form a different pattern so is that it would suit her room
To secure the individual hexagon I countersunk three holes to the adjacent side of the mating peace and buried them with wood plugs
What’s really cool is that you don’t necessarily have to make an entire unit you can make individual hexagons and stagger them up the stairwell or star got them in different locations around the home
Thank you so much for looking give it a try you might like the project
CLOTHES RACK
(01/2017)
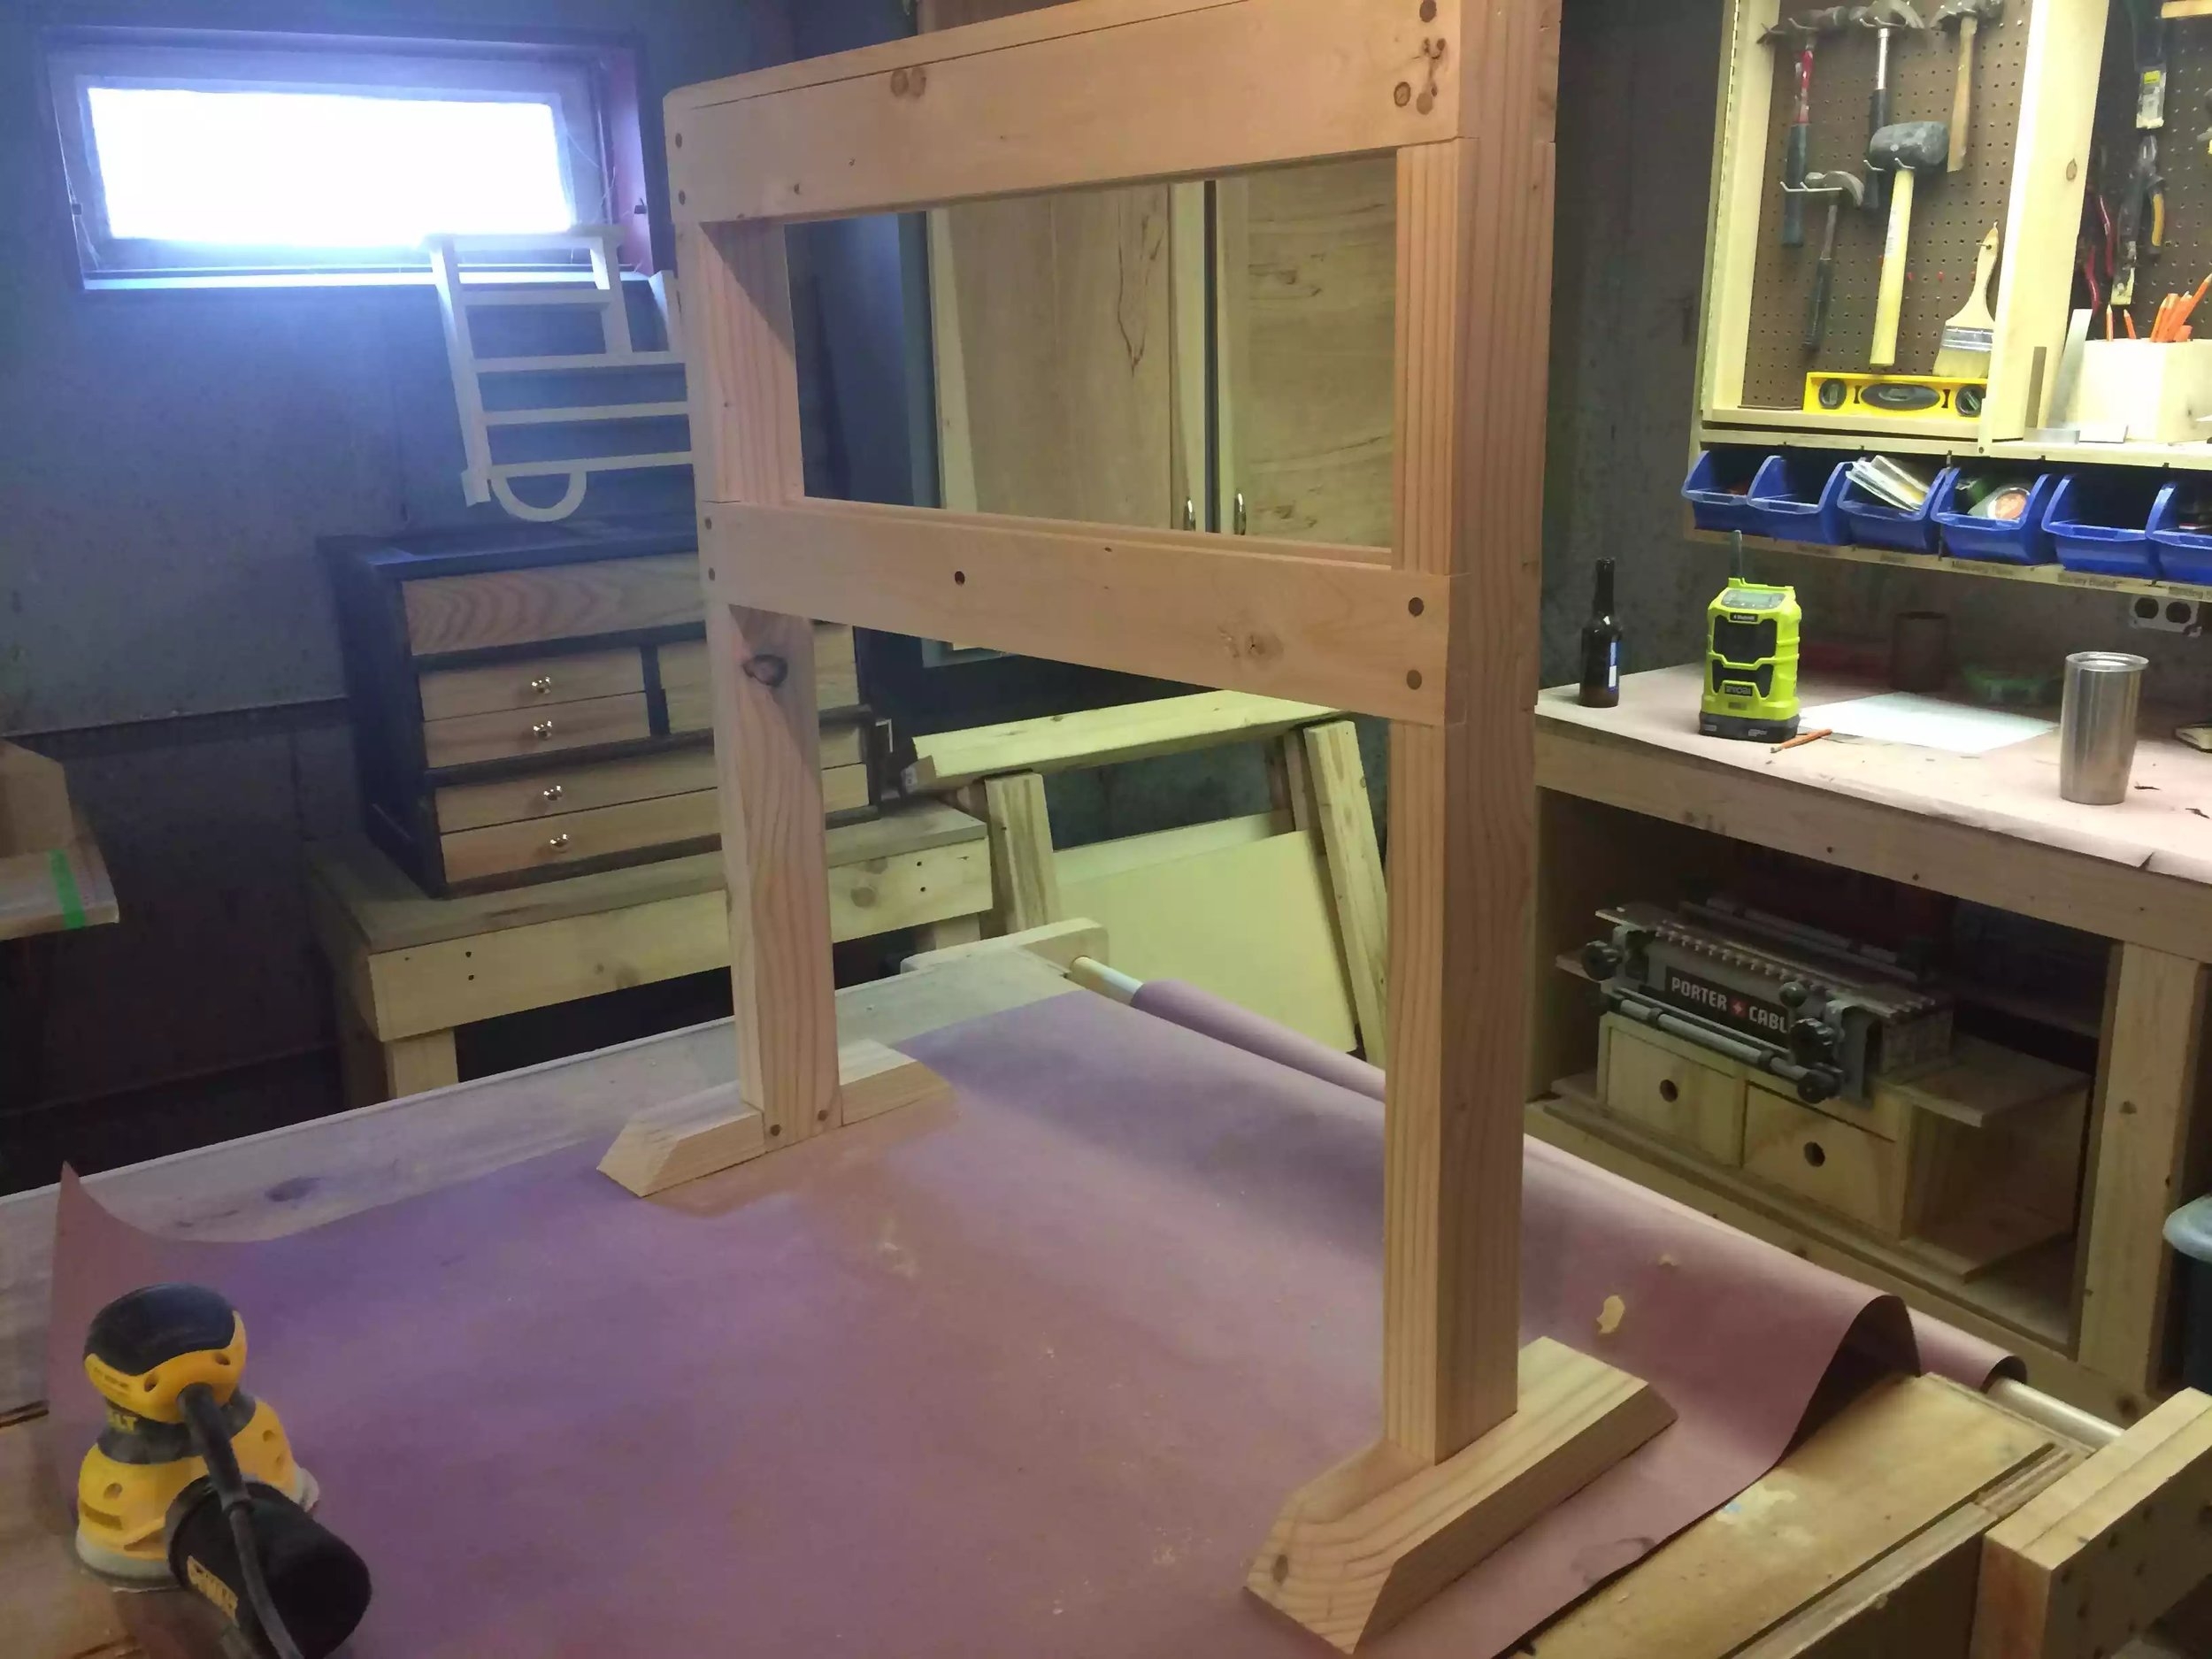
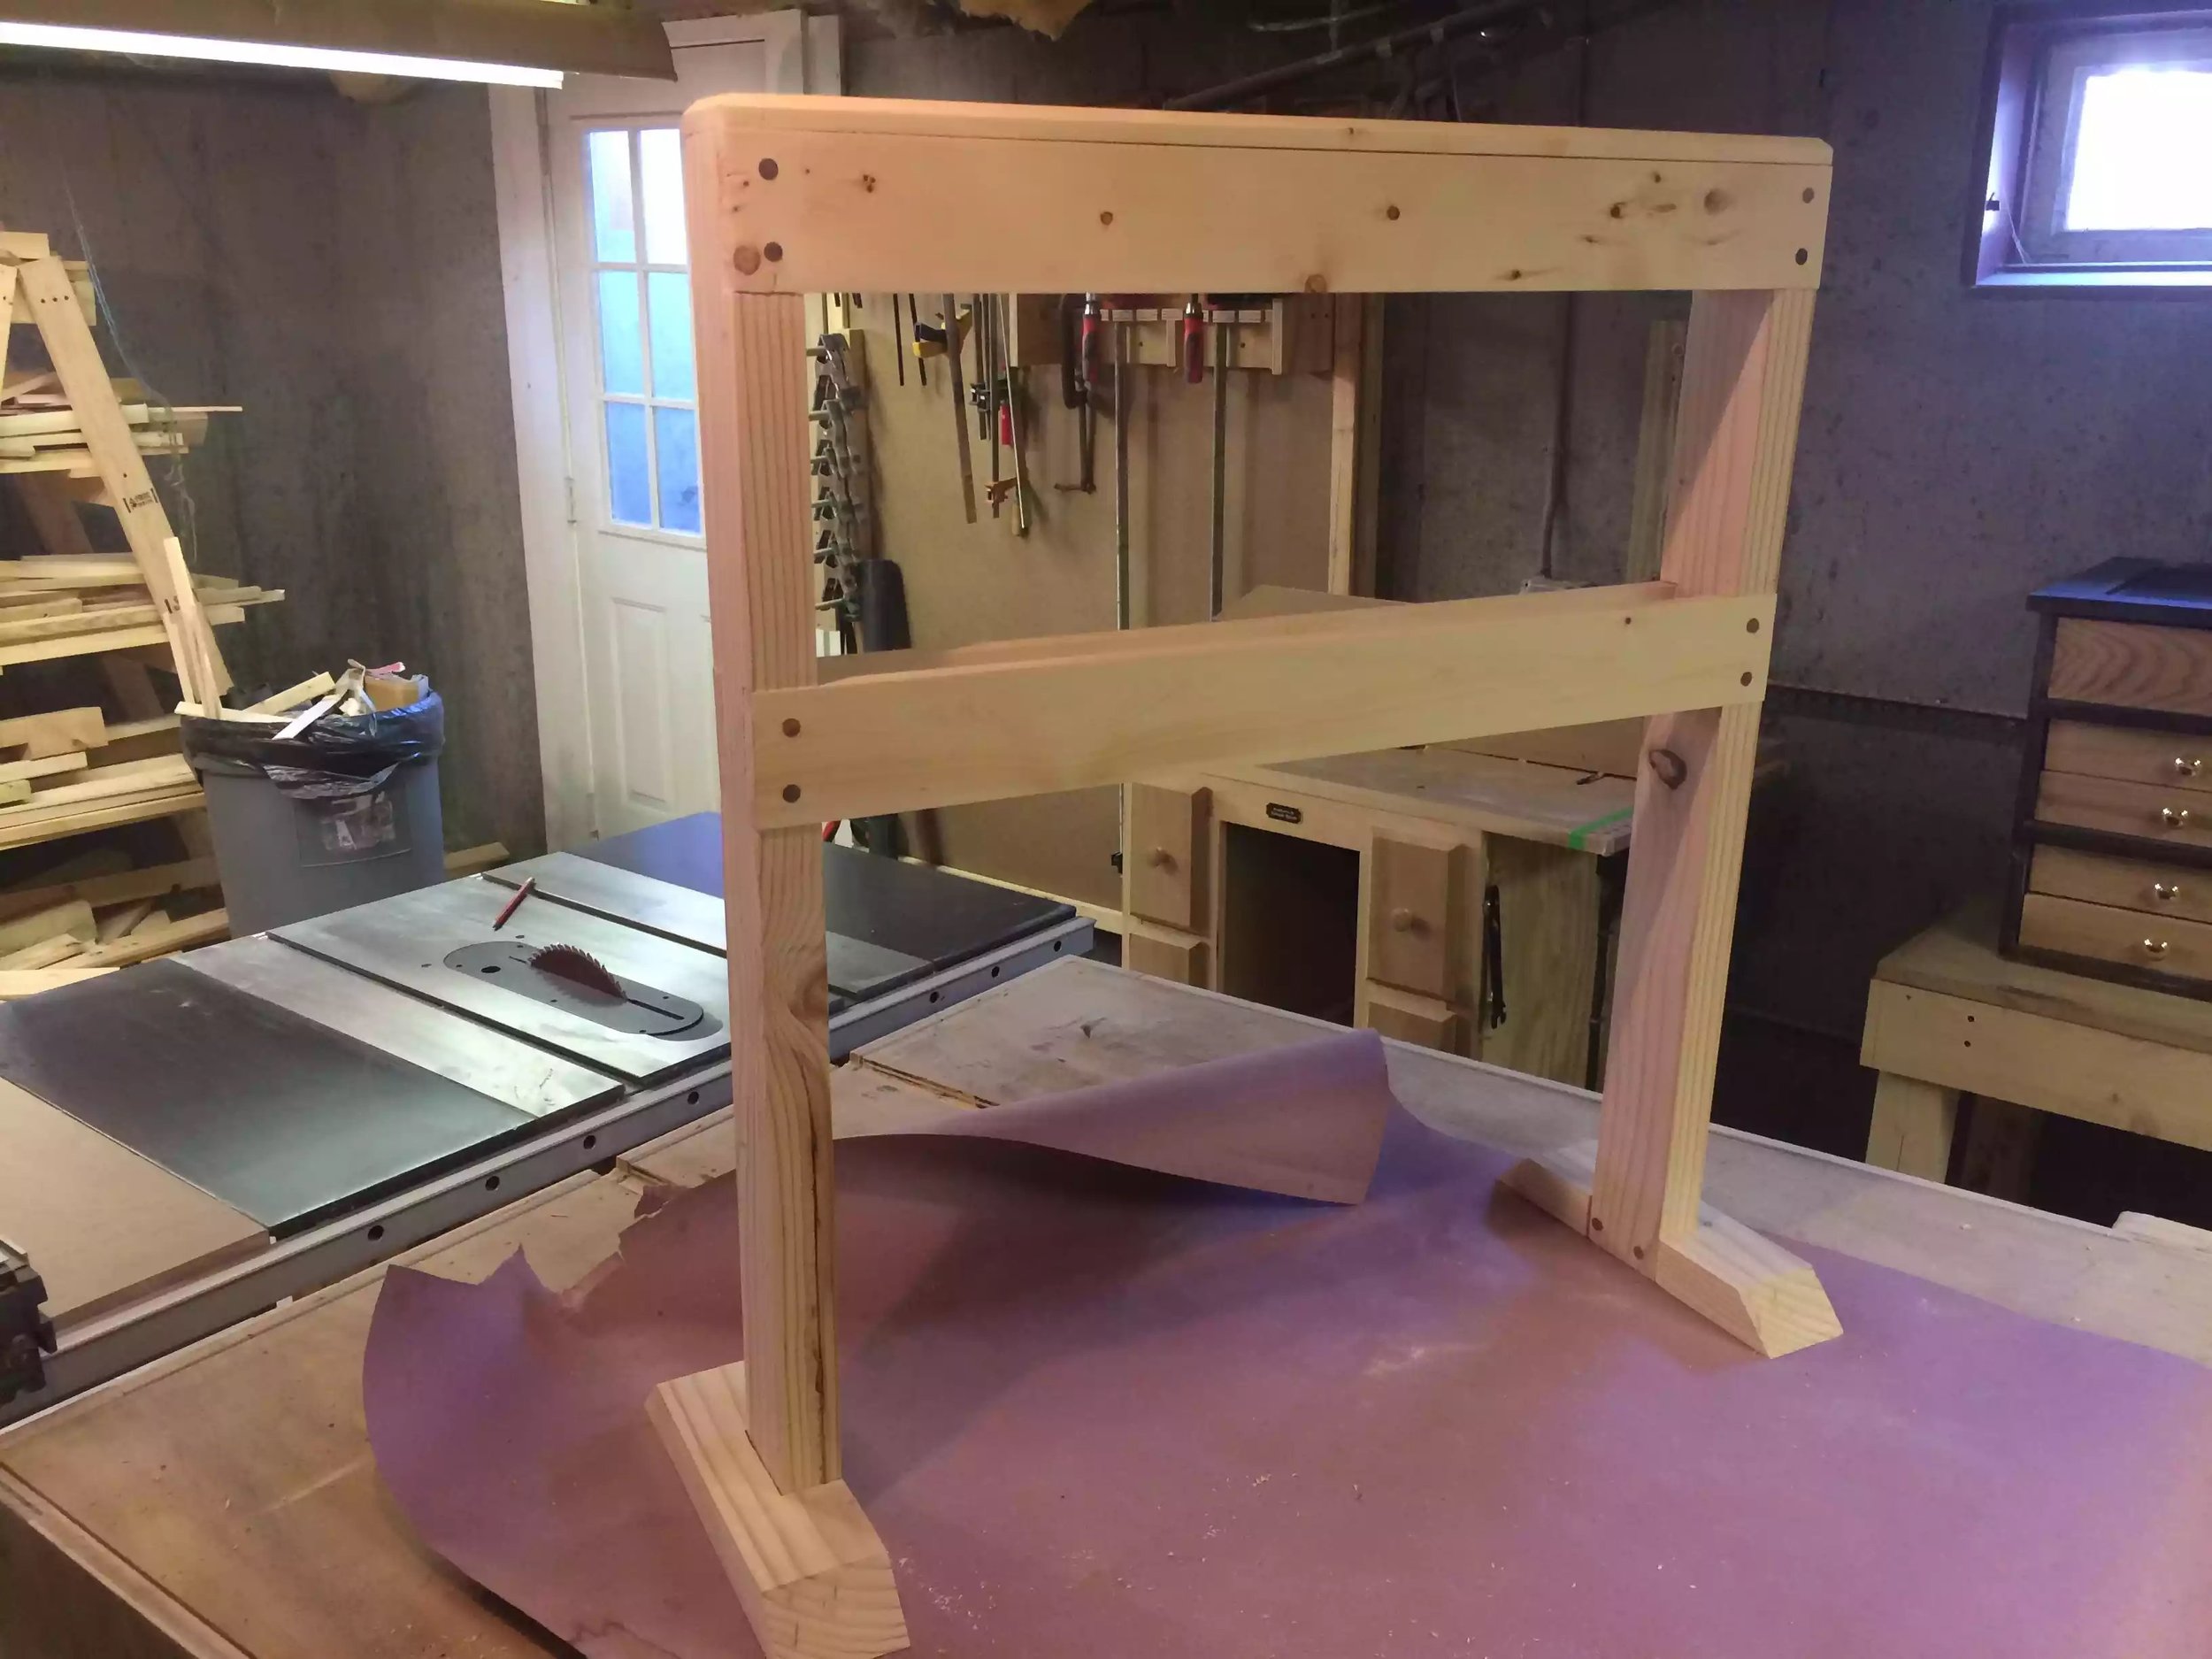
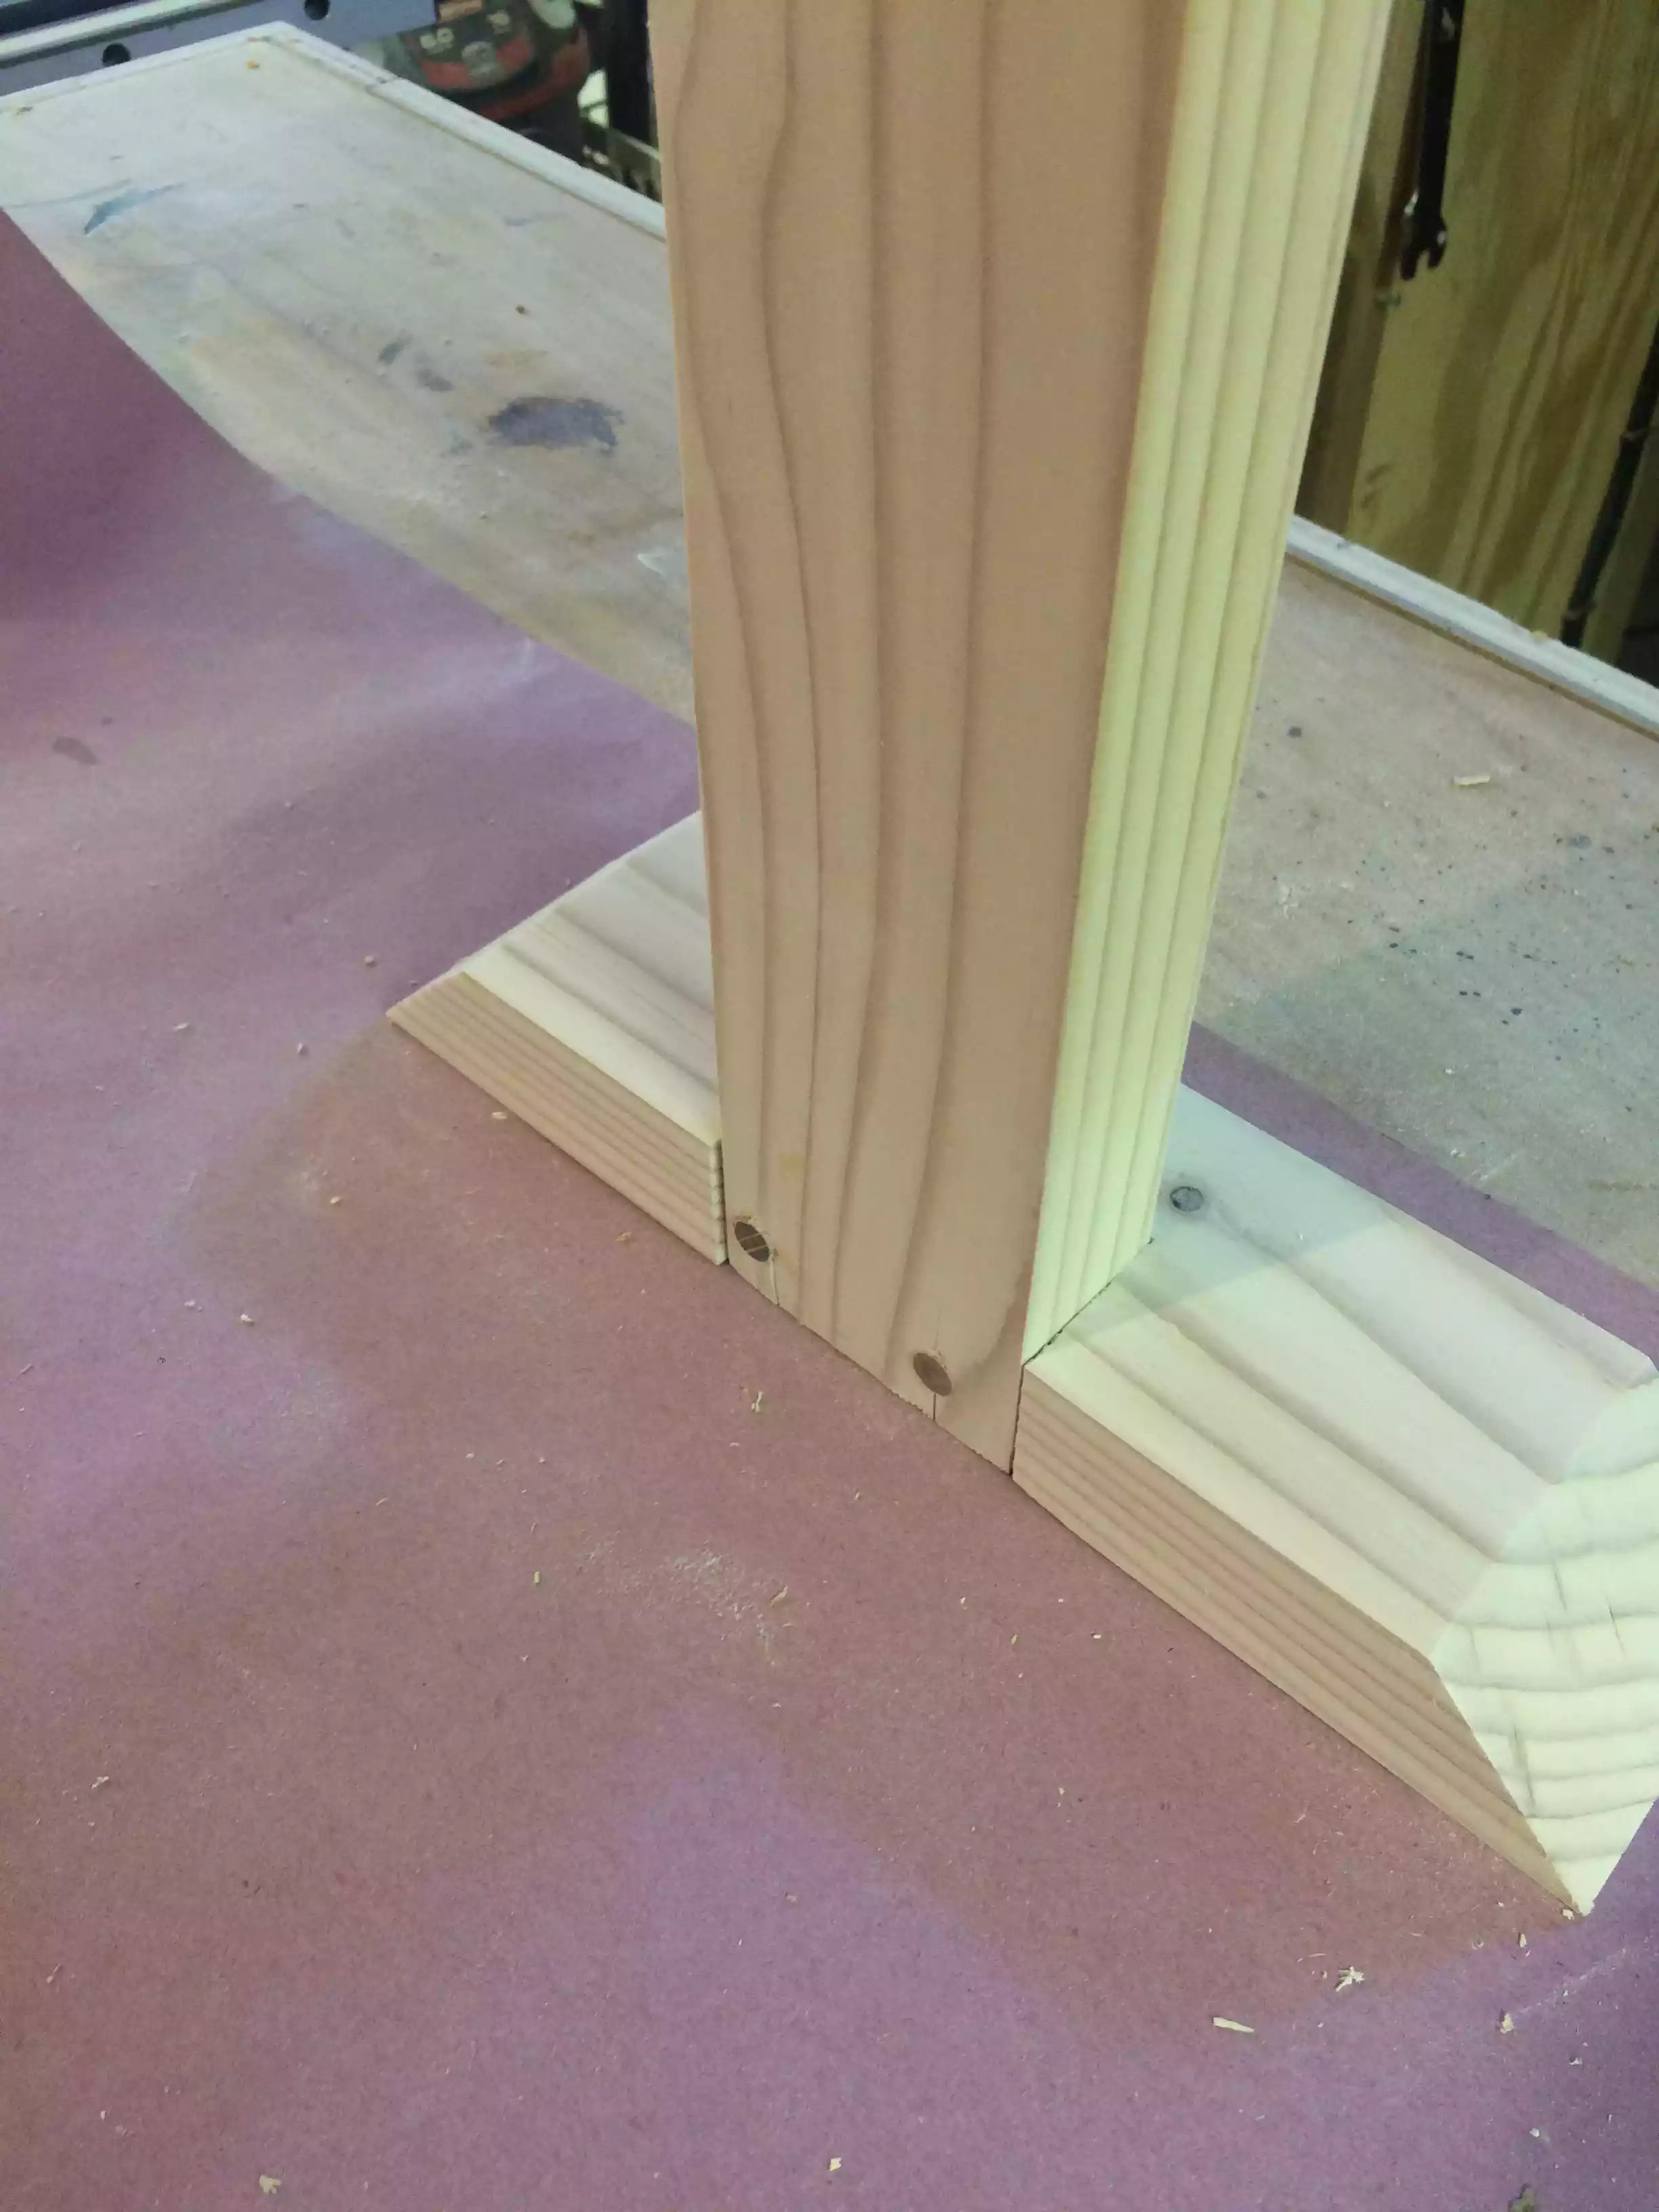
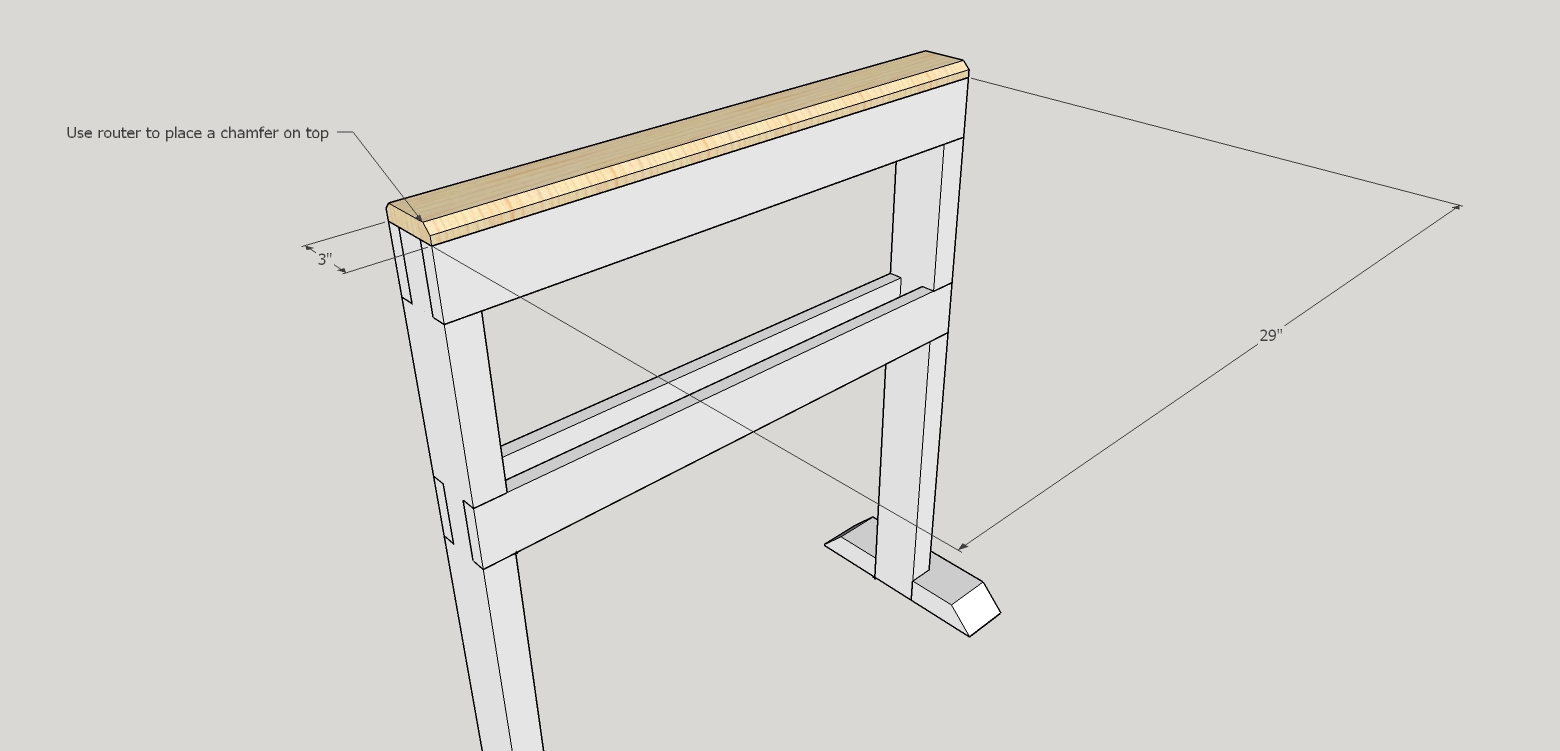
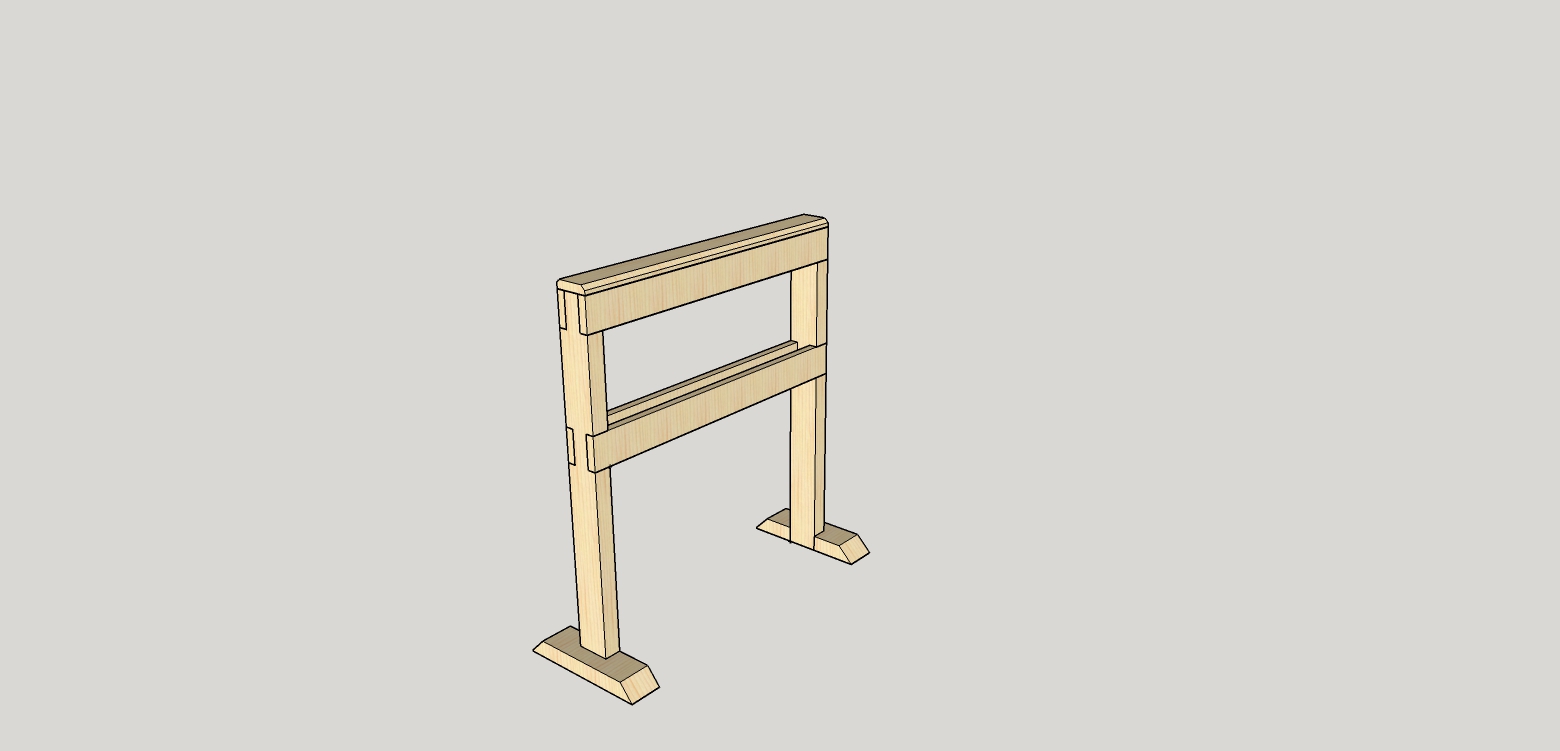
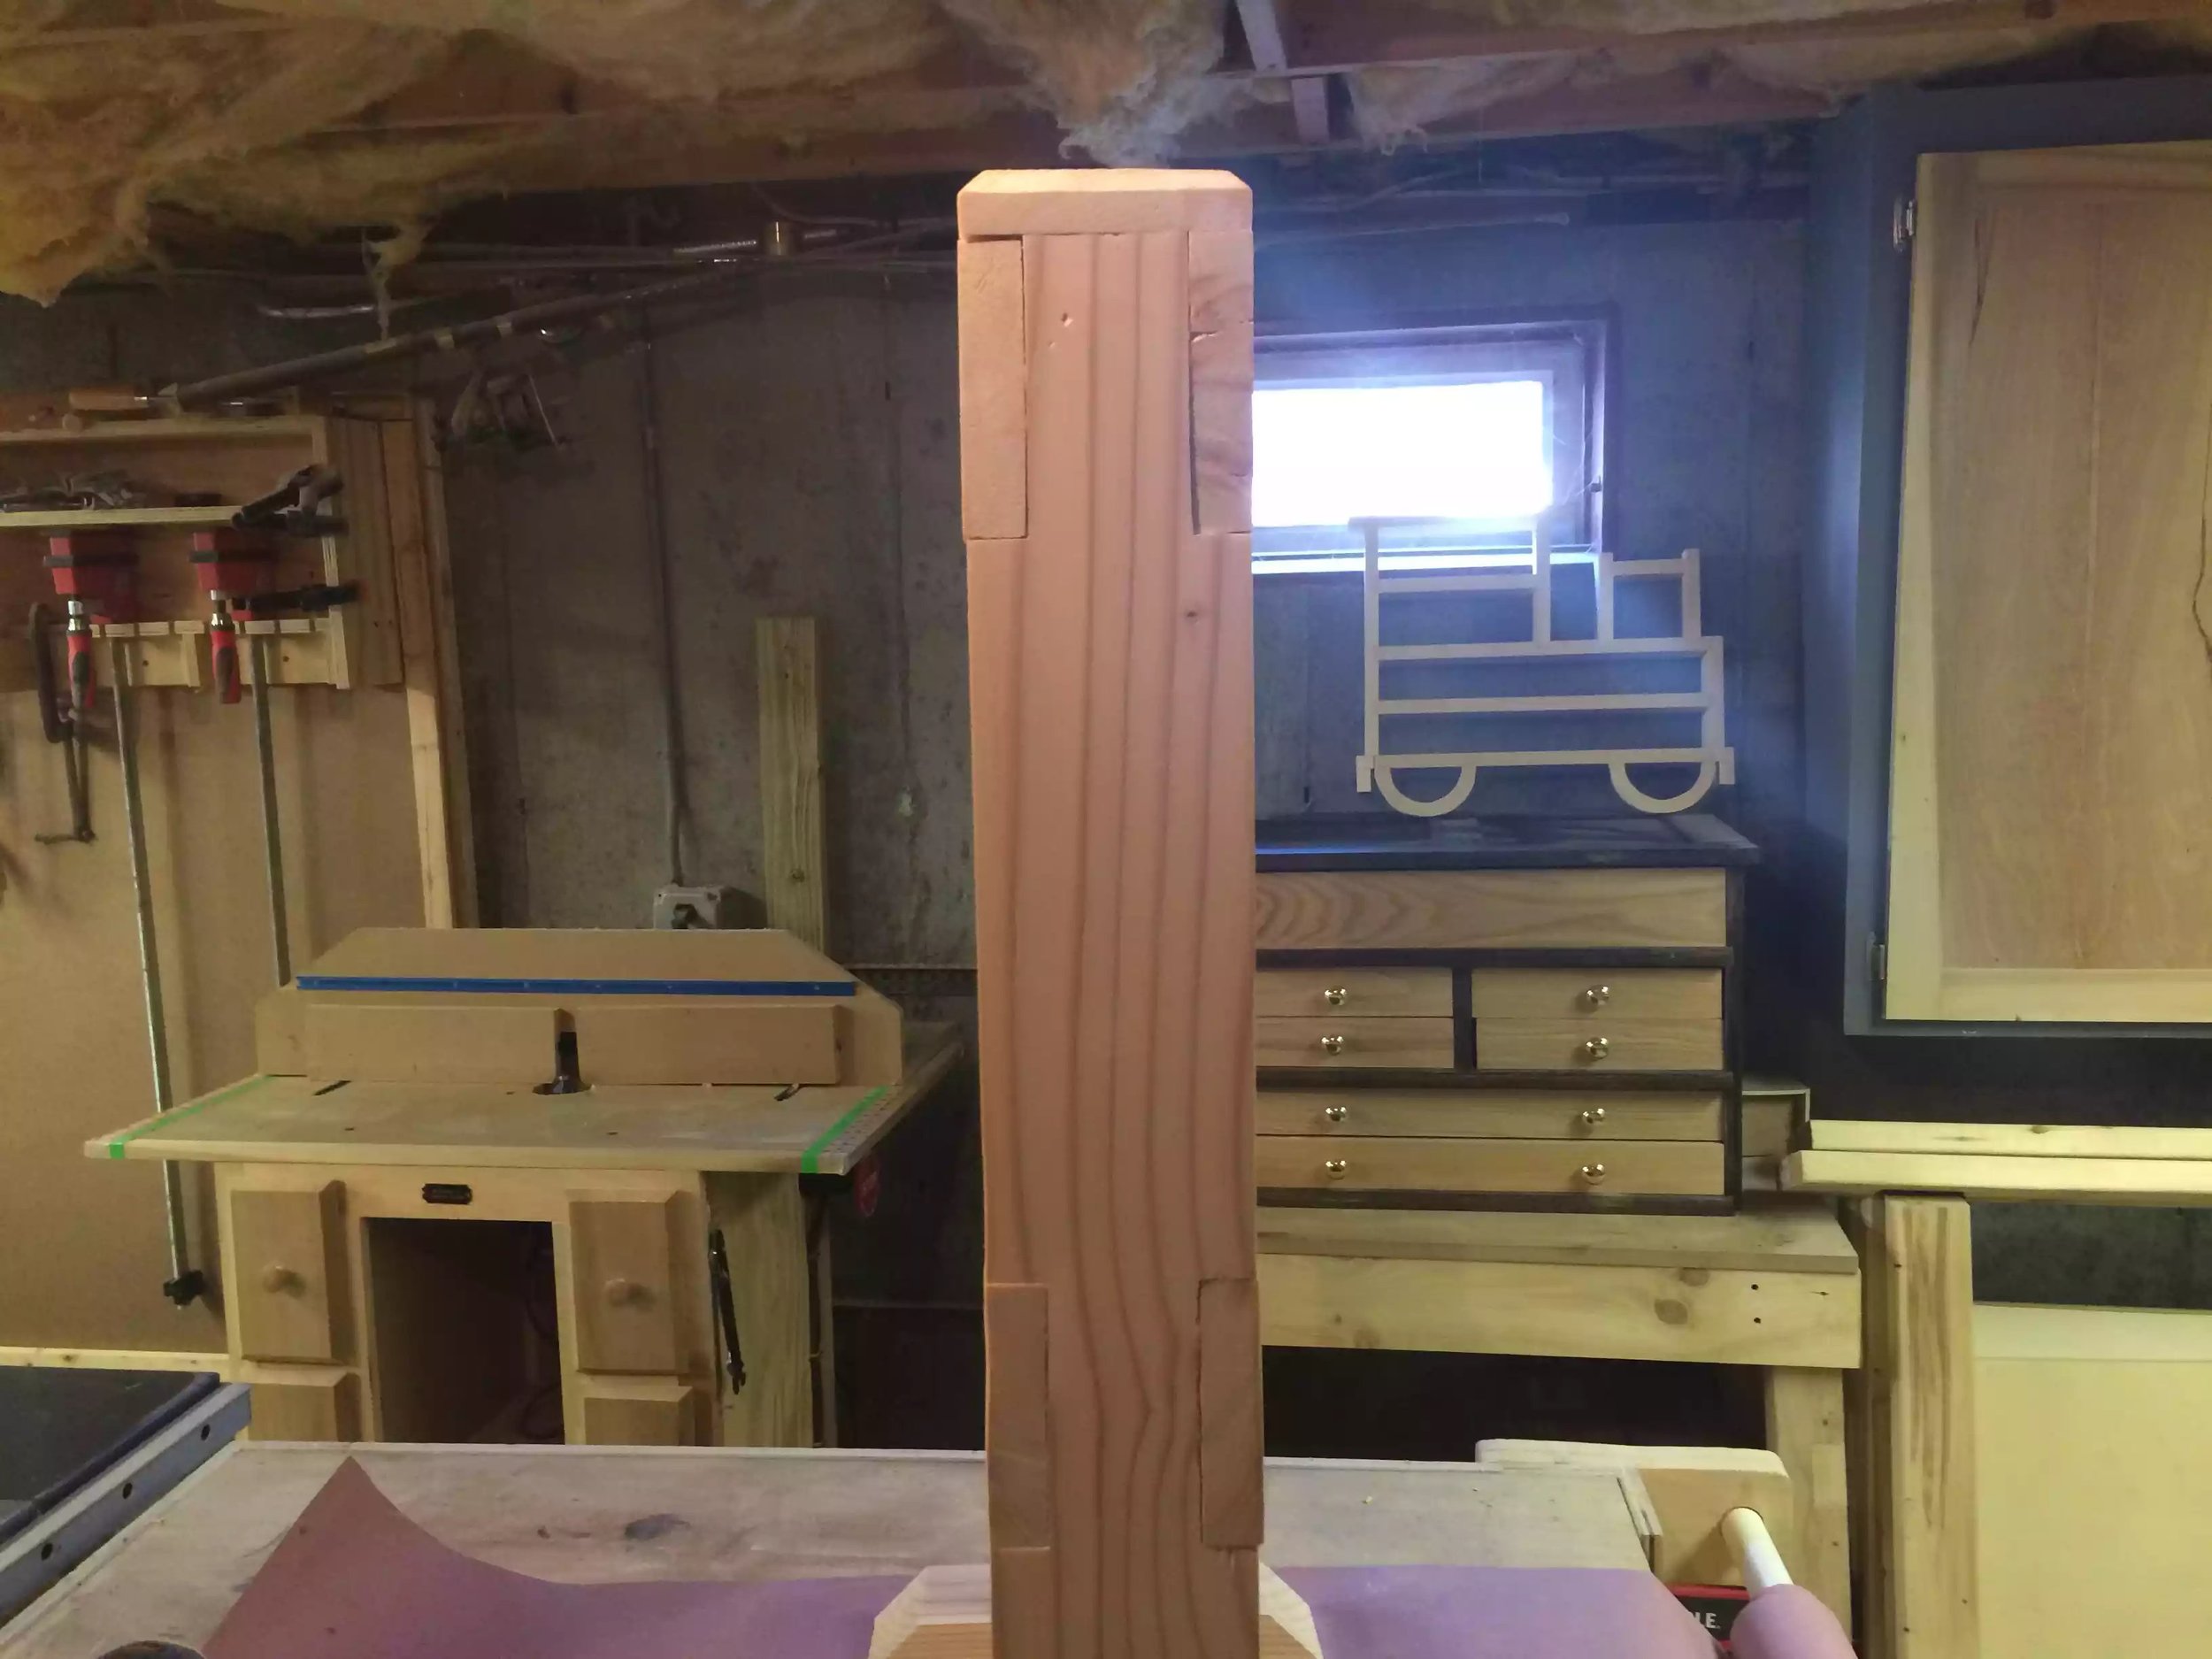
I had some pine left around and in an effort to clean shop I decided to get rid of this project off the honey do list…
Its basically made from 2×4 and 1×4 lumber I cut off the rounded edges of the lumber and reduced it to 1.5” x 3” the unit measures 29” wide by 32’ high.
I basically lap jointed all the pieces to get rid of that big and cumbersome looking feel to it and then screwed/glued all the stretchers into the dados and rabbits and then to fill all the countersunk holes with oak plugs…
I would like to eventually stain it to match the bedroom set which is mahogany but in this weather it wouldn’t dry in my basement.
Thanks for looking
KEEPSAKE BOXES
FOR MY SONS (09/2015)
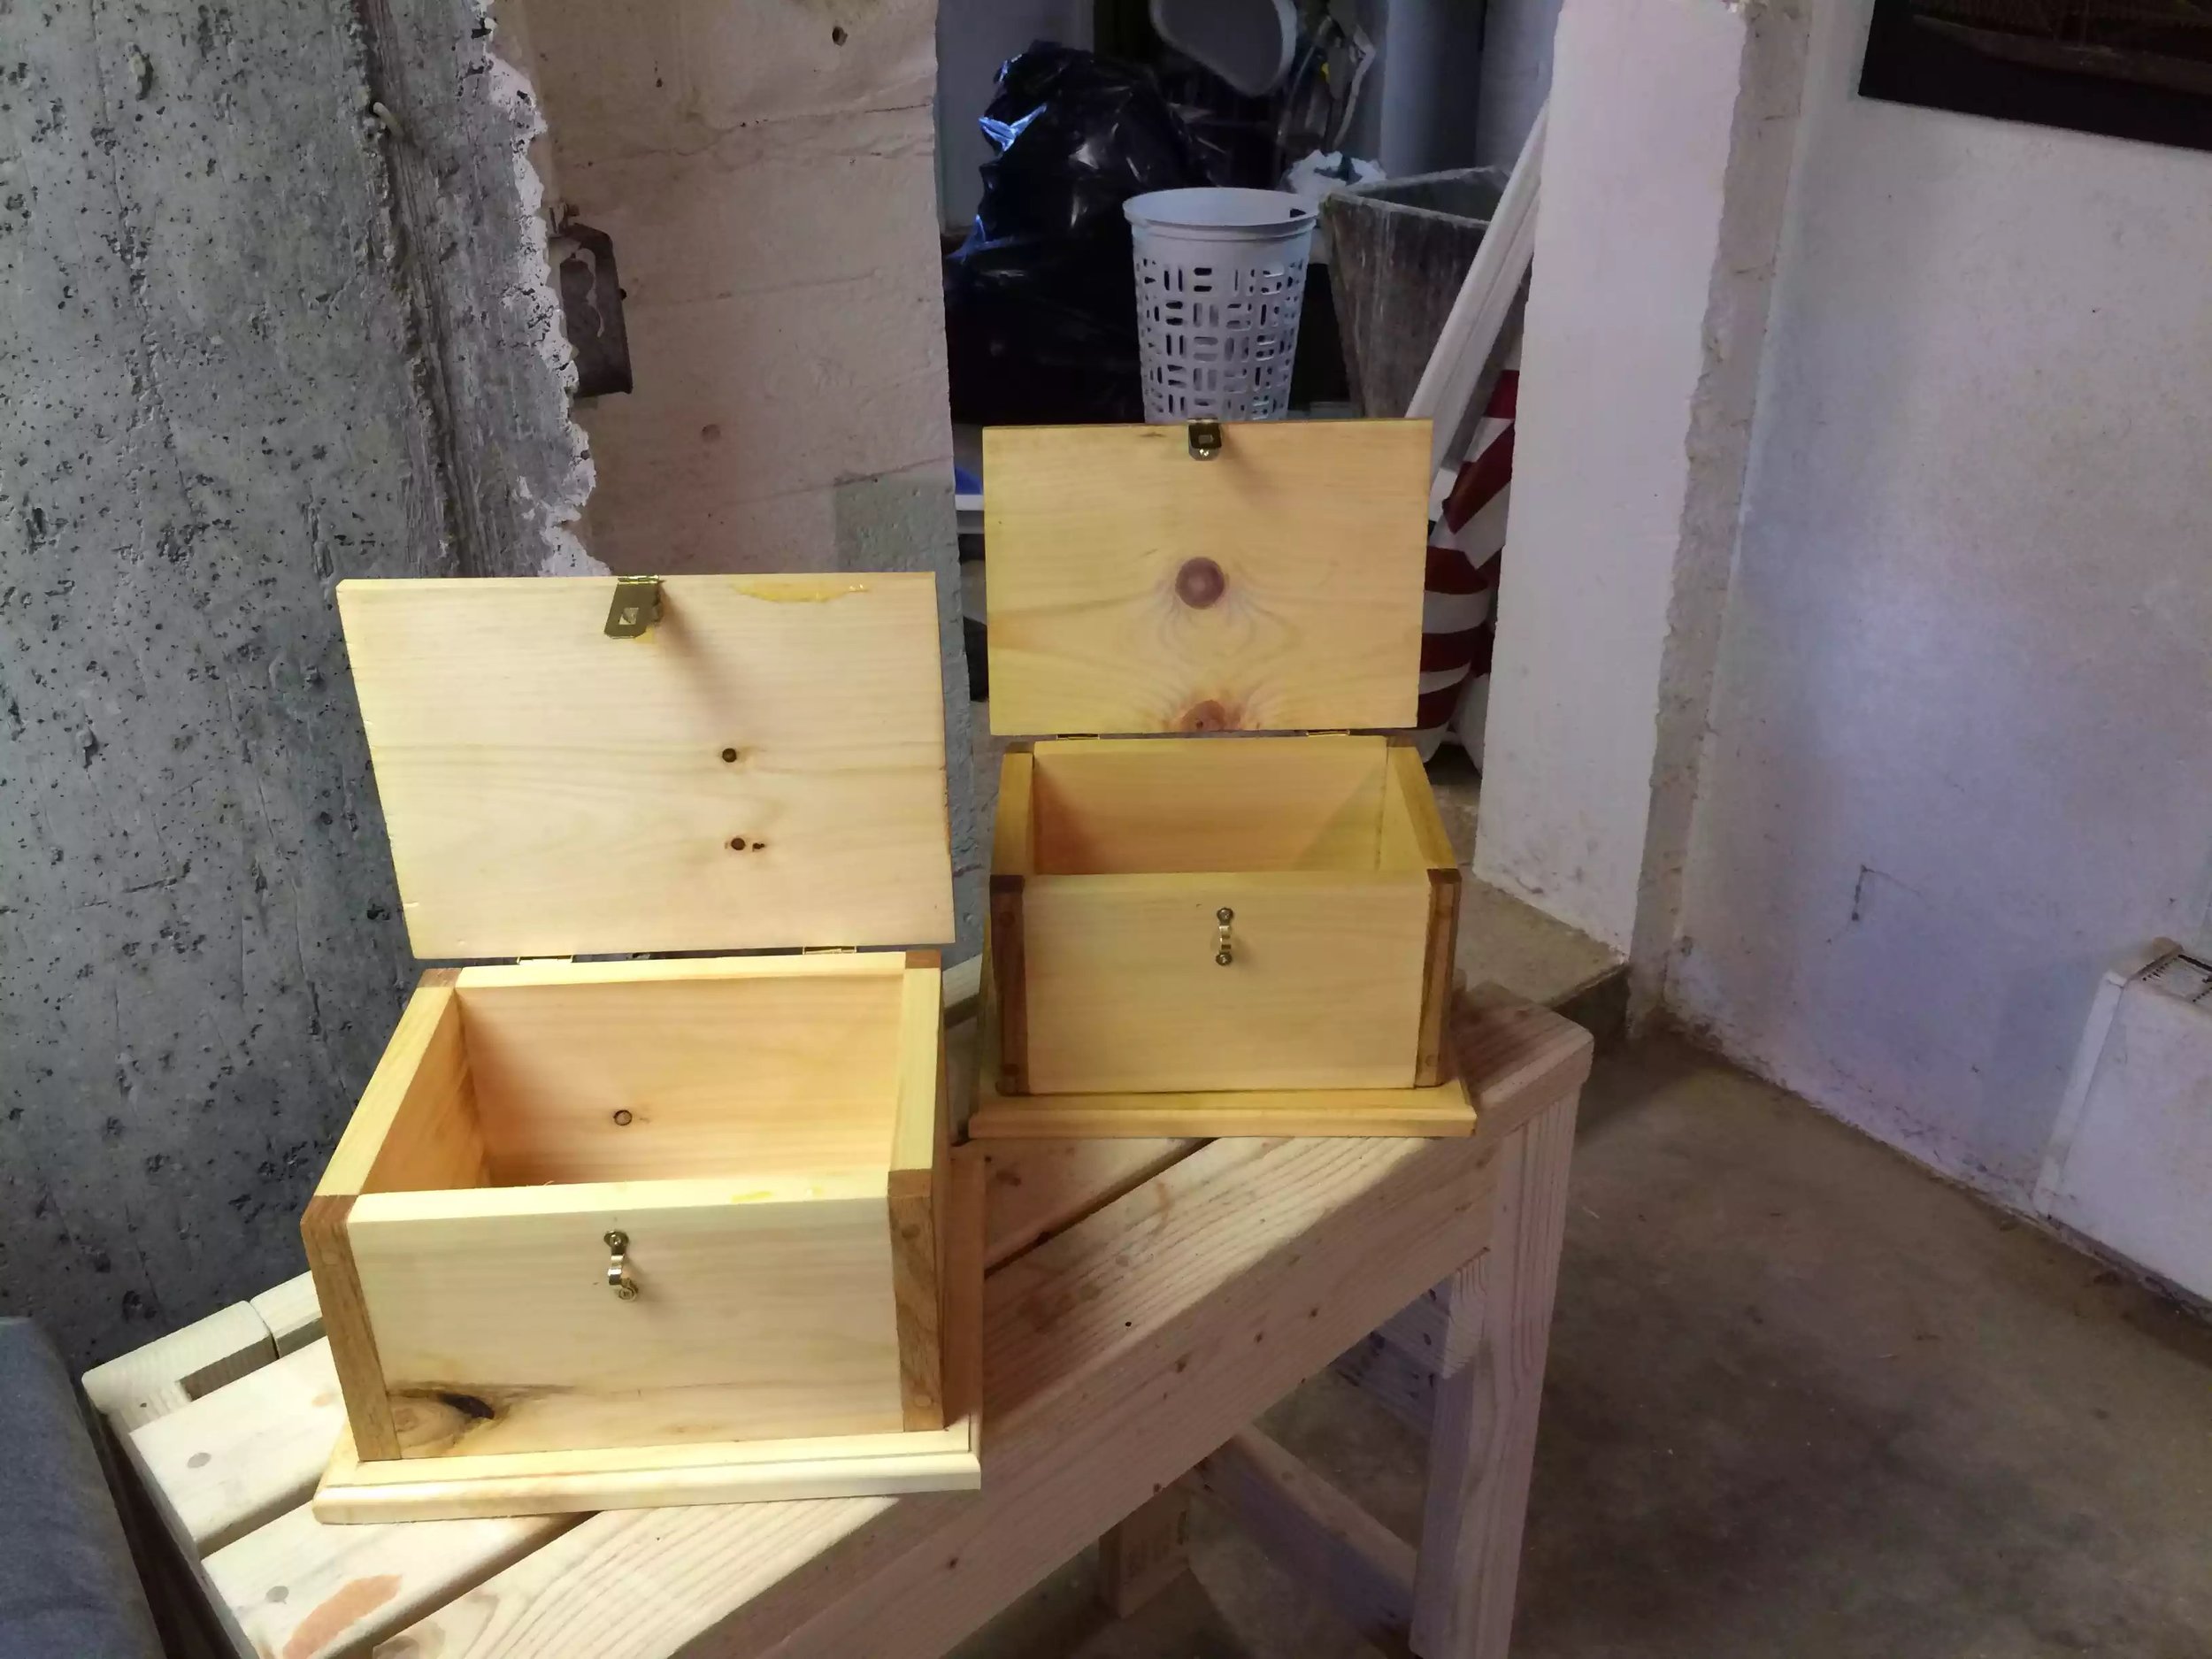
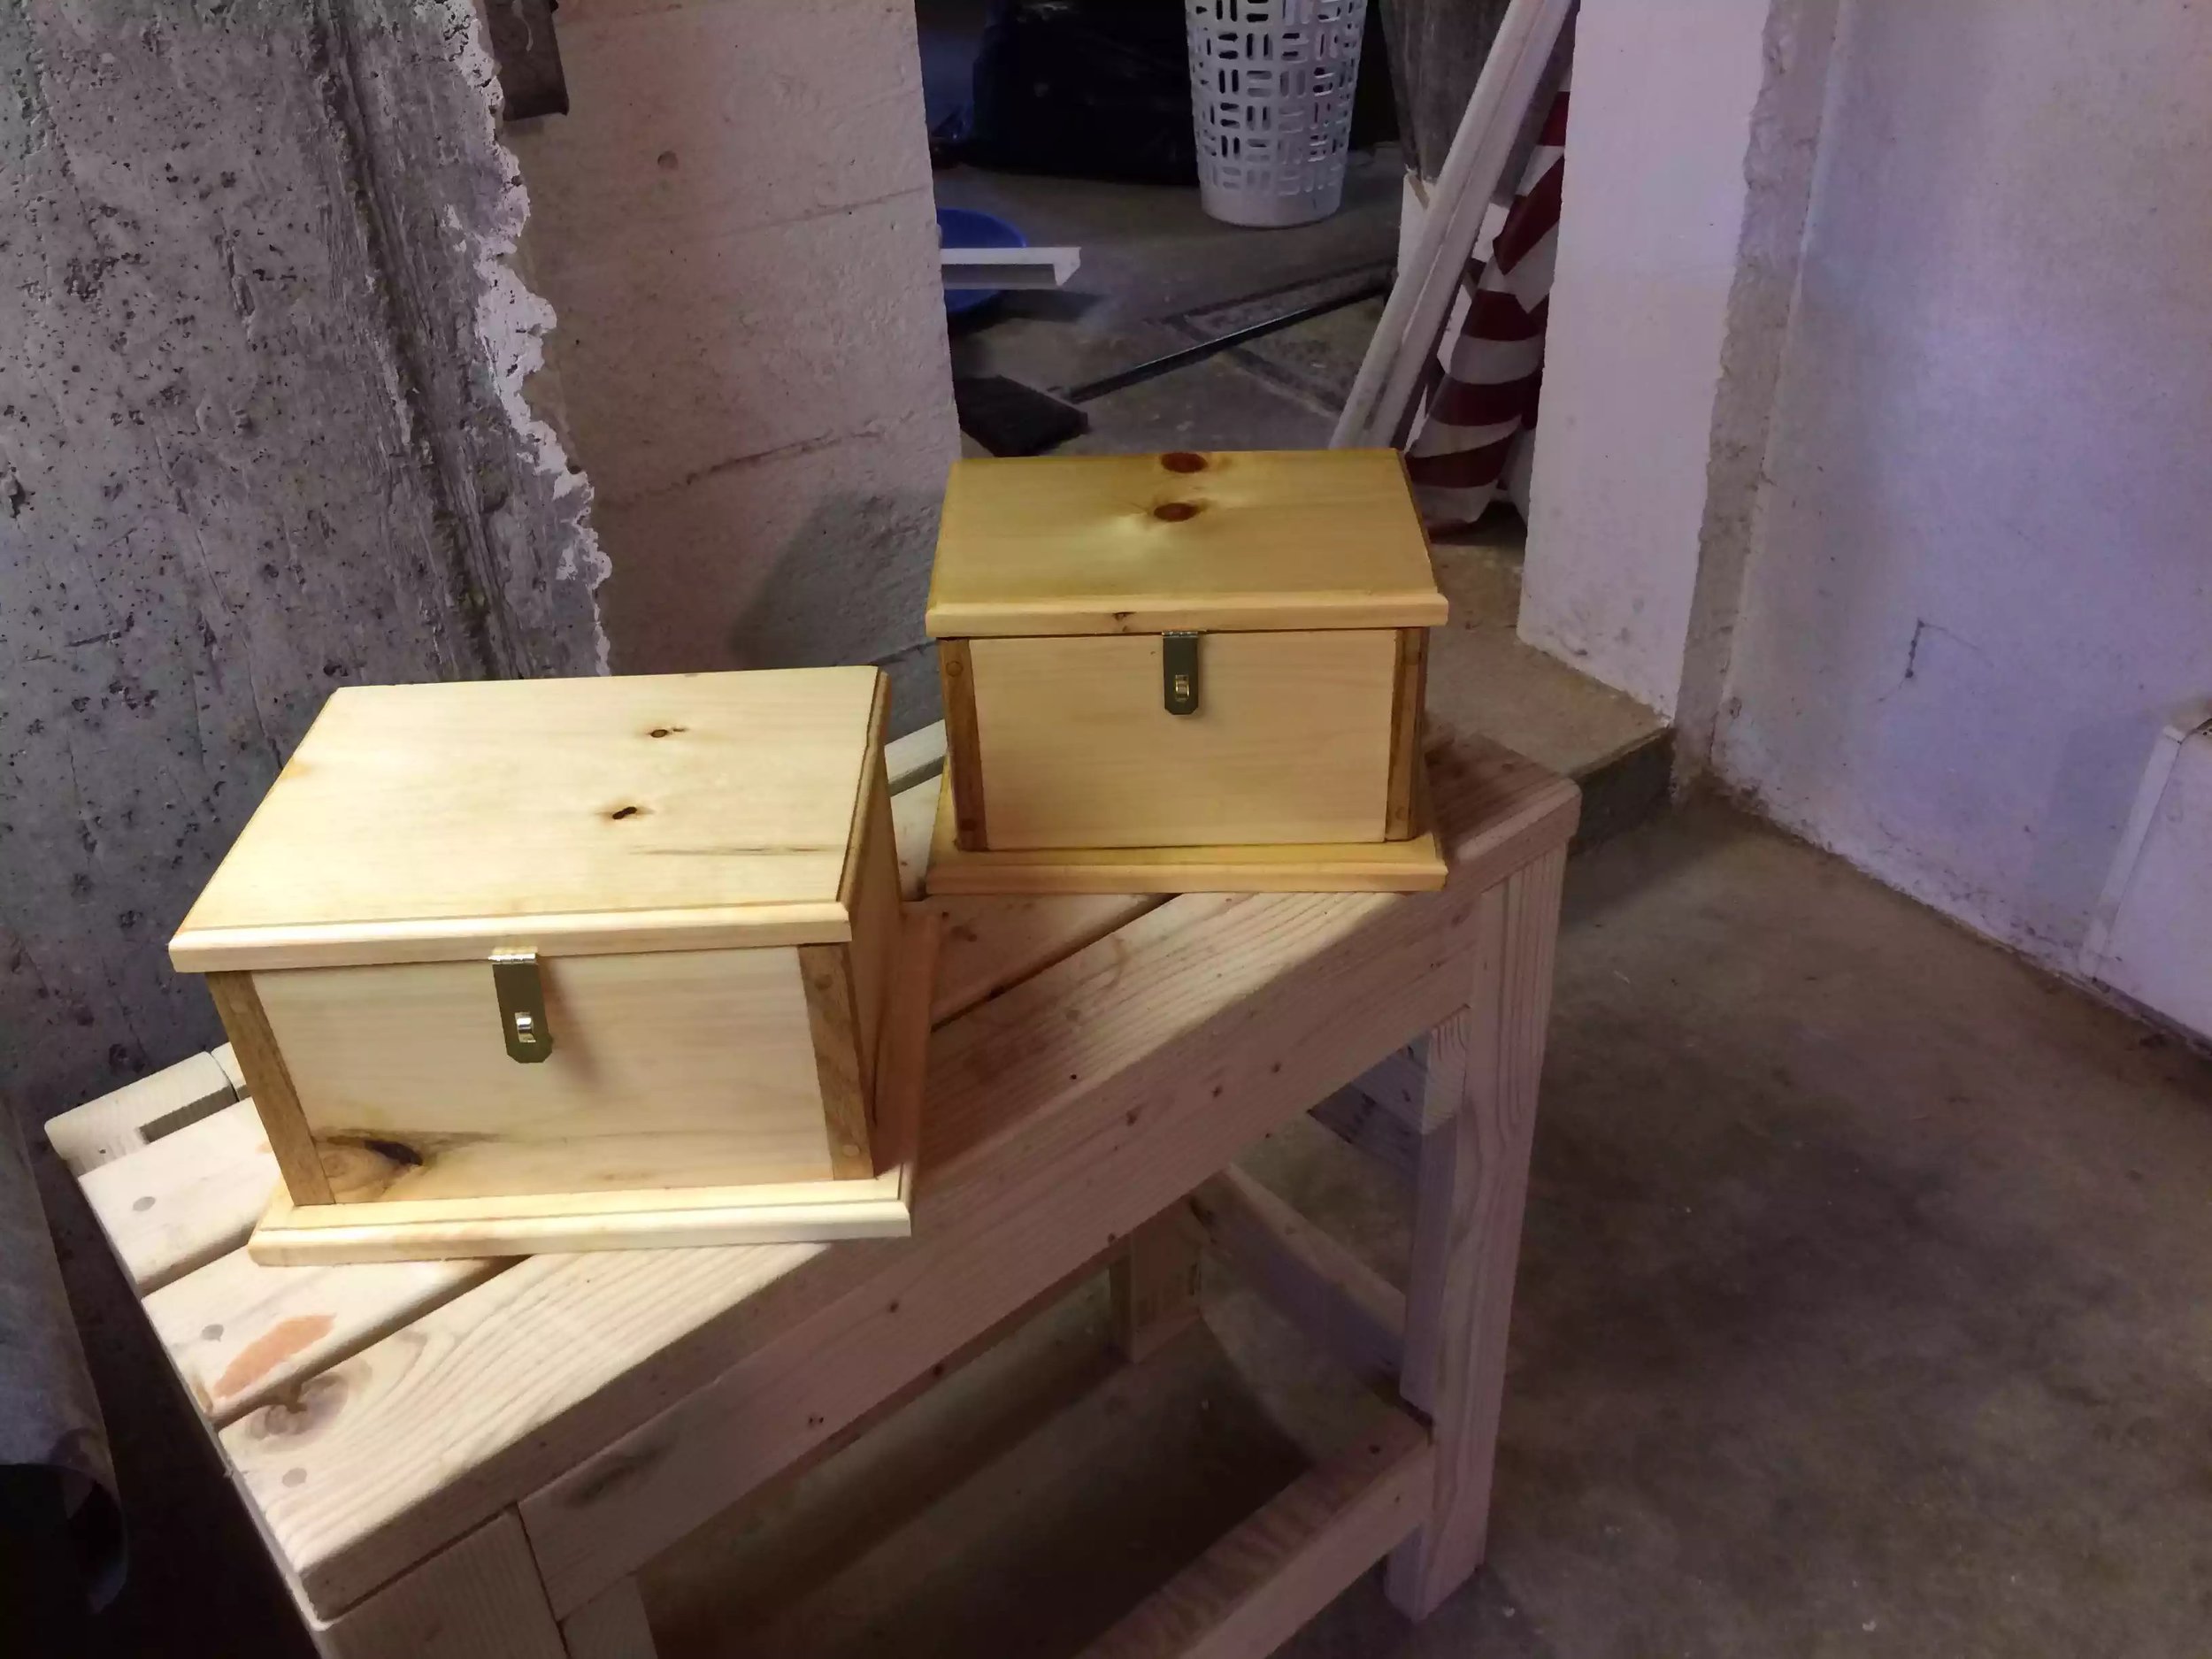
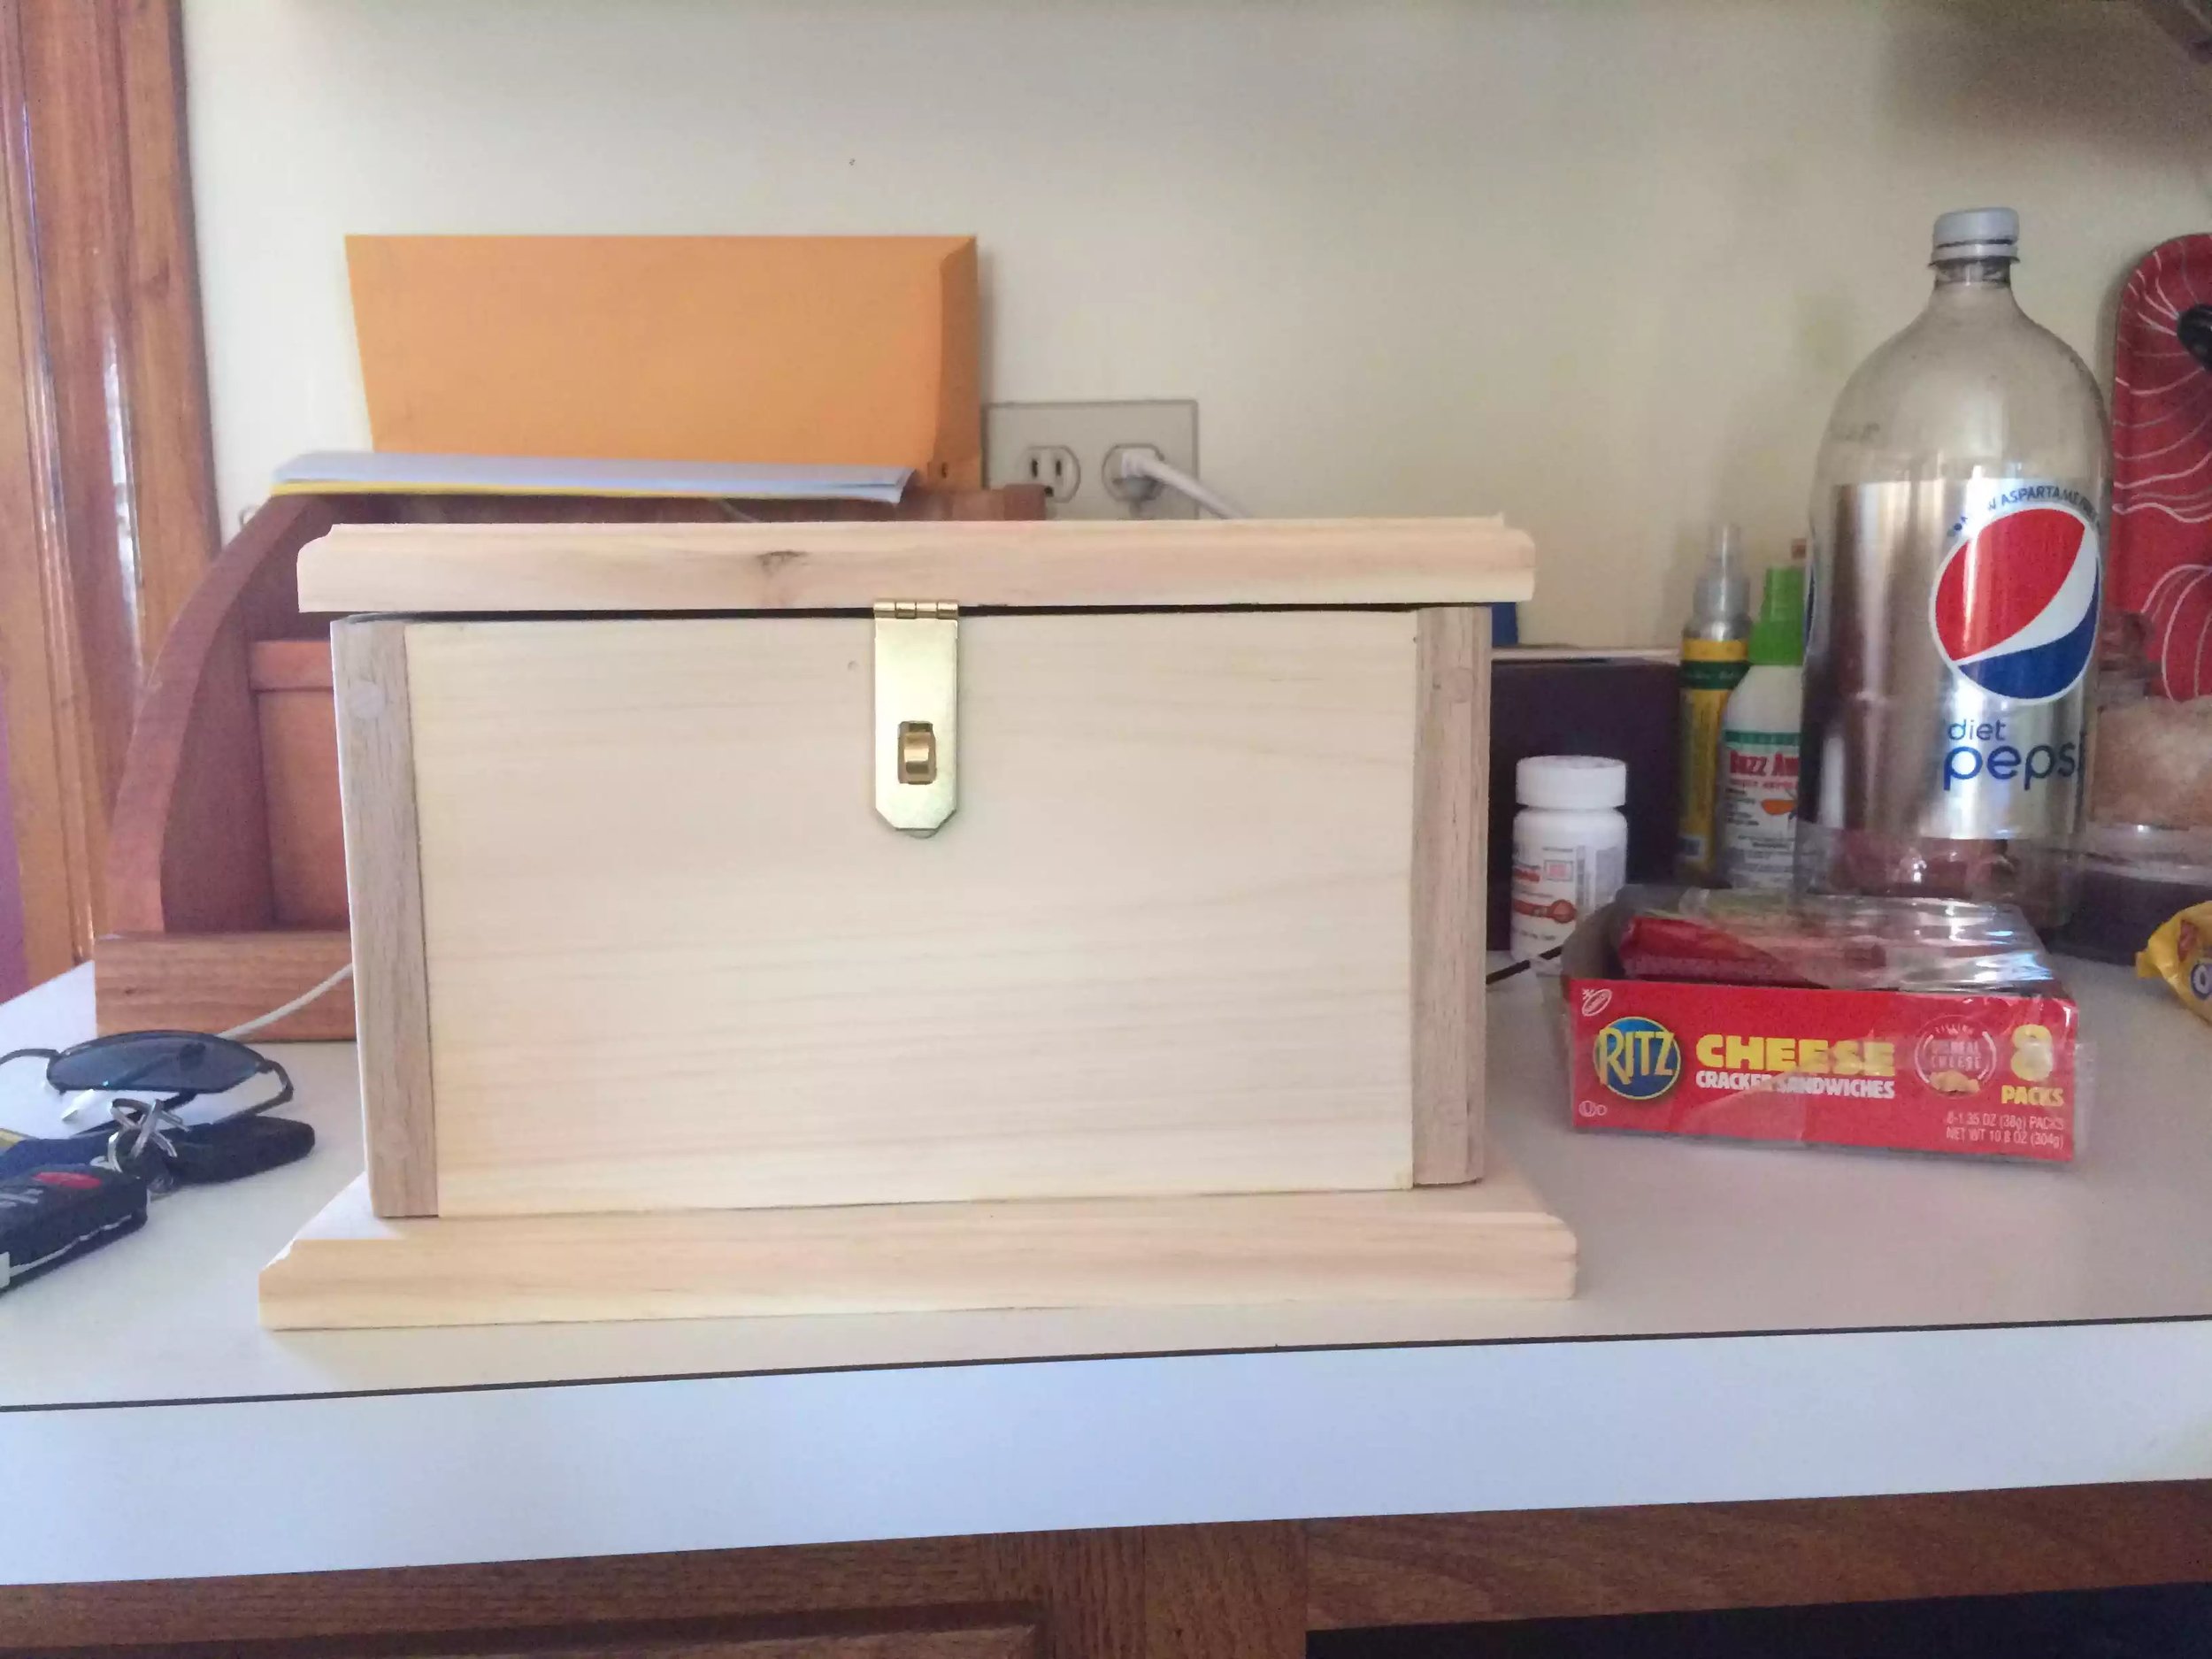

I have meaning to make both sons some keepsake boxes and I was a little tired from doing big projects I thought it would be a nice and small project to do.
Shopping List:
- 1. 1×6 pine board 6’
- 1. 1×10 pine board 6’
- 1. 3/4” x 3/4” oak square dowel 4’
- 4. 90° Stop Hinges
- 2. Hasp
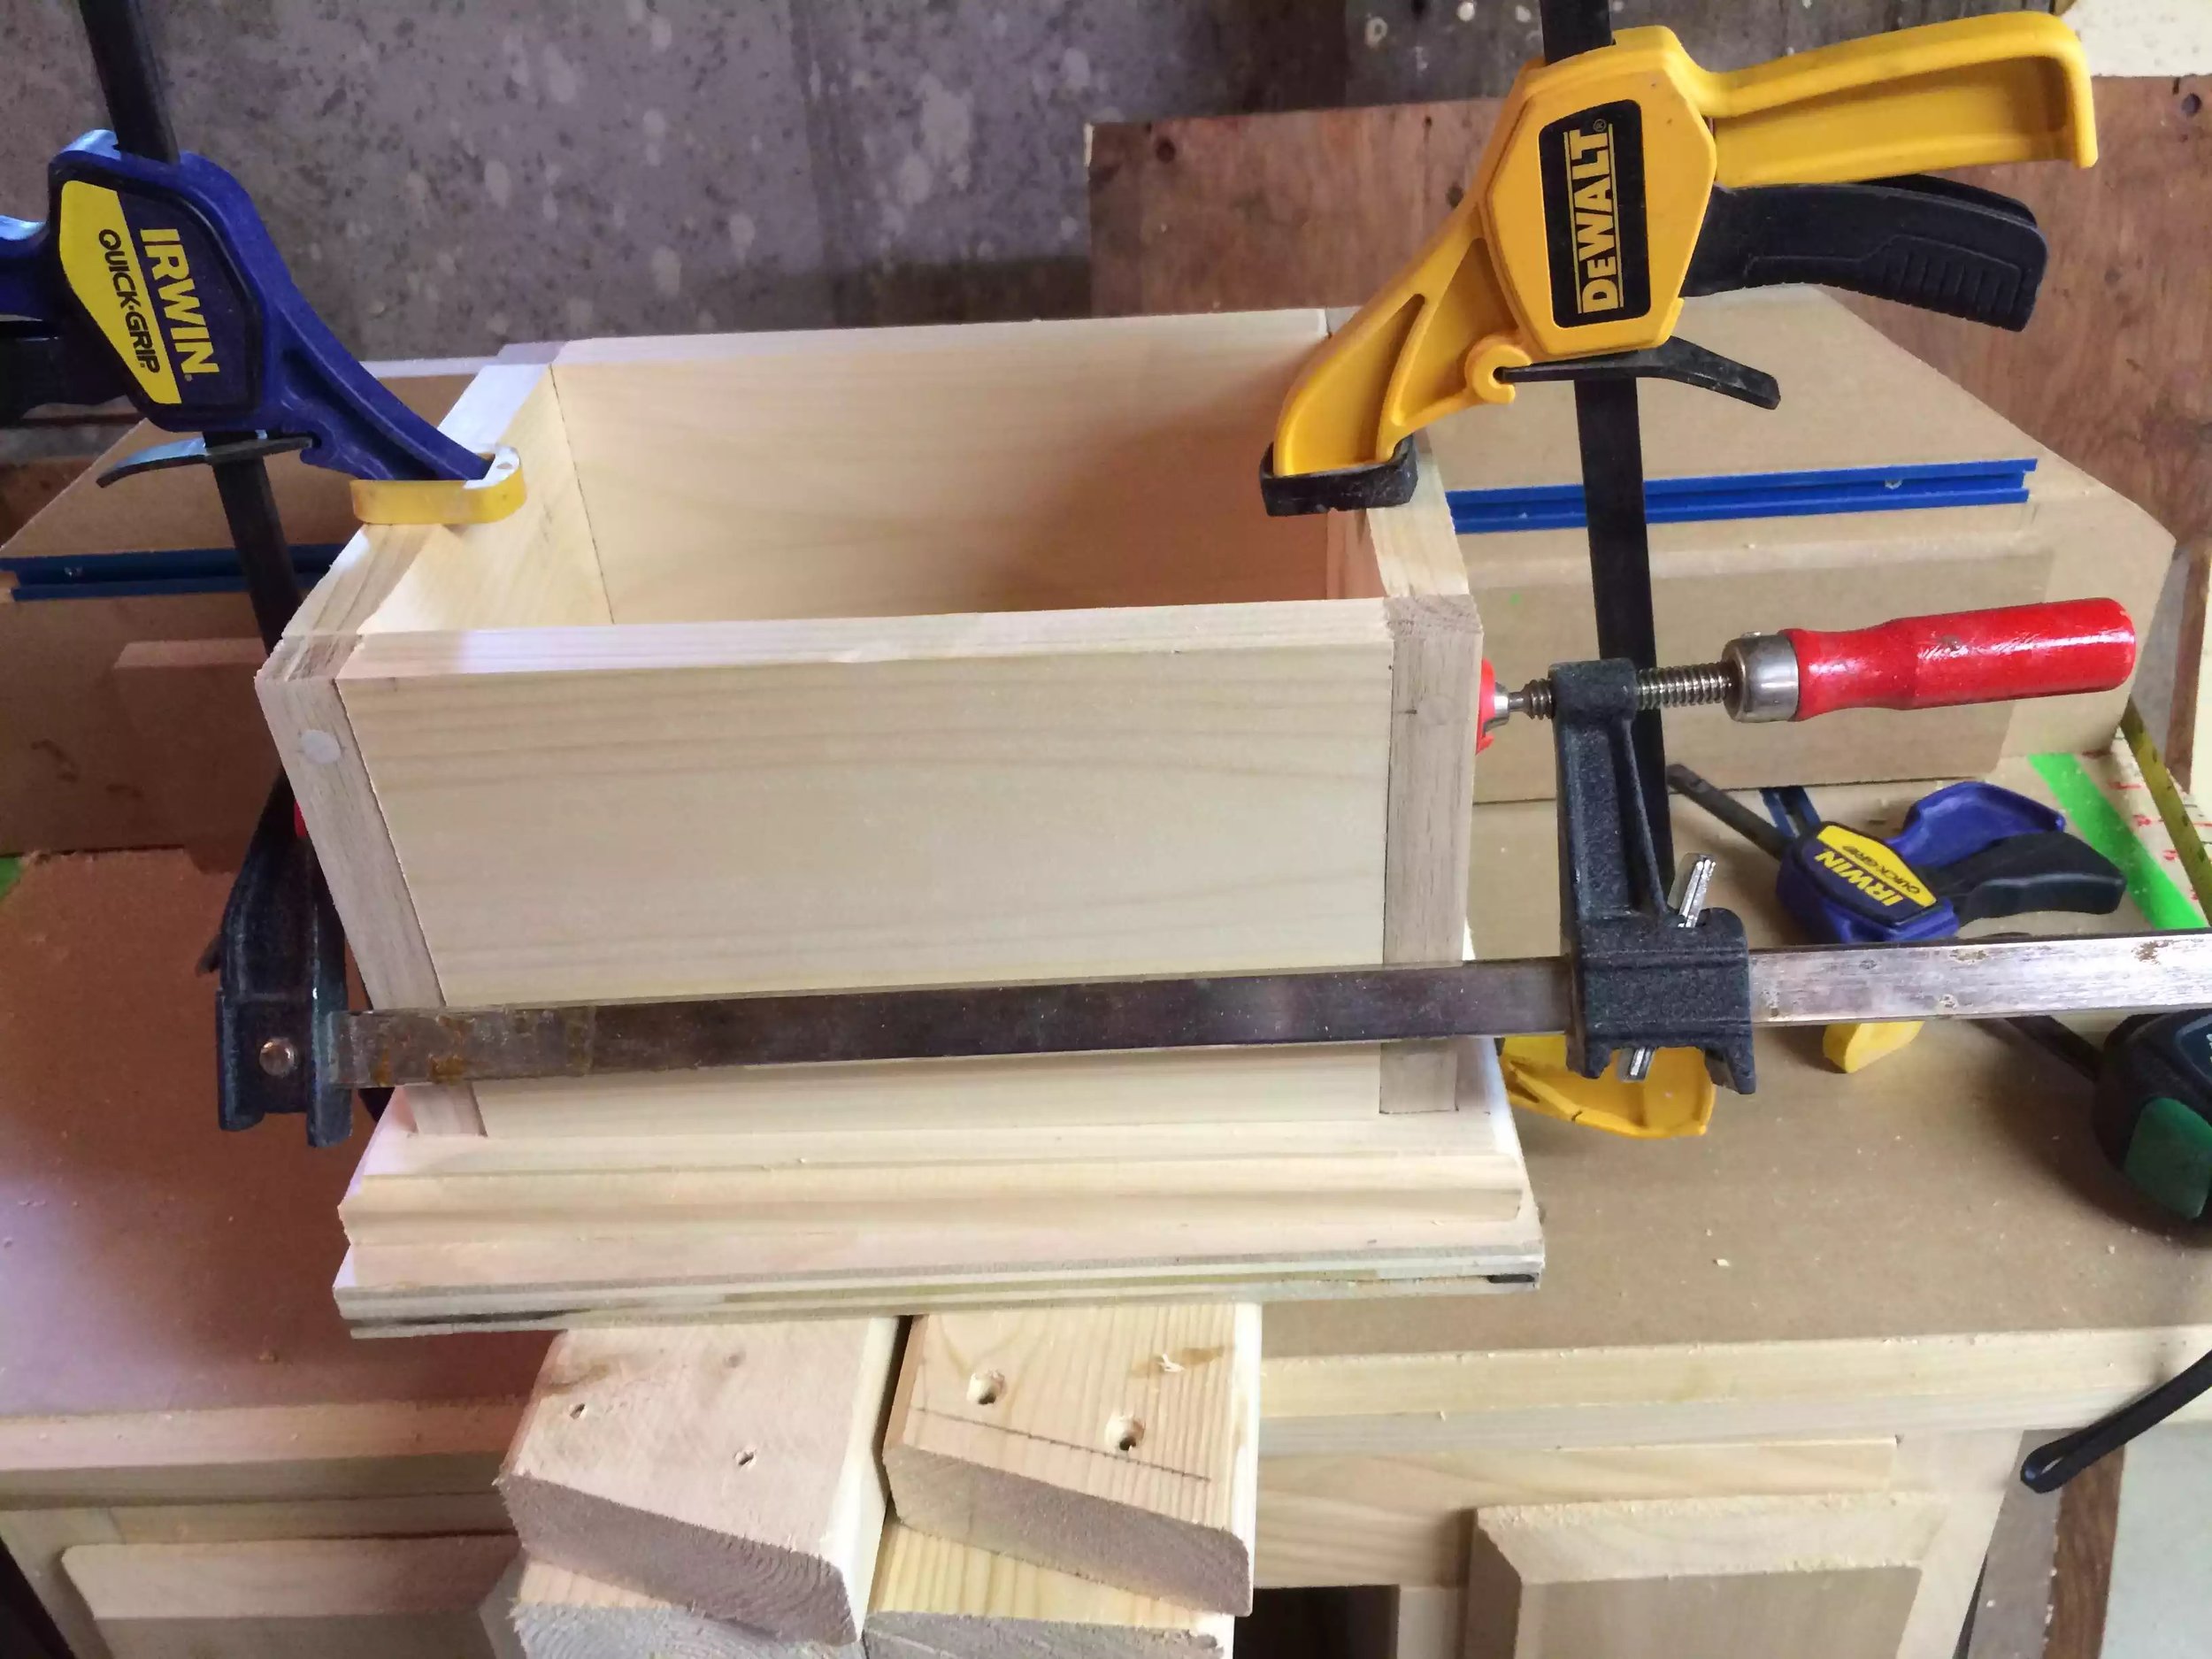
Step 1. cut the sides to my dimensions ( 1×6x6) and cut 2 pieces of oak dowel, place 2 holes on each face to was going to be abutted to another piece ( be carful so as to space the holes so they don’t bump into each other on each face) and screw them to the front and back of the sides. ( Repeat this step again for the right side)
Step2. fix the front and back pieces ( 1×6x8”) to the sides creating a frame. I placed hole plugs to each hole there was a hole at.
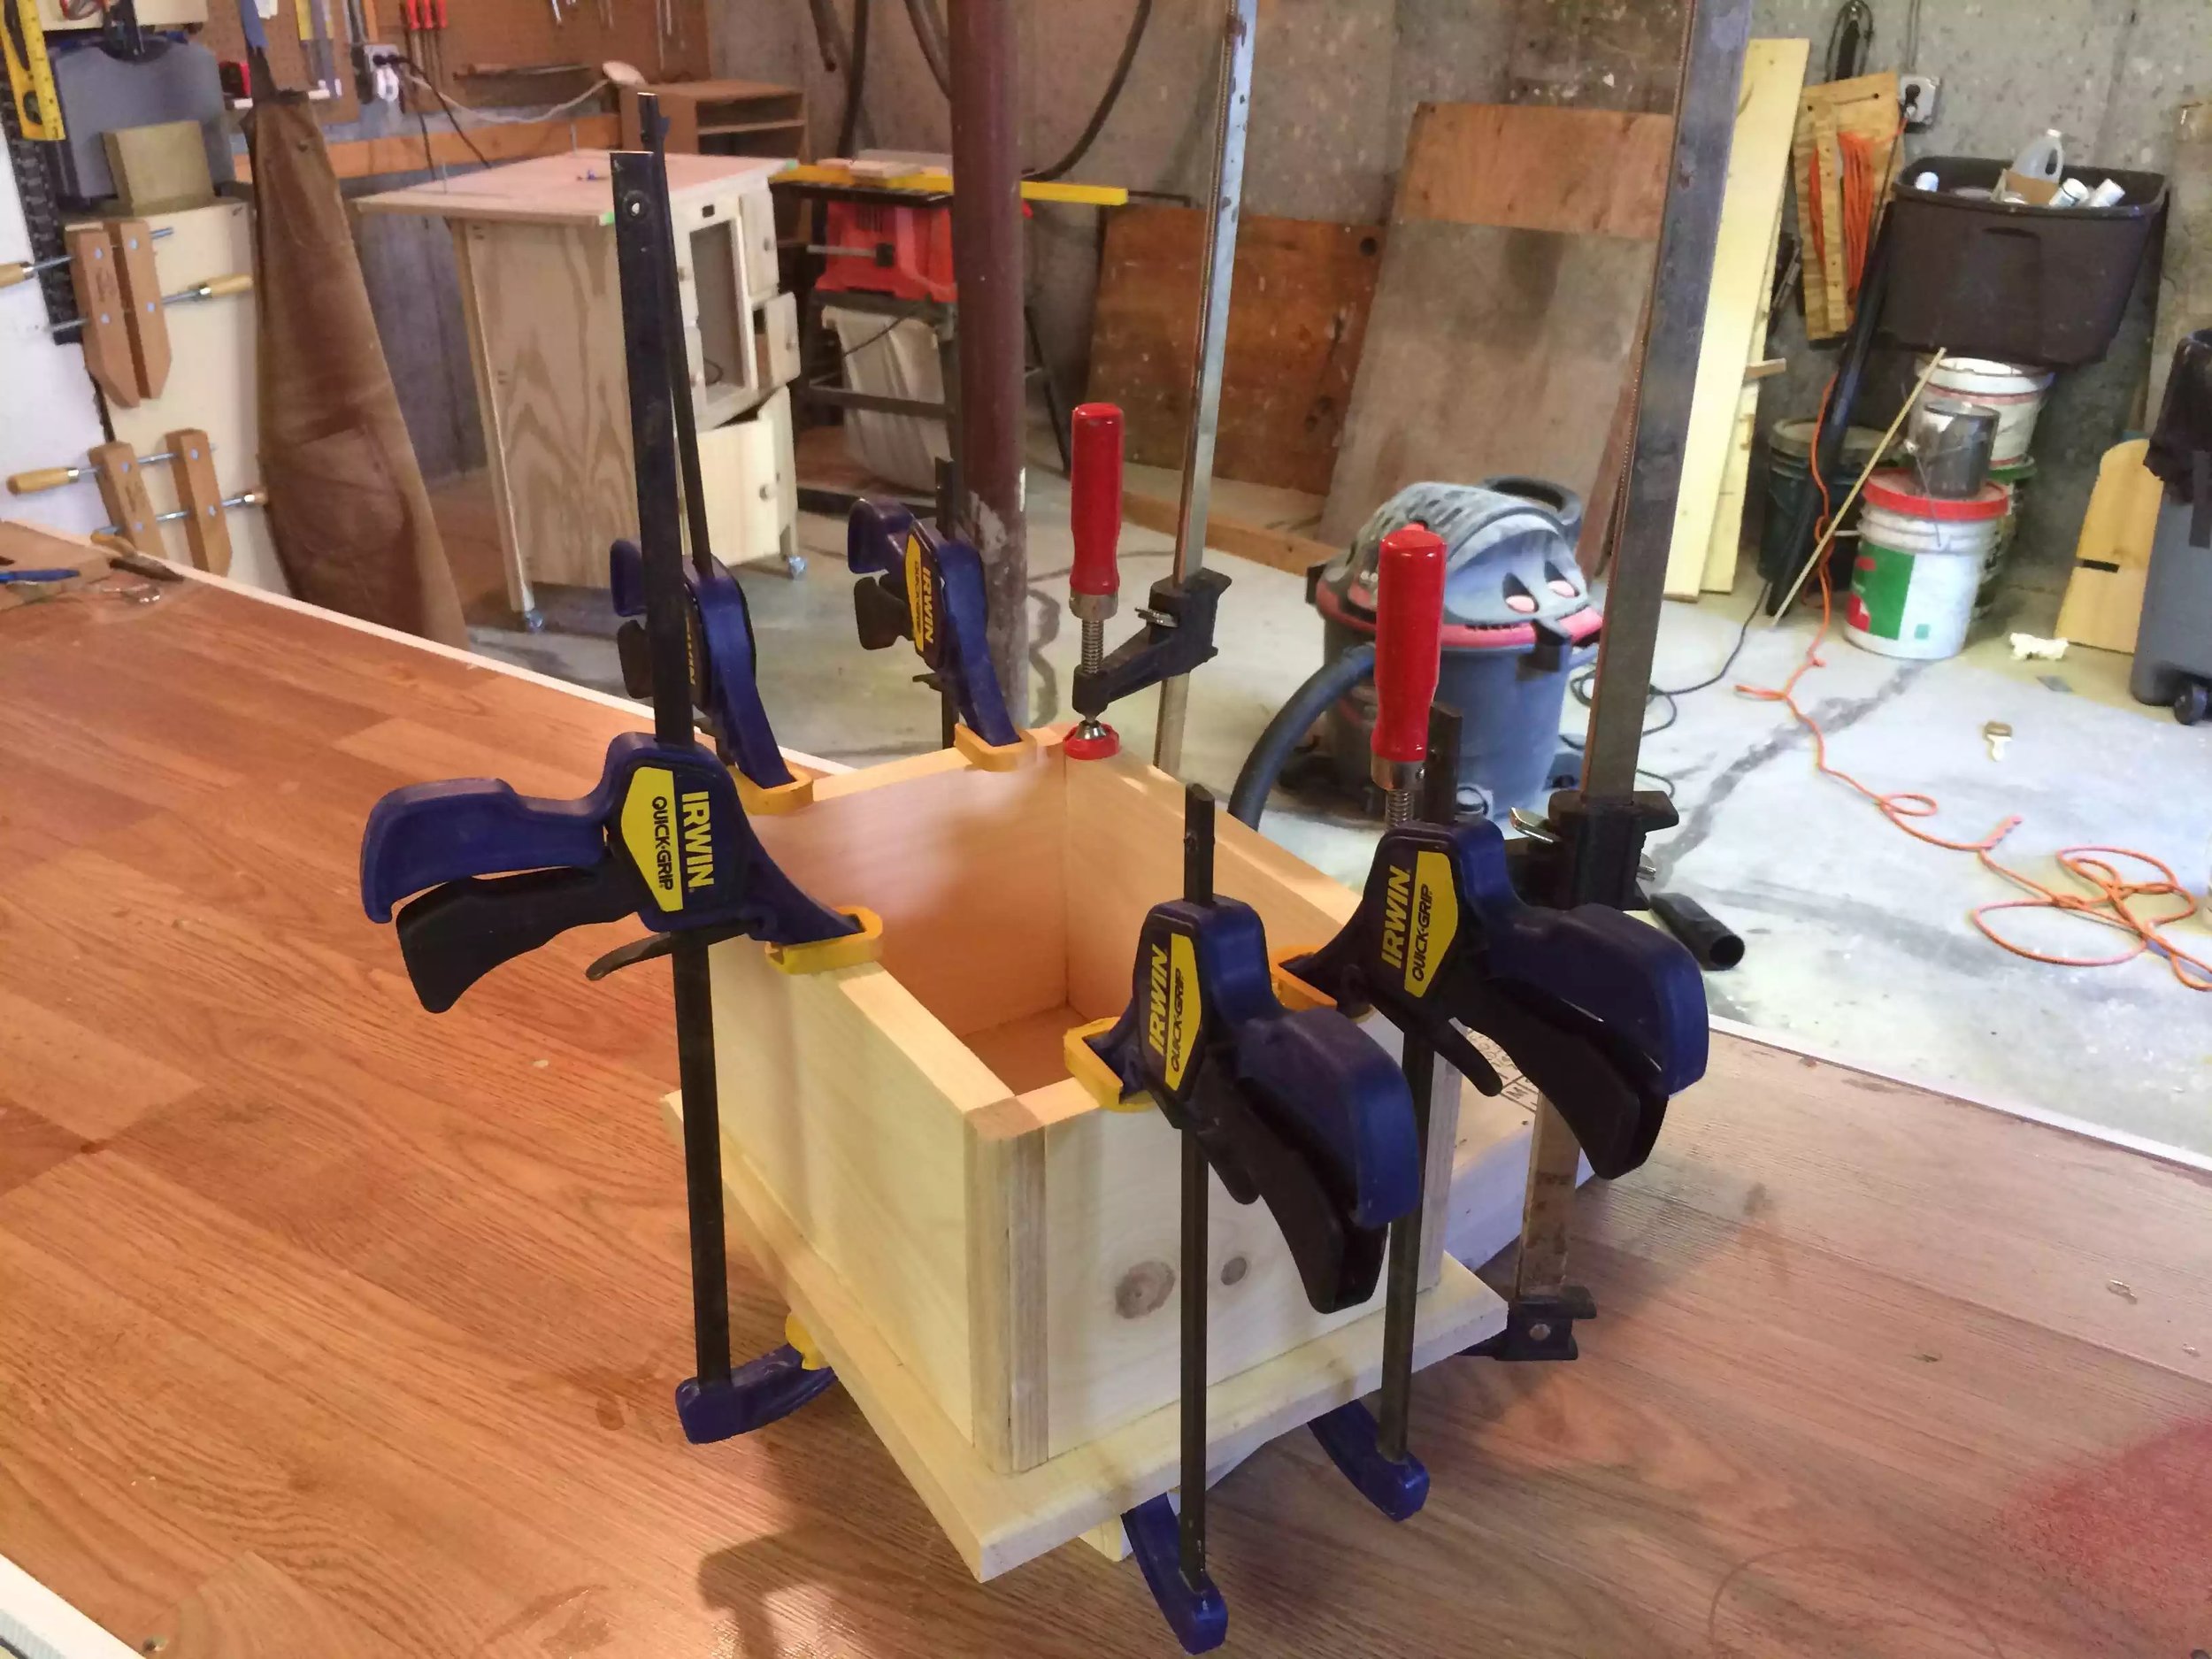
Step 3.Create the base (1×10x 12”) router the base on each side accept the back with a round over bit.
Step 4.Place the box assembly onto the base leaving a 1/2” space around the box and edges of the base, I traced a line around the outside and inside perimeters of the box so as that I knew where drill by holes to secure the box to the vase, I countersunked the holes and after placing the screws I placed more hole plugs with glue and sanded flush.
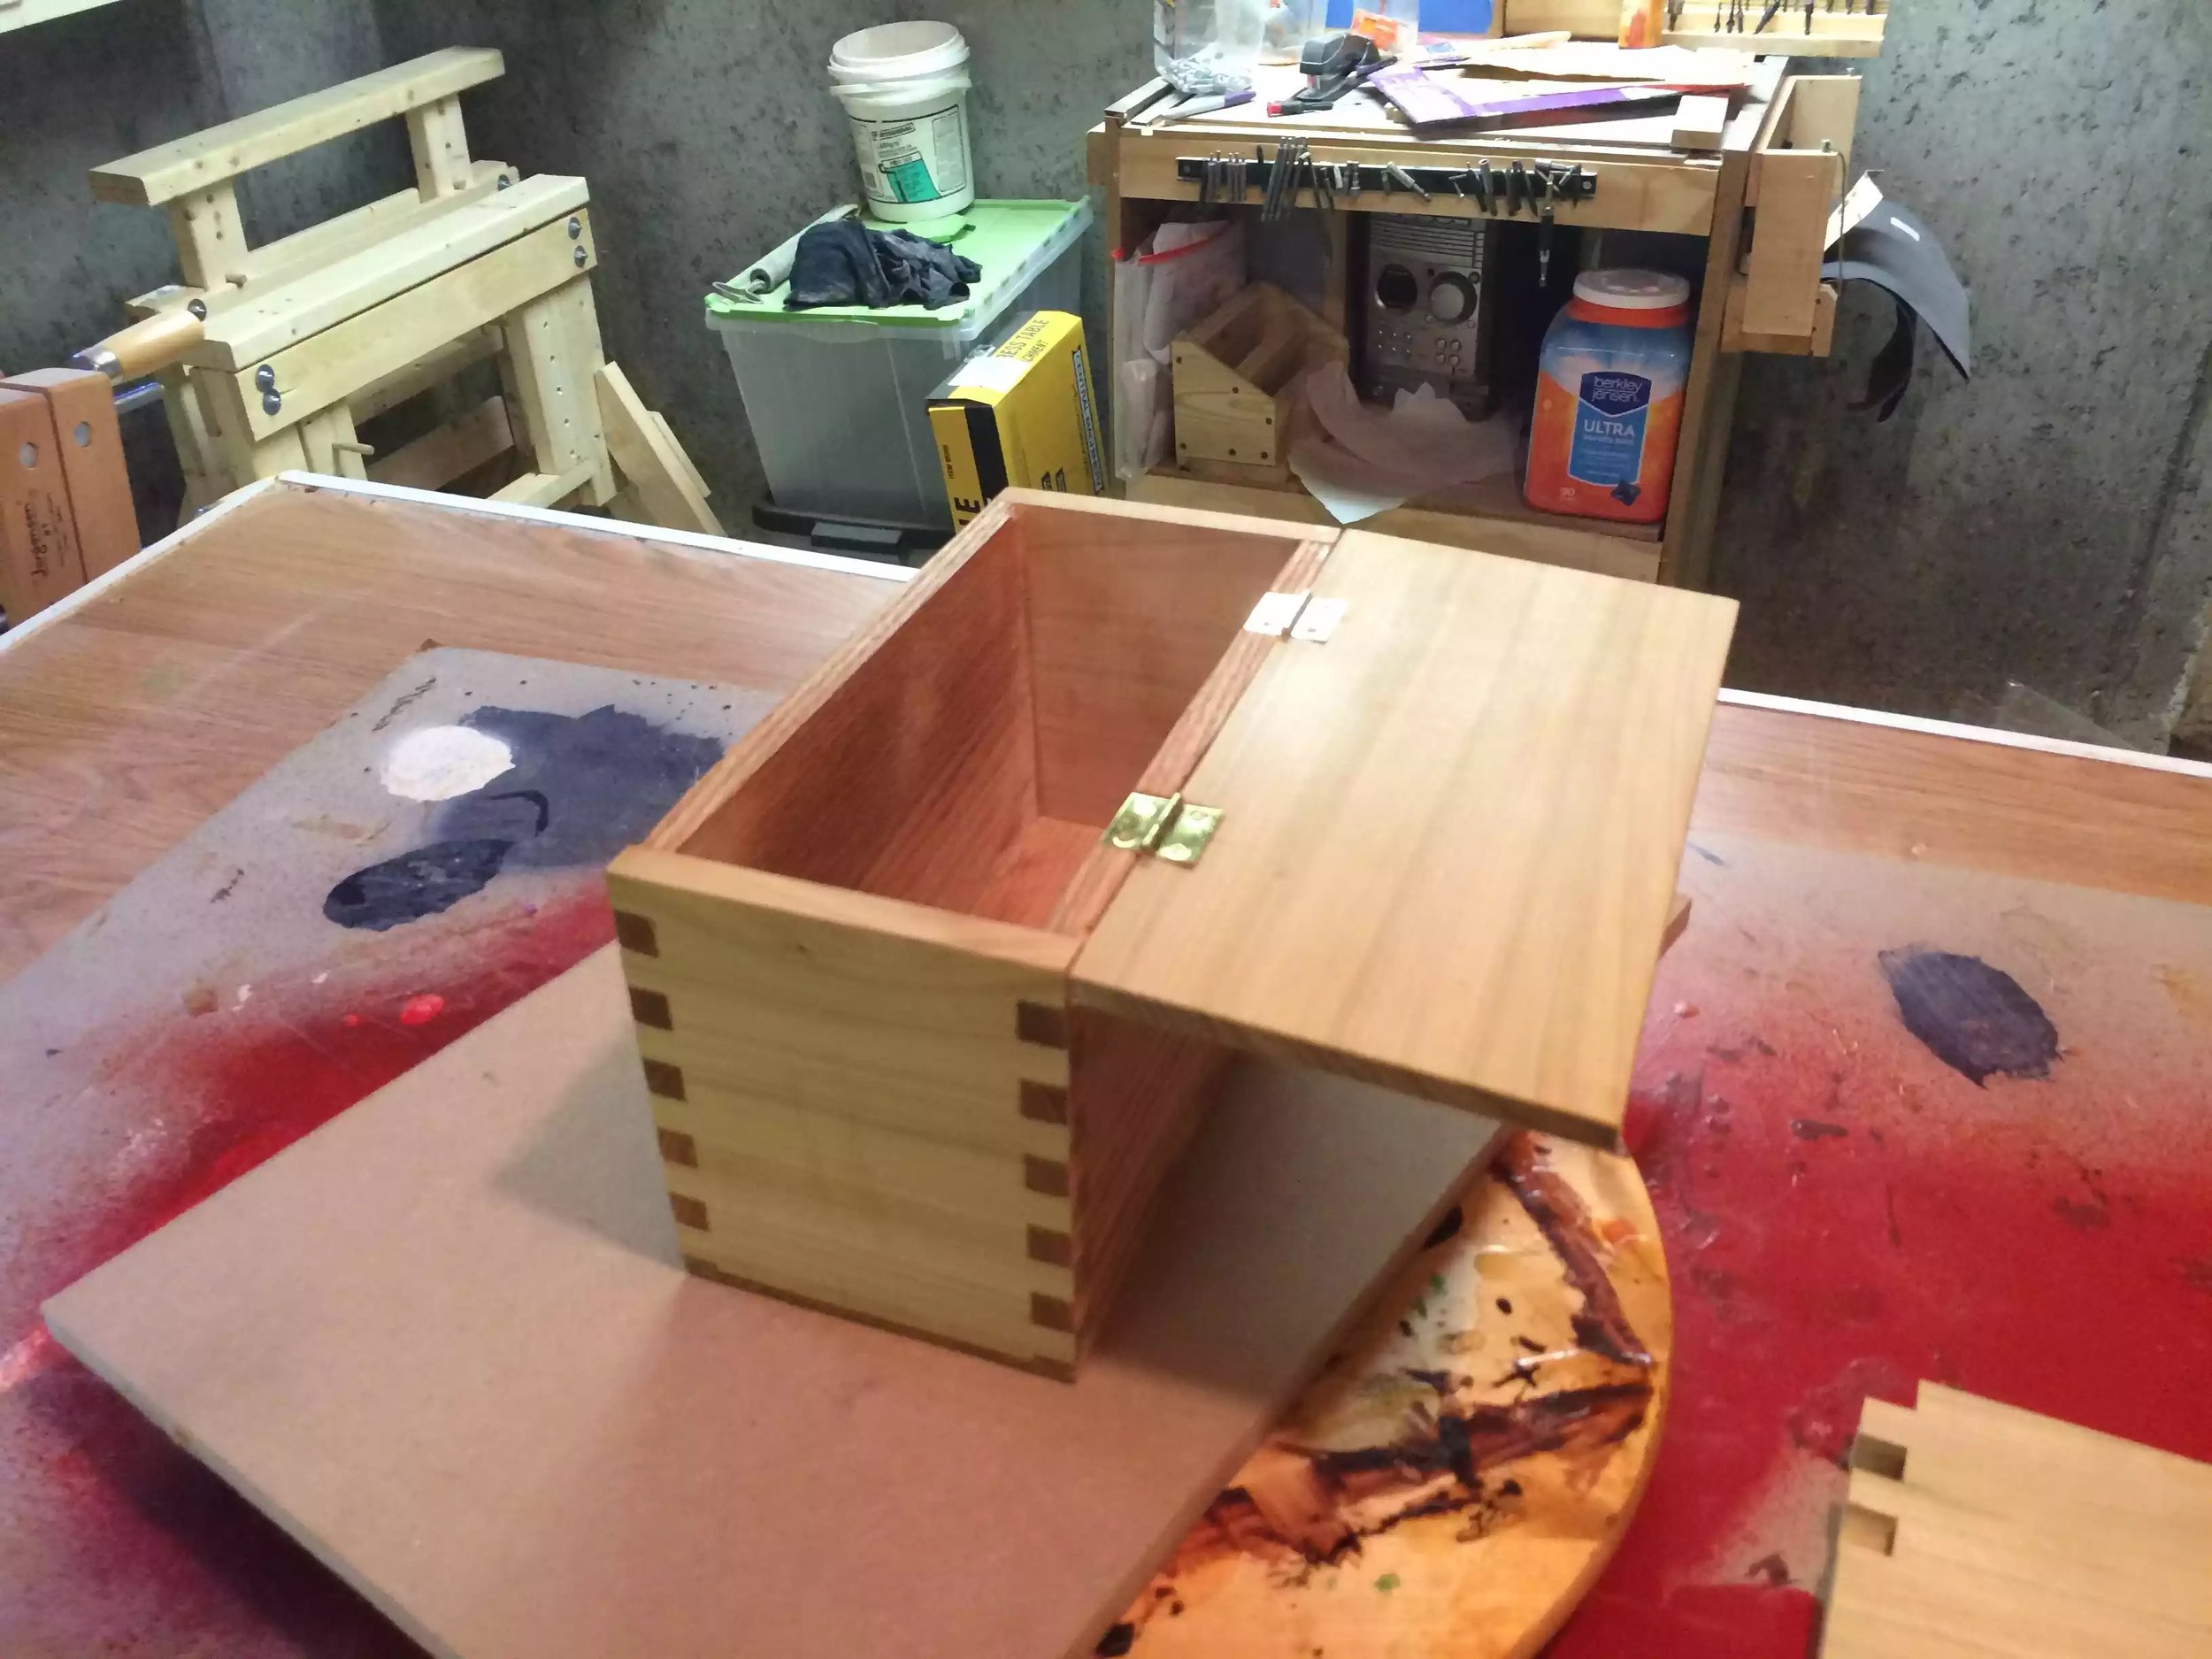
Step 5.Create the lid making all sides flush with the box and again I routered all edges accept the back with my round over bit I drilled pilot holes for the hasp and hinges ( these hinges are great they stop the lid from folding all the back, I like the bright brass finish off them.
Step 6.Finishing I used 2 different finishes polyurethane on one box and beeswax on the other ..
That’s it
Hope you like
STUDENT DESK
(09/2015)
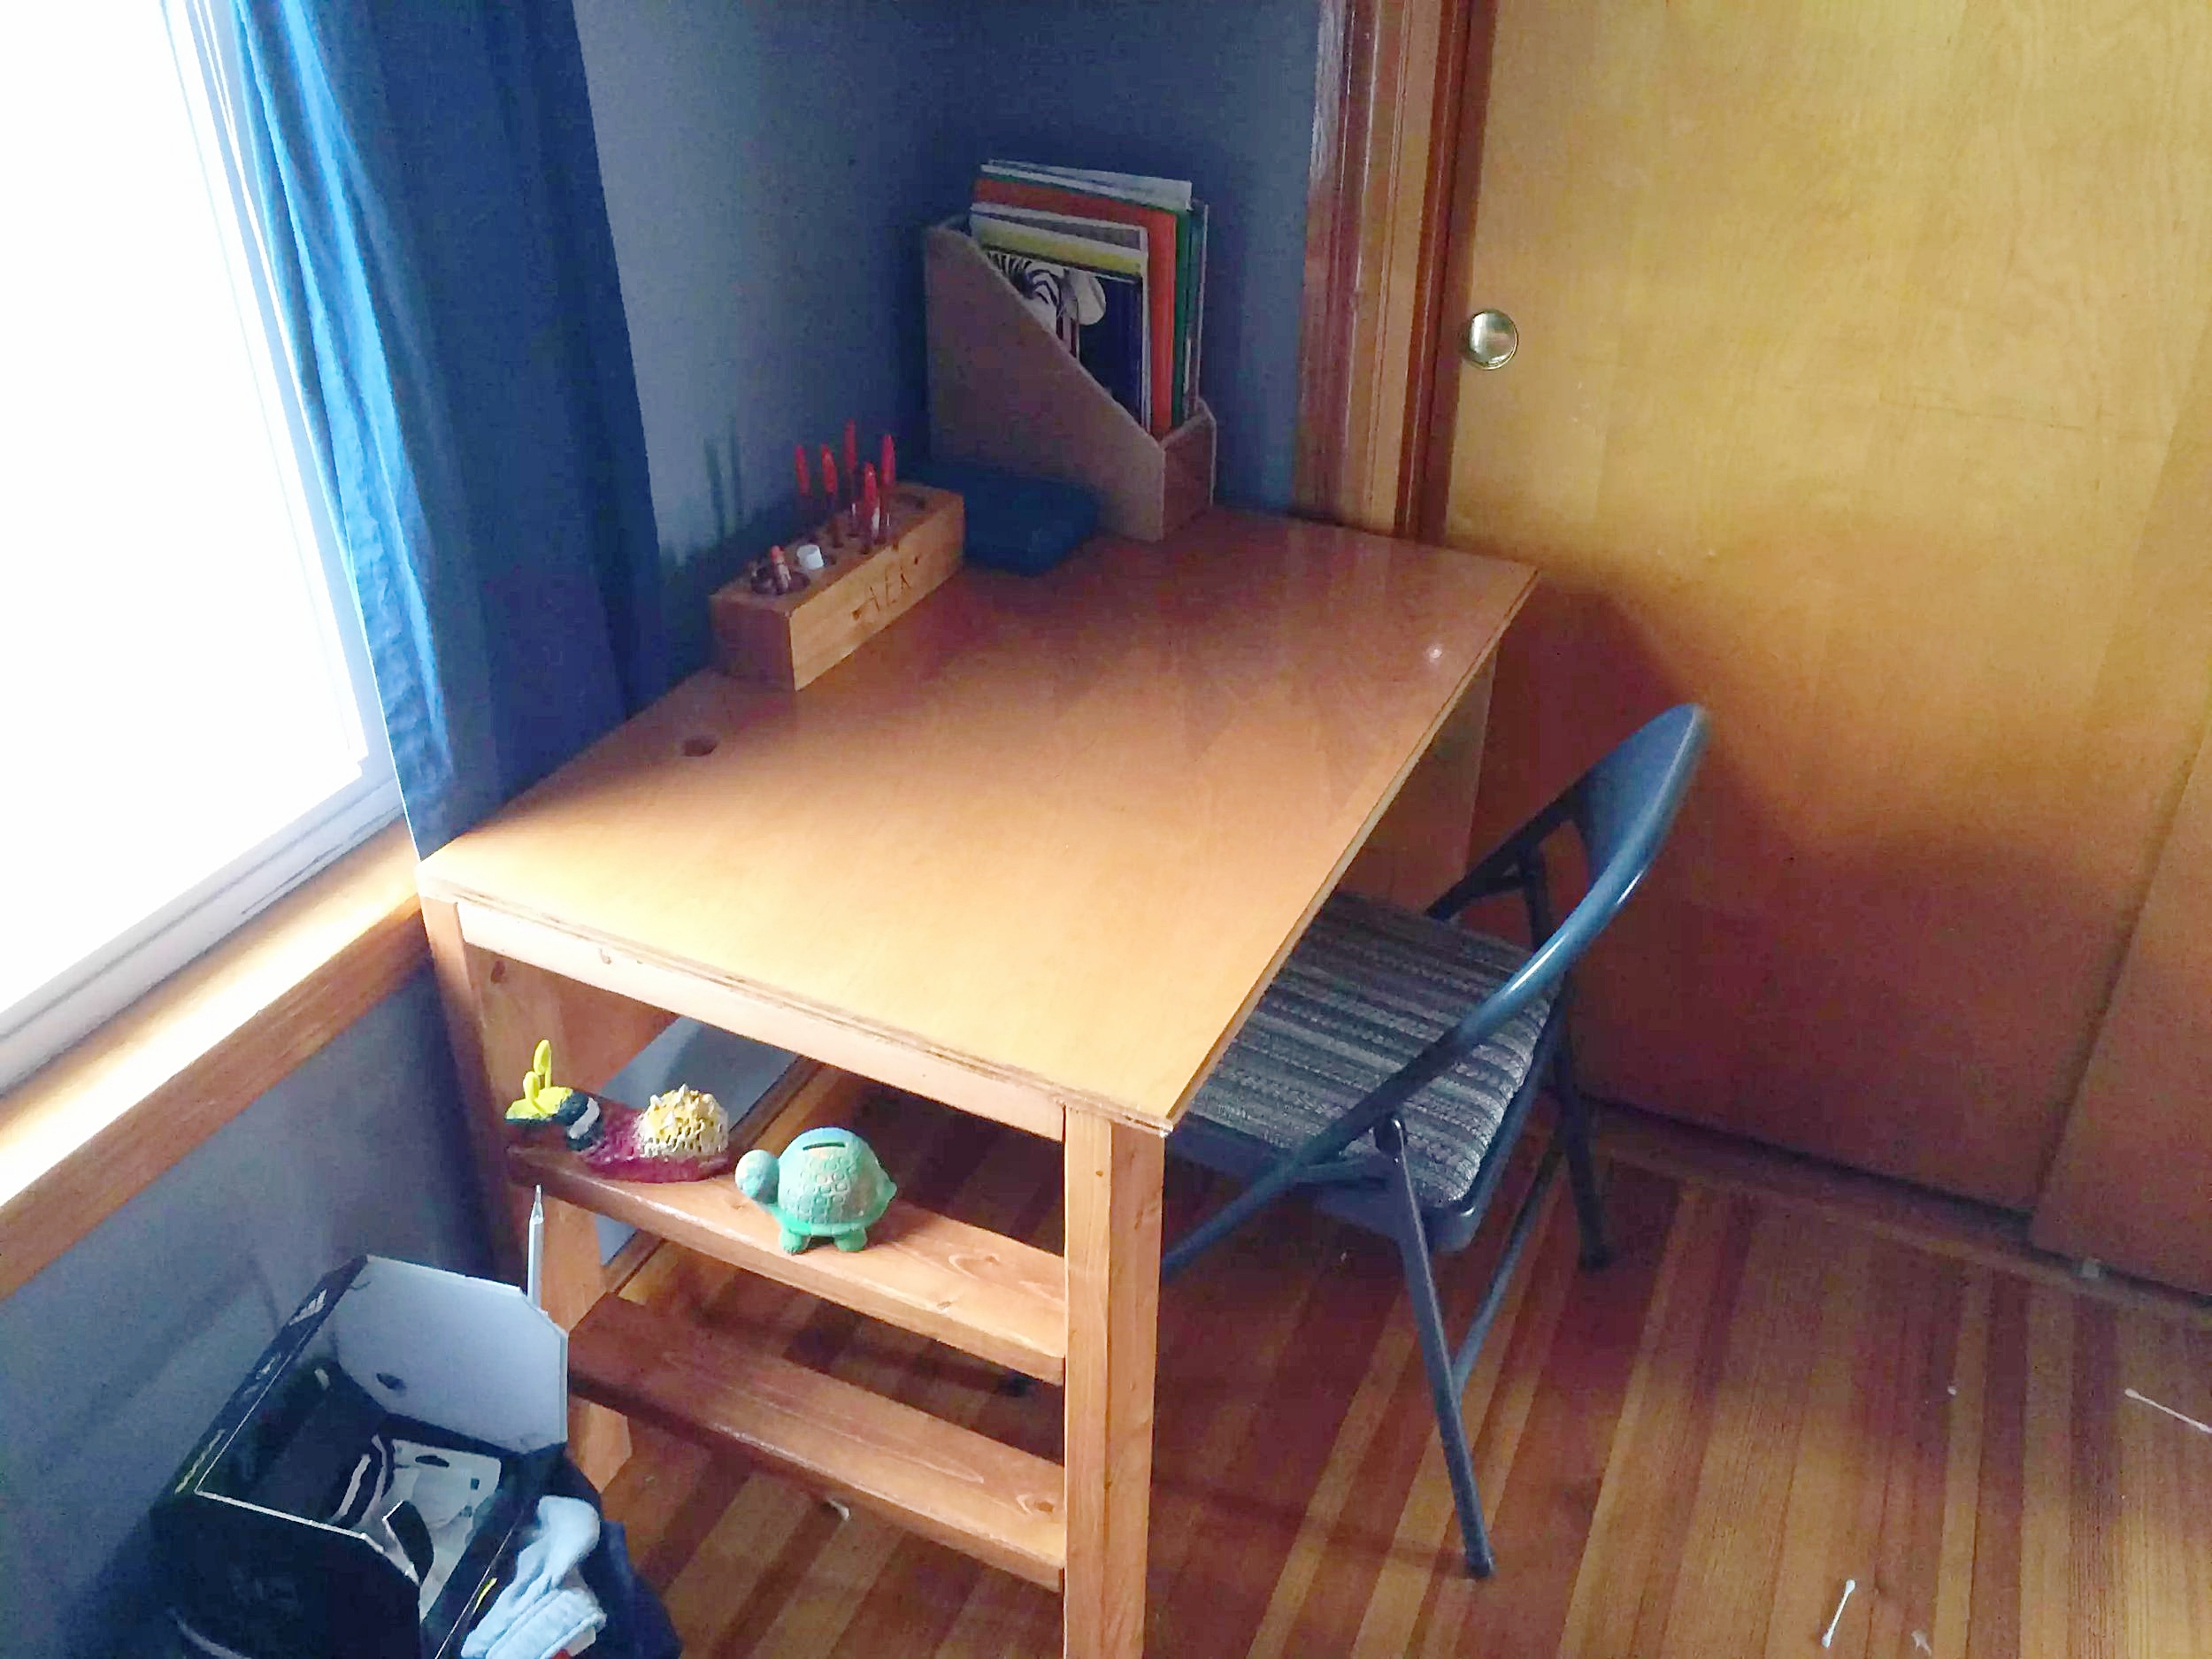
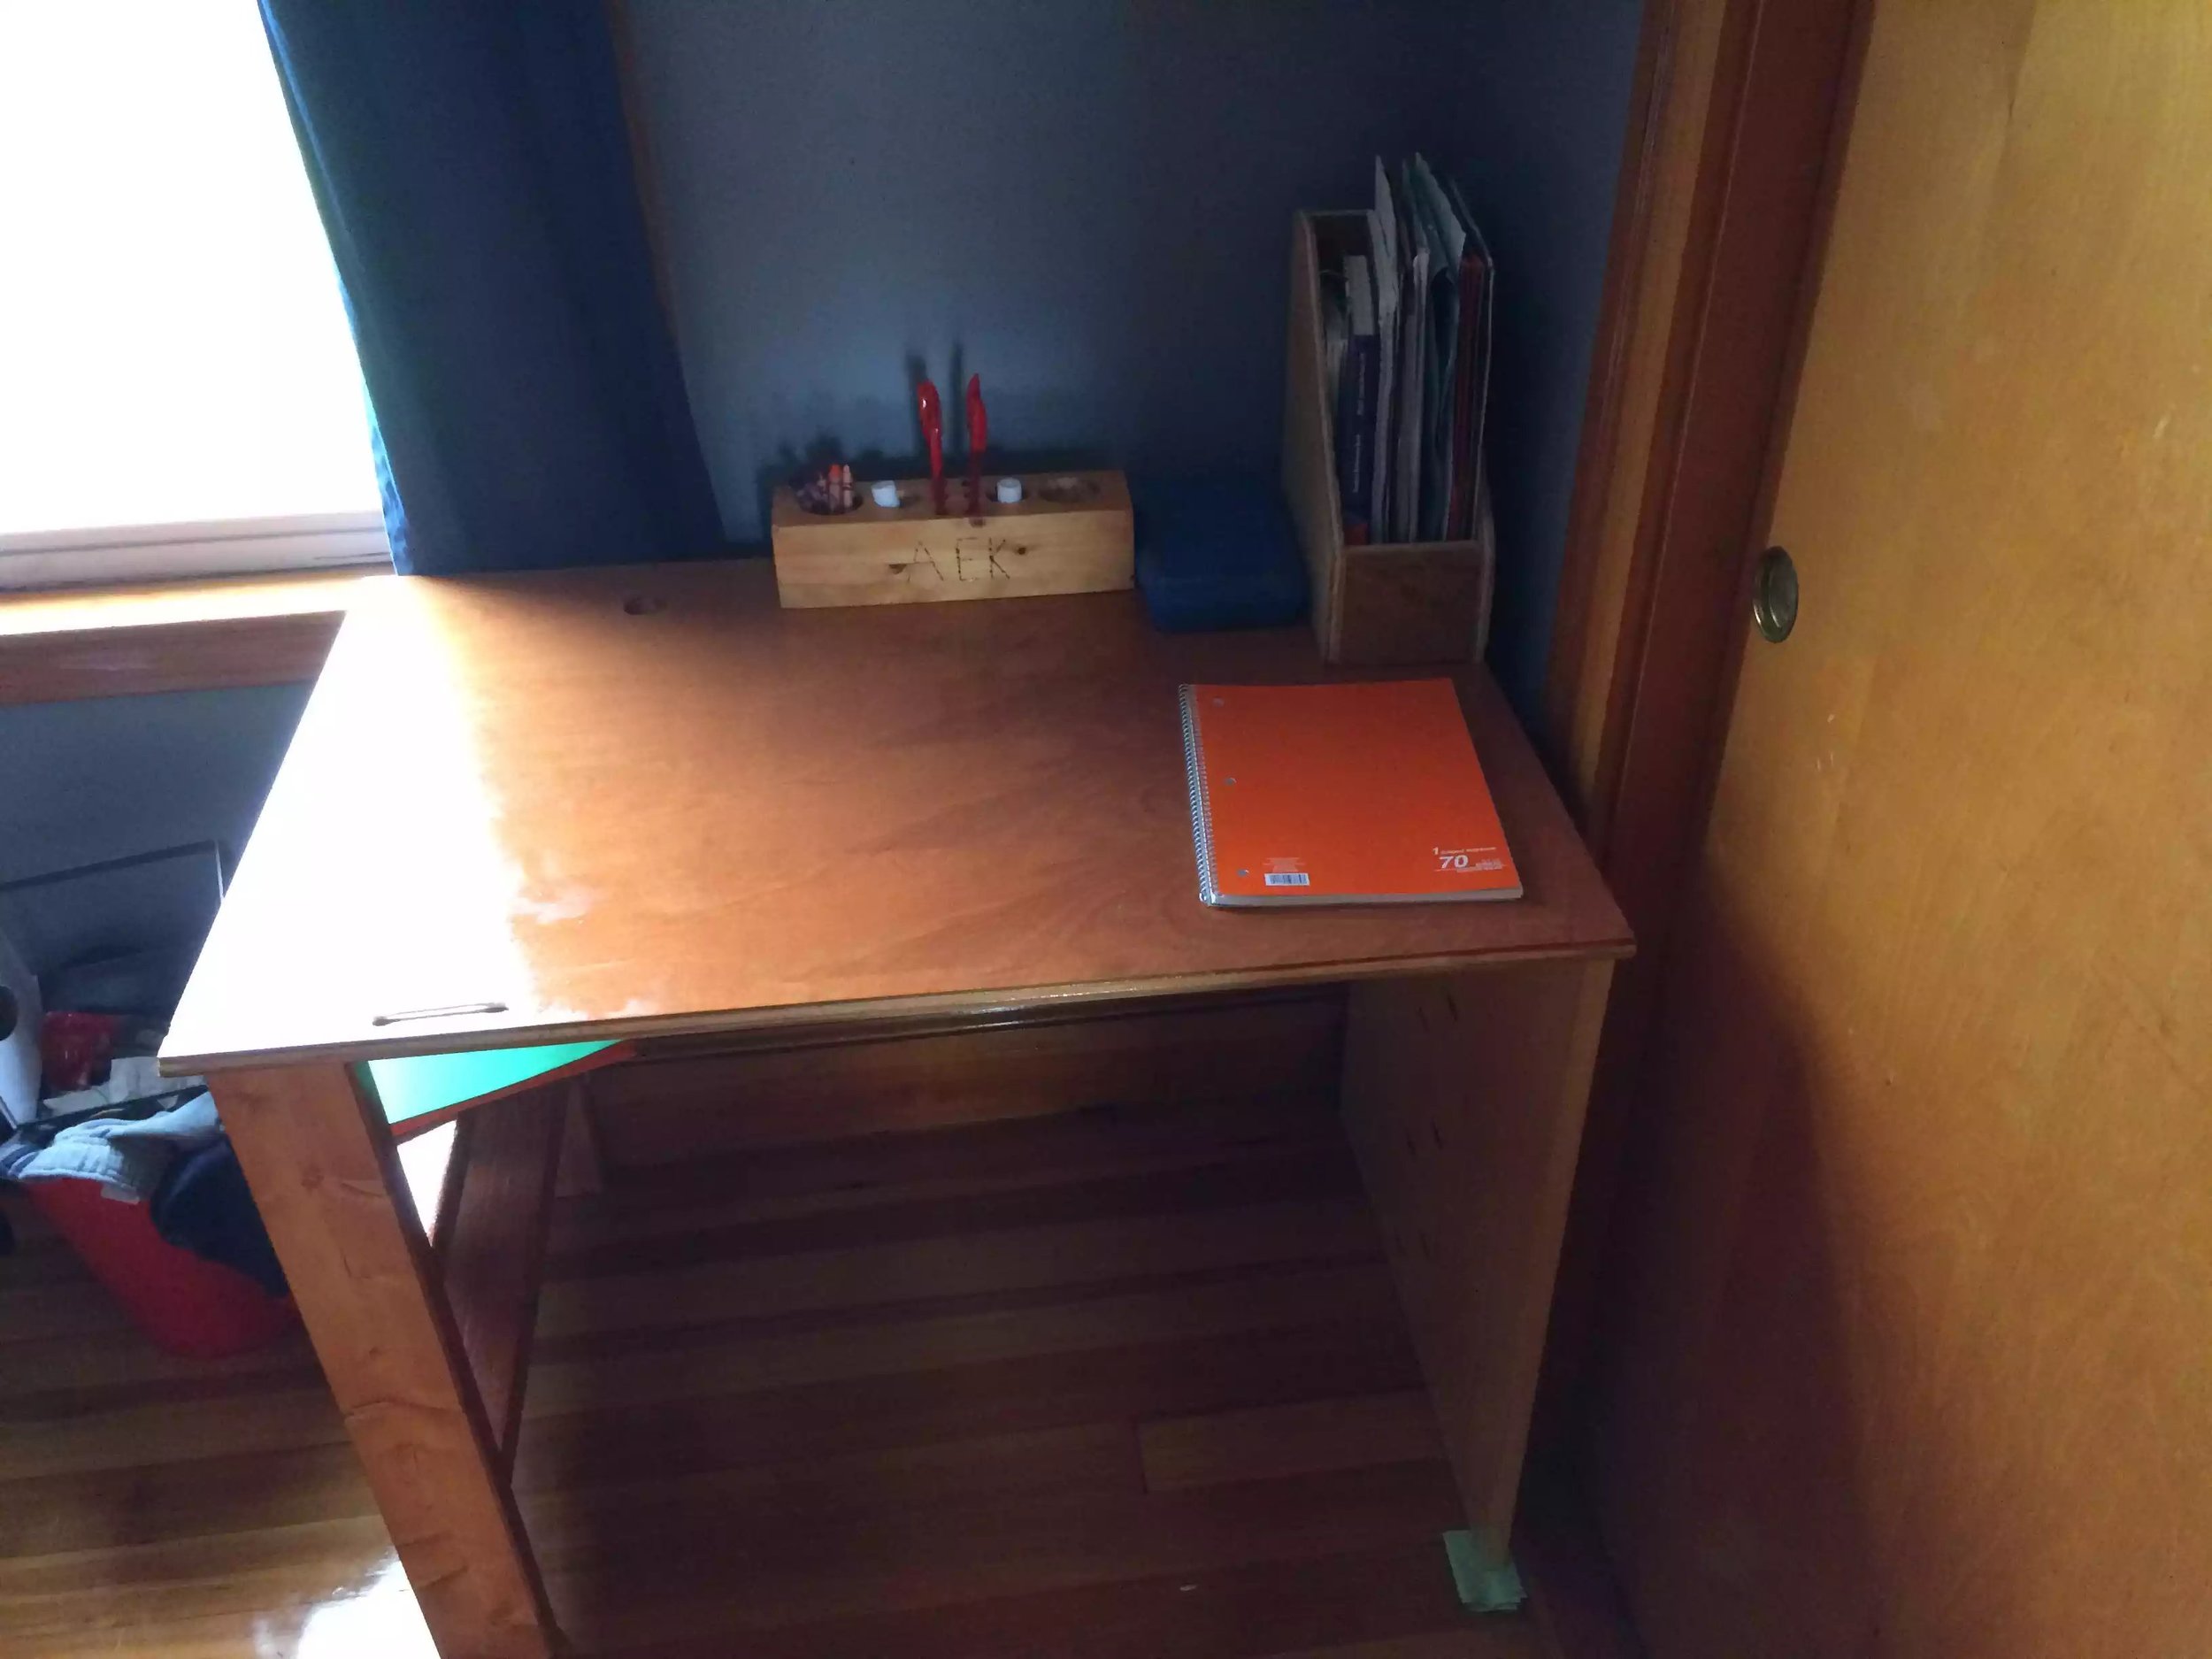
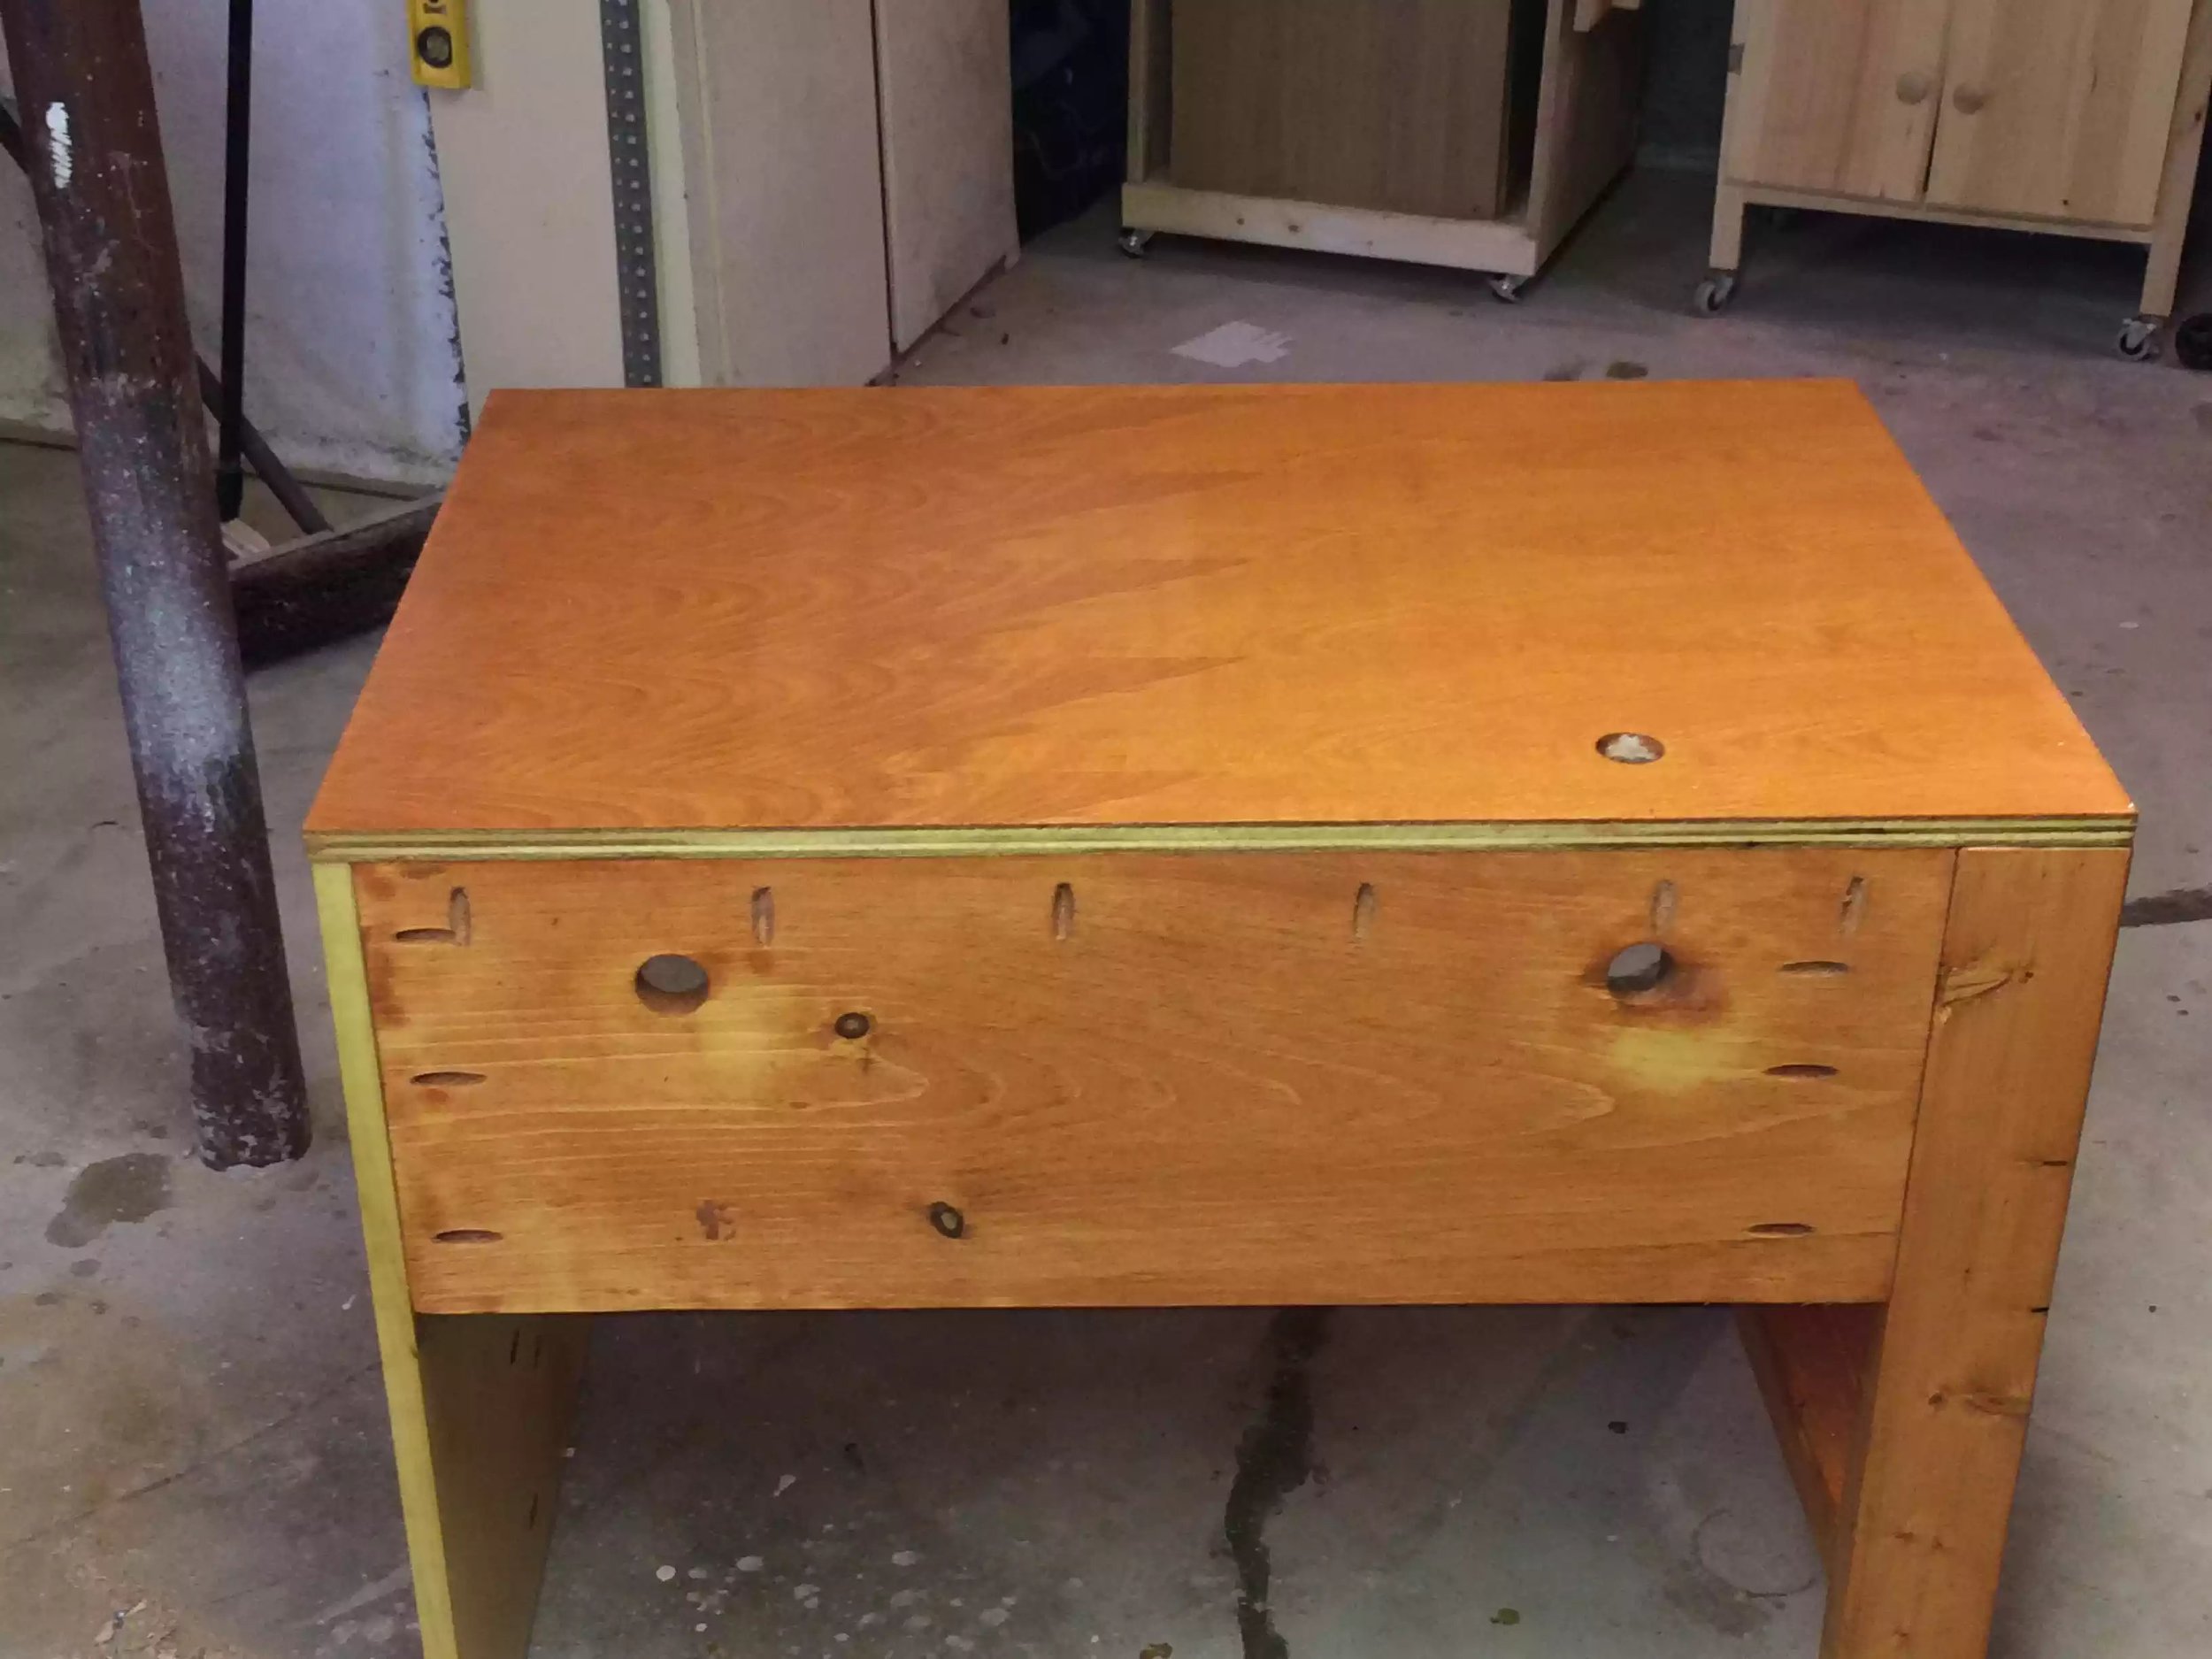
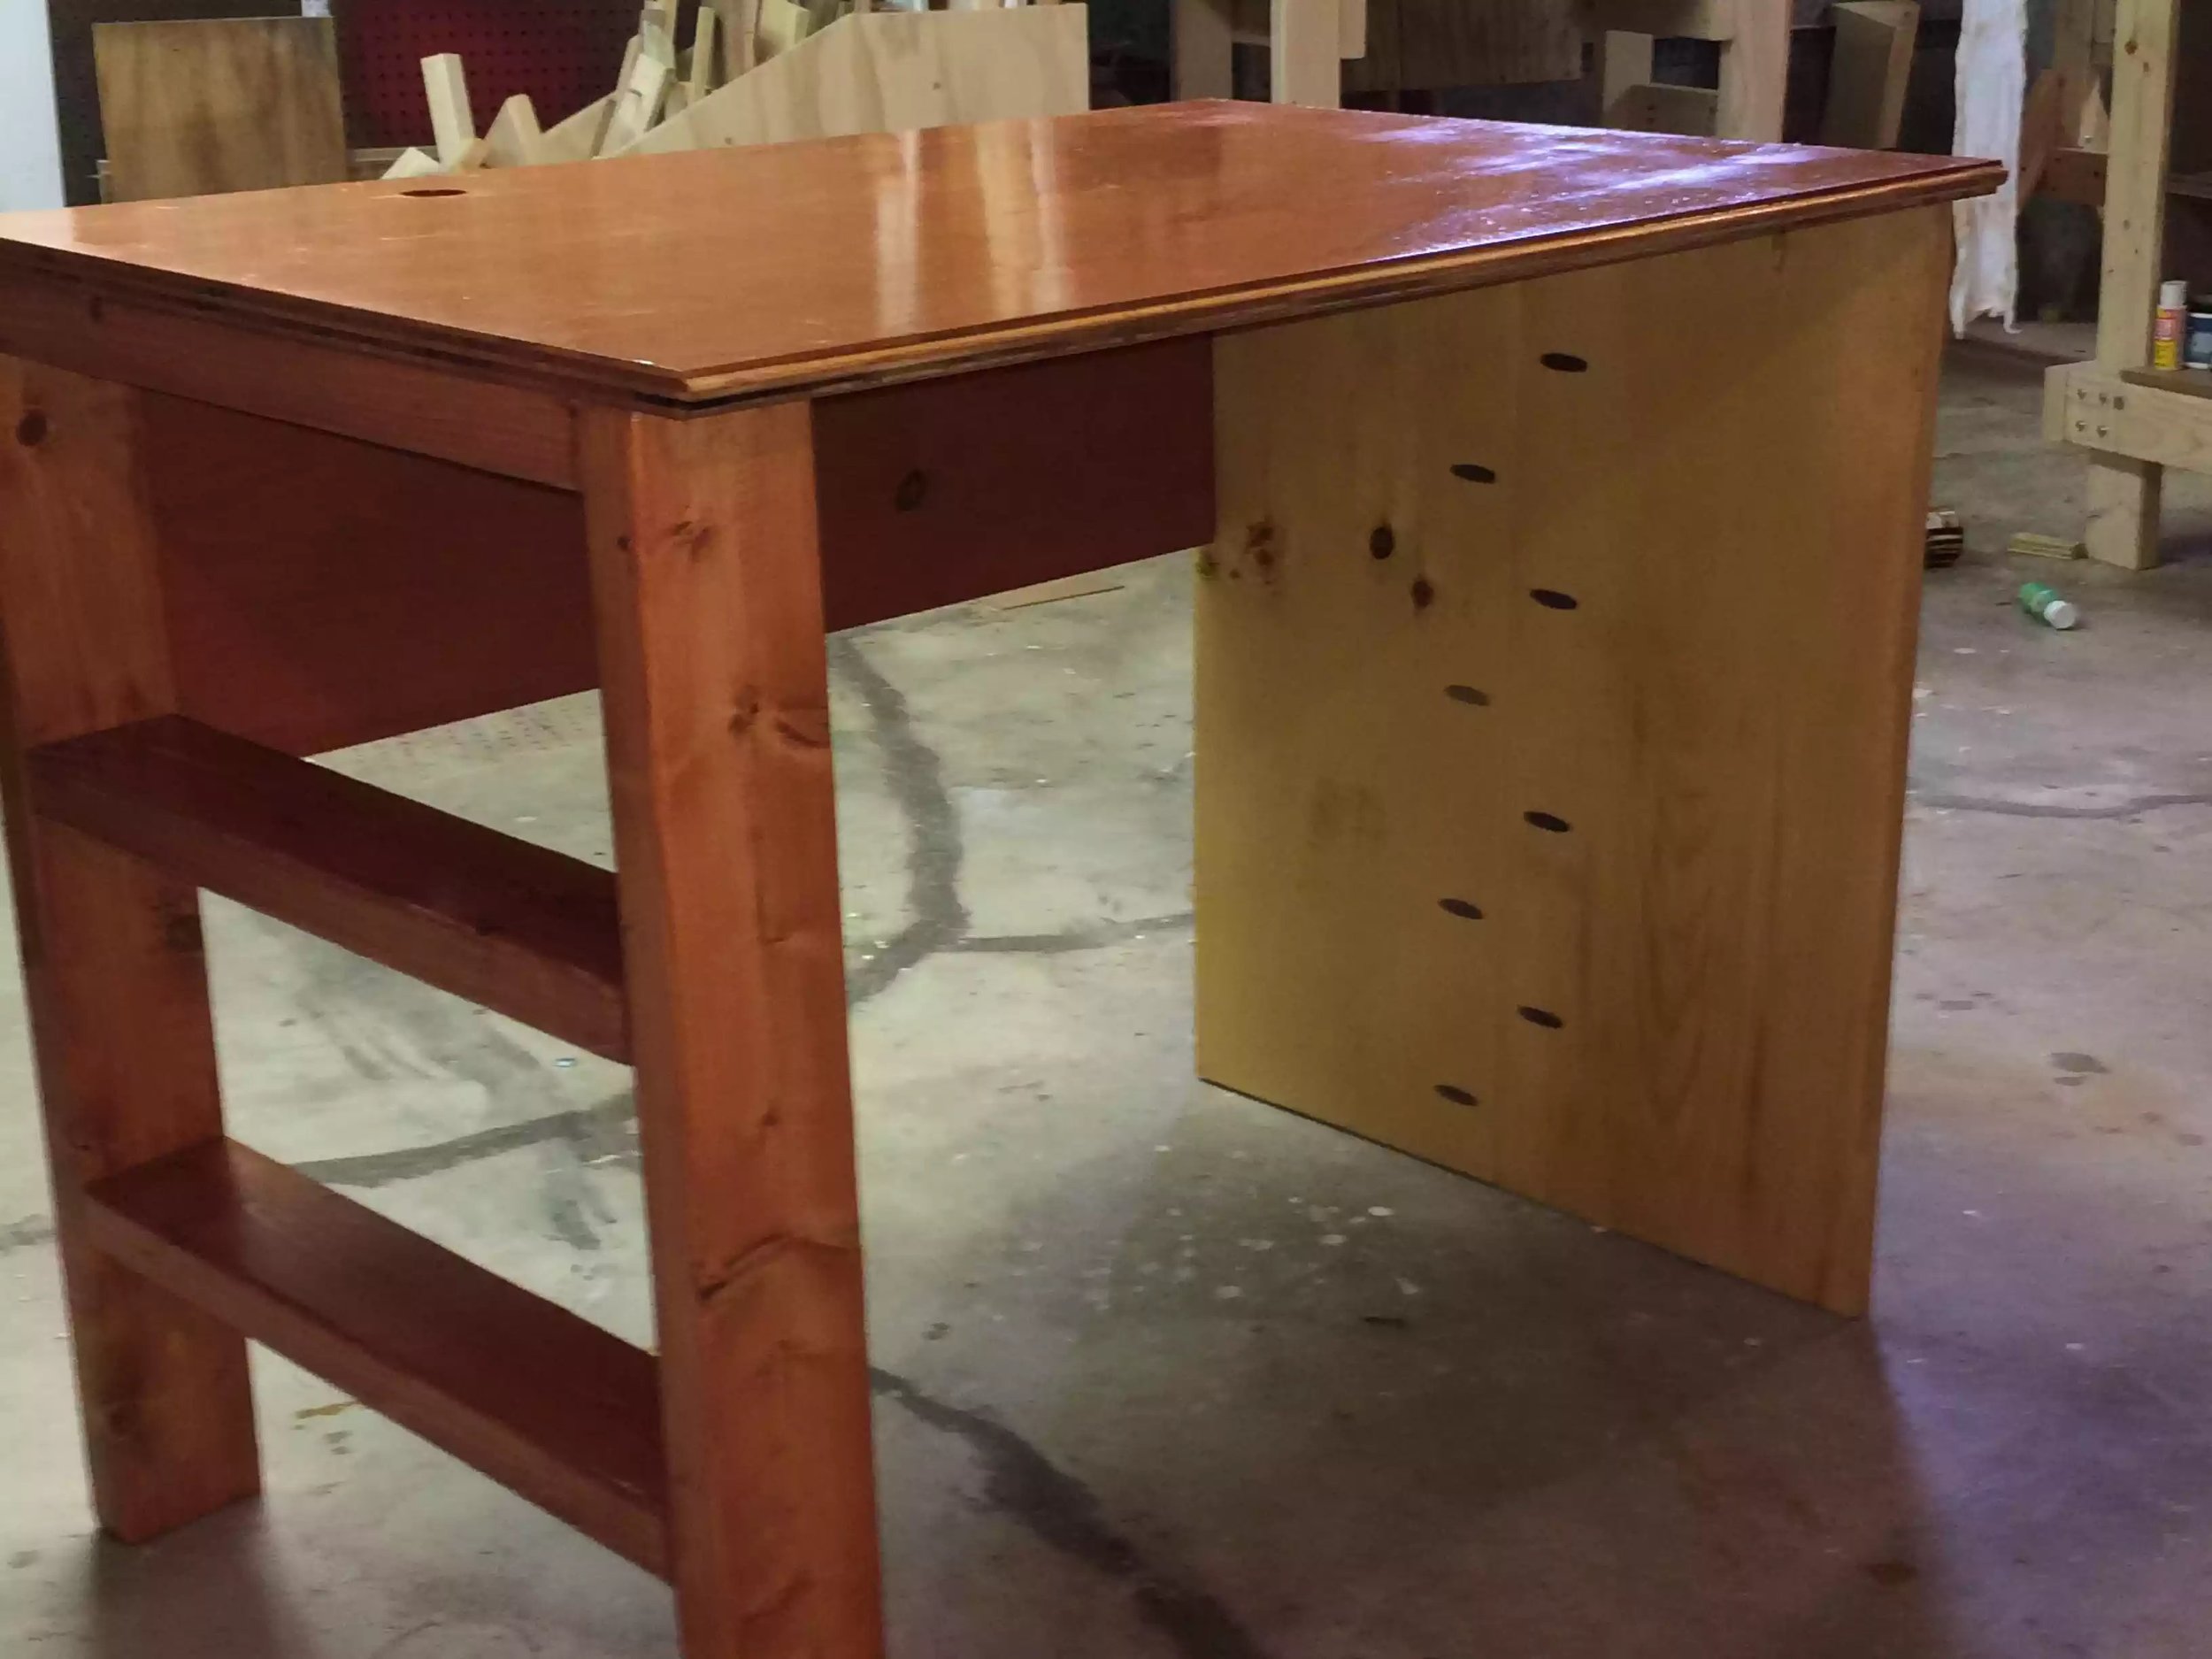
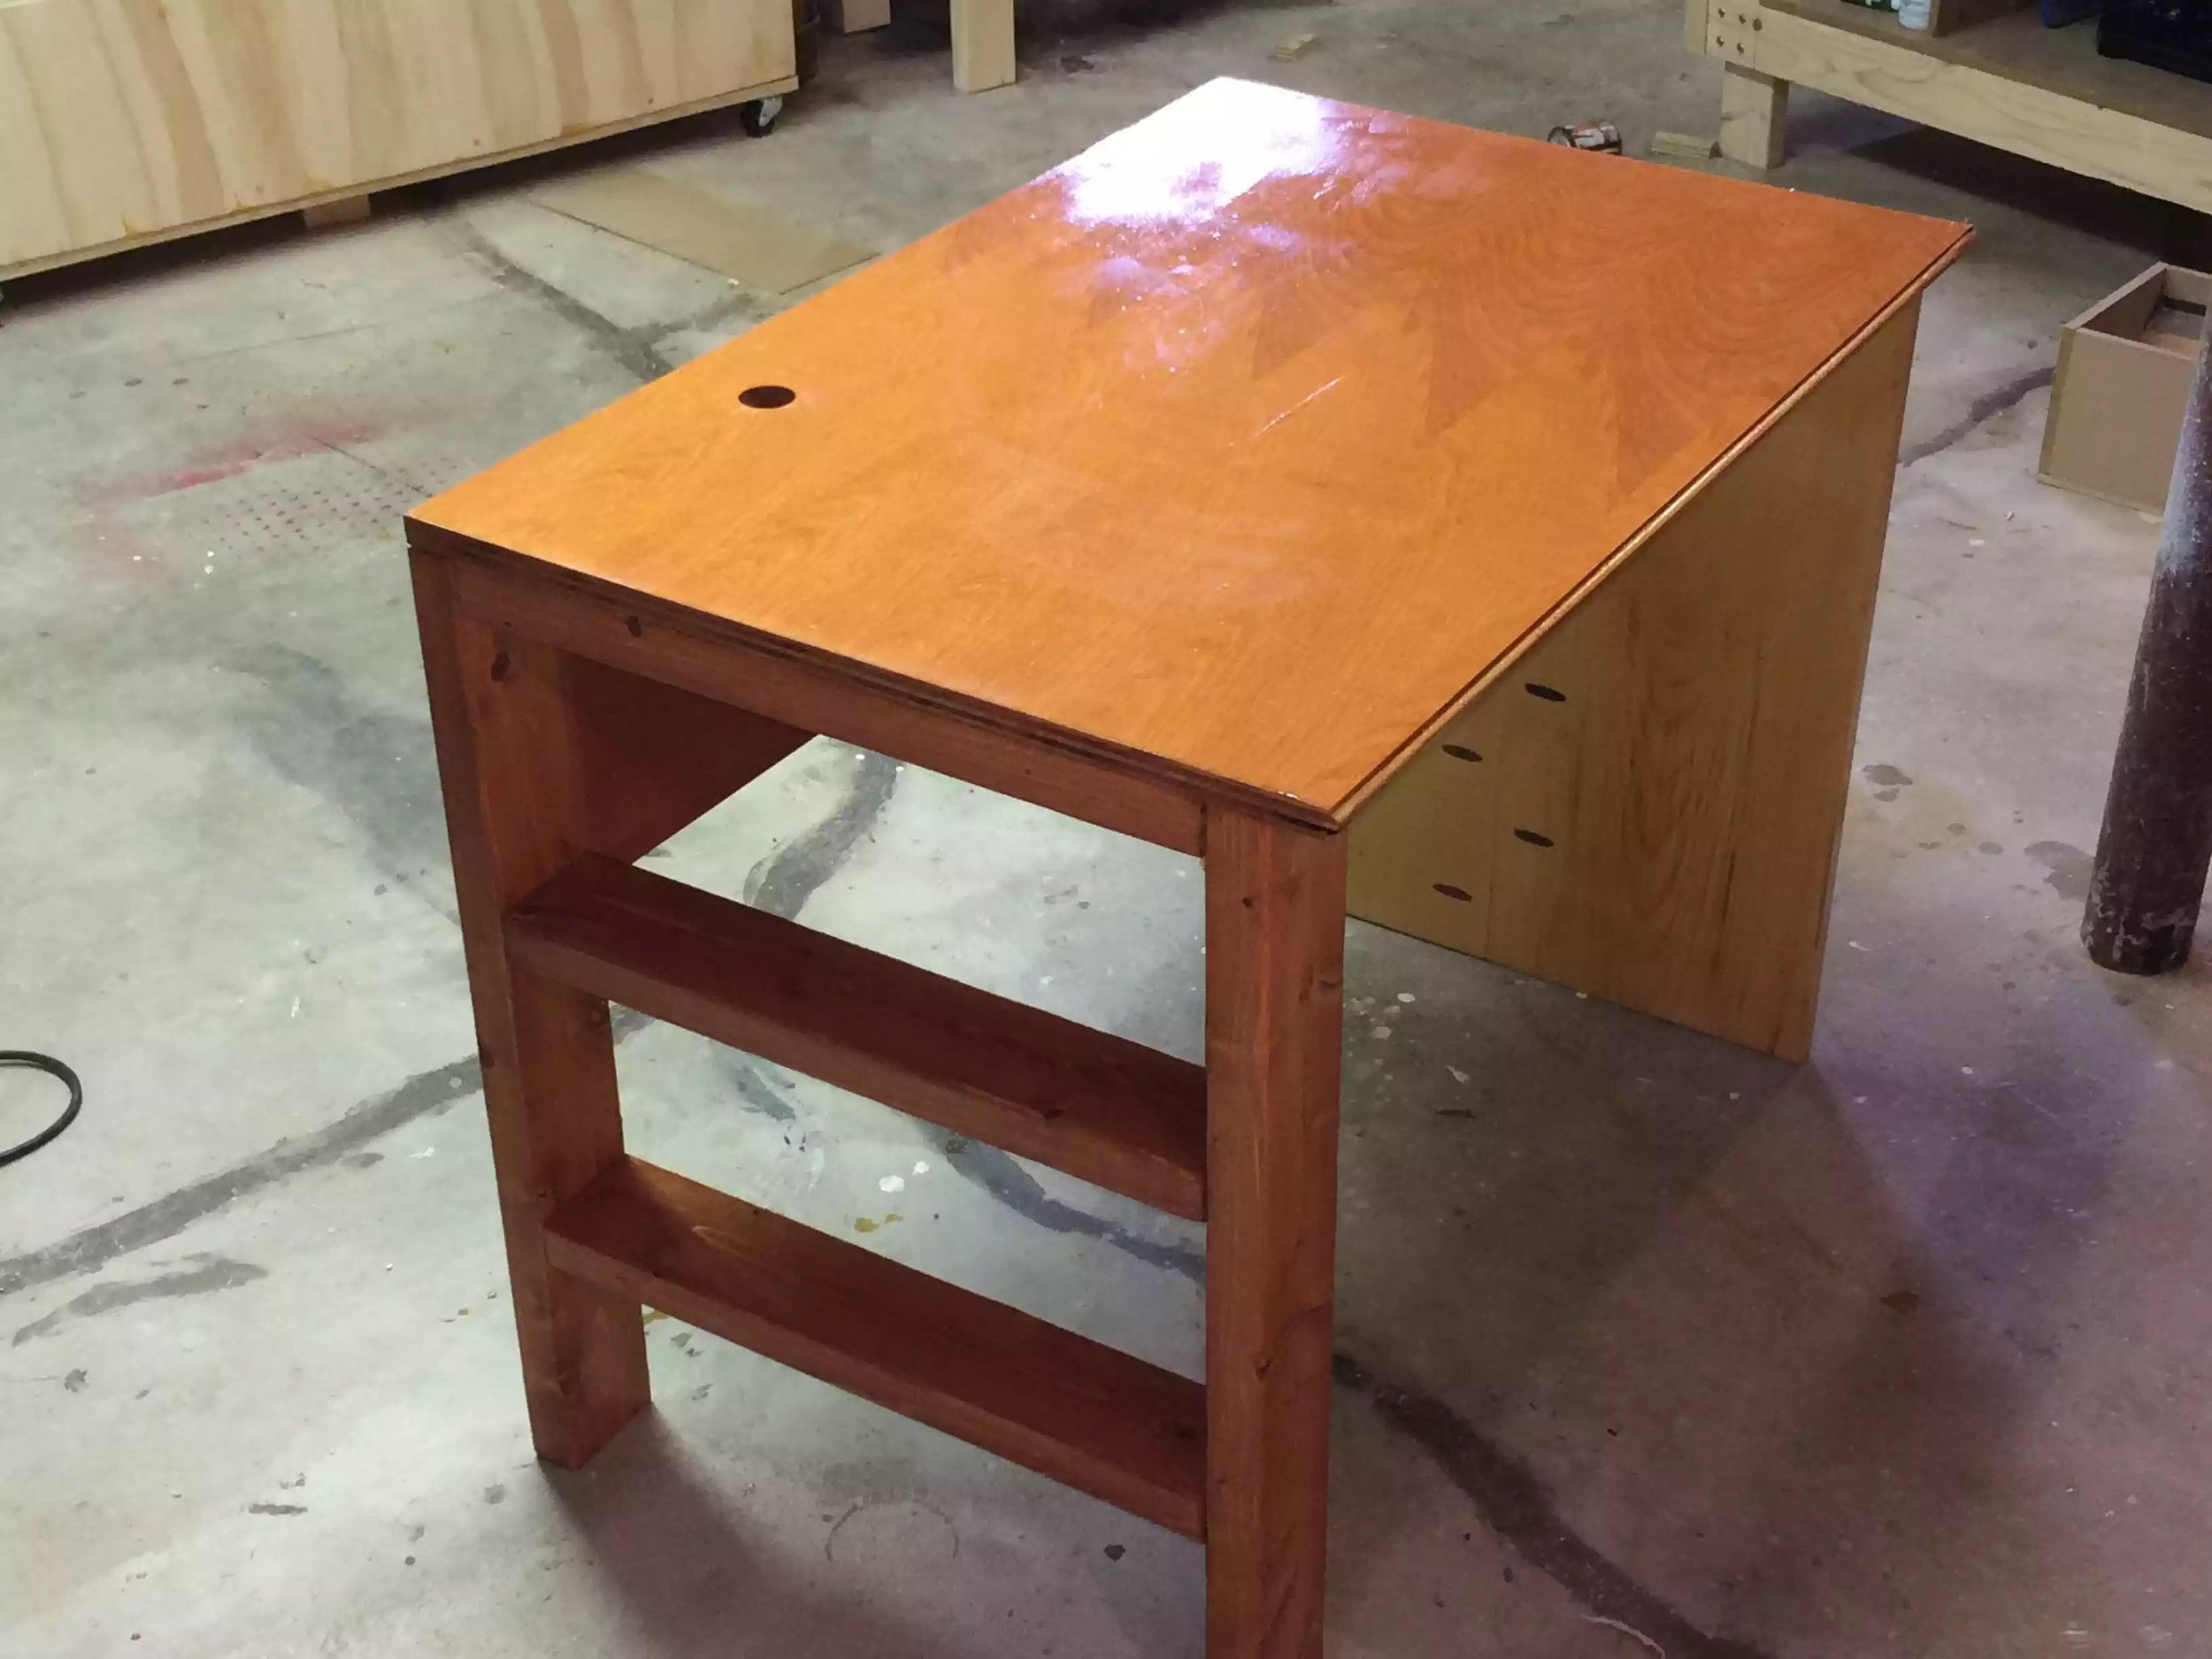
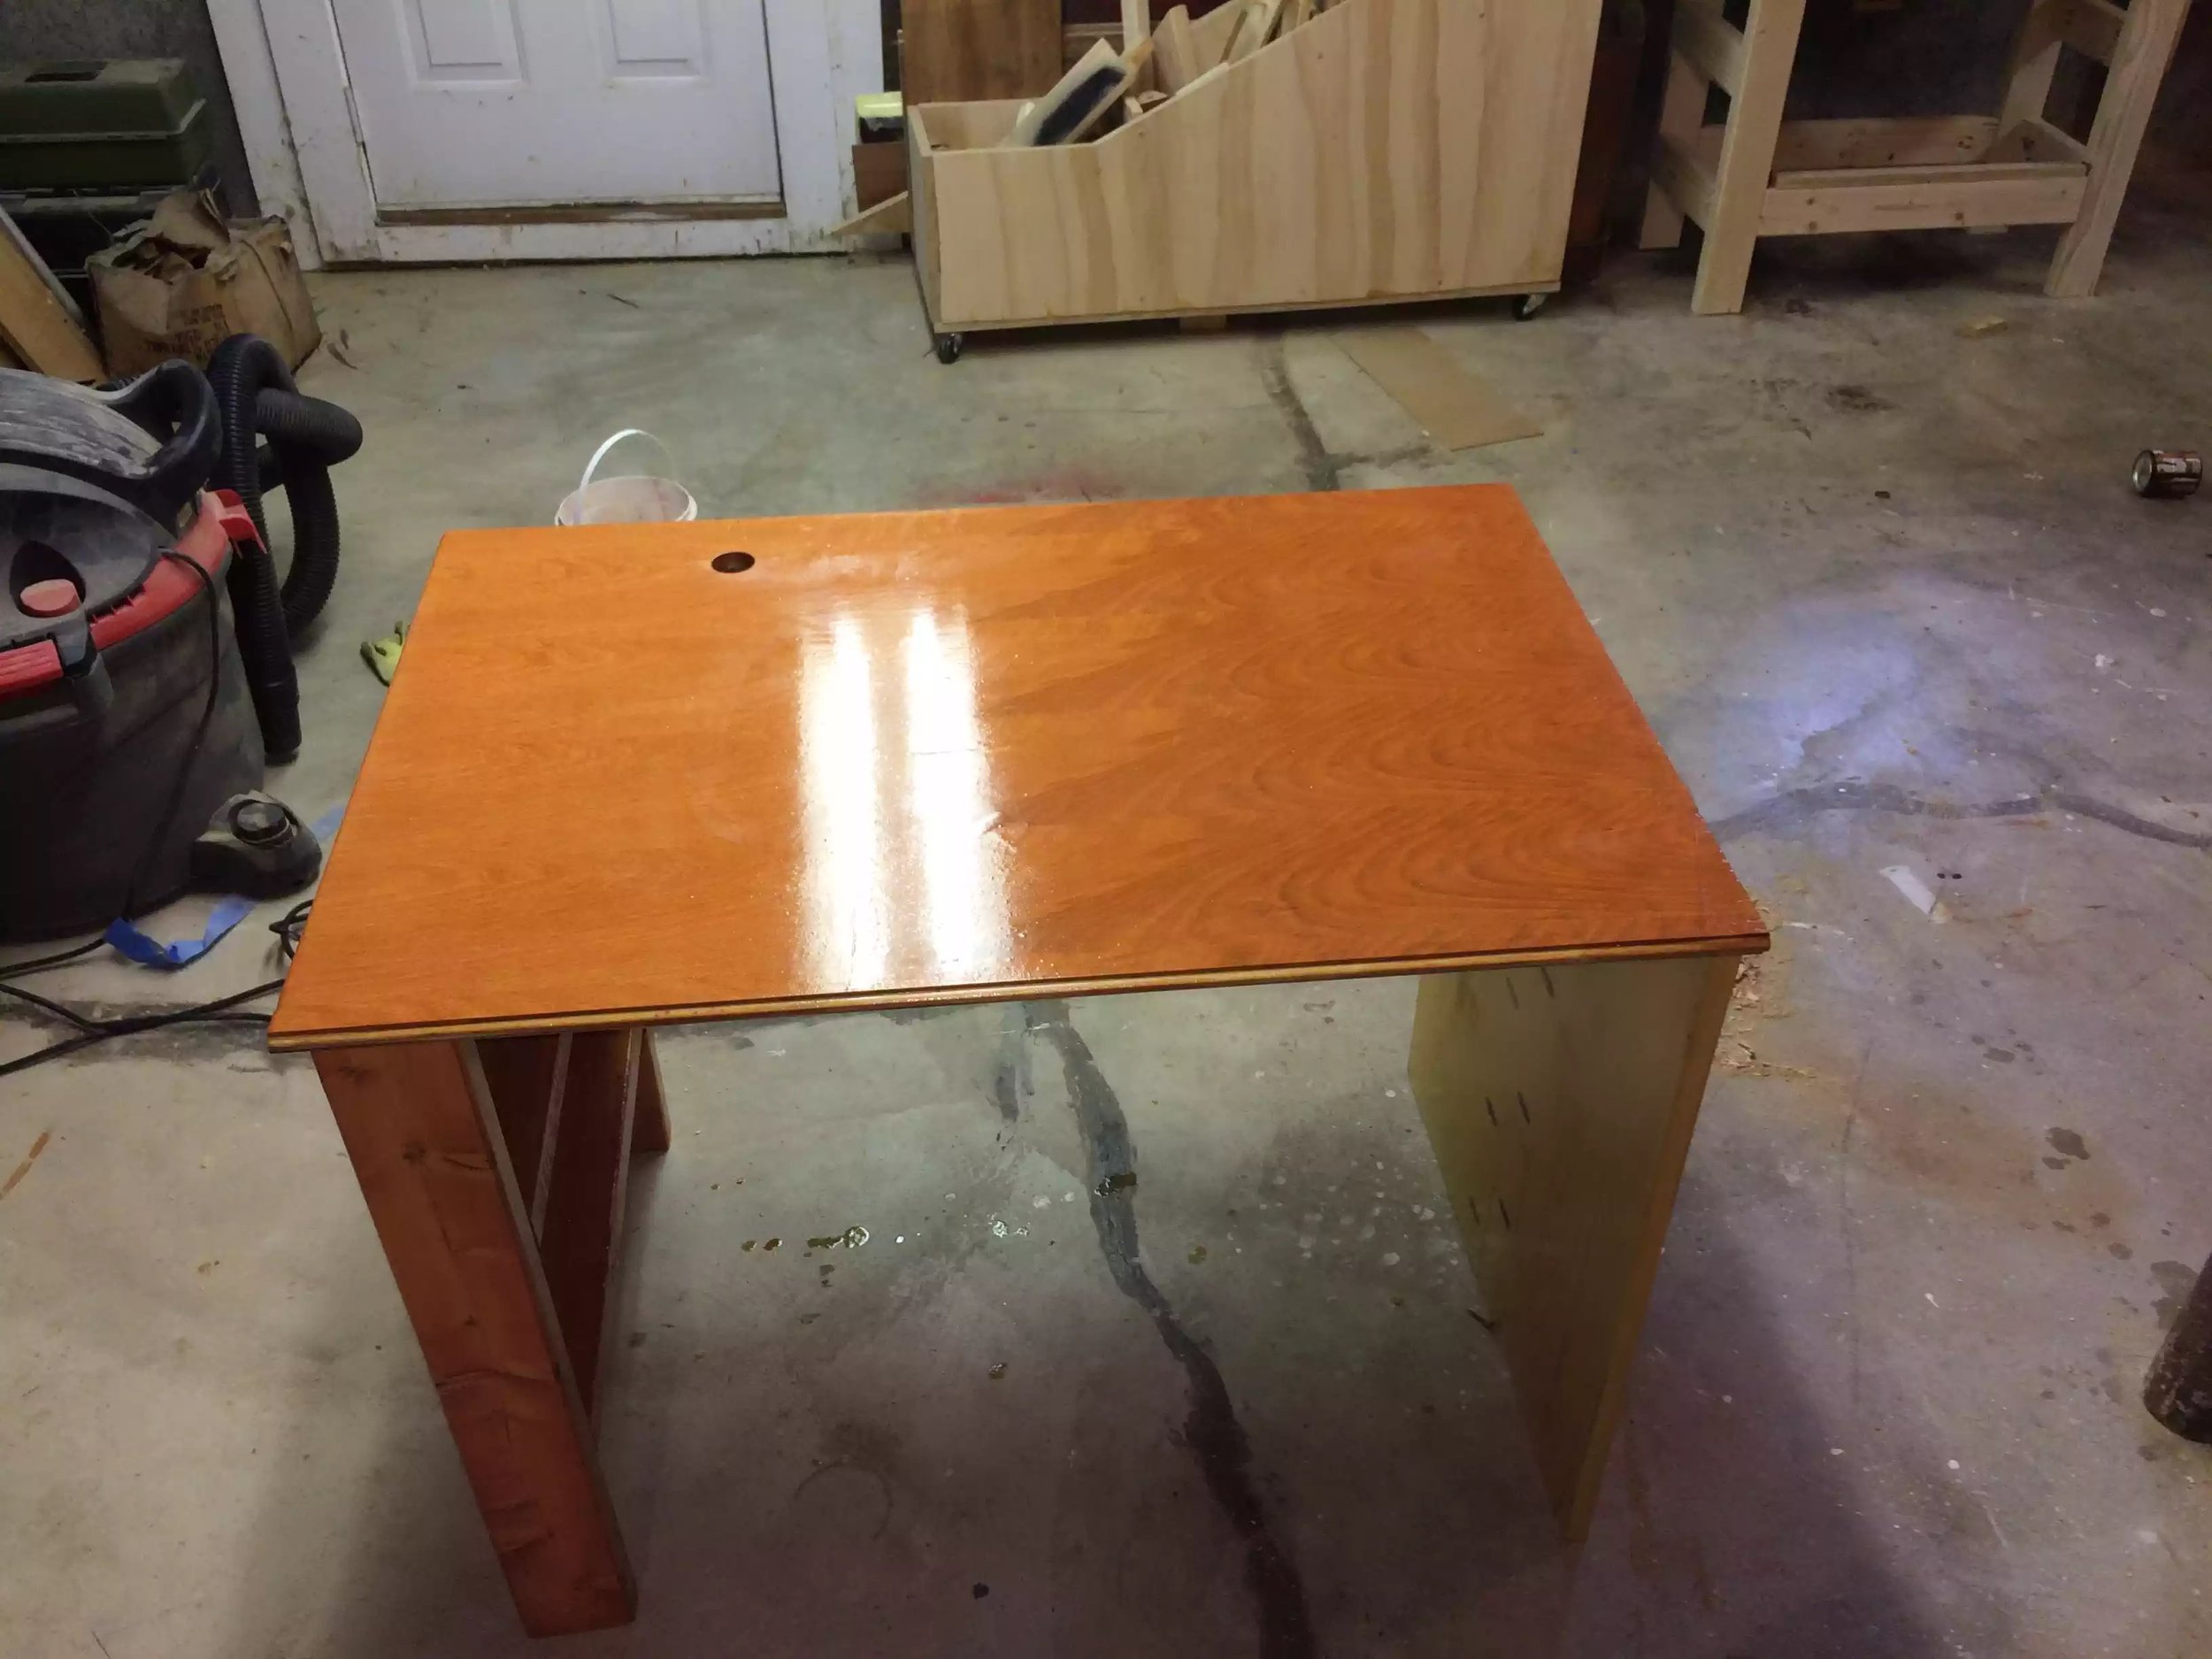
My son had asked me to make him a desk and since his room is not the biggest I decided to custom make his desk to the room and his dimensions.
The Materials:
- (2) 2×4’s
- (1) 1/4 sheet of birch plywood 3/4”
- (1) 1×12 pine select board
- Pocket Screws 1.25” &2.5”
- Stain
- polyurethane
Design :
The left side of the desk is basically 2 legs (2×4) and 3 supports also 2×4
The right side is basically 2 pieces of 1×12 butted together and joined using pocket hole screw and the plugs are hidden with walnut pocket plugs and sand flush to the surface
The back is also 1×12 with a series of pockets to adjoin the pine to the 2×4’s and the pine board on the right..
The top is 24×36 3/4” birch plywood secured from the underneath through the 2×4’s on the left and pocket holes from underneath on the pine board …
I finished the whole unit with stain and 3 coats of poly.
He loves it and should last for a long time…
BEDSIDE UNIT
(11/2016)
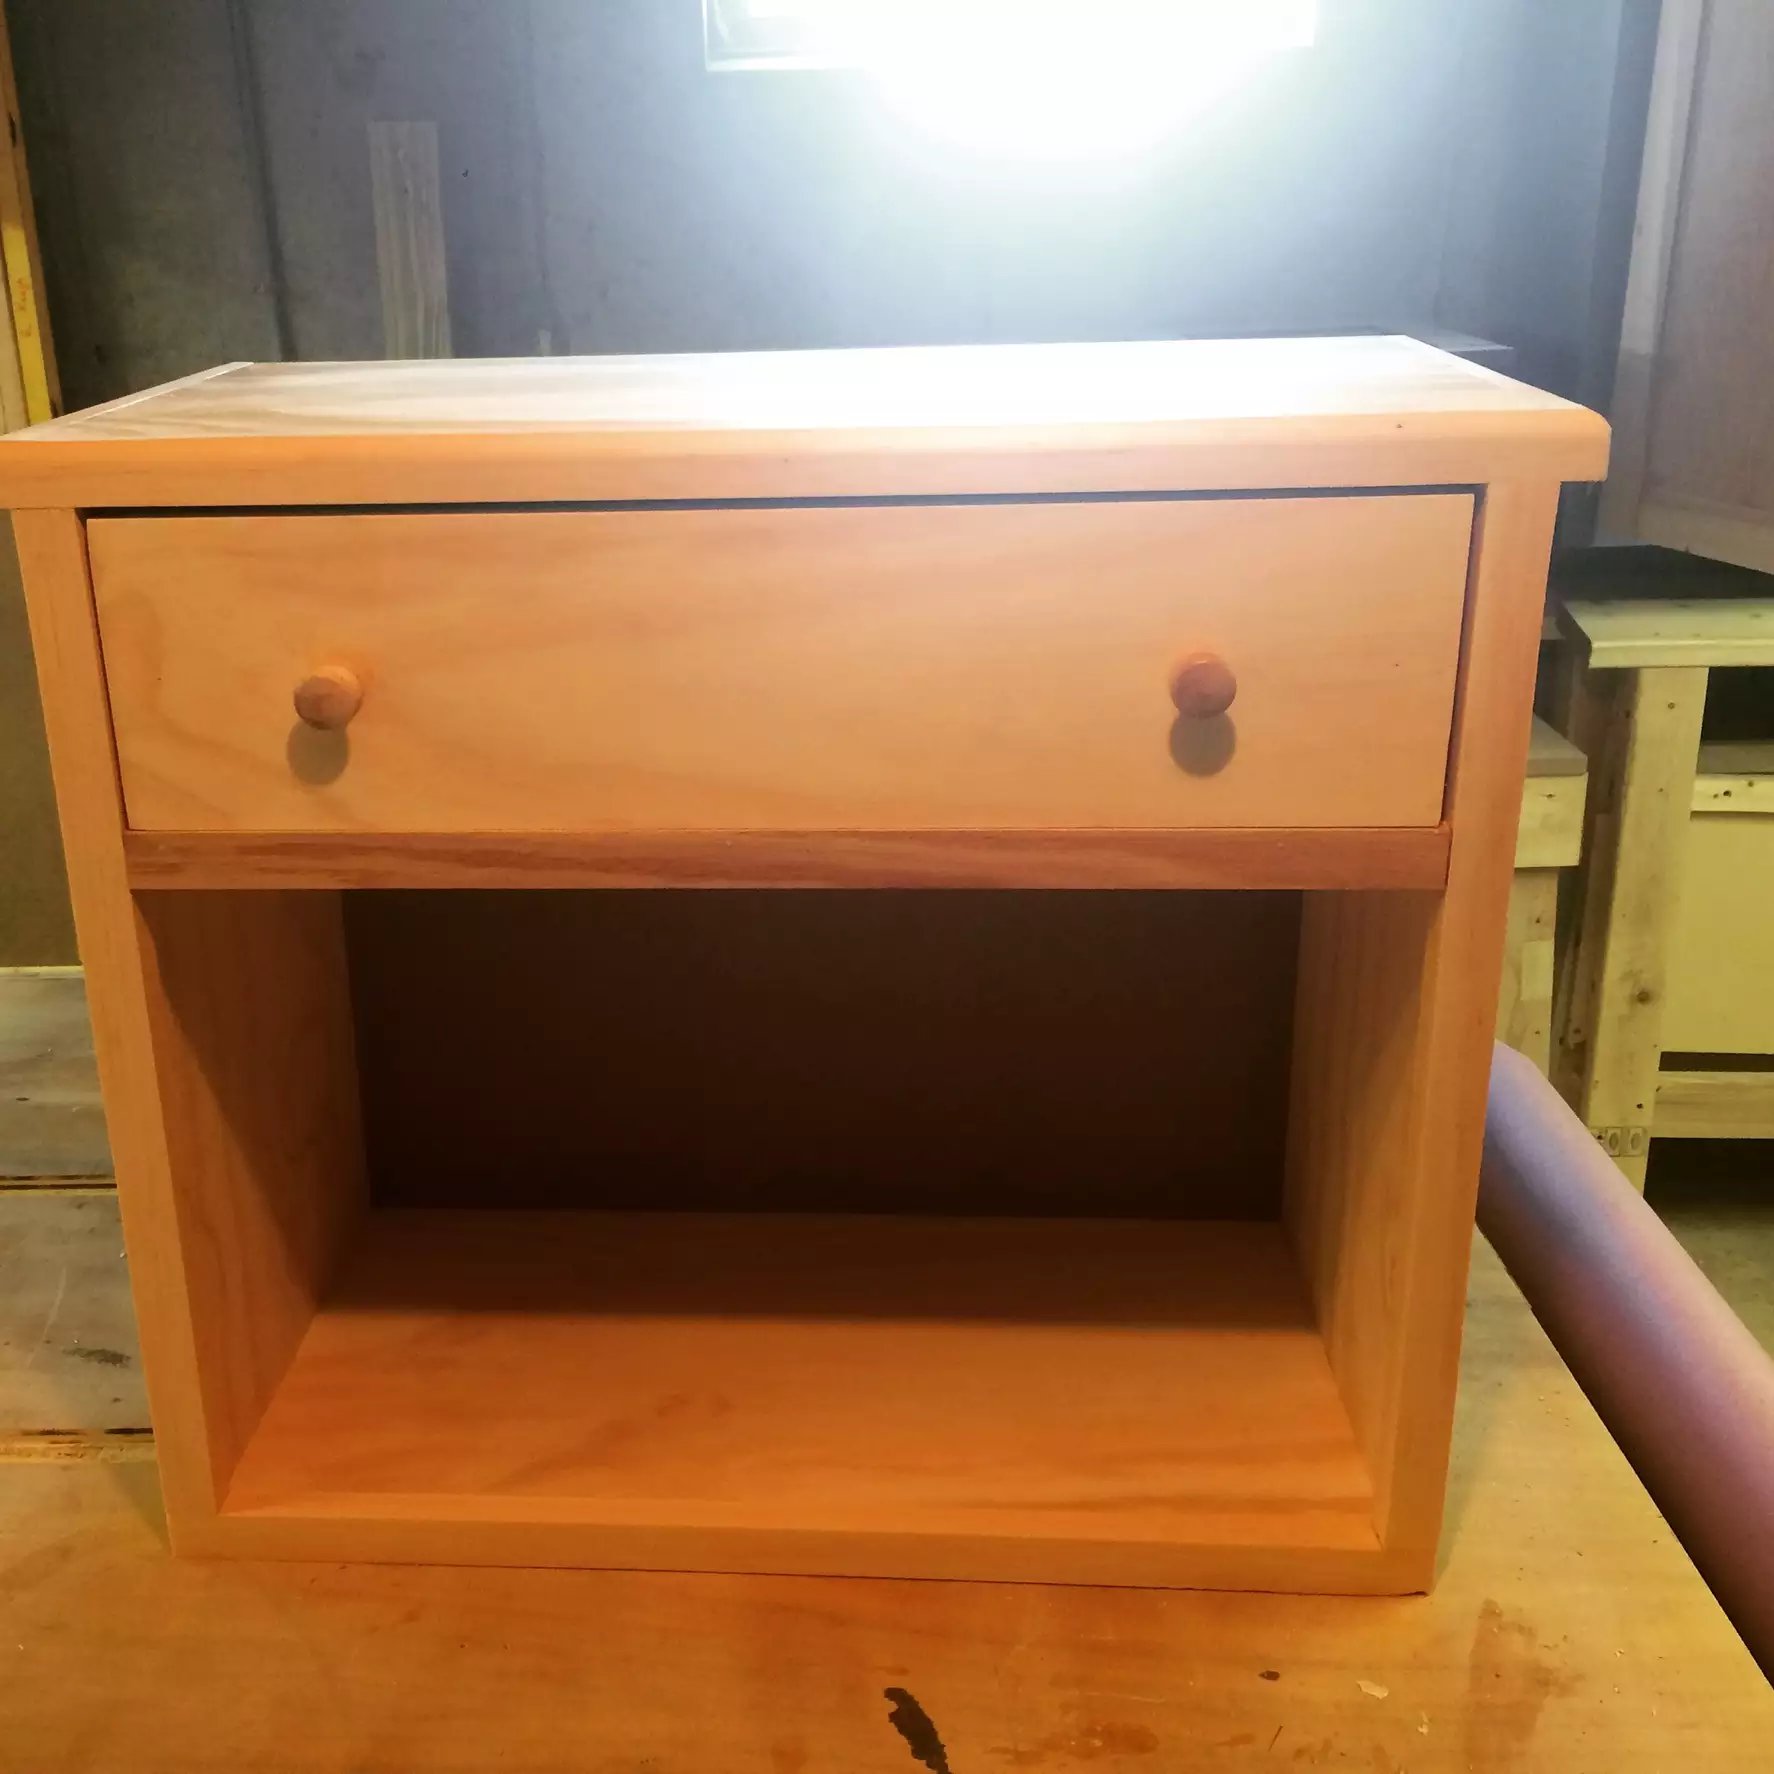
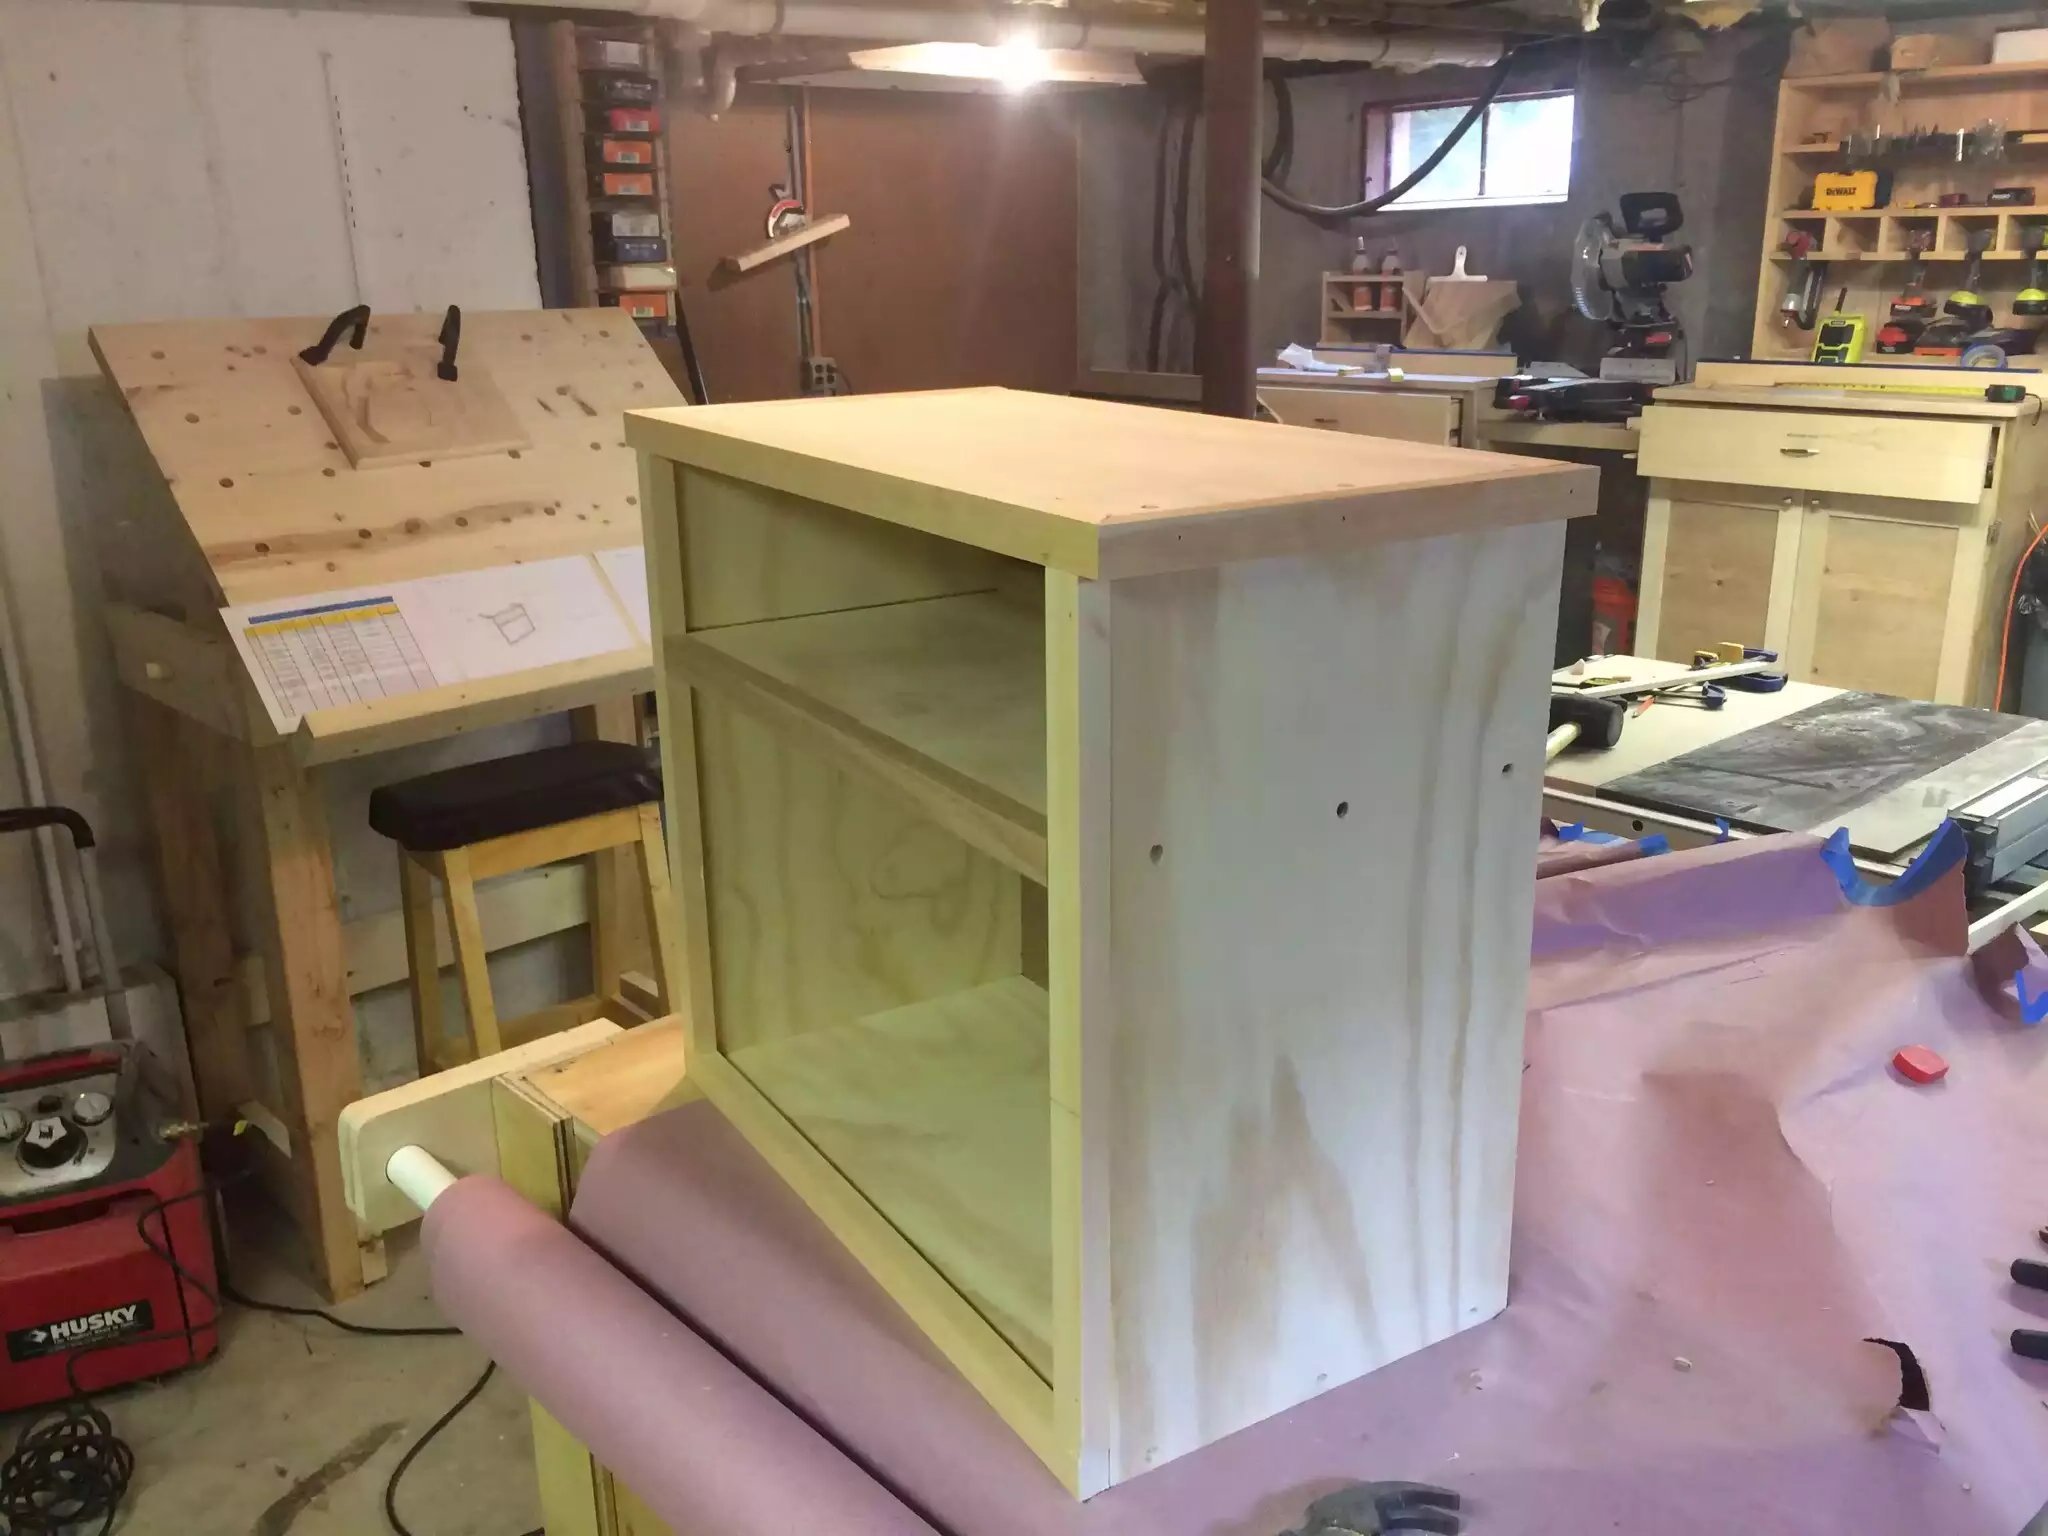
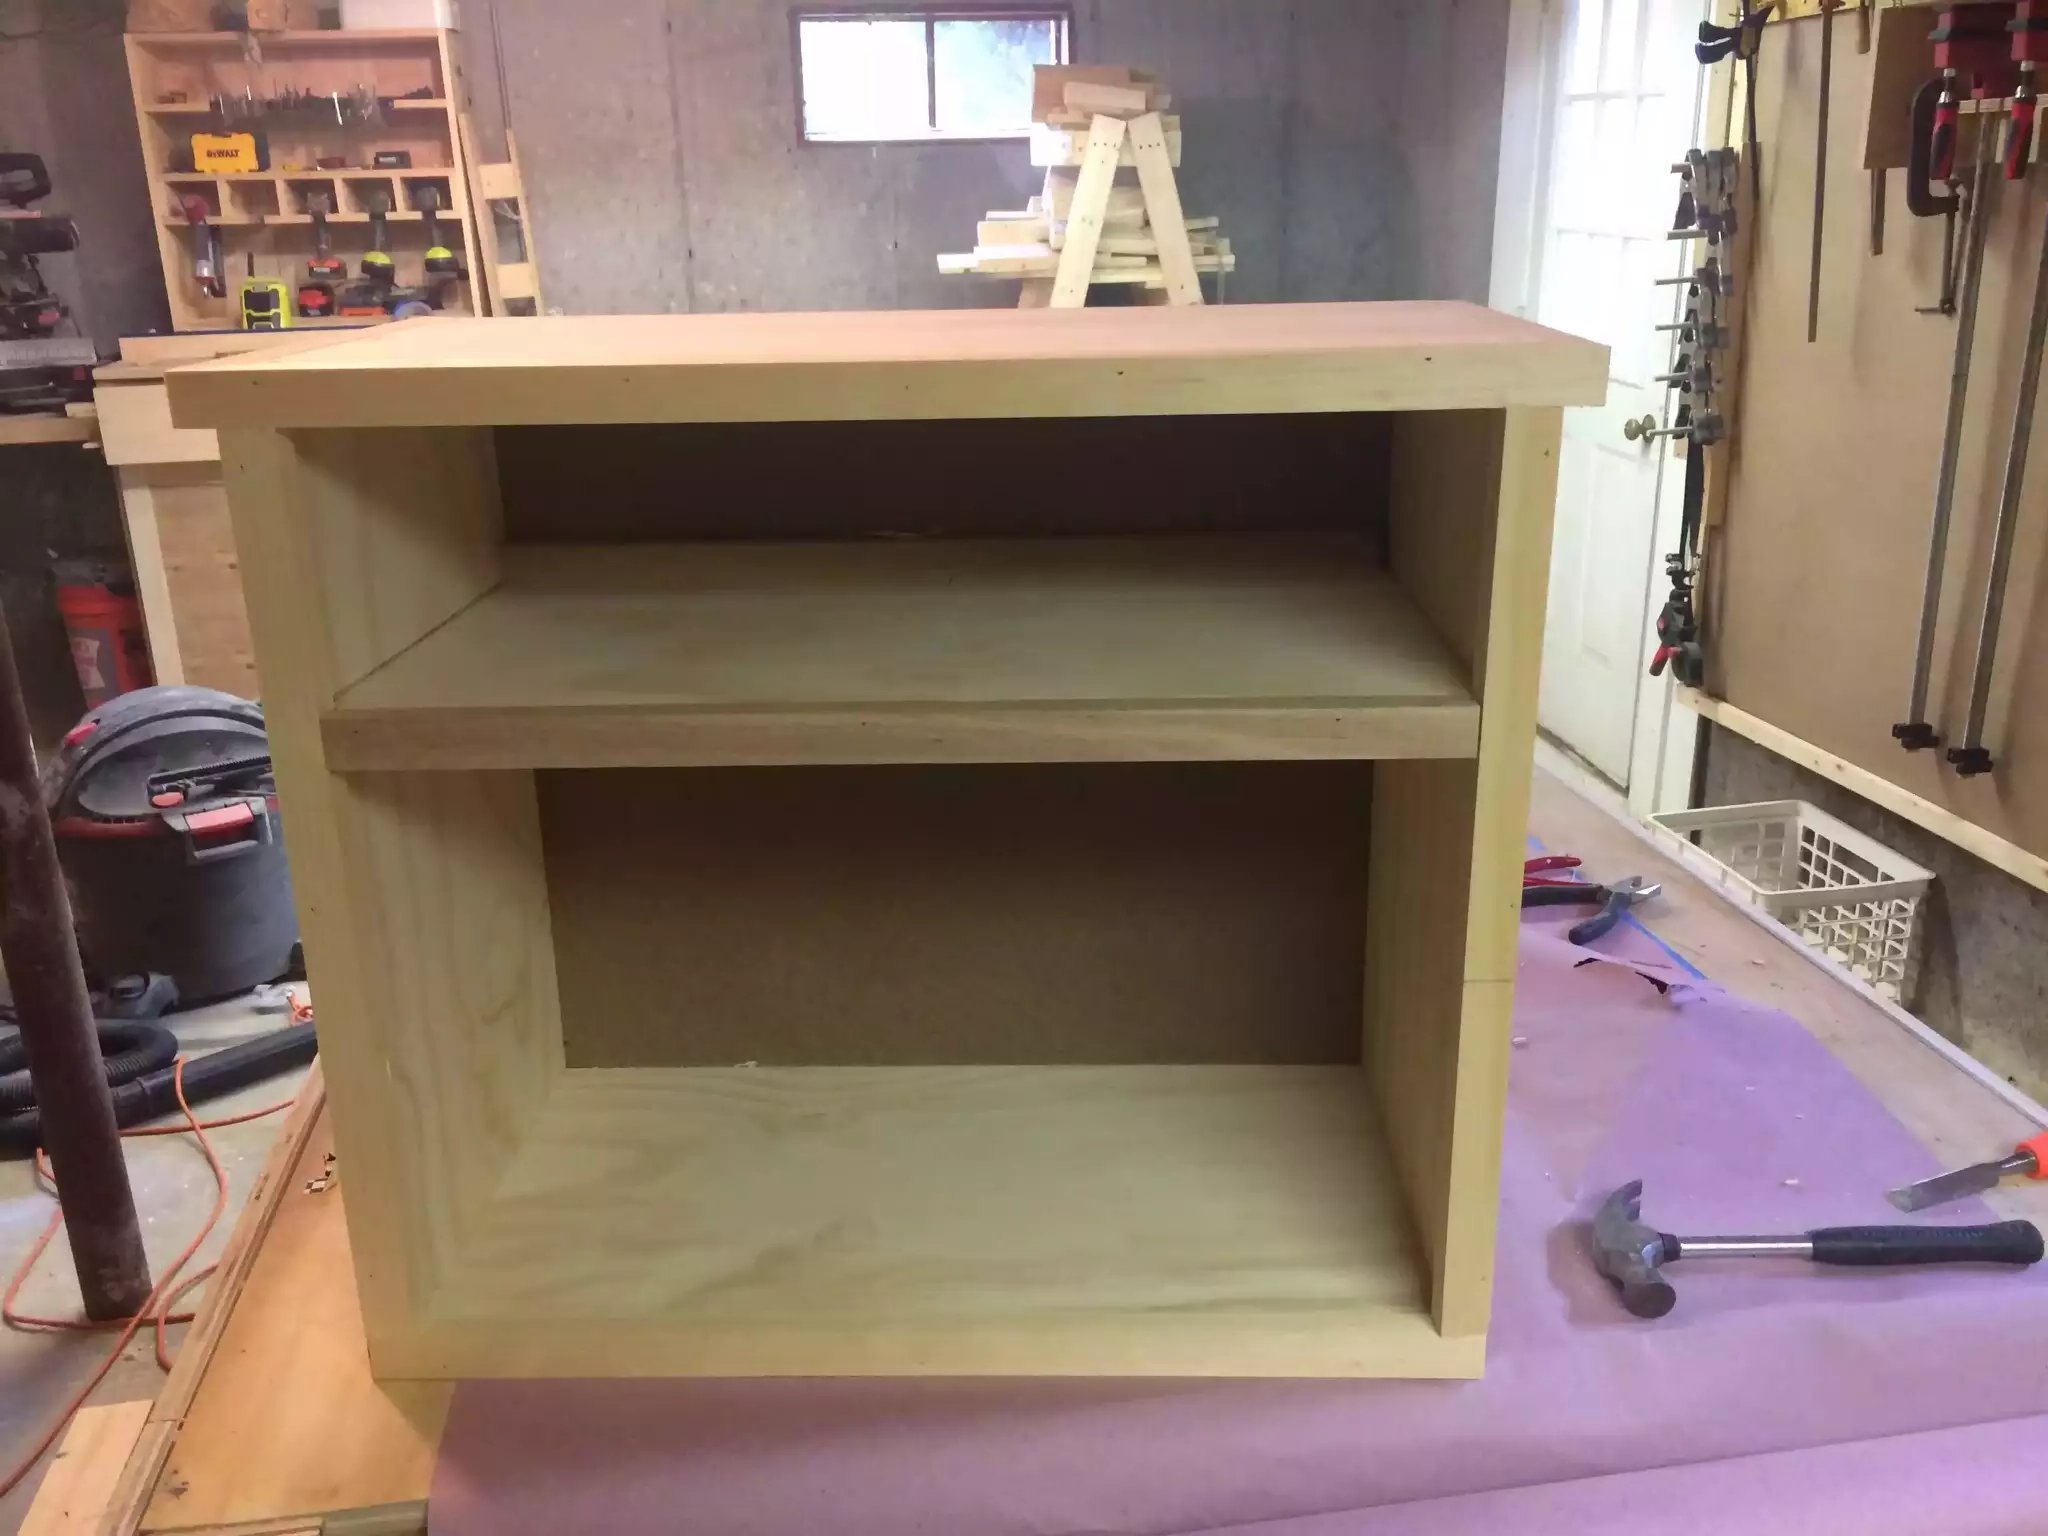
My son needed a bedside unit so as that he could put his alarm and growing companies lectionaries of bedside reading.
- It’s basically a plywood box with dado and rabbit joints as joinery I also used screws and glue to assemble the unit. I plugged the screw holes with dowels and sanded the plugs flush.
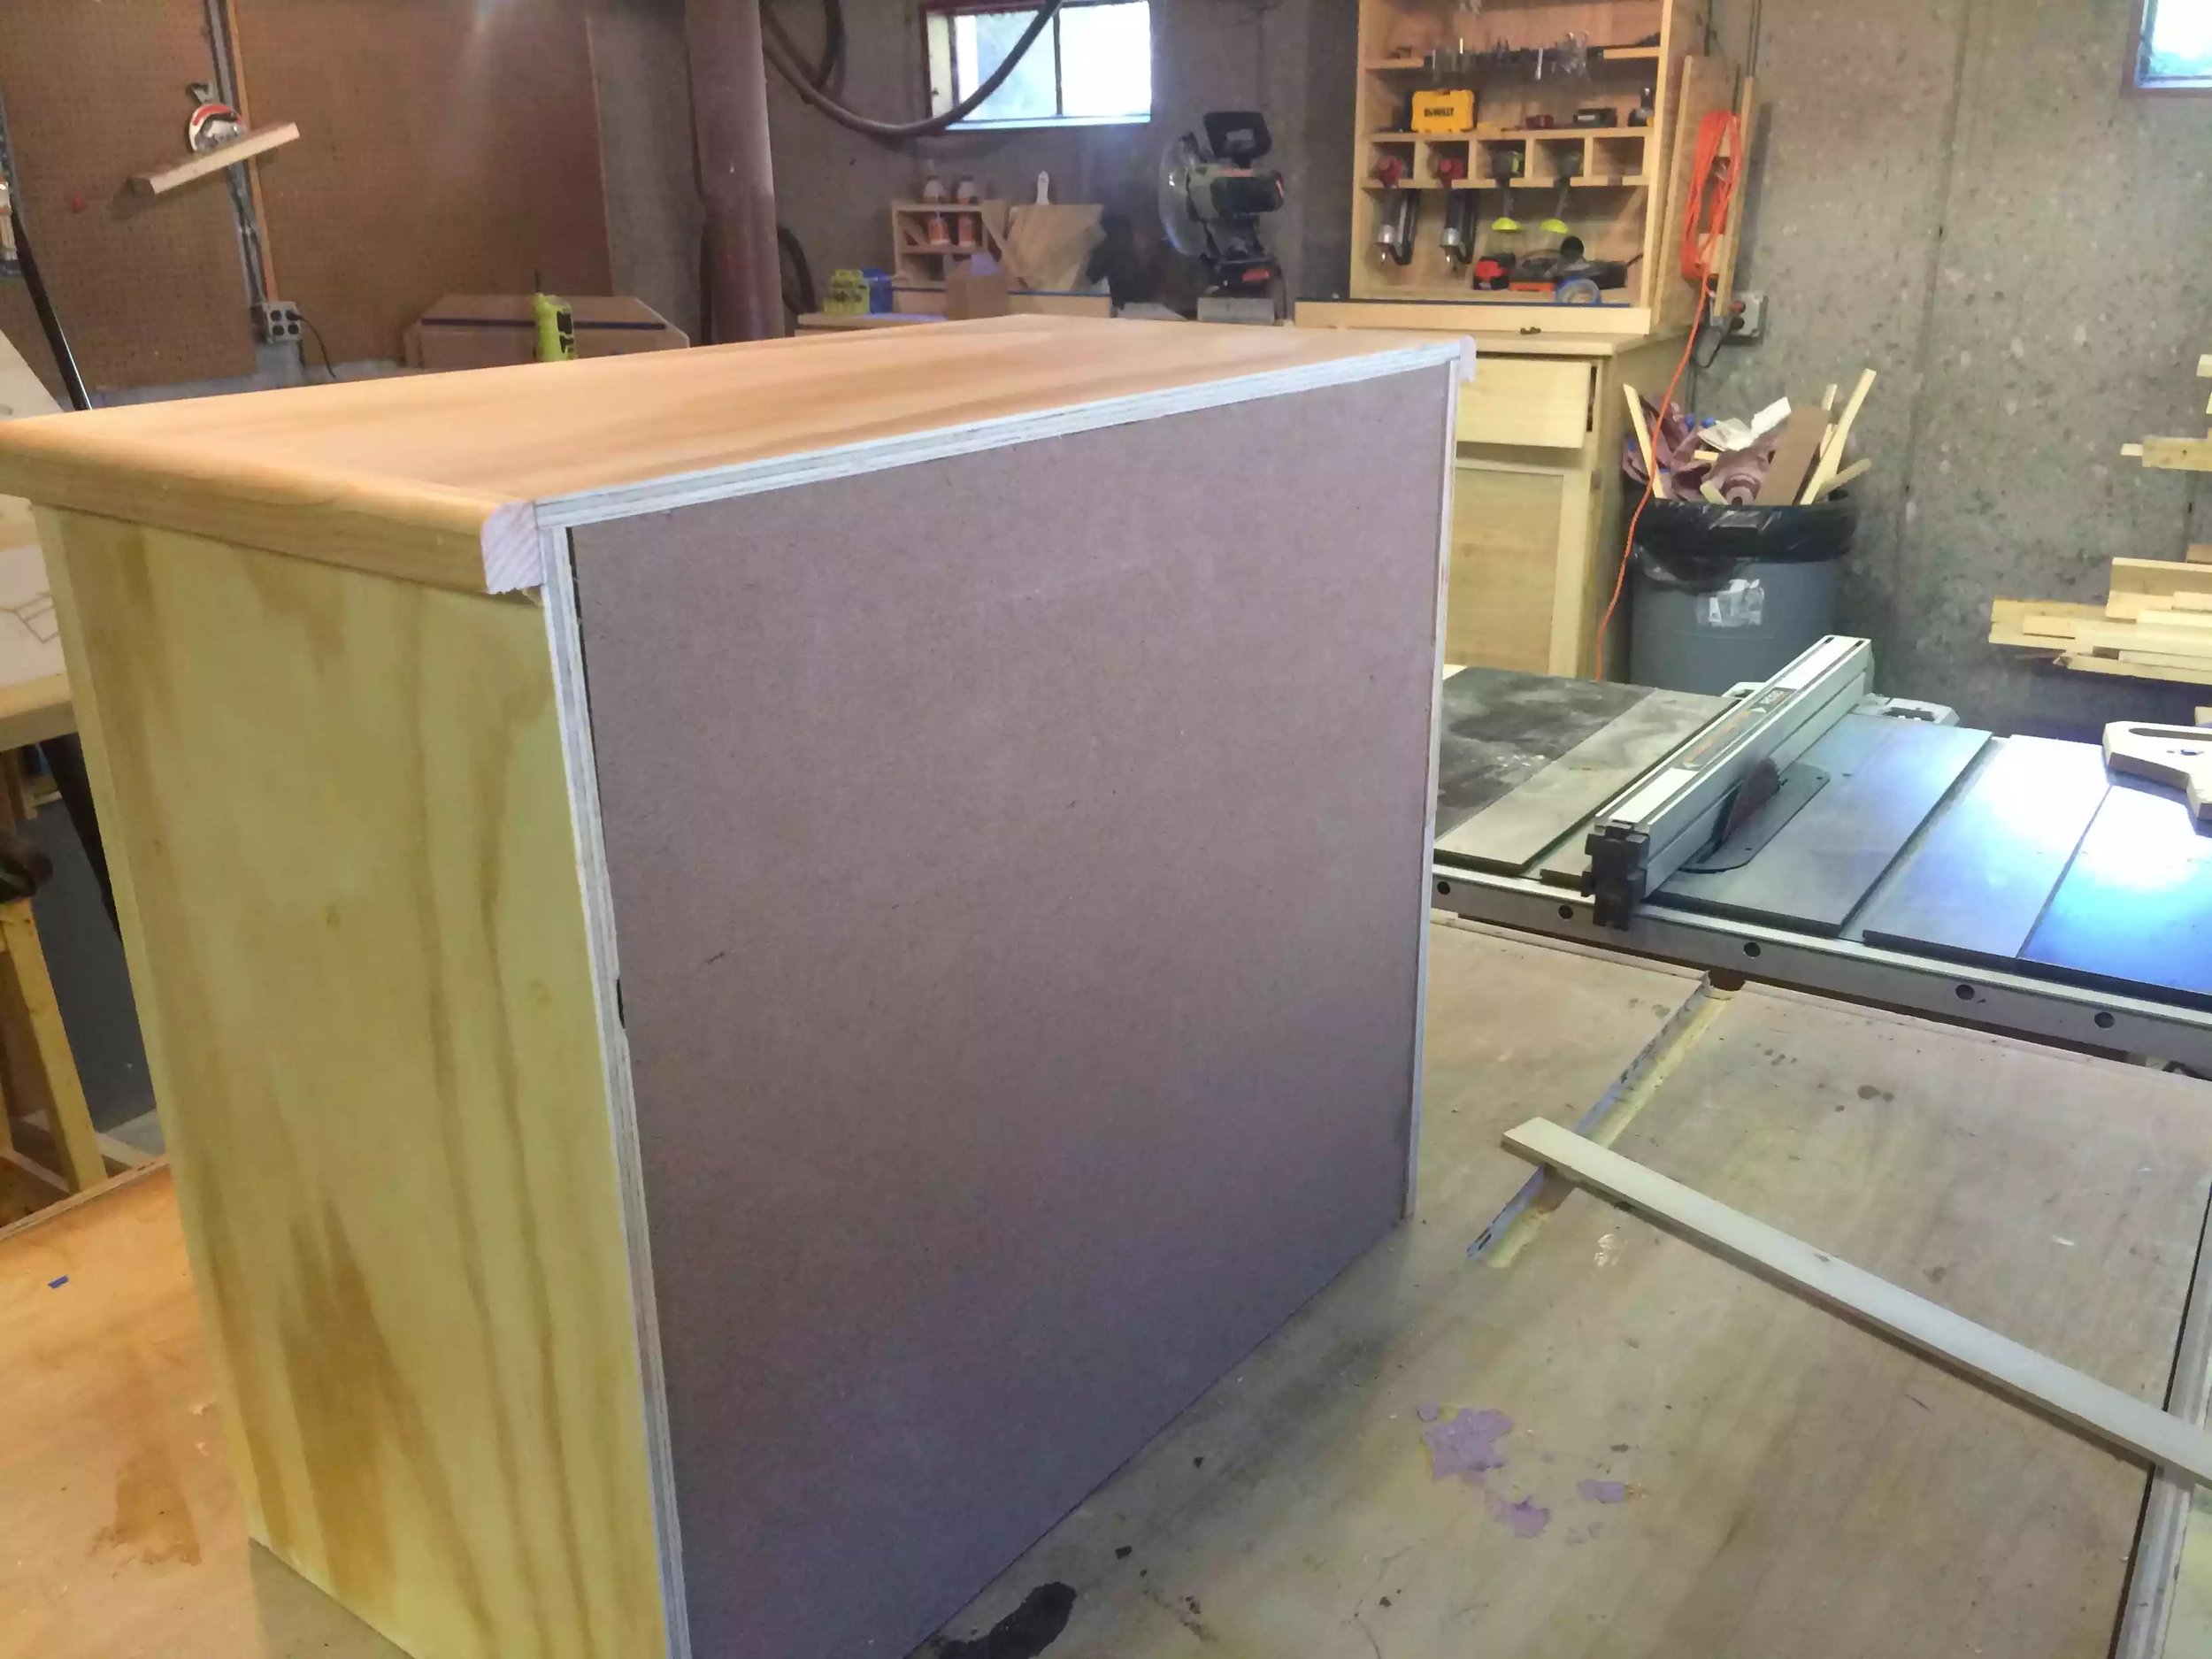
- To hide all the plywood edges I decided to put a solid wood edge banding around the plywood top and also made a face frame so as to conceal all the plywood edges on the outside of the unit.
- The back hardboard panel is recessed in a rabbited back and Brad nail it in place .
- The drawer is very basic I used plywood for its construction and used my pocket hole jig to assemble it.
- In hindsight I should of added legs or feet to the base, as its gathering dust. I can always add that soon.
Sometimes I revisit projects that I have made and thing to myself is there anything I can add or something I would do different if I were to make it again, well this project needs feet.
I didn’t like all the sharp corners on the top edge banding so I used a 3/8” round over bit in my router.
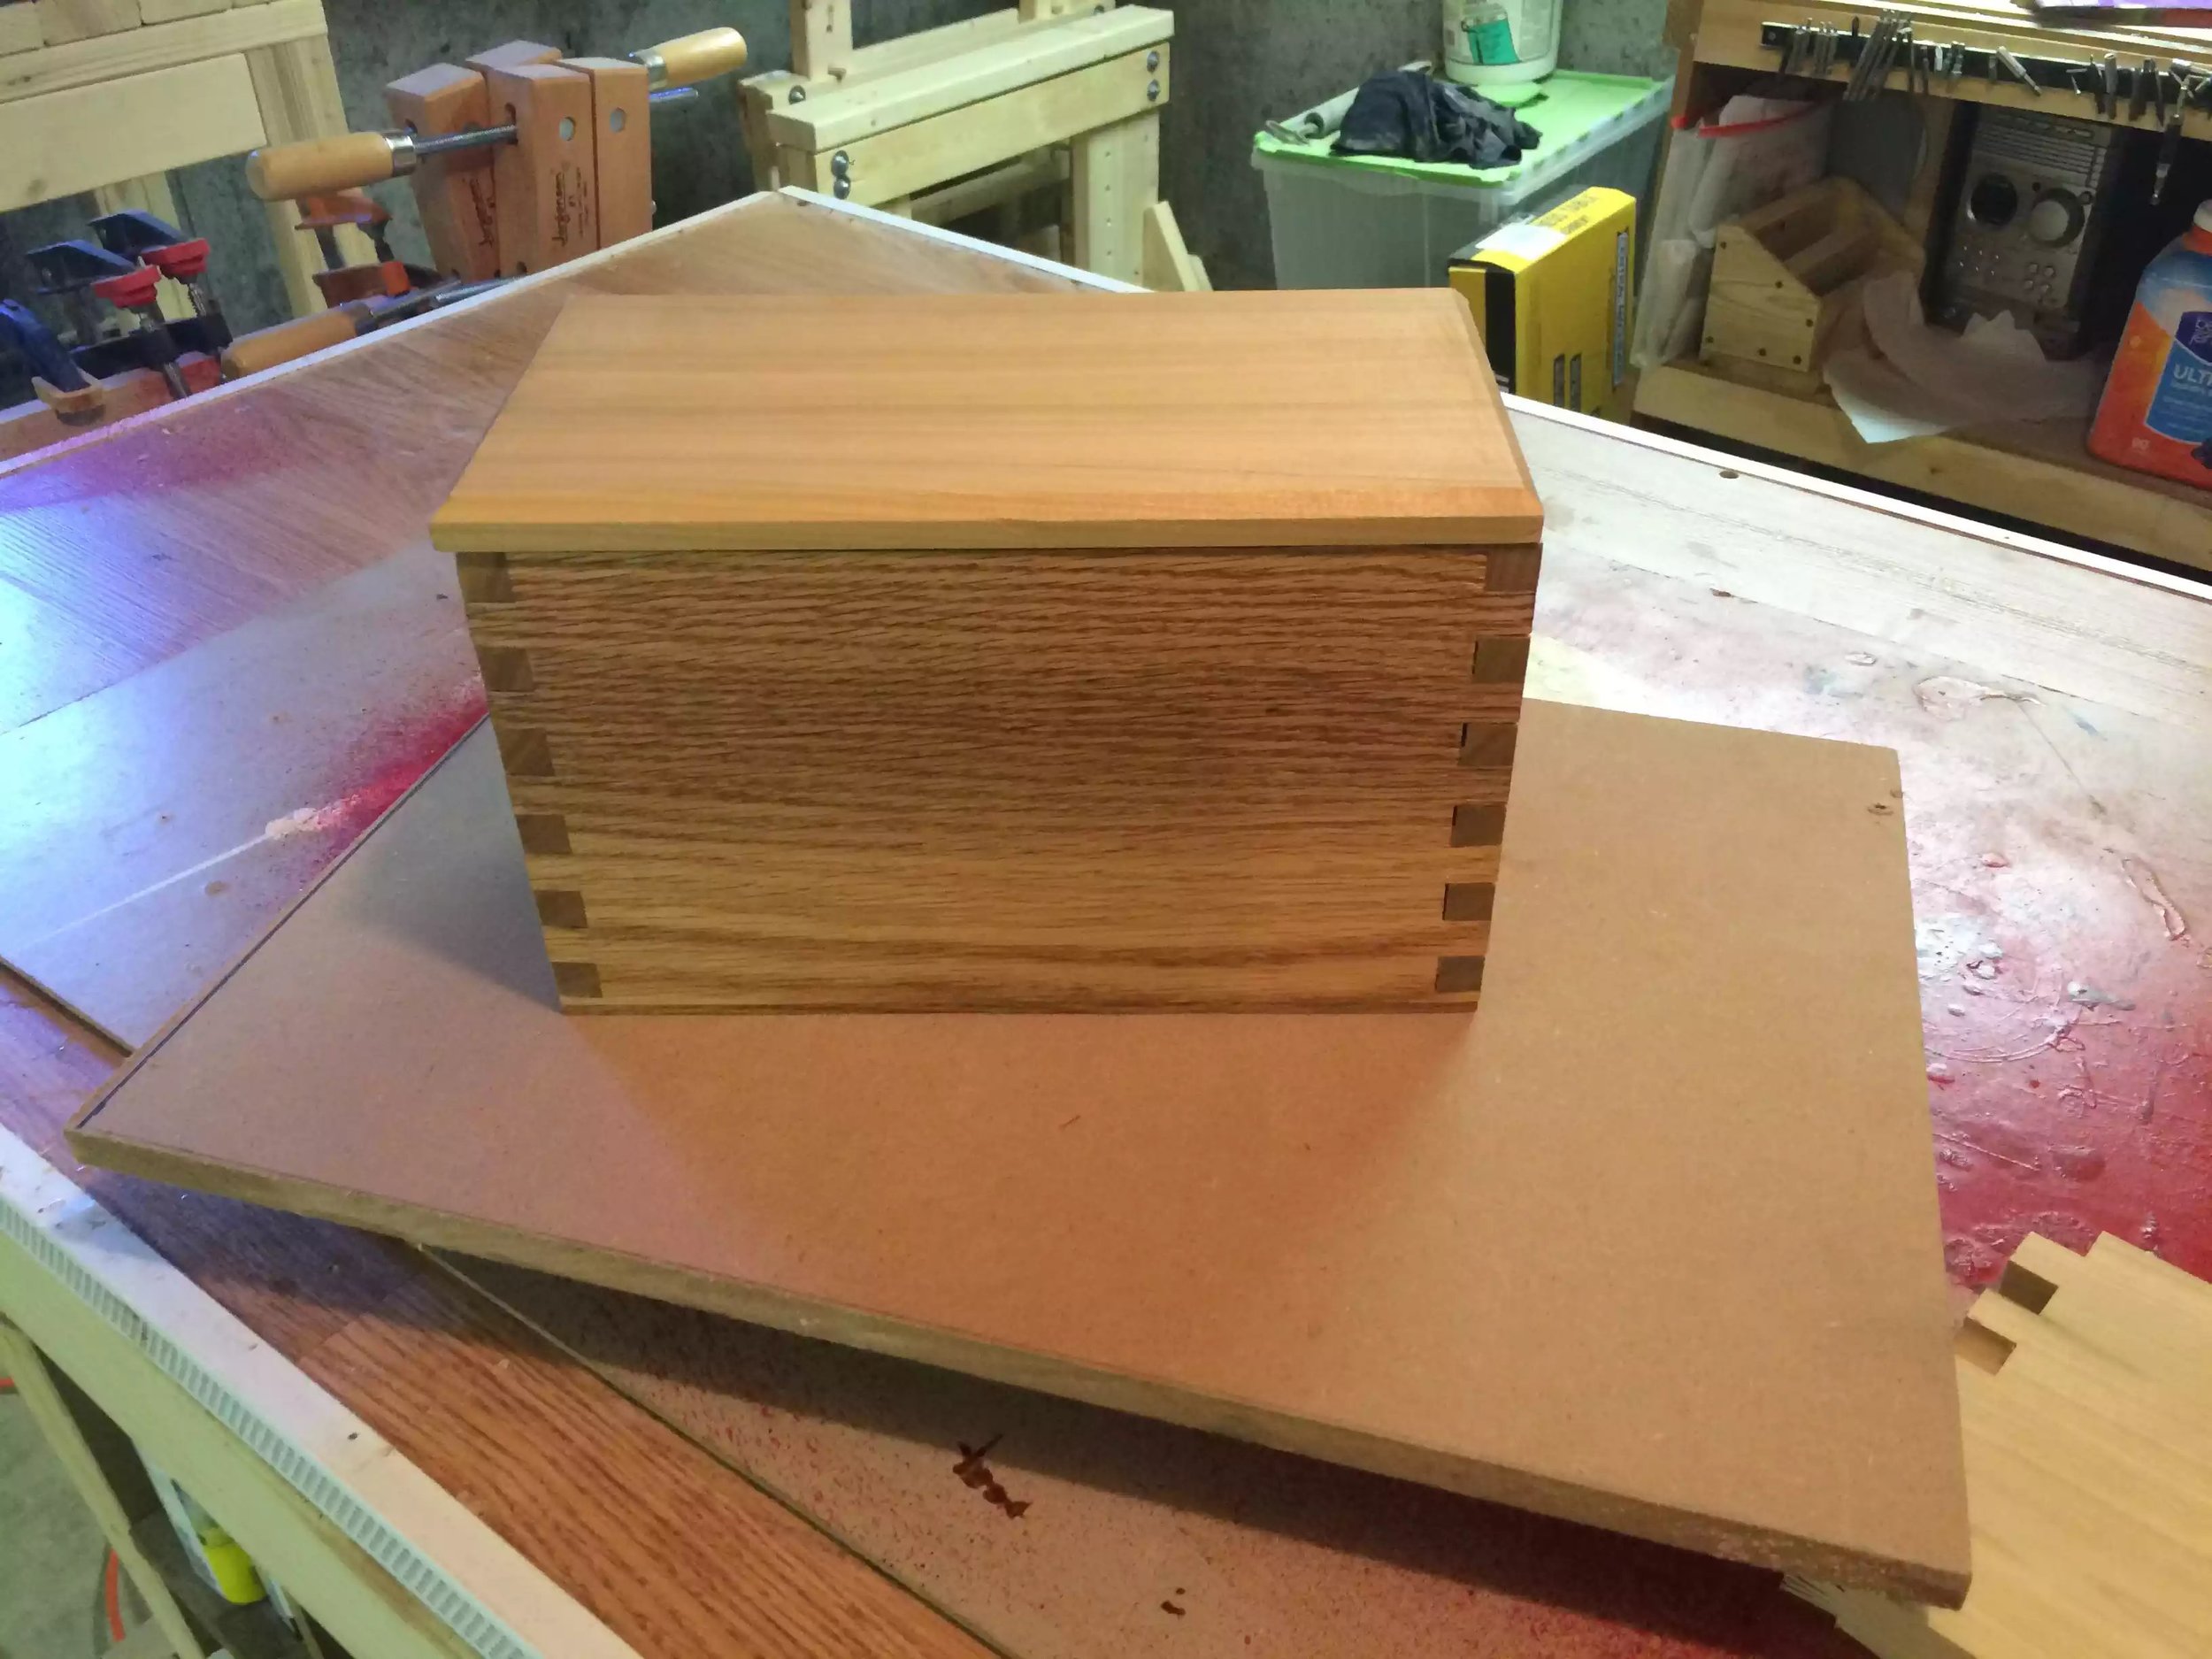
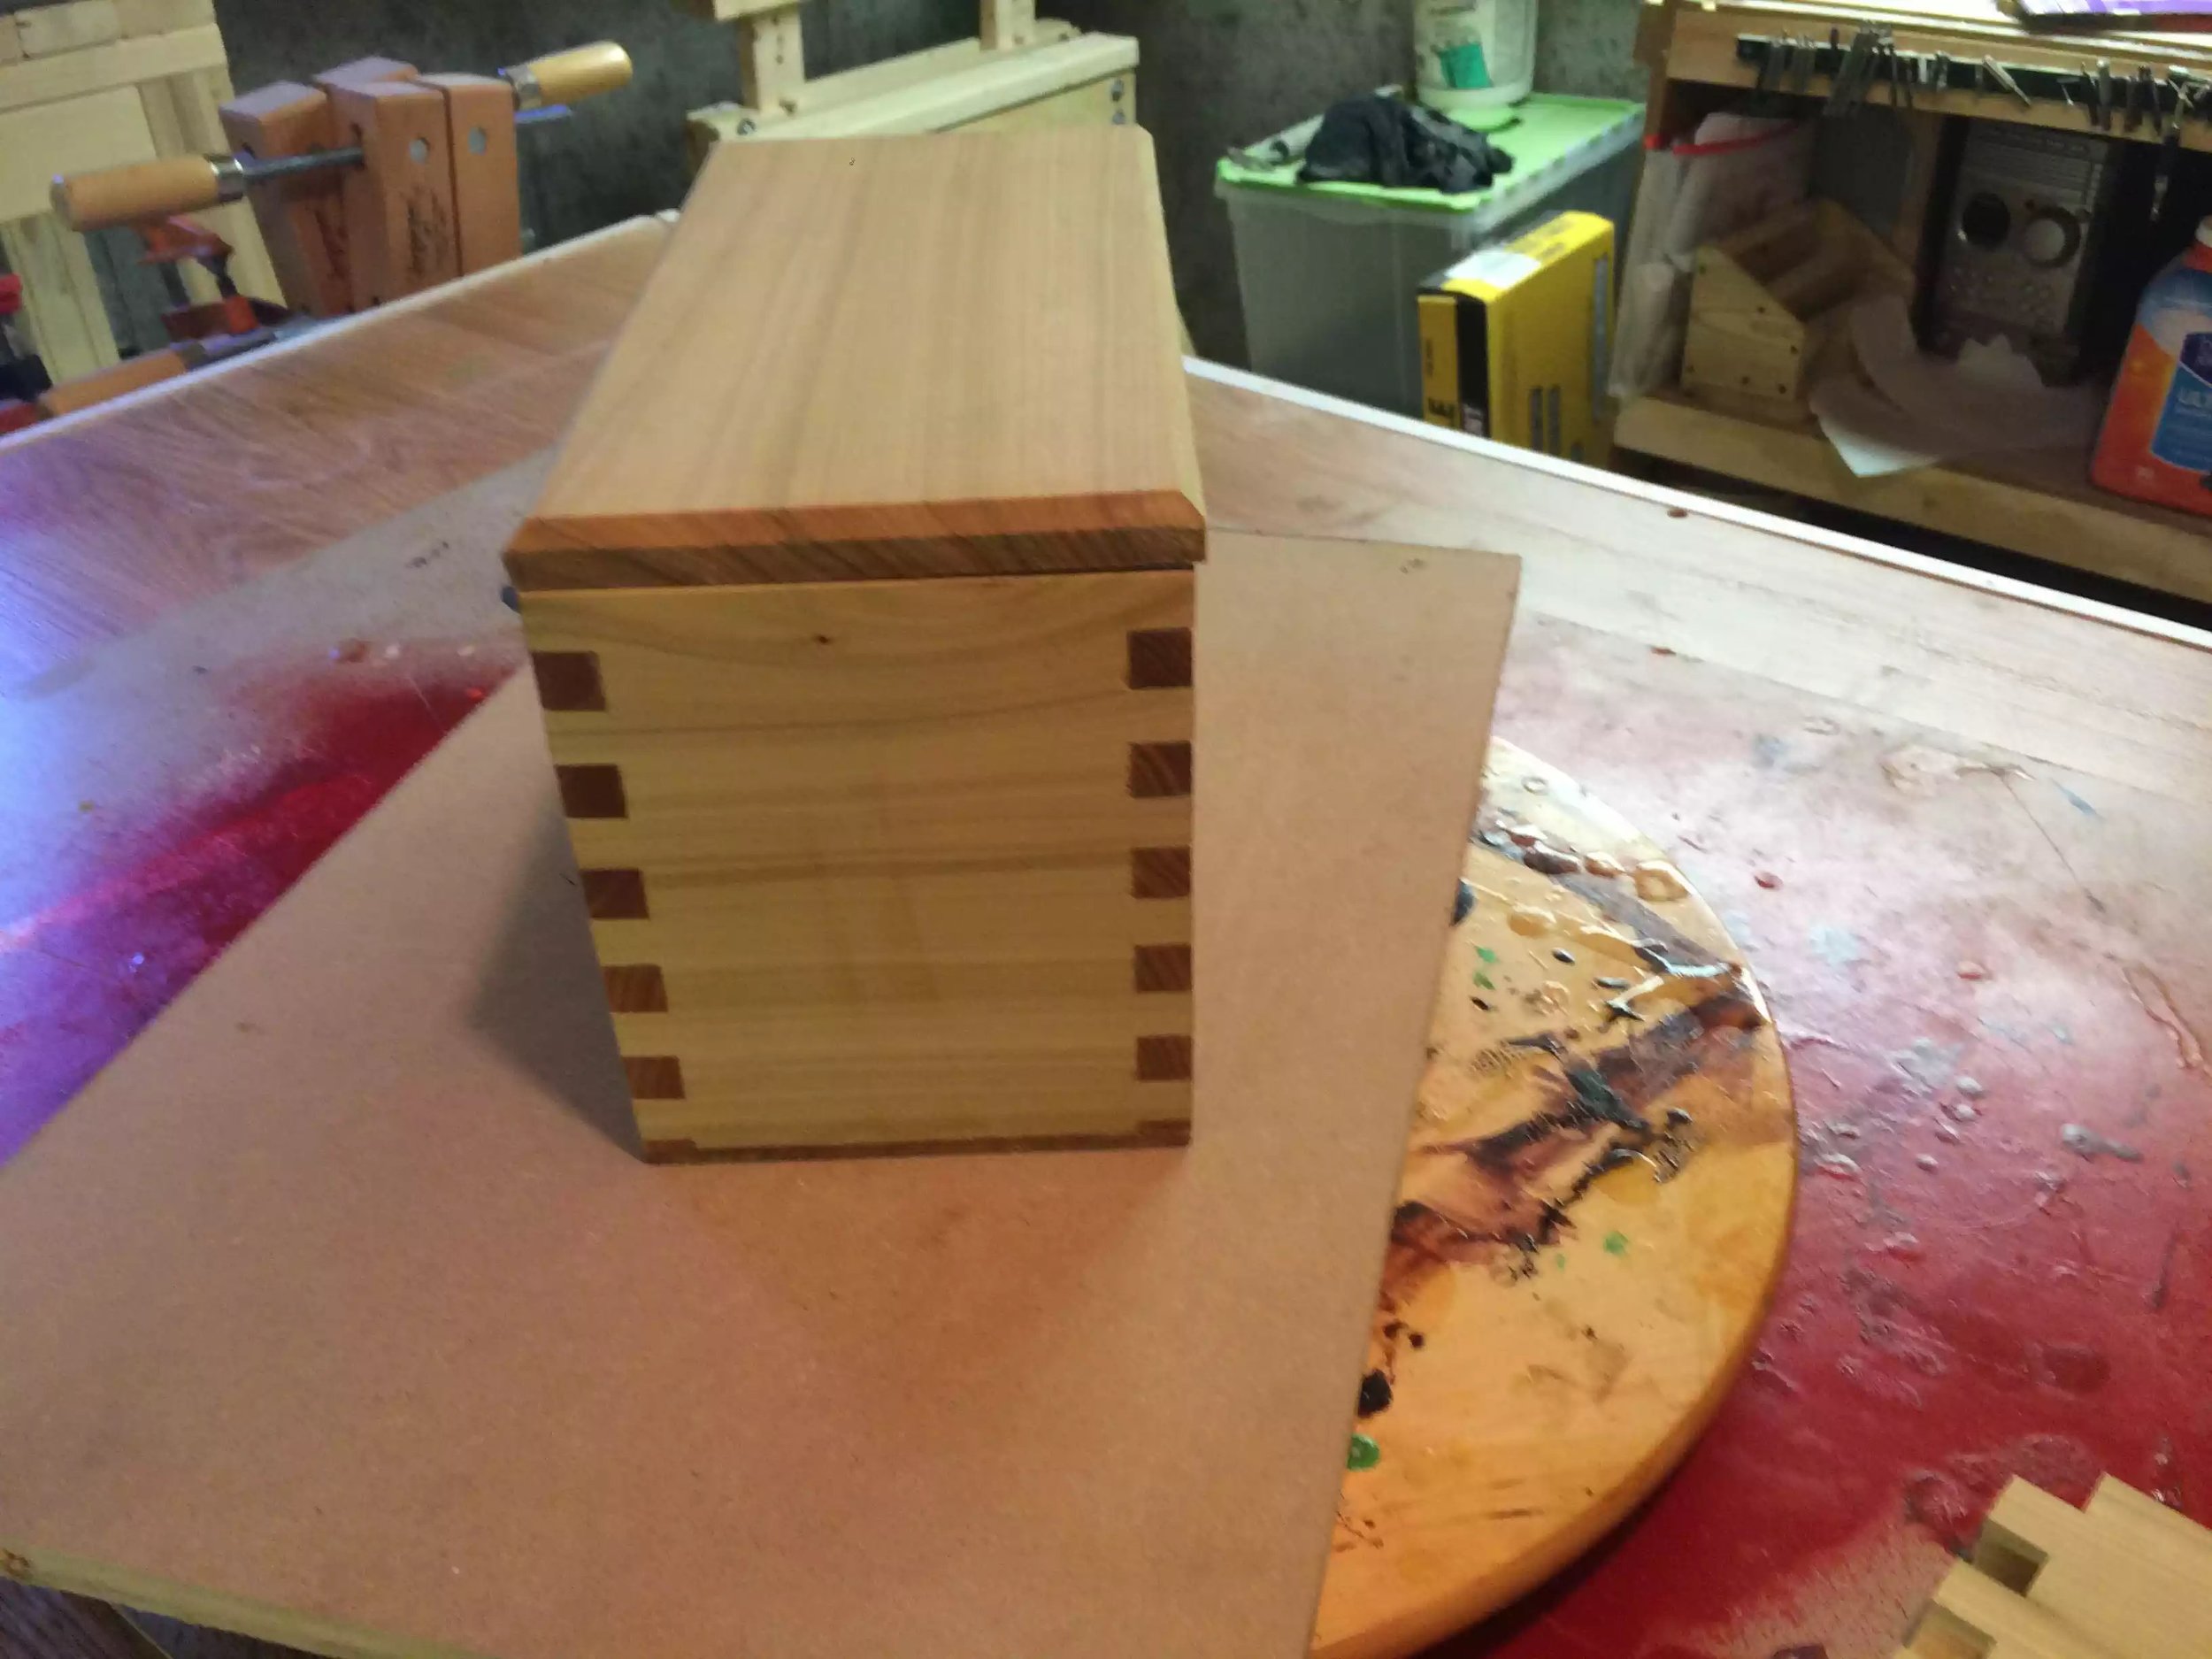
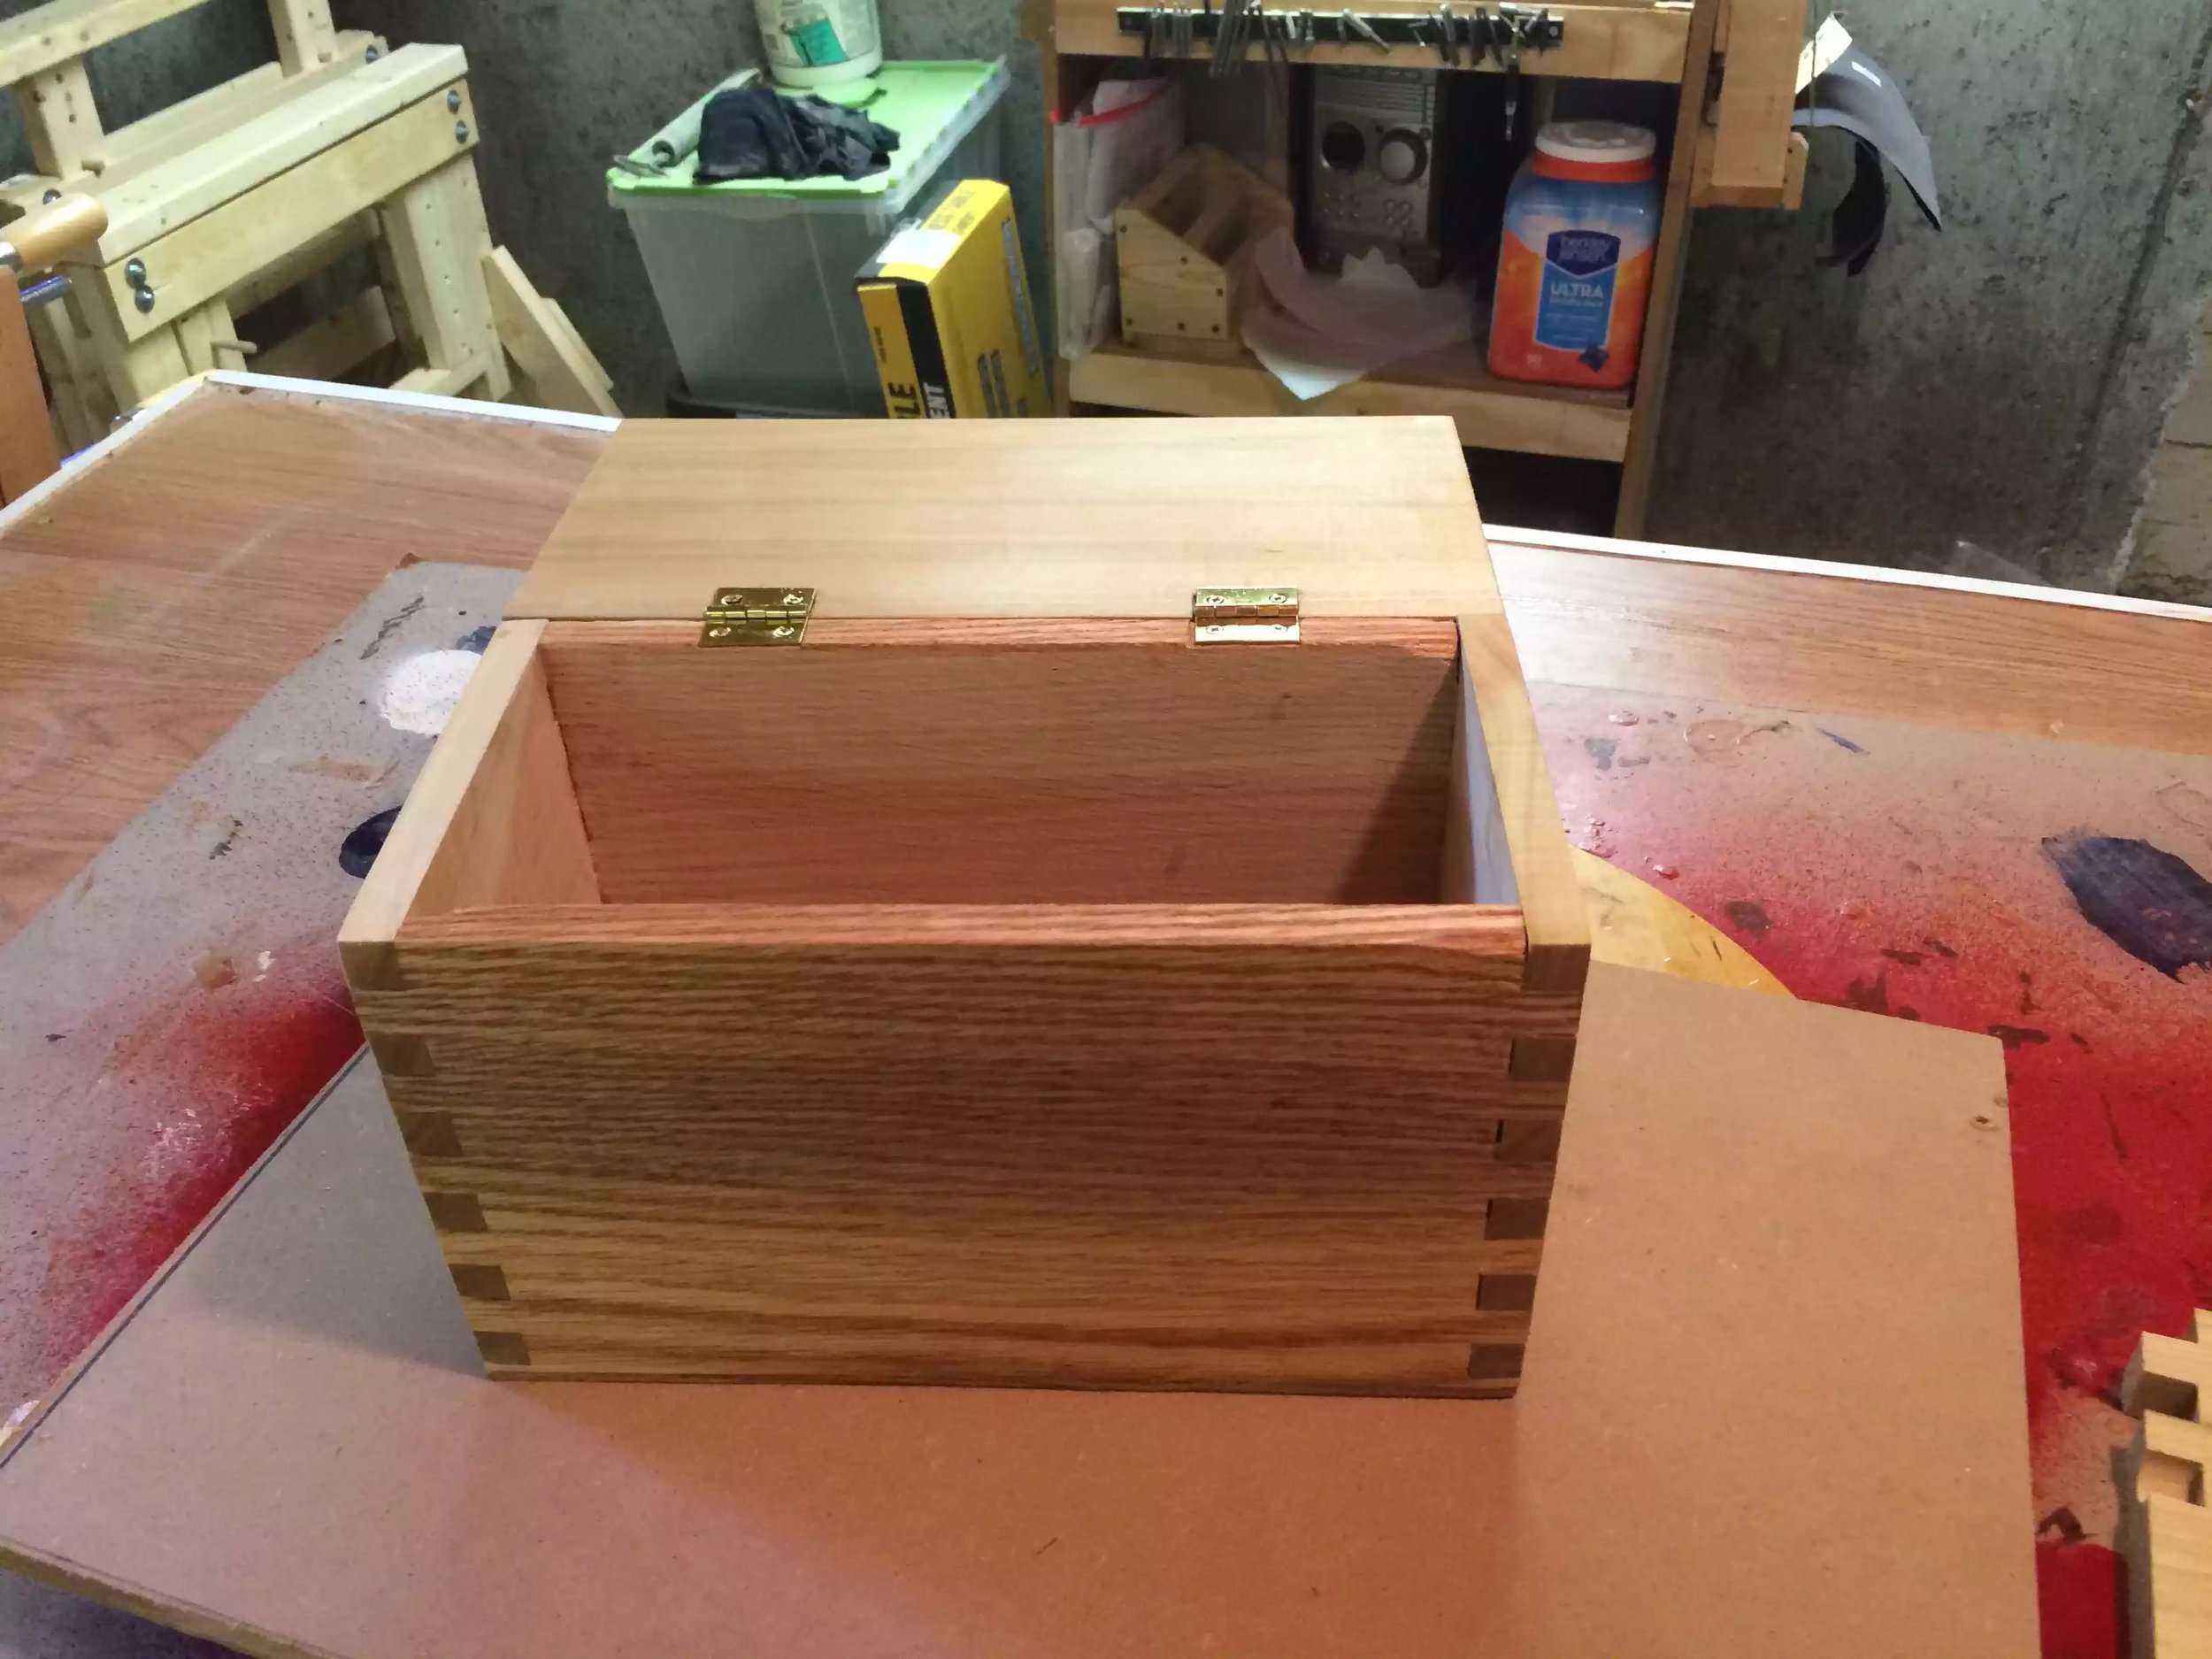
FINGER JOINT (BOX JOINT)
KEEPSAKE BOX
(10/2015)


Hi all,
I really wanted to do something that I haven’t done beforehand in joinery techniques.. So since I designed and built my router table box joint jig, I decided to make the jigs maiden project and designed a box , originally it was going to be a jewelry box but the wife doesn’t need one, I might keep it for myself and use it for a keepsake box.. Until I make a much bigger one…
I got the design on lumberjocks thanks to Justin , here is a link to his box.. The main difference is that his box is made from 1 species of wood, oak and mine is made from poplar in addition to the oak…
Anyway the dimensions are 10” wide, 5.5” high and 5” deep…..
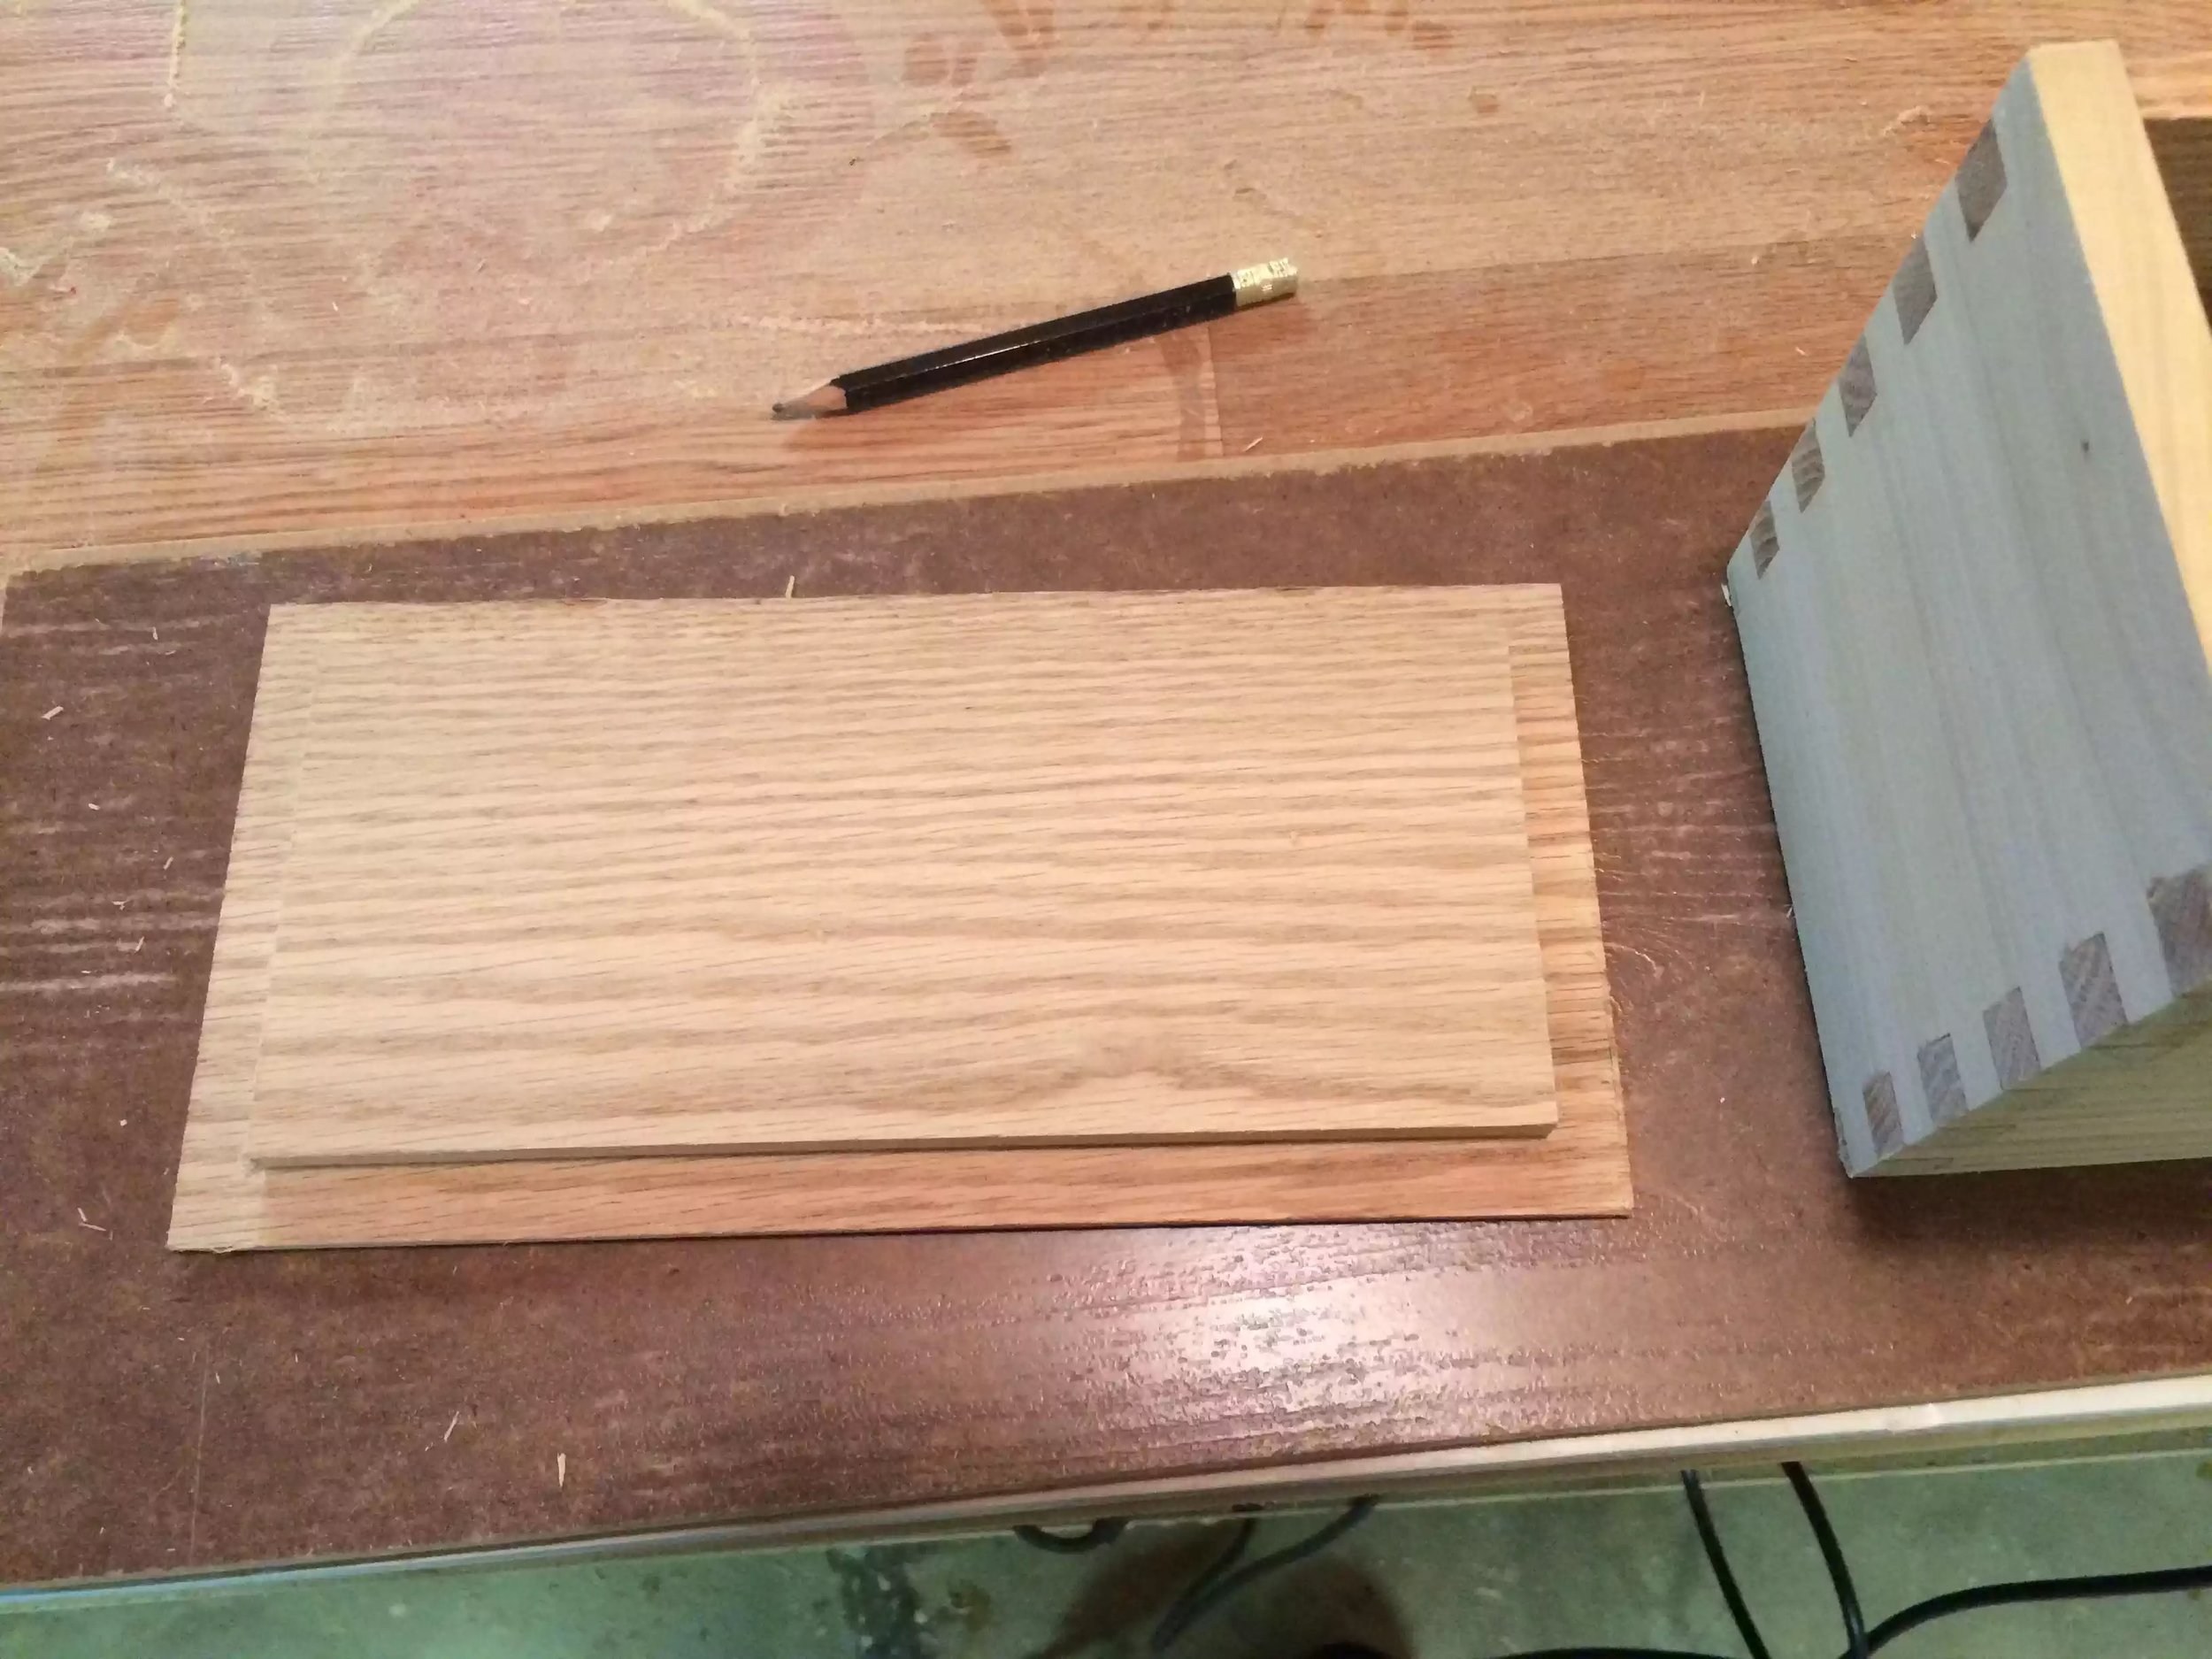
The box is 100% glue and finger joint and the base has a rabbit cut out all along the perimeter of the base to fit inside the box walls
I finished it with Danish oil and that’s it
Thanks for looking
ZIG ZAG
CORNER SHELVING UNIT
(06/2015)
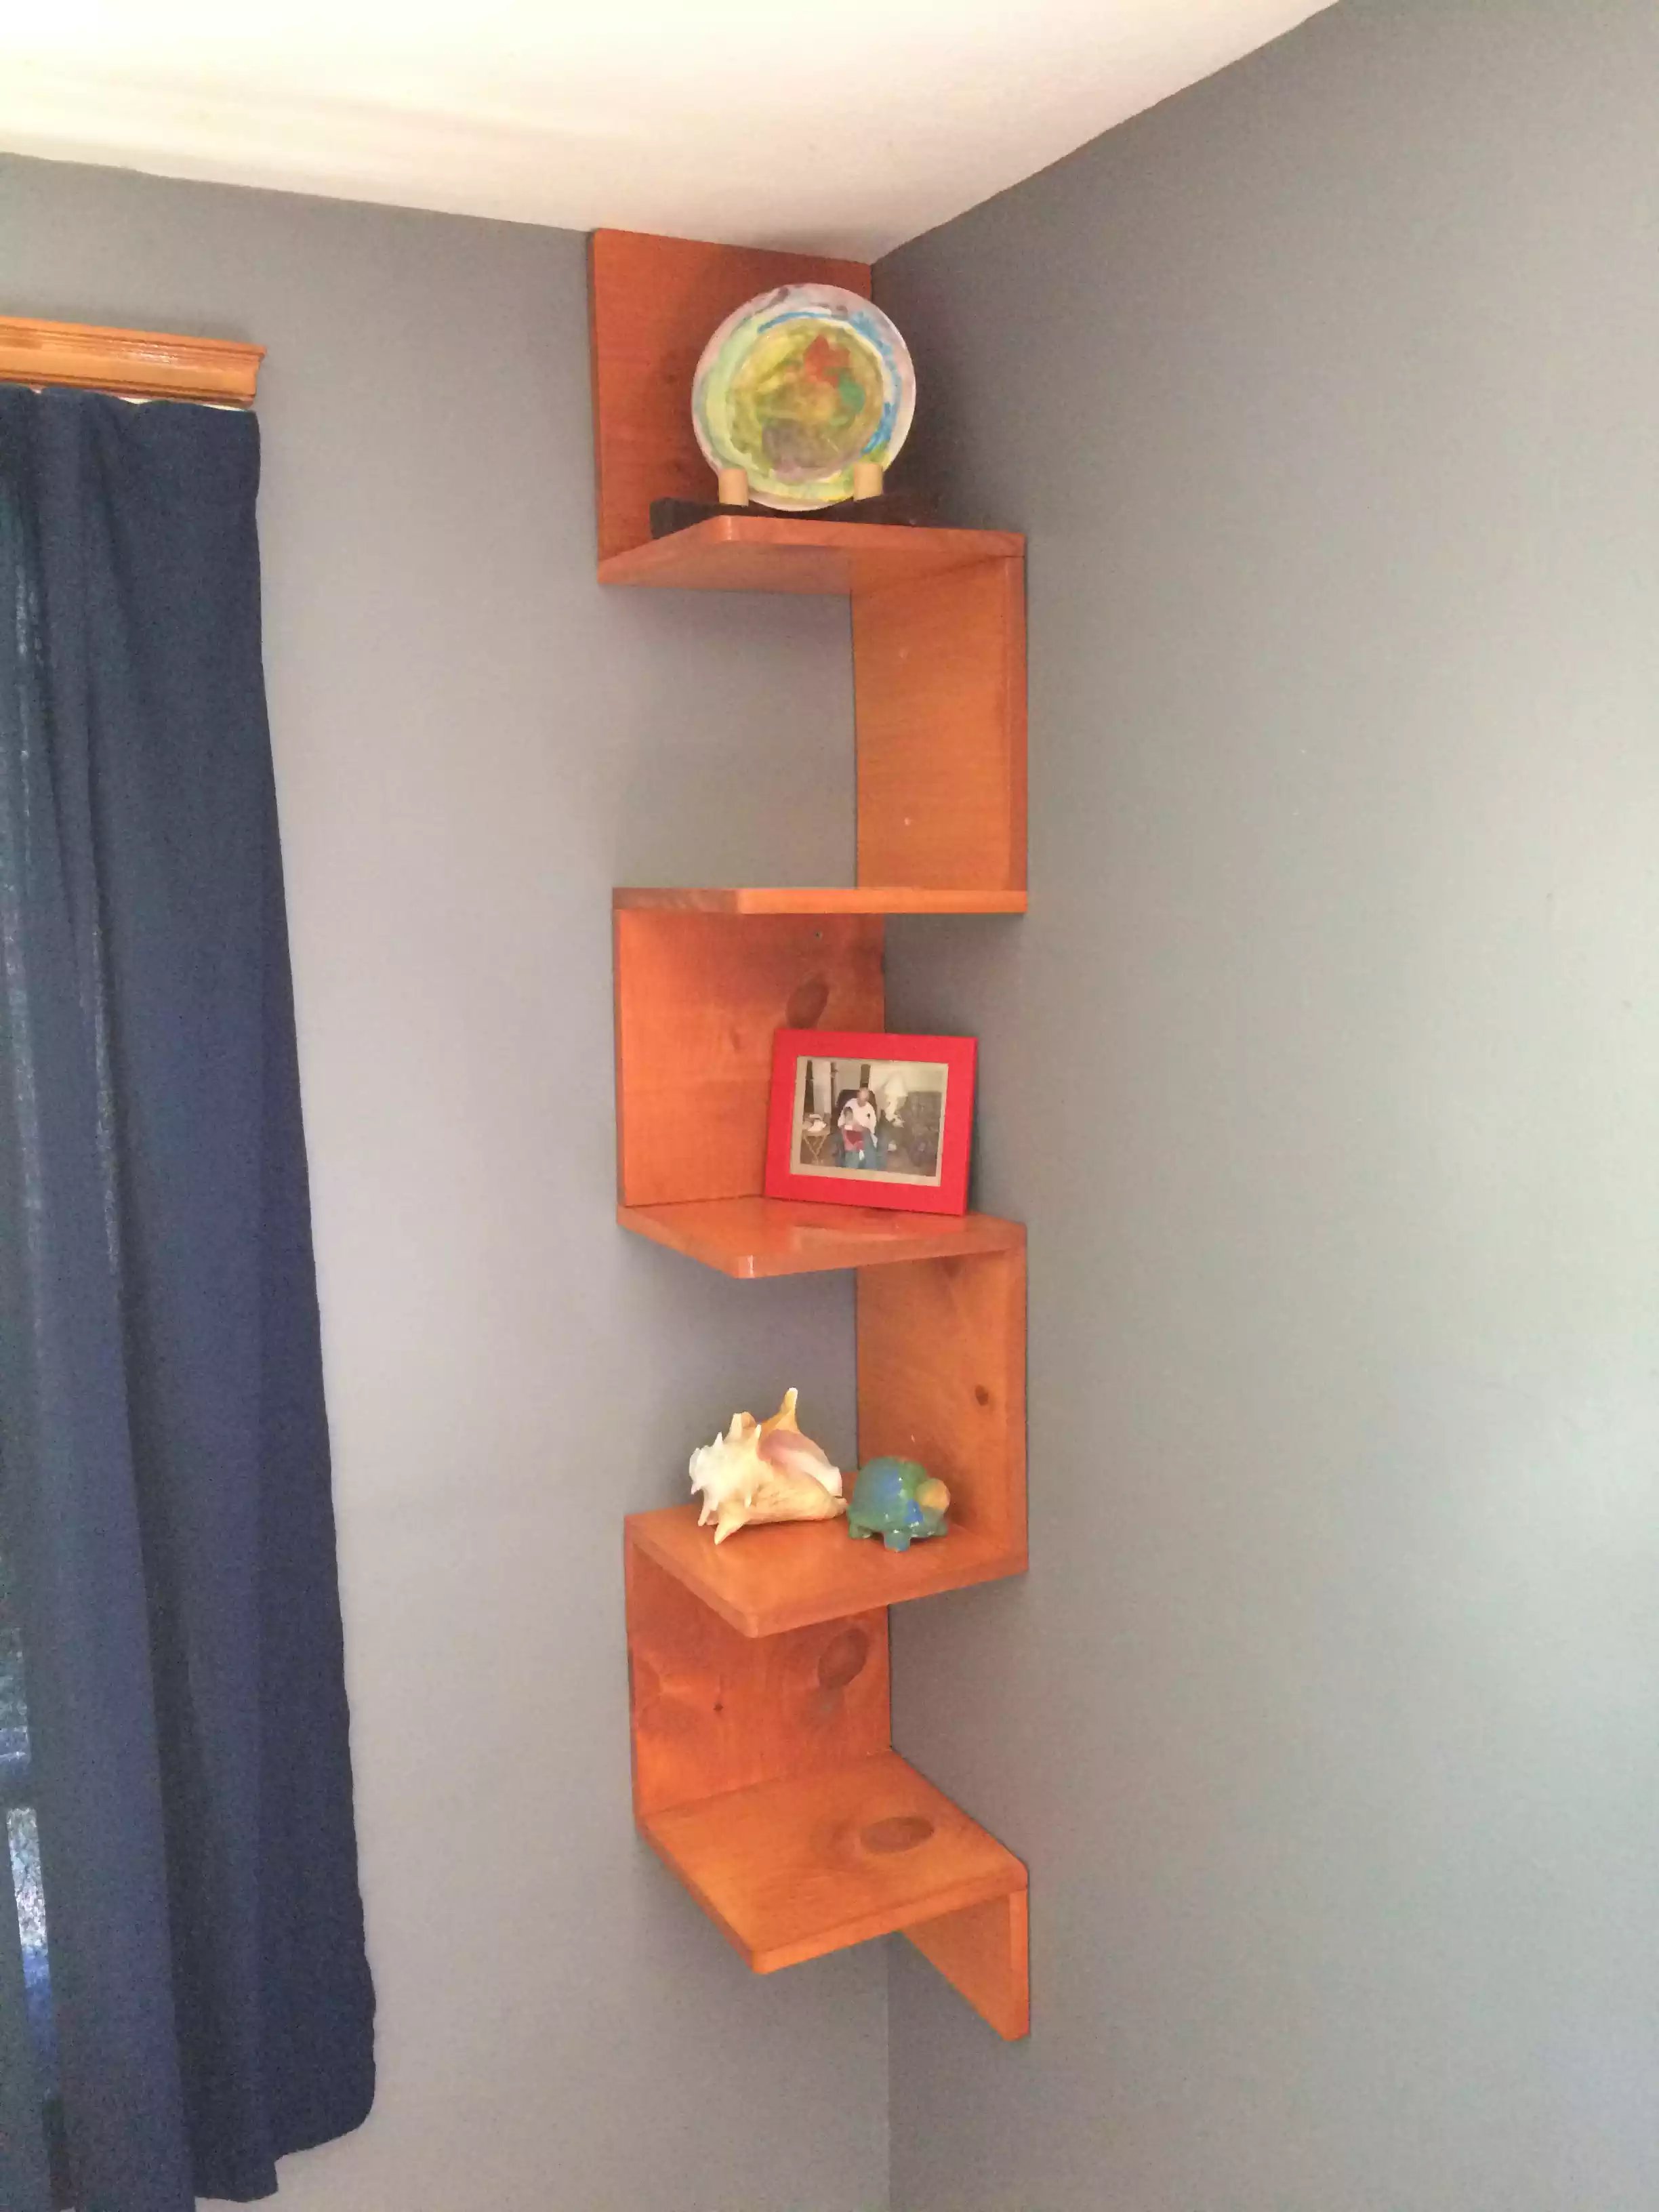
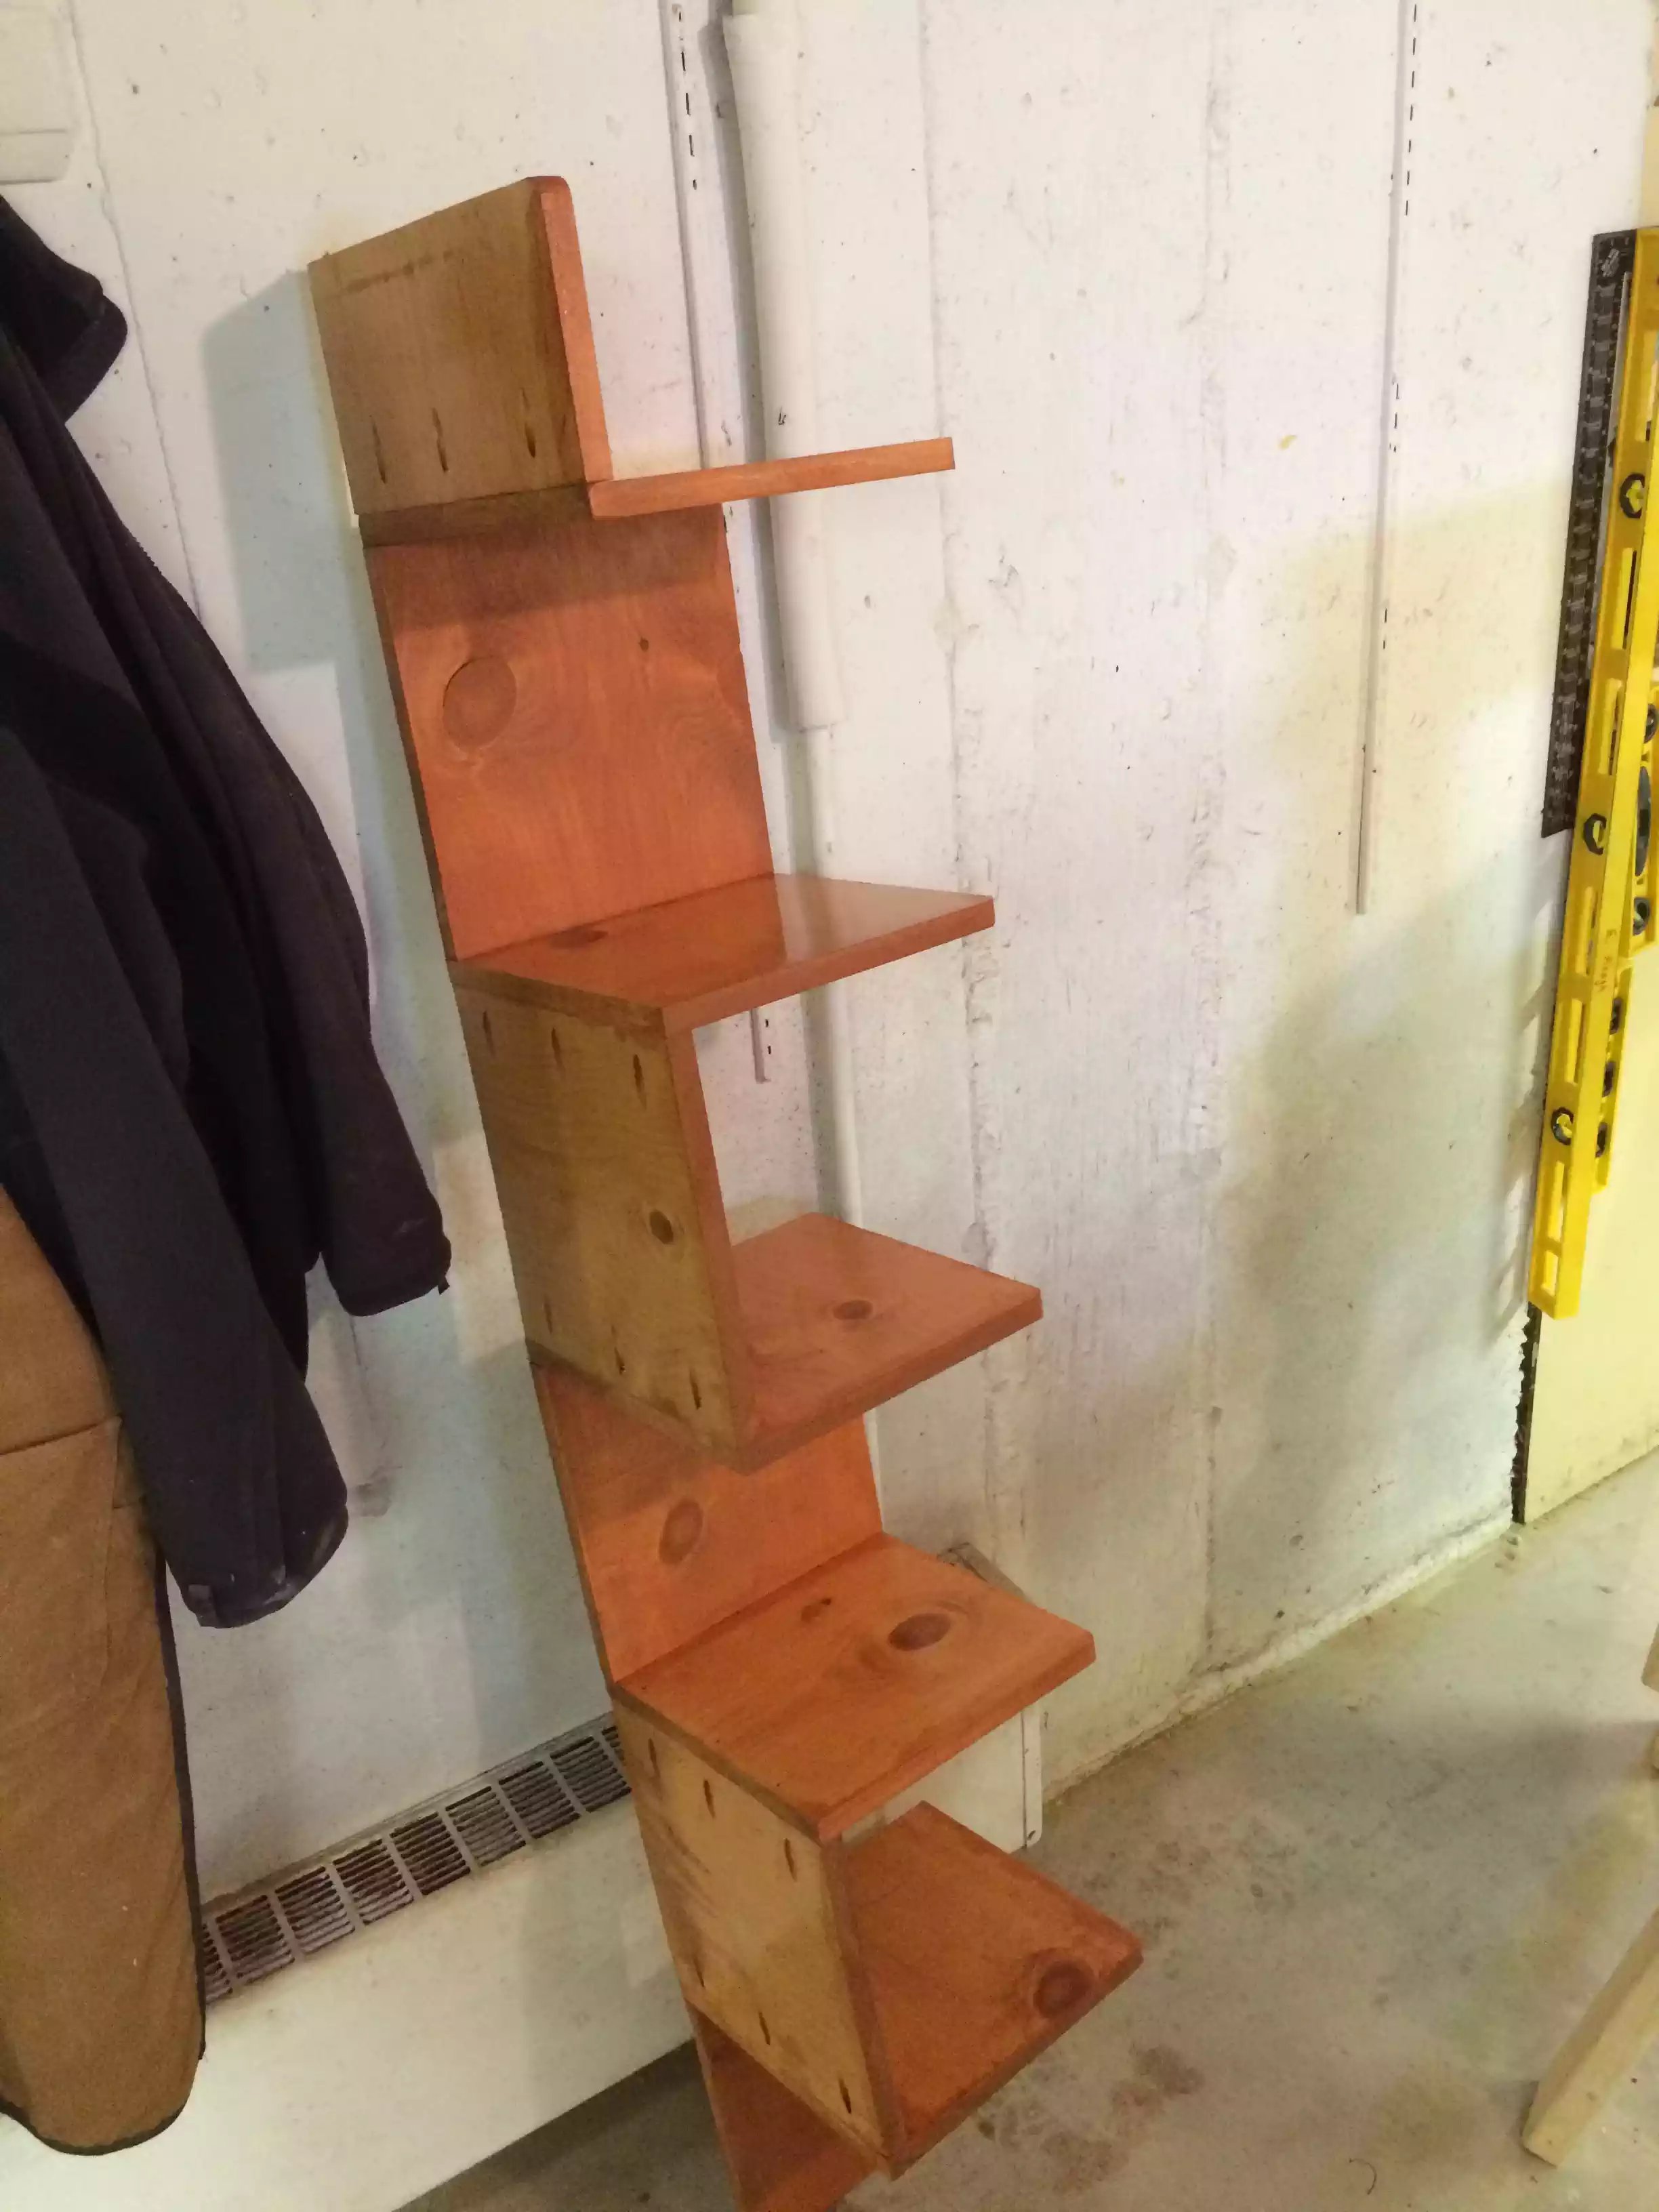
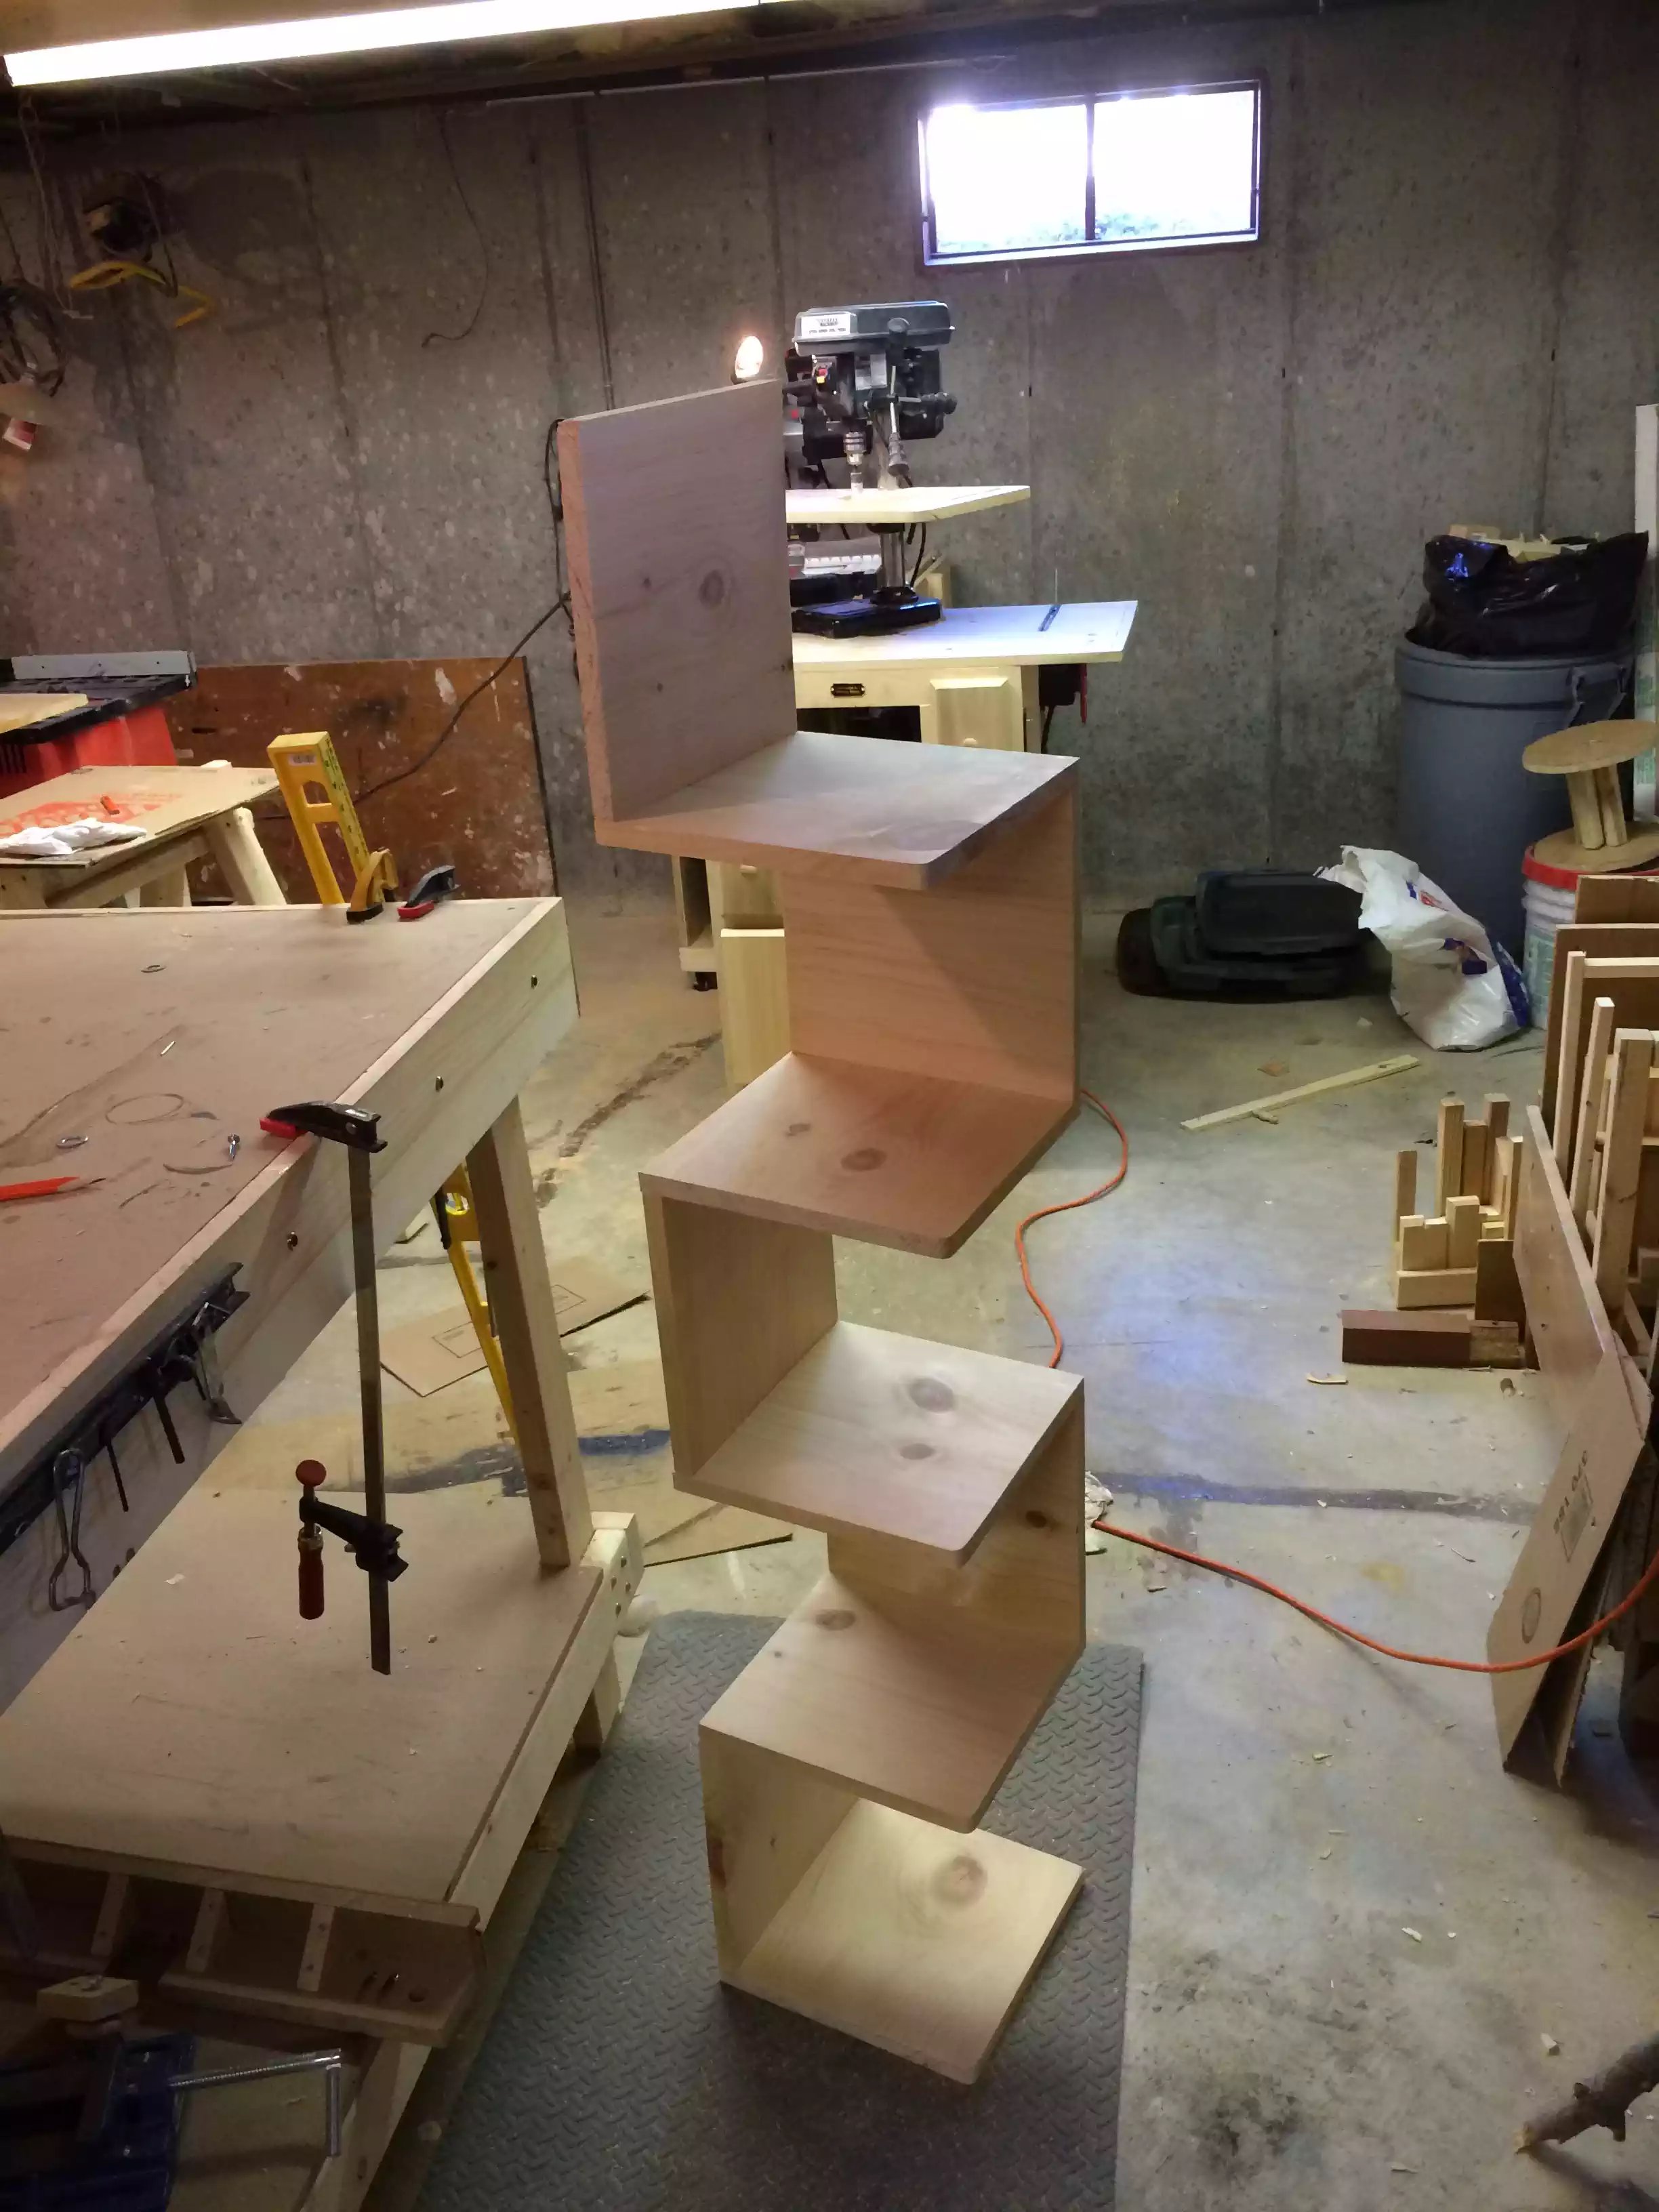
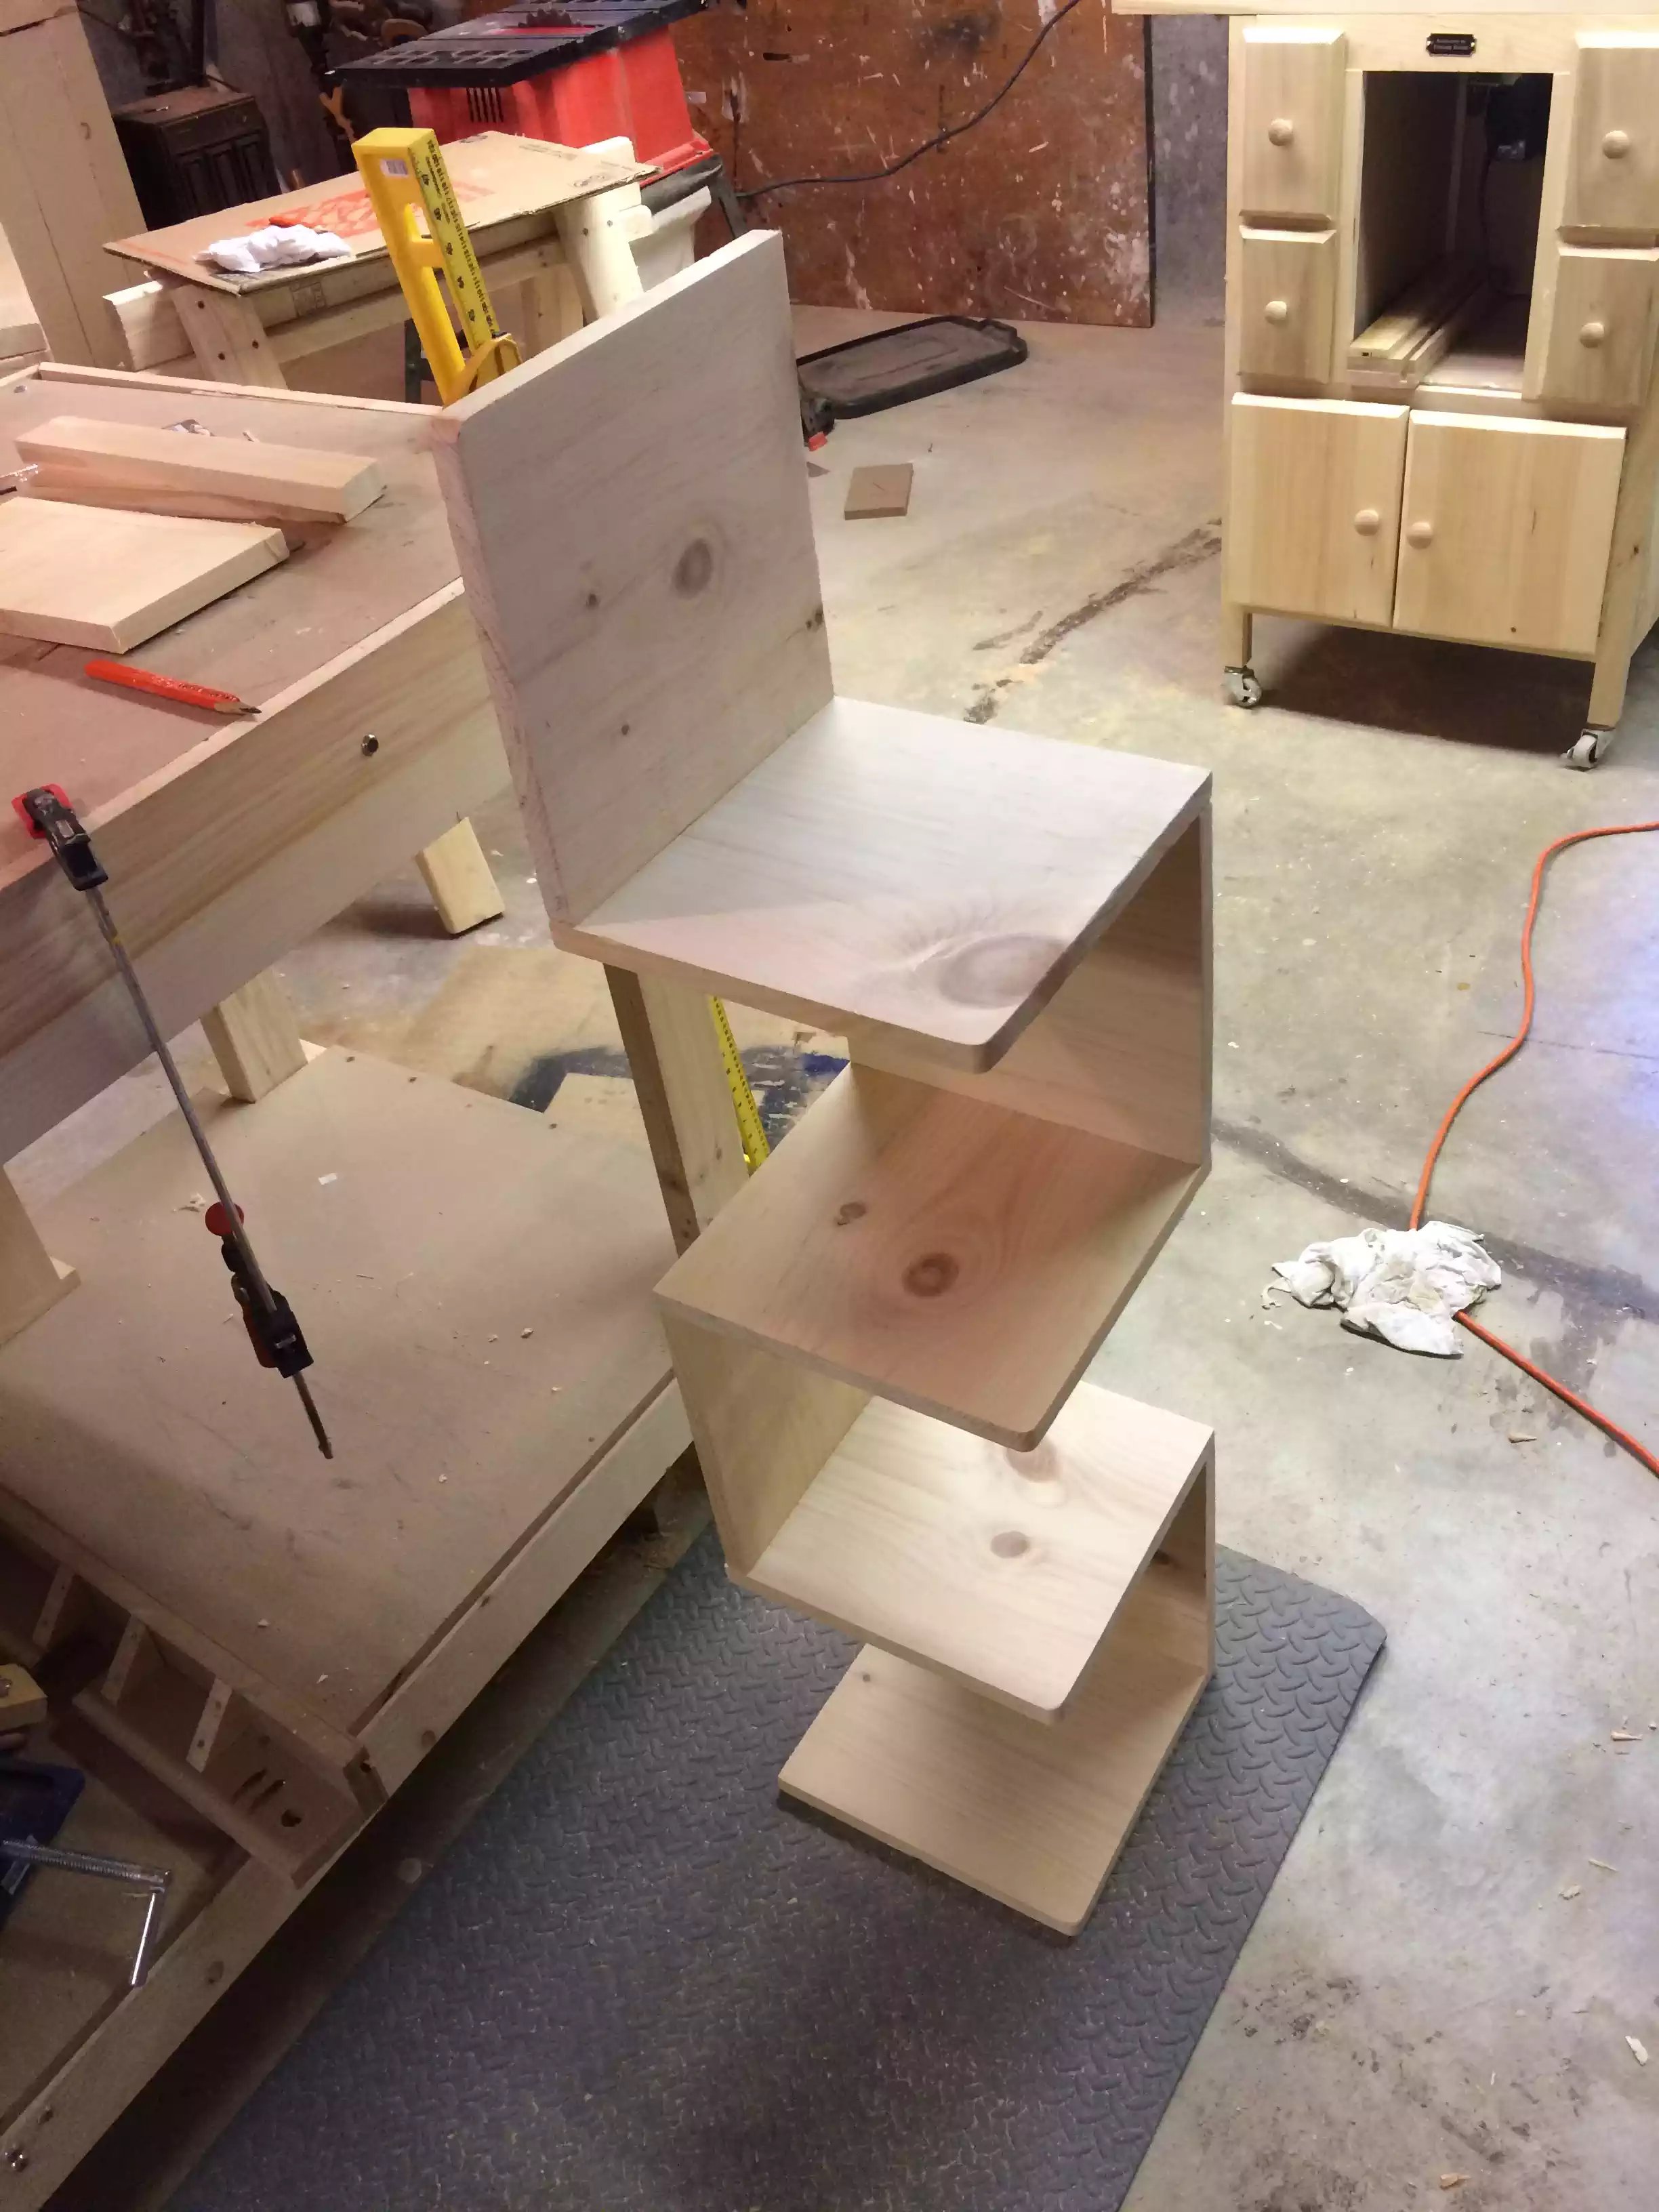
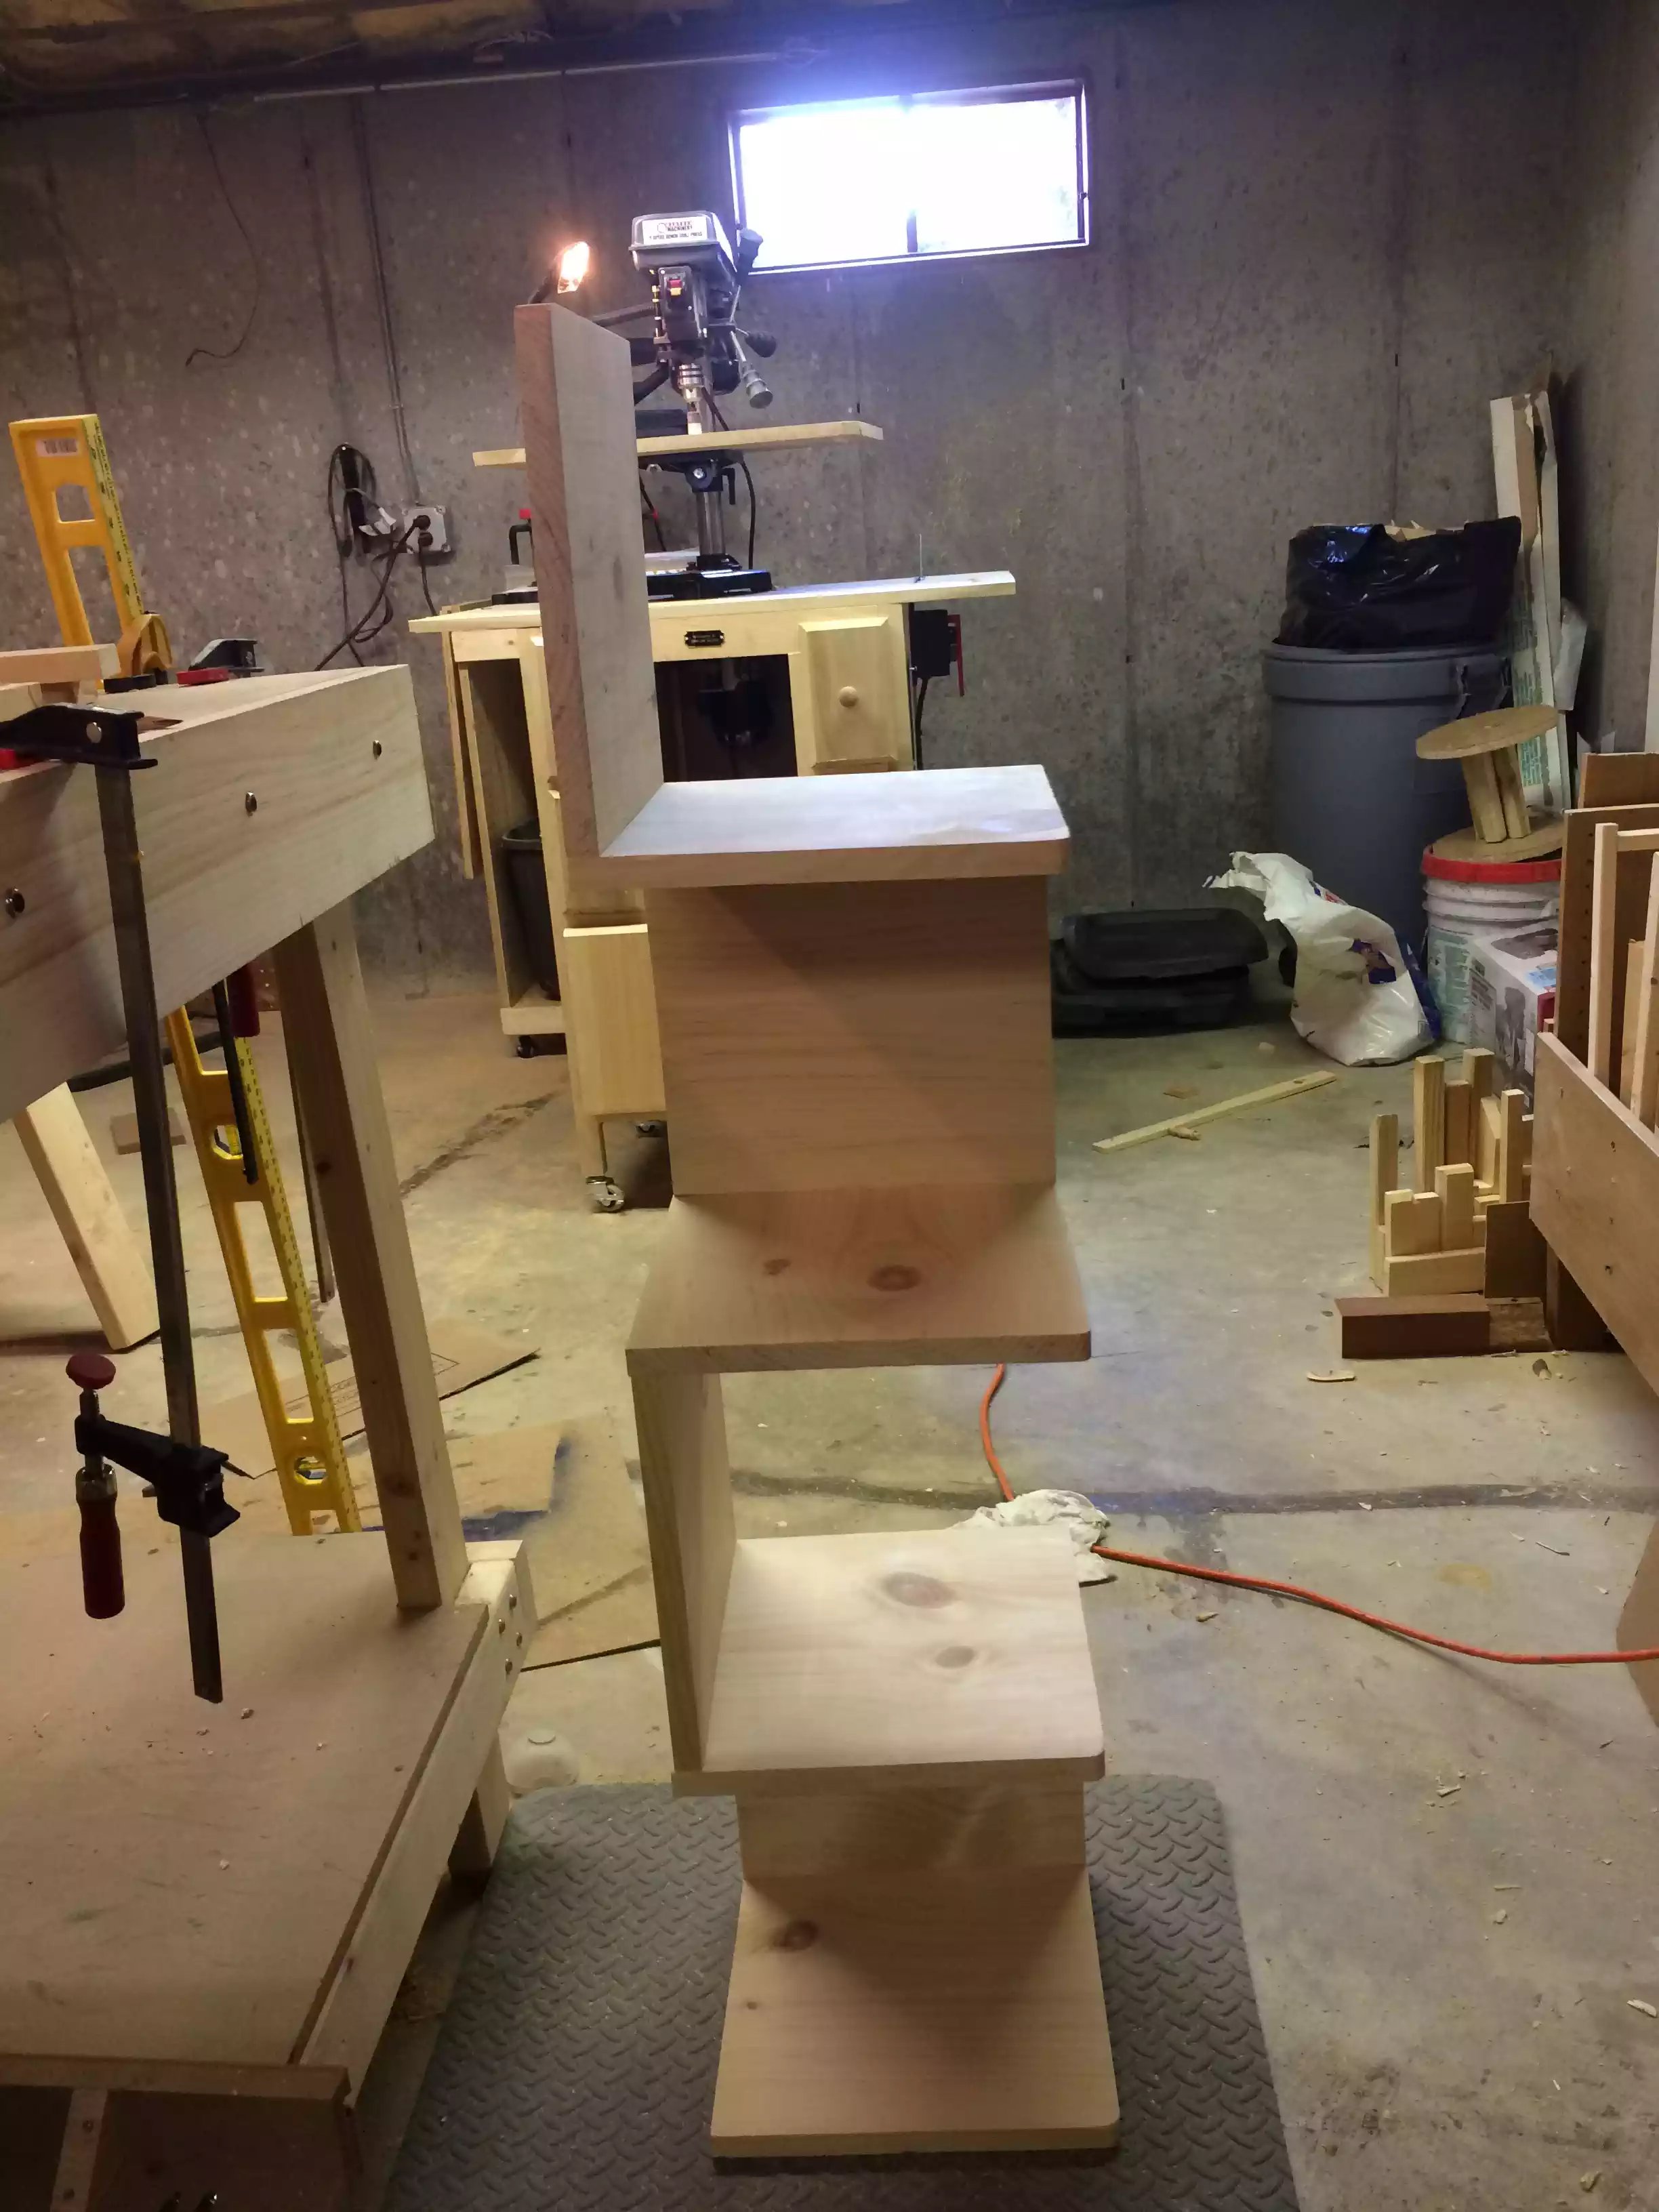
I saw a project online similar to this one and I had just bought my Kreg K4 jig and thought to myself this is a perfect project to start using the jig.
My unit was made out of 1×12 pine board and I needed (2) 8’ lengths to get a unit that has 5 shelves in it..I attached some Sketchup drawing below to give you an idea of dimensions, but the beauty of this project is you can add or remove the number of shelves to suit the space it’s going into.
Step 1: Cut all pieces . My design was easy all the pieces were the same size , because I used 1×12 ( actual dimensions .75” x 11.25”.. That is the length I cut them all to so as that I would have a total of
Qty (10 @ 11.25” sq) ( 1) at 6” high and 11.25” wide as the footer piece.
Step 2: Kreg Jig.. Place pocket holes in all necessary pieces make sure you know the orientation of the unit so you know where to place the holes in order to conceal them. I used 30 pocket hole screws.
step 3: round all corners , I attached a drum sanding bit to my drill press and banged them out in no time ( basically any corner that’s outward facing that doesn’t abut any other piece of wood should be rounded.
Step 4: attach each piece of the unit together, this was a little tricky the longer the unit got from each shelf but you just need to take it slow
Step 5: Sand, stain and poly…