poplar

New Project: Trivets

So I needed a little project to keep me busy and I needed to use up some scrap wood that I had lying around. I was sitting at dinner one night and noticed that all the trivets looked terrible and some were even broken, so I went on YouTube and finally found an easy way to make them using a table-saw and dado stack.

THE PROCESS

  • The Wood

  • Miter Saw

  • The Trivet blanks

  • A little Layout

  • Cutting the Grooves

  • Adding a Round-Over on the Router Table

  • A lot of sanding

  • All finished

THE WOOD

Since I wanted to use up some scrap that I had around I used a piece of 1x8 poplar that I could get about 9 trivets out of. I wish I had some 1x8 oak as that would of been a nicer trivet, but maybe in the near future I will make some trivets for Christmas presents.

Here is the piece of poplar that I used.

Here is the piece of poplar that I used.

THE MITER SAW

Usually I use the miter saw a lot for a project but I only wanted to cross-cut the board to around 18” as I wanted to do a trial run making 3 trivets and see how they turned out.

Crosscutting the board at my miter saw station.

Crosscutting the board at my miter saw station.

TRIVET BLANKS

  • So after cutting the piece I took it from the miter saw to the table-saw and ripped the board to its final width.

  • I took out my cross-cutting sled because I usually get more accurate cuts from it and set-up a stop block and cross-cut the board into 3 blanks that were exactly 6”x6” square

Here is my cross-cutting sled is not fancy but it’s dead on accurate. You can also see the stop-block which is nothing more than a scrap of plywood clamped with the sled fence.

Here is my cross-cutting sled is not fancy but it’s dead on accurate. You can also see the stop-block which is nothing more than a scrap of plywood clamped with the sled fence.

Here is the 3 blanks all dimension-ed and ready to be turned into trivets.

Here is the 3 blanks all dimension-ed and ready to be turned into trivets.

A LITTLE LAYOUT

I needed to do a little layout on one of the trivets to make sure all my dimensions were correct, so I took it to my bench and drew some layout lines where I was removing wood.

  • Measure over 3” to find the center of the blank and strike a line, then measure 3/16” to the left & right of that line so as to center the 3/8” dado stack to the work-piece.

  • Finally measure 3/8” on the wood thickness (as it is half of 3/4”wood thickness) so as that I new where to position the dado stack in the table-saw

  • Now that I had marked up one face I needed to turn the board 90° and do the same on that side that is what creates the waffle pattern I am going for.

Here are my layout lines on one of the edges. All the “x” represent where the grooves will be run.

Here are my layout lines on one of the edges. All the “x” represent where the grooves will be run.

Here you can see the dado stack measuring up-to the 3/8” line on the blank edge.

Here you can see the dado stack measuring up-to the 3/8” line on the blank edge.

CUTTING THE GROOVES

Here is where it will get tricky in how to explain this process. Using a 3/8” thick dado stack in the table-saw I needed to cut the 7 grooves on each of the marked faces which will give me the waffle pattern design that I want. This is my first time making trivets lets alone doing repetitive groove cuts in such a small pirce of wood, but I am happy with the results, practice makes perfect. One more thing I experience a lot of tear-out doing this and it left a decent amount of sanding after.

Here is my attempt at detailing the step by step process.

STEP 1. With my 3/8’ wide dado stack center on the work-piece I run it through the blade, which results in a centered groove. As you see in the following pictures some of the cuts are made with the grain and others against it which is what makes the waffle pattern.

Using my center-line I ran the stock through the 3/8” wide dado stack

Using my center-line I ran the stock through the 3/8” wide dado stack

Here is the center groove

Here is the center groove

STEP 2: The goal of the next couple of steps is make grooves on one side of the blank with equal spaces between each groove.

  • Using the groove that I just made in the center, I re position that groove on the blade and use a spacer block which is 3/4” and position it beside the cut groove and line my table-saw fence against the spacer block and then move the work-piece over until it reached the rip fence. This step can gut 2 groves either side of the center by simply turning the workpiece 90° after each cut.


Here is the spacer block against the fence, when I remove the spacer block and move the work-piece against the fence it will center the next 2 grooves.

Here is the spacer block against the fence, when I remove the spacer block and move the work-piece against the fence it will center the next 2 grooves.

Here you can see the work-piece butted up to the fence and ran through the blade, once this is done I rotate the piece 90° to get the other groove.

Here you can see the work-piece butted up to the fence and ran through the blade, once this is done I rotate the piece 90° to get the other groove.

This is what you should have, 3 grooves equally spaced.

This is what you should have, 3 grooves equally spaced.

REPEAT STEP 2 UNTIL YOU GET ALL 7 GROOVES DONE ON ONE SIDE OF THE WORK-PIECE.

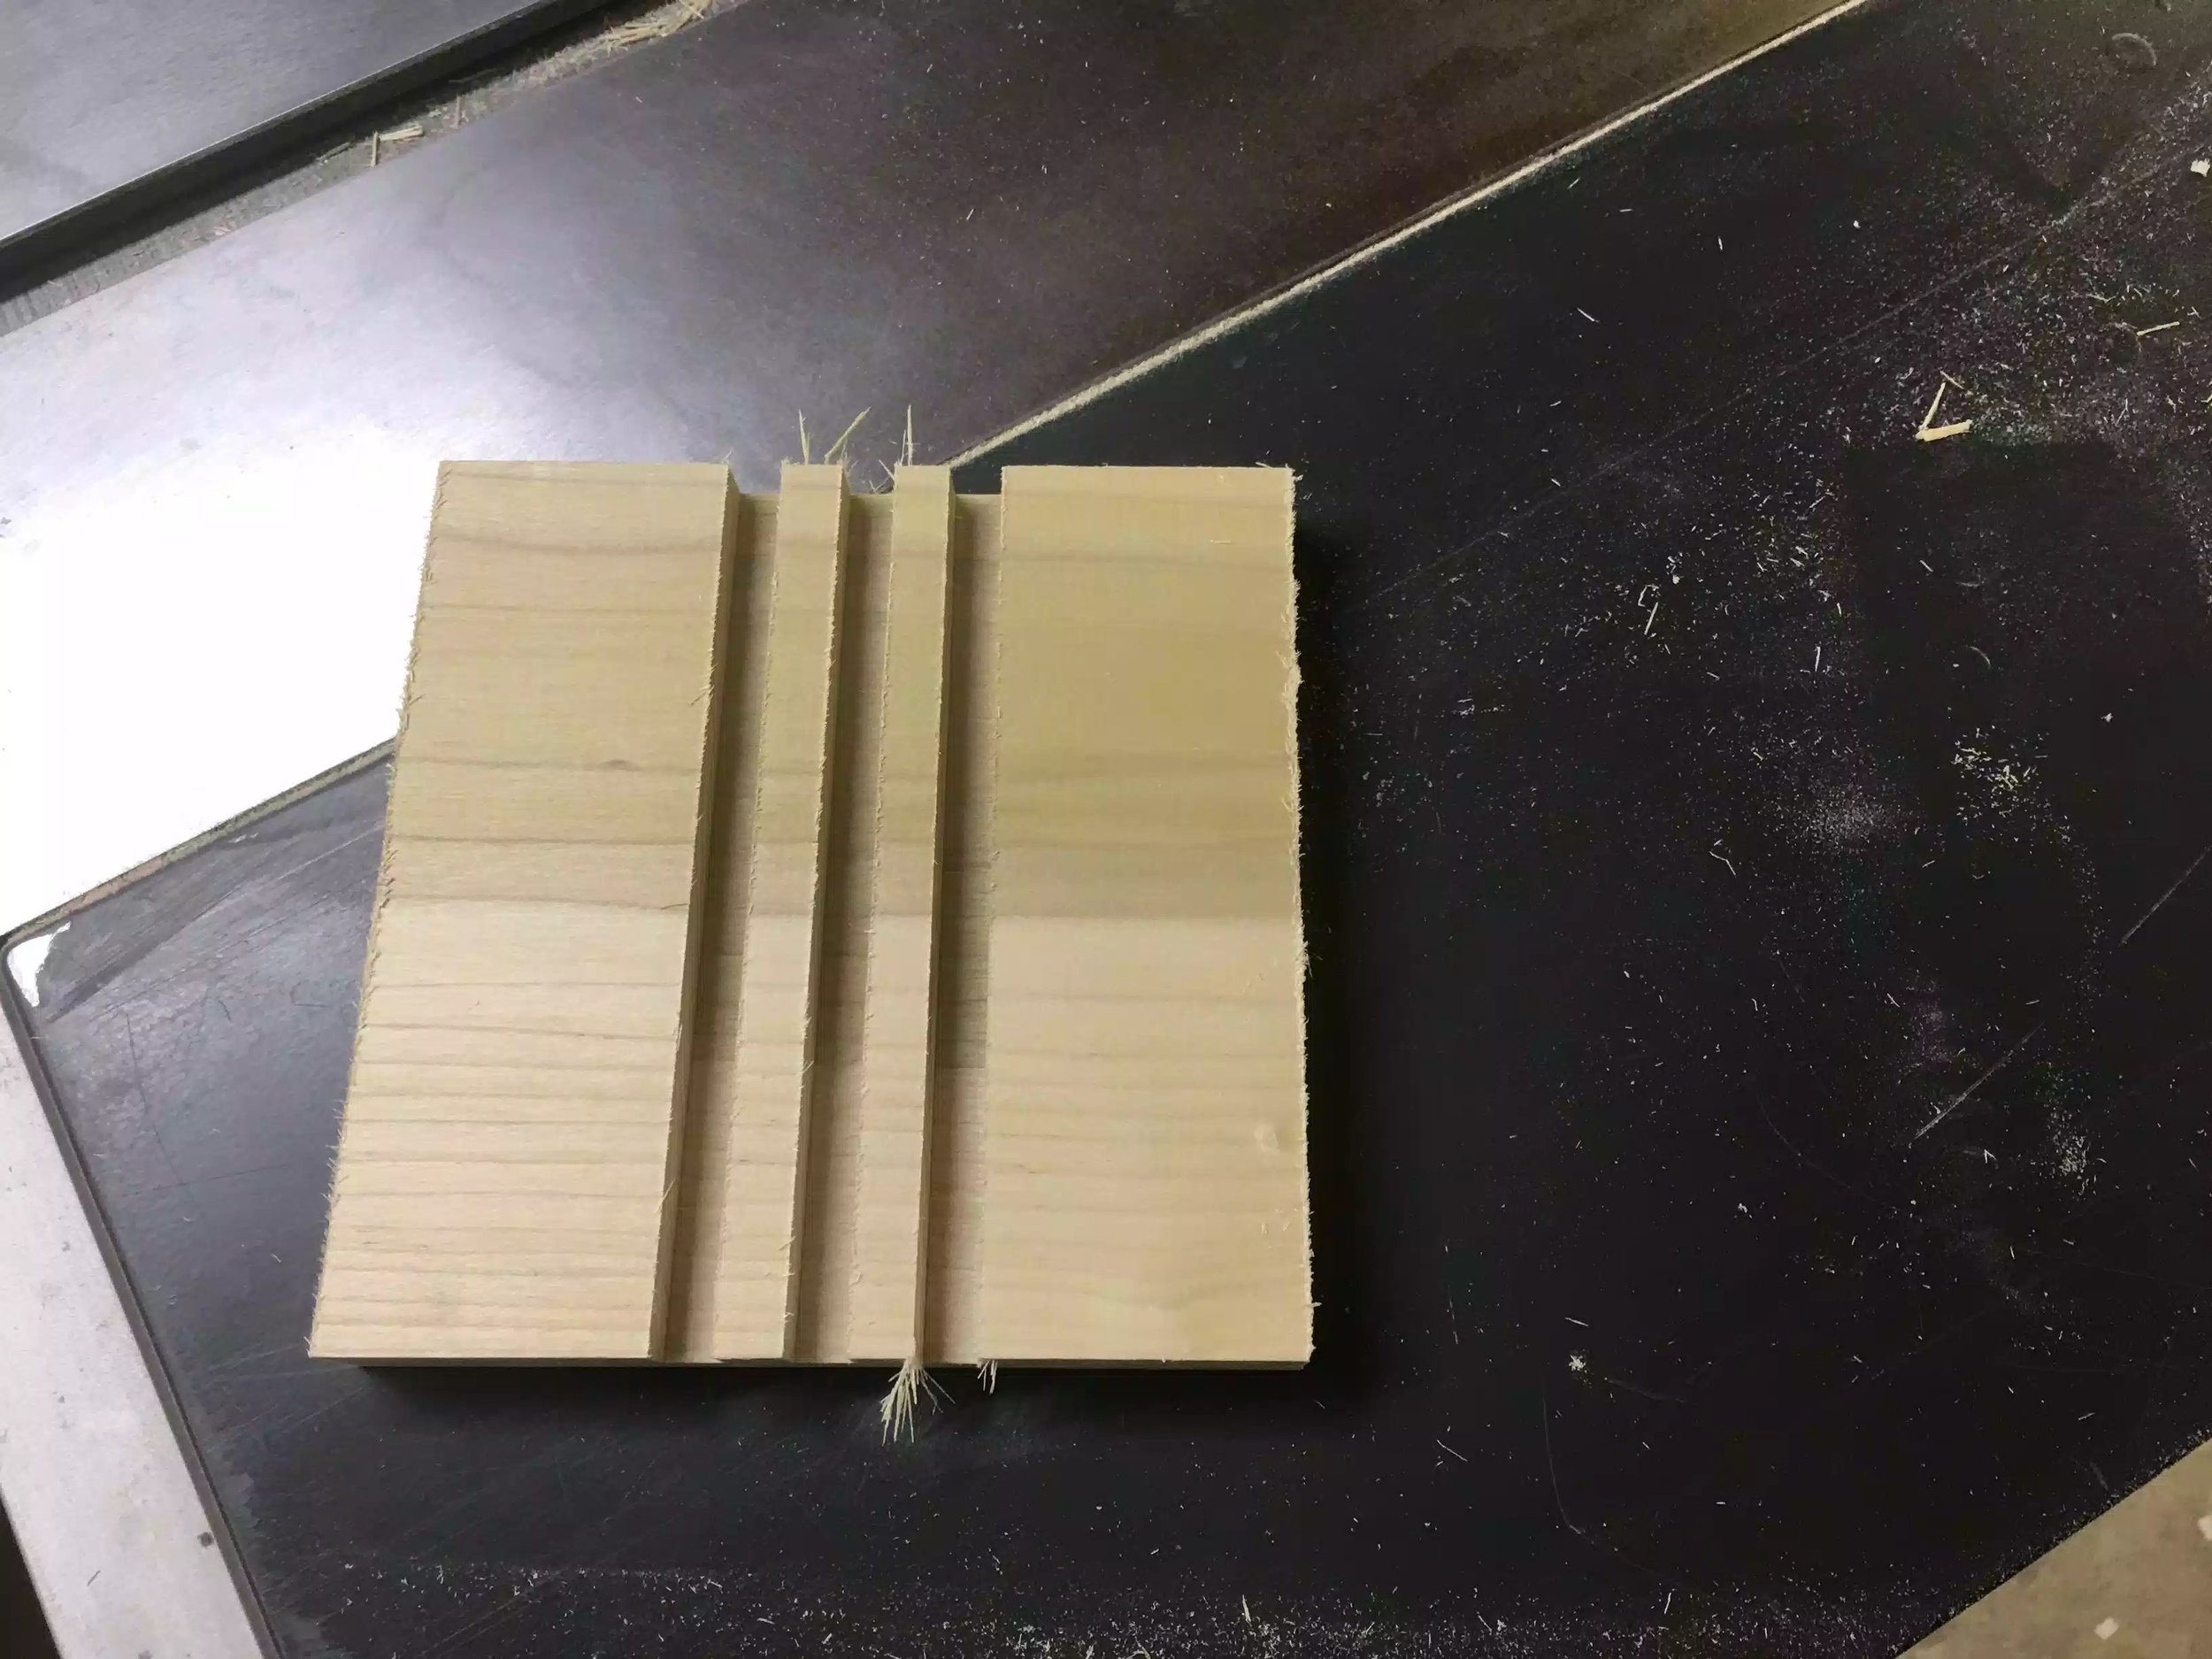
After repeating step 2, two more times you should have this. 7 grooves all running in the same direction, and for the most part equally spaced.

After repeating step 2, two more times you should have this. 7 grooves all running in the same direction, and for the most part equally spaced.

Here is a edge view of what your work-piece should look like.

Here is a edge view of what your work-piece should look like.

STEP 3: Now we turn our attention to the other side of the work-piece and create 7 grooves that go in from the other side than the ones we just did, this will reveal the waffle pattern.

  • Using the center line on this side, run it through the blade which is still at 3/8” wide & 3/8” high, you might need to make a couple of passes until you remove enough material to reveal one groove where you can see the waffle pattern below. After this step you should have what looks like below

Waffle pattern coming to life after cutting the center groove.

Waffle pattern coming to life after cutting the center groove.

As we did in Step 2 above we need to repeat that process to define all remaining 6 grooves using the spacer block and the rip fence method I used in Step 2. You should now have a work-piece with the waffle pattern visible, although in rough shape because of all the tear-out.

With 3 grooves cut, your piece should look like this, only 4 more cuts to make.

With 3 grooves cut, your piece should look like this, only 4 more cuts to make.

Here is the final waffle pattern, there was so much tear-out that I thought that I was doing something wrong or my dado stack wasn’t sharp. Anyway we clean this up later.

Here is the final waffle pattern, there was so much tear-out that I thought that I was doing something wrong or my dado stack wasn’t sharp. Anyway we clean this up later.

ROUND-OVER AT THE ROUTER TABLE

To remove all the sharp edges on the outside edges of the trivet I used a 1/4” round-over bit in my router at the router table and eased some of the edges.

1/4” round-over profile bit in the router table.

1/4” round-over profile bit in the router table.

I’m not sure if you can see the round-over profile as it is very small, but it did the trick. I will also be using several grits of sand paper to clean it up more, especially on the inner grooves that the router table cant reach.

I’m not sure if you can see the round-over profile as it is very small, but it did the trick. I will also be using several grits of sand paper to clean it up more, especially on the inner grooves that the router table cant reach.

A LOT OF SANDING

To be honest the most time consuming part of this project is all the sanding that needed to be done, there was so much tear-out on the inner grooves because the wood was un-supported going through the dado stack that it created a mess, so I used a piece of sand paper and wrapped it around a 1/4” thick piece of plywood to fit inside the grooves, I also used a chisel to remove some of the stubborn wood fibers.

After using the sandpaper I turned to my random orbital sander to sand the top / bottom sides of the trivet to make it inviting to the touch.

Here is what I started with when beginning to use the sandpaper.

Here is what I started with when beginning to use the sandpaper.

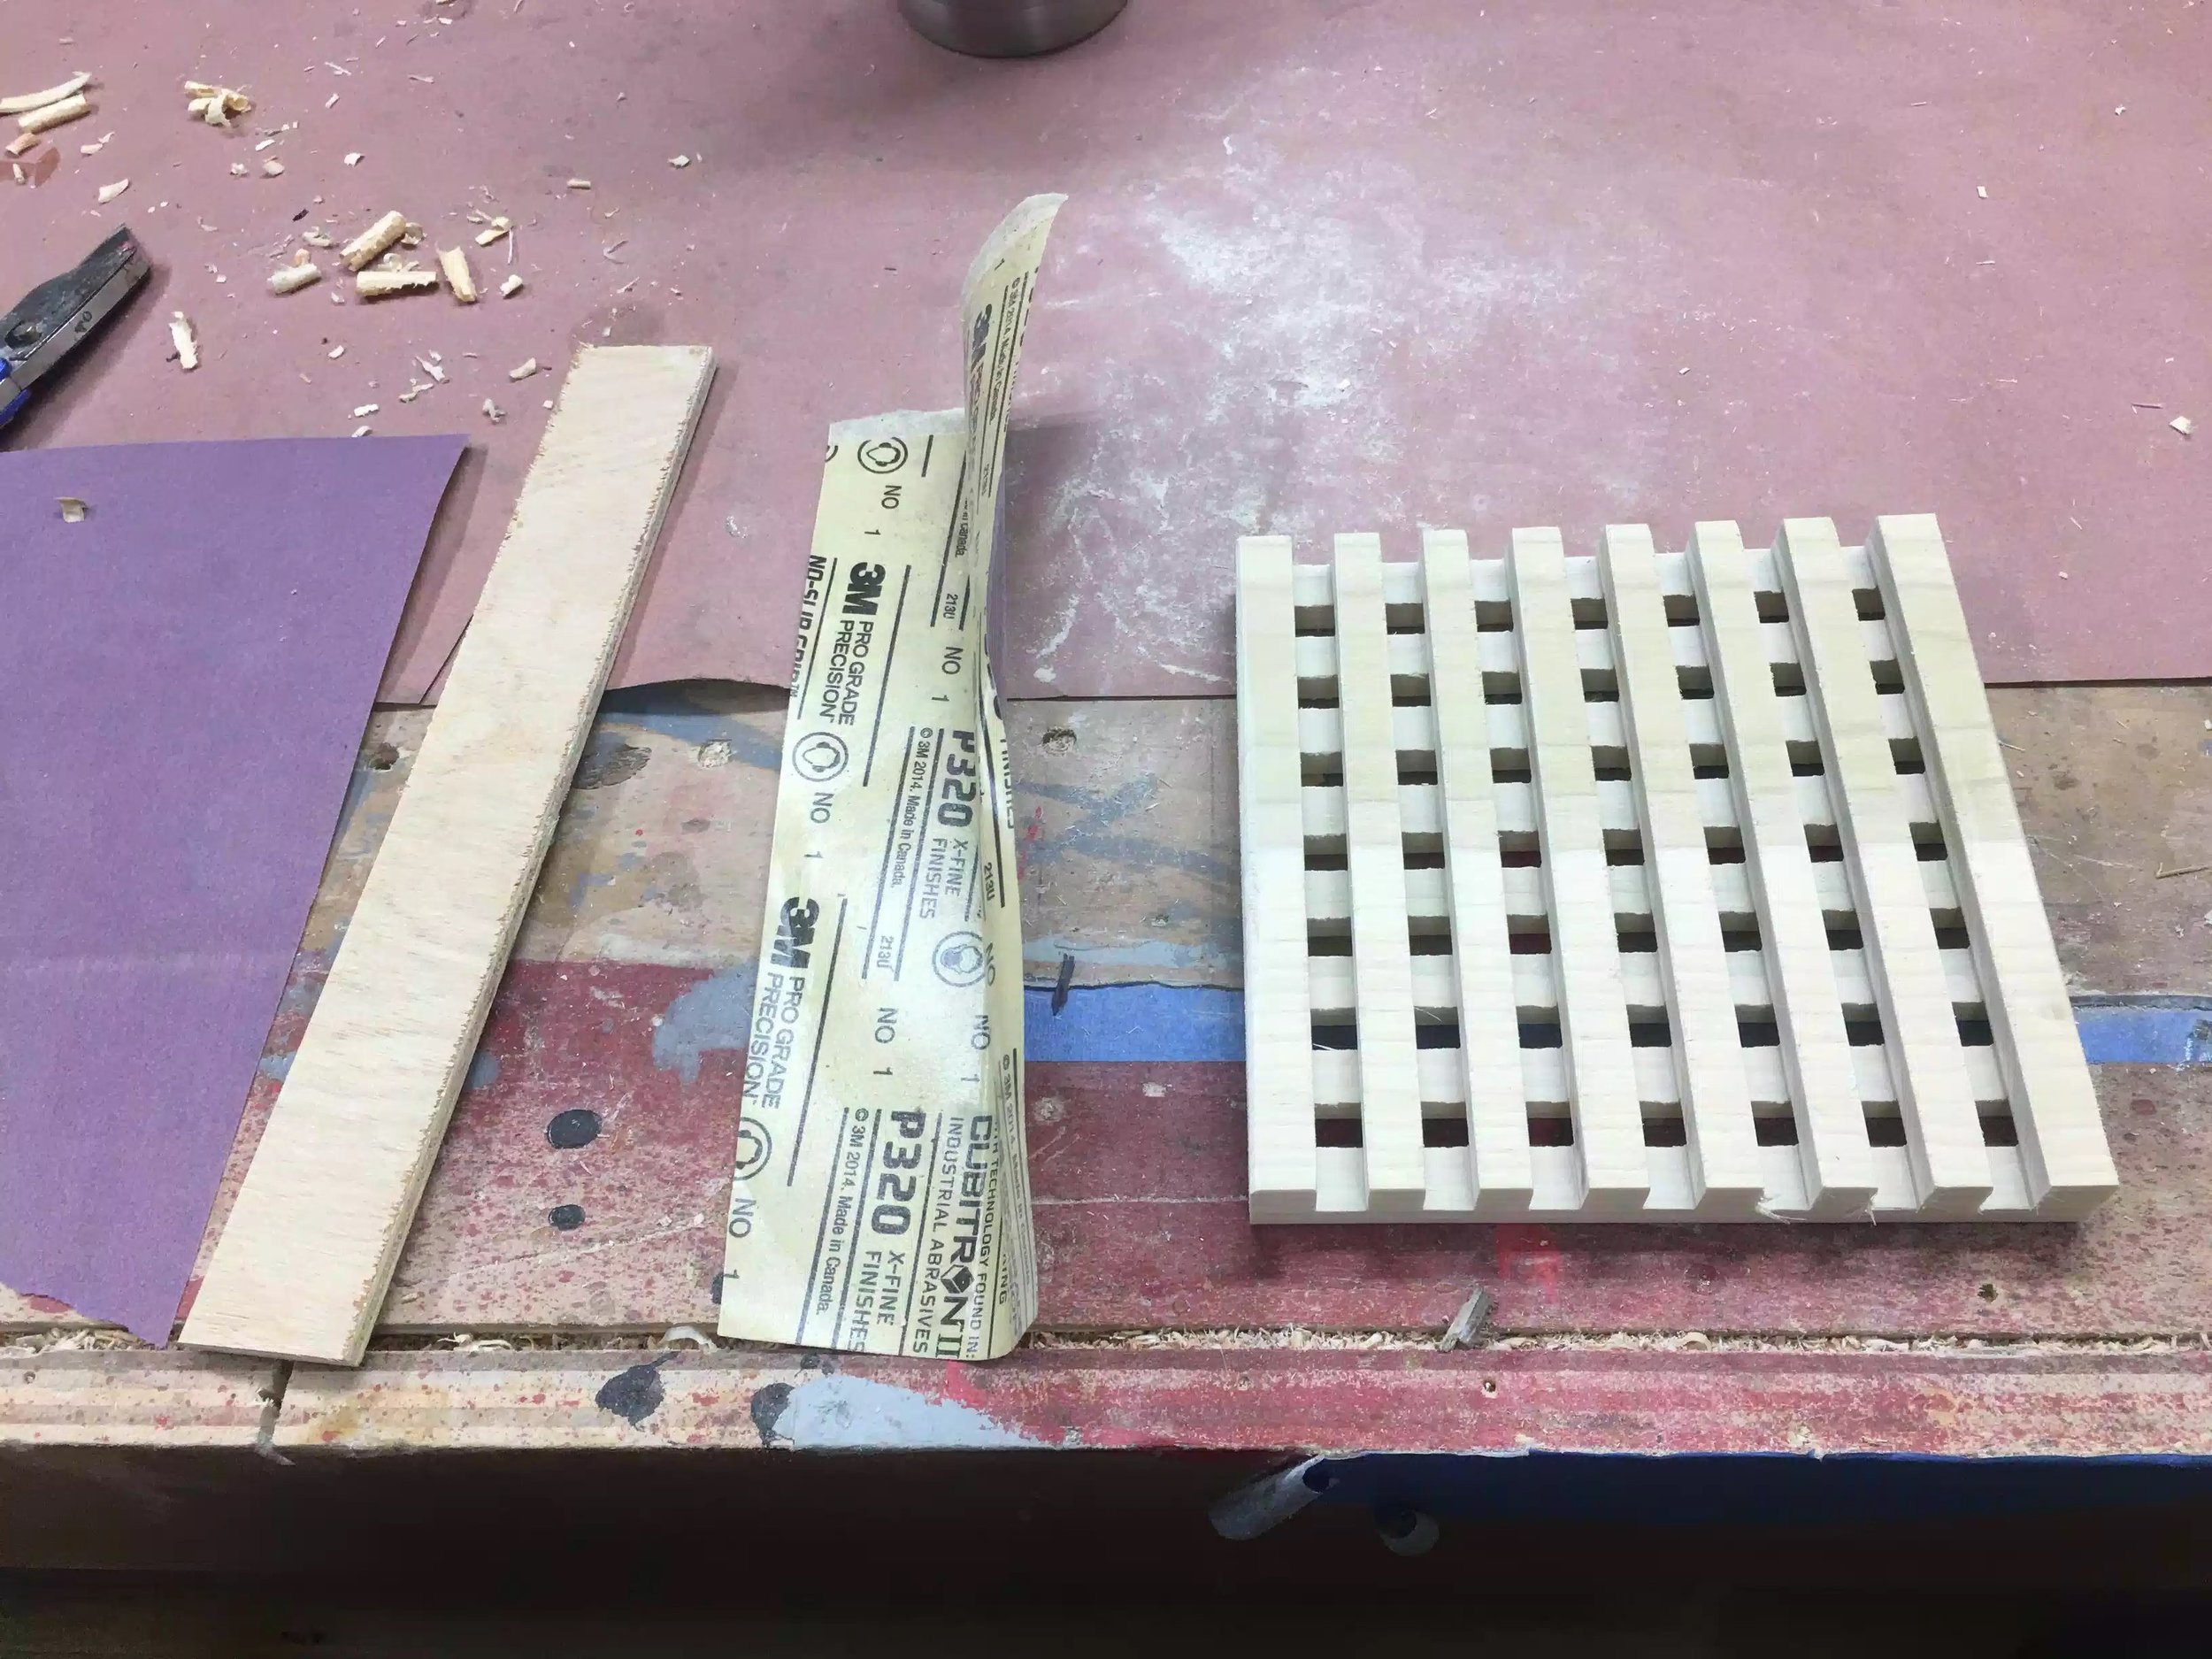
Here is my solution to sanding in between the grooves. Some various grits of sand paper finishing with 320 grit and a piece of 1/4” plywood scrap. I wrapped the paper around the plywood and went to town.

Here is my solution to sanding in between the grooves. Some various grits of sand paper finishing with 320 grit and a piece of 1/4” plywood scrap. I wrapped the paper around the plywood and went to town.

Here is the sandpaper doing the trick

Here is the sandpaper doing the trick

Here is the finished trivet, a great improvement over what I had started with.

Here is the finished trivet, a great improvement over what I had started with.

ALL FINISHED , FOR NOW!!!

Well I set out to make 3 and that is what I got done today, I gave the 3 to my mother in law and she was happy. These make a great little present, and the holiday season is coming up. I must say this was a fun little project and the possibilities are endless with the style options. I am actually thinking of making a jig that I can use with my router to do curved grooves, below is a few pictures of the threesome that I made.

Awesome project and a nice little item at the end.

Awesome project and a nice little item at the end.

Whats useful is that you can group them together if you have a large item that your table-top needs protection from.

Whats useful is that you can group them together if you have a large item that your table-top needs protection from.

image-2674.jpeg

Well thanks for reading and I hope to catch you again soon. I am in the process of making plans for these exact trivets and I will post them in my store as soon as they are completed.

New Project : Portable Sharpening Station


Ever since I was working on the hand plane restoration projects I didnt really have a good set-up for sharpening my tools, and I recently spent a lot of money on certain tools to help me sharpen properly such as the Veritas MKII honing jig and I also purchased 2 DMT Diamond grit sharpening stones (Course and fine) I need to buy 1 or 2 more stones in the future but these will do for now., and I finally bought a strop kit that I need to make its basically a piece of honing leather and compound to use on polishing my sharpened tools. Anyway I needed a way to store all of these tools and went about designing one on Sketchup.

CONCEPT & DESIGN & RESEARCH

After doing some research online I came across countless projects that were used for sharpening stations, some were very elaborate and some were simple.

I wanted a sharpening station that had the following features:

  • Small & Portable

  • A good comfortable working height

  • Storage for the stones and accessories.

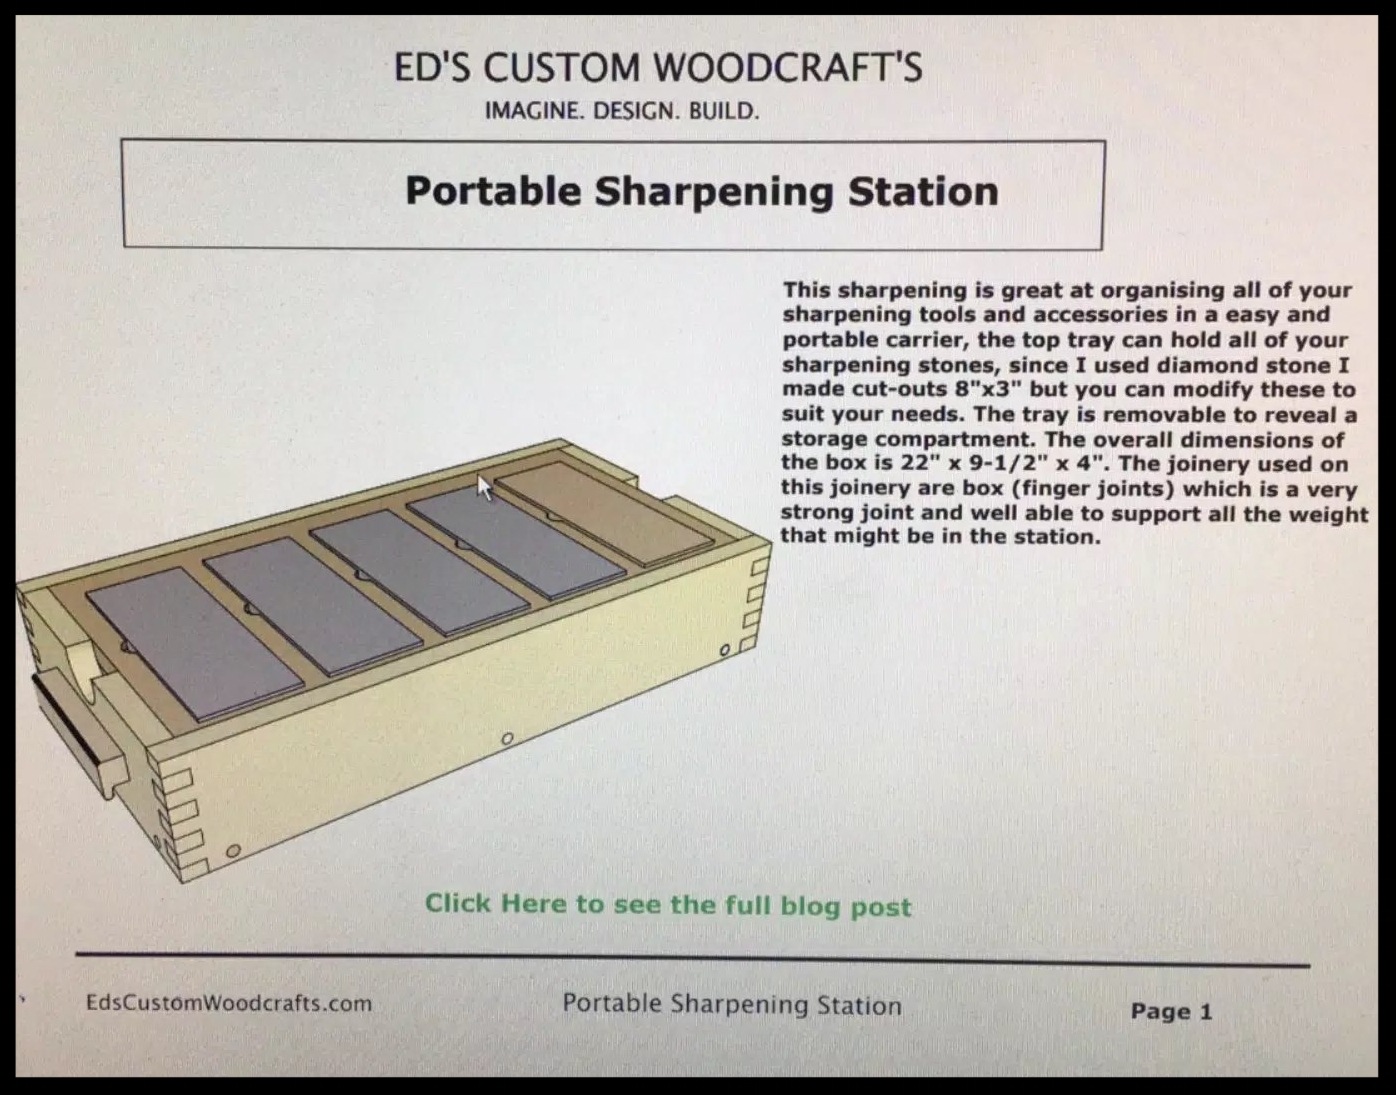
Here is my Sketchup design for the box. The top of the box is a removable tray that houses the sharpening stones and beneath the tray is a storage compartment for all the stones and accessories. I used finger joints to join the box frame together.

Here is my Sketchup design for the box. The top of the box is a removable tray that houses the sharpening stones and beneath the tray is a storage compartment for all the stones and accessories. I used finger joints to join the box frame together.

While researching online I found a YouTube video where Johnny Brook @ Crafted Workshop made a sharpening station, this is where I got the idea of a Tray with imlayed inserts to hold the bench stones, he also used a CNC machine to mill out all the patterns to use to hold the sharpening stones, I do not own a CNC machine so I have to come up with my own idea on how to remove this material, I’ll probably use a plunge router freehand or make a template to guide the router. I have included his video below.

I also came across another YouTube video from Steve Ramsey @ Woodwroking for Mere Mortals, his video shows you how to make a Finger (Box) joint jig for the tablesaw and I figured that I would use this joint to make a box. I have included his video below on how he made the jig and its also the jig I made for this project. Its not fancy in anyway but its quick to make.

So with these Youtube videos I had my concept complete and its what I brought to my Sketchup software so try and finalize a 3D model of the station.


BOX (FINGER ) JOINT JIG

So before I even started making the sharpening station I needed to make this jig and figured I would make and test it out and have it ready for that part of the build, I think it took me all of 15 minutes to make the jig, 5 minutes of which was looking for a suitable piece of scrap lumber. I settled on a 1x6x22 piece of plywood I had and I also need 1/2” x 1/2” sqaure dowel that was used a register that I used in the jig. If you want to look at a video of how to make this i have posted it above, where Steve Ramsey made it.

Finished jig, I have it screwed onto the miter fence. You can also see the 1/2” stacked dado blade in the saw, and also see the square dowel used to register the piece as you work on it.

Finished jig, I have it screwed onto the miter fence. You can also see the 1/2” stacked dado blade in the saw, and also see the square dowel used to register the piece as you work on it.

Here you can see it in action.

Here you can see it in action.

image-2628.jpeg

GETTING STARTED: PARTS

This is where I get started with the station, I used my 1”x6”x6’ piece of poplar to start cutting the box parts, using my cut-list I ripped and crosscut all parts to their final dimensions. There are 4 parts that make up the box as you would think there is 2 sides a front and a back piece.

Here is the poplar length of wood that I used for the box.

Here is the poplar length of wood that I used for the box.

Here are the 4 pieces in their correct orientation, I am deciding what faces to have have on the outside of the box, I usually try to wrap the grain around the box but because I was doing box joints , this didn’t matter as much as it normally does, …

Here are the 4 pieces in their correct orientation, I am deciding what faces to have have on the outside of the box, I usually try to wrap the grain around the box but because I was doing box joints , this didn’t matter as much as it normally does, anyway its only a shop project

SOME LAYOUT WORK

Usually when I am working on joinery I always mark out with pencil what I need to do, and to help simplify things when it came to using the jig I marked out all the pieces that needed to be removed, so using my marking gauge and straight edge I made all the marks, and placed an x on everything that was getting removed.

I placed an X on all parts that were to be removed using the box joint jig

I placed an X on all parts that were to be removed using the box joint jig

Here I am using my marking gauge set to the thickness of the work-piece which is 3/4” this measurement determines the height of the cut.

Here I am using my marking gauge set to the thickness of the work-piece which is 3/4” this measurement determines the height of the cut.


FINGER JOINT JIG TIME

For step by step instruction on how to use the box joint jig, Steve Ramsey from WWMM has it all laid out on his site, I just mimicked how he did, you get the instructions using this link below

This was my set-up

This was my set-up

DRY ASSEMBLY

I always do a dry assembly to make sure all the parts fit nicely together and another reason is to rehearse how and where to apply clamping pressure. So now that all the finger joints have been cut its time to see how everything fits together, to be honest there is a little bit of work to clean up the finger joints because of the glue squeeze out but that is later.

Here is me doing a dry assembly no glue yet because there are a few more steps before I glue it up.

Here is me doing a dry assembly no glue yet because there are a few more steps before I glue it up.


THE CLEATS

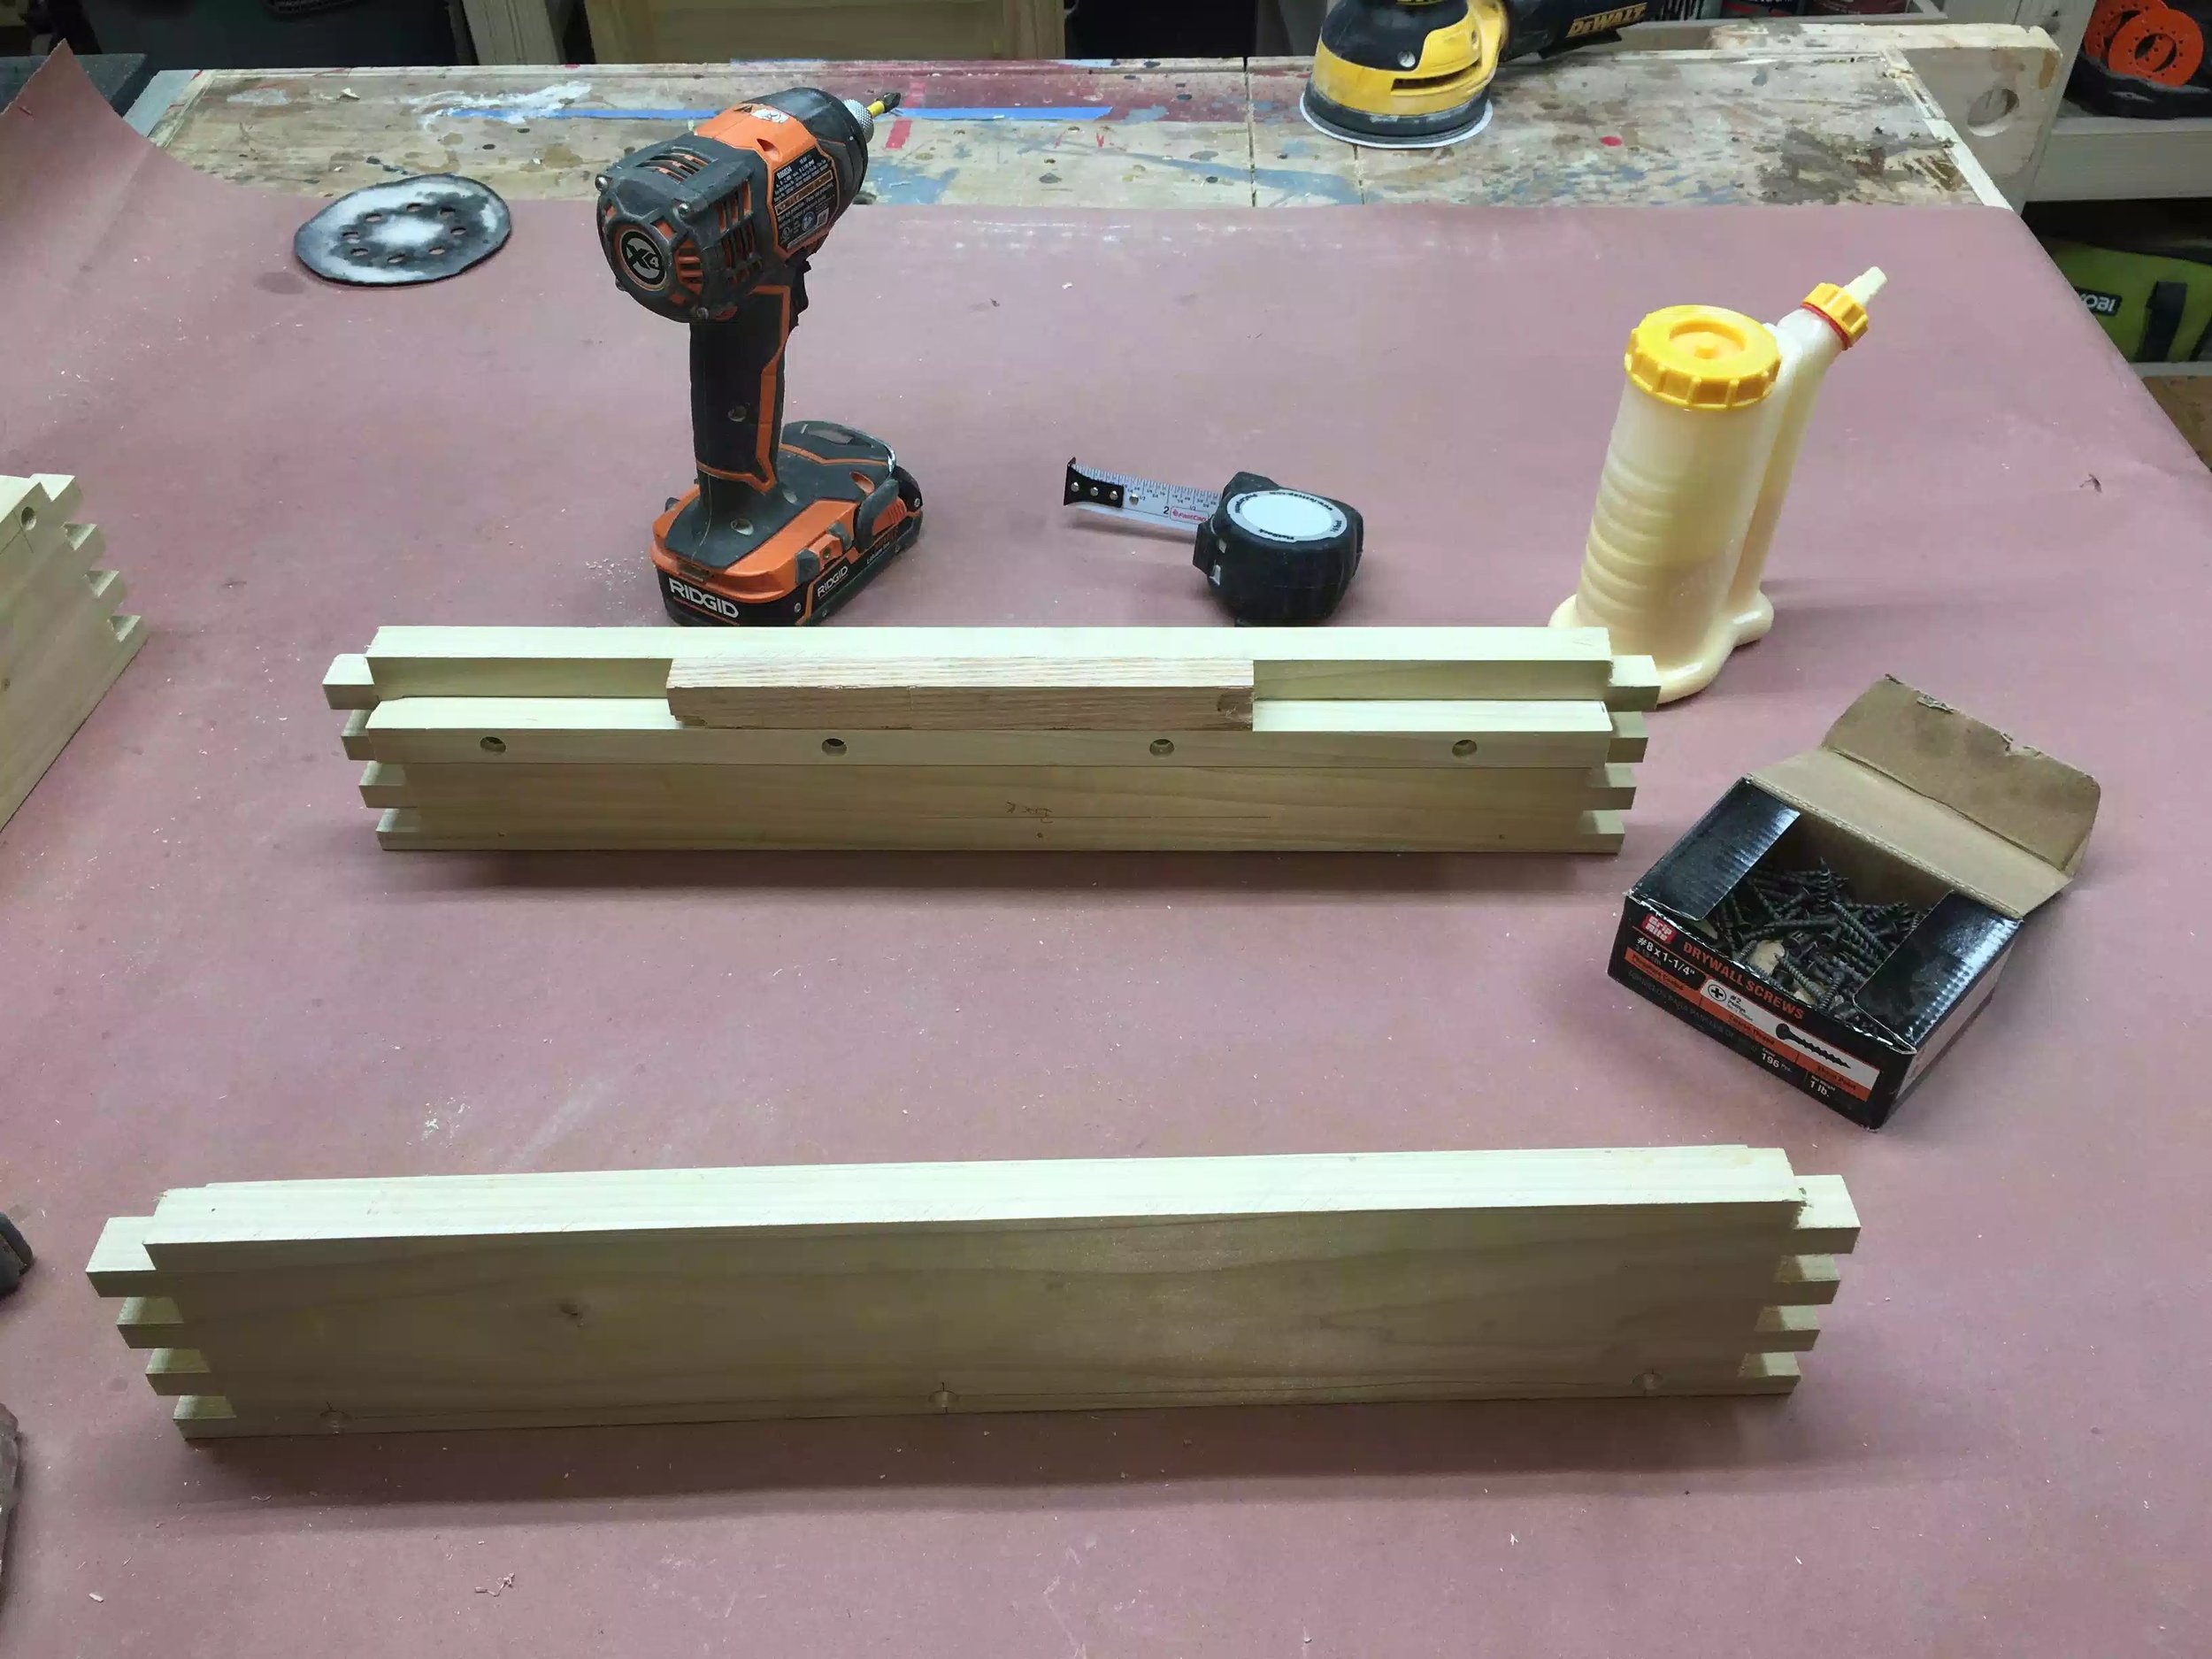
The cleats are what I am using to support the removable tray that will hold the sharpening stones, these cleats are very simple. They are basically 3/4” x 3/4” x length of the front and back pieces, I need to pre-drill them on the drill press and attach them to the front and back pieces. To aid me in this I used a piece of oak to use as a spacer block so as that when I position the tray its flush with the top of the box that way I will not be hindered when atually sharpening.

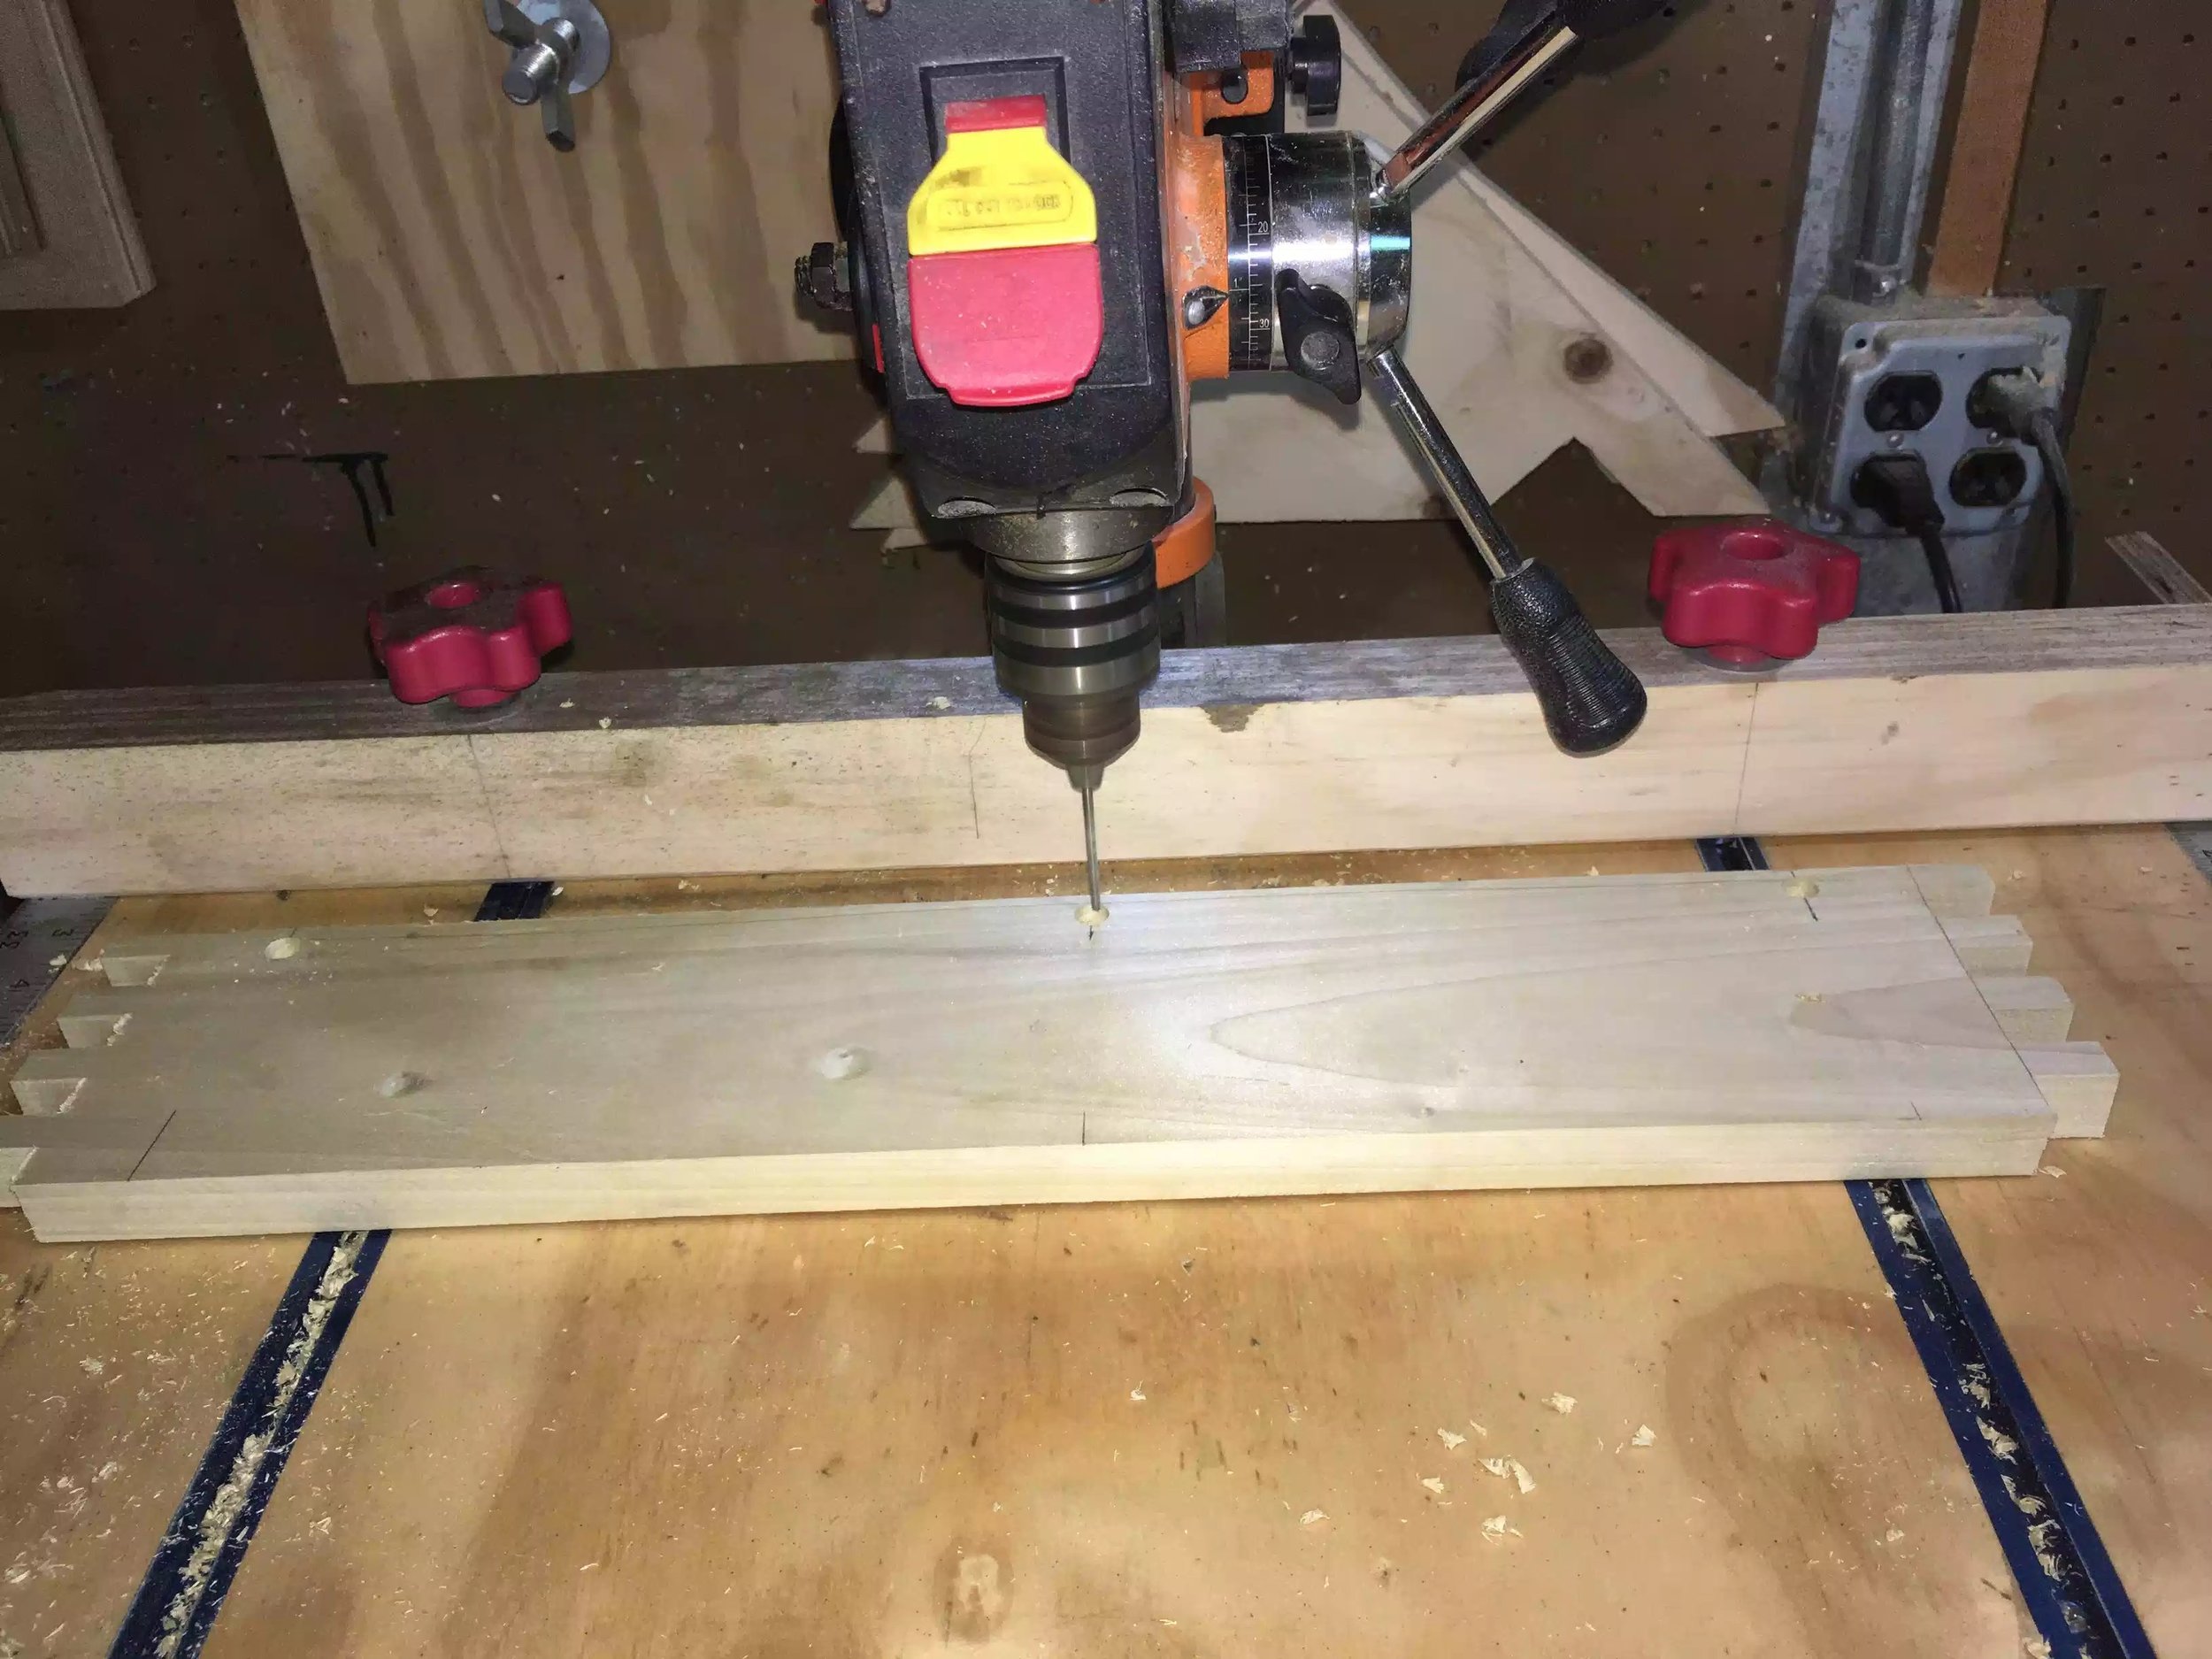
First I went to the drill press and using a forstner bit I drilled 3/8” diameter holes and then came back with a 3/16” drill bit to finish the holes with screw holes that way when I screw the cleats into the box I will not run the risk of splitting the cleats or the box parts. I also need to do this part before the glue up because I would not be able to fit my drill/driver to reach the angle of the screws.

While I was at the drill press I also decided to drill all holes for the project on the box pieces because I will be attaching the base with screws and glue and I will be returning to add wooden plugs to cover the screws. (more about that later)

“Here are the cleats receiving their 3/8” diameter holes for the screws.

“Here are the cleats receiving their 3/8” diameter holes for the screws.

Here I am working on one of the sides, using smaller diameter drill bit to make through holes. Its so much easier doing this now than doing it after the box is assembled.

Here I am working on one of the sides, using smaller diameter drill bit to make through holes. Its so much easier doing this now than doing it after the box is assembled.

Here is the step before I actually screw the cleats in place, there is not much room and I thought it better to do this now than later, its always important to layout the steps of assembly that way you wont be pulling your hair out try to figure how…

Here is the step before I actually screw the cleats in place, there is not much room and I thought it better to do this now than later, its always important to layout the steps of assembly that way you wont be pulling your hair out try to figure how to screw the cleats in place after the box is already assembled.

Using a spacer block to determine where to place the cleat so as that the tray is flush to the top and will not interfere with the sharpening of tools when I am actually using it. Everything looks fine so I screwed 4 screws into each cleat, overkill…

Using a spacer block to determine where to place the cleat so as that the tray is flush to the top and will not interfere with the sharpening of tools when I am actually using it. Everything looks fine so I screwed 4 screws into each cleat, overkill I’m sure but at least I am assured that it will never move.

I used a scrap piece of oak that I had to make sure the top would be flush, I also used a level to make sure. It all looks fine.

I used a scrap piece of oak that I had to make sure the top would be flush, I also used a level to make sure. It all looks fine.


THE SIDES

So before I get to working on glueing everything up there is still a few things that need to be done, sometimes its easier to get shaping and milling done before the glue up and in this case I need to add a few features to the sides before I do that.

I wanted to add a finger relief in the sides to aid me when I needed to remove the top tray to get access.

To create the arc that would be convenient to use I used a sanding sleeve from my spindle sander to draw a semi-circle half way down the length of the sides, this center it from the left and right sides, and since I was going to use my spindle sander to finish sand it I thought what better way to get a best curve.

I took the sides to my band-saw and gang cut the semi-circles out together and then smoothed them out on the spindle sander, as an after thought I decided to use my palm router to add a rounder on the cut outs as they were a little catchy and I didn’t want to scratch myself when I placed my fingers in there to remove the tray.

Here you can see the spindle sander sleeve that I used to create the arc. I used double sided tape to stick both sides together for the cutting and sanding parts of this step.

Here you can see the spindle sander sleeve that I used to create the arc. I used double sided tape to stick both sides together for the cutting and sanding parts of this step.

Here is the spindle sander sanding both sides to remove all the milling marks left by the band saw.

Here is the spindle sander sanding both sides to remove all the milling marks left by the band saw.

I am using my palm router to add a 1/4” round-over to the cut outs and all the splinters were gone, in hind-sight I should of used a backer board to the left & right sides of the cut out because that wood was not supported when the router left t…

I am using my palm router to add a 1/4” round-over to the cut outs and all the splinters were gone, in hind-sight I should of used a backer board to the left & right sides of the cut out because that wood was not supported when the router left the cut I had some tear-out but nothing that cant be fixed with some sanding.

Here is the cutouts after I used the router on them, do you see the tear-out, no biggie it happens from time to time.

Here is the cutouts after I used the router on them, do you see the tear-out, no biggie it happens from time to time.


BOX GLUE-UP

After all that the box is finally ready to be glued up, as I said before I did a dry rehearsal before actually applying glue so I had an order in my mind as to how to complete this process.

I applied glue to all surfaces of the finger joint except on the faces that would be see on the outside of the box, that is why this joint is very strong, its not as strong as a dovetail joint but it close enough for what I need it for.

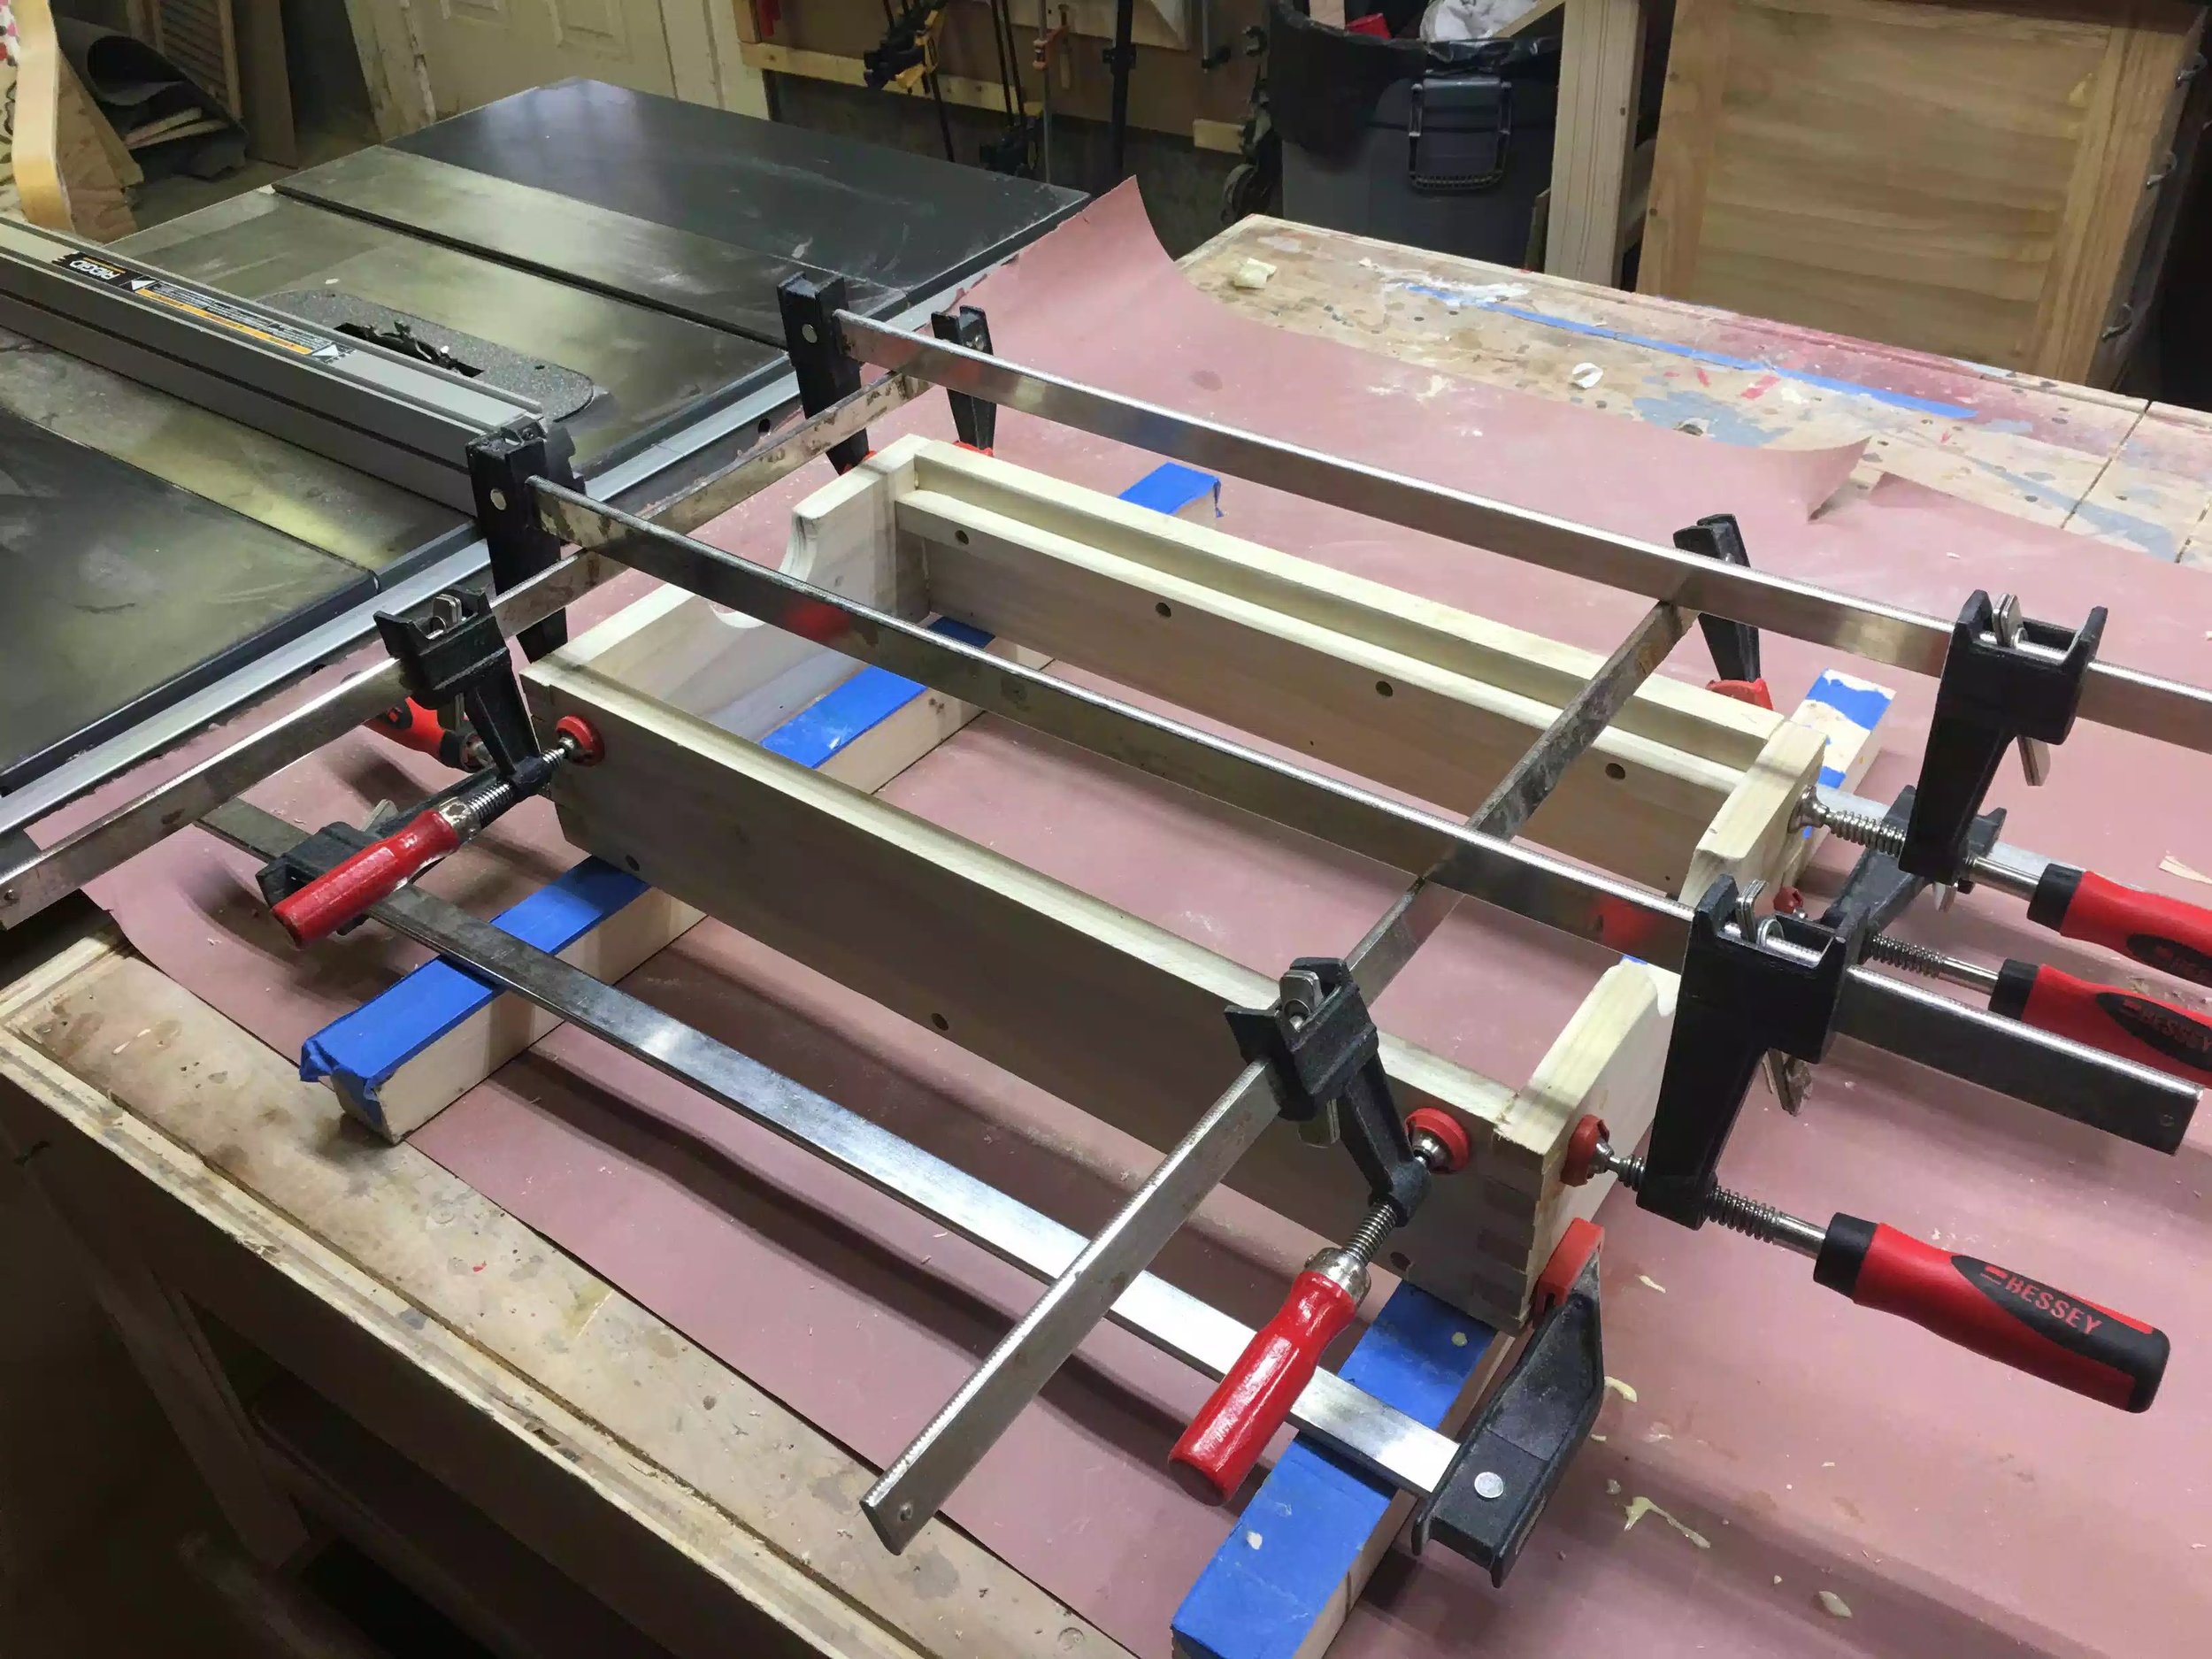
I used a total of 8 clamps to glue this up making sure I was in square as I need to add the top tray and base after this has dried, out of square would be a disaster

I used a total of 8 clamps to glue this up making sure I was in square as I need to add the top tray and base after this has dried, out of square would be a disaster

Here is another view of the glue-up

Here is another view of the glue-up

A close up of the box joints, they do look nice but I will have to clean them up after the glue sets.

A close up of the box joints, they do look nice but I will have to clean them up after the glue sets.

That is all I had time for today, thanks for reading

NEXT

  • Cut the base to size.

  • Cut the top tray to size

  • Rout all the recesses for the sharpening stones in the tray, wishing I had a CNC machine at this moment in time lol.

  • Make handles for the sides

  • Apply a finish.