


ACTIVITIES
Cut down sheet goods to manegeable pieces
Cut Vertical Partitions to size
Place Dadoes in Vertical Partitions
Cut Toe-Kick notches
Assemble Cabinets
Attach Castors
Attach Stretchers & Toe Kicks
Made solid oak drawer/cabinet pulls
Attach Cabinet Doors
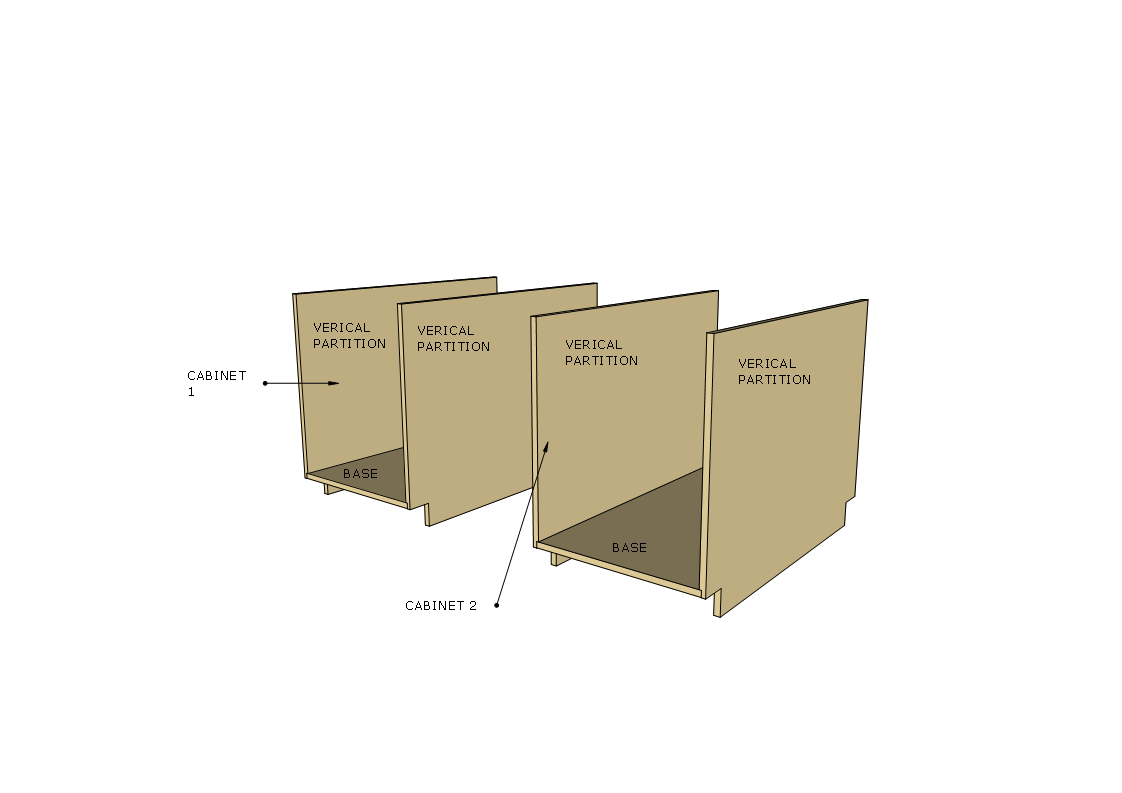
The below diagram shows you the section of the project I am working on at the moment the base frame consists of the following:
4 Vertical Partitions
2 Cabinet Base’s
3 Top Stretchers
2 Toe-Kicks
So with the cabinet bases cut to size it was time to switch my attentions to the vertical partitions.
VERTICAL PARTITIONS
There are 4 partitions in total that make the sides of the cabinets, each vertical partition gets the following:
A dado groove measure 3/4” wide x 1/4” deep positioned 3” from the bottom of the pvertical partition which goes from the front to the back of the vertical partition so as that the base can fit inside and then I will glue and screw into position.
3” x 3” notch cut out so as that I can place the toe-kick which spans the entire table base but more on that later , I used my jigsaw to cut out the notches.
NOTE: I needed to measure the plywood thickness as nowadays plywood is not the advertised 3/4” it was actually 23/32” of an inch I used my dado stack inside my tablesaw to cut out the dadoes.
Make sure that you orient each vertical partition the right way as only the inside faces of the them will receive a dado, if you don’t you will put a dado on the wrong side and the base will not fit into the cabinet

Here is the measurements needed to perform all the tasks on the vertical partition

Here you can see the toe kick notches cut out and the dado groove running from the left to right side.

A closer look at the vertical partition

Although Marc Spagnulo didn’t add screws to secure the base I will be using screws and glue, this line indicates the center line of the dado I will be counter-sinking 1-1/4” screws into this outside face of the panel I will also come back later and plug the holes with probably oak plugs.

Here you can see the pre-drilled counter-sunk holes.

Here is an image displaying the toe-kicks all cut out they measure 3” x 3”
ASSEMBLE CABINET’S
With all the components cut to size for the cabinet bases it was time for some assembly. Here is the order I did the assembly:
Started working on the left side cabinet by placing glue on one of the vertical partitions dadoes
I also cut some temporary stretchers to balance the base of the cabinet while I secured it with screws that I Pre-drilled holes for.

I added glue to the Dado in one of the vertical partitions

Here you can see the temporary support stretchers I screwed to the cabinet side. This way when I lie the base on the sides Dado it can rest on the supports as I secure the base with screws

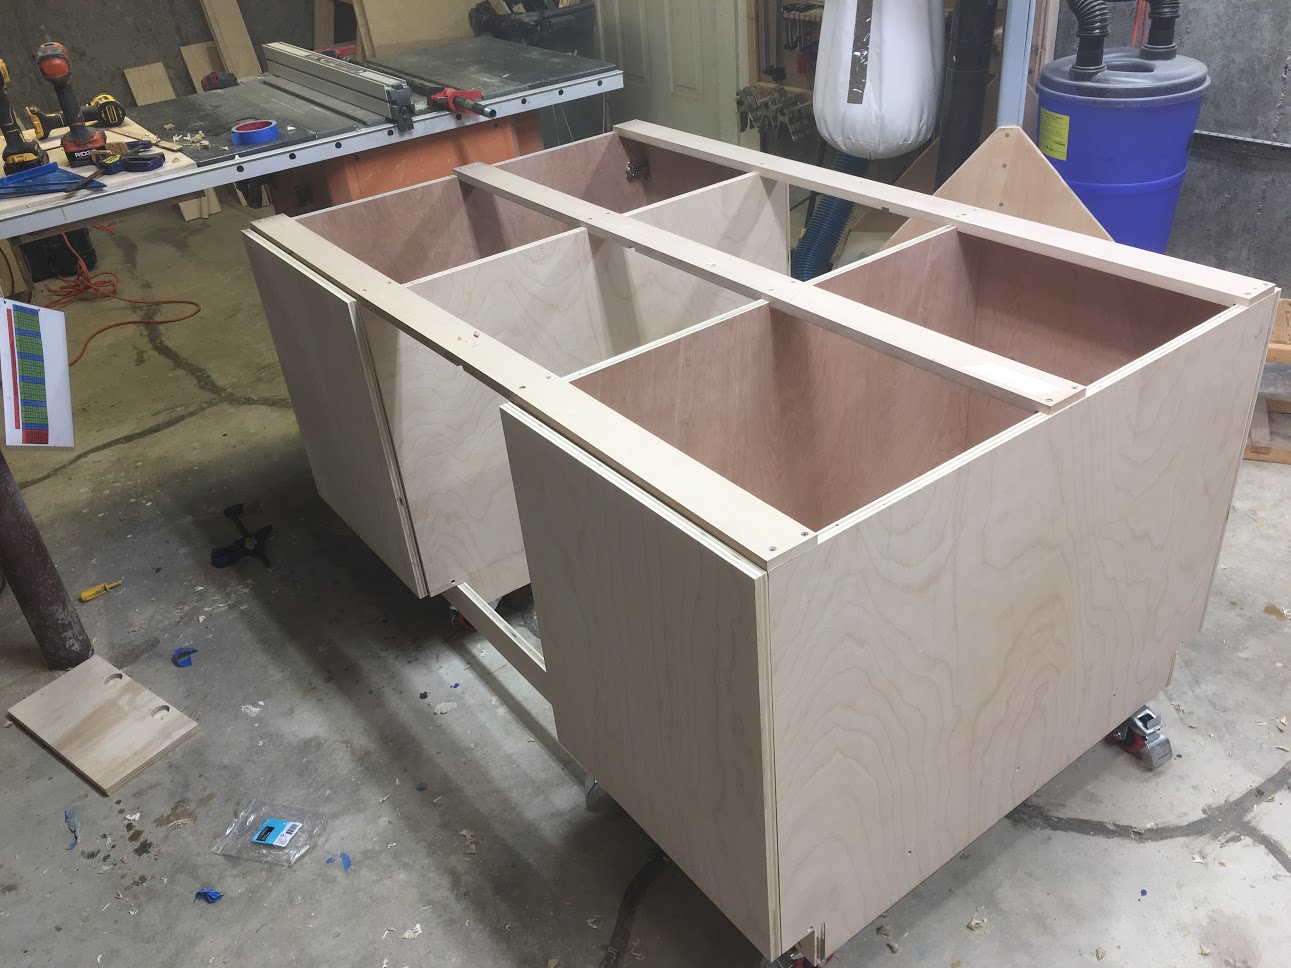
Here is what the cabinet carcass frame looks like all assembled, just checking for square and everything looks great.

Right side cabinet all complete as well. Starting to get places.

I positioned both cabinets with the space between them for the bank of drawers I will be placing in there, just making sure everything lines up.
GETTING MOBILE : ADDING CASTERS
Almost every piece of furniture in my shop is mobile as I think that is extremely important, because you never knw when you need to move things around. Especially with projects this big it takes a lot of staging space so as that your comfortable when in the assembly stages of big projects like this.
I will be adding a total of eight 3” casters, 4 on each cabinet.
Here are the steps I took in attaching them:
Attached 3” high glue blocks which are basically 2 pieces of 2x4 glued together then Predrilled and attach to the underside of the base cabinet.
Using hex head bolts I will be securing the 3” casters to the the glue blocks.

Here is the 3” thick glue blocks, you see if I didn’t add the glue blocks I would not have enough clearance to get around the toe-kicks when they ae eventually attached.

Finally here are the casters attached
ATTACHED STRETCHERS & TOE KICKS

As you can see from the above diagram the cabinet carcasses are held together by 3 stretchers that go over the top of the cabinets, and using the toe-kick pies to securing the unit from the bottom.
THE STRETCHERS:
The stretchers are positioned on the front and back of the cabinets and one in the middle, before I cut the 3” wide stretcher pieces I cut a series of rabbets at both ends of the workpiece and then 2 in the center. Make sure to measure accurately the distance from left to right side of each cabinet and then measurement will be transferred to the 3/4” workpiece.
Next using cut the rabbets and dadoes, I used my dado stack inserted into my table saw. Once all these grooves are cut , I cut them to final size of 3”. Finally I predrilled the top side of the stretchers and secured them to the cabinet frames.
These piece are vitally important for 2 reasons.
The attach the 2 cabinets together into one unit
They also keep the cabinets plum and square.

Here you can see the ends of one of the stretchers with the rabbet cut out and secured in place.

Here are the 3 stretchers attached to the cabinets.
THE TOE-KICKS
Usually most cabinets receive toe-kicks for decorative reasons, but I decided to use as part of the structure of the cabinet, the other reason people design toe-kicks is so they don’t stub their toes when at the cabinet, but I really didn’t need the toe kicks as I have the cabinets up on 3” casters, but as I said I needed the structural convenience of this piece.

The easiest way I attaching the toe-kicks was to put the cabinet on its back that way I could have easy access to securing the toe-kick.

Here is the image of the cabinet in proper orientation with the toe-kick attached and in place.
MADE DOOR/CABINET PULLS
Shop projects are a great way of experimenting with lots of things, I decided to make my own cabinet pulls because to be honest I didn’t like the once at the big box stores and I had some solid oak on hand and figured that wood would give a nice contrast to the birch once all completed.
I went online and found a great article on how to make them and you can find the article here

Here is my plans that I made on Sketchup.
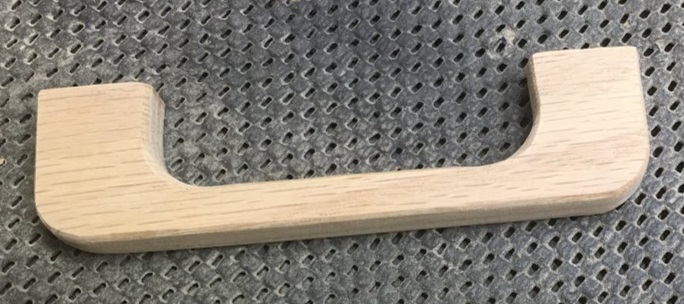
All finished, looks great, I needed t make 12 of these as I will be using them on my doors and drawers
ATTACHED CABINET DOORS
I know that I stated that doors and drawers would be dealt with in Phase 3 but I just got the Kreg concealed hinge jig and was itching to try it out, the jig was that awesome I attached all the doors in like 60 minutes. If you use a lot of Euro 35mm concealed hinges and don’t always have access to a drill press this jig is great.
THE JIG

Here is a stock image on the jig
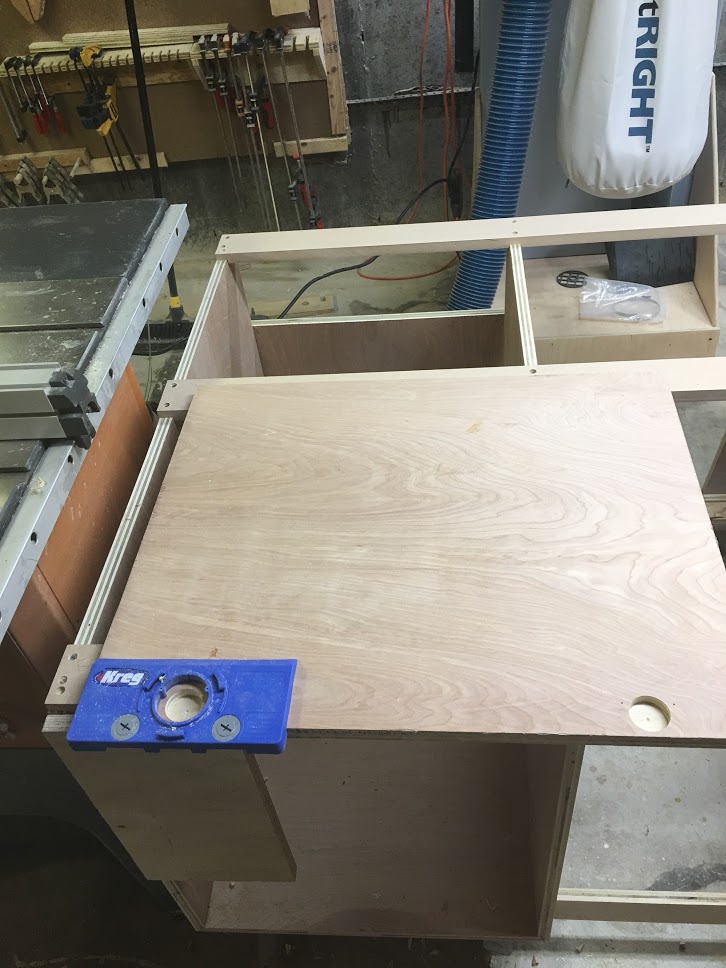
Lined up the jig so the left side was flush with the door, then clamped in place

The jig comes with a stop and drill guide to keep the hole straight and plum and the stop prevents you from not going through the door.

Hinges all attached and doors work great.
OUT WITH THE OLD & IN WITH THE NEW
THE OLD


My old assembly table served me well for more than 5 years but it is all beat up and it didn’t satisfy my storage needs anymore.
NEW

PHASE ONE: FINISHED
Next I will be moving onto Phase 2 : The Torsion Box I am really excited in starting this as I have never made one before. But I probably will not start it until the weekend.
PS: I posted this blog post on Saturday but when I actually saw on my site I realized that the post didn’t save right and I had to redo the post over… but this is Phase 1 in its entirety.
Catch you soon.
