

ACTIVITIES
Cut down sheet goods to manegeable pieces
Cut Vertical Partitions to size
Place Dadoes in Vertical Partitions
Cut Toe-Kick notches
Assemble Cabinets
Attach Castors
Made solid oak drawer/cabinet pulls
Attach Stretchers & Toe Kicks
Attach Cabinet Doors
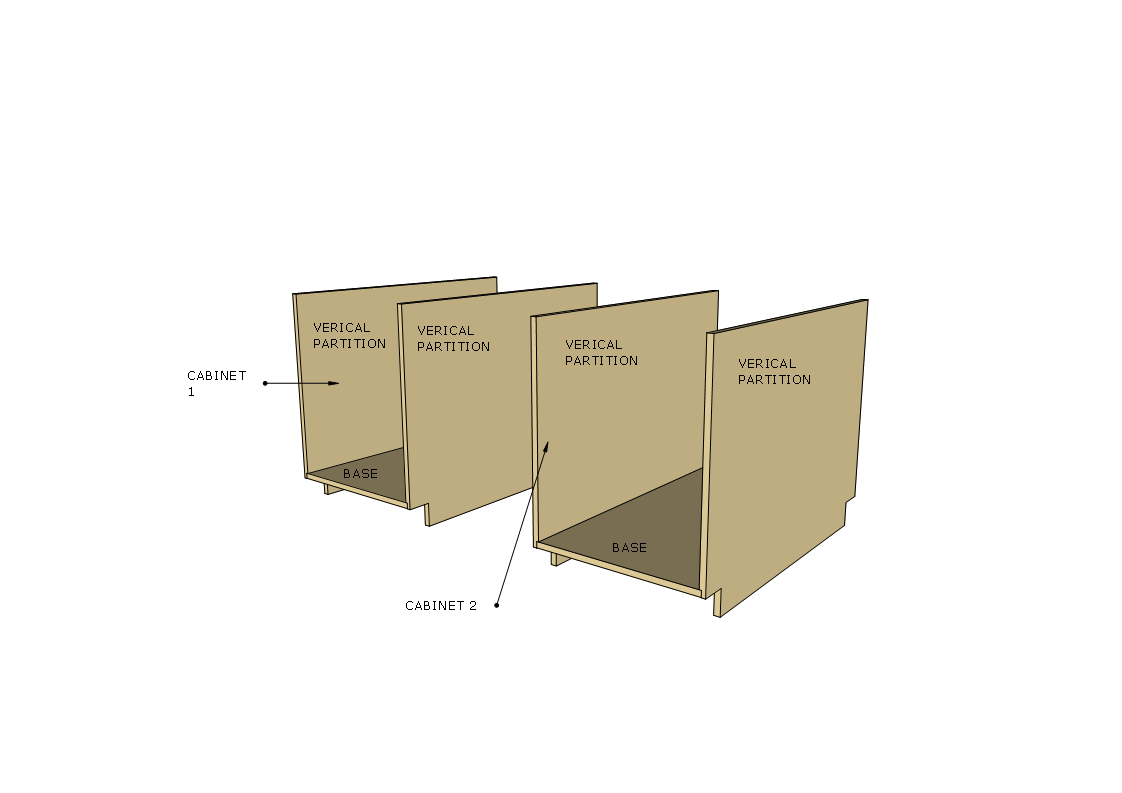
The below diagram shows you the section of the project I am working on at the moment the base frame consists of the following:
4 Vertical Partitions
2 Cabinet Base’s
3 Top Stretchers
2 Toe-Kicks
So with the cabinet bases cut to size it was time to switch my attentions to the vertical partitions.
VERTICAL PARTITIONS
There are 4 partitions in total that make the sides of the cabinets, each vertical partition gets the following:
A dado groove measure 3/4” wide x 1/4” deep positioned 3” from the bottom of the pvertical partition which goes from the front to the back of the vertical partition so as that the base can fit inside and then I will glue and screw into position.
3” x 3” notch cut out so as that I can place the toe-kick which spans the entire table base but more on that later , I used my jigsaw to cut out the notches.
NOTE: I needed to measure the plywood thickness as nowadays plywood is not the advertised 3/4” it was actually 23/32” of an inch I used my dado stack inside my tablesaw to cut out the dadoes.
Make sure that you orient each vertical partition the right way as only the inside faces of the them will receive a dado, if you don’t you will put a dado on the wrong side and the base will not fit into the cabinet

Here is the measurements needed to perform all the tasks on the vertical partition

Here you can see the toe kick notches cut out and the dado groove running from the left to right side.

A closer look at the vertical partition

Although Marc Spagnulo didn’t add screws to secure the base I will be using screws and glue, this line indicates the center line of the dado I will be counter-sinking 1-1/4” screws into this outside face of the panel I will also come back later and plug the holes with probably oak plugs.
ASSEMBLE CABINET’S
With all the components cut to size for the cabinet bases it was time for some assembly. Here is the order I did the assembly:
Started working on the left side cabinet by placing glue on one of the vertical partitions
I also cut some temporary stretchers to balance the base of the cabinet while I secured it with screws that I Pre-drilled holes for.

I added glue to the Dado in one of the vertical partitions

Here you can see the temporary support stretchers I screwed to the cabinet side. This way when I lie the base on the sides Dado it can rest on the supports as I secure the base with screws