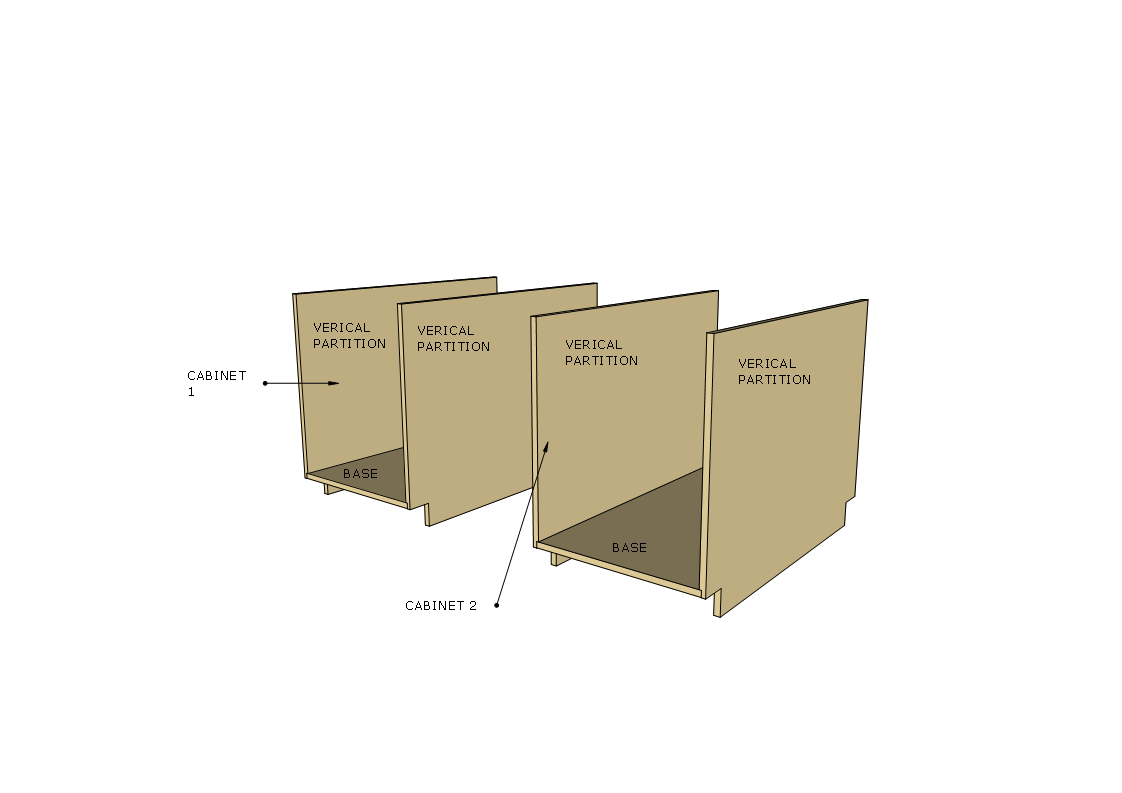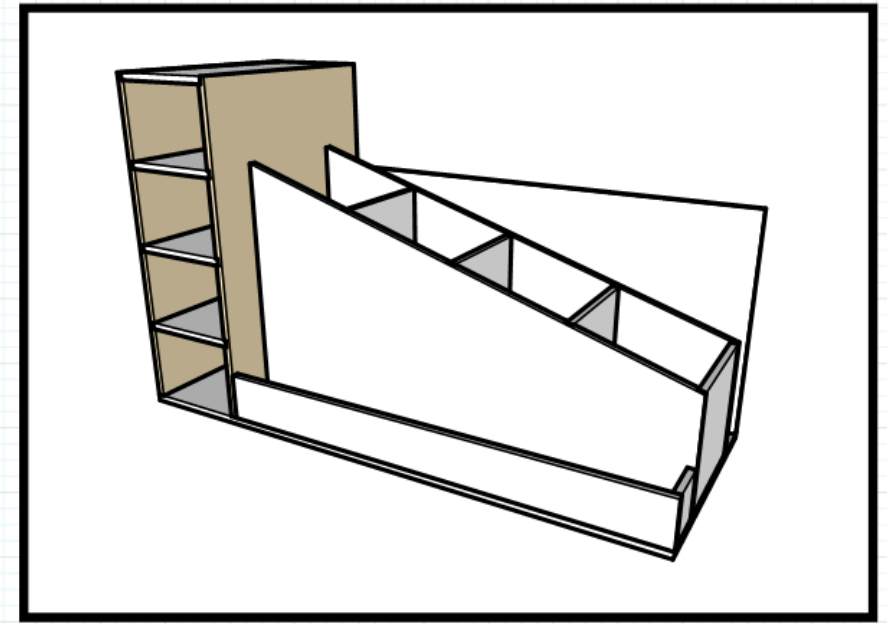
This is the section of the cart that I will be working on first, The Vertical Storage Shelves. Its the brown highlighted section.
As I mentioned in my previous post I will be tackling this project in 4 phases, this is the first of 4. Before I head into this part let me first breakdown what I will be writing about in this post.
Research & Design
Materials & Tools
Left Side Panels
Shelves
Pocket Holes
Vertical Shelf Unit Assembly
The cart has a ton of storage within a small footprint, this shelving unit that I am making has a decent amount of work to make it, I will be using pocket hole joinery ,dadoes, screws and glue to assemble it. So lets start.
RESEARCH & DESIGN
I wish I could claim credit for this design but I was not the one who designed it. I came across this project on Pinterest and the original design came from DIY Montreal, you can find her website in the link and she also has free project plans to help make it. She also documented a project video on YouTube and you can wtch it below.
As far as design I did also complete my own set of plans for this project and I will also post these free plans on my site after the project is completed. But you can see my Plans Cover page below. I designed my plans on Sketchup like I almost always exclusively do.

MATERIALS NEEDED
This project requires the following materials & tools in order to make the cart. Ask the home center to break down the 2 big plywood sheets, they are available in both sets of plans.
(2) Full sheets of 3/4” plywood
(4) 3” Casters
Wood Glue
1-1/4” wood screws
1-1/4” pocket hole screws
#12 3/4” Hex Head Slotted Sheet Metal Screws (I use these to secure the casters to the base)
TOOLS NEEDED
Tablesaw
Dado Stack
Skill Saw
Router
3/4” Straight router bit
Router Dado Jig
Pocket Hole Jig ( I used the Kreg K4)
Drill & Driver
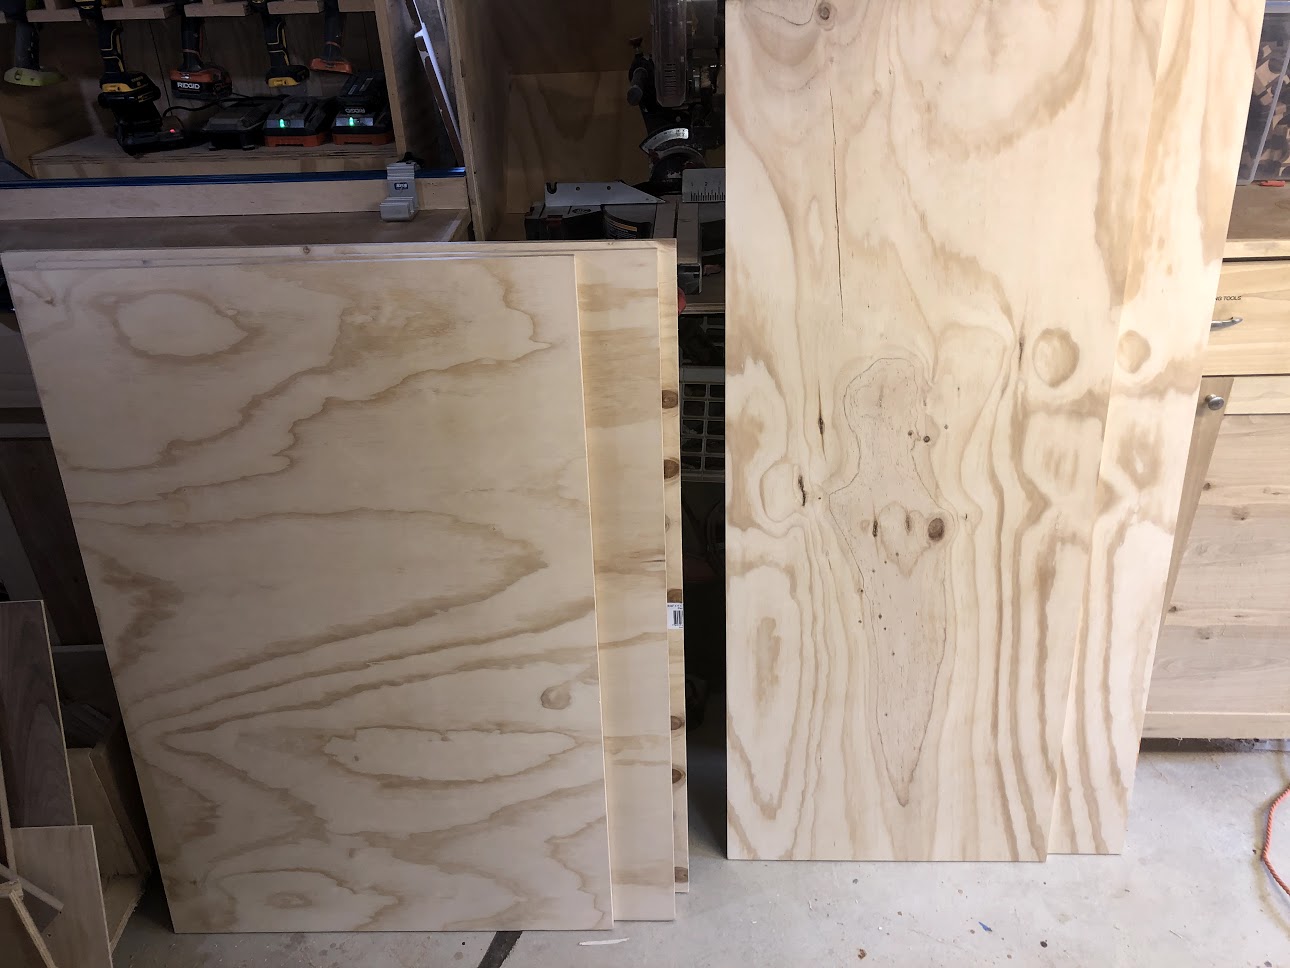
Here is the 2 sheets of plywood cut down to manageable pieces, I had this done at the home center.

Here are the 3” casters & Screws. I also have my trusty plans to help me build this project especially to help me with dimensions of the various parts of the cart.
VERTICAL SIDES
The vertical storage sections is basically made up with 2 sides and 4 shelves, the shelves are secured with glue and screws into the dado’s that were cut using a dado stack installed into my tablesaw
LAYOUT
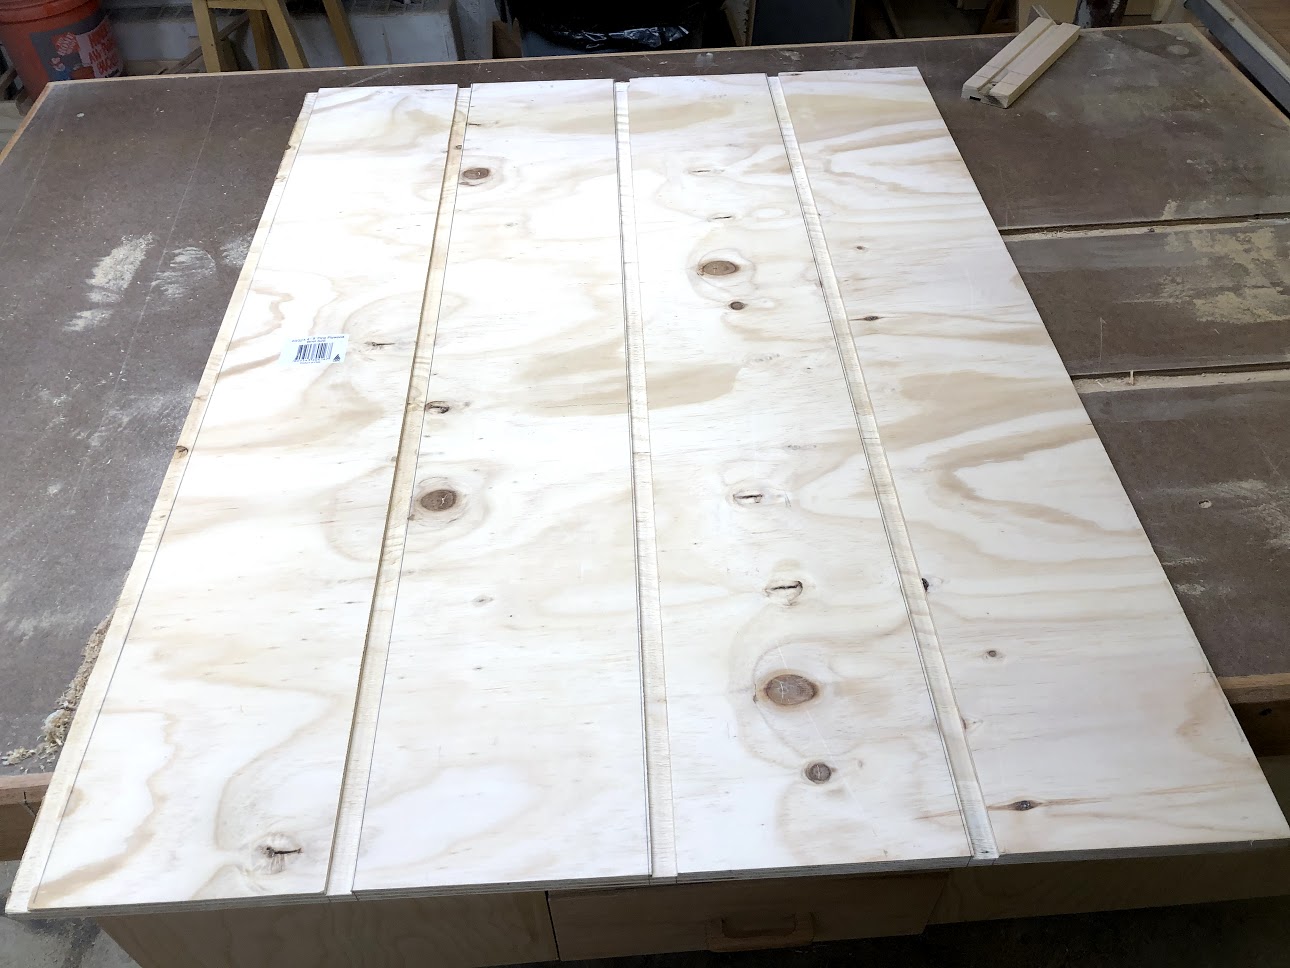
When I was at the home center I had the plywood boards cut into certain sizes, I did this to cut down on the work I had to do and this is one of them boards, this boards measures 48” x 36” this was cut to these dimensions as I could cut the dado’s all at once, the dadoes are placed 8-1/4” away from each other into 1 panel and then cross cut the panel into the 2 sides. I did this because I wanted to guarantee that all the dado’s measured up when it came to installing the shelving. As you can see I used pencil marks to position where I wanted the dado’s to be cut on the tale saw.

CUT THE DADO’S
Here you can see the same panel with all the dado grooves cut into where I had previously made my layout marks. These dado are places 8-1/4” away from each other, thus giving me equally spaced shelving. But still notice that it is still one panel. To cu the dado’s I used my 23/32” wide dado stack in my table-saw and cut the dado to a 1/4” deep.
CROSSCUT THE SIDES
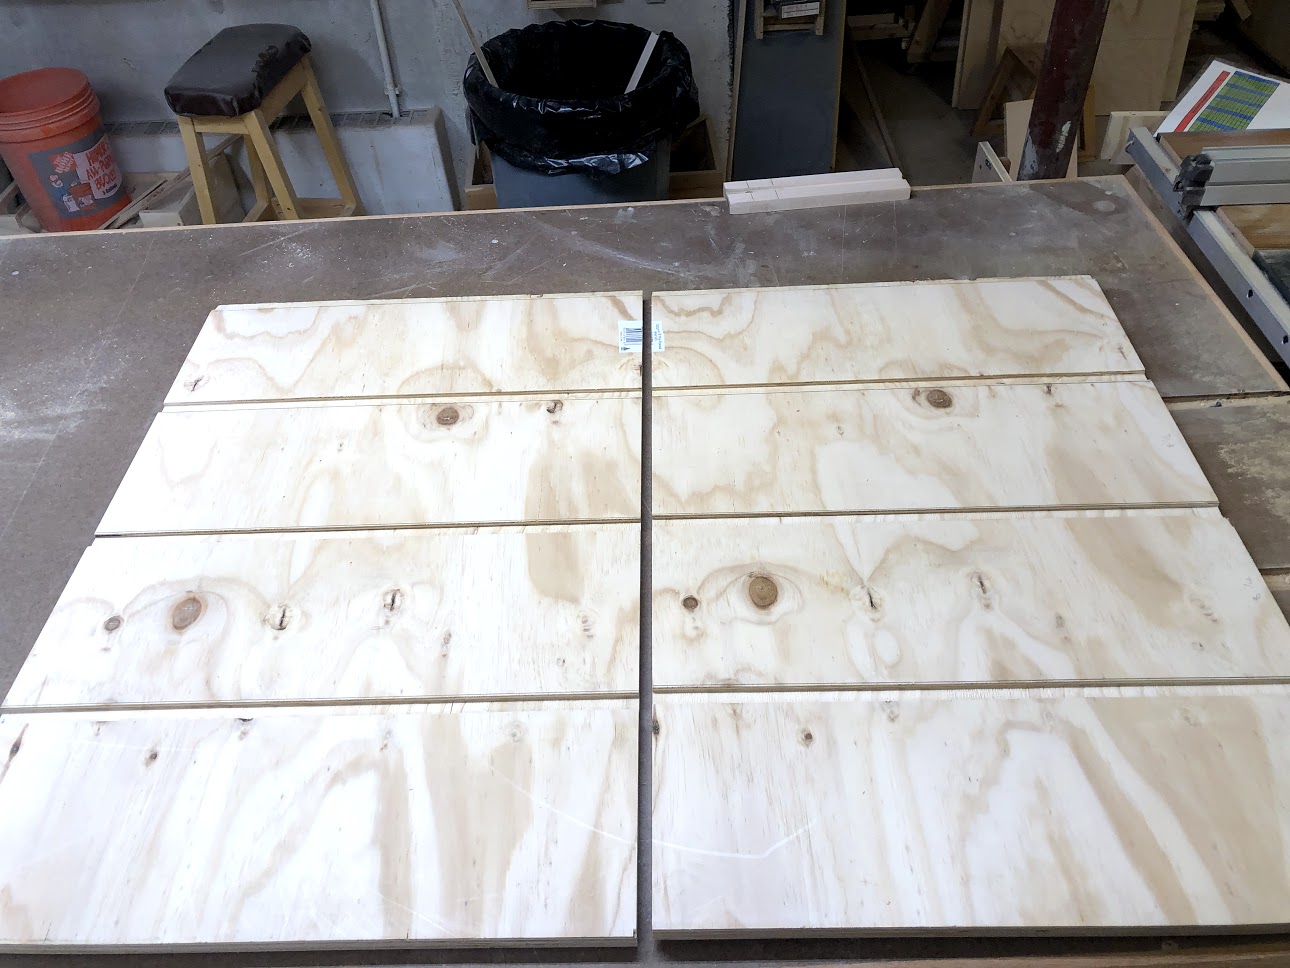
Now that the dado grooves were cut into the board I was able to crosscut the boards that will ultimately become the 2 sides of the vertical shelving unit on the cart. I installed my 60 tooth table-saw blade into the saw and crosscut and as you can see the dado grooves all line u with each other.
COUNTER-SUNK TIME
Since I will be using glue and screws to secure the shelves into the dado grooves, I decided to place all these holes now as it would be a quick process. So I used my drill installed with a counter-sunk bit to place 2 holes on either side of the panel.

POCKET HOLE TIME
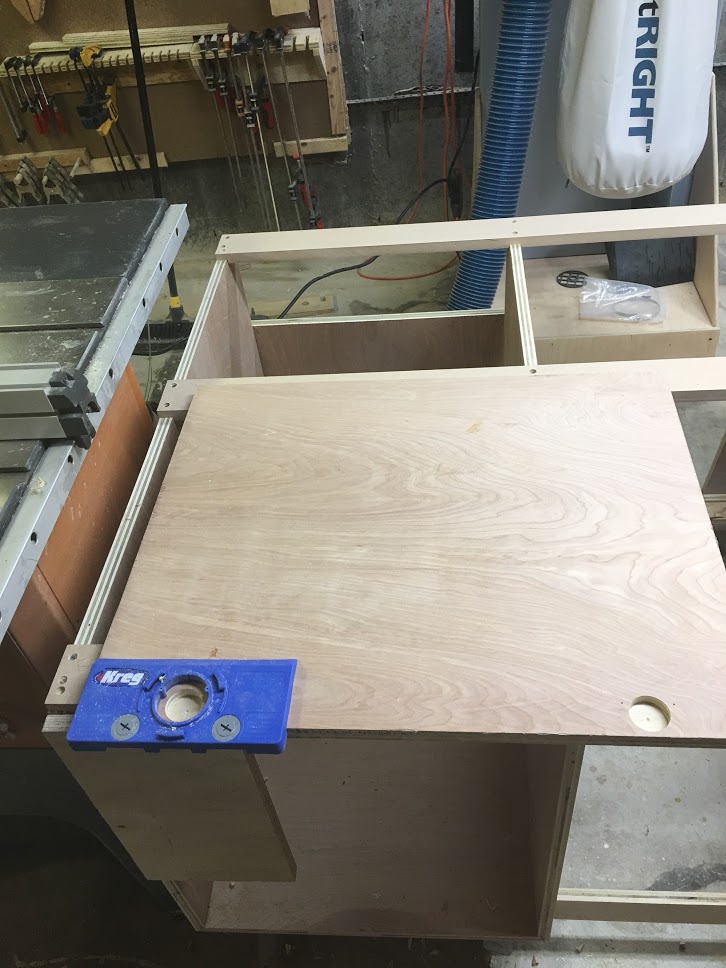
I will be using pocket hole joinery in certain parts of this project, here I am placing pocket holes in the bottom outside faces of the vertical side panels, this is how I will be securing the shelving unit to the base of the cart. Here you can see me using the Kreg K4 jig , I like using this method sometimes as it is quick and I don’t need a lot of big clamps to secure the workpiece as I wait for the glue to dry. This method allows me to keep working on the project.

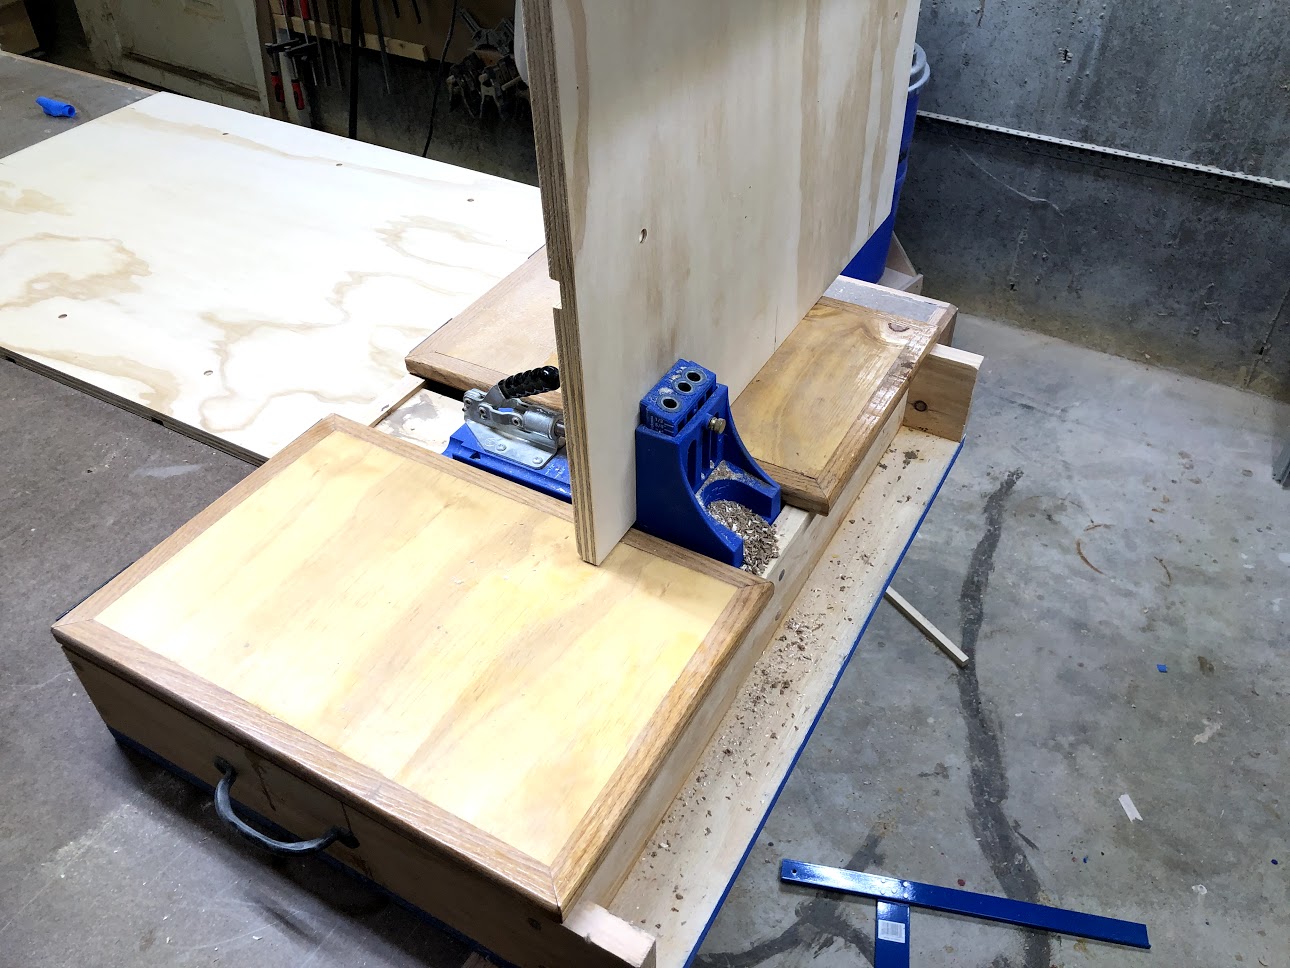
Here is the front side of the jig
SIDE PANEL
Here you can see one of the side panels all outfitted with counter sunk holes and pocket holes all ready for the assembly phase, which will be soon.

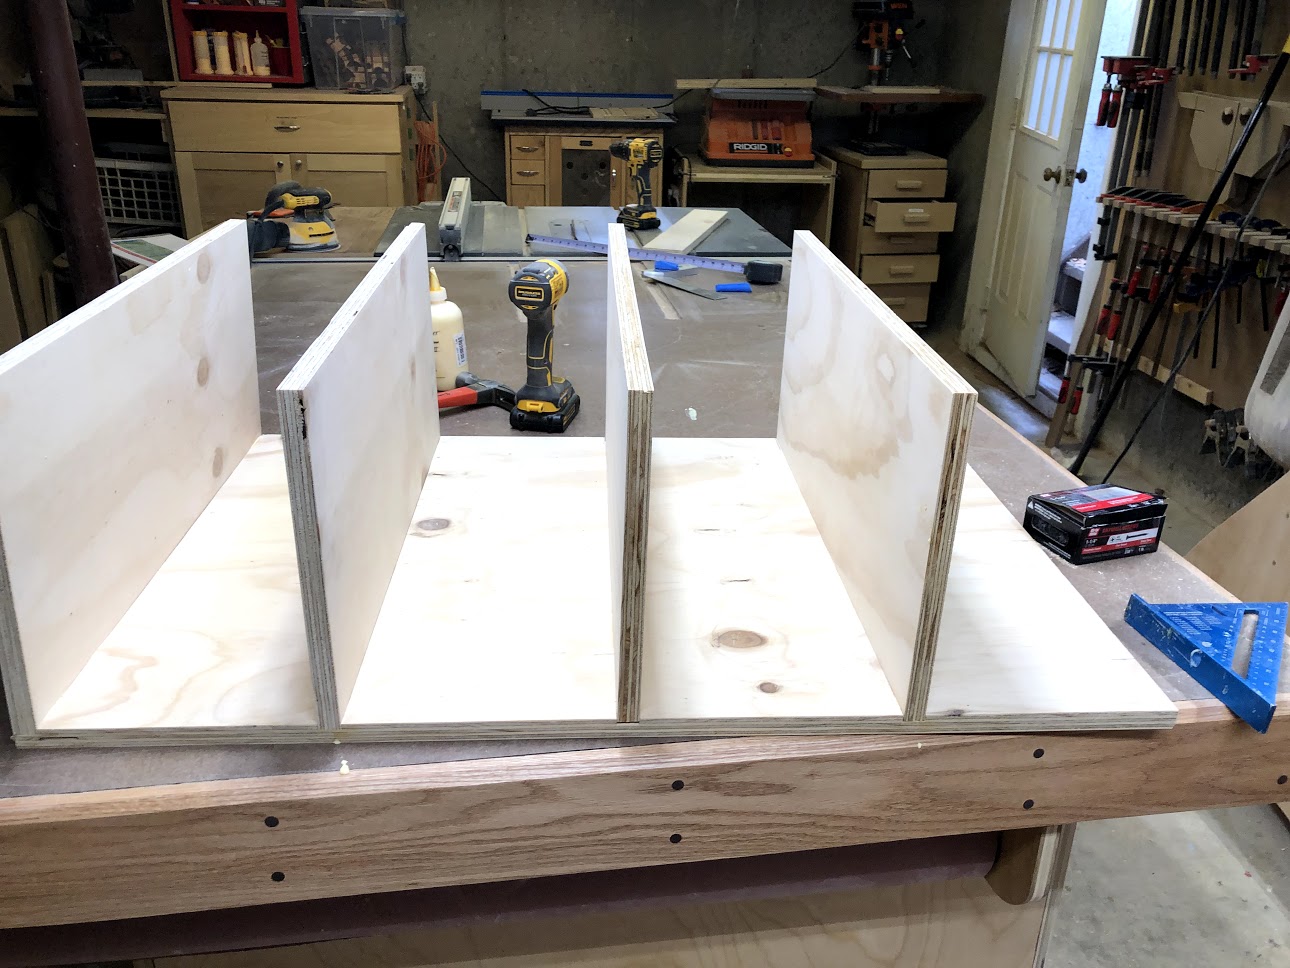
DRY ASSEMBLY
In this image you can see that all the shelves have been cut, there is nothing to do with these panels other than to cut them to the plan dimensions which is 24” x 11’. I am putting them into the dado grooves that were cut earlier and making sure that they all line up.
ASSEMBLY TIME
All that was left to do was to assemble the shelving unit. These are the steps I took to assemble the unit.
I place one of the sides flat onto my assembly table with the groove side up, I placed glue into all 4 grooves and then installed the shelves into the grooves, but no screws yet as I don’t have access to this side as it is laying on the table.
Next I placed the mating side piece onto the shelves this time with grooves facing down, after adding flue to the edges of the shelves I use my 1-1/4” screws to secure the side panel onto the shelves.
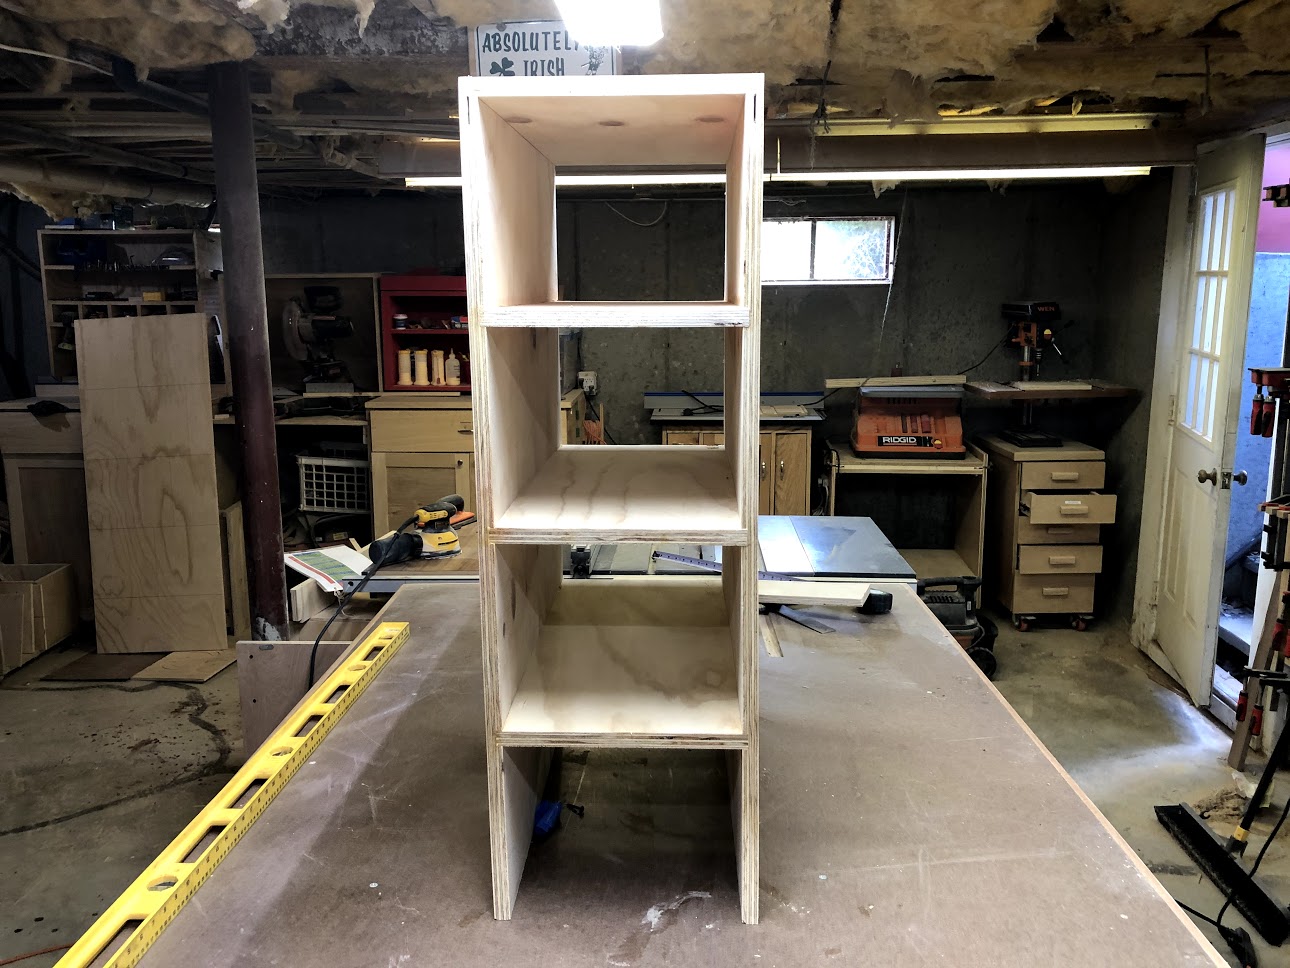
All that was left was to flip the shelf unit over and secure the other side panel with the 1-1/4” screws, and that was it.


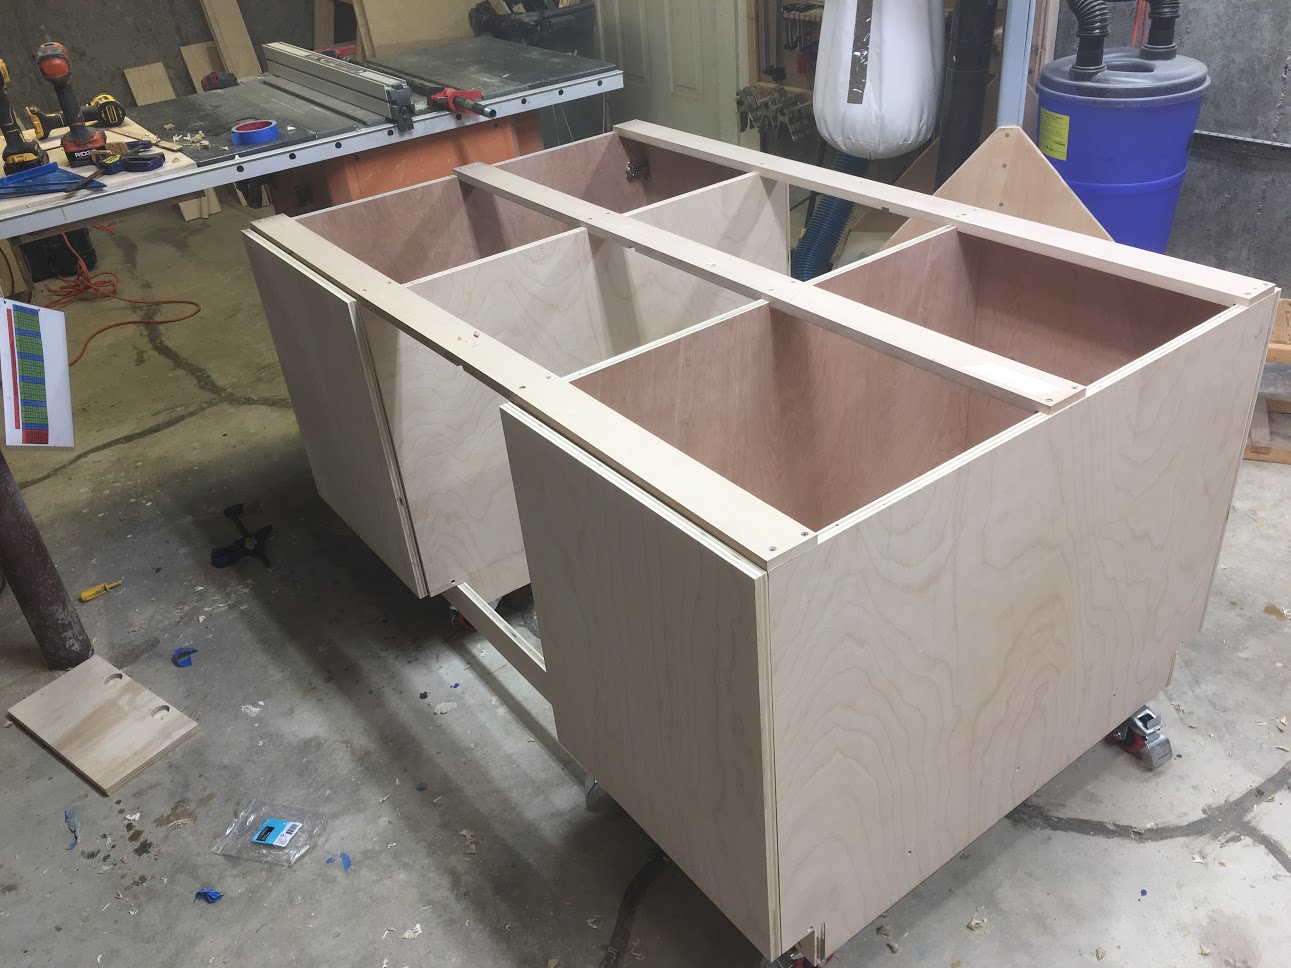
Here you can see the shelves sitting in the dado grooves, these shelves are not going anywhere. I will need to sand the unit down but its made.
I had some difficulty getting this unit square and it had nothing to do with my layout work or even my screw placement, I discovered that the plywood panel that these pieces were cut from had a bow to the panel, be careful selecting plywood from big box stores as they sometimes are not the flattest. In the end I managed to get everything square and plum.
Well this wraps up Phase 1 of the project build and next I will be working on the central storage bins for the cart.. catch you then.