Dust Collector Cart

Table-Saw Dust Collection

Back at the start of the month I purchased a new dust collection system which was the Dust Right System from Rockler and it works out great, the cart I also made for the unit is also working out great but the last time I left the Dust Collection shop upgrade project I had not hooked it up to any of my power tools as I needed to figure out that process.

Well today I went to my nearest Rockler store to purchase what I needed to hook the dust collection system upto my table-saw and I detailed it all below:

MATERIALS

Flexform Hose ; This hose runs from the elbow underneat the table-saw dust shute and into the Quick Connection for the dust collection system

Flexform Hose ; This hose runs from the elbow underneat the table-saw dust shute and into the Quick Connection for the dust collection system

The Flexform hose is the middle component

The Flexform hose is the middle component

Here is the elbow this attaches directly to the table-saw dust shut and is held in place using the metal hose clamps, this really does provide an air tight seal around the dust shute where the saw dust is collected before being sucked up by the Dust…

Here is the elbow this attaches directly to the table-saw dust shut and is held in place using the metal hose clamps, this really does provide an air tight seal around the dust shute where the saw dust is collected before being sucked up by the Dust Right collector.

Here is an image of the port, this is the port that I needed to attach to the Flex-form hose and is what I attach the dust collector hose that runs from the Dust Right Collector, it completes the dust collection loop from the table-saw to the dust c…

Here is an image of the port, this is the port that I needed to attach to the Flex-form hose and is what I attach the dust collector hose that runs from the Dust Right Collector, it completes the dust collection loop from the table-saw to the dust collector

Here is the order of assembly The Quick Connect Dust Ports attaches to the flex-form hose which then attaches to the elbow and the elbow attaches directly to the table-saw dust shut under the saw.

Here is the order of assembly The Quick Connect Dust Ports attaches to the flex-form hose which then attaches to the elbow and the elbow attaches directly to the table-saw dust shut under the saw.

HOOKING IT ALL TOGETHER

I will try and explain this the best way I can using layman’s terms.

Step 1: The Elbow is first up and I needed to get under saw to attach the elbow to the dust shute, the rubber end of the pipe is awesome because it allows you to fit it easily without wrestling with the OD of either the shute of elbow then you simply tighten the hose clamps until its nice and right.

Below is a picture I got of the internet this is not my saw but you can see the dust shute with the table-saw upside down

The dust shute is the 4” hole you see here in the center of the underside of the saw. This is where the elbow gets attached.

The dust shute is the 4” hole you see here in the center of the underside of the saw. This is where the elbow gets attached.

STEP 2 : The next step is to connect the 4” flex-form hose to the end of the elbow, I was surprised to pen the box to this part and not find any hose clamps in the box but luckily enough I still had some left over from when I purchased the dust collector, I used 2 one at each end to attach the hose to the elbow and the next step as well.

STEP 3 : My next step was to attach the Dust Right Quick hose port to the end of the flex-form hose, this is where my dust collector hose connects with the pipe and thus completing the circuit for dust collection to happen. I again used another hose clamp that I used on the other end of the hose , as seen above.

This recessed port allows the flex form pipe to connect to one end and the dust collectors hose to the other.

This recessed port allows the flex form pipe to connect to one end and the dust collectors hose to the other.

The only problem that I had to figure out was how to attach the this hose port to the left wing of the table-saw at a convenient height to connect my hose from the dust collector, I cam up with a temporary solution by tying the hose port to the left wing using twine but I will need a better solution, perhaps making a housing out of wood or something.

ALL CONNECTED

Below are some pictures of the finished assembly and I have to say that it works great, I fired up the dust collector and for the first time I am very happy to say that “it sucked” I ran a few test cuts through the table-saw and I didn’t see and saw dust after the cuts were completed, finally a dust collection system that works and my lungs will thank me for it in the years to come.

Here is the dust collector connected to the quick port that I have tied to the tablesaw.

Here is the dust collector connected to the quick port that I have tied to the tablesaw.

Here is the entire set-up and it works great.

Here is the entire set-up and it works great.

One more item that I purchased for down the road was a dust separator which I will definitely need when planing wood, if you would like to learn more about this check out the below video. I can use it in connection with either a shop vac when using smaller hand power tools or the dust collector when hooking it up to the planer, it basically takes all the large wood chips out of the saw dust and puts it into the dust separator providing you with multiple benefits which are

  • Saves your filter on your shop vac so as that it doesn’t fill up or clog as often

  • You don’t have to empty your dust collection bag as often.

Fits nice and conveniently on my cart, if you want a link to this click here

Fits nice and conveniently on my cart, if you want a link to this click here

Dust Collector Cart Project : Completed

Well for the most part the dust collection cart is finished, I needed to do a few little things to finish it up.So here is what I did today.

  • Applied a few coats of polyurethane to the sides and the base of the cart

  • Attached all the mounting hardware to the divider

  • I filled the gap that was left in the base.

  • All finished

POLYURETHANE

As I said in my last blog post I was going to apply a couple of coats of polyurethane to the base and side assemblies in the cart, this adds a couple layers of protection to the cart and it is also easy to wipe down.

Here is an image of one of the sides after applying the 2 coats of polyurethane, the wooden plugs pop and look nice, there was no point painting as the sides would get the most abuse.

Here is an image of one of the sides after applying the 2 coats of polyurethane, the wooden plugs pop and look nice, there was no point painting as the sides would get the most abuse.

MOUNTING HARDWARE

I needed to add the mounting clip that holds the dust collector in place as well as all the mounting hardware that keeps all the handles and dust collections hose in place.

Here is all the mounting hardware attached, I actually moved one of the straps on the bottom left to the bottom right to hold my floor sweep that I also purchased.

Here is all the mounting hardware attached, I actually moved one of the straps on the bottom left to the bottom right to hold my floor sweep that I also purchased.

FILLED THE BASE GAP

Since the base is basically a plywood sandwich with 2” x 4” ‘s in the middle it created a 3-1/2” gap so I decided to cover it up, so I cut 2 pieces of plywood to size ans secured it with screws into the lumber. Below you can see before and after pics.

Here is the gap I am referring to before covering it.

Here is the gap I am referring to before covering it.

Here is the gap covered up with the plywood panel. Looks a little better and will prevent dust from getting inside the base.

Here is the gap covered up with the plywood panel. Looks a little better and will prevent dust from getting inside the base.

ALL FINISHED

This will probably one of them on going projects as I build my dust collection accessories but as of right now that is all I have to install on the cart, possibly in the future I might add a small 2” dust hose real and probably a dust separator.

I am very happy about how the cart came out and it works great, I used it for the first time today and world awesome I might need a longer hose other than the 14’ hose I am currently using to reach my entire shop but that is why I made the cart, as it follows me through-out the shop.

I have plans available in my store soon and I will include a link below

This side of the cart is empty for now but I will probably add a hose real and a dust separator

This side of the cart is empty for now but I will probably add a hose real and a dust separator

Here is a picture of the floor sweep, this works great and is ideal for cleaning up the shop floor, I actually used one of the dust hose straps to attach it to the divider of the cart , that way it will not fall when the cart is mobile.

Here is a picture of the floor sweep, this works great and is ideal for cleaning up the shop floor, I actually used one of the dust hose straps to attach it to the divider of the cart , that way it will not fall when the cart is mobile.

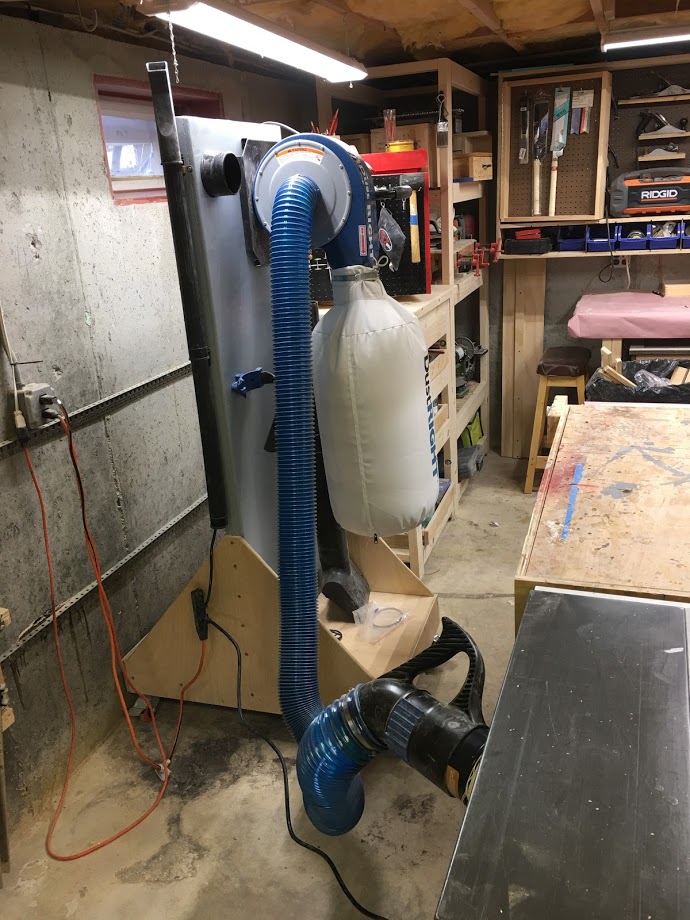
Here is the dust collector in its new home, it looks great and is extremely versatile allowing me to clean my entire shop and also will eventually be hooked up to all my station power tools to get rid of the saw dust.

Here is the dust collector in its new home, it looks great and is extremely versatile allowing me to clean my entire shop and also will eventually be hooked up to all my station power tools to get rid of the saw dust.

Just another angle of the cart, I really like the docking cup that holds the handle in place and Rockler will did a great job inventing the dust hose organizer.

Just another angle of the cart, I really like the docking cup that holds the handle in place and Rockler will did a great job inventing the dust hose organizer.

Thank you for reading this blog series and Ill talk to you again soon.

Take Care

Dust Collector Cart : Finishing Touches

So now that I have the Cart assembled I needed to do some of the finishing touches on the project and a few other odds & ends today, so here is what I did.

  • Filled all of the counter-sunk holes either with wood filler (on the divider& base) or wooden plugs needed to be added to the sides.

  • Making the wooden plugs

  • Some Sanding

  • I needed to build the dust collector & install it temporarily onto the cart

  • A lick of paint

ADD WOOD FILLER

I added wood filler to the counter-sunk holes on the divider 7 base sections of the cart, I used filler in these 2 sections because I was going to come back and paint these sections later on today.

Below you can see some pictures of the filler and before and after pictures of the cart.

I used this filler because its natural color matched the color of the sanded plywood.

I used this filler because its natural color matched the color of the sanded plywood.

Here is what some of the holes looked like, I have to say that the filler did a great job, sometimes I usually mix wood glue and saw dust so as that the filler matches the wood being filled but because this was plywood I just used this.

Here is what some of the holes looked like, I have to say that the filler did a great job, sometimes I usually mix wood glue and saw dust so as that the filler matches the wood being filled but because this was plywood I just used this.

Here is the plywood after being filled, doesn’t look too bad at all, but no mind this will be painted later. The plywood looks dusty but I have not wiped it down yet.

Here is the plywood after being filled, doesn’t look too bad at all, but no mind this will be painted later. The plywood looks dusty but I have not wiped it down yet.

MAKING SOME WOODEN PLUGS

I decided to use wooden plugs on the sides since I wasnt going to paint this section. I usally have a ton of wooden plugs on standy but I couldnt locate them and I didnt want to go to a store to buy some more. I did find however a length of oak dowel that I decided to cut up into indivual plugs to use.

I brough the dowel over to my chop saw to cut them but everytime I cut one dowel I bounced all over the place and I could not find it, so I decided to switch gears and them by hand.

I made a quick and dirty jig and use my Japanese pull saw to cut them, the jig is very basic. I used a scrap piece of plywood and glued a fence in place , then cut a kerf into the base indicating where to position my saw and receive the same length dowel everytime, you can see a few pictures below of the jig.

Here is the jig, I used a spring clamp to hold the stop block in place while the glue set, you can also see the kerf I cut indicating where to position the saw.

Here is the jig, I used a spring clamp to hold the stop block in place while the glue set, you can also see the kerf I cut indicating where to position the saw.

This is a close-up picture of the jig

This is a close-up picture of the jig

Here you can see my Japanese pull saw, this worked out awesome and I will definitely use this jig in the future.

Here you can see my Japanese pull saw, this worked out awesome and I will definitely use this jig in the future.

INSTALLING THE WOODEN PLUGS

Installing the wooden plugs is very simple, just apply glue into the counter-sunk holes making sure to get glue on the walls of the hole and not the base because that is where the screw is, wood glue will not work attaching the plug to screw head, tap the dowel home until you hear it seat, then leave for about 30 minutes returning with a flush cutting saw to remove the excess, you can see pictures below of this process.

Here are the plugs insta

Here are the plugs insta

Here is me using my flush trim saw removing the excess plugs.

Here is me using my flush trim saw removing the excess plugs.

Here is a picture of wooden plugs all flush trimmed, looks good, these plugs will pop once I apply the polyurethane finish to the sides.

Here is a picture of wooden plugs all flush trimmed, looks good, these plugs will pop once I apply the polyurethane finish to the sides.

SANDING

I didn’t take any pictures of this step because lets face sanding is boring , its one of them steps that needs to get done but I dont get and enjoyment out of it, I used 120 grit sand paper on my orbital sander and sanded every surface, and then came back with 180 grit and sanded some more, after I was done I came back with a tack cloth to remove all the dust, and prepped the cart for paint.

ASSEMBLING THE DUST RIGHT DUST COLLECTOR

Before I moved onto the painting part of the project I needed to assemble the dust collector unit, so I did the following:

  • Removed all the contents of the boxes

  • Read the user guide and assembly instruction

  • Made sure all parts were accounted for and not damaged.

  • Assembling the dust collector was pretty easy except they included the wrong size wrench in the assembly kit to tighten all the bolts, but its a good thing that I have my own.

    Other than that the tool was well packaged and the instruction were easy to follow, below you can see the parts all laid out before assembly began.

Here is the Dust Right dust collector pre-assembly.

Here is the Dust Right dust collector pre-assembly.

TEMPORARILY ATTACHING THE UNIT

Now that the dust collector was all assembled I needed to determine the following before I got to painting the cart.

  • The dust collector motor is attached to the cart using the supplied Z bracket, which is almost like a shop made french cleat but made of metal, the bracket is about 10” long so I needed to place the bracket so as that I came into contact the 2” x 4”’s I used to make up the divider, this dust collector is not light and I needed to locate these studs so as that all of it considerable weight could be handled correctly

  • Secondly I purchased some accessories to organise the dust collector main handle and hose, otherwise this cart would fail before I ever got to using it, the hose that I purchased was 2 feet long but expanded to 14 feet and I needed a way to organise this and not just have it sitting on the cart base..

  • I also purchased a Rockler Dust right floor sweep which basically is a big vacuum attachment that you can use in conjunction with the dust collector to vacuum the floor of my shop.

    Below are pictures of all these accessories and of course the main dust collector.

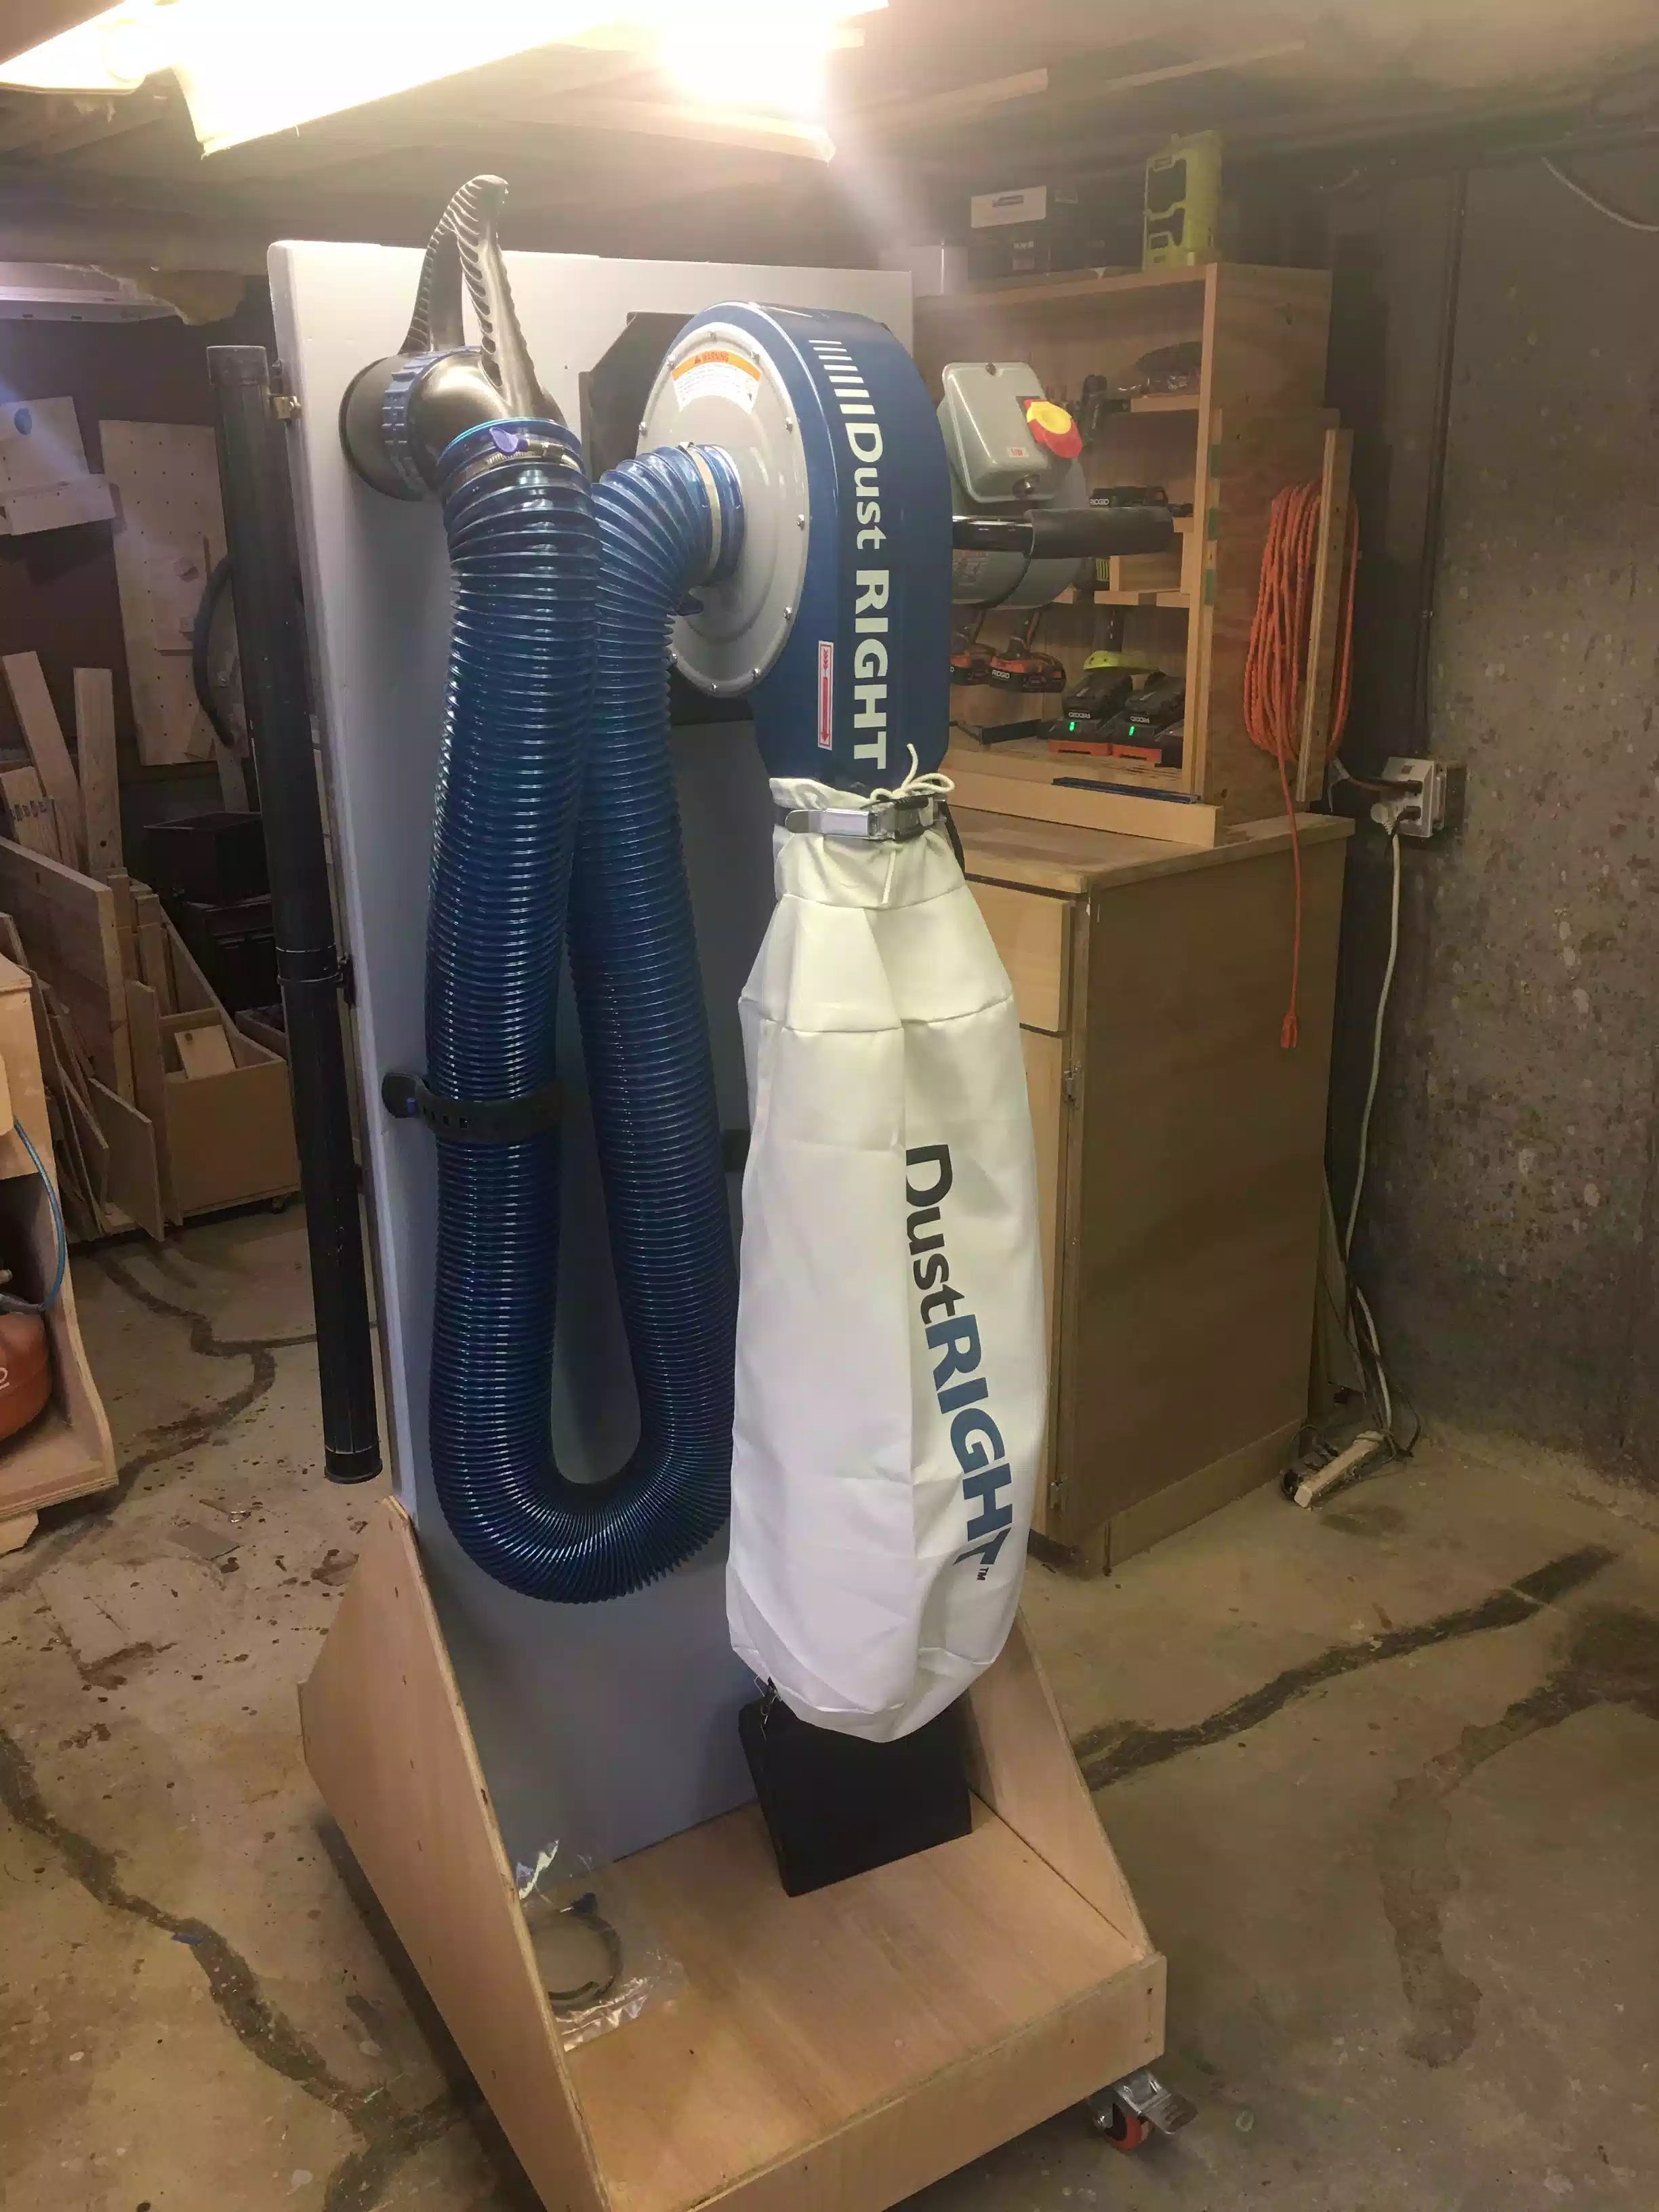
Here is the main dust collector all attached, the organizers keep everything in its place.

Here is the main dust collector all attached, the organizers keep everything in its place.

Here is the docking port for the main handle, this handle hooks up to every accessory that I purchased, this docking cup is screwed to the cart using 3 screws and the handle slips on over the outside of the dock, works awesome.

Here is the docking port for the main handle, this handle hooks up to every accessory that I purchased, this docking cup is screwed to the cart using 3 screws and the handle slips on over the outside of the dock, works awesome.

Here you can see the adjustable straps that keep the hose organised while its not being use, its basically a rubber strap with holds , you can use this with a variety if diameter hoses.

Here you can see the adjustable straps that keep the hose organised while its not being use, its basically a rubber strap with holds , you can use this with a variety if diameter hoses.

I didn’t get to organised this today , but this is a stock photo displaying what it can be used for. I think this will probably get mounted on the other side of the dust collector.

I didn’t get to organised this today , but this is a stock photo displaying what it can be used for. I think this will probably get mounted on the other side of the dust collector.

Here is another stock photo displaying the docking systems for the handle and hose.

Here is another stock photo displaying the docking systems for the handle and hose.

PAINTING TIME

Like I commented earlier in this post I decided to paint some of the cart, so I decided to purchase a gloss paint the color of the powder coating on the dust collector its a kind of light grey. But before I got started painting I needed to section off the areas that were not receiving the paint, which were the sides and the base.

My painting skills are not that great so I used blue painters tape to outline the area that I was painting and then used a 2’ paint brush to cut in the paint around the edges and then finally used a small roller to paint the divider panels, I think it came out great, below you can see the pictures.

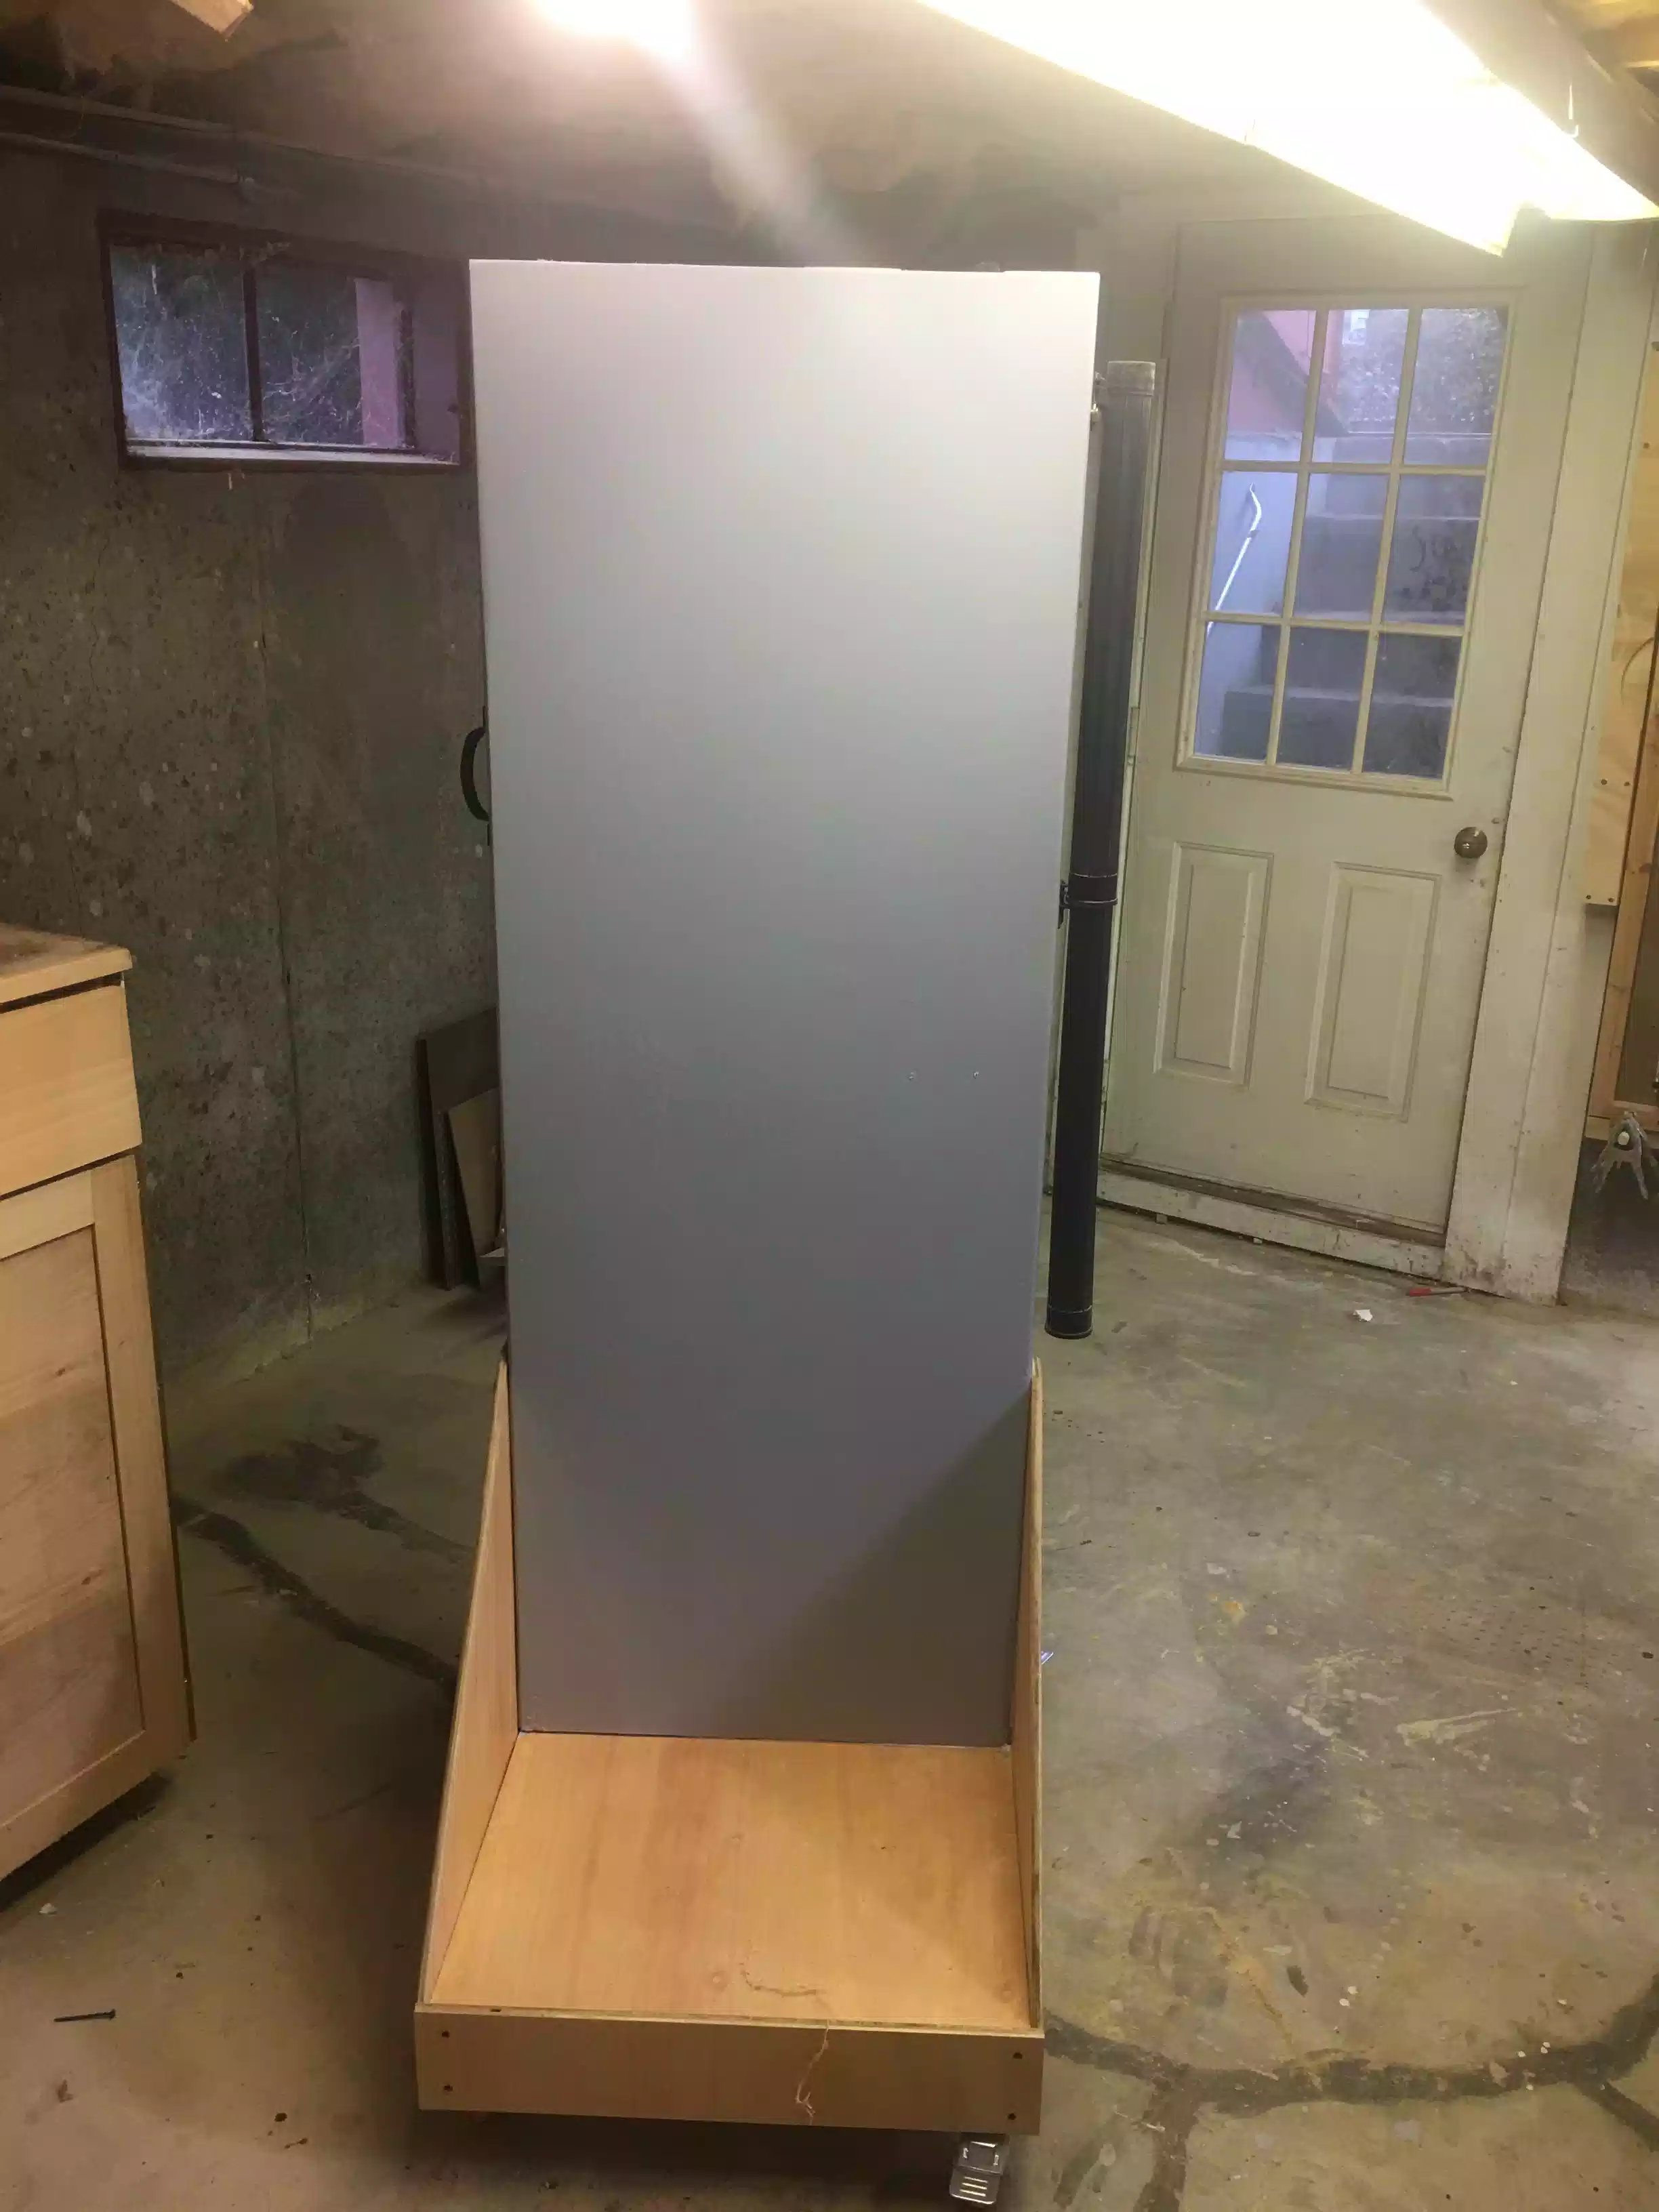
Here is one of the sides of the cart all painted up, its the same on the other side.

Here is one of the sides of the cart all painted up, its the same on the other side.

Well that is all I had time for today, thanks for reading.

NEXT:

  • I need to add polyurethane to the base and sides of the cart

  • Permanently mount the dust collector and all accessories, I still need to figure out where to place my small shop vac.

  • Add handles to the upper edges of the cart, so as that I can pull it around with ease.

Dust Collector Cart: The Build

So now that I have everything that I need to get started on the build, I have broken down the build into the following sections:

  • Follow the cut-list

  • Make the Base

  • Make the Divider

  • Attach the Sides

CUT-LIST

Using my plans and cut-list it was time to start cutting everything to their final dimensions. My first stop was to the table-saw to cut all the plywood parts to final size.

Here is a picture of me cutting the plywood down.

Here is a picture of me cutting the plywood down.

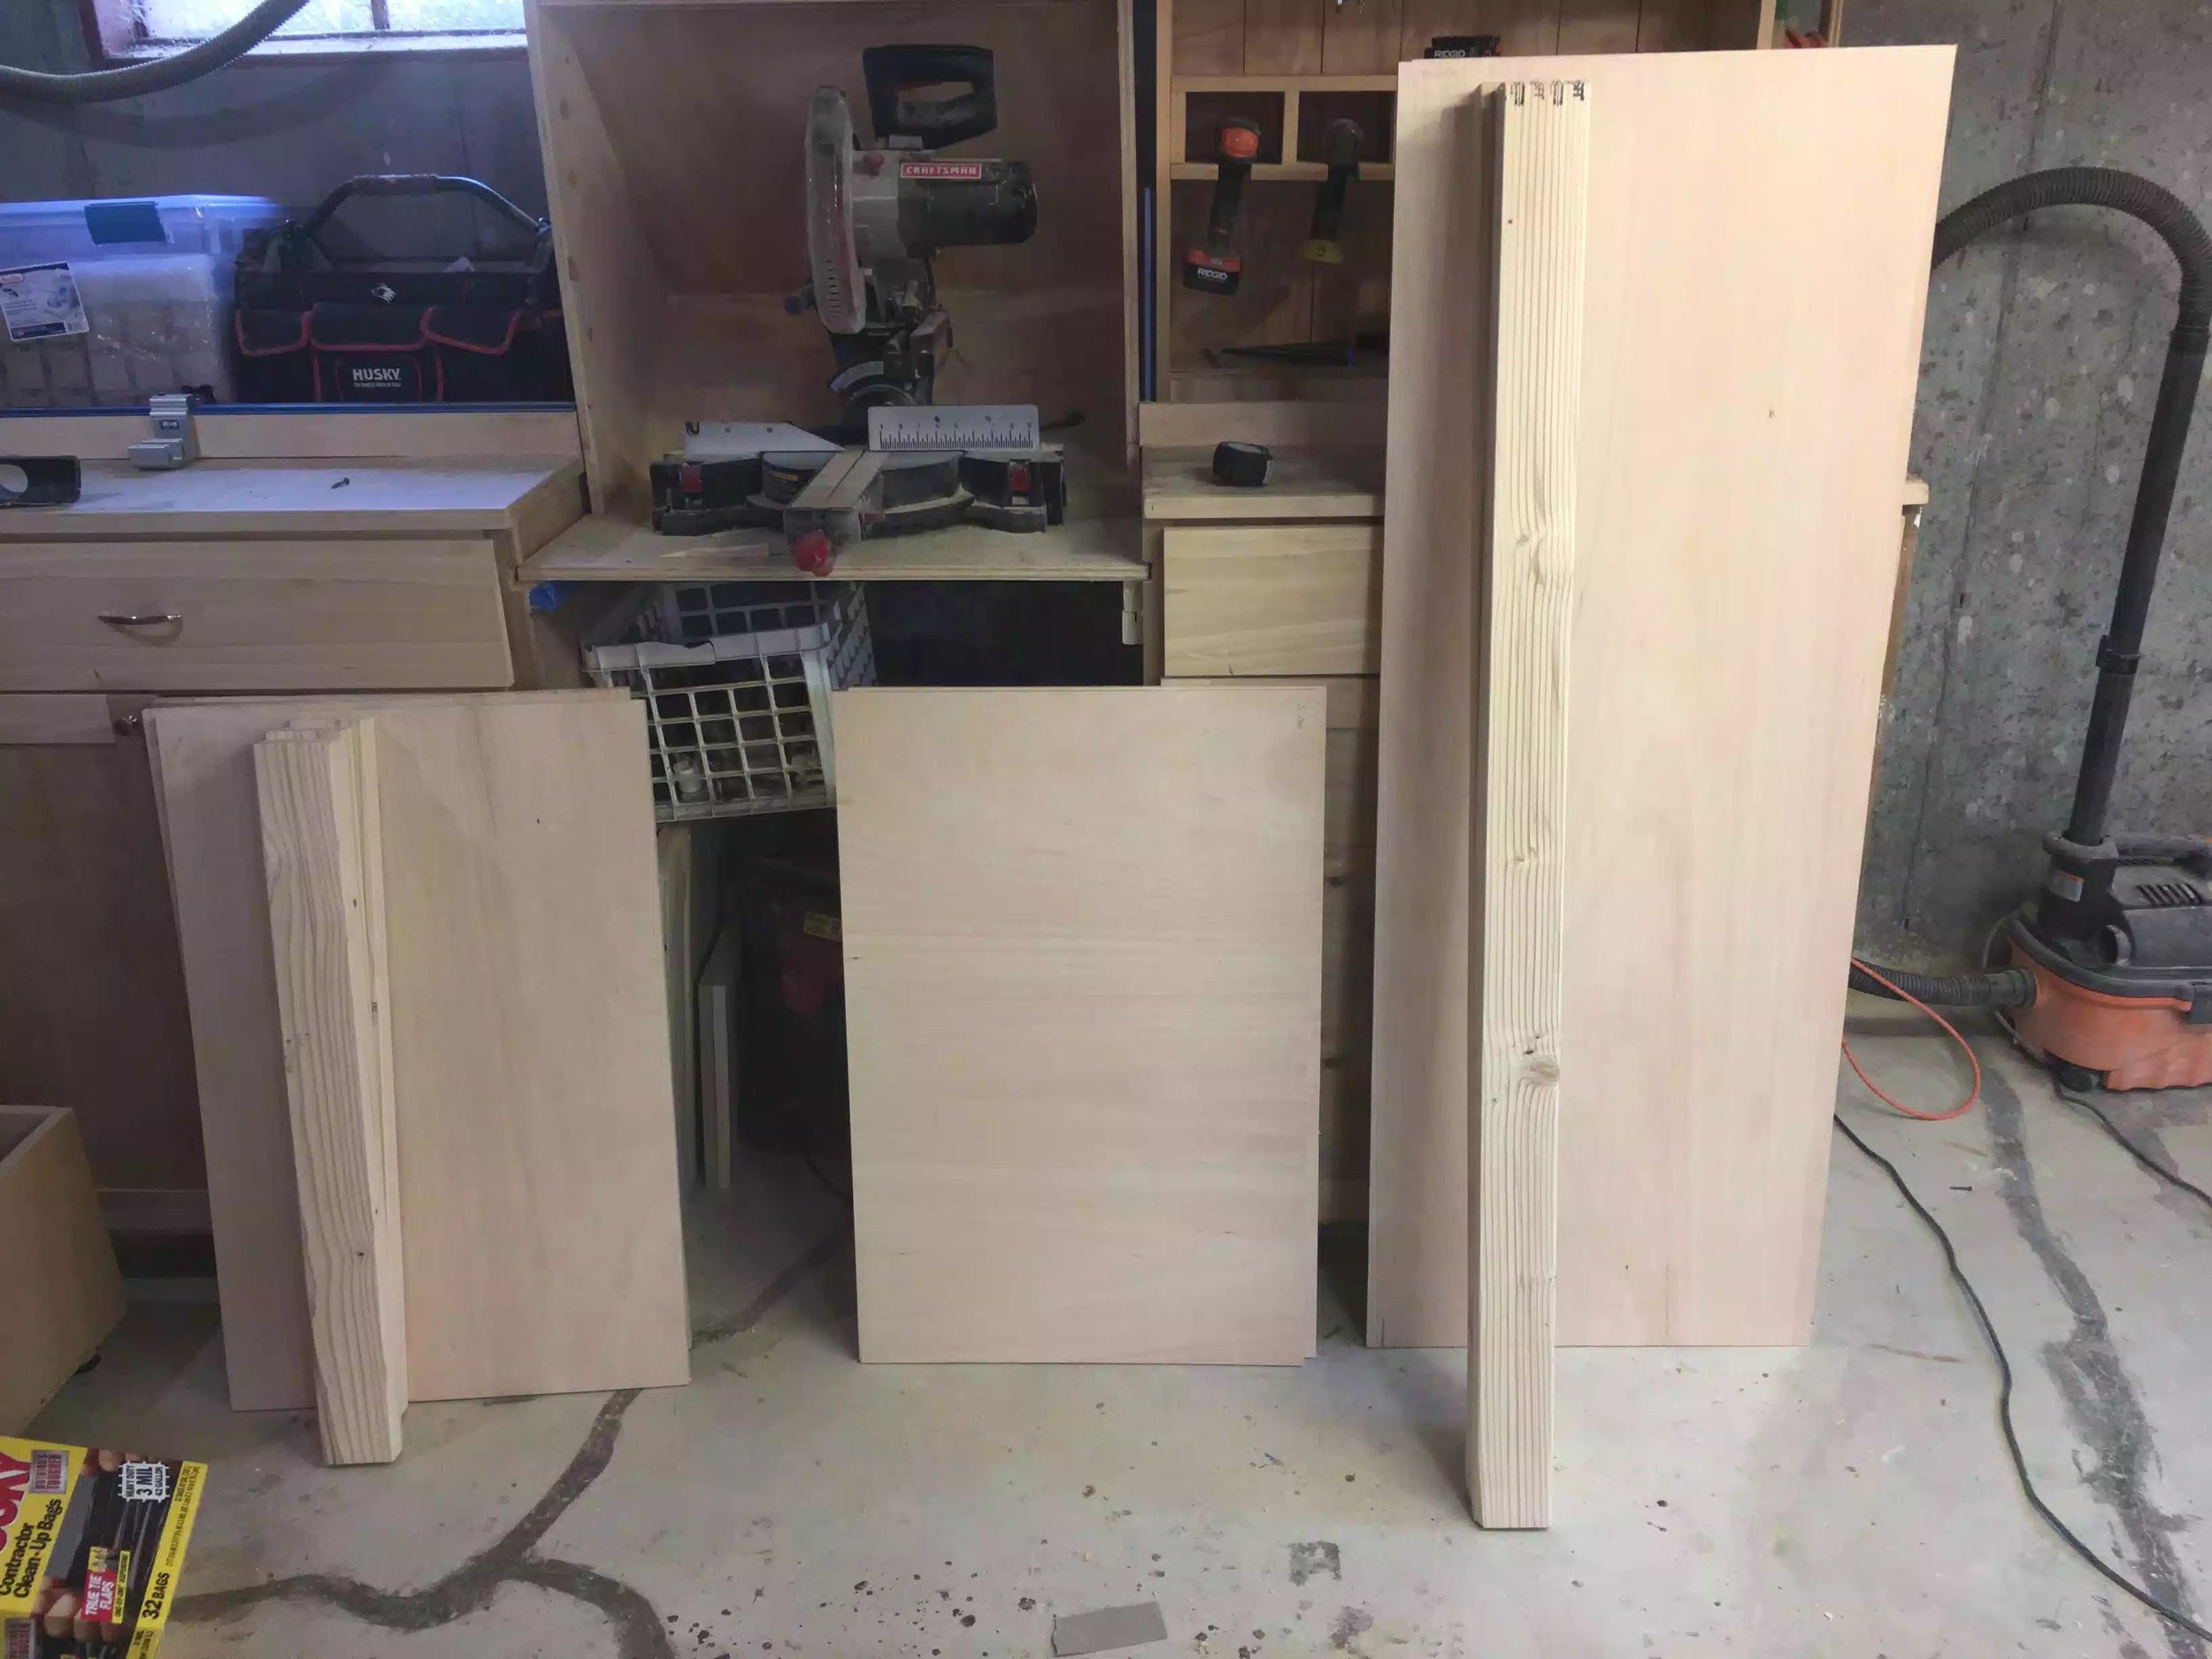
Here is all the plywood cut down to their respective dimensions

Here is all the plywood cut down to their respective dimensions

Next I was over to the miter saw station to cut all the 2” x 4” lumber to their final dimensions.

Here you can see my miter saw station set-up, or part of it anyway lol

Here you can see my miter saw station set-up, or part of it anyway lol

My miter saw station is one of my most used workstation because I can set-up repeatable cuts just like this one, I used my Kreg production stop to make quick work of cutting these dimensional lumber down to size.

My miter saw station is one of my most used workstation because I can set-up repeatable cuts just like this one, I used my Kreg production stop to make quick work of cutting these dimensional lumber down to size.

So now that everything has been cut to its final dimension, well except for the sides (but more about that later).

Here is all the sheet goods and lumber all cut to final size.

Here is all the sheet goods and lumber all cut to final size.

MAKE THE BASE

The base is basically a sandwich of plywood and 2x4’s glued and screwed together.

Step 1: I gathered my parts to make the base which were 2 plywood panels and 3 pieces of 2” x 4”. The plywood is positioned on the bottom and the top and in the middle is the 2”x4” positioned on their sides. I screwed through both bottom and top plywood sheets into the lumber sandwiched in the middle, I also applied glue to both edges of the lumber so as that when I screwed into the sheets the screws would act as clamps until the glue dried.

Here is the base with the plywood sheets on top and bottom with the lumber sandwiched in the middle, I clamped the plywood onto the lumber while screwing everything together, glue was also added. I counter-sunked the screws because I will be coming …

Here is the base with the plywood sheets on top and bottom with the lumber sandwiched in the middle, I clamped the plywood onto the lumber while screwing everything together, glue was also added. I counter-sunked the screws because I will be coming back and filling all these holes later on in the project.

Here is another picture of the base, you can see where I placed all the counter-sunked screws.

Here is another picture of the base, you can see where I placed all the counter-sunked screws.

ADDING CASTORS

Almost everything in my shop is mobile mainly because I work alone I need all my large shop furniture to be easily moved about to make shop layout a little easier.

In the past when adding castors I usually used lag bolts and nuts to attach the castor’s to the bottom of whatever it is I am making, but I am tired of pre-drilling holes and making sure that I have enough clearance for the nuts to not interfere with the mobile aspect of the project.

But over the last 2 projects I have using self taping hex head screws and they have been working great, below you can see the screw type that I am referring to and they can be purchased at any home center.

Here is the self tapping screw, I just add a washer and using my driver I screw them home.

Here is the self tapping screw, I just add a washer and using my driver I screw them home.

A real close-up of the Hex Head self tapping screw

A real close-up of the Hex Head self tapping screw

Here is one oft he 3” casters that I will be using to make the whole cart mobile.

Here is one oft he 3” casters that I will be using to make the whole cart mobile.

All casters positioned and ready to roll

All casters positioned and ready to roll

Here is the completed Base

Here is the completed Base

THE DIVIDER

Again the divider will act as a wall in which I secure the Dust collector on and everything else that I can fit, the construction of the divider is very much the same as the base with a few subtle differences

  • Its bigger

  • The 2” x 4” lumber is laid flat and not on its edge

  • The plywood is screwed into the lumber from the front and then glue is used to hold everything together, the screws again acts as clamps.

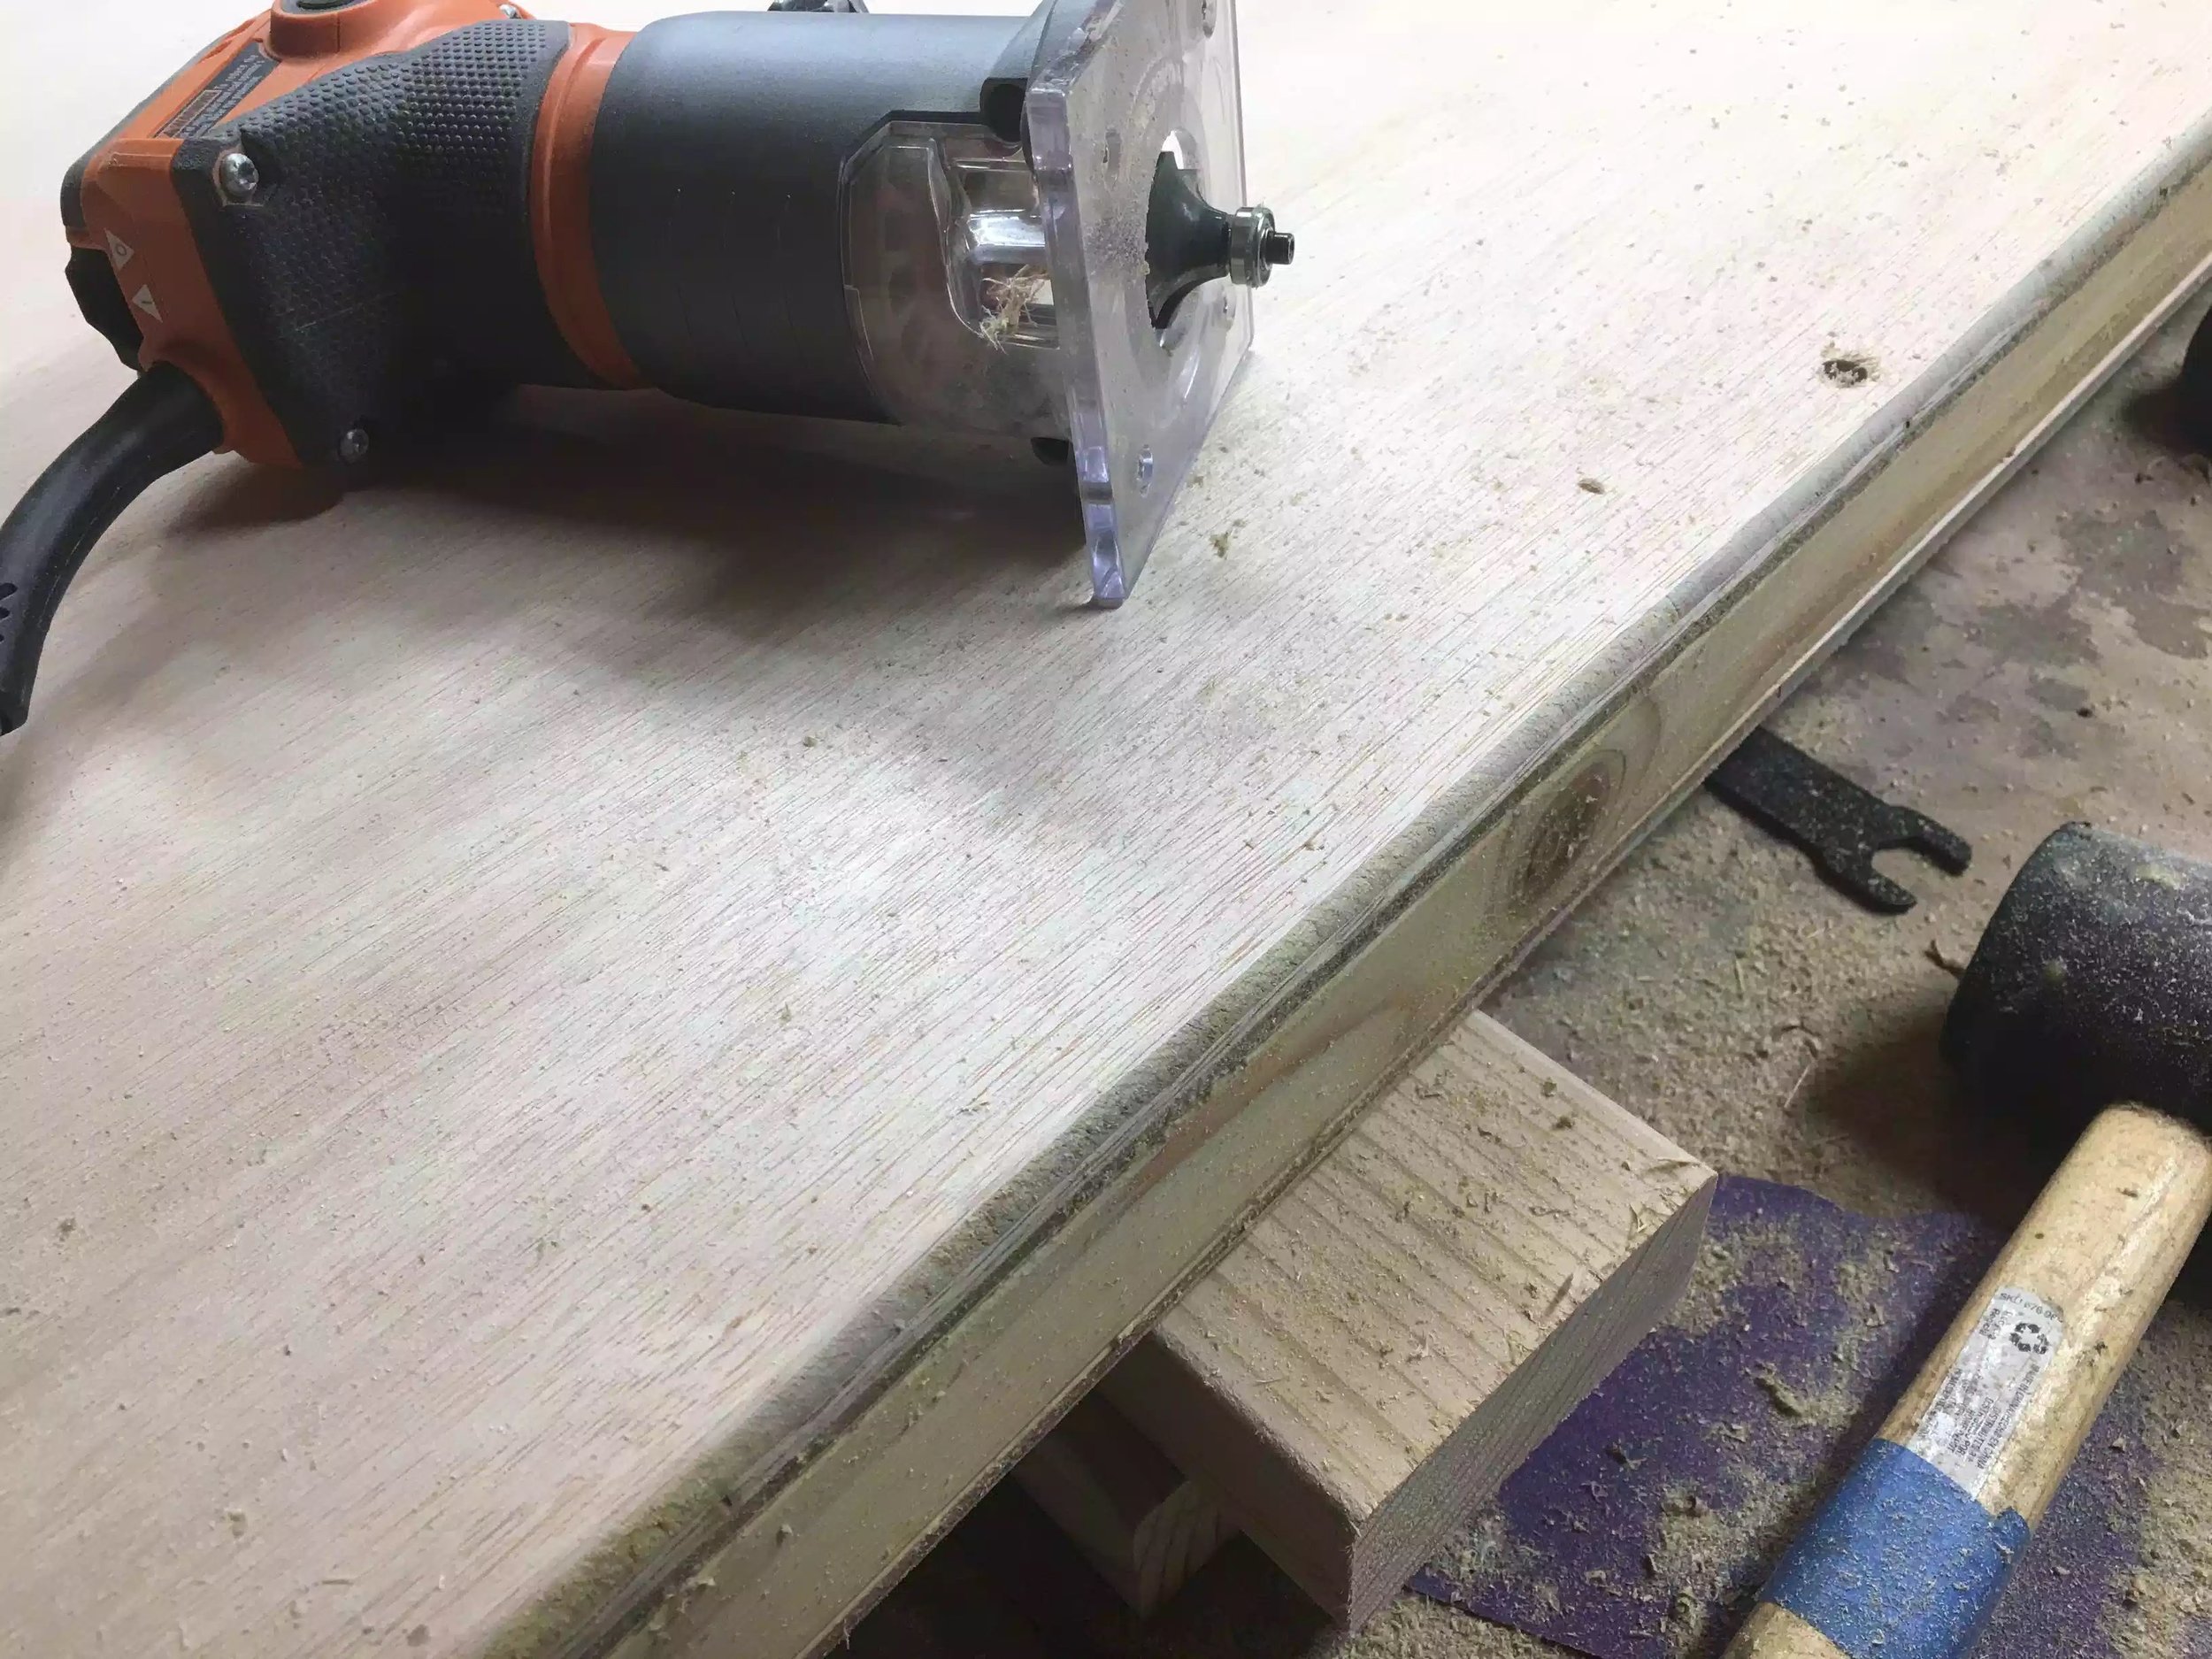
  • I used my hand held trim router to round-over the sides of the divider so as that they are nice to the touch.

I didn’t spare any glue on this glue-up but this is a look at how the divider was constructed, I did place a few countersunk screws into the lumber to hole it in place so as that I could flip the divider to the other side and attach the other panel.

I didn’t spare any glue on this glue-up but this is a look at how the divider was constructed, I did place a few countersunk screws into the lumber to hole it in place so as that I could flip the divider to the other side and attach the other panel.

Here is a close-up of the round-over, Ill come back later and sand everything down

Here is a close-up of the round-over, Ill come back later and sand everything down

Both panel;s have been attached and I about to use my router to round-over the sides of the divider.

Both panel;s have been attached and I about to use my router to round-over the sides of the divider.

Here is the divider sitting on the base, it has not been secured yet that is why I am using some shop made right angle holders.

Here is the divider sitting on the base, it has not been secured yet that is why I am using some shop made right angle holders.

image-6969.jpeg

POSITIONING THE DIVIDER ON THE BASE

In order to make the sides I needed to position the divider on the base and make sure that everything lined up when i went to attach the sides.

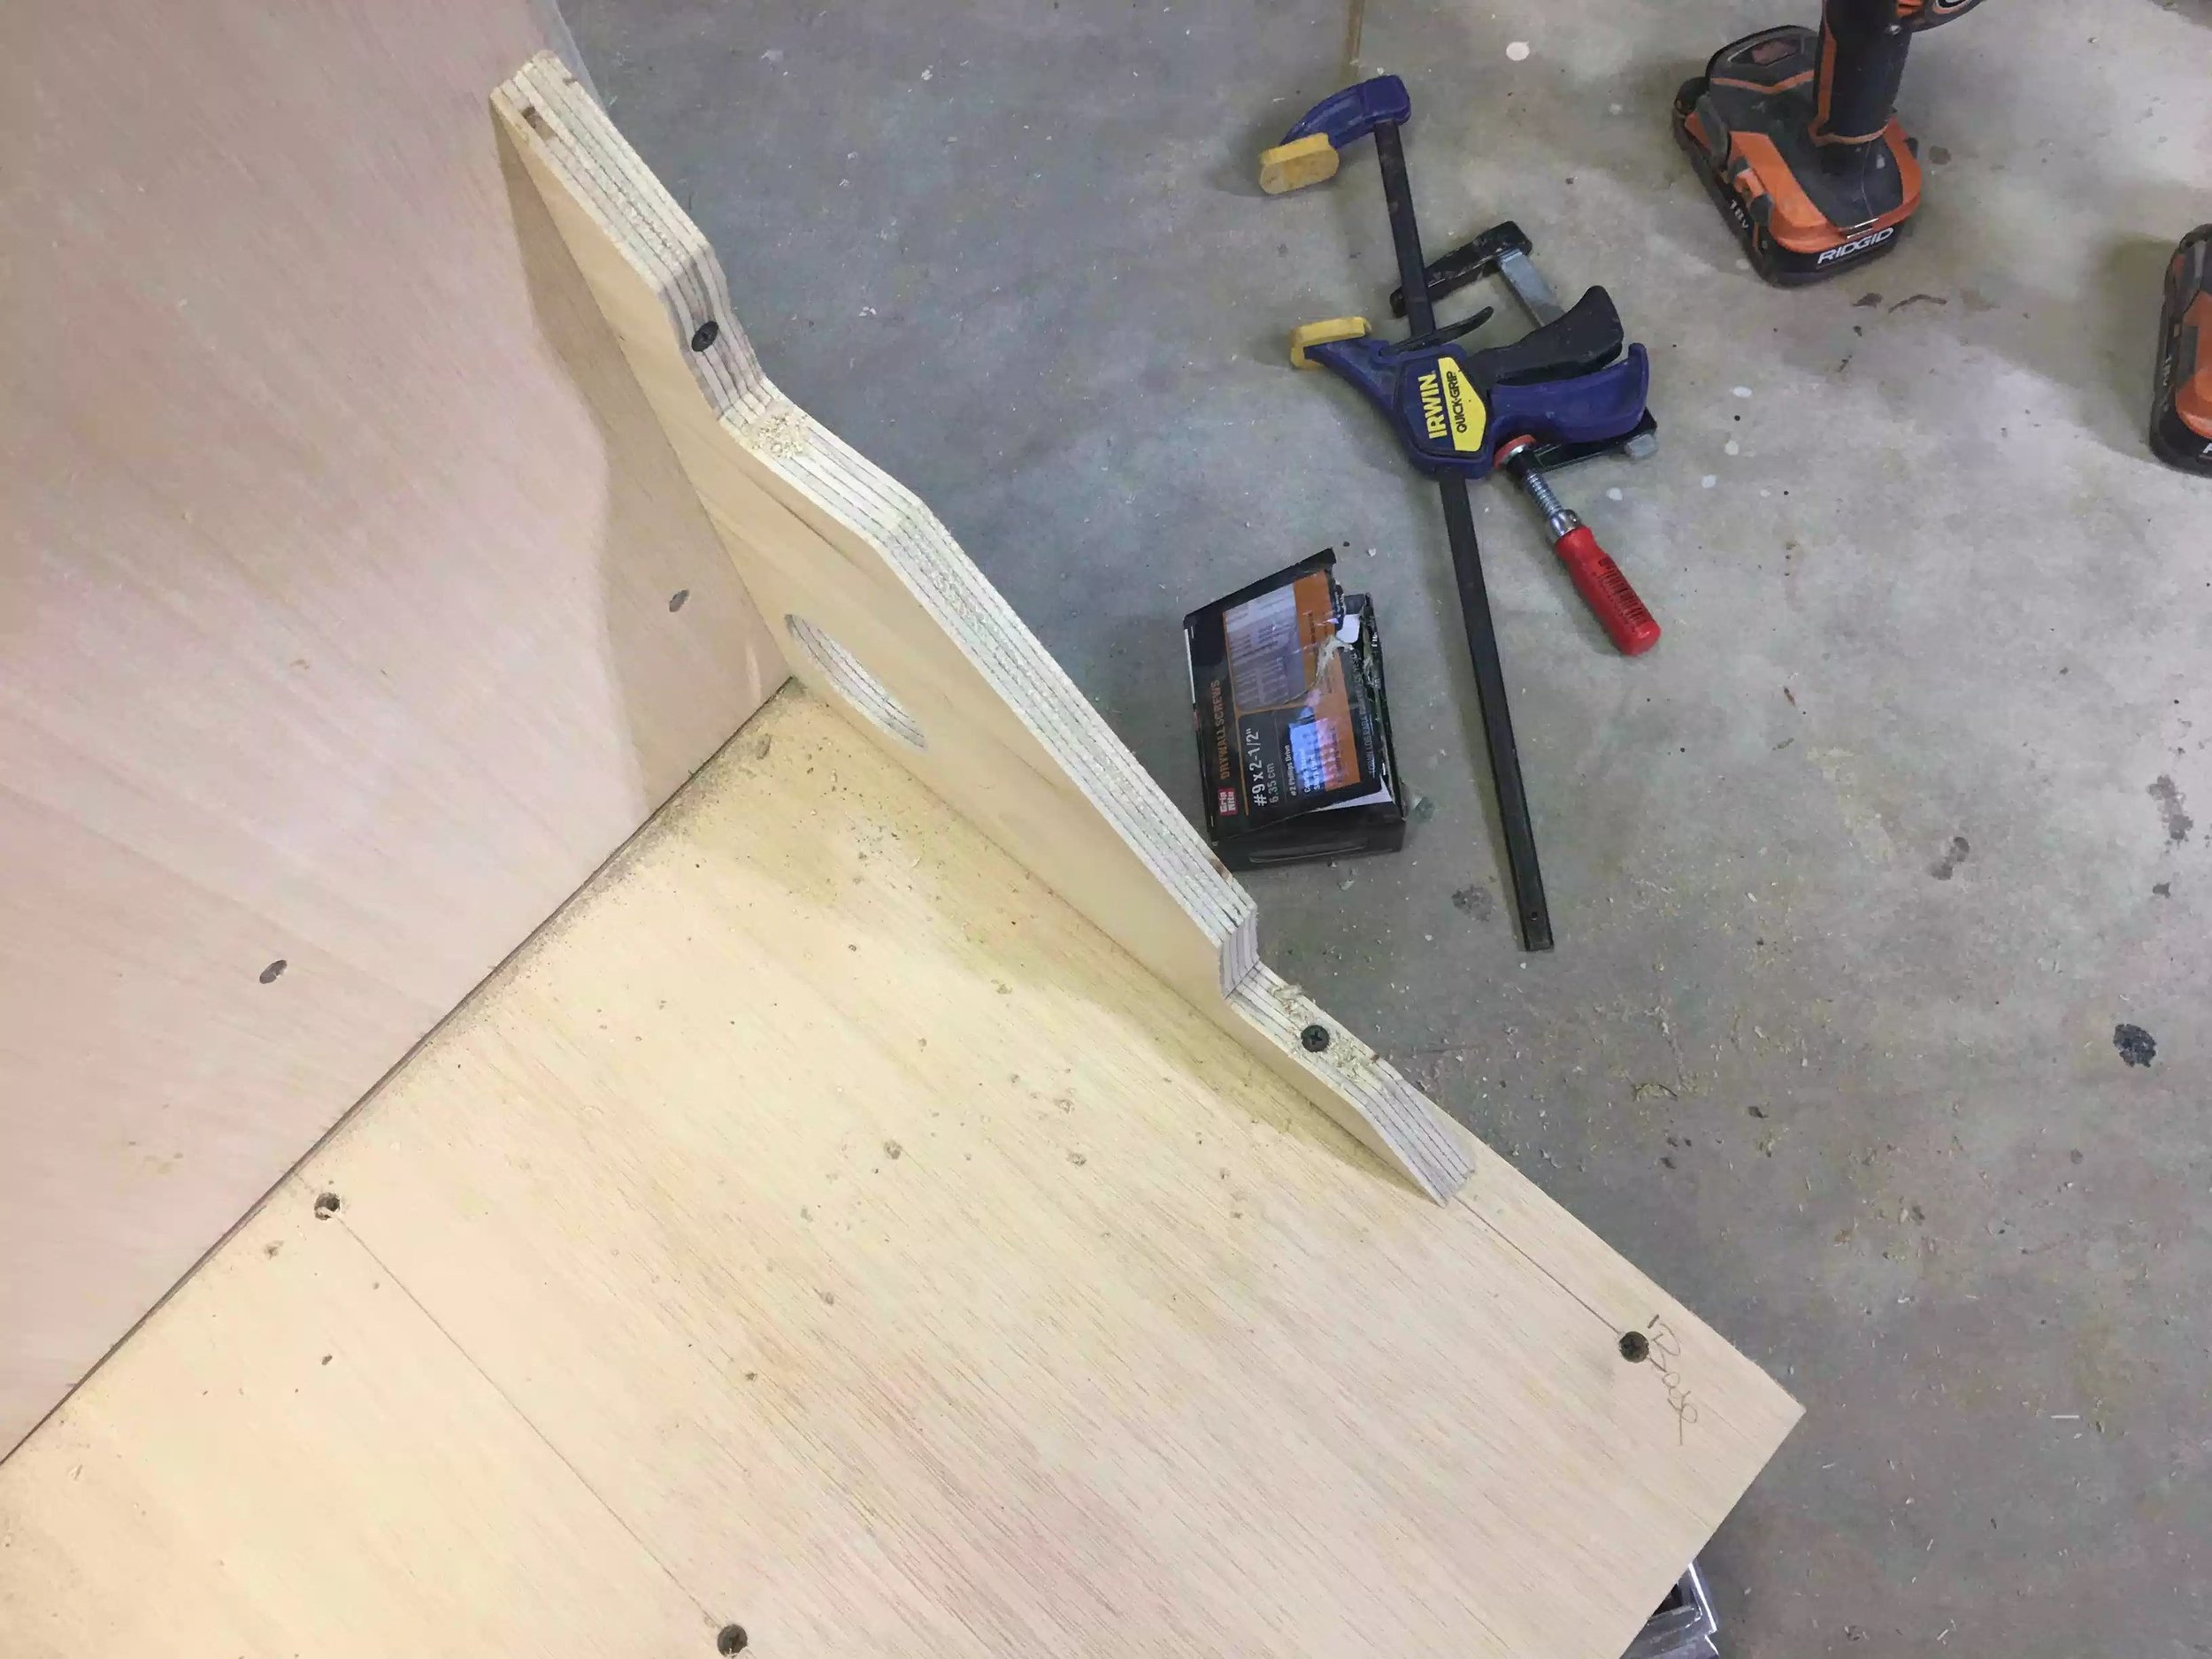
In the above picture you can see that I used a unique clamping method these little helpers are a must have on a big projects like these as they act as another set of hands. I basically clamped these supports so as that I could position the divider in the middle of the base, but the clamps posse a major problem, since I need to attach the sides by screwing them from the outside of the plywood panel the clamps were in the way, its funny how you can never imagine all the problems of a build until your building, so my solution was to remove the clamps and basically screw the right angle supports into the base and the divider.

Here you can see the screws holding the right angled support in place allowing me free access to the sides without any hindrance.

Here you can see the screws holding the right angled support in place allowing me free access to the sides without any hindrance.

Here is another images, whoops I cracked one of the supports

Here is another images, whoops I cracked one of the supports

Everything plum and square

Everything plum and square

Now that I can stabilize the divider it was time to move onto making the sides.

THE SIDES

The sides are probably the most important part of this construction because it holds everything together, since I did not attach the divider to the base I need the sides to hold all the weight of the divider.

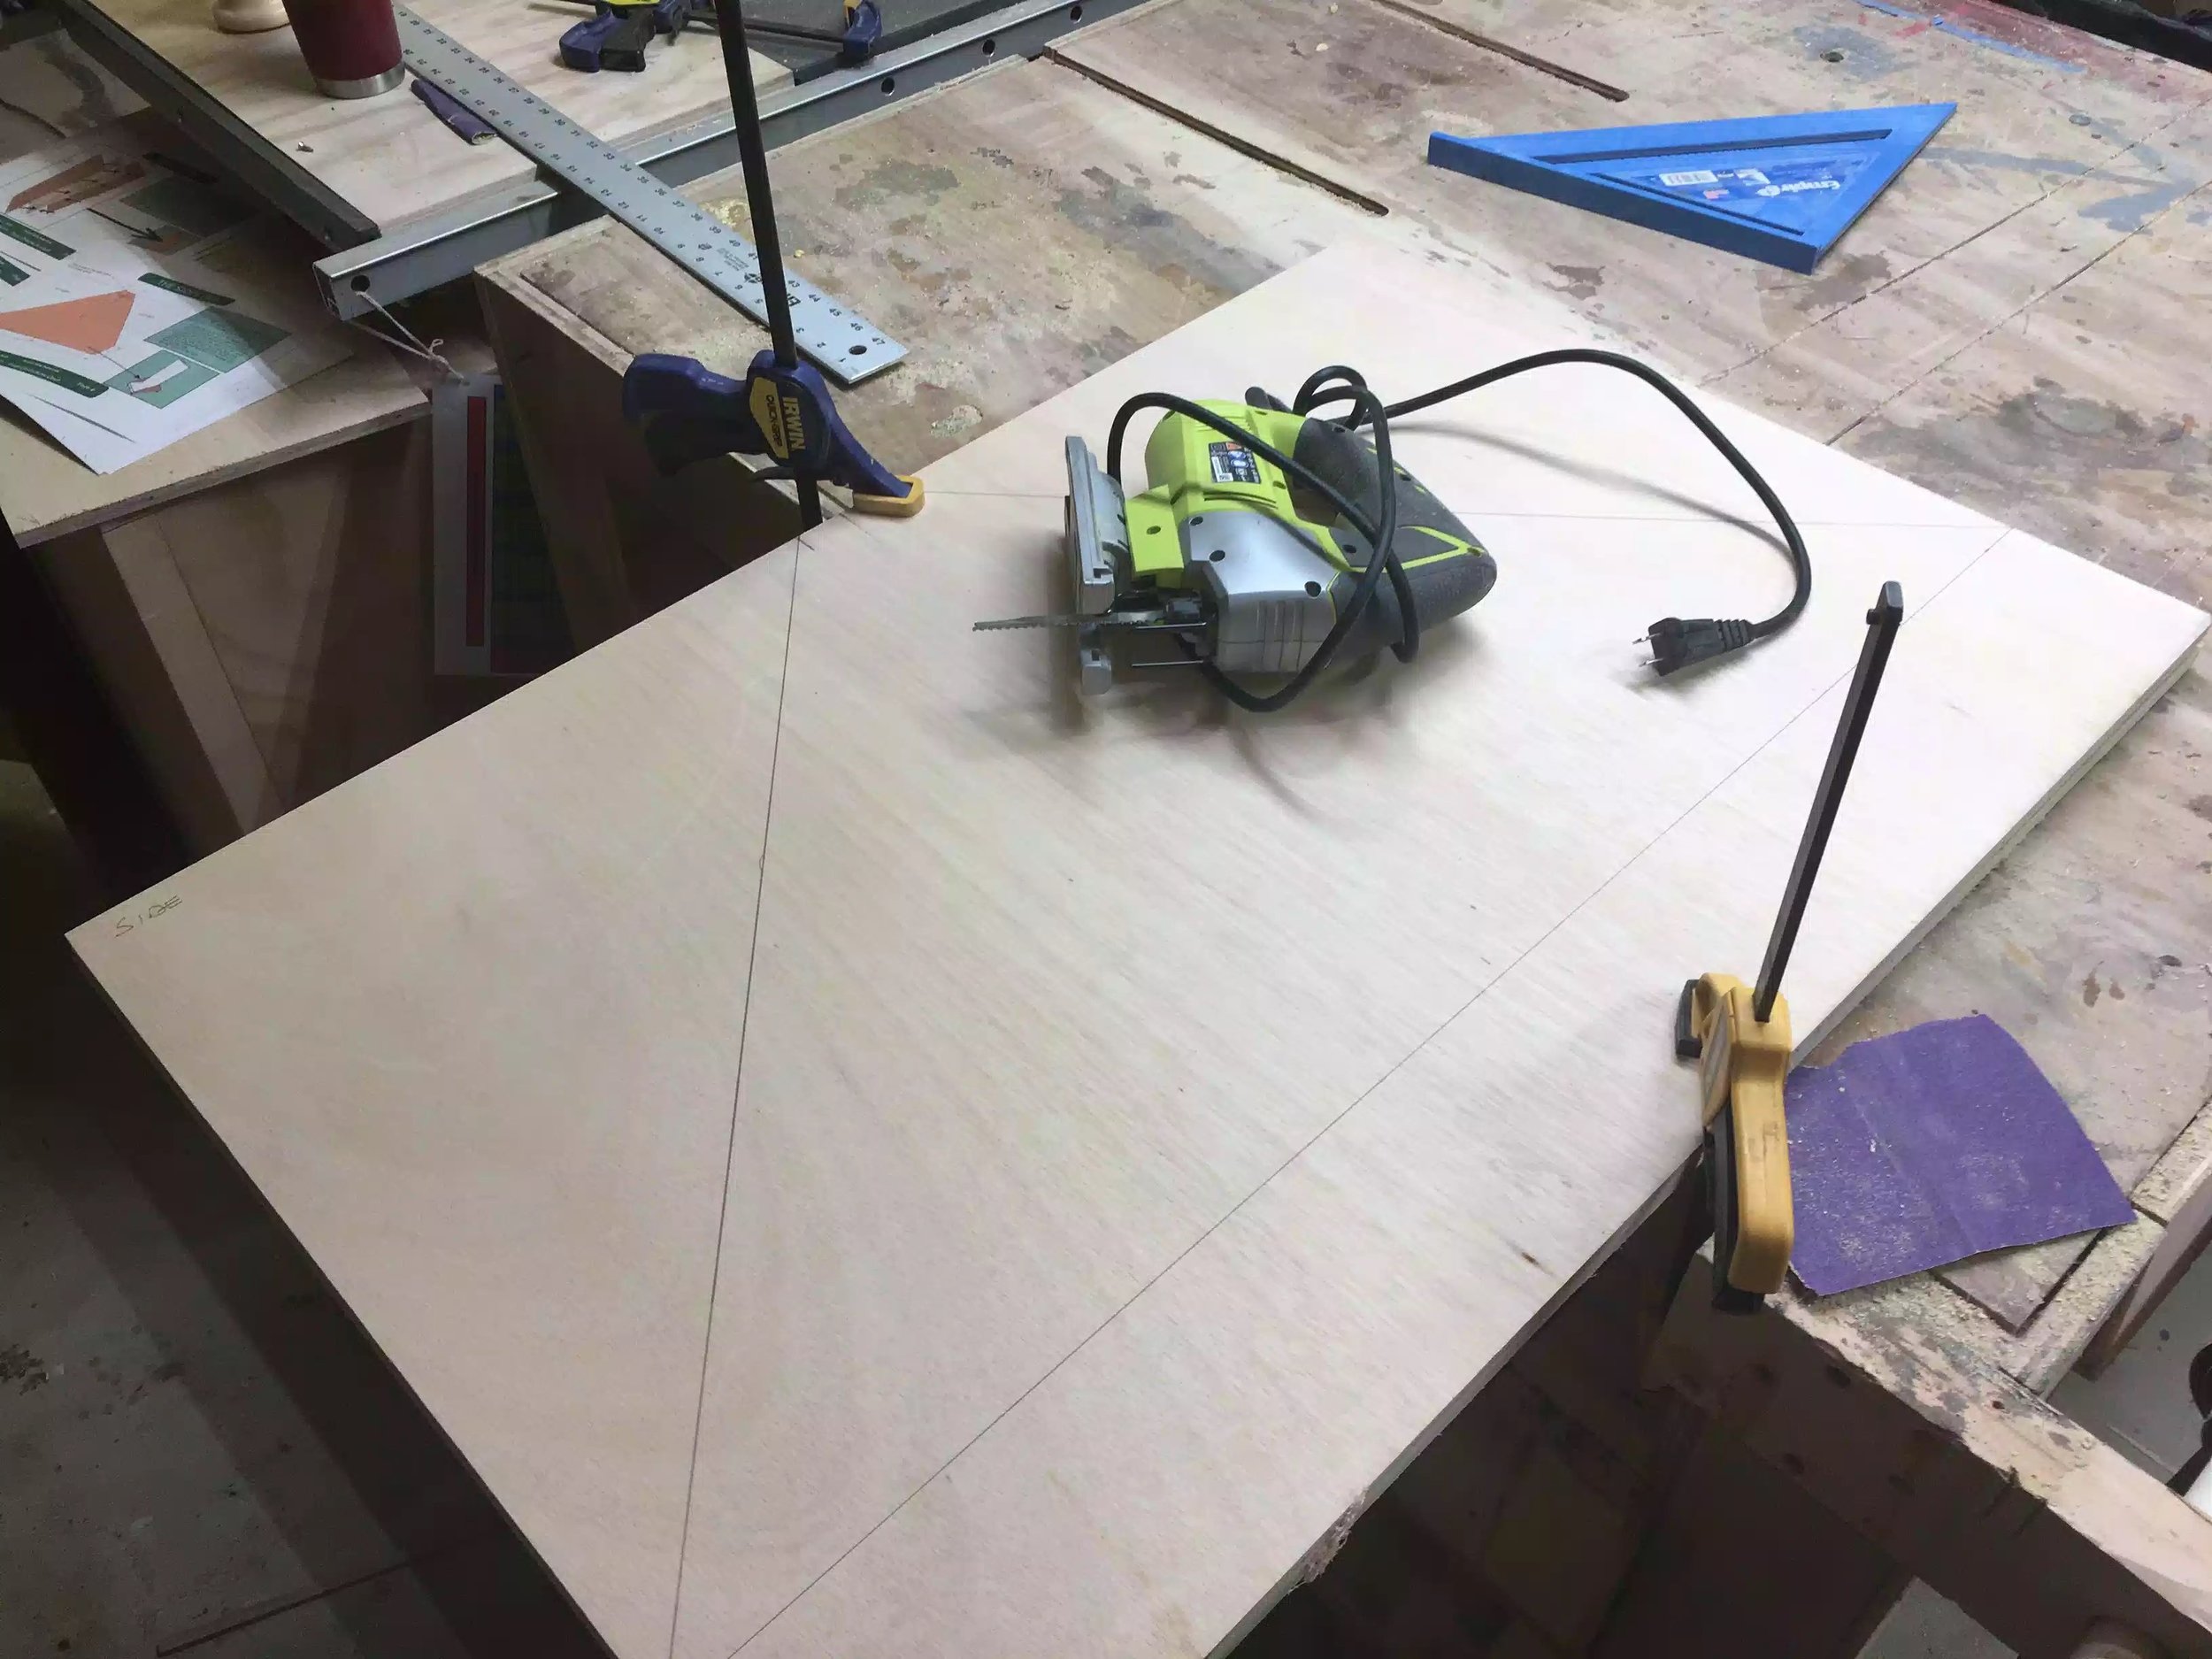
The sides are basically 2 big triangles that I cut out with my jigsaw and then as usual glue and screwed them into place from the outside of the side panels.

A little lay-out work is needed

A little lay-out work is needed

I clamped both sides together and gang cut them with my jigsaw that way both sides would be identical.

I clamped both sides together and gang cut them with my jigsaw that way both sides would be identical.

After cutting the giant triangles I placed countersunk holes in the areas that I needed to use screws to attach them to the divider and base, I also used a riser block under the side as I was securing them .

I positioned riser block on the ground to sit the side onto and then applied the glue and screwed this side in place I repeated this for the other side. I will be filling all these holes in the future.

I positioned riser block on the ground to sit the side onto and then applied the glue and screwed this side in place I repeated this for the other side. I will be filling all these holes in the future.

CART ASSEMBLED

With the sides in place the construction phase of the build is complete, I still need to do a bunch more work finishing the cart but you can see where I leave the project today.

image-6734.jpeg
image-6801.jpeg

NEXT PHASE 5: FINISHING

Thanks for reading catch you all soon.

Dust Collector Cart Project : Research & Design

So now that I purchased the Dust Collector from Rockler, the next phase of this multi-faceted project was to store it . I needed the following features of installing a dust collection system in my shop

  • It needed to mobile

  • It needed to drastically improve my dust collecting capabilities in the shop

  • I needed to remedy my constant need to clean the shop especially when it came to the dust.

  • It needed to reach all my major tools that I have now and ones that I plan on purchasing in the future.

As I usually do for any project I take the following steps before I decide on what to make and how to make it.

  • Research

  • Make Plans to assist with the build

  • Buy Project Supplies

  • The Build

RESEARCH

While scouring the internet I came across this concept from a YouTube channel simply named Evan&Katelyn where they build this awesome cart out of construction lumber and plywood and it solves most of my problems.

Its basically a wall mounted on a mobile base where they hang all there dust collection equipment, everything from the same system that I will be using and a tone more such a a hanging shop vac, all accessories for the Dust Right System all neatly organised on a double sides wall.

Below you can see the YouTube video

DESIGN

As I usually do I went to Sketchup my 3D design software and drew up a set of plans and cut-lists and so forth, I will be making these plans available in the near future.

Although the video was a tremendous help they never told me what the dimensions were and anyway I needed to modify this cart so it would function in my work-space.

My design can be broken into 3 main assemblies

  • The Base (needs to be mobile so I added 3”castors)

  • The Divider

  • The Sides

Below you can see the 3D representation of the cart

Here you can see the 3D model of the cart, its 72” tall x 24” wide x 36’ deep

Here you can see the 3D model of the cart, its 72” tall x 24” wide x 36’ deep

PROJECT SUPPLIES

I needed to go to my local big box store and get the supplies that I needed and here is what you need to make this cart

  • (QTY 2) 4’x8’x3/4” plywood

  • (QTY 6) 2” X 4” X 8’ construction grade lumber

  • (QTY 4) 3” Castors

  • Glue

  • 1-5/8” screws (1 Box)

NEXT : PHASE 4 THE BUILD………………..

Dust Collector Cart Project : Shopping

SHOPPING

Phase 2 was all about shopping I had saved for a little while and now it was time to buy the dust collector and a few accessories so off I went to Rockler Woodworking located in Cambridge, Massachusetts.

Here is a list of what I purchased:


Rockler is a great store that you can go for all your woodworking needs, I am lucky enough to have a store near me but they do have a great website that you can check out

Rockler is a great store that you can go for all your woodworking needs, I am lucky enough to have a store near me but they do have a great website that you can check out

Here is a quick picture of everything that I got, its all mentioned above.

Here is a quick picture of everything that I got, its all mentioned above.

PHASE THREE NEXT

Dust Collector Cart Project : Making Room

MAKING SPACE

As I mentioned in my previous post I am currently under going a shop improvement and Upgrade phase and to kick this off I just purchased a new Dust Collector Unit. I went with Rockler’s Dust Right Unit.

When I originally planned I had an idea of where I was going to put this unit so as that I would be central to all my tools especially the tools that generate the bulk of my saw dust for example the table-saw and chop saw. I even went so fat to alter my current layout by getting rid of a unit I was using and place it on the wall which is one of the reasons I purchased this system, but it wasn’t to be because it really was not the best location and was way to far away from my chop saw, so I had to rethink its home.

Below you can see the alterations that I made in the before and after pictures

BEFORE PICTURES

The bench that I had made and attached to the shelving unit was designed way too high so 9 could store my router table under, and the bench height was just too high to do any type of work on.

The bench that I had made and attached to the shelving unit was designed way too high so 9 could store my router table under, and the bench height was just too high to do any type of work on.

image-7574.jpg

AFTER PICTURES

Here is the space that I created after removing the bench, it would have been ideal with the outlet right there and my table-saw on the side.

Here is the space that I created after removing the bench, it would have been ideal with the outlet right there and my table-saw on the side.

I am not worried though as I will be using the space in the future, I plan on building a traditional style workbench in the future and this maybe its new home.

I am not worried though as I will be using the space in the future, I plan on building a traditional style workbench in the future and this maybe its new home.

Sometimes what you have planned for your work-space works out great and other times it doesn’t, to be honest I was eventually going to amend this bench in the future so I look at it as a win win, its better to correct a mistake than to force a bad idea to make it work.

I think over the past 4 years I have changed my shop layout at least a half dozen times and the shop looks completely different than when I started. My goal is to always make it work easier and make my workflow smoother.