


So after yesterday’s glue up fiasco I decided today that I would make a clamping station, something that I have been meaning to do for a while now and I will describe the project below.
Research
Materials
Design
The Build
RESEARCH
I found 2 articles online that I used to design this jig, one I found on one of woodworking pages that I am a member of and the other was a YouTube video, links to both are below.
I really liked this concept because of a couple of reasons.
It was quick to make
I could use scrap plywood, so it didn’t cost anything
I could collapse the jig and store until I needed it
I could customize it, I could make any length I wanted depending on the usual size of glue-ups I do, I could also make different sized stretchers depending on what size clamps I would be using.

The other resource that I found was a YouTube video created on a channel called the Woodworkweb and you can see it below.
This guy took a different approach to how the pipe clamps would be secured into the jig, instead of using the half-circle approach , he thought that there was still too much movement when the pipe clamp was sitting on the jig so he created a “V” so as that the pipe would be more secure inside the jig.
He demonstrates this in the video below.
MATERIALS I USED
I decided to use scrap plywood that I had on hand and I couldn’t think of a better project because I could clear some of my stock.
I had a quarter sheet of plywood, so the dimensions I used was 4” high x 40” long piece for the front and back of the jig. I also made 2 different sized stretchers or sides of the jig so as that I could use different sized pipe clamps depending what I was actually gluing up, so I made the stretchers 24” & 36” wide.
DESIGN
I turned to my trusty Sketchup to design the 3D Version of the jig. You can see some pictures of the plans that I made below.

Here is the finished design.
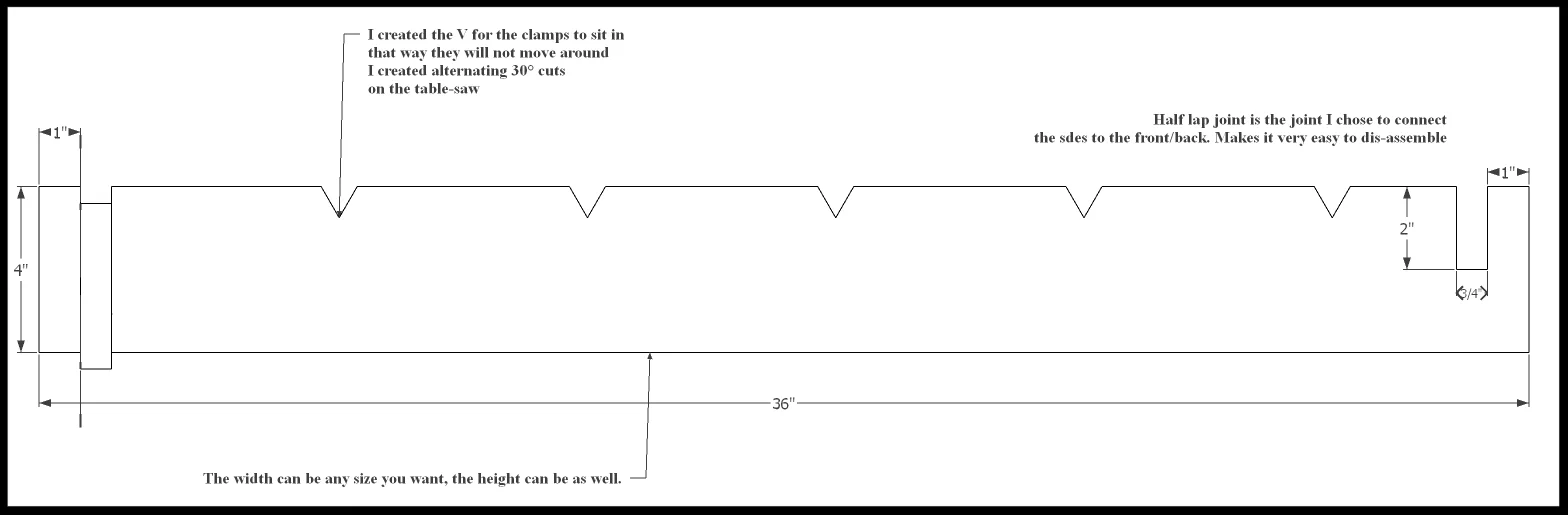
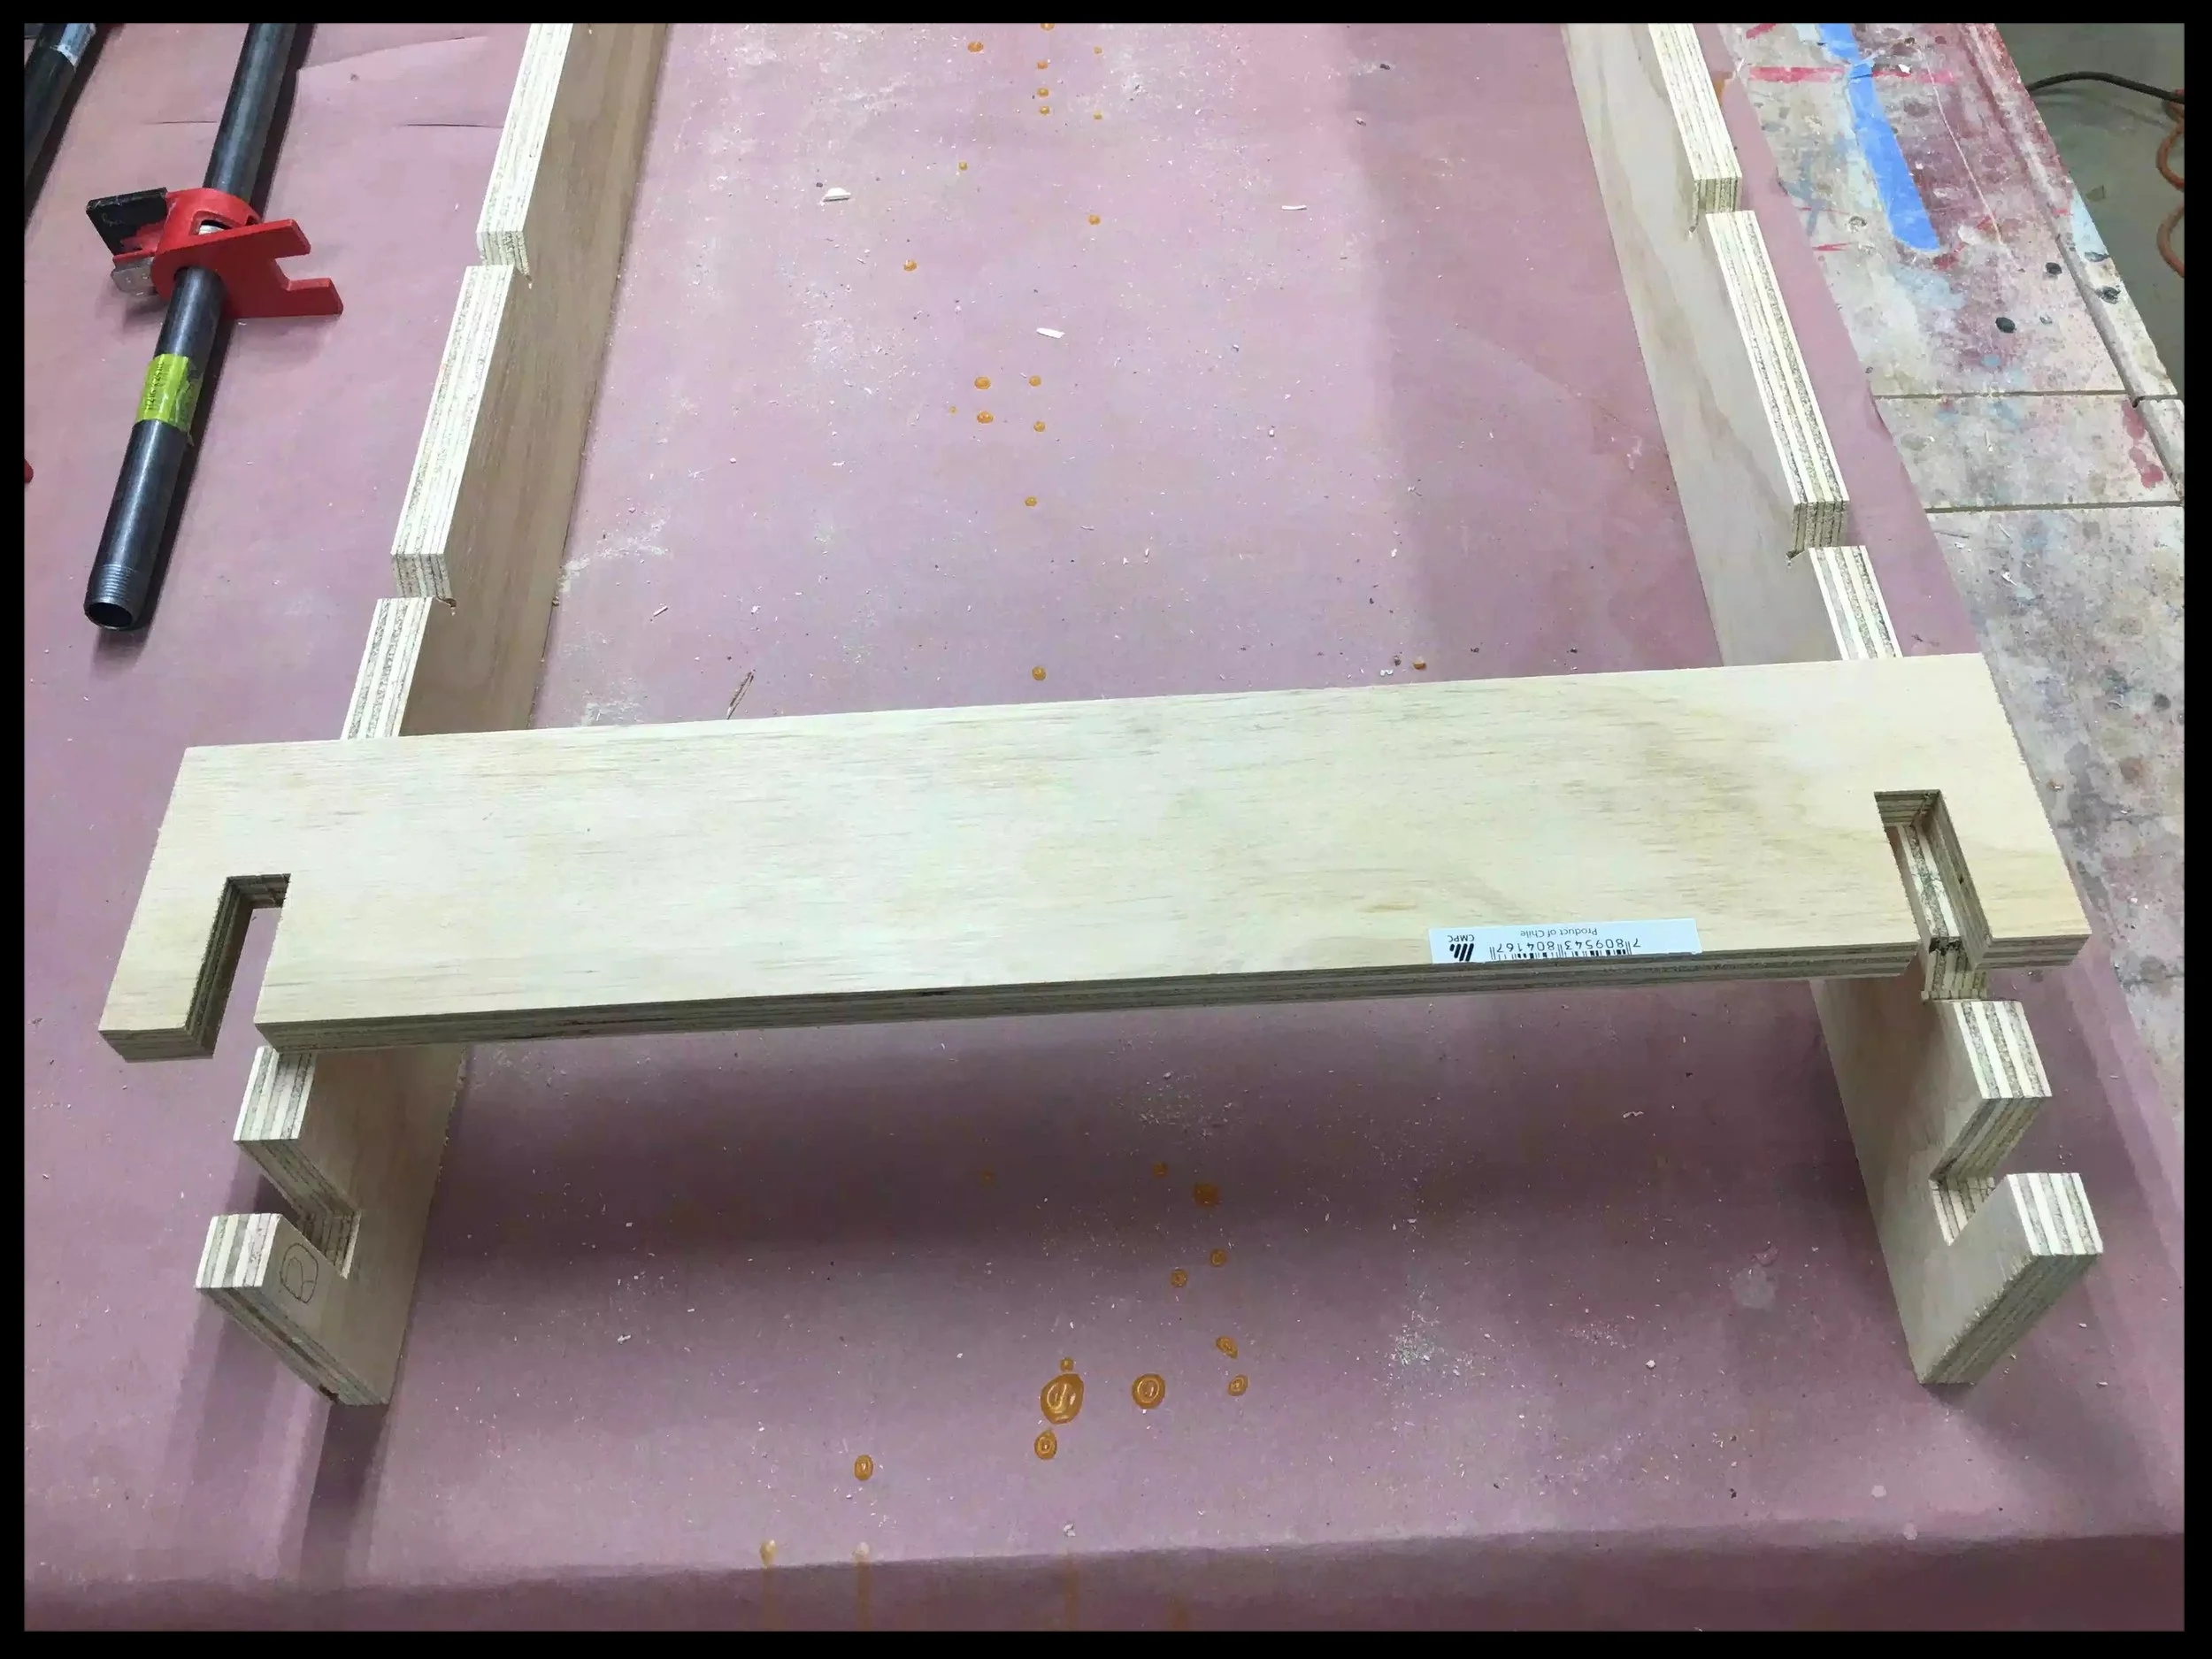
Here is the front & back clamp rail, the front & back are mirror images of each other, you can see the V cutouts that I made and the guy is absolutely correct the bar clamps do sit more securely in the jig.

Here is the side , again each side is the exact same as each other, and the only thing you need to do to them is create the half-lap joint that creates the joint to secure them to each other, it is also what enables the jig to disassembled and stored away. One thing to note is the sides has the bottom part of the joint cut and the front/back has half-lap cut into the top part.
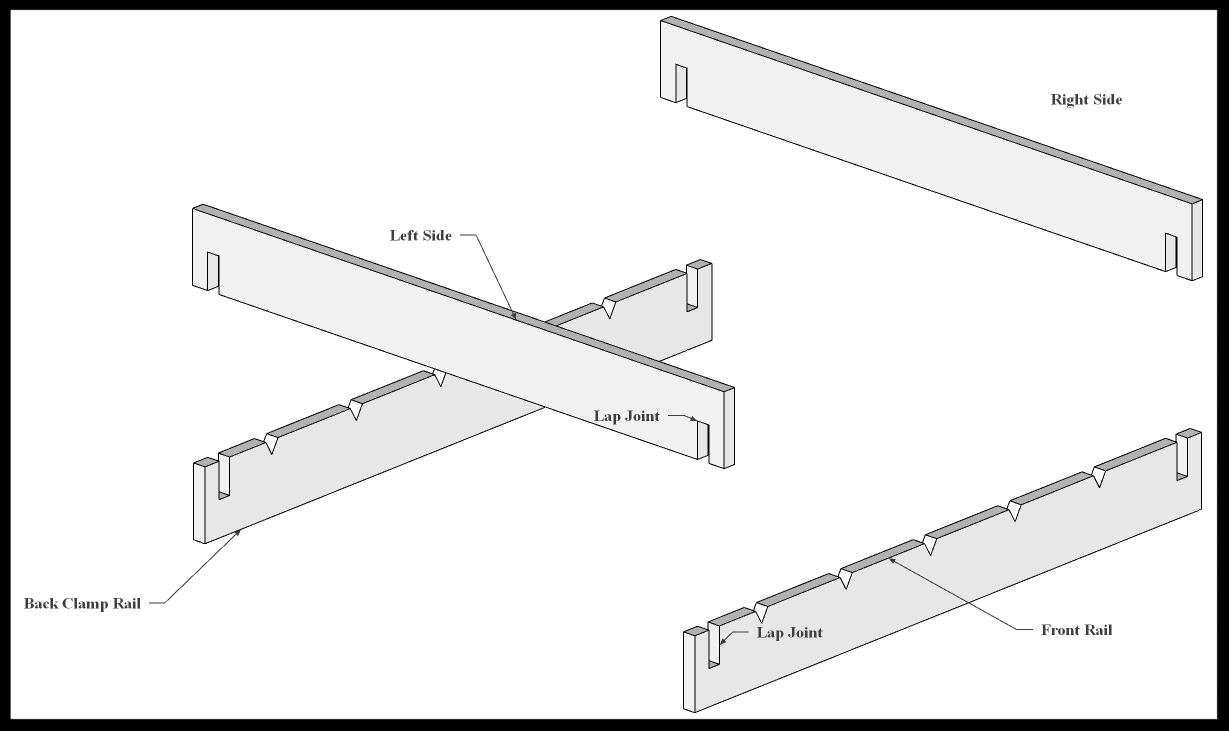
Here is an exploded view of the jig, you can kind of see how the parts fit into each other.
I included a link to the free plans at the bottom of the post.
THE BUILD
STEP 1 : I cut the plywood to size which was the following
2 Pieces at 4” wide x 36” (front & back pieces)
2 Pieces at 4” wide x 36” (sides)
2 Pieces at 4” x 26” ( these will be used with 24’ pipe clamps)
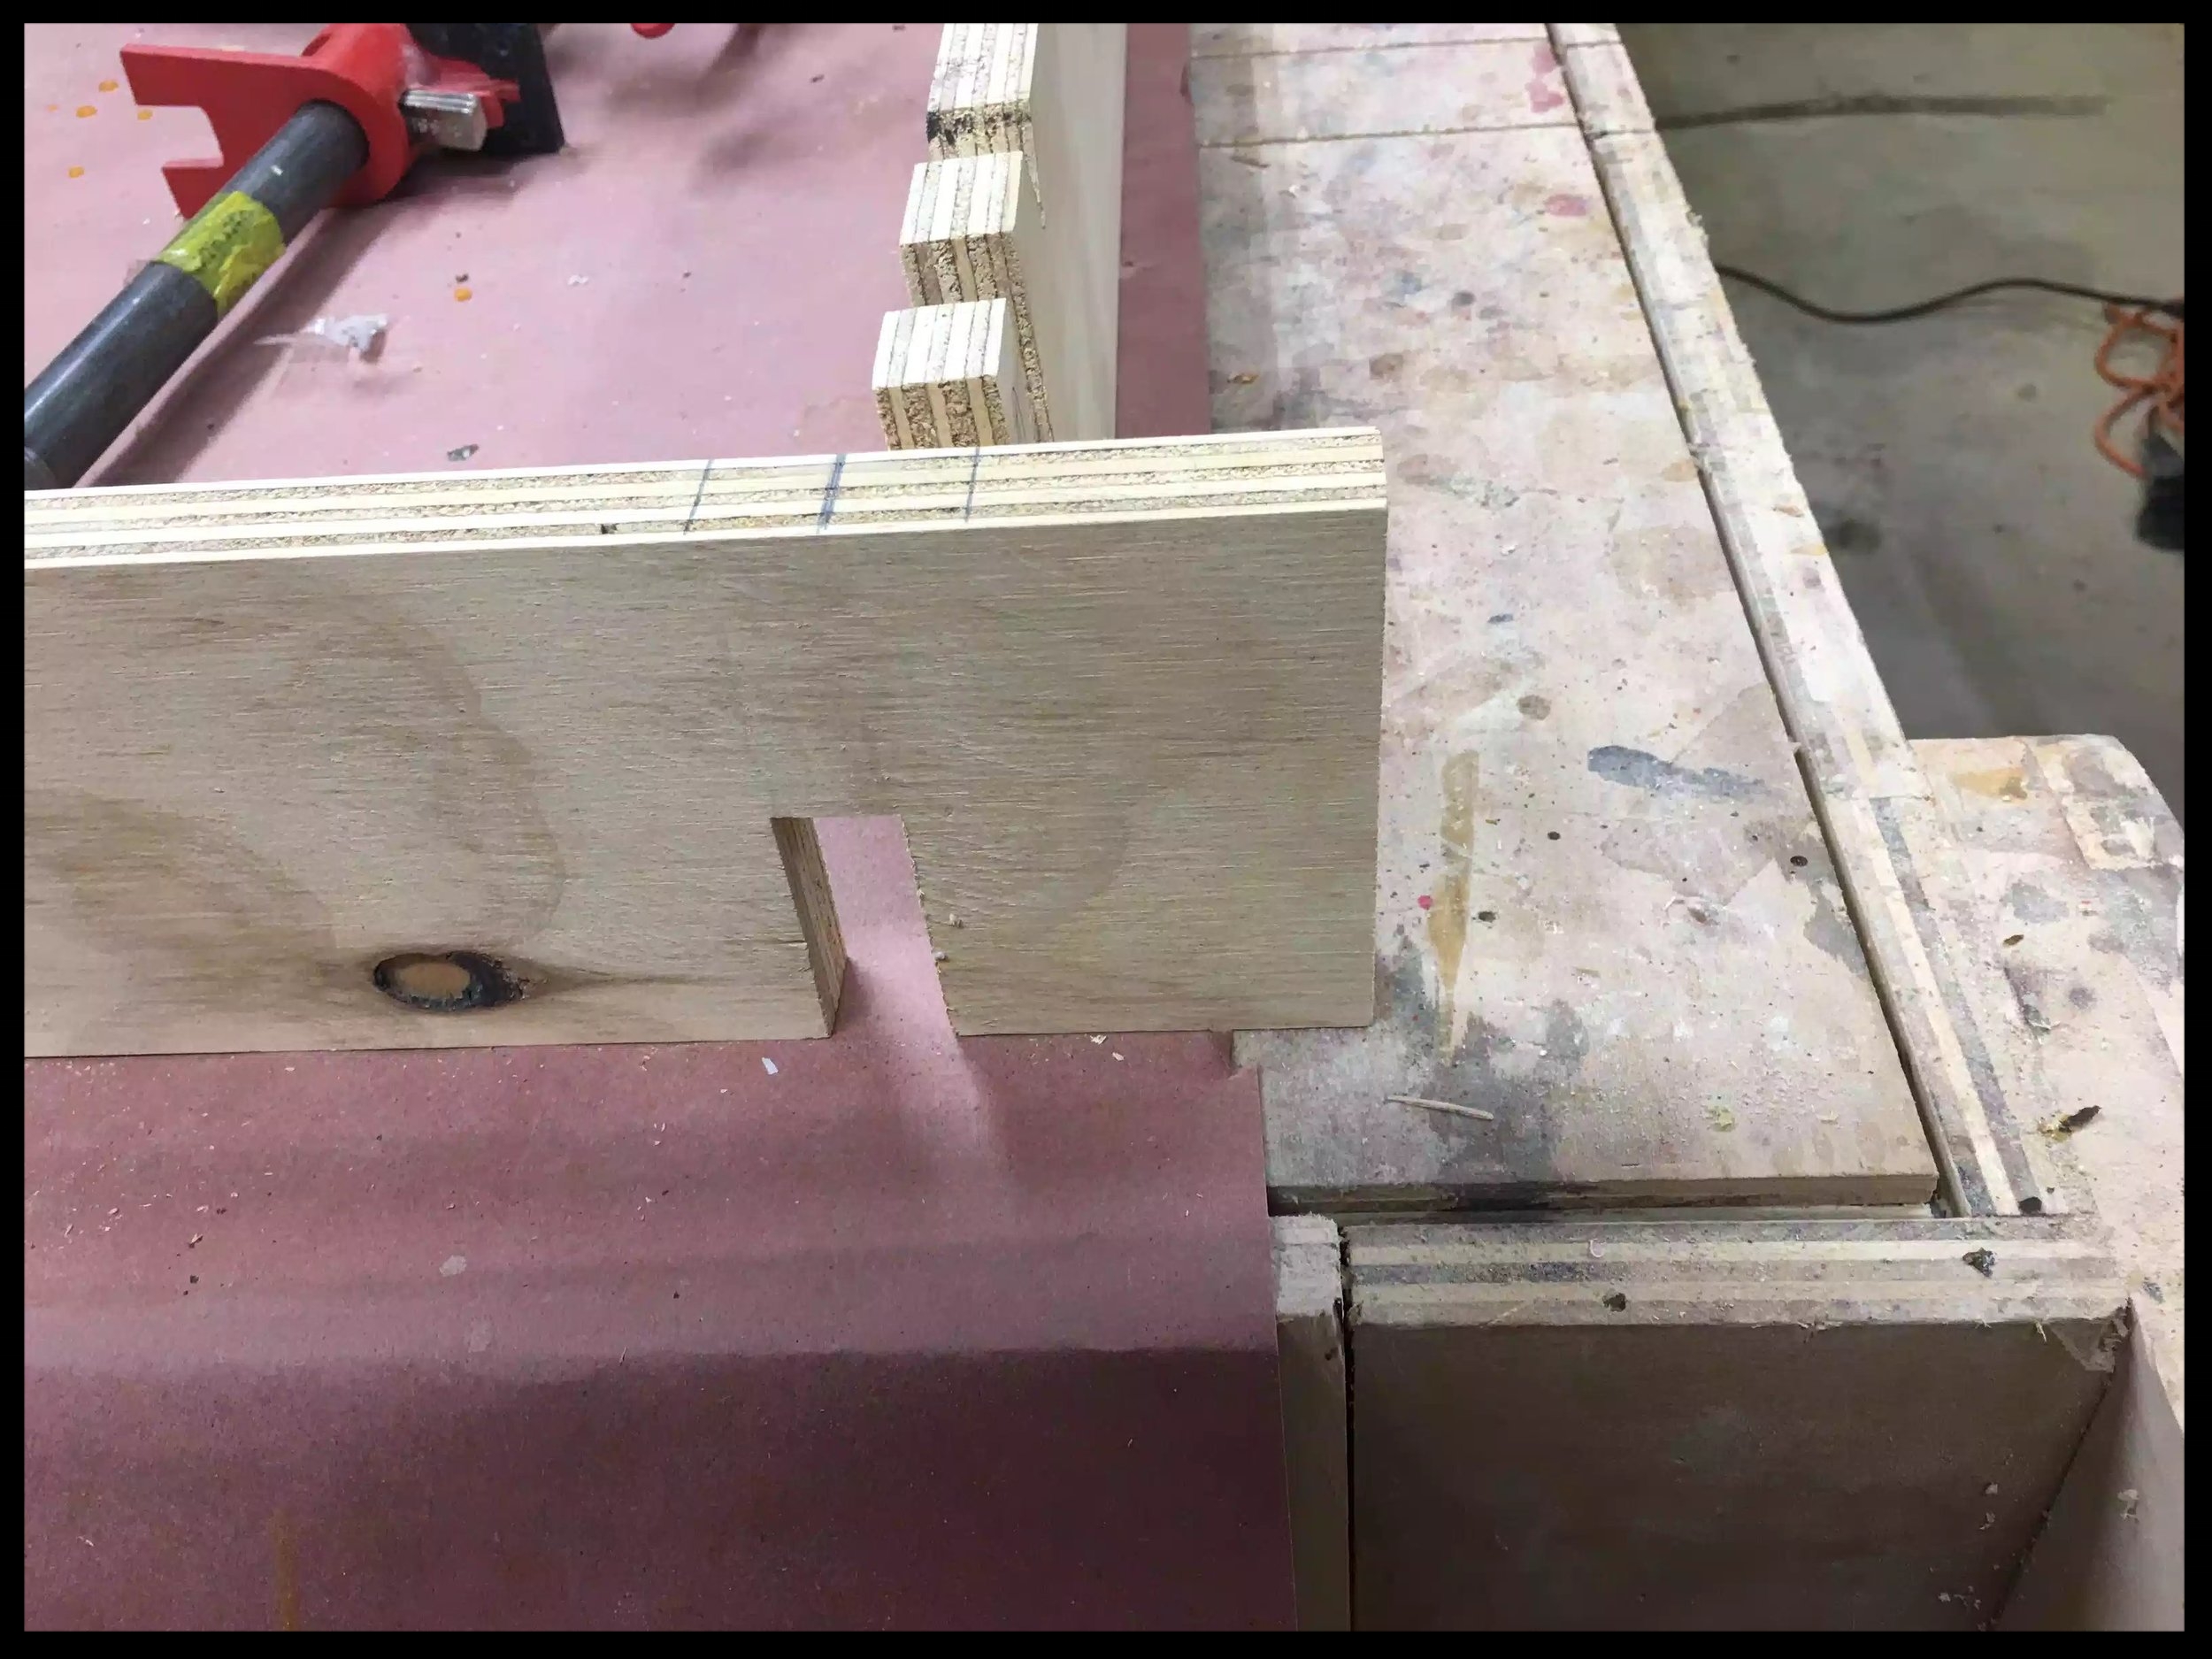
STEP 2 : I marked out where the half-lap joinery needed to be placed so I measured 1” from each side of the front/back parts then using a piece of scrap of plywood marked the position of the lap joint. To avoid making any mistakes mark out the waste for the lap joint ,on the front & back the lap should be removed from the top. The side pieces should have the material removed from the bottom. I could of used my dado stack in the table saw to remove the half-lap waste but 4 only 4 cuts I decided to just leave the regular blade in the saw and clean up with a chisel.
STEP 3 : I needed to add the “V” notches to hold the bar clamps in place.
To do this I tilted the saw blade to 30° and lowered the blade to about 3/4” high and made a pencil mark on my miter fence to determine where the starting point of the blade entering the work-piece and then made another adjacent mark about 7/8” away from the other, this marked bot sides of the cut, thus creating the V. I spaced out each V about 5-1/2” away from each other and I got this measurement by laying out 2 bar clamps next to each other to determine what space I needed so as that hat the clamp handles could rotate freely to tighten the clamp without bumping into each other.
Basically that is all you need to do, I posted pictures below to show some of the features of it and I actually got to use it today for another Project that I am working on “The Craft Beer Flight Project”
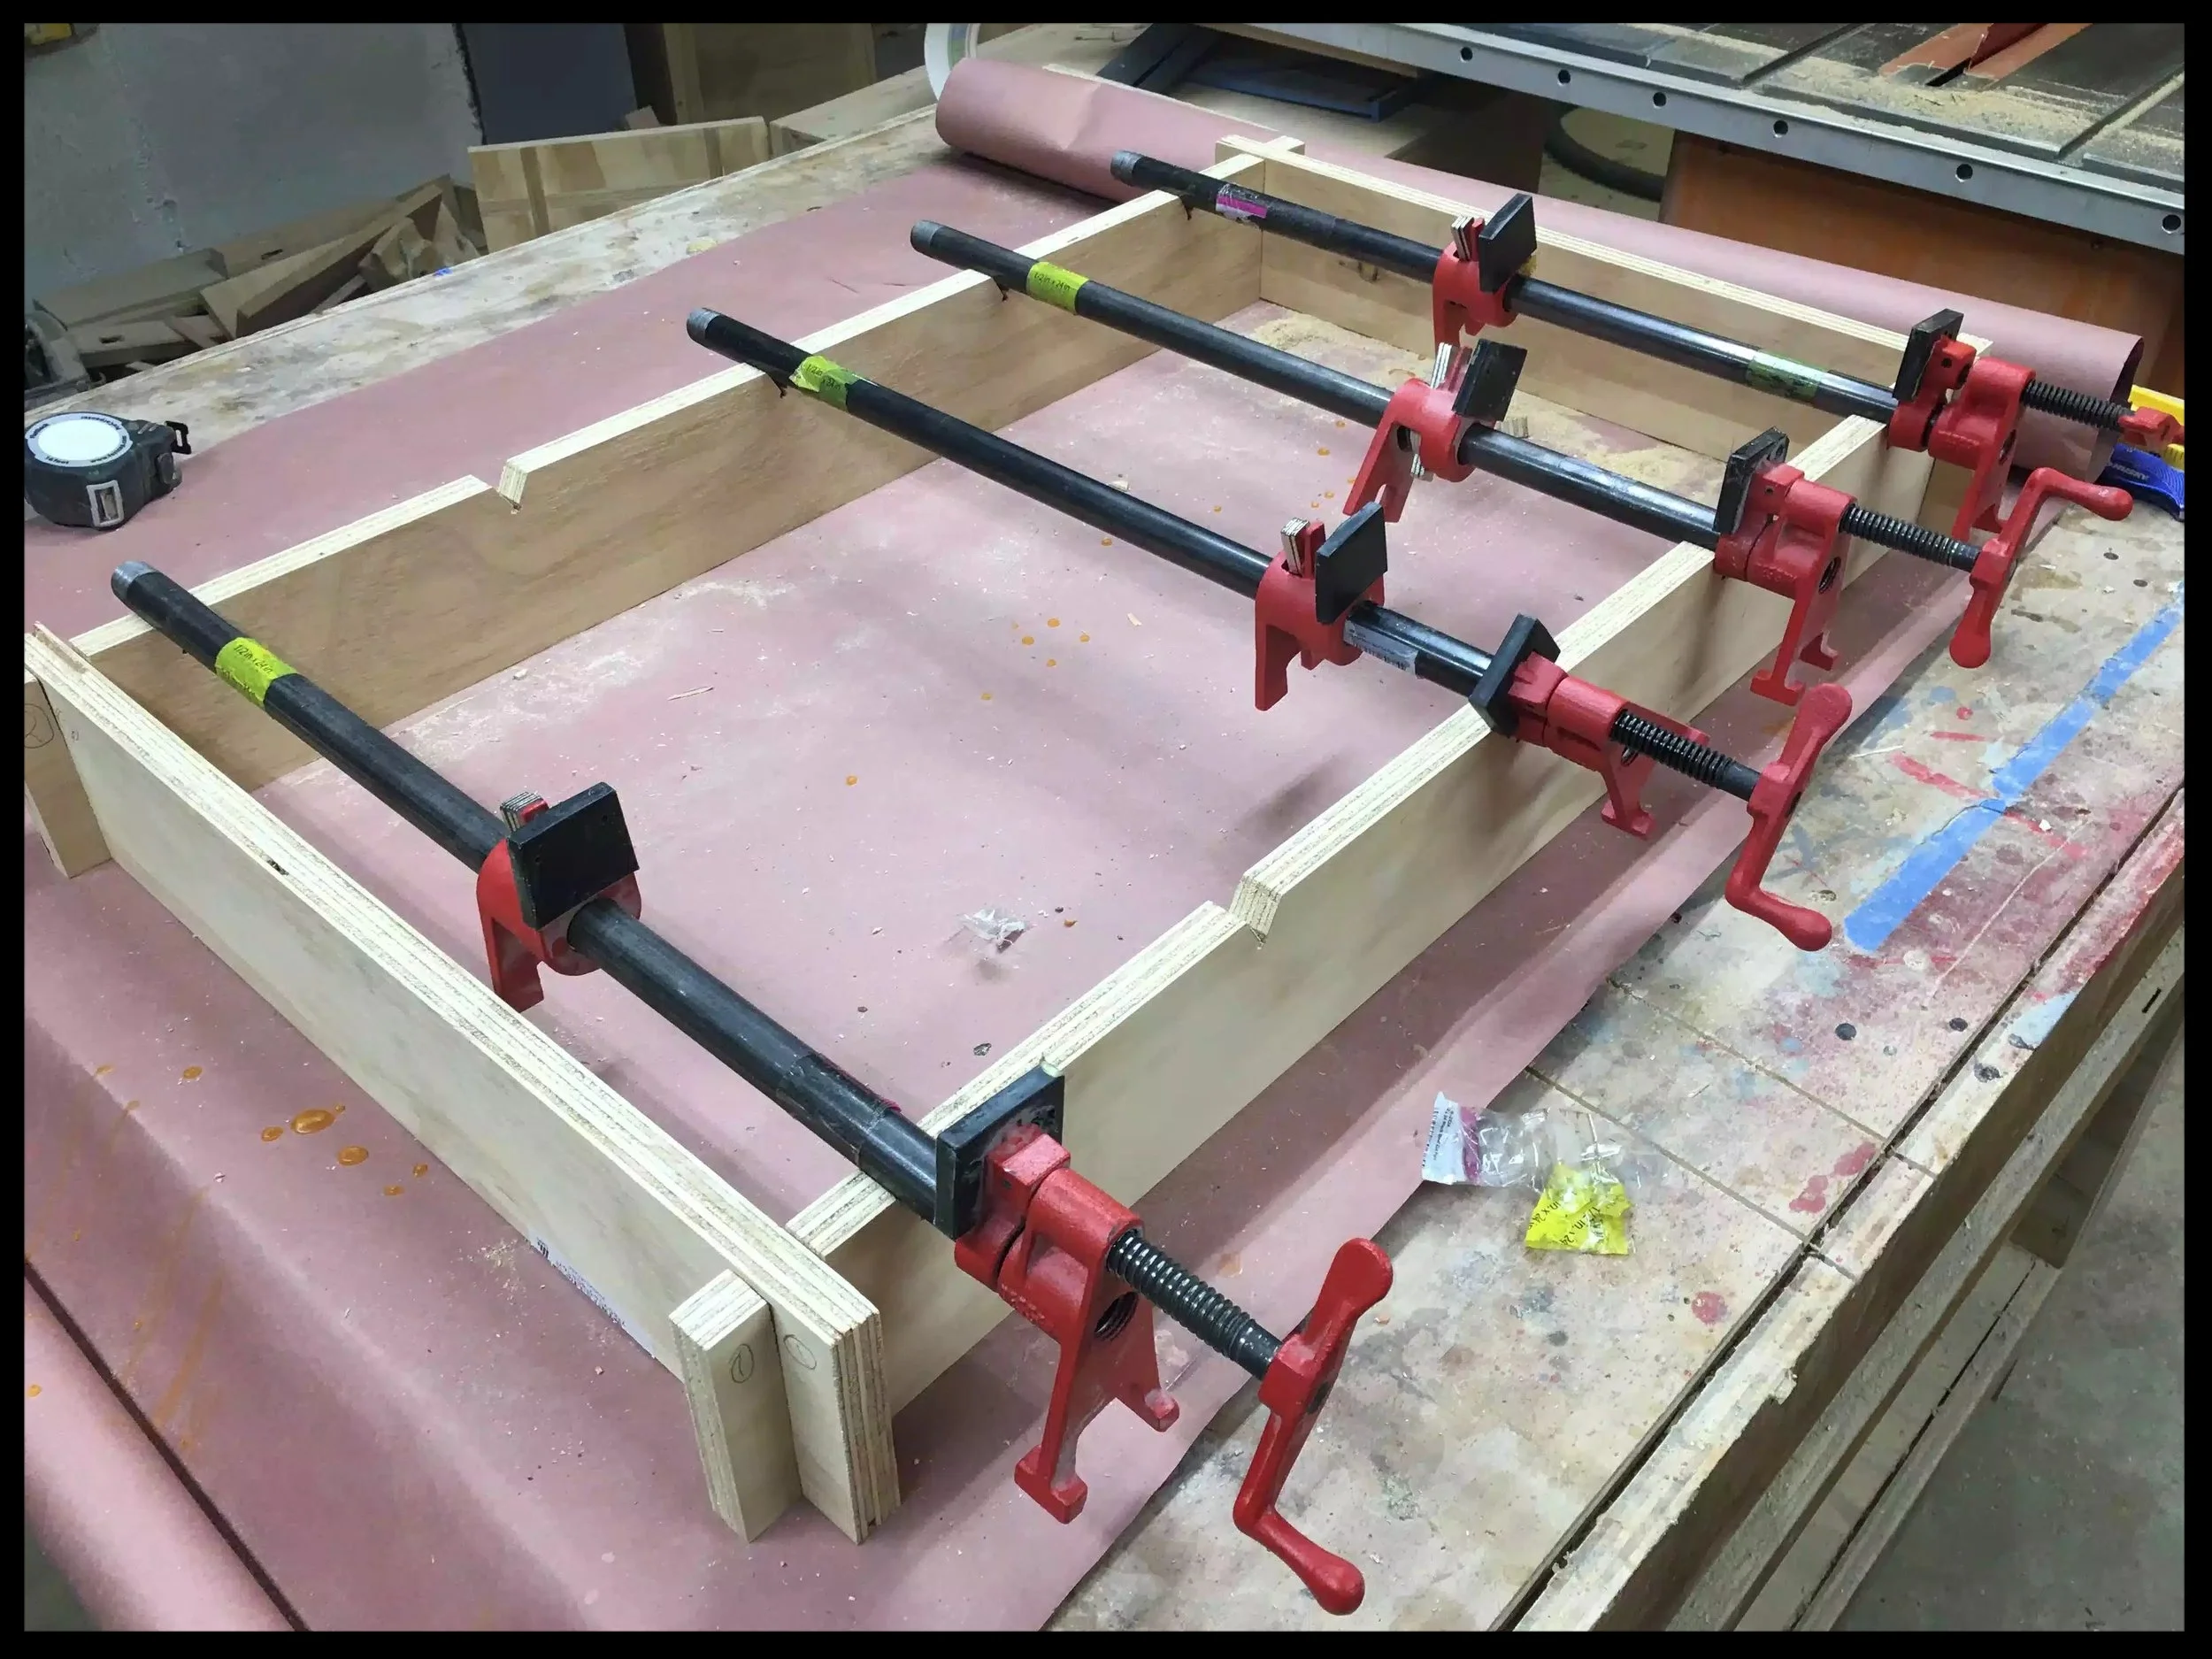
Here is the finished jig.

Here is a close-up of the half-lap on the front part of the jig, you can also see the V notched in
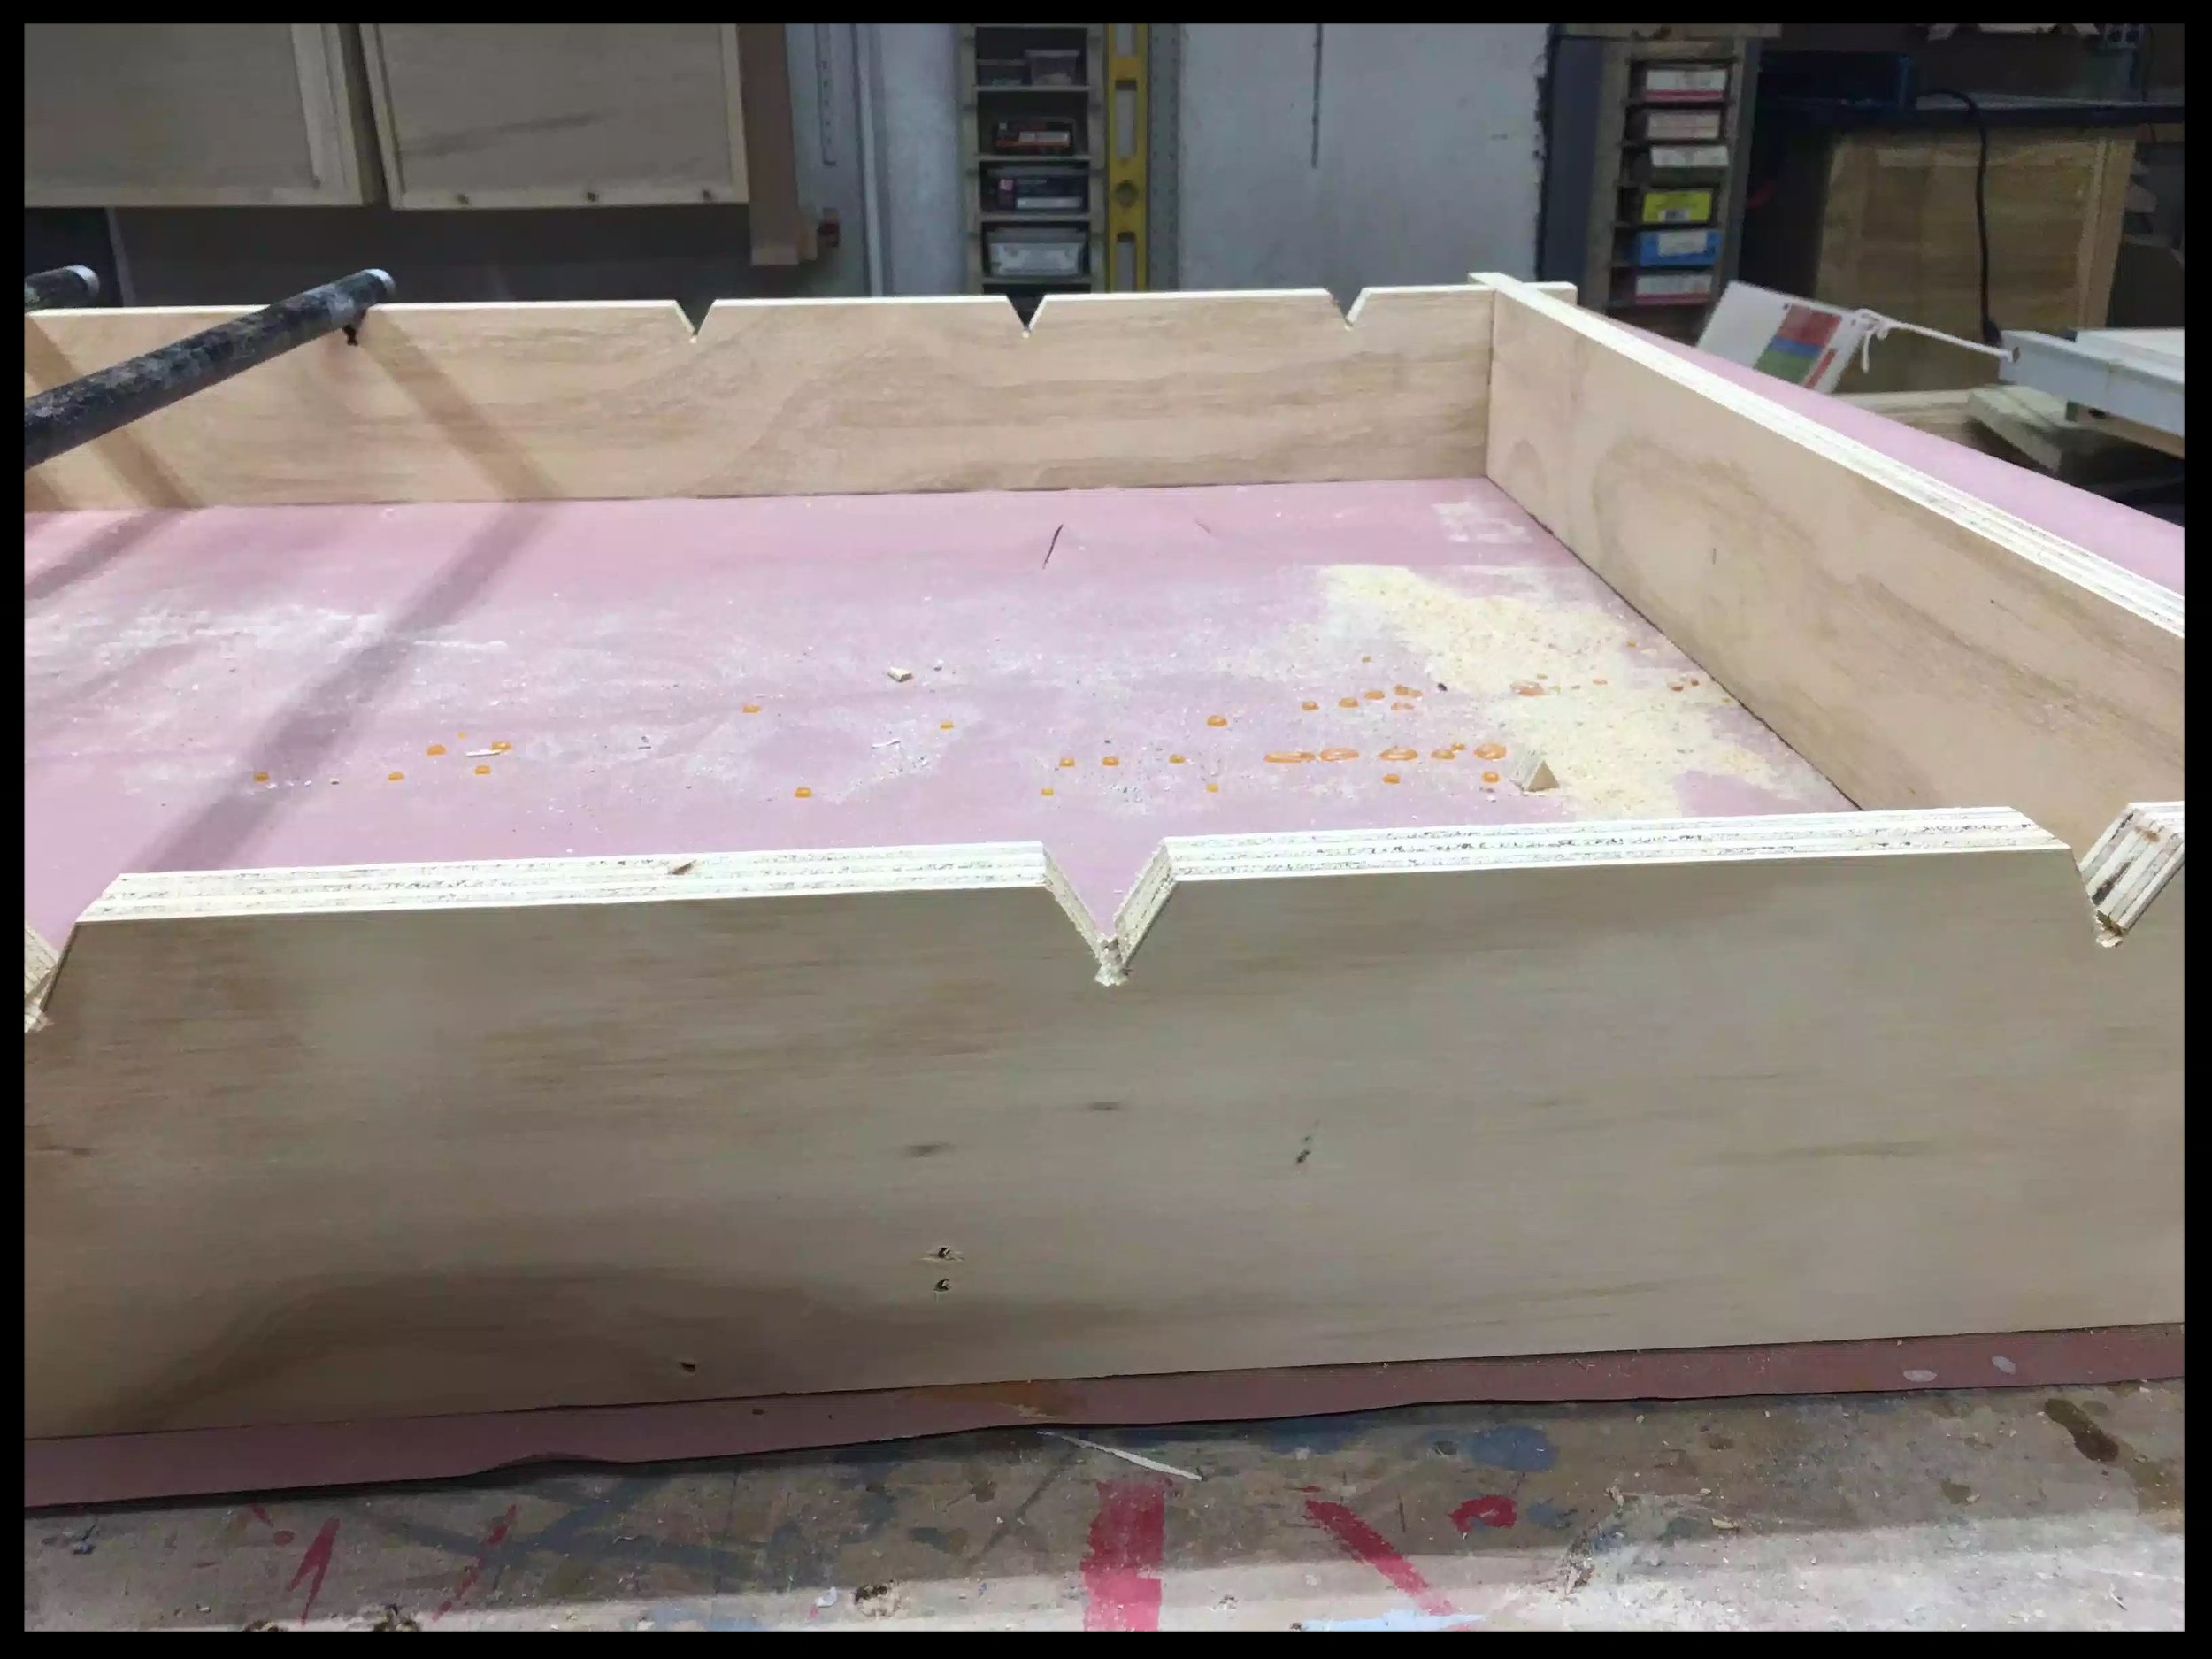
Here you can see how the clamp sits in the V notch and it works awesome
Here is one of the sides with the material cleared on the bottom of the joint.
Here you can the side piece with the completed half-lap material removed.
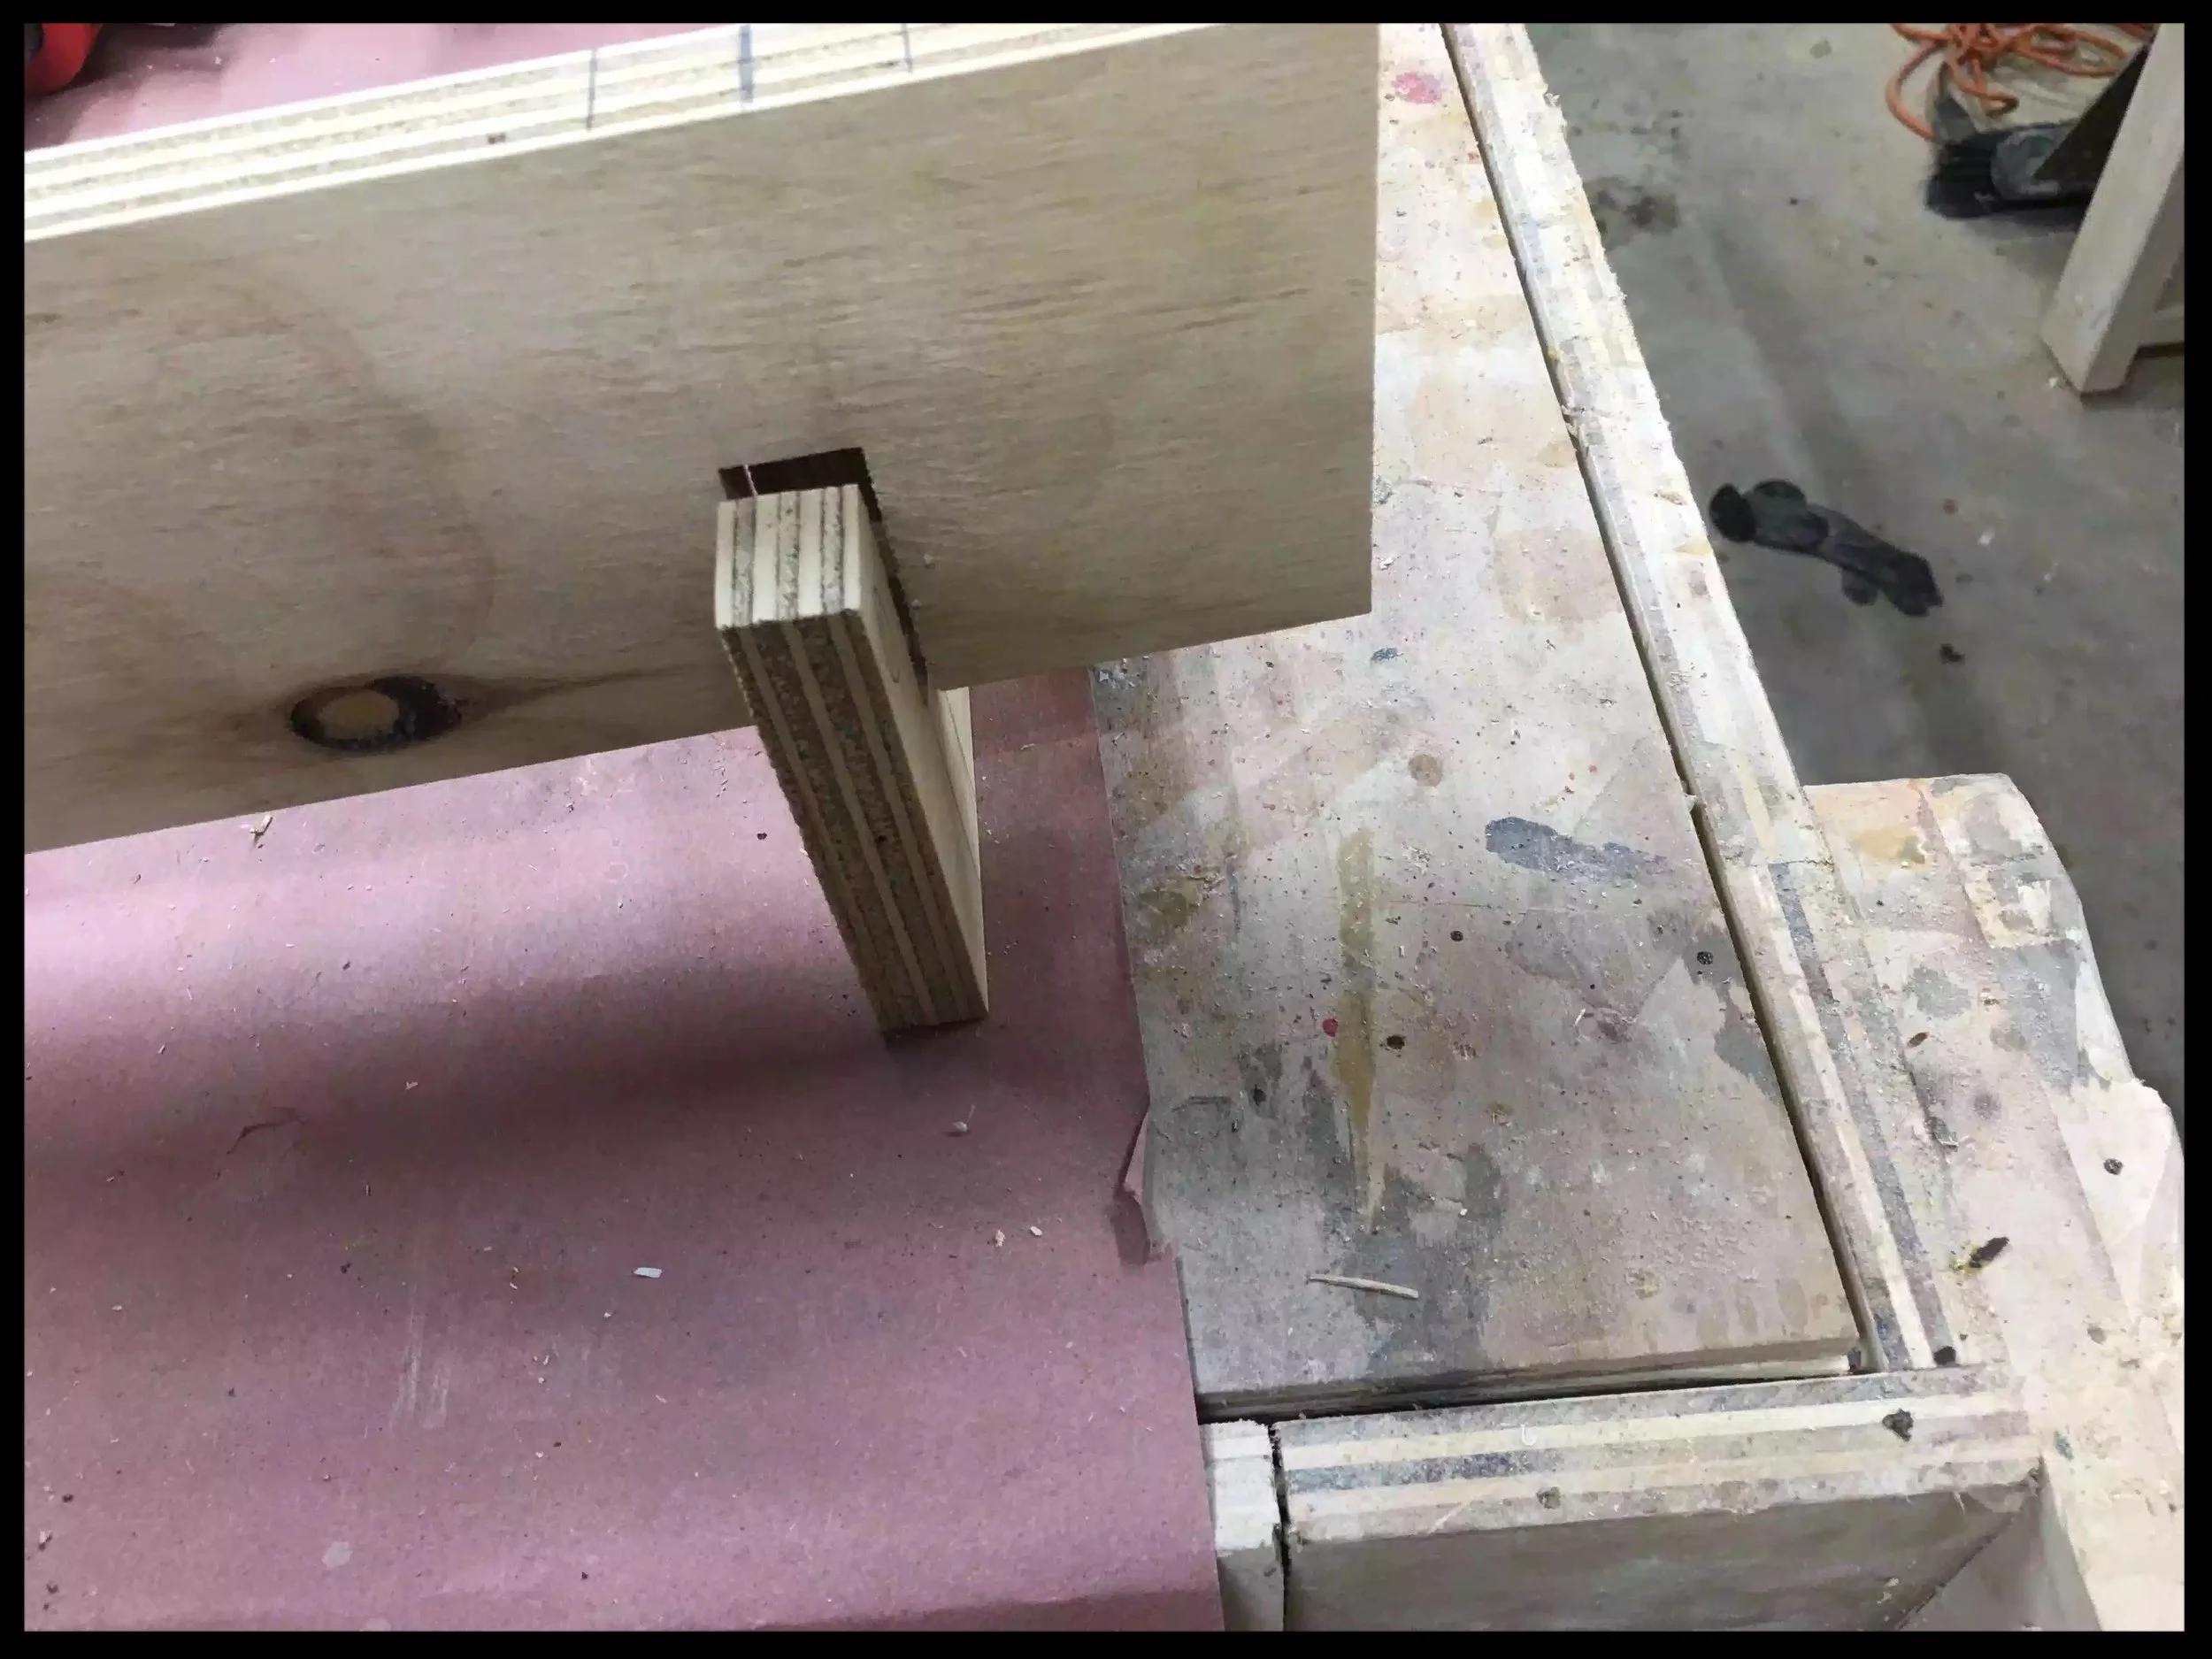
Here is how the half-lap works its an extremely strong joint.
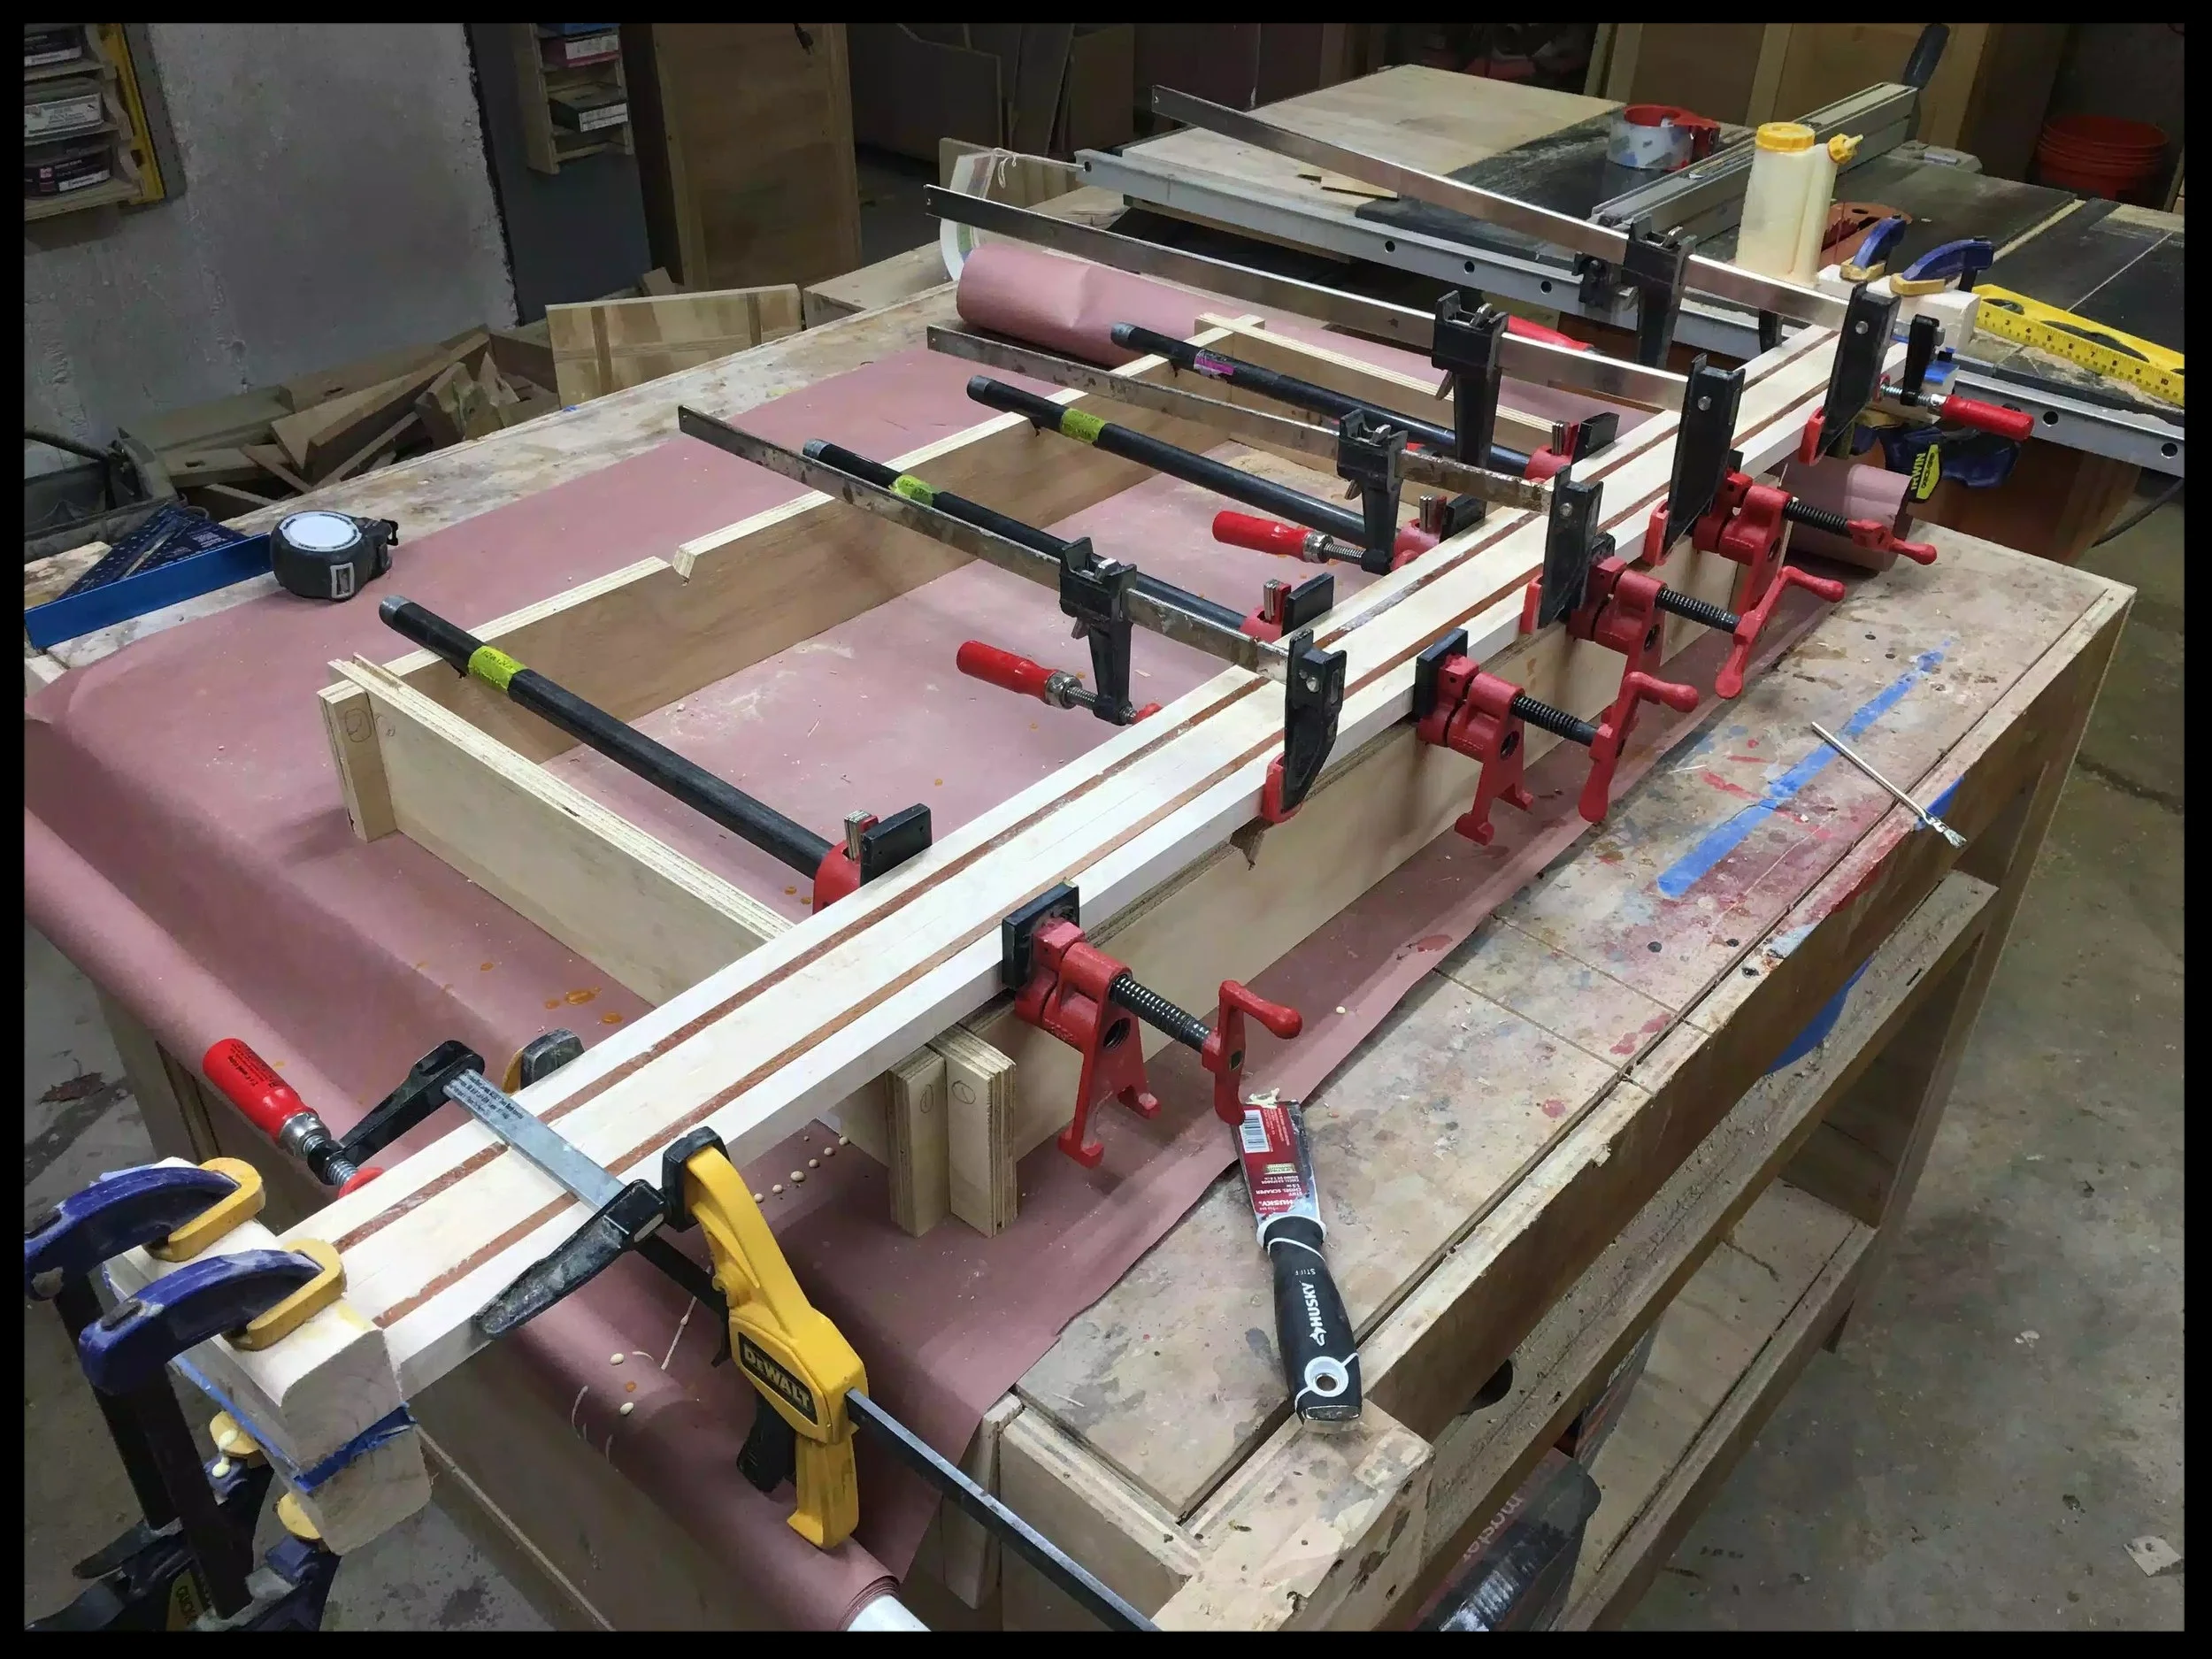
Finally the jig in action, I should have made this a long time ago.
So now that I have solved my glue-up problem I can move back to my main project. I hope you enjoyed this little project, its not the fanciest project but it sure is a functional one.