Last night a finished the cart and to be honest it was the most fun I had on this entire project because I made my own drawer pulls which is something I never did before. I used the solid ash that I purchased on that road trip I made last week and I am so glad that I made these pulls because I think I made a total of 25 pulls and it only cost me $6.. but there was a good beat of work needed to make them.
MAKING DRAWER PULLS
- 3D Model on Sketchup
- Ripped the ash on tablesaw
- Router table time
- Using my Kreg Jig to install them
- Finished pictures of the cart
3D MODEL
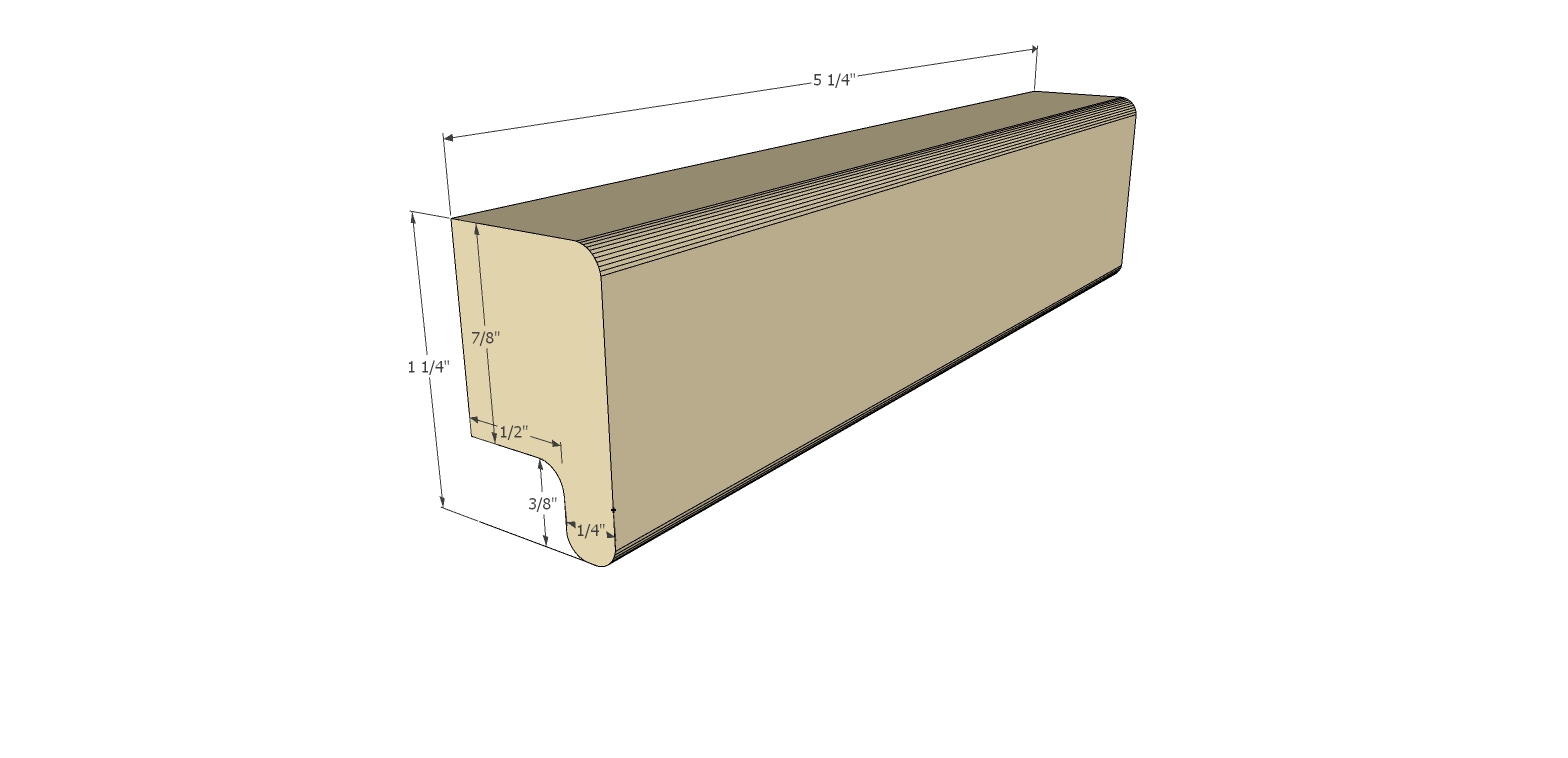
Since I never made drawer pulls before I used my 3D Modeling software call Sketchup to draw up a scaled model from which to work from. Below is that model.
Here is the model I made on Sketchup and all the key dimensions for the pull
I nice brand new set of router bits for the project
TABLESAW
I had a piece of 1"X 6" X 30" of ash that I needed to rip into 1-1/4" wide strips, this is how high my drawer pulls would be since that was pretty uneventful I didn't take any pictures.
ROUTER TABLE TIME
The bulk of machining was on the router table, I purchased a new set of router bits that I was dying to use and here was my perfect project to use them on. Now that I had my 30" long blank I figured I could make 5 pulls per strip so everything that I am writing about I repeated 5 times for all the pulls.
I used 3 router bits in making this pull
- The first was a 1/4" core box bit to use on the underside of the handle where I would be removing the wood that would form hand grip on the underside of the handle. I did this incrementally because I didn't want to remove so much wood at one time so as to avoid drastic tear-rout.
- The second bit was 1/8" round-over bit this is where I would add a rounded profile on the outside lip of the pull, this was done very quickly.
- The last bit I used was a 3/8" round-over that I used on the top outside edge of the pull to ease the look of the handle.
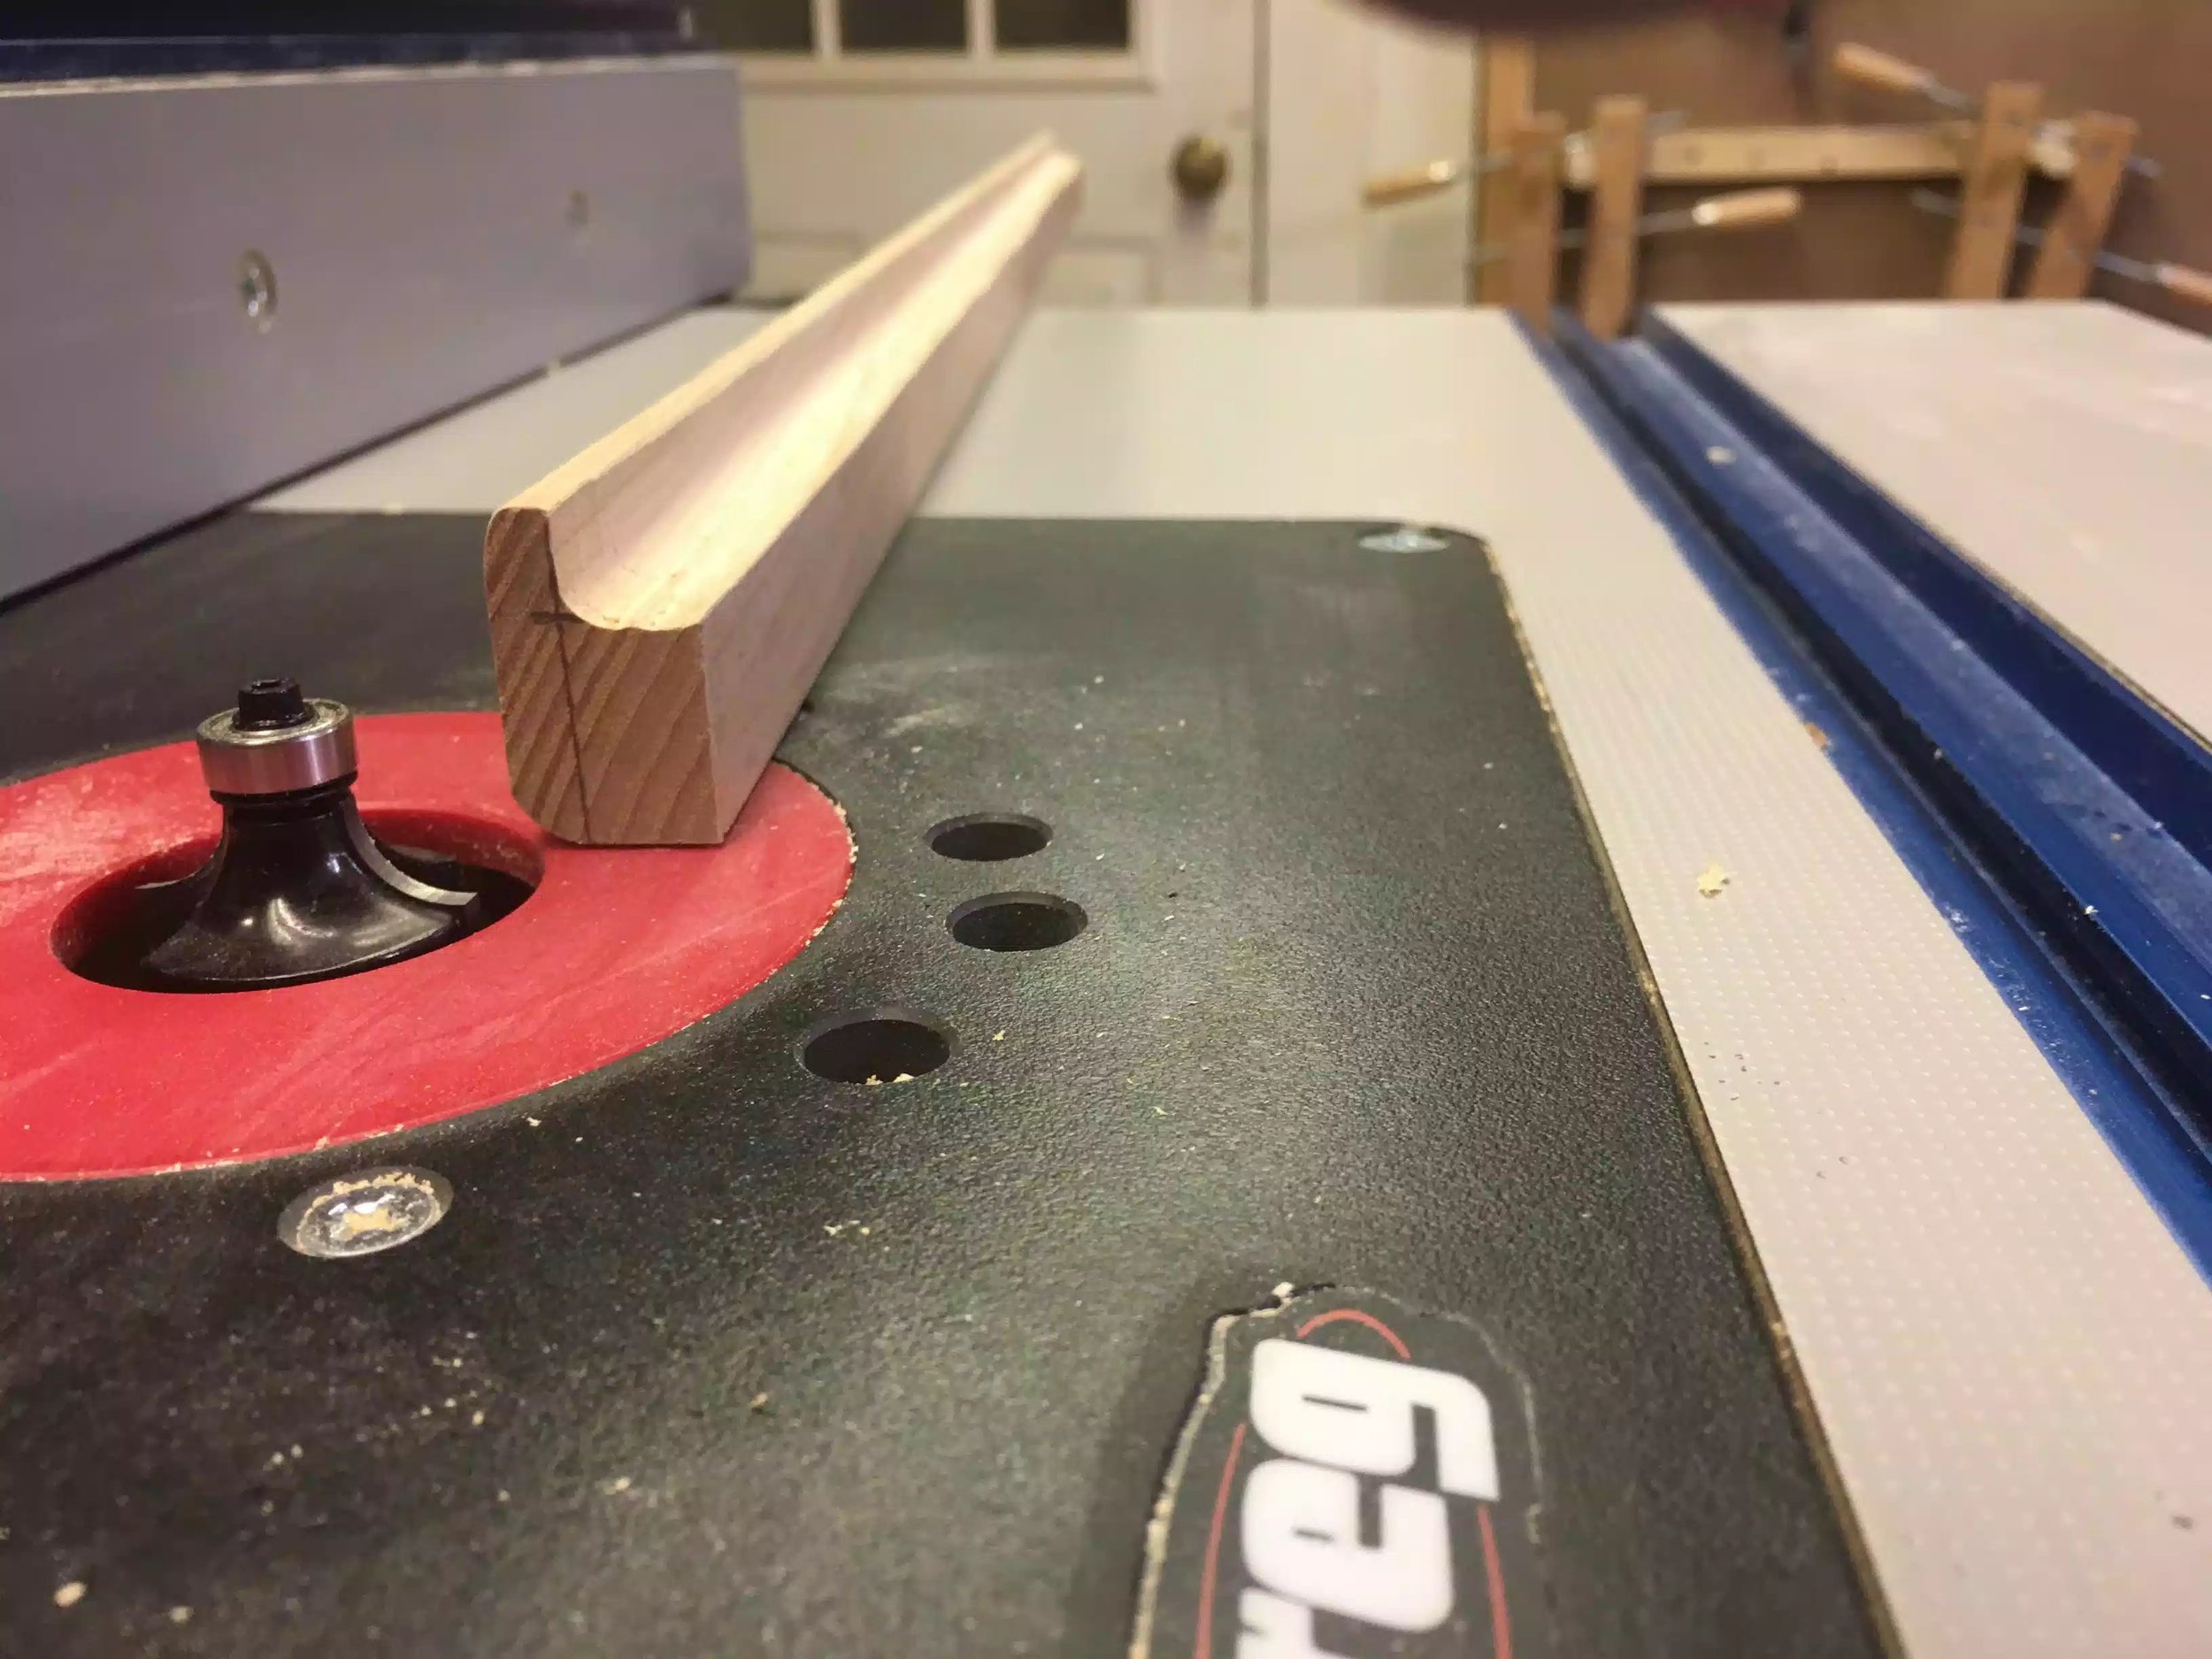
It all starts with the blank that I made my layout lines, these are 3/8" high x 1/2" wide, you can also see a close-up of the router bit I used to remove the material, I used this bit as it left a rounded profile on the top of the material that was removed as this leaves a nice finish on the pull.
Here is the the final drawer pull .. looks awesome and it was a ton of work that I enjoyed immnsnly.
Another view of the finished pull, just needed to crosscut them on my table-saw.
Here is the underside of the pull, very simple but effective. You can see the 1/8' round-over profile on the top edge of the pull. But the 3/8" round-over is in the router table in this picture.
KREG JIG TIME
I purchased the Kreg jig to install the drawer pulls that way they would all be unifrom on the cabinet, to be honest I usually make my own jigs for this type of project but I got this on sale and thought that I would try it out, thinking that it would remove all the work out of placing them on the false fronts and to a degree it did. But I still needed to do a little measuring to center the pulls. To be honest I didn't read all the instructions for the jig I kind of just opened the pack and started using it.
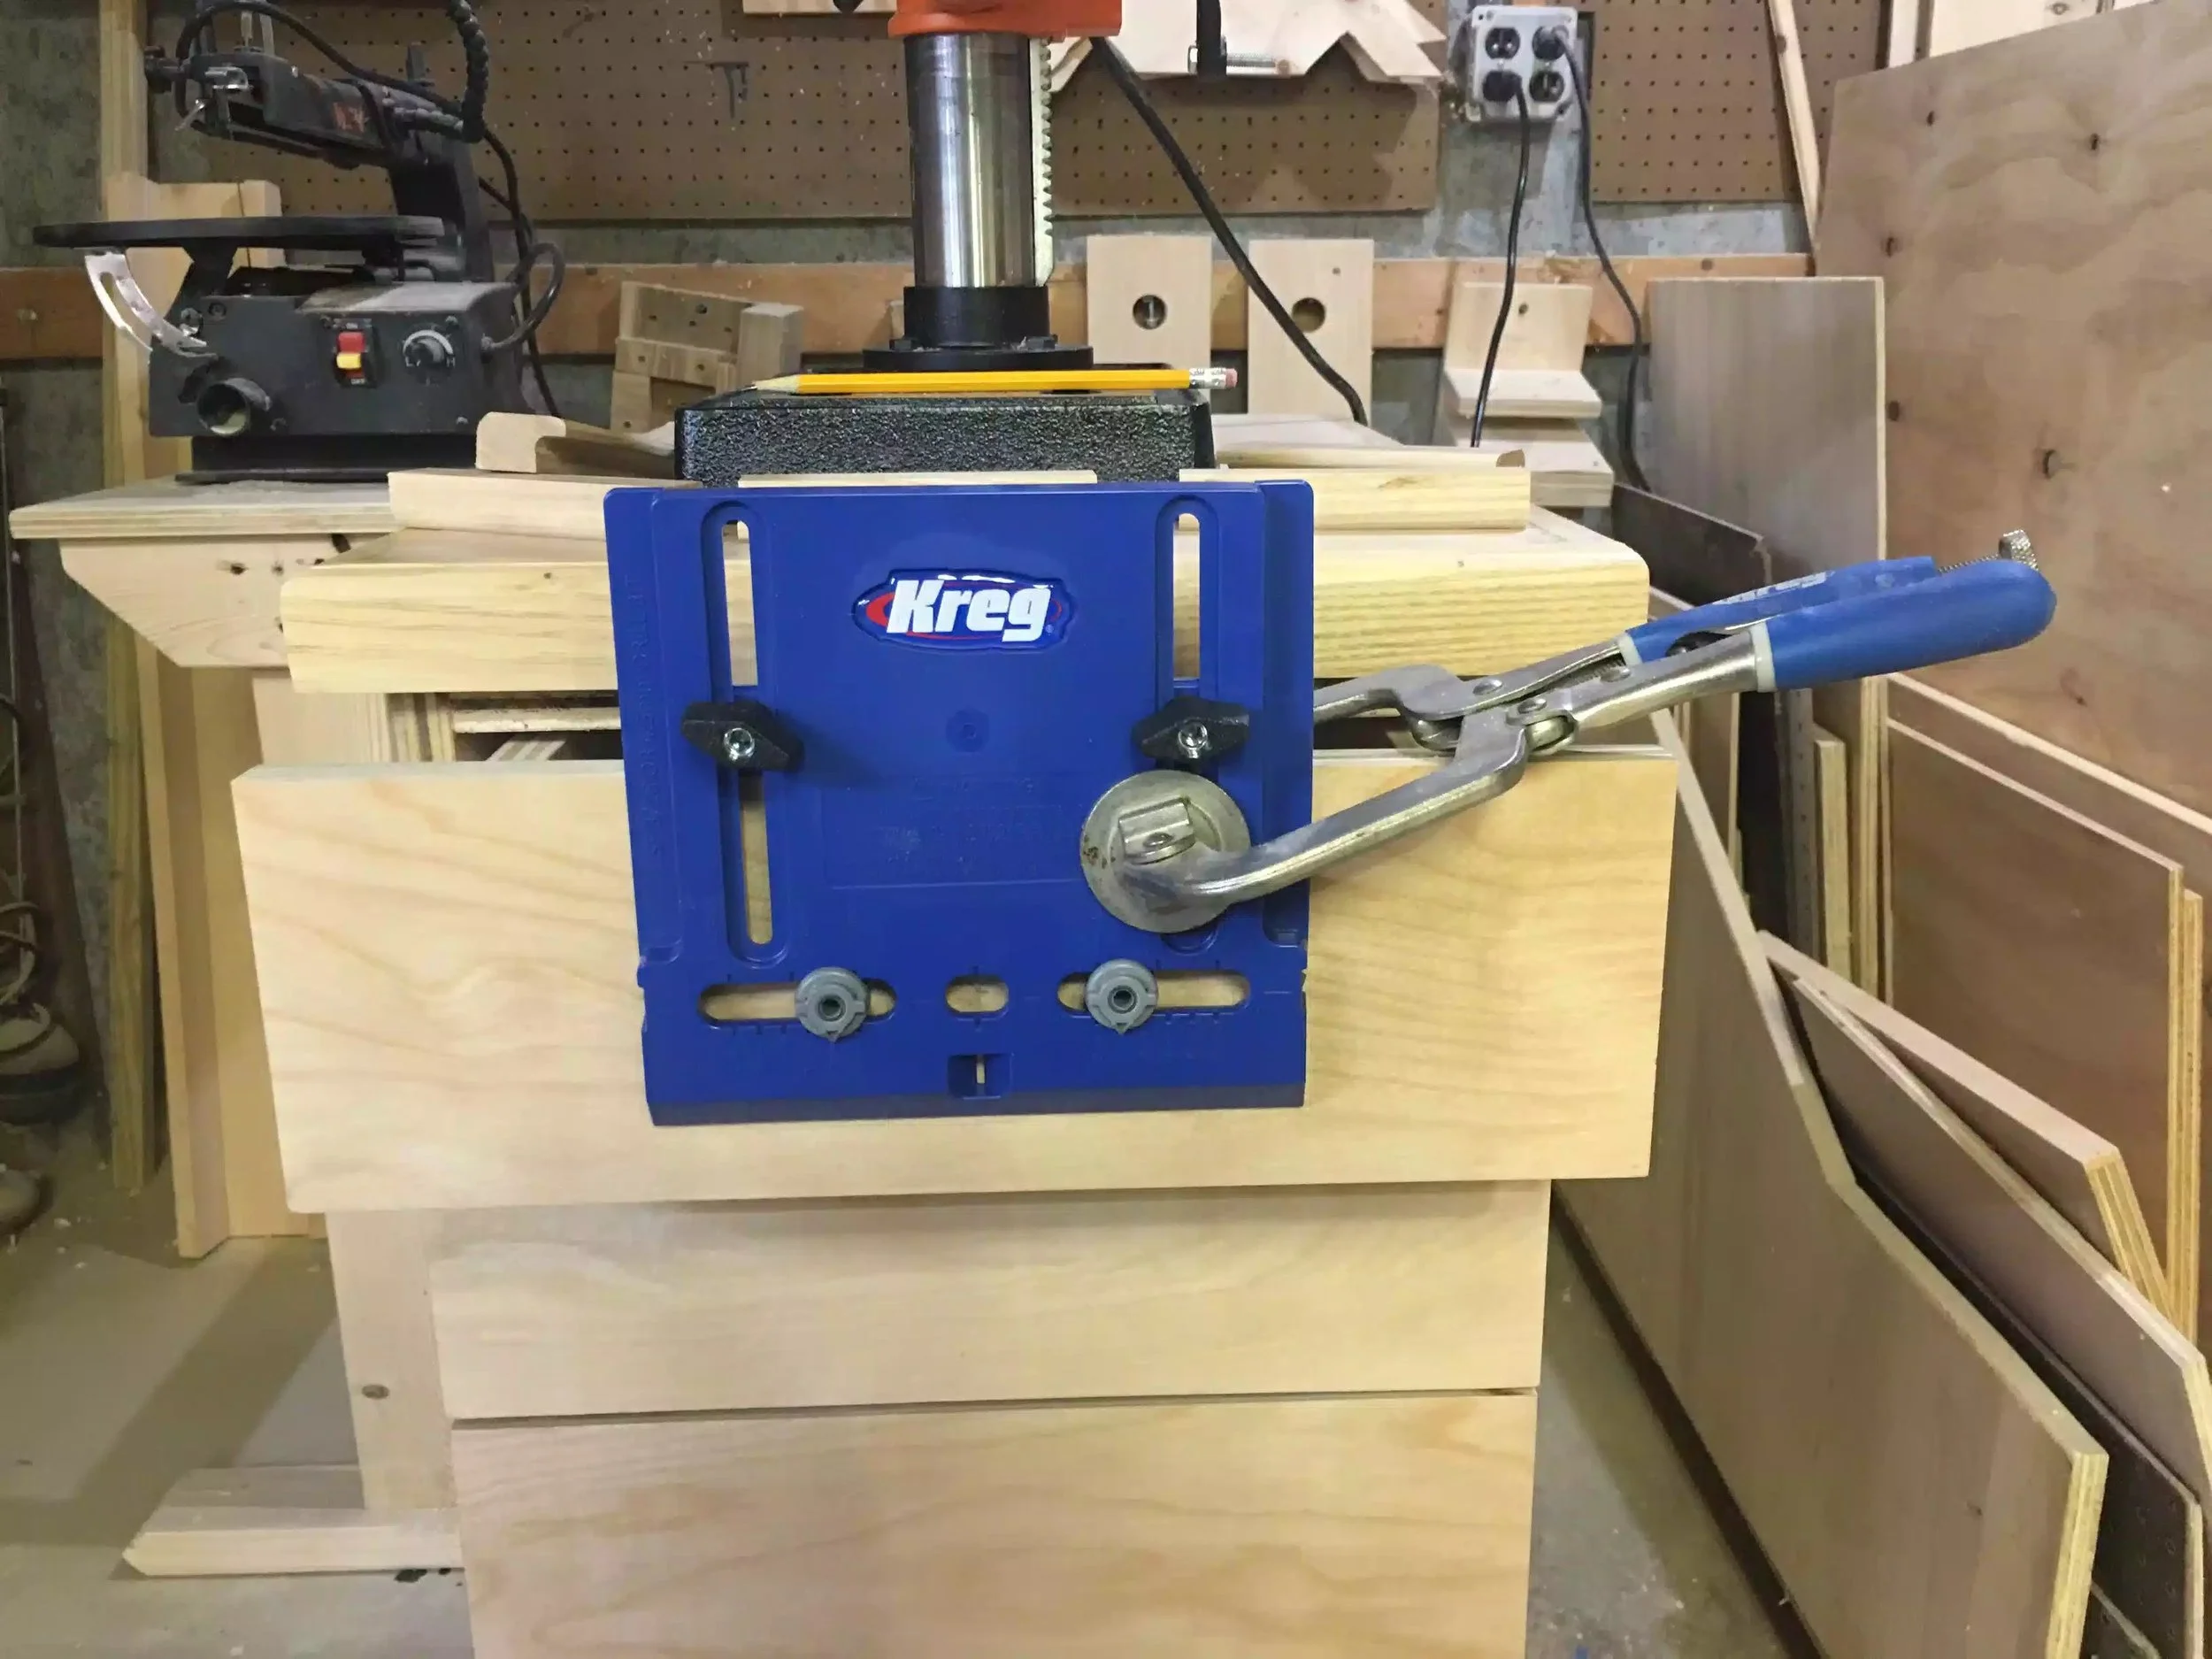
Here is the jig that I clamped to the drawer fornt, I made a measurement finding the center of the drawer and then I use a 5/16" drill bit to drill throught the drawer and then add screws to secure the pull.
Another angle of the jig.
The grey round knobs are the drill guides that you can adjust depending on the size of the pulls you are using, since mine were shop made I don't think they were a standard size.
Here is the first drawer pull installed and I have to say that the pulls look awesome and match the solid edge banding on the cabinet top.
Side profile of the pull.
Here is the finished project of adding the drawer pulls
That's a wrap I hope you have enjoyed this project with me, please feel free to leave any comments or comments on the project, I am thinking about making plans avavilavle for this project but I have not decided yet.


