


Since I had already built the drawer frames all I needed to do today was to add the drawer bottoms.
Here is what I got done today
- I added the drawer bases to the 5 drawers
- Test fit 1 drawer with drawer slide
- Needed to overcome a measurement error
ADDING THE DRAWER BASES
I needed to make 5 drawer bases so as that I could attach them to the drawer frames. So I took the following steps to complete the drawers. I have detailed pictures below detailing each step of this.
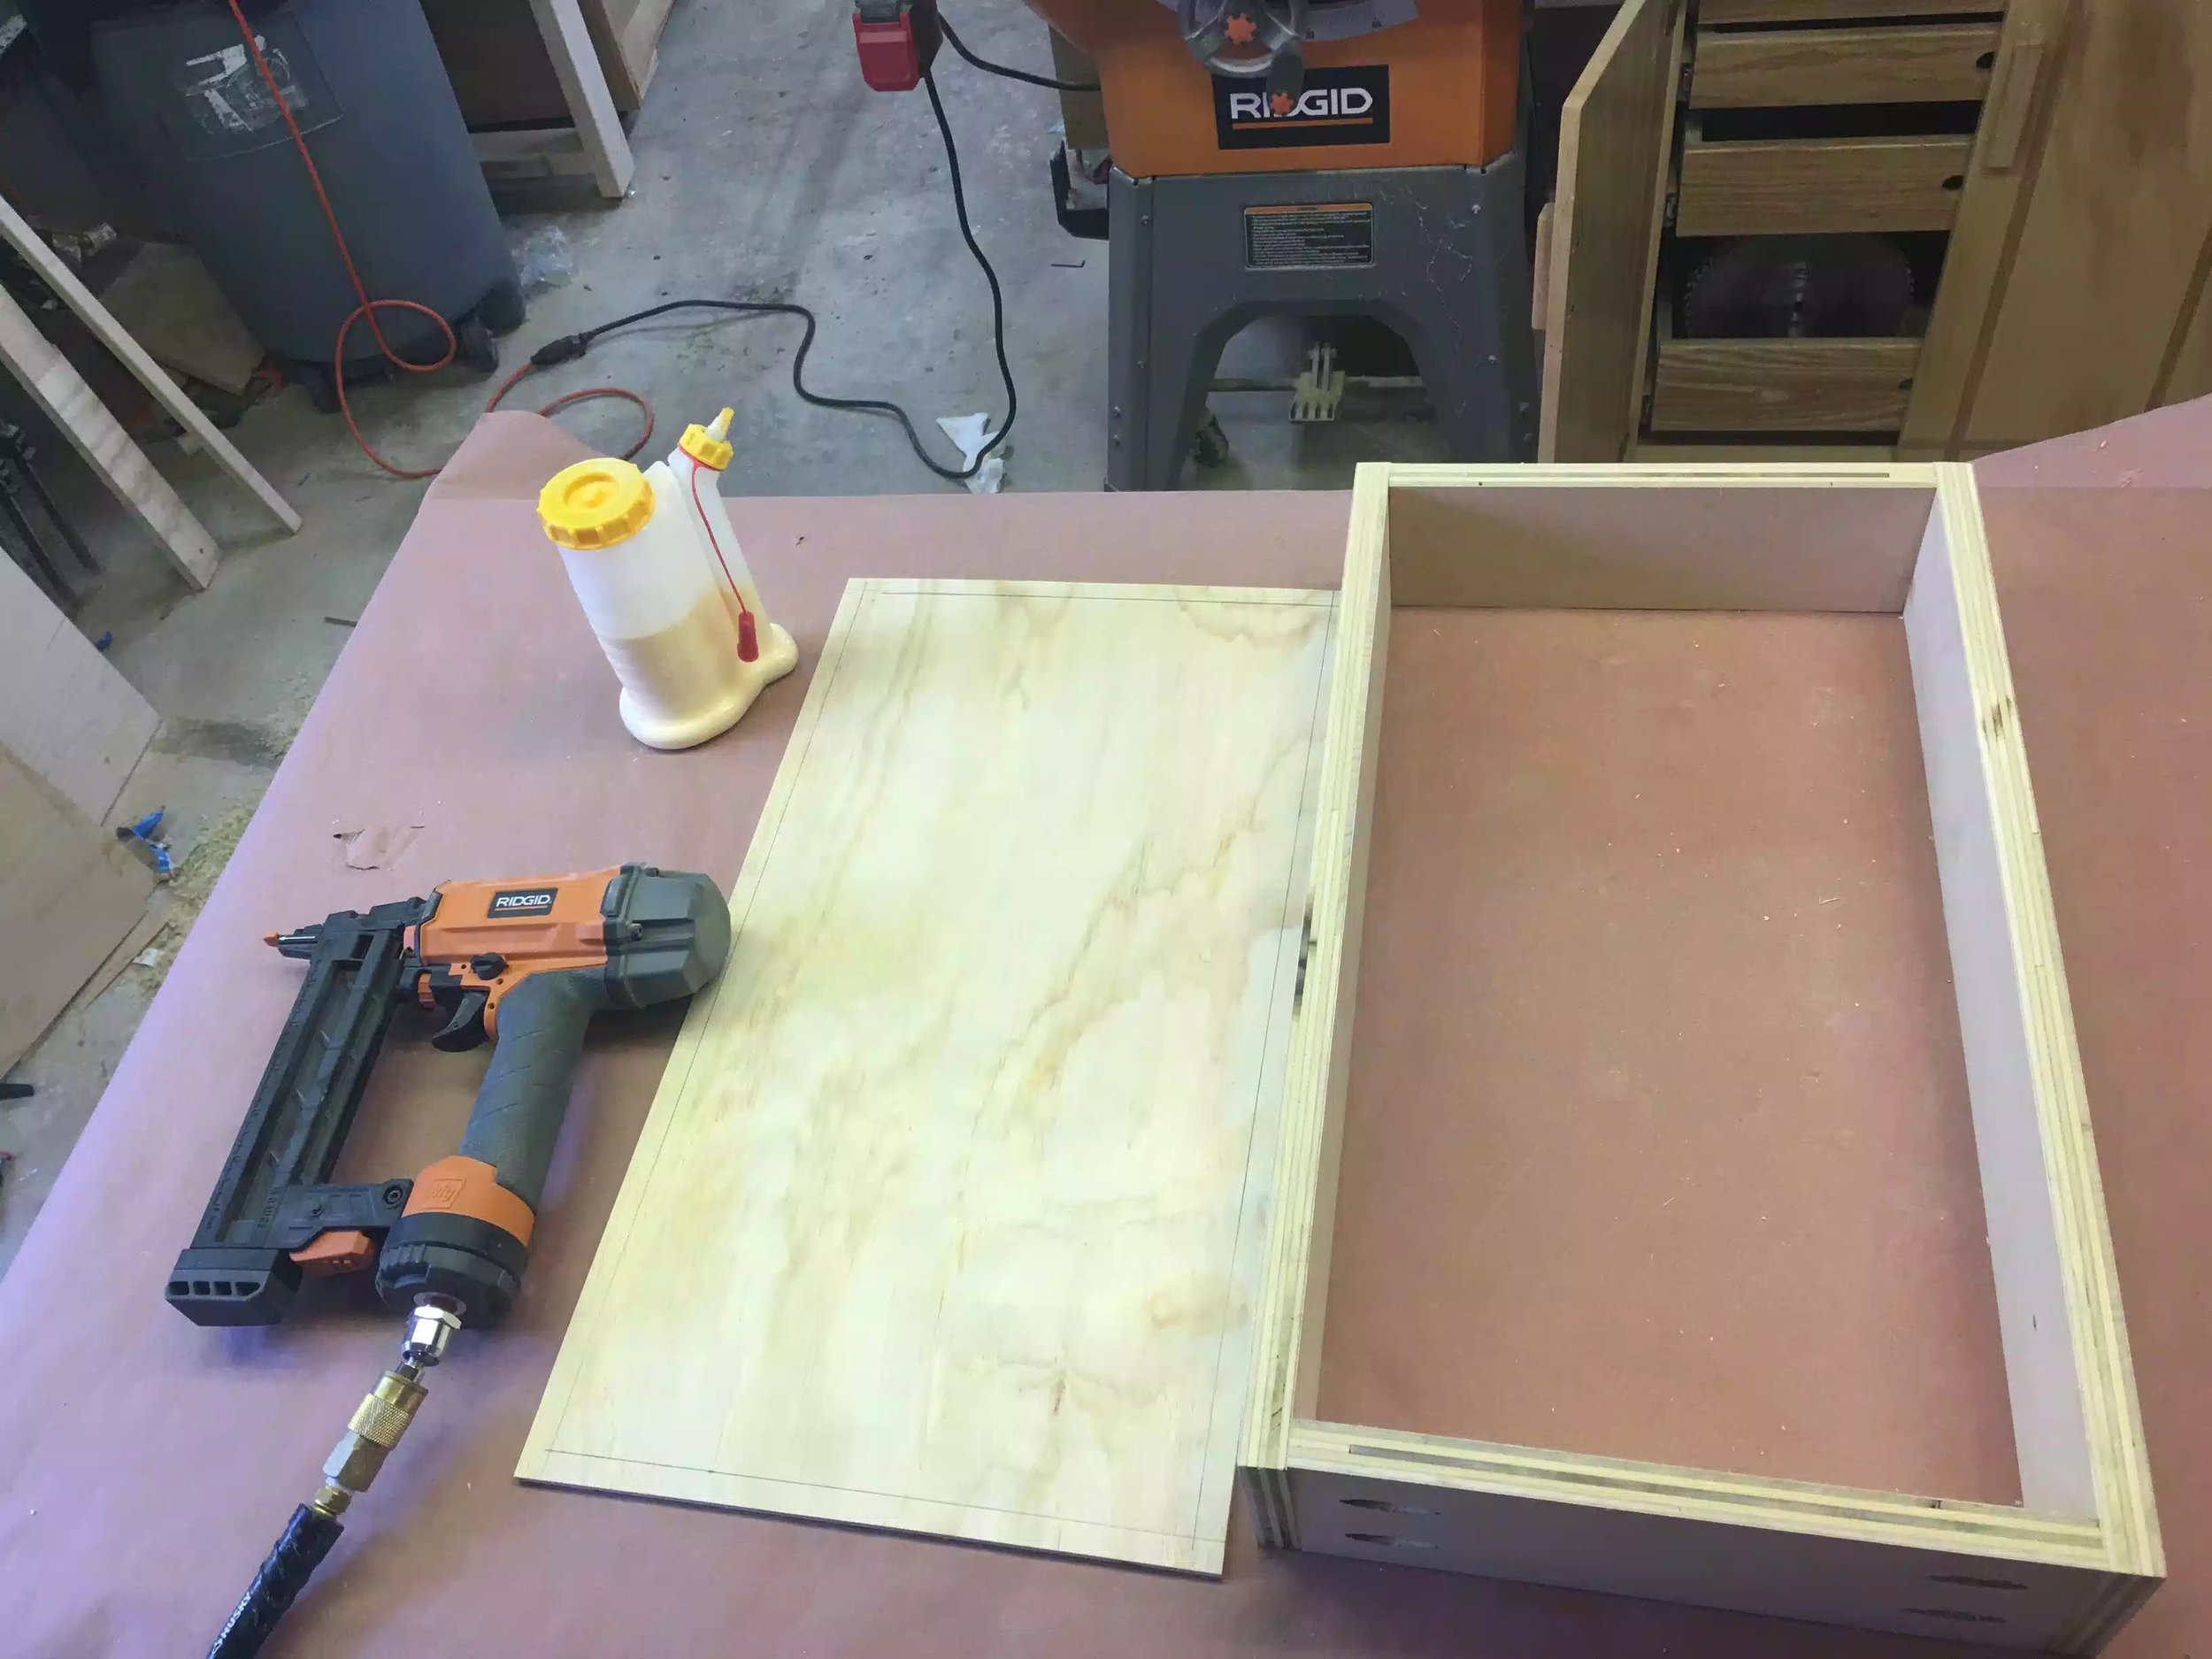
- Cut up a 1/4" thick sheet of plywood to the final dimensions to fit the drawer, since I was not doing any fancy joinery the cuts were very quick, I was basically cutting the the 1/4" plywood and using my brad nailer and glue to secure the bottom on the drawer.

Here is a picture of me cutting the plywood into smaller sections to fit the drawer base.
2. Now that all 5 drawer bottoms were cut to size , next I wanted to draw a reference line 1/2" in from all sides of the panel, to drive brad nails in the bottom securing them to the bottom of the drawer, I used my Incra T-Ruler to accomplish this, I needed the brad nails inset a 1/2" because I need to use my router on the edges more about this in a later step.

Here is the Incra T-rule, I used this to mark a 1/2" line around all edges

Here is a close up the pencil line outlining the 1/2'' reference line on the drawer bottoms, I needed to do this to all 5 panels
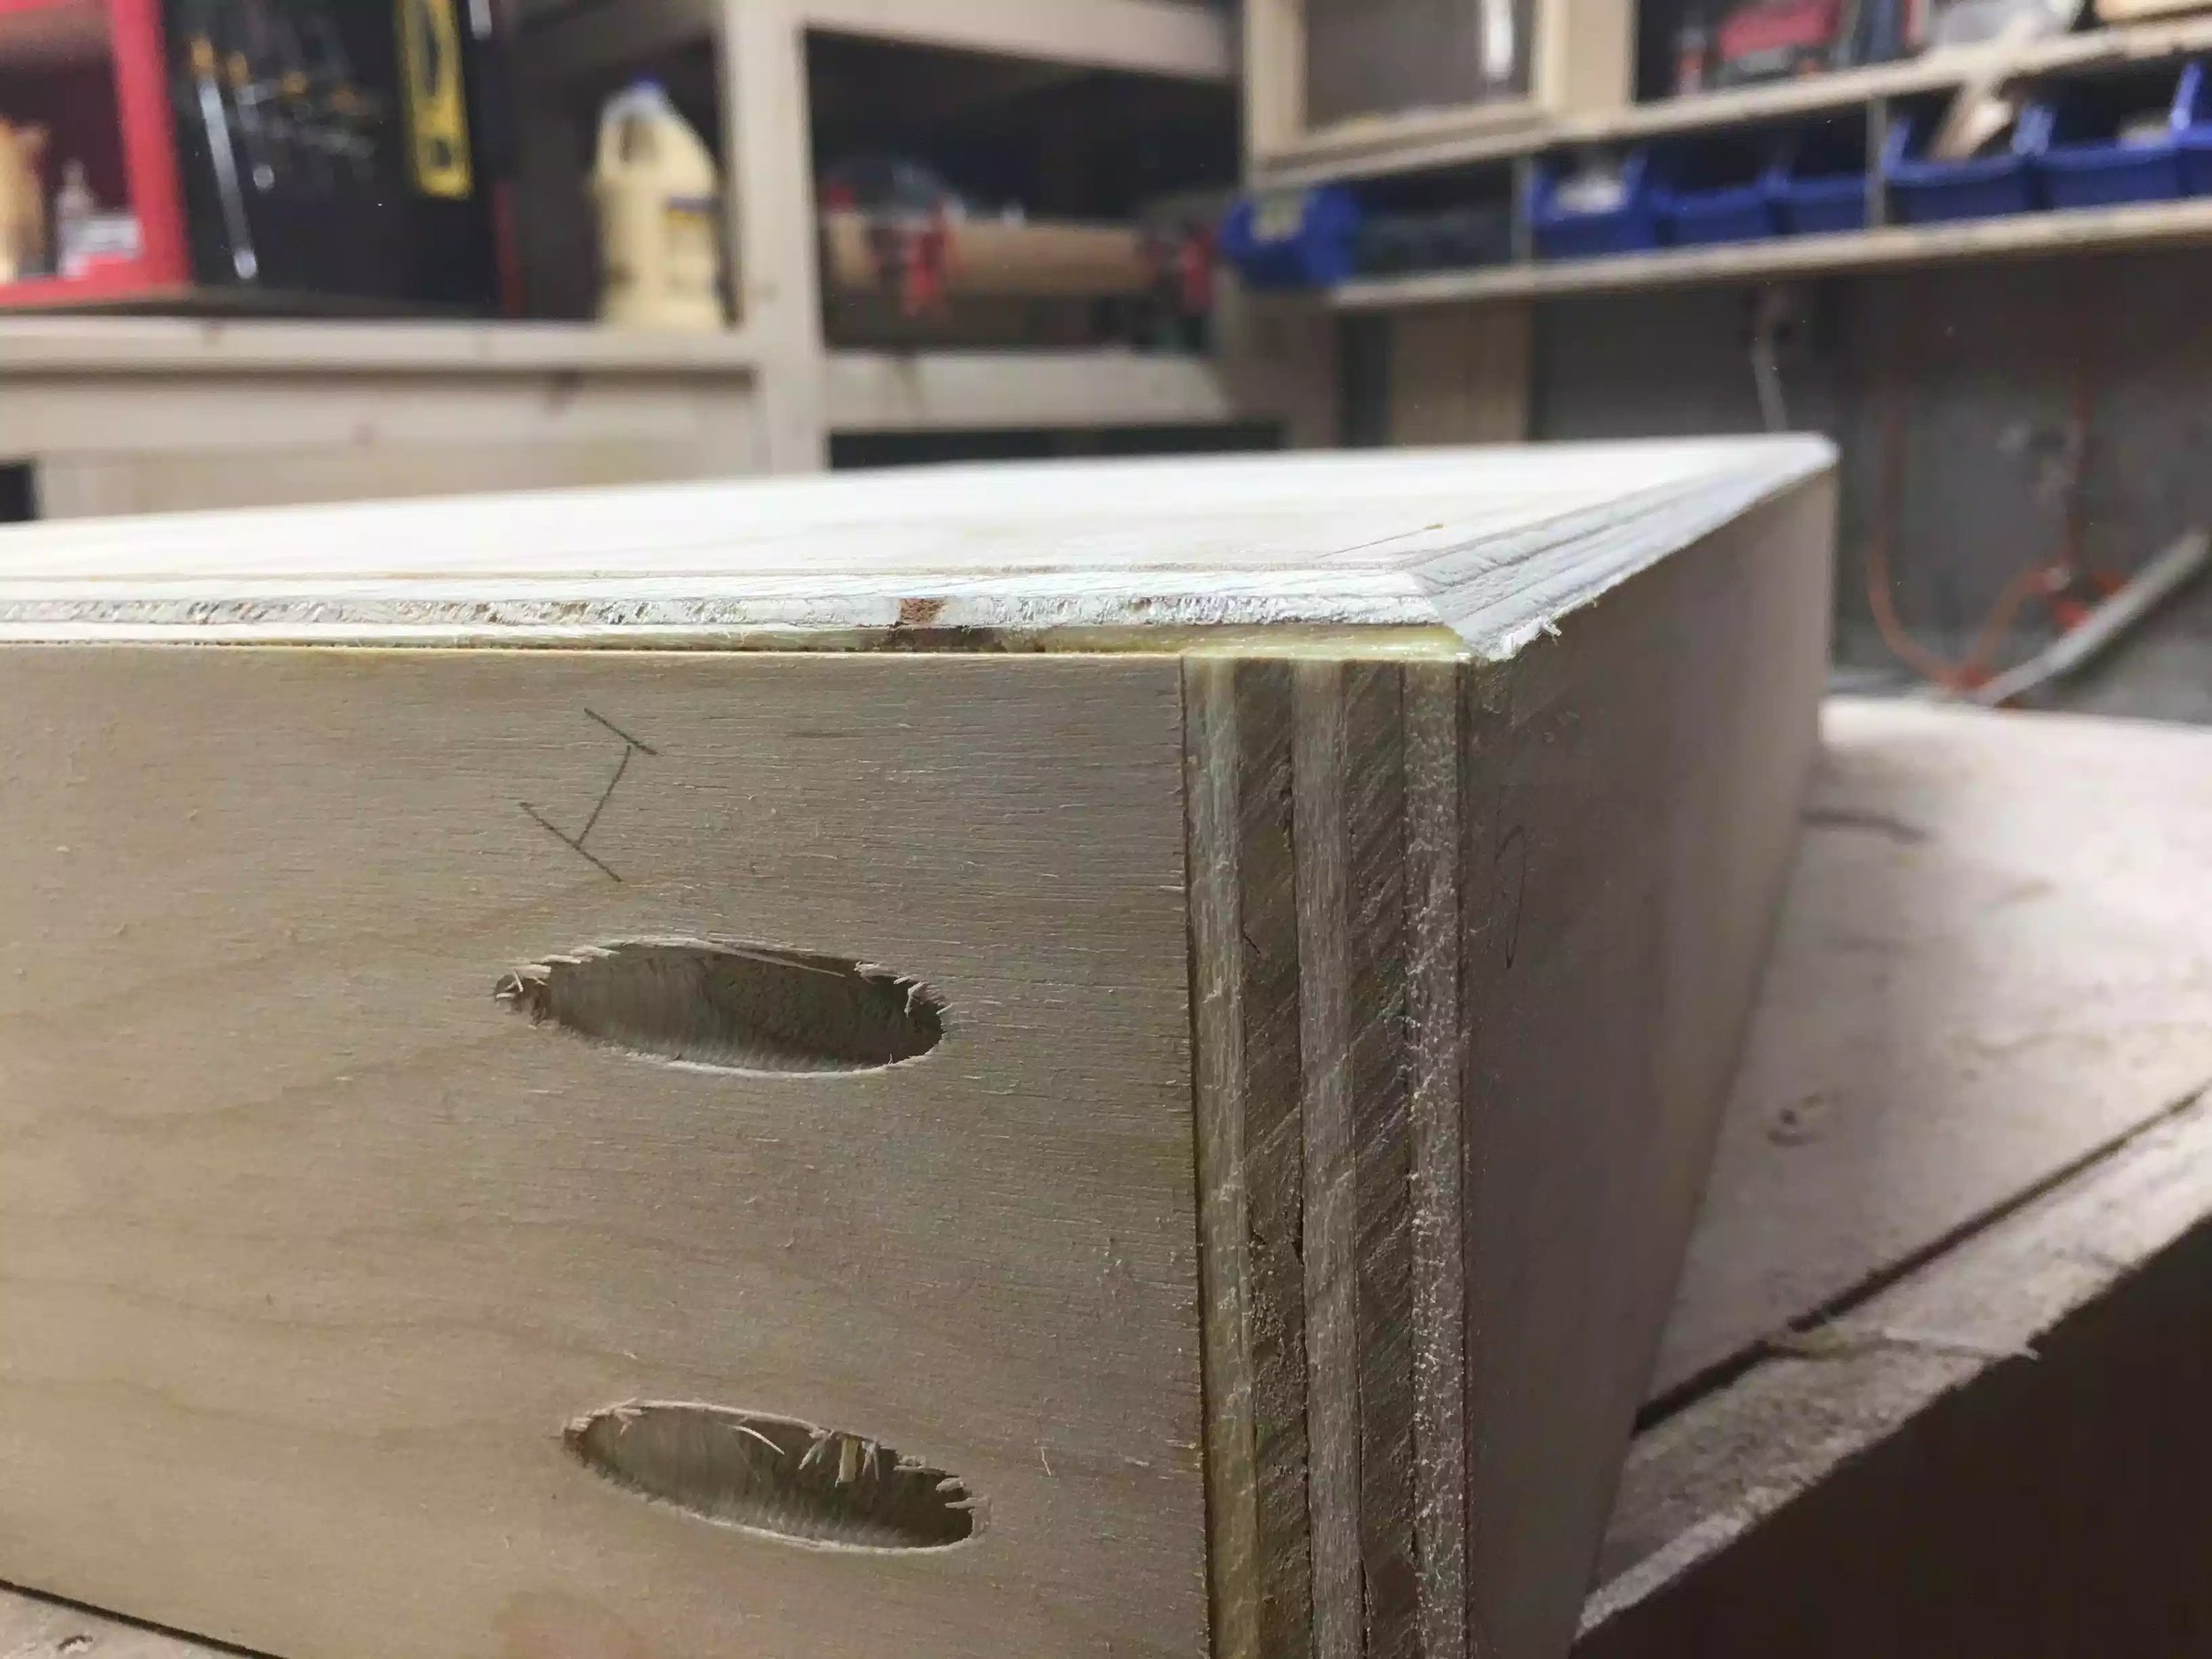
3. Next I needed to set -up my assembly table to secure the bases to the drawers, below you see what I needed. I used my pneumatic nailer with staples inside, some glue. Using the 1/2" line that I did in the previous step I used the arrow on the tip of my brad nailer to reference where the nails would be entering the drawer being careful not to actually shoot a nail through the actual drawer base.

Supplies needed, a nailer, the bottom drawer plywood panel and glue.

Here is a view of the bottom. I needed to sand all the bottoms and edges to remove any glue .
Another picture before assembly

Here is a look inside the drawer

Here are all 5 drawers with bases attached one more step before there almost complete.
4 . Before I can say the drawers are finished I needed to use my palm router to add a chamfer to the plywood edges. I saw this trick used online and I think it is a very clever method to hide the plywood edges on drawers. You basically use a chamfer bit in a router and go around all edges of the plywood drawer base and it removes the material that can be seen when the drawer is sitting in the cabinet or unit. Oh and I almost forgot to tell you that the brad nails were recessed because I didn't want my router catching the nails as I removing the plywood edges when I was going around the drawer base with my router.

Here you can see the palm router ready for action, its installed with a router chamfer bit.

Here is a close-up of the router with the chamfer bit. I really love this tool. Perfect for applications like this.
Here is a close-up of the drawer base after I added the chamfer.

BEFORE picture, this is the drawer base before I added the chamfer.

AFTER Here is the drawer base after, see no visable drawer base.
INSTALLING THE BOTTOM DRAWER
Although I didn't have enough time to install all drawers I wanted to at least install one. To my surprise the bottom drawer was a tiny bit shy (short) of engaging the right drawer slide , so I needed to remedy this by installing a shim to close the gap.
- I started by preparing a spacer jig so as that I could space the drawer slides evenly going up both sides of the cabinet, to do this I measured the cabinet and luckily enough I could get away with one spacer would have equal distances between the drawer slides. I also put a 1/4" thick piece of plywood to raise the bottom drawer up so as that it would not come in contact when the drawer was slid in and out.
- To be honest I was quite annoyed at the drawer slide and drawer not being wide enough, I measure everything twice and followed all cut-list, I also checked for square, I think the more I think about it my problem arose because my plywood was not exactly 3/4" thick and that was something that I took for granted, usually I buy big box plywood and they are usually 23/32" and not 3/4" but I purchased this plywood else where and they told me that it was full 3/4" but lesson learnt and I am mad at myself at not making sure as I usually do, anyway we live and learn. Everyone makes mistakes, all you can do is learn from them and move on.

Here is the spacer block with the slide sitting on top, I clamped the spacer to the cabinet and pre-drilled and screwed in 3 screws, this was before I realised that the drawer was not quite wide enough.

Here you can see how I remedied the bottom drawer slide issue.
- Next I pulled the drawer out on the slide and I could access two holes in the drawer slide to partially secure the drawer to the slide, I did this on both sides of the drawer and then I fianlly removed the drawer with the slide attached to the drawer and finished adding the back screws to each side, and it was complete.

Here is the bottom drawer installed and it moves perfectly now.
That is as far as I got this morning thanks for reading and I catch you on the next post.
NEXT
- I will be installing the remainder of the drawer slides and hopefully the drawers
- Prepare the drawer false fronts to hid the pocket hole screws on the drawer fronts
- Make the top
- Attach Casters
- Apply finish