

WHAT I DID TODAY
Hi everyone,
Well I took a day off from the project to enjoy the weather and got back in the shop today, I also hit a roadblock to forced me to change my original plans regarding the middle leg.
- Project Revision
- Middle Foot (Revision)
- More Sanding
- Added the hinges
- Free standing Unit
PROJECT REVISION
When I originally planned my project I thought if I just left the middle leg with just a castor on the base and not make a foot like I did on the left and right sides because all I was using the middle leg for was for pivoting the divider sides, well that didn't work out because too much weight would of been put on the butt hinges that I was using to join the two panels.
So to remedy this I decided to make a small foot and add 1 castor and not 2 castors as I previously did on the left and right sides.
I also needed to add clearance to middle of the two panels to allow for the panels to move on the butt hinges, so I added another piece of lumber on the left side of the right panel and glued and screwed it in place.
MAKING THE MIDDLE FOOT (REVISION)
As I stated in my project revision I needed to make a middle foot to support the weight of the dividers and to move some of the weight away from the hinges. So I changed my joinery from a mortise and tenon joint to basically designing a foot riser and added a castor. The reason for changing the joint was because I needed a lot more wood to insert the castor stem and therefore could not add a tenon because the stem would not be able to be inserted.
So I made 6" foot and centered a mortise that was the same size of the leg since I could not make a tenon. Then I used my router to clear out most of the waste and then used my chisel's to square the mortise. In essence the leg end was a type of tenon but wood was not removed as is traditionaly done to create tenon shoulders. It was the best solution I could come up with. Below you can see pictures of this step

Here I just hogged out most of the mortise using my palm router and then I used my chisels to square the mortise corners.

Test fitting the leg foot , I made the foot oversize and trimmed it to 6".
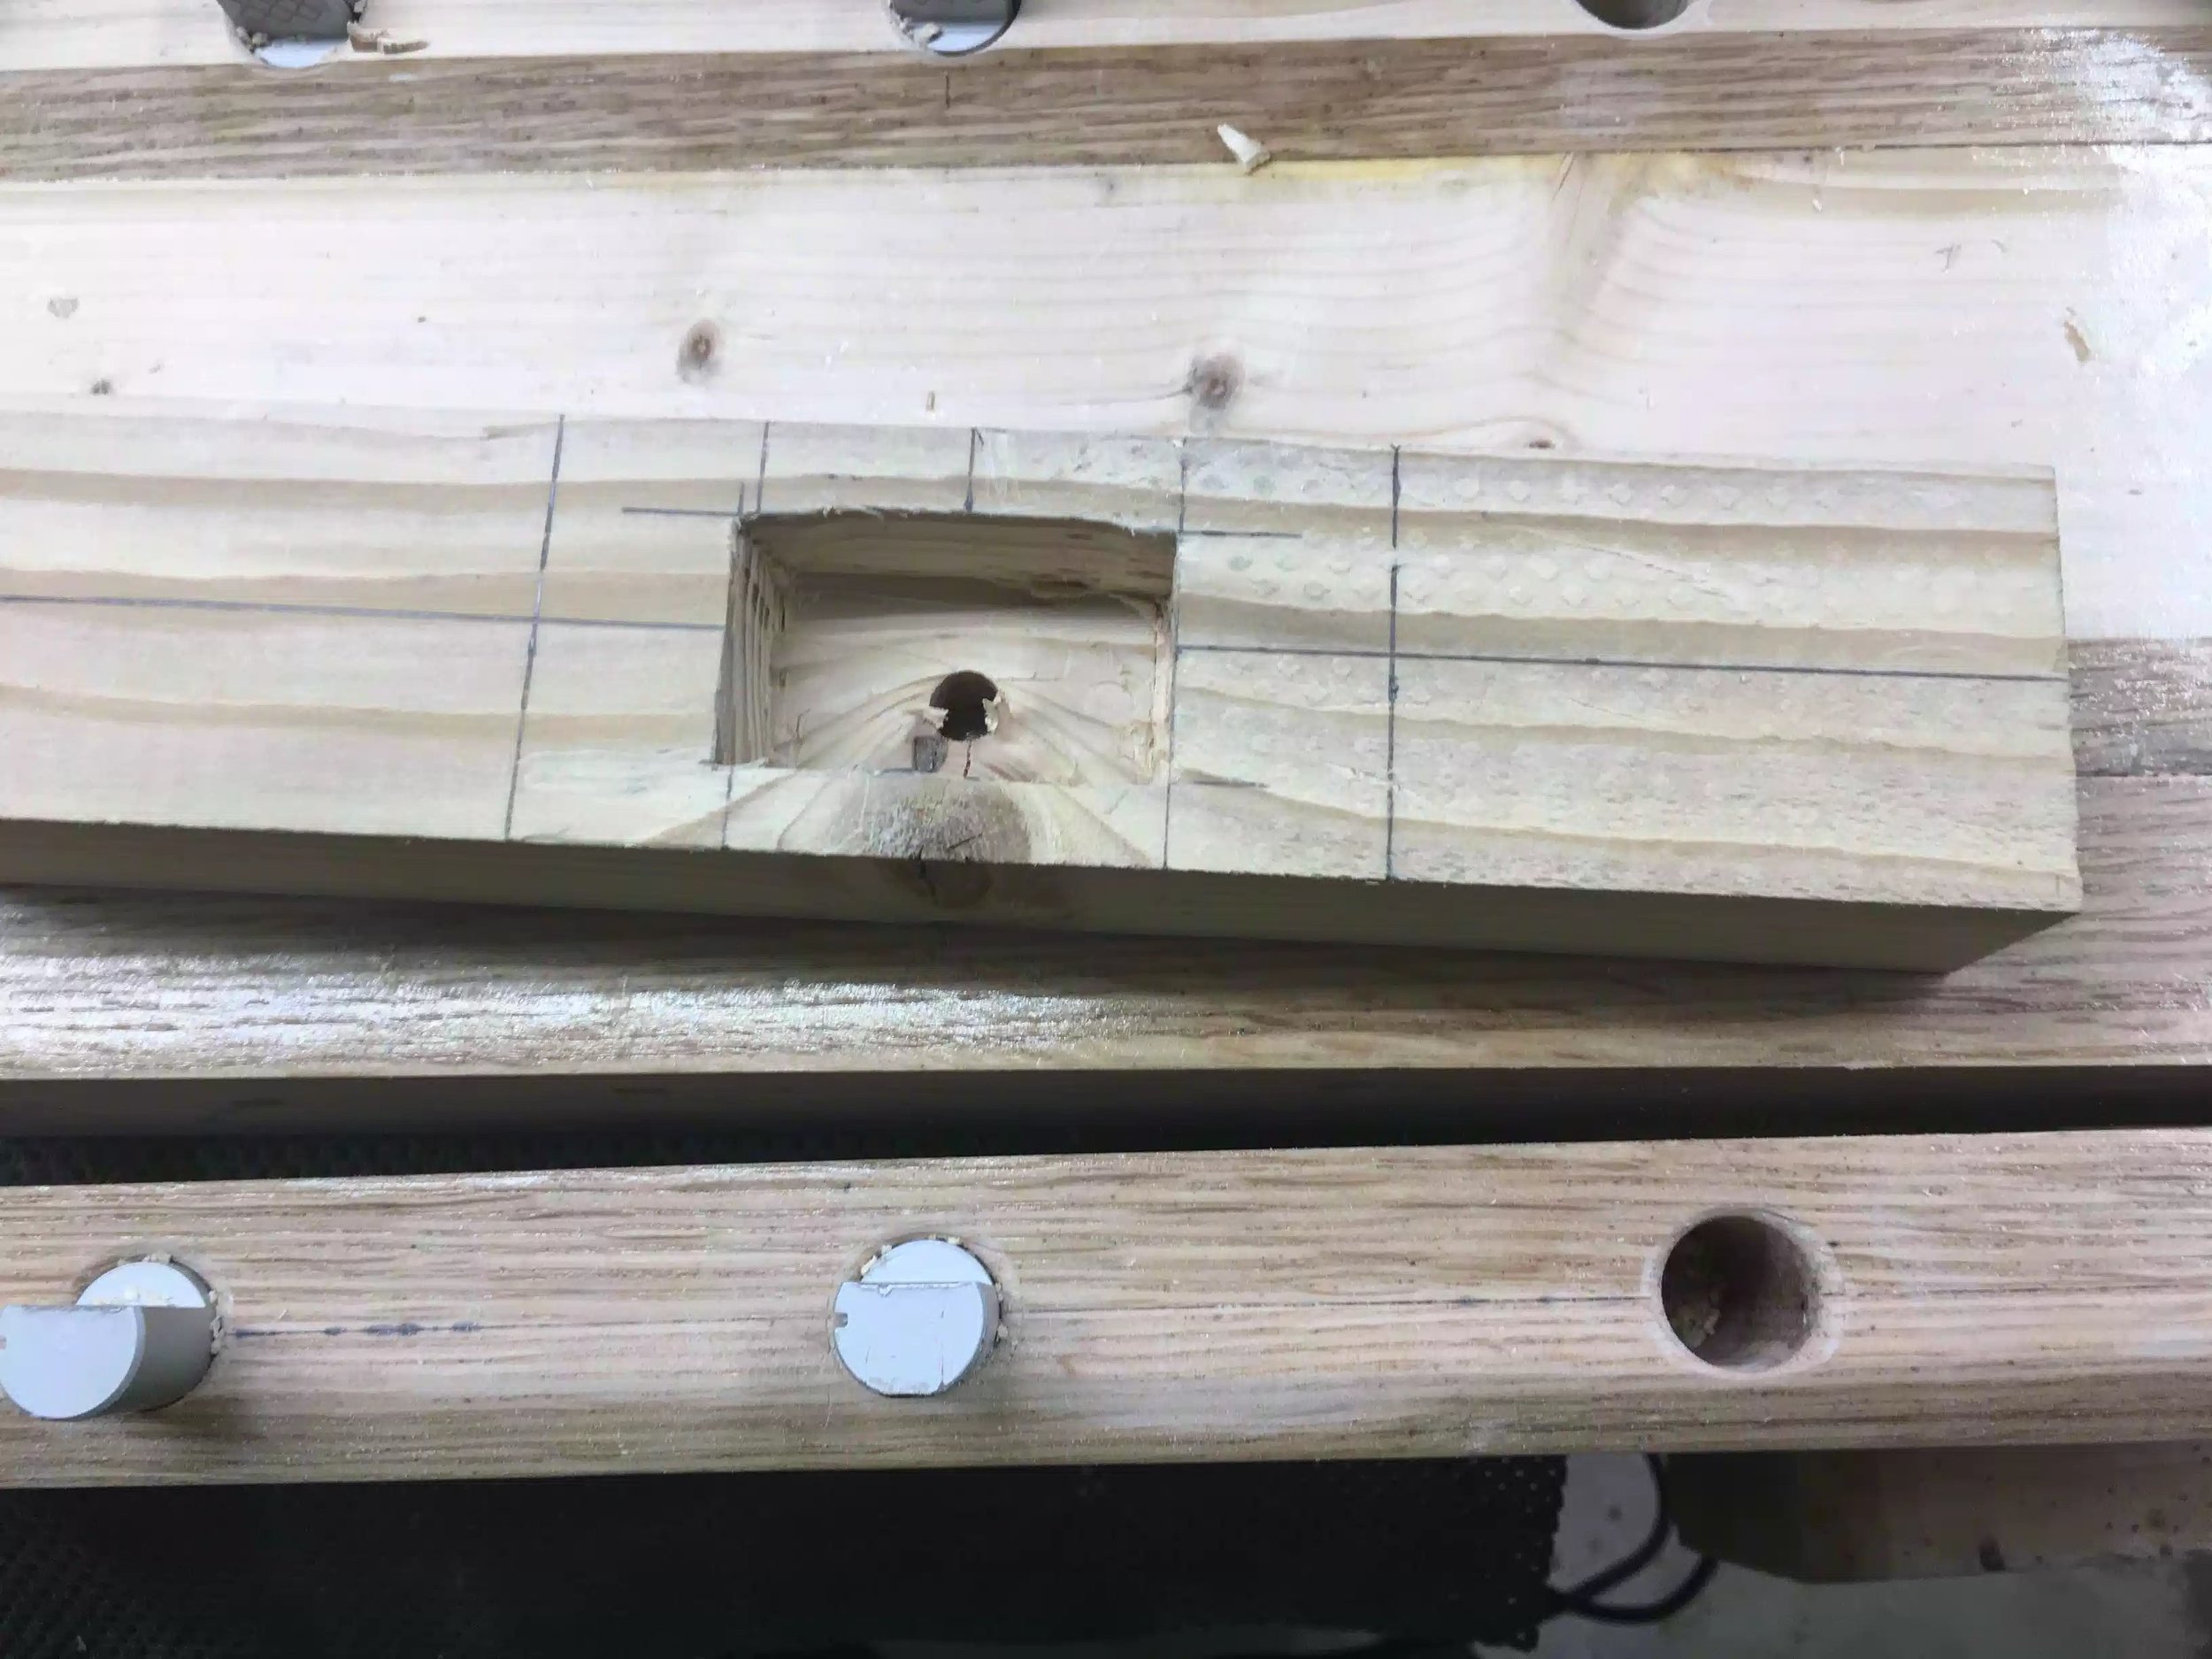
Here I needed to drill a 3/8" hole for the caster stem to fit up into the foot. This way I had a starting point to drill up into the actualy leg and not worrying if both holes were in the same place to receive the castor

Finally I needed to add a round-over to mimic the other feet on the left and right side so I just used the masking tape to add a curve and then I cut it at the band saw, and smoothed it at my spindle sander

Here is the finished foot and it looks great, I know I made it correctly because the plywood panel is plum and I can even move the panel around on 3 casters.Success
When I was taking a lot of these pictures I thought a 4" foot was long enough and after making the entire foot I had a knot right in the middle of the mortise and it cracked so I had to replace the entire foot so I made it from scratch again and made it 2" longer.
MORE SANDING
After I finished working on the middle foot I had to sand the entire 2 panels again and I also finished rounding over the legs . I used a mixture of belt sander and orbital sander and used from 80 grit - 220 grit. Below you can see my temp sanding station.

Here are my sanding tools and a hand planer.
ADDING THE HINGES
I added 3 butt hinges to the center of the 2 panels , I placed them at the top, middle and bottom. I secured the left side of the hinge to one panel and then added a little spacer block and secured the rest of the hinges.
I also needed to temporarily prop the bottom left side of the right panel because that didn't have a castor to support it so I just put scrap-wood underneath that side making sure that top of each panel was level with each other, it wasn't pretty but it was very quick way of achieving a level top and bottom, then I finished securing the right sides of the hinges. Oh yea I also used clamps to pull both panels together into the spacer block I positioned in between the dividers that way I was assured the hinges would line up under each other.

Here is the top hinge secured on one side, you can see the spacer blocker in the middle, you can barely see the clamps holding the panels together.

Here you can see all 3 hinges attached to the left side and the clamps 2 on each side holding everything together until I get to the other side of the hinges

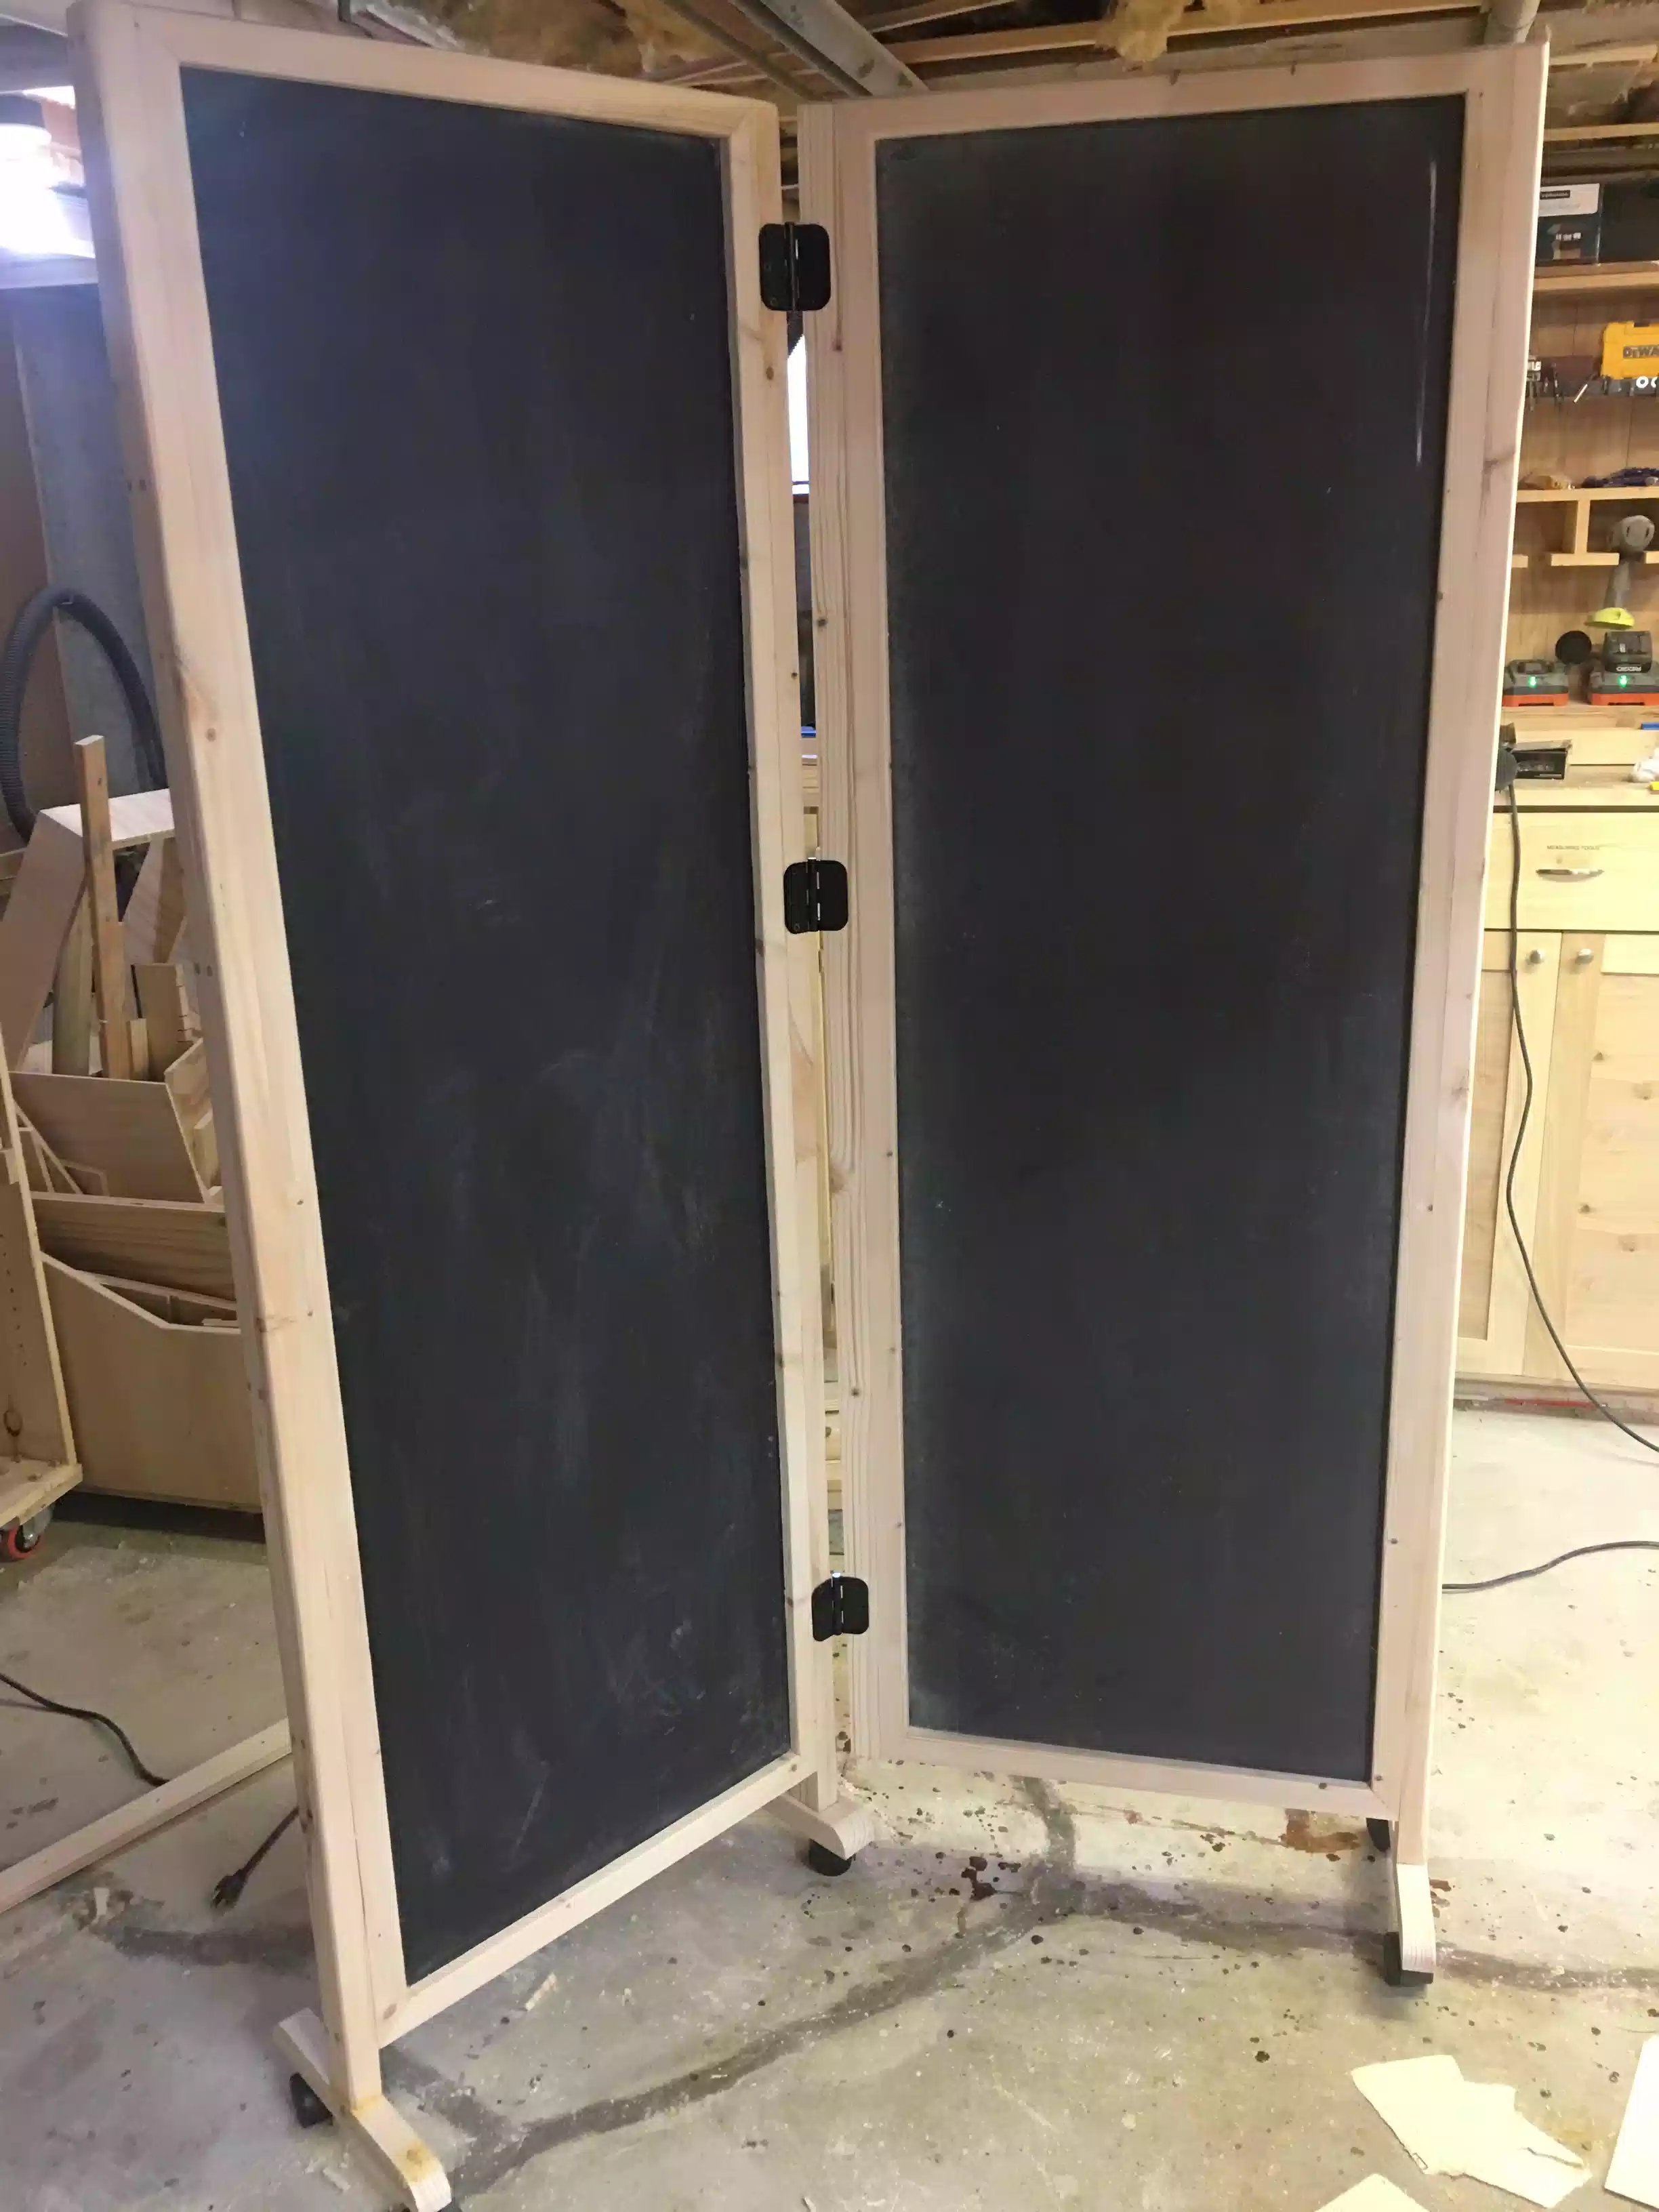
All hinges attached and we have a function divider.
FREE STANDING DIVIDERS
It has taken me a long time in getting this far and with so many obstacles on my journey thus far, but today we have a free standing room divider that can move and bend and not fall over. I feel accomplished and whats more important the wife really likes it, but were not finished yet.
A closer look, don't worry about that black panels I need to apply another coat of paint to that.

Free standing unit that can pivot, not bad looking

Final picture of the panel, looks awesome
NEXT
- Today I came across a broken router, specifically the collet nut on my Craftsman router is stuck so I am trying to either fix it or order a new one, I need the router for the next phase of the project specifically for the herringbone design I need to make.
- I have to prepare the wood for the herringbone, there are a lot of pieces to this, cant get this step done until my router is functional.
- Need to apply a 2nd coat of black paint to the front face(s) of the dividers.
- Need to purchase and install cork-board, and chalkboard paint to the back of the dividers
- Finally need to put 2-3 coats of Poly-Acrylic to the project I am using a HVLP sprayer to do this.
Until then, take care