


Here are the parts I will be working on in Phase 3, The Back, Front and the Cart Base.
Phase 3 deals with the cart Base, Front and Back. This section is the final section where I will be cutting the final components of the cart before I start my assembly.
Here are the tasks that I completed in this section:
The Base and Casters
The Back and Pocket Holes
The Front
THE BASE & CASTERS
THE BASE & CASTER WHEELS
The base is pretty basic stuff but its role in the cart is crucial. The base is what all the other components that I made sit on, so it needs to cut to the exact size in order for everything to fit on it. As far as skill needed to create the base its very basic stuff but here is the order of events that went into prepping it.

REINFORCING THE CASTERS
4 Plywood squares and screw them into the underside of the base. These square reinforce the corners of the base where the caster will be position. I also countersunk 4 screw holes where the screws will be inserted to secure it to the bottom of the cart. Then I used glue and screws to secure it.
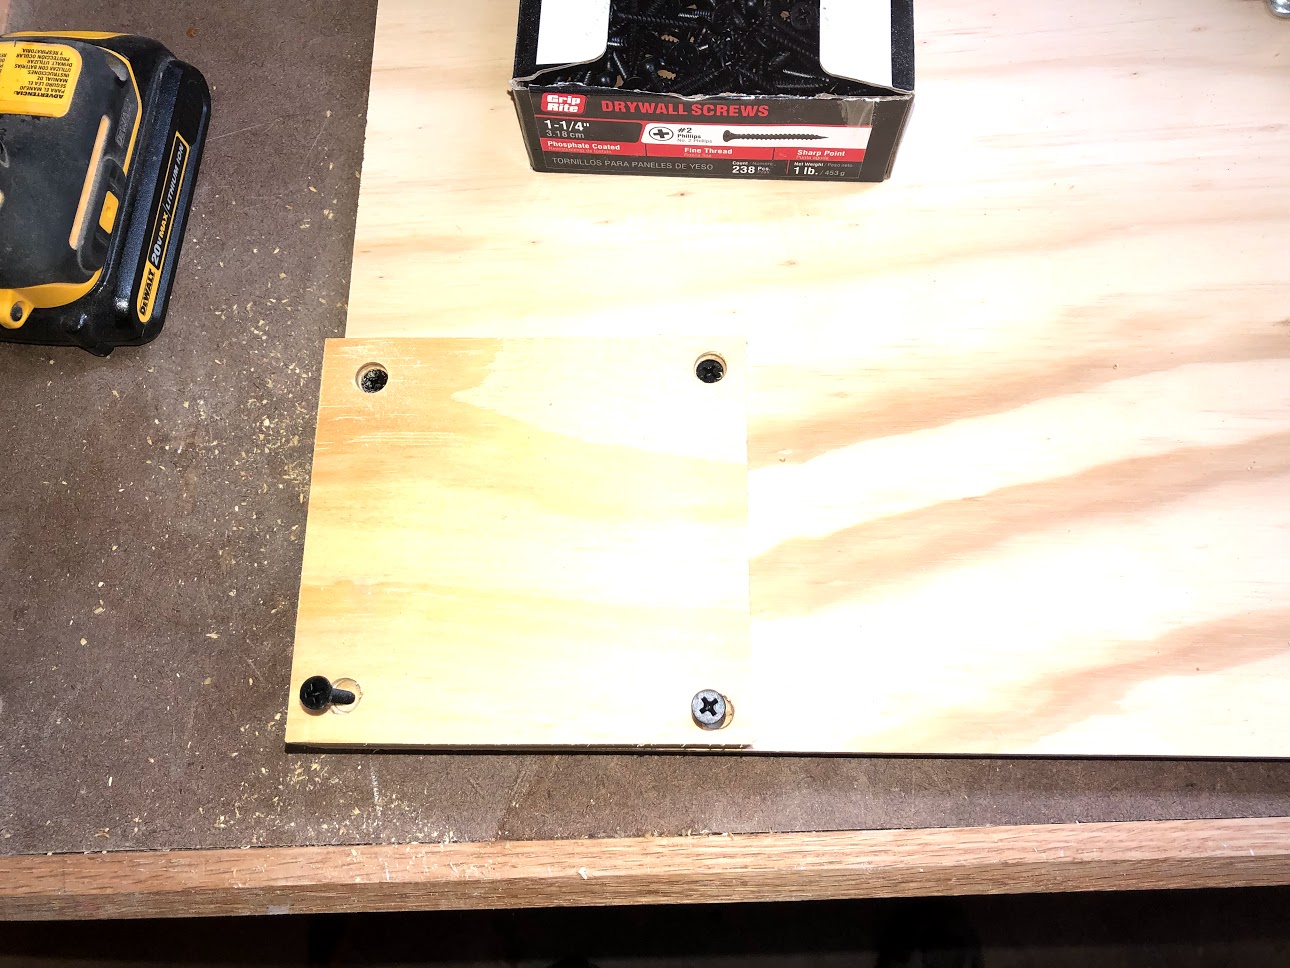
SECURING THE CASTERS
To secure the casters to the squares I just screwed to the cart base, I used 4 Hex Head Sheet metal screws into the 4 holes of the casters. I really like these Hex Head screws because I can use my drill to attach them using a head bit in it. I used to use bolts , washers & nuts to do this but I hated that I needed the bolts to protrude through whatever base I was adding casters to then securing the caster in position with nuts. With these screws they do not protrude through the base and they are out of sight. Some time whatever you are attaching them to get in the way of other components.


Here are the hex screws I was referring to.
2 DOWN : 2 TO GO
Here is the second caster I added all that was left was to add 2 more on the front end of the cart, and basially the cart base is ready.

THE BACK
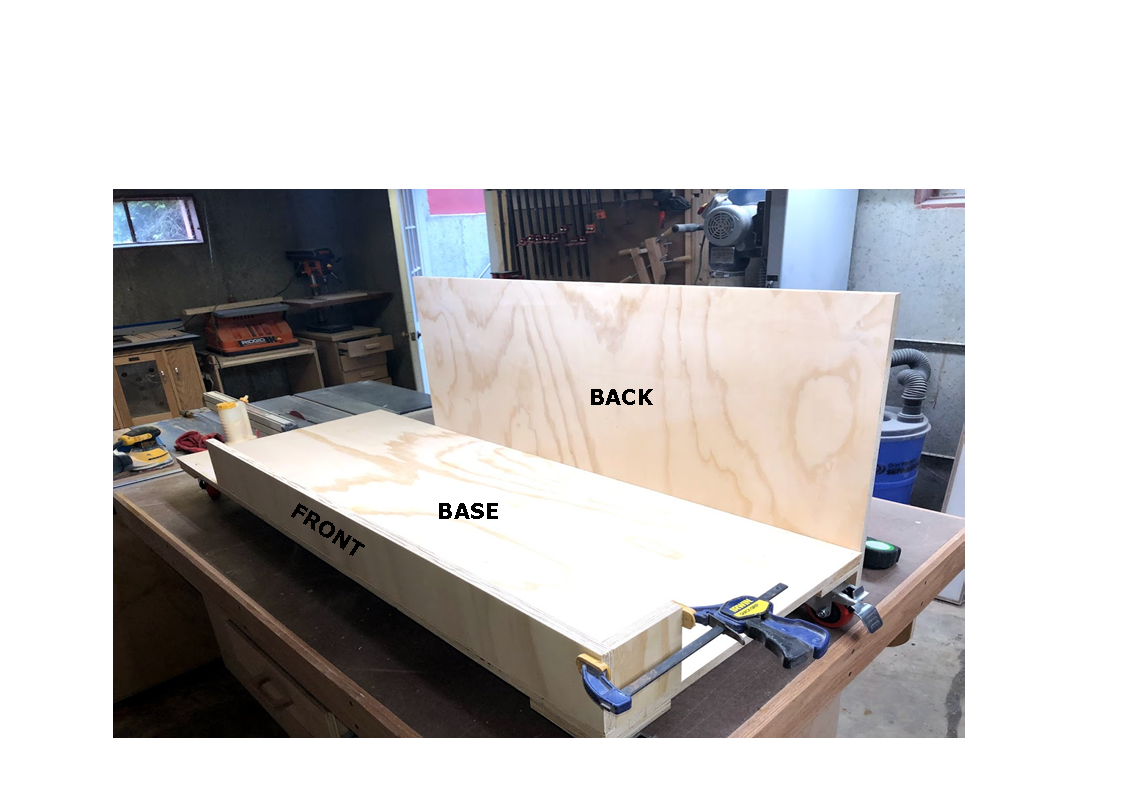
The back of the cart is basically a plywood panel that is secured on the back edge of the base, this panel defines the sheet goods storage space that I am building into the cart. In hindsight I wish this space was wider, because at 6” deep it really doesn’t cater to storing that much storage space, but anyway hindsight is a beautiful thing. The panel is basically a quarter sheet of plywood with pocket holes all the way along the long edge so as that it can be screwed into the base of the cart, I also positioned pocket holes on the back edge so as that I can secure the panel into the vertical shelving rack I built in phase 1.
THE BACK PANEL & POCKET HOLES
Here you can see the back panel which is 48” x 24” in size, you can also see all the pocket holes that I drilled on the bottom & back edge so as that I can secure the panel into the cart.

THE FRONT
Basically the front is a long piece of plywood that is positioned on the front of the cart, as you can see in the image there is very little to it. I basically cut the panel to 48” x 6” wide. But what you don’t really see is that I have drilled pocket holes into the back face of the plywood panel in order to secure into the base. Basically anything that is being secured into the base is pocket hole screwed with glue.
PHASE 3 COMPLETE
Phase 3 basically wraps up all the table-saw work, all the pocket hole drill and basically all components are ready to be assembled into 1 pretty well organized cart. All of these phases could of been stand alone projects on their own. So lets recap we have made a vertical shelving unit with 4 shelves, a cubby with 4 compartments to store wood in, a base where we added casters.
All that is left to do is assembly and that will be Phase 4 pf the project.