

So today's activities included a trip to my local home center to purchase some latex primer and chalkboard paint.
WHAT I DID TODAY
- Went to Home Depot
- Applied Latex Primer
- Finished the Right panels Herringbone Pattern
WENT TO HOME DEPOT
I still needed to go to Home Depot to finish up getting my supplies for the divider which included:
- Latex Primer (little did I know that it was recommended that I needed to use a primer before applying the chalk-board paint) so I needed to get that.
- I also needed to purchase the chalk-board paint.
Below you can see the products I purchased and links to them


APPLIED LATEX PRIMER
So to get started with applying the chalk-board paint I needed to apply the primer to ensure good adhesion of the chalk-board paint.
I learnt from my mistake when applying the black semi gloss paint to the front of the panels, so I applied painters tape to perimeter of the panel before applying the primer, below you can see some of the pictures of latex paint and blue painters tape.

Here is the primer I used

Here is the panel after the primer has been applied, I used a 6" roller to apply and the painters tape kept the primer away from legs and face frames of the panel.

Here is another view of the panel

Another picture of the primed panel
FINISHED THE RIGHT PANEL
The other day I finished applying the herringbone panel on the left side so today I got the right panel finished, this panel will receive the cork-board on the back side. Basically everything that I did on the left panel was repeated on this panel.
- Used the template to position the wood pieces
- Glued and brad nailed the pieces in position, each template took care of 2 rows at a time and I got a scare when I thought I didn't have enough room to lay the final row of the pattern, but thank go I did have enough room and my measurement for the panel was the same as the left side. That would of been really bad and would of been very hard to rectify.

The right side panel all complete, just need to add the cork-board to the back
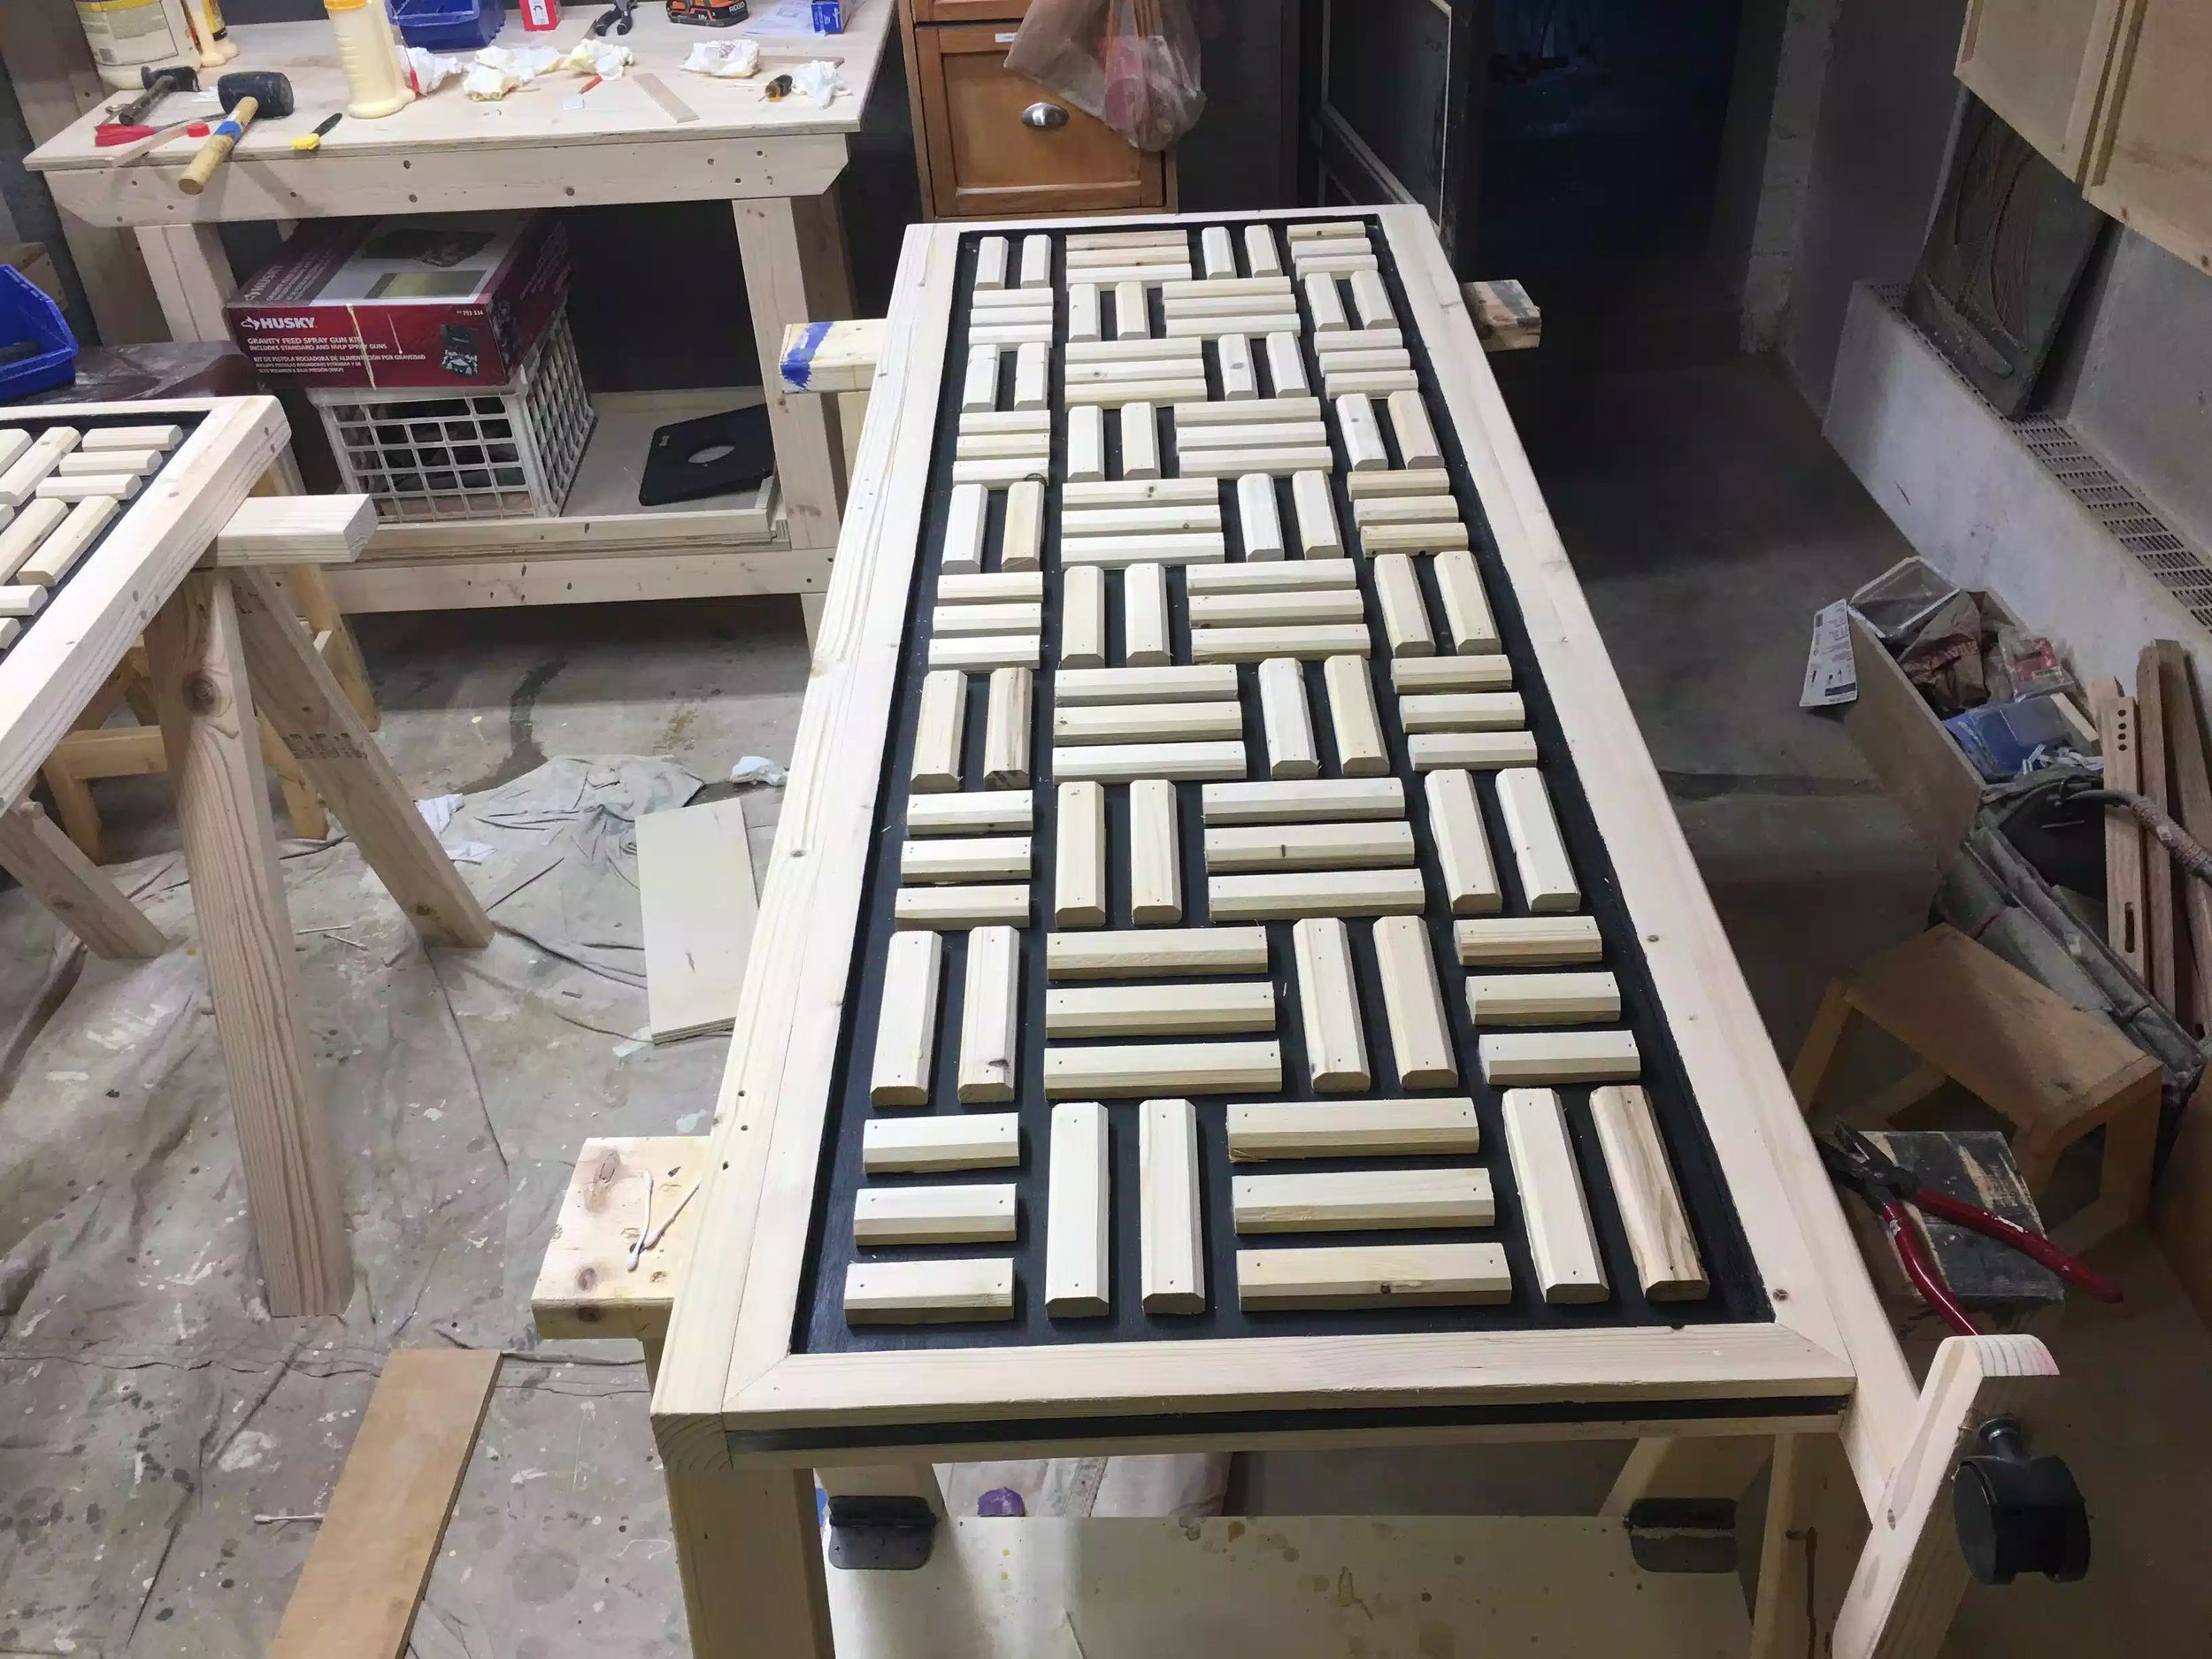
Here is another view of the right side panel, I cant wait to get both of these panels together and see what they look like.
NEXT:
- I need to finally apply the chalk-board paint
- I need to buy and install the cork-board: I am currently researching the best way of attaching the cork tiles to the plywood panel. I think possibly applying spray contact adhesive will work.
- Finally get to use my HVLP sprayer to apply the Poly-Acrylic finish to the divider.

Here is a picture of my HVLP spray gun.