

So today was a short day in the shop and didnt get much done, but I did assemble the bracket feet, made the cove molding and assembled the whole bracket feet assembly to the unit.
WHAT I DID TODAY
- Cleaned up all the glue on the feet and frame
- Laid out my guidelines for the molding
- Made the Cove molding to go around the base
- Drill holes in the feet to be used to secure them to the base
- Securing the frame to the bottom base of the shelf
- Attached the bracket feet parts to the base
- Finished Bracket Feet Installation
CLEANED UP THE GLUE
So the feet and frame were all glued up from yesterday so I just used a combination of hand sanding and also used my orbital sander to clean up all the squeeze out and they came out awesome I was hoping that the design wasn't too elaborate for the unit because after all it is a minimalist style project.

Here is another view of the feet , not cleaned up yet.

Here is the finished bracket feet , all sanded, I just love how the grain wraps around the feet.

Here is the mitered frame I made using biscuit joints, the bracket feet are attached to the bottom of this frame.
LAYOUT FOR THE MOLDING
To figure out how much cove molding I needed to make I used my shop made offset guide block to draw a 1/4" line on the front and sides, since I wasnt applying molding to the back as it will be against a wall I didnt place a line back there.
Here you can see the 3 offsets on the block , I used my dado stack on the tablesaw to make this. My offsets are standards at 1/4",3/8" & 3/4".

Here is another view of my offset block, I also used my label maker to print labels to show each position of the offset

Here you can see the layout lines and my offset block
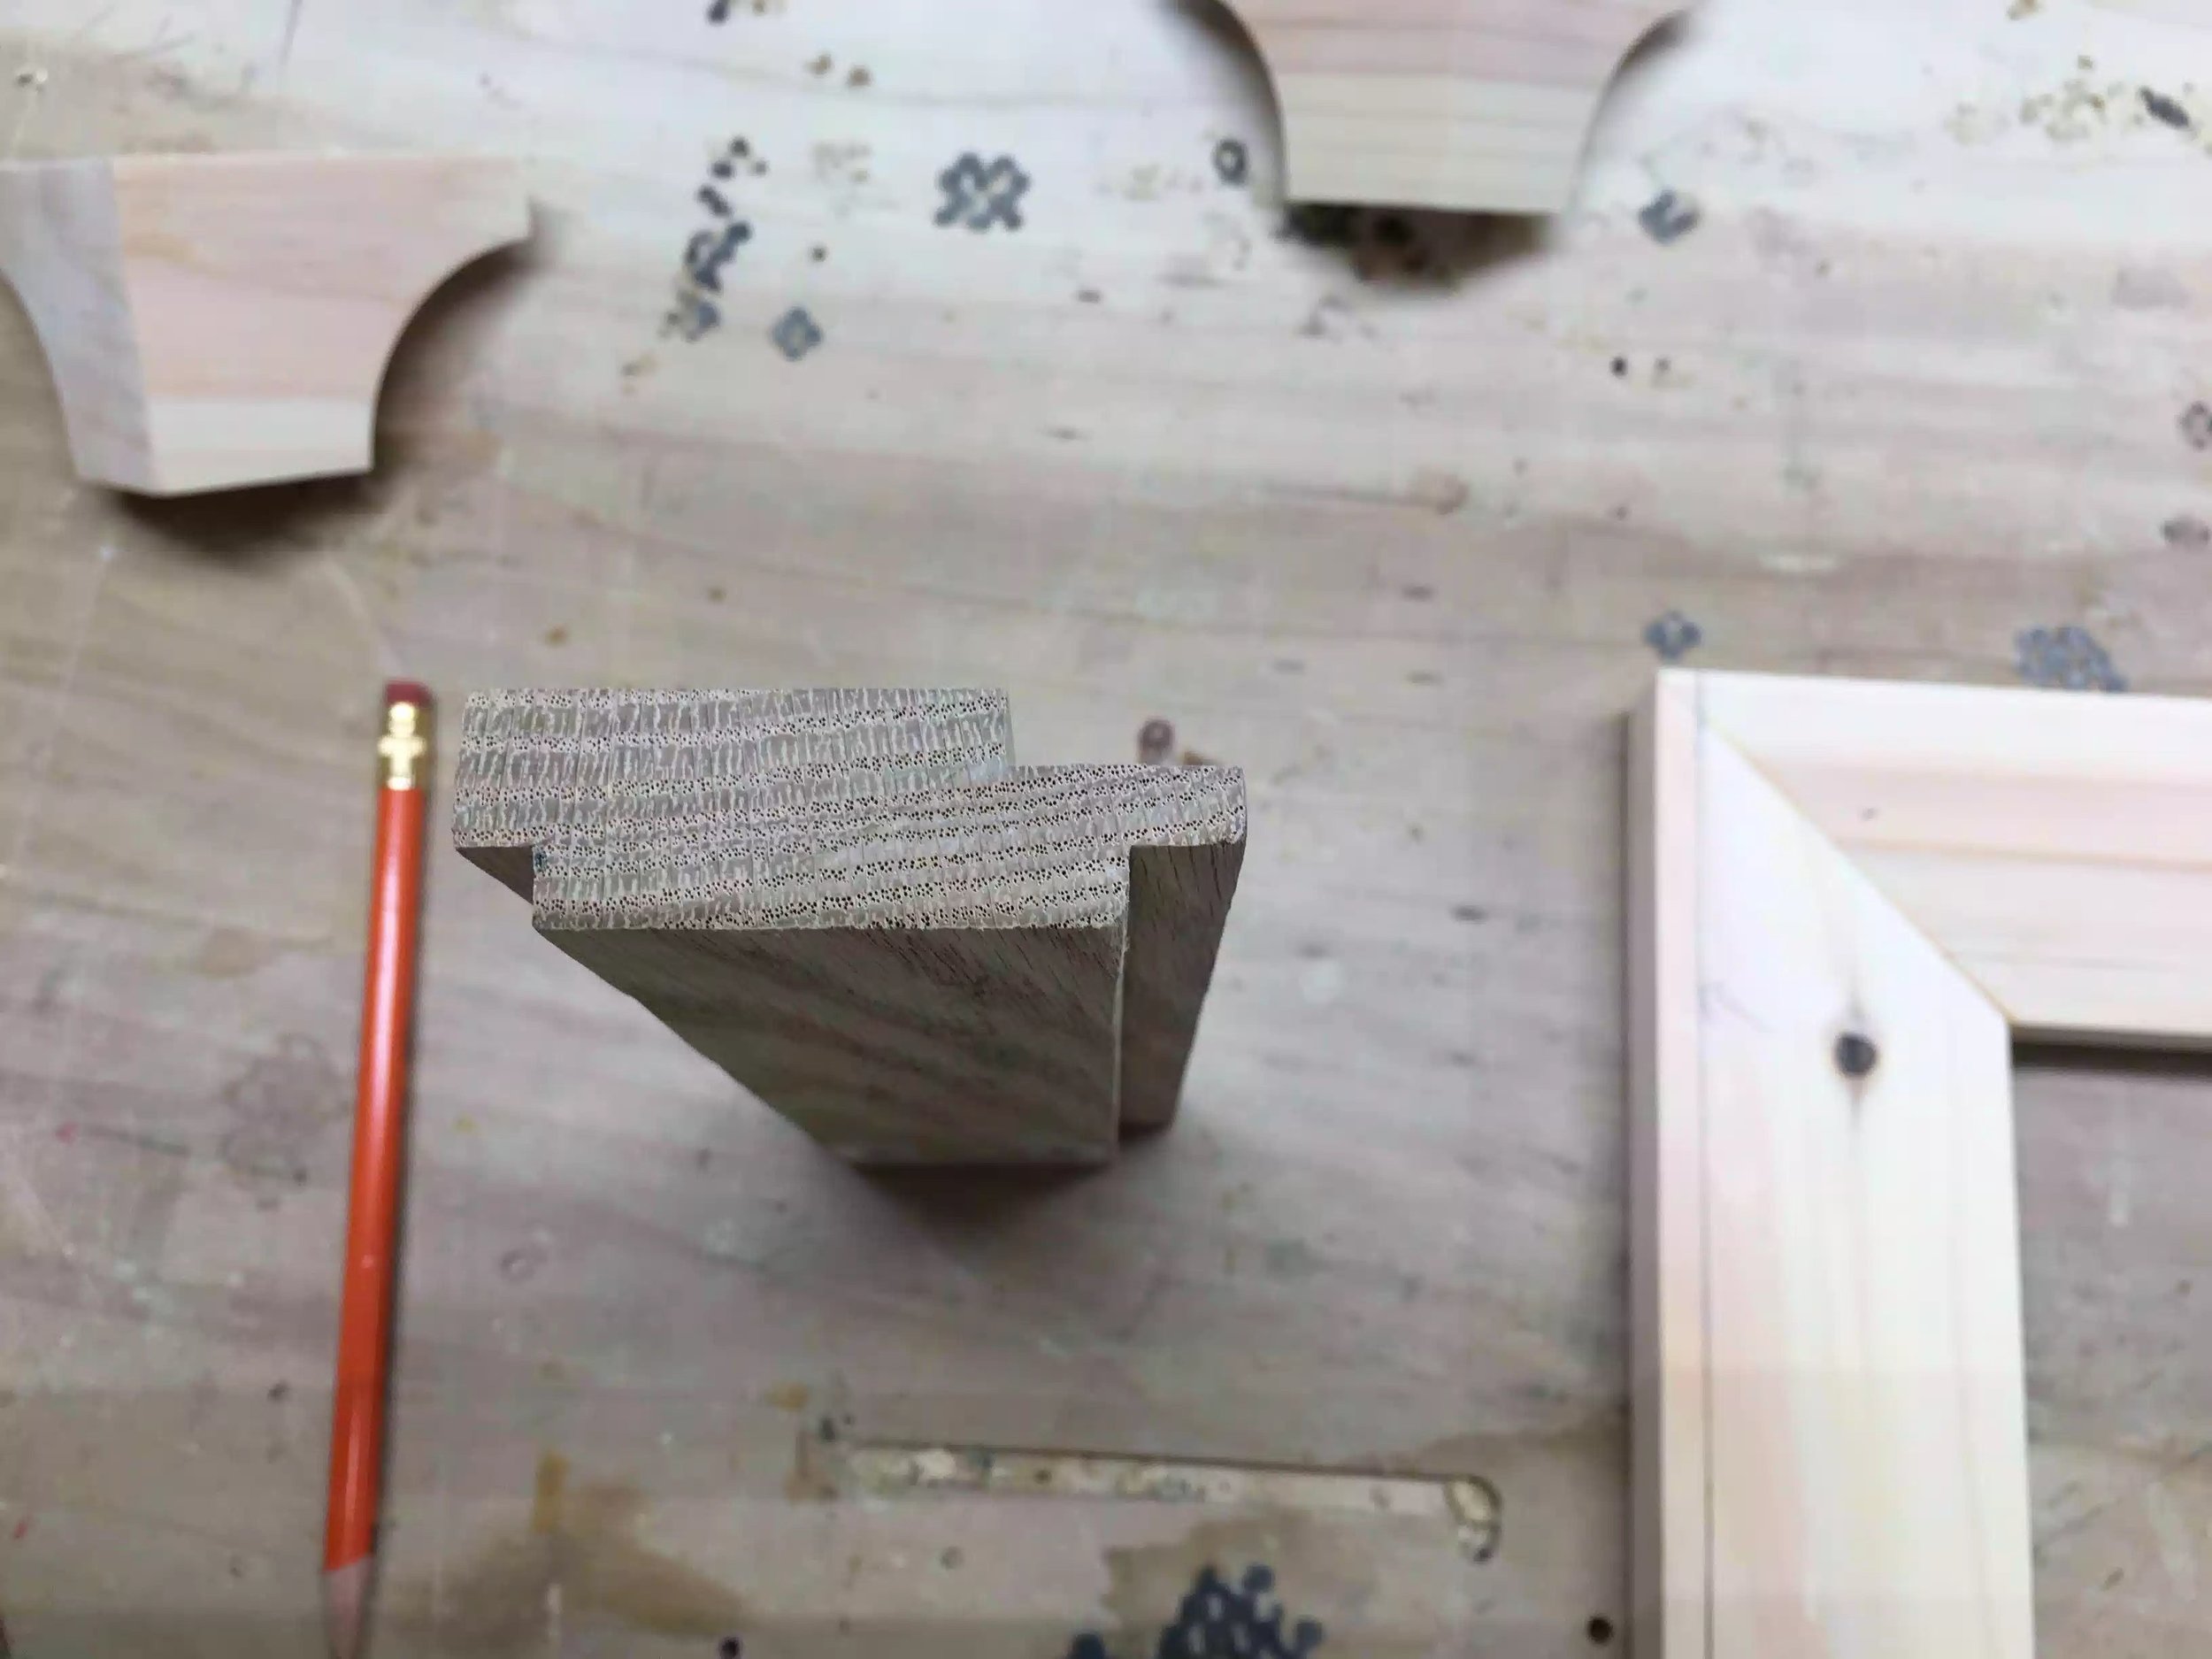
MAKING THE COVE MOLDING
I was in my local Home Depot looking at finishes for this project , could decide on one yet, but since I was there I went to the mill work dept and looked at buying some cove molding for project and their prices were outrageous, so I made some myself using my router and a cove molding router bit that I forgot I had.
After doing a little research online and watching videos on YouTube I was pretty sure I could pull this off, so I used an oversize blank of scrap wood that I had, brought it to the router table with the cove bit installed and ran it through the blade, after that was done I brought the blank to my table-saw to rip the profile off and that is it . I used some sanding paper to clean off the milling marks left from the router and hey presto I had my piece of molding ready for my project.

Here is my router table and the blank I used.

Using my Grripper and the table-saw I ripped the molding off.

Here is the finished cove molding,
MOUNTING THE FRAME TO THE BASE
Since all my parts were milled it was onto the next step off adding all the parts to the shelving unit base, so I started with adding the mitered frame onto the base of the unit, this was not very hard and it didn't need to look pretty either, but the frame did need to be positioned correctly because I made the frame oversized because I was adding the cove molding and I need a surface to glue and brad nail it to.

A good look at the frame, its basically a big picture frame.

Here is the mitered frame attached to the base , I used 1 1/4" drywall screws to attach it, and that's it, making sure the frame was flush to the back and that the over hang on the front and the sides matched the thickness of the molding I made.
MOUNTING HOLES FOR FEET
The bracket feet will be attached to the base with glue and mounting holes that I drilled using a forstner bit on my drill press, I also used little clamps to keep the feet attached while I hand screw the feet into position, I didn't want to use a impact driver for fear of blowing the out the feet and all my hard work down the drain.

Here is my drill press with a 3/8" forstner bit preparing to drill the hole

Here you can see the mounting holes in position, I also used a little 1/8" drill bit to clear the hole to the other side because a forstner bit only clears out so much wood it isnt designed to go all the way through

Here you can see me attching one of the feet on the frame, I used an F style clamp to keep the foot in position while I hand screw the foot on, I also added glue to the top of the foot.
FINISHED INSTALLING BRACKET FEET & MOLDING
So with the feet attached and the entire unit a lot more stable I moved onto installing the cove molding that I made, I made sure I made enough to have errors in cutting the coves mitered ends, I really needed all the angles to line up going down the corners of the base otherwise it would look terrible.
I used my table-saw with a mitering sled I made for the saw a couple of years ago, this was over kill but I didn't have any other way of cutting the 45 degree miters accurately

Here is my tablesaw mitering jig I made. If you would like plans tto make this jig please click the green button on the left, or below if looking on a mobile device
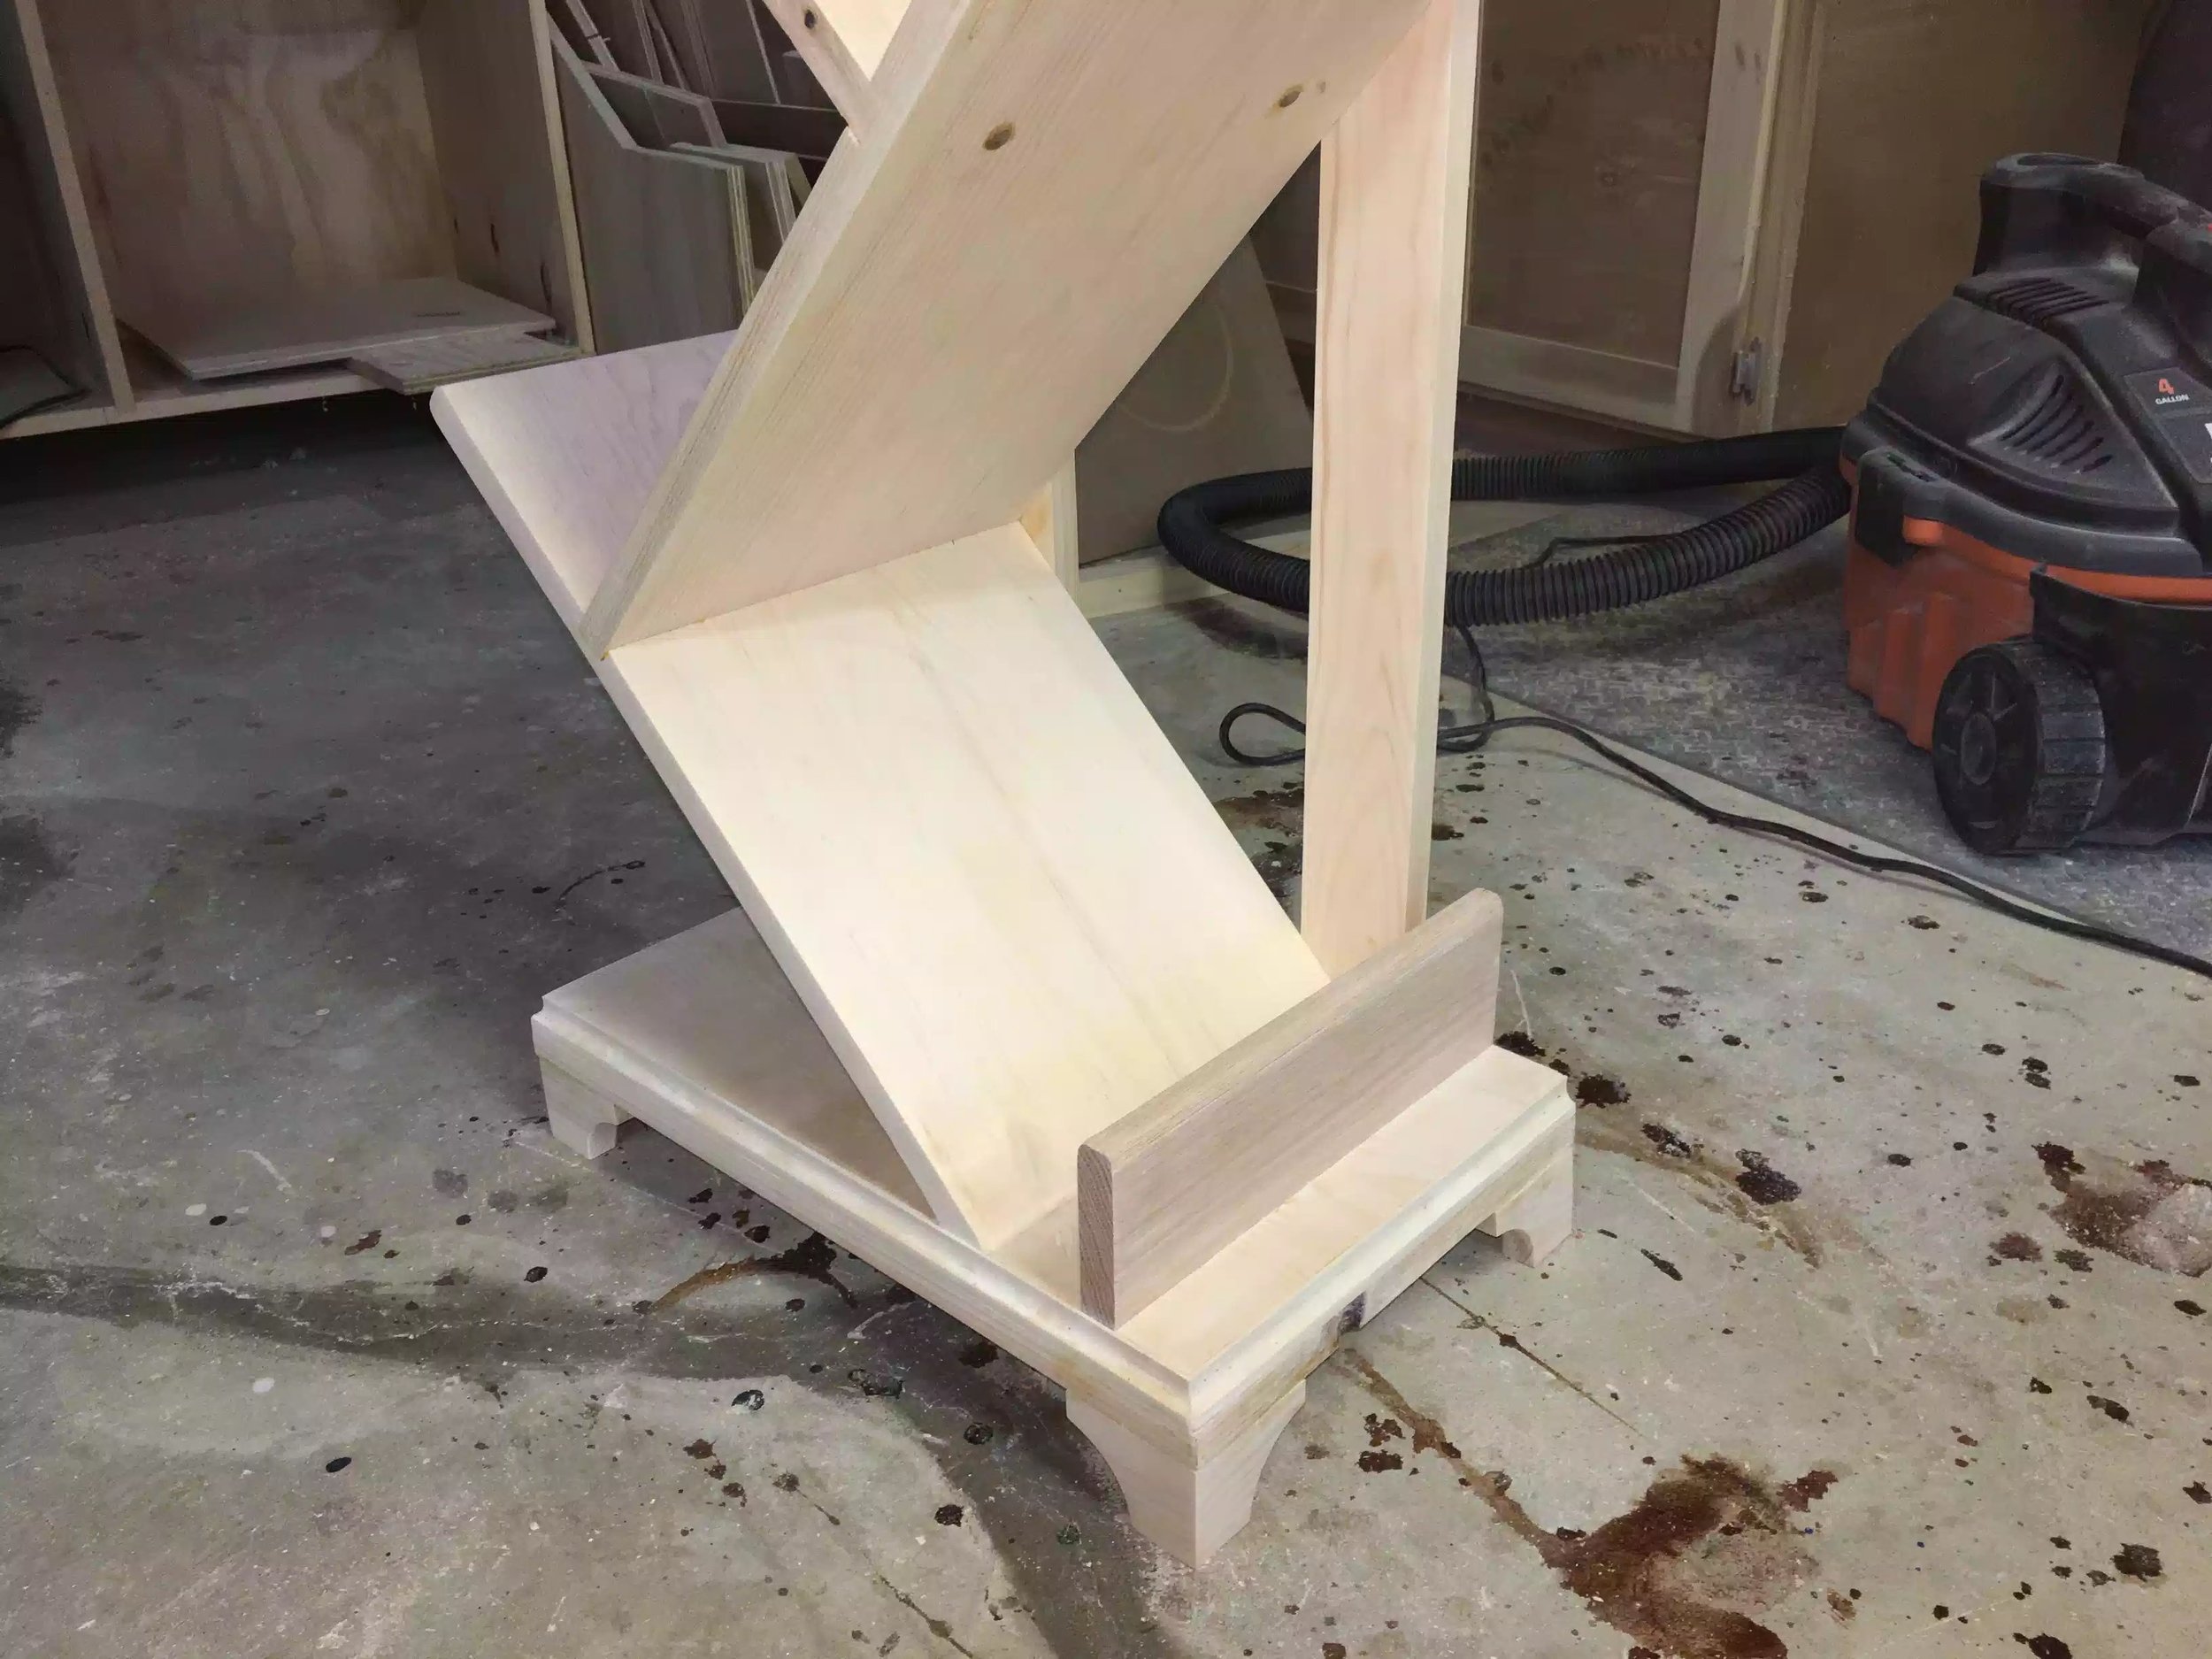
Here is the finished base, I really love the bracket feet and it was a nice new project inside a project. Love when that happens

Here is a close-up of the cove molding, need to clean up the brad pin marks and then sand it all down.

Here is the front of the base, not too bad.
So that is it for today this last part fininished the build phase of the project. Tomorrow I will be onto the finishing touches, such as sanding , using some wood filler to cover the pin holes on the molding. I still need to figure out a finish on this, I might use some paint but I got to check with the boss as to what she wants, since she is the painter in the family, until then.