

WHAT I DID TODAY
- Cleaned up the legs
- Attached the face frames
- Miter Joint Tips/Tricks
CLEANING UP THE LEGS
Yesterday I glued up the legs into a solid leg, this morning after the glue had dried and set I went about the process of removing all the glue squeeze out, since I made the legs oversize I could achieve this by ripping the legs on the table-saw by removing a skim cut. I also needed to make the legs top and bottom flush so I used my new Veritas flush trim saw to cut them to final size. There is still more work to do on the legs such as sanding them, add biscuit slots so as that I can attach them to the panels, cut a tenon on the bottoms and I will probably also add countersunk holes to add some screws, but at least they are made.

You can see the leg blank that is oversized I ripped the sides and use my flush trim saw to clean them up.
ATTACHED THE FACE-FRAMES
Yesterday I cut all the face frames for the plywood panels and today it was tyime to attach them. I used 1 1/4" brads from my brad gun and wood glue to attach them.
Each side of the panels were receiving them so I placed them on the panels and added the glue and then nailed them in place. I also needed to start cleaning them up because I needed to fill all the brad indents by using a special filler just for this task. I also needed a way to make the miter joints look a little tighter (they always seem to move a hair when the glue is setting, the gap always seems bigger than it is because the 45 degree angle compounds the gap so it looks like the grand canyon,so I i used a method that a lot of woodworkers are familiar with, but more on that in a second.

I just added the glue and brad nails, waiting on the glue to set up.

Doing a dry fit of the face frames, next to add the glue.
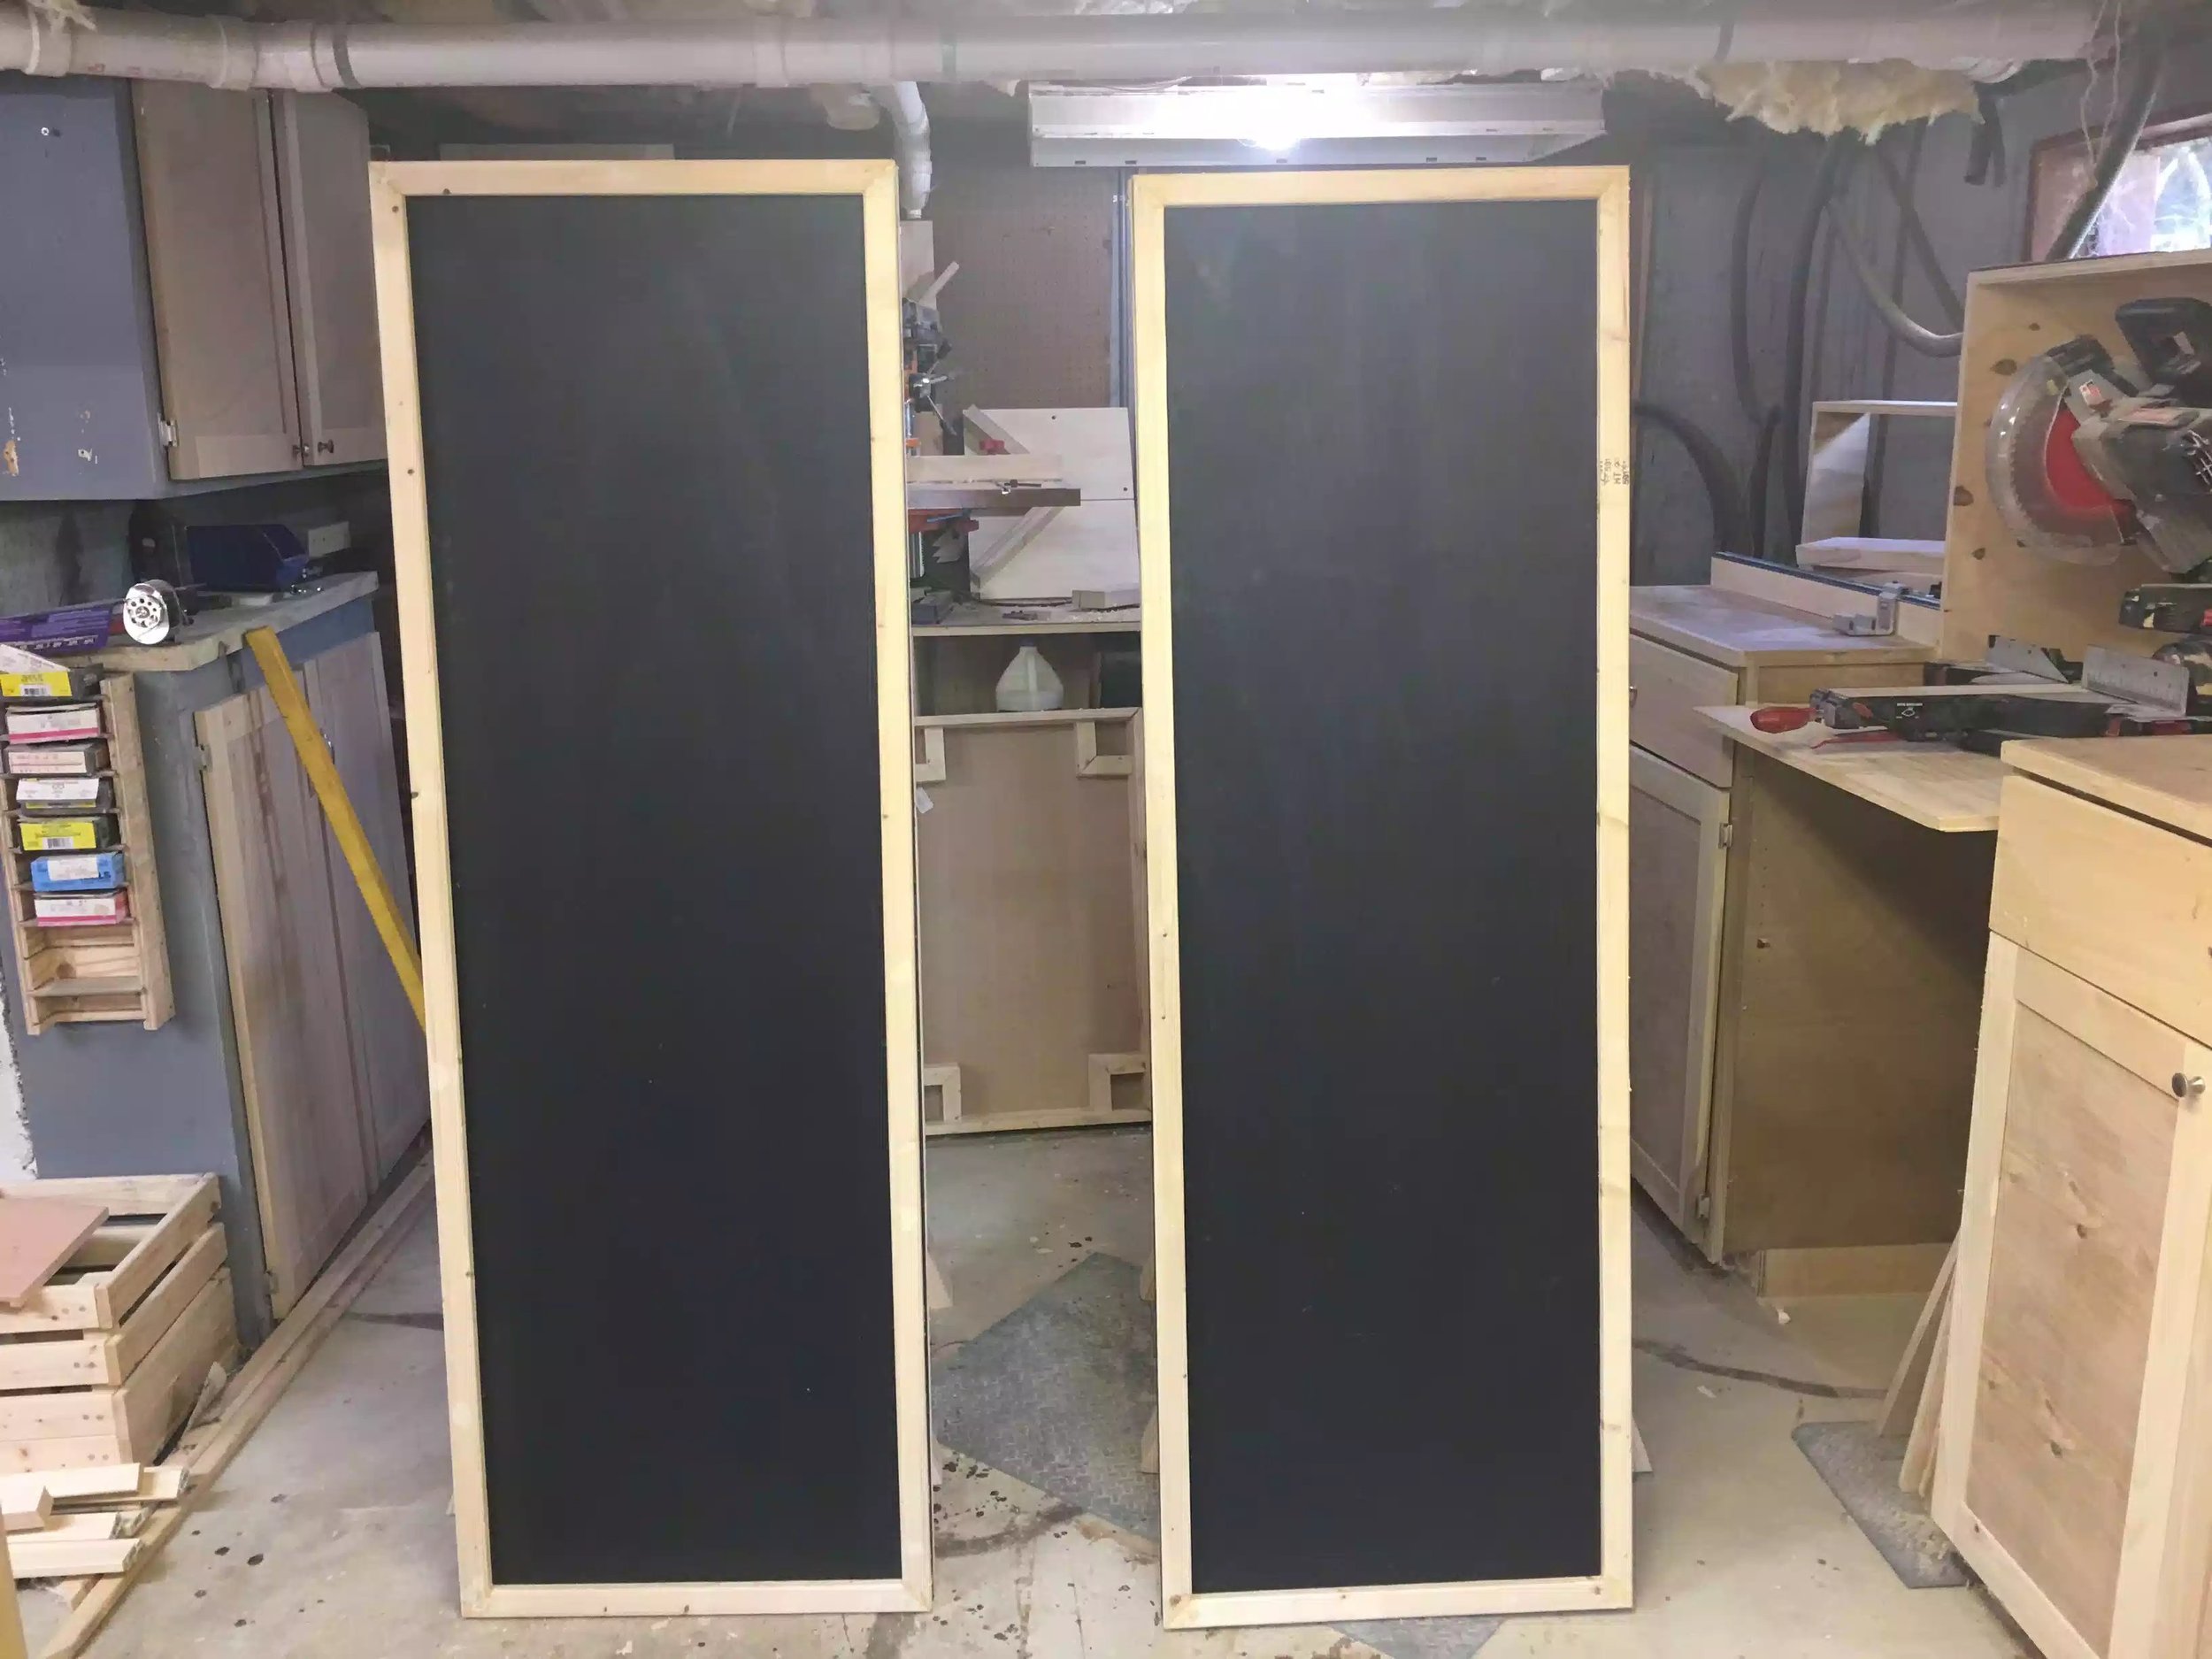
Here is the front side of the panels, still have alot of work to do but they are starting to take shape.

This is the back side og the panels, I will be adding chalkboard paint and corkboard, later in the project
MITER JOINT TIPS/TRICKS
Sometimes when you make miter joints you try so hard to make sure that joints line up to make it look like the wood corners around the project seamlessly, but despite your best efforts and your attention to detail you find yourself with the smallest of gaps but it looks like you could drive a bus through the gap. So a while ago I specifically solicited advise from fellow woodworkers what they do in this situation and the one that I like the most is this.
Sawdust Paste
Whenever you cut wood by either ripping or crosscutting the boards keep the sawdust that you generate because if you mix that sawdust with wood-glue you can use it to fill in them little gaps that you have. So I got in the habit of bagging sawdust and keeping it for occasions such as this, espicially hardwoods such as oak or maple, but on this occasion its pine.
Below are pictures of me applying the paste , I will need to come back to the miter joints tomorrow and cleaning them up so the gap totally disappears.
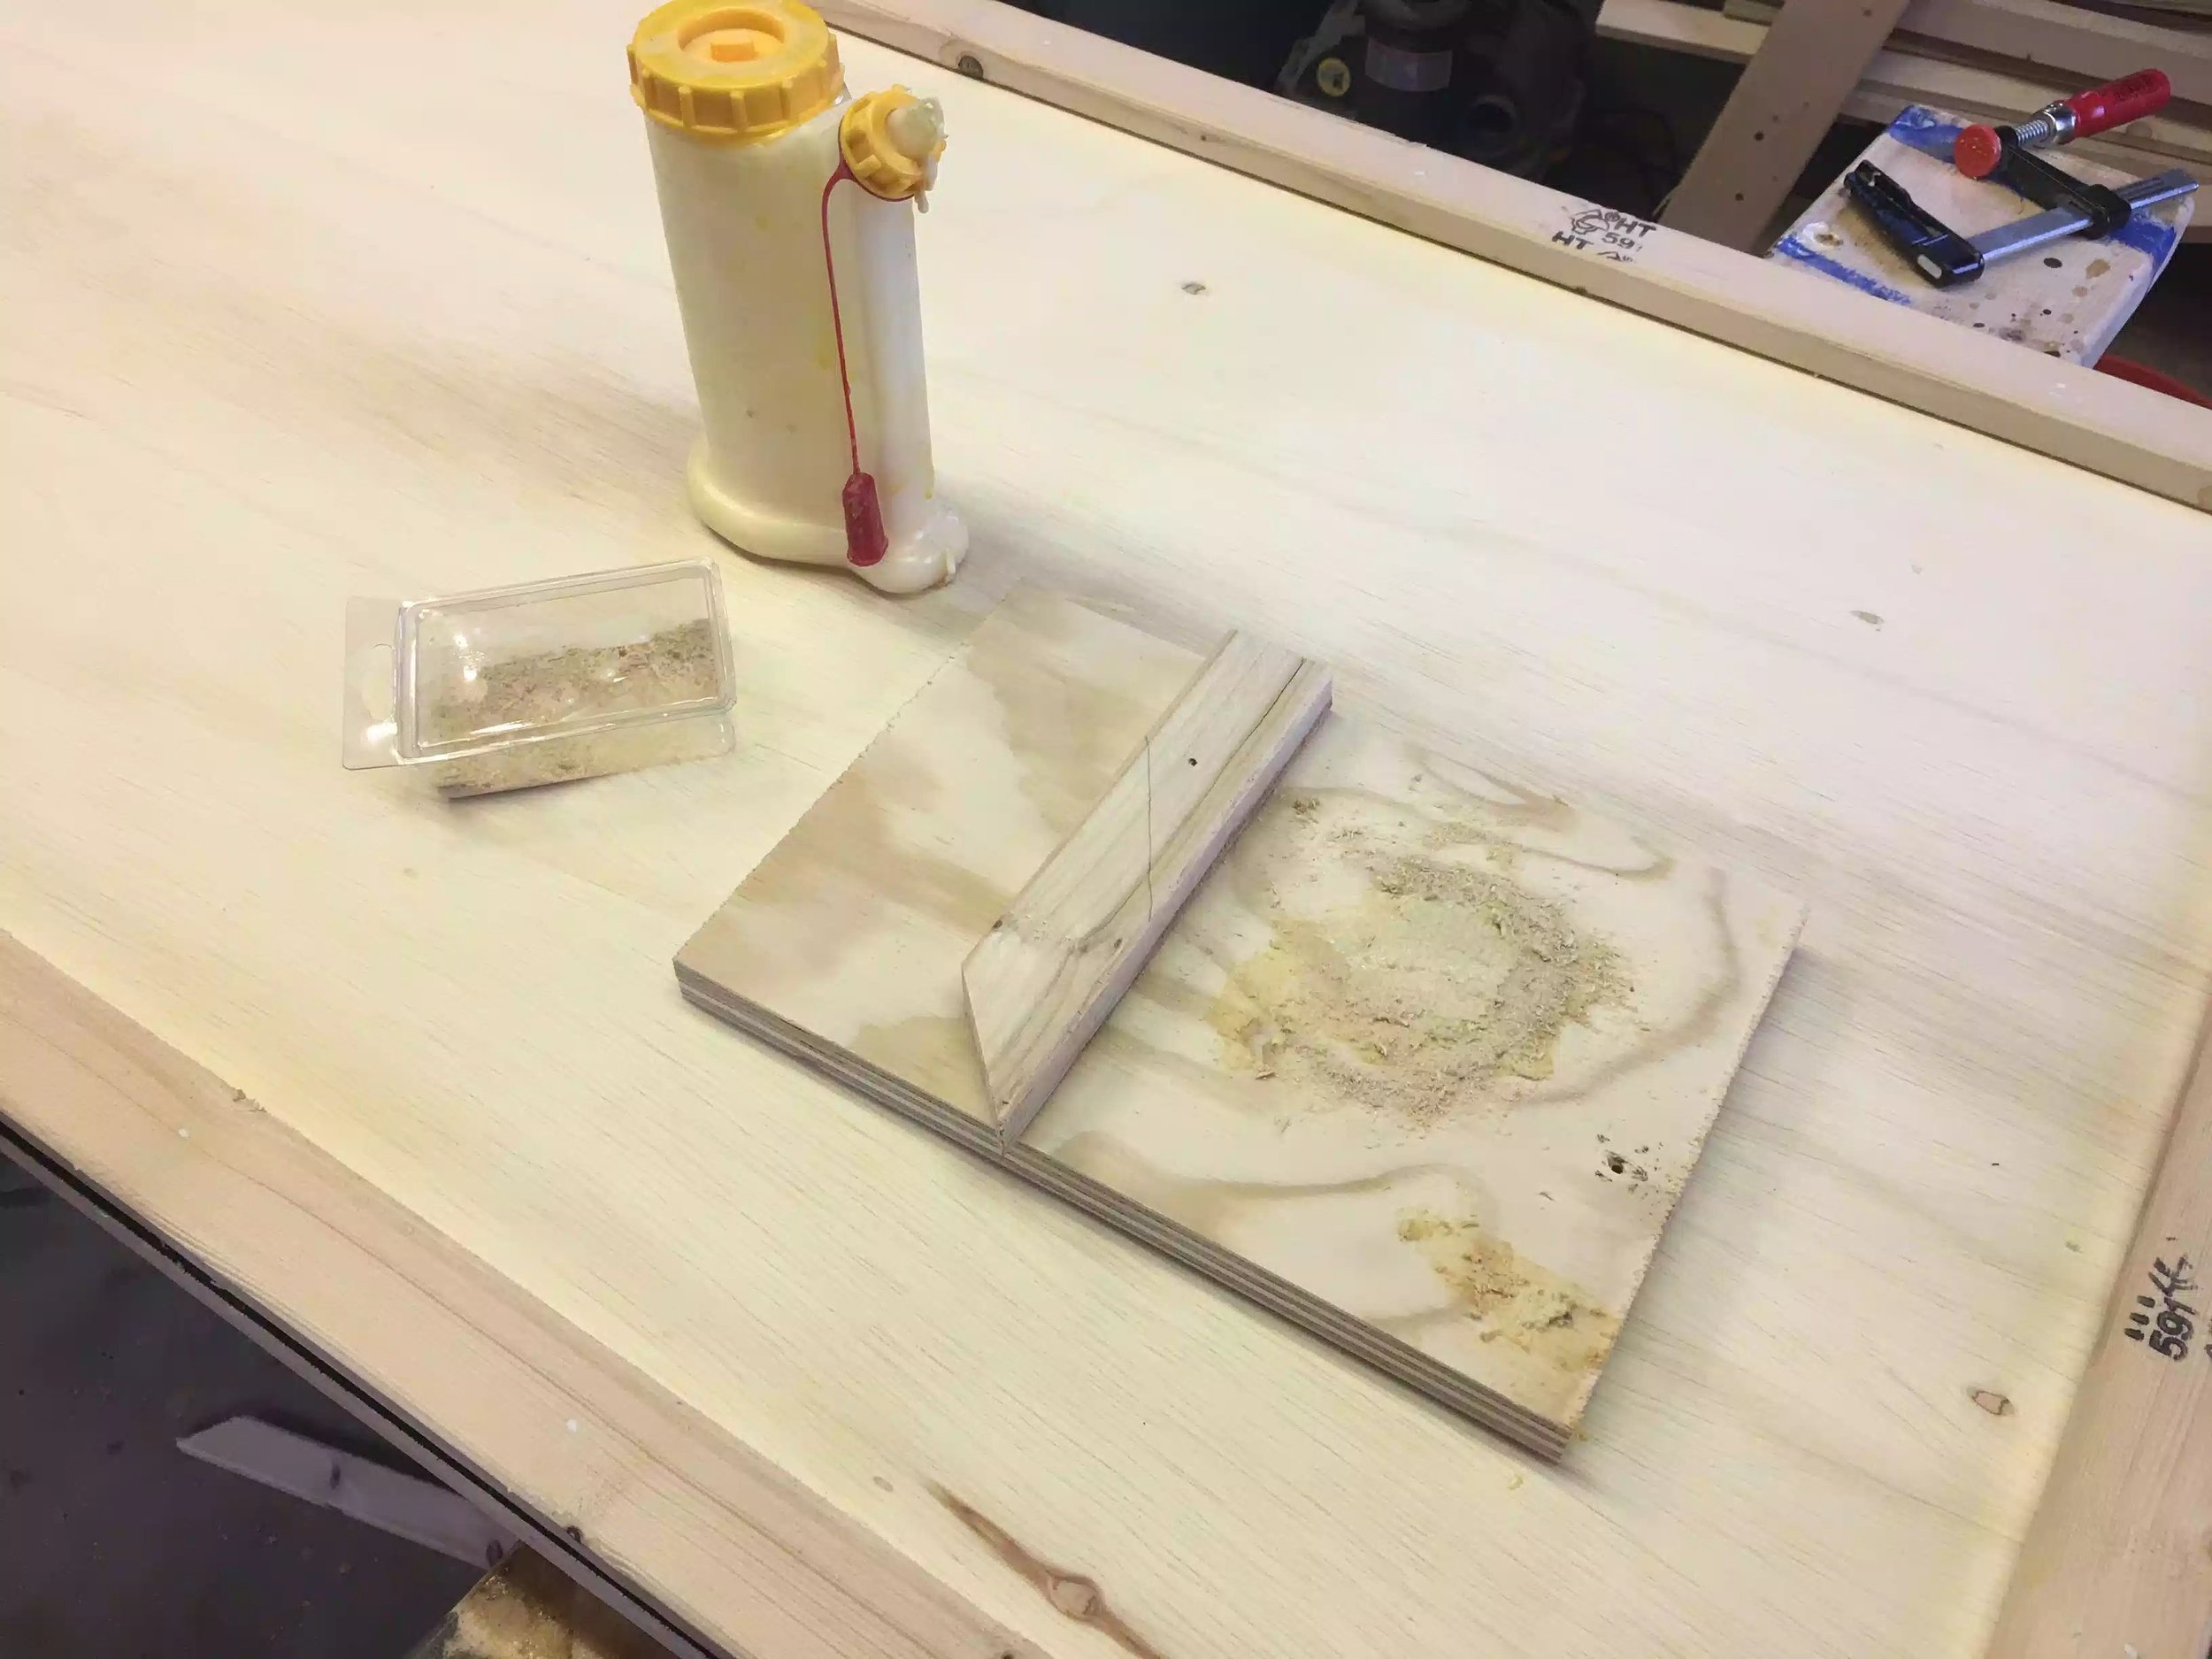
Here is my little set-up. The sawdust is in the plastic container, my glue bot and a scrap piece of plywood to do my mixing.

Here is the joint after I have applied the wood paste, i will clean it up tomorrow.
If you would like to learn more about this process I found a useful article in Popular Mechanics explaining it
Tomorrow I will be cleaing up the face frames by sanding them, I will also be cutting some of the biscuits slots so I can attach the legs to the plywood panels.
Until then, Take Care