
MISCELANEOUS JIG
PROJECTS
PIPE CLAMP GLUE JIG
(11/2018)
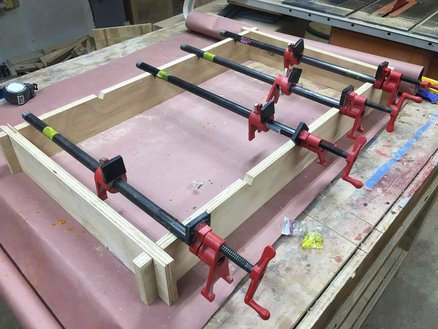
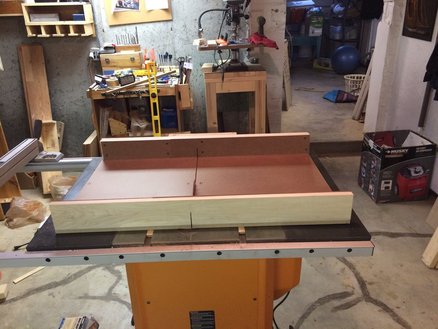
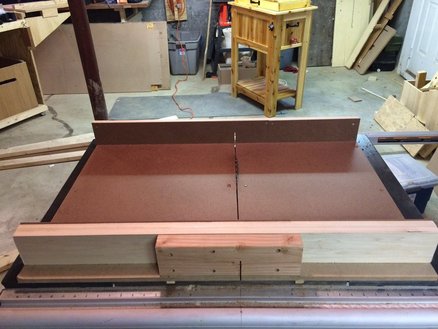
I have been doing a lot of glue-ups lately and I still had not found a great system than just dealing with it as each project comes and goes. So I decided to make a station that could be broken down as I dont have enough room in my shop for a dedicated glue-up table.
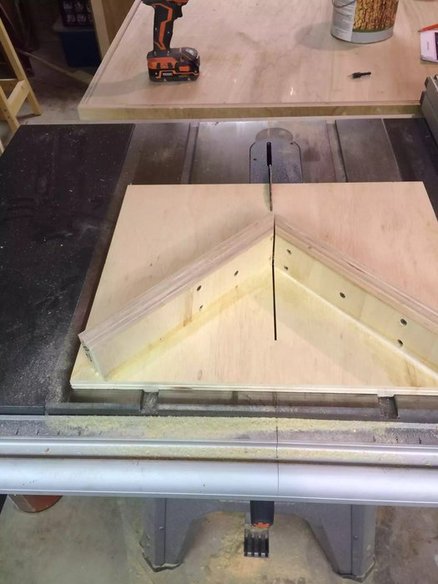
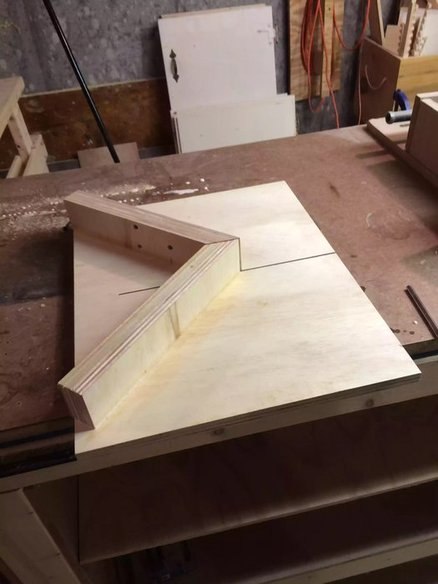
After doing some research I actually found a project on Lumberjocks by Brad Nailor for this really cool design. I also decided to add my own little twist to the station by not using half-circle cutouts to secure the clamps in place but instead using a V notch.
I really liked this concept because of a couple of reasons.
It was quick to make
I could use scrap plywood, so it didn’t cost anything
I could collapse the jig and store until I needed it
I could customize it, I could make any length I wanted depending on the usual size of glue-ups I do, I could also make different sized stretchers depending on what size clamps I would be using.
I also created a project blog and created free plans that can be downloaded, links are below.


ROUTER TRIVET JIG
(10/2018)
TRIVET JIG DESIGN
I would love to take credit for this jig but unfortunately it wasn’t me, I came across this jig online at www.rocker.com , the jig’s concept is really easy to comprehend. It’s basically a trammel on a base, the base has 2 fences that hold the trivet blank and you adjust where the slots are cut with spacer blocks. Ill explain in more detail in a later part in this blog.

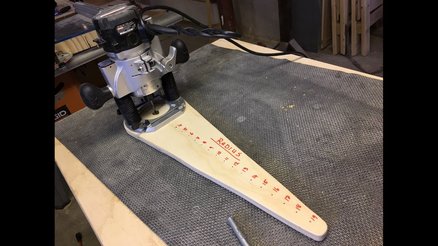
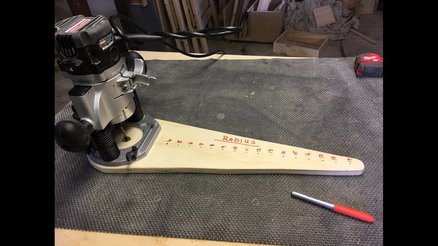
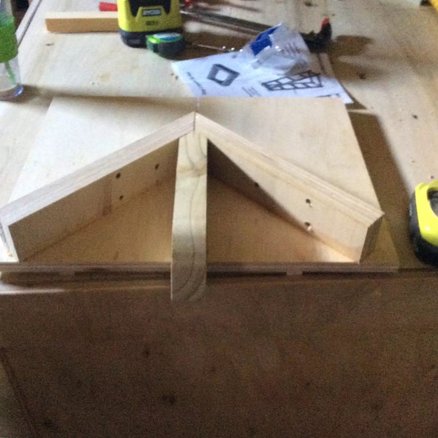
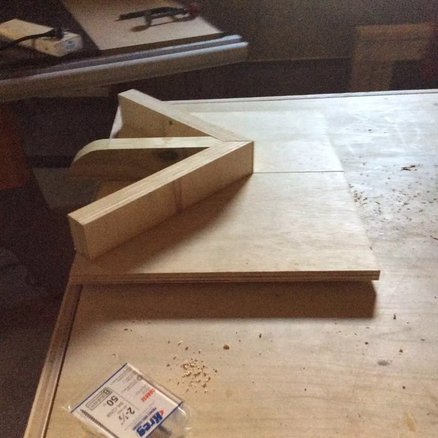
Here is the completed jig, its basically a base that has 2 fences that form a 90° corner where the trivet gets positioned, and held in place with the fences.

Here is the jig in use, you can see the router attached to the pivoting arm which is how I achieve the curved grooves in the trivet.
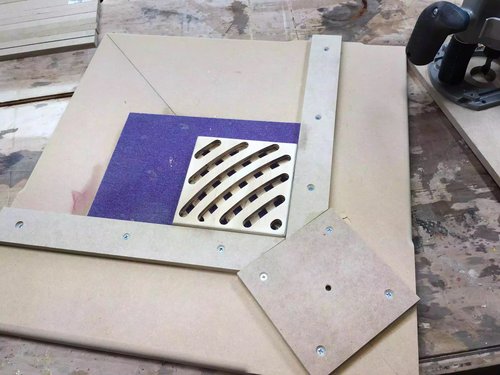
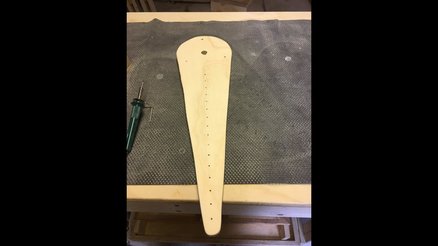
Here is a picture of the jig with the trivet blank positioned between the fences, I also used self adhesive sand paper to help keep the blank positioned while using the router.

Although this is a plywood prototype of one of the designs I will be using, I am very happy with this design.
STEP BY STEP BUILD
Source Rockler.com

Completed trammel jig (stock photo)
The trammel jig is fairly easy to assemble and, while it doesn't alter router's cutting radius, it allows you to make repetitive cutting patterns very simply. The jig is really simple to build. Start with a 22"-square scrap of 3/4" plywood or MDF, and draw a diagonal line connecting two corners. Cut a 6"-square trammel support from 1/2" scrap and bisect it with a pencil line. Fasten it to the base with glue and brads so the outermost corners of the support align with the edges of the base and the pencil marks of the two jig parts line up. Now rip a pair of 1/2" by 2" fences, cut them to an overall length of 15-5⁄8" and miter-cut one end of each to 45°.
JIG BUILD
Once you've put the mitered ends of the jig fence together against the support block, nail them down to secure them to the base. Butt the fences against the support piece so the tips of the miters touch. Make sure they form a square “pocket” for the trivet blanks to register against before nailing the fences to the jig base. Line the “field” area inside the fences with sandpaper attached with spray adhesive. Later, this will hold the trivets stationary as you rout them. I left the base’s outer corner bare where the trivets and spacers don’t reach it.

After mitering the corners of the fences to 45°, pin them in position and making sure everything lines up using a square. (stock photo)

Attaching the trammel to the router (stock photo)
ADDING THE TRAMMEL
Draw a layout line 12" from the center-line of your bit to establish the pivot point of the trammel. The trammel is a scrap of 1/2" material cut 6" wide and 20" long; this width fit my router base nicely. If your router has a wider base, change the trammel width to suit it. Set the router near the trammel’s end to mark mounting holes for screws, as well as to establish where to bore a clearance hole for the router bit. Mark the trammel carefully with two layout lines: one identifying the center-point of the router bit and a second drawn 12" back from this line, before making the bit clearance hole and fastening the router to it.

Positioning the router in order to find the pivot point on the jig (stock photo)
NEXT
Slide the trammel along the support block until the router bit touches the outer corner of a trivet blank to set the position of the jig. You’ll need one of your 6"-square trivet blanks to mount the trammel properly on the jig. With the router bit installed, set the trivet blank in the corner formed by the fences and balance the trammel on it and the square support block. Slide the trammel along the support until the inside edge of the bit just kisses the outer corner of the trivet

Drilling the location of the pivot pin (stock photo)
ATTACHING THE PIVOT PIN
Use the dowel's pivot point line to find where you can bore a dowel hole to complete the trammel. Make sure it lines up evenly over the support before boring a 5/16" dowel hole through the trammel and support — right into the base. Center this hole on your 12" layout line drawn previously. Now insert a 2" length of 5/16" dowel to engage the trammel’s pivot action. You’re nearly ready to start routing trivets, but first, make up 14 spacer strips from 1/2" scrap. Mine were 3/4" x 14".

Begin routing the design (stock photo)
MAKE SOME TRIVETS
Making your first cuts on the trivet face using a pair of spacers along the jig fences and cutting a little deeper than halfway through the blank in the first slot. Start the router and make your first cut, milling to final depth in two passes. I used a 1/2” up-spiral router bit — but any sharp straight bit should do fine. Swing the router clockwise or counterclockwise — either works fine, but keep the trammel pressed down firmly against the trivet blank to prevent it from shifting.

Adding spacer strips to maintain equal gaps between the grooves. (stock photo)
Continue adding and subtracting spacers and feeding your router clockwise and counterclockwise to make further cuts, but keep the trivet stationary as you pivot the router. Once you complete the first cut, pull the trivet forward, insert another pair of spacers and repeat for the second, longer “swoop.” Continue adding spacer pairs between subsequent cuts until you reach the other corner of the blank. Now flip the blank over, give it a quarter turn to establish the “X” pattern and repeat the whole routing process. This time remove one pair of spacers after each pass.

The waffle pattern is coming to life. (stock photo)
FLIP THE TRIVET
Flip the trivet and give it a quarter turn to make an "X" cutting pattern on the second face, continuing to cut them in the reverse of how you made the first side. In minutes, you’ll have your first trivet knocked out and be on to the second. Sand away any bit burn marks or fuzz, and round over the edges
THE above step by step guide is taken from the Rockler.com article as well as all the pictures, but below is a trivet that I made and looks OK, it will look even better when I actually get to use some really nice wood and not the plywood prototype that I used below.

Adding a round-over to both sides of the trivet really feel great to the touch and doesn’t look too bad either.

Love the dimensional aspects of this little project.
I still need to do some research on making these and eventually with a bit of luck will be able to sell them in my Etsy store…
router table : FINGER JOINT Jig
(10/2015)
After tons of research online and help from my LJ’s buddies I designed my own box joint jig for a router table without a sliding mortise track..
This project took much longer than I thought because of the minute adjustments I had to make in the jigs final position and secure the cleat.. But it’s done and the fingers are a little loose but they fit together like a dream with just enough real estate to glue up a joint…
The basic design is ” L” form with a cleat that overhangs the table to slide it though the straight bit.
I had some leftover poplar so I used that and I also had 1/2” square dowel left so I used that as the key…

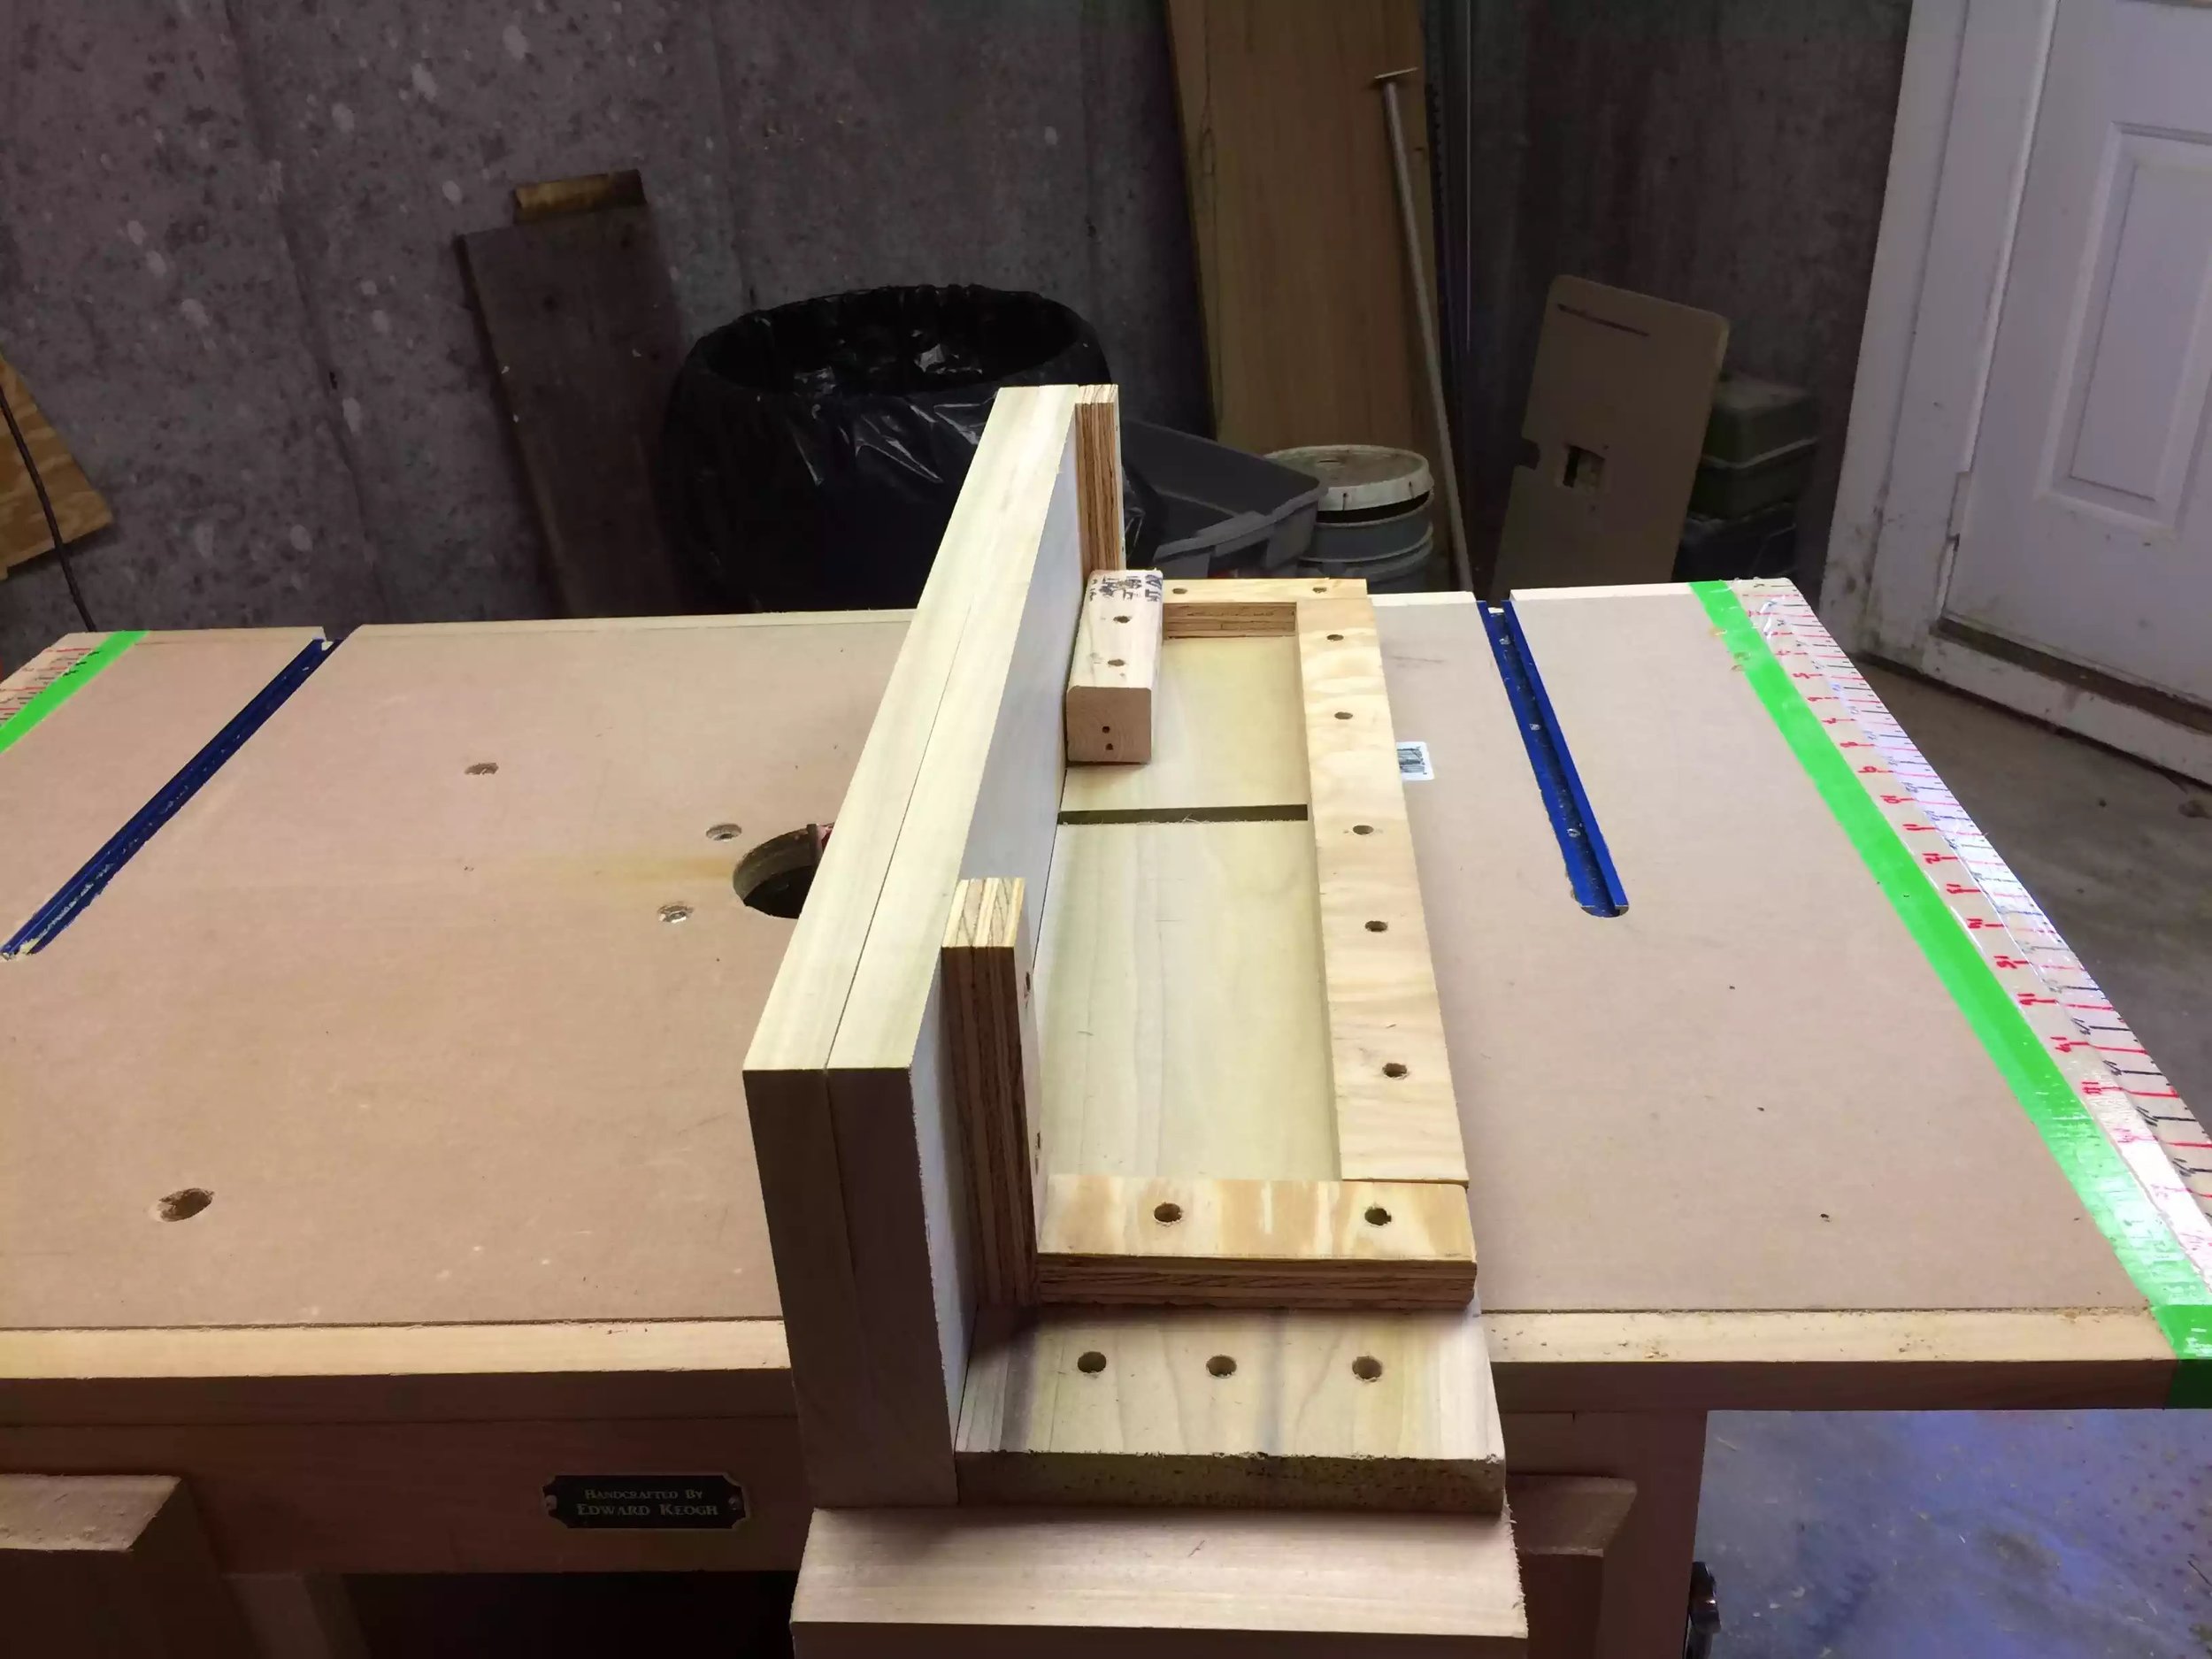

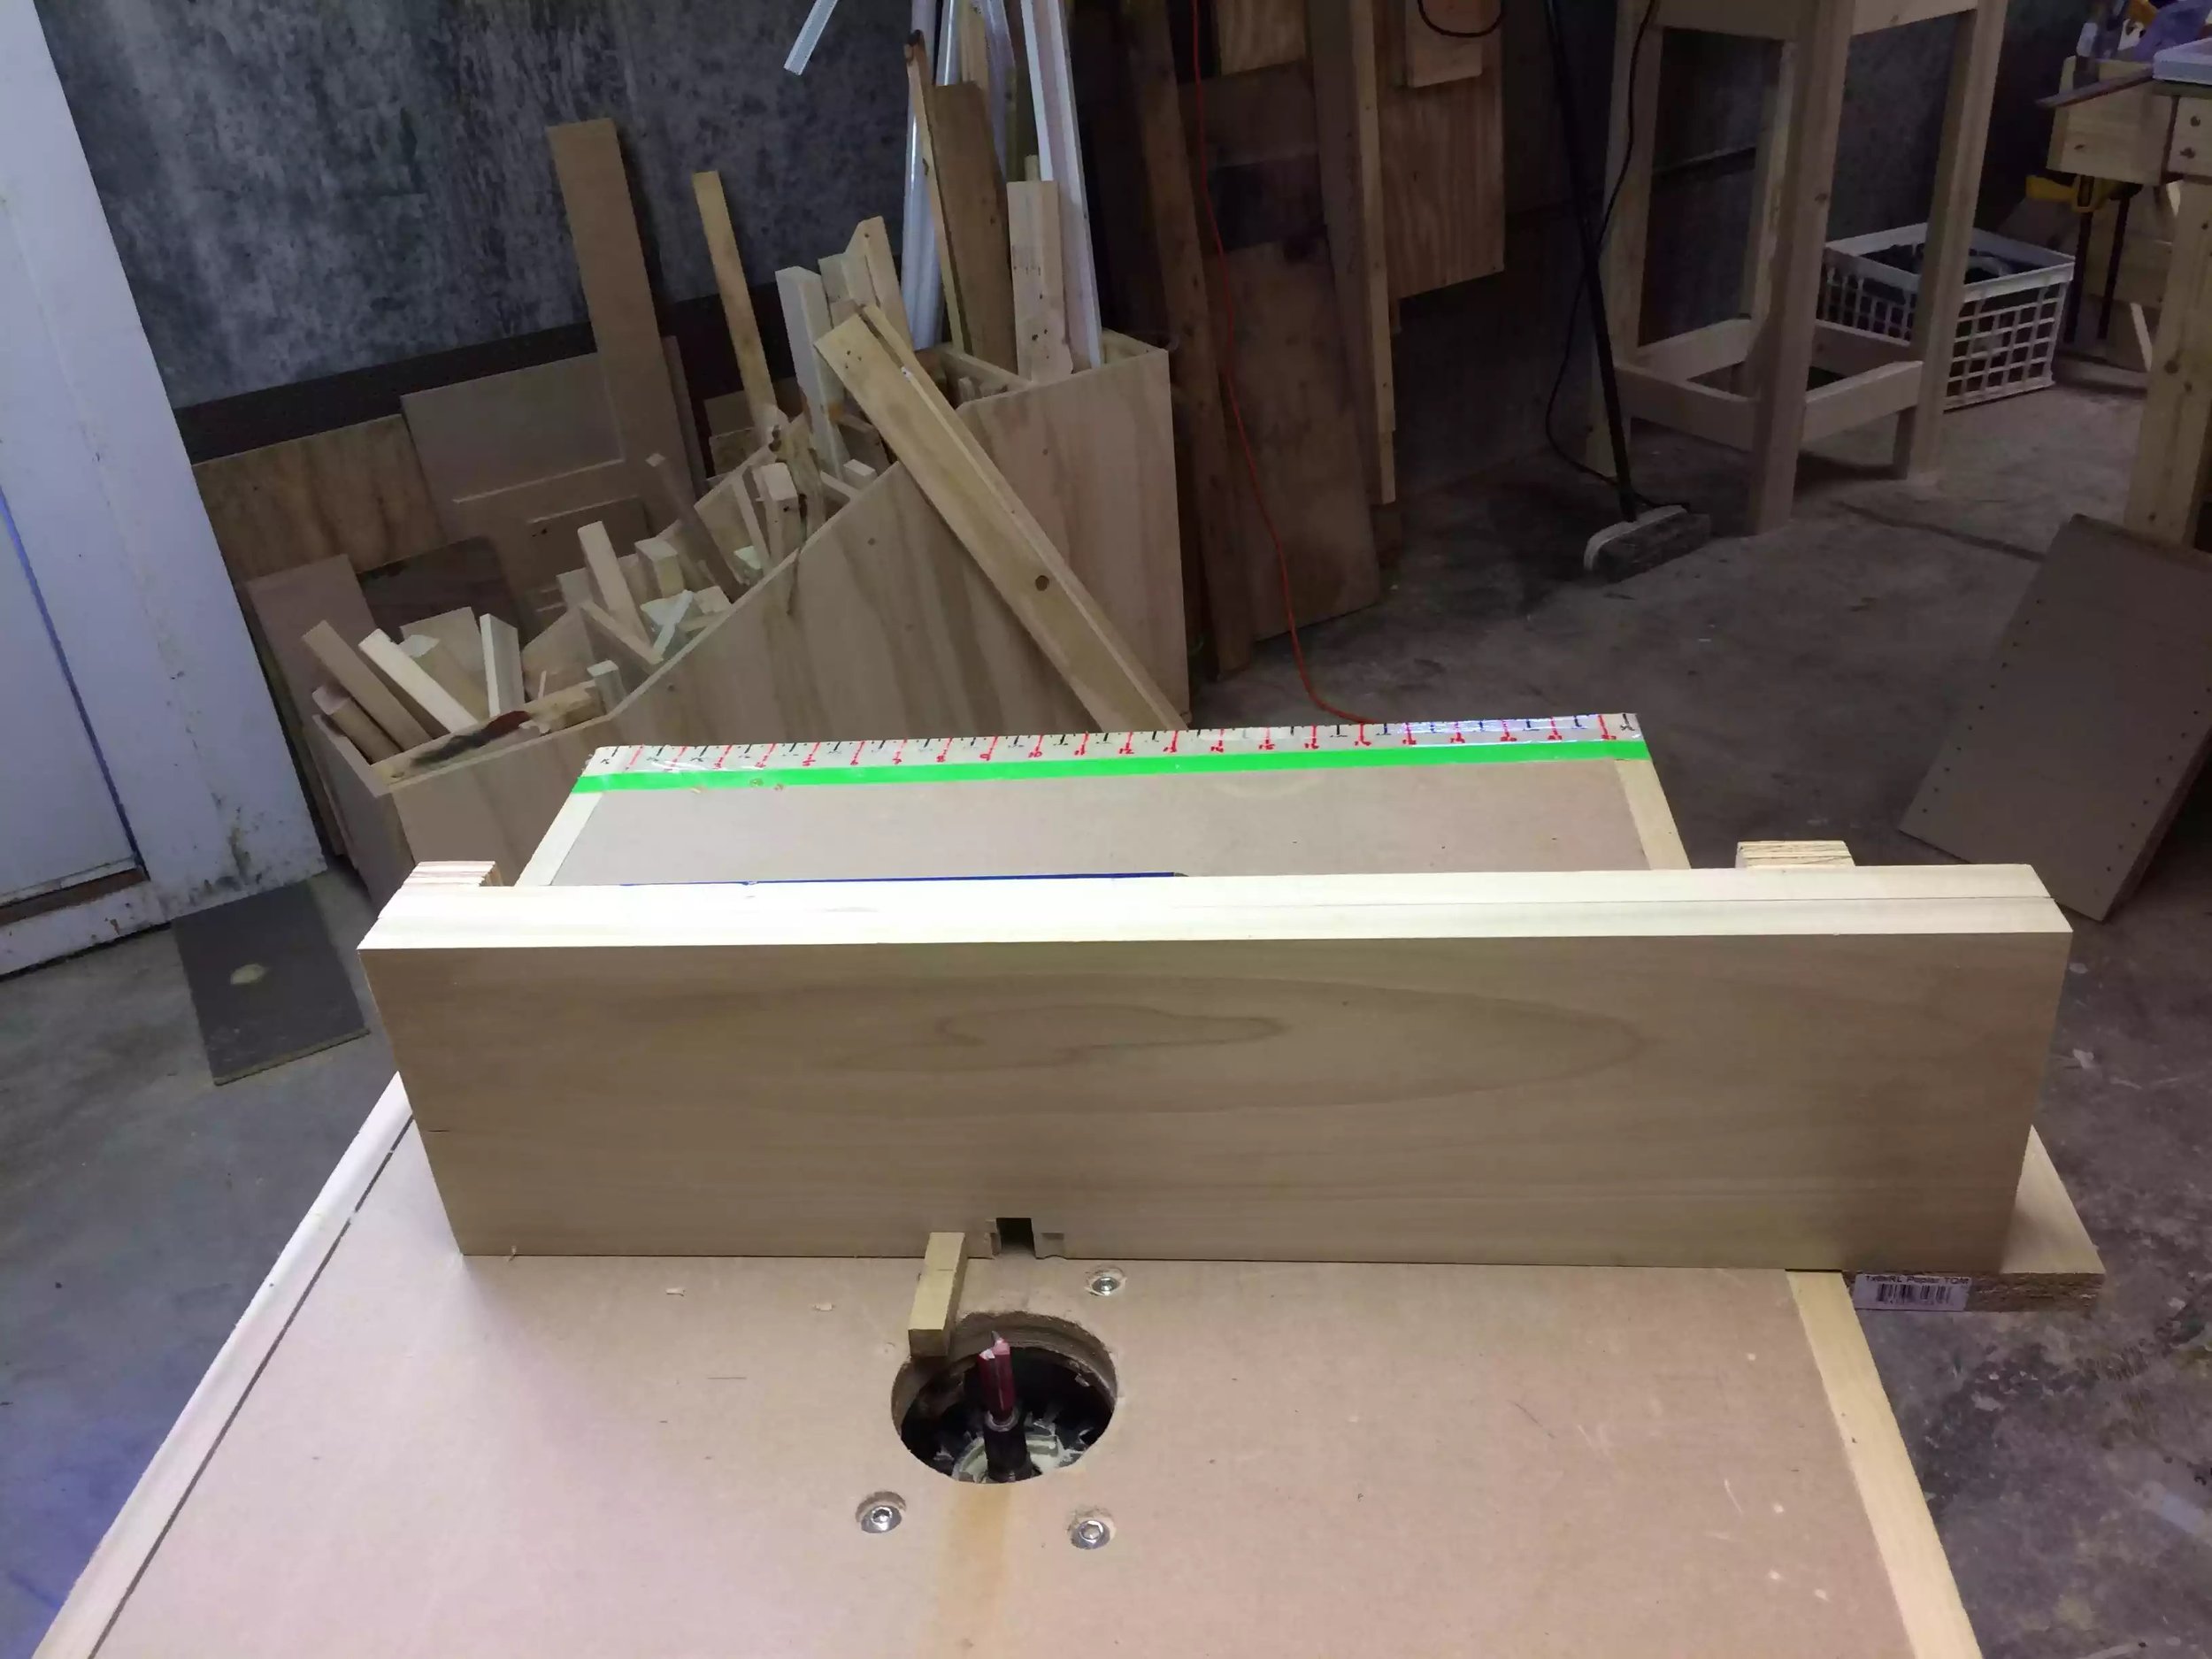
Because I cut a Chanel all the though the jig I supported the back with some scrap plywood L brackets held together with glue and pocket joinery … And the back of the jig where the channel comes out of the jig I placed a scrap piece of plywood to keep the jig square to the table and cutting bit…
I’m delighted with the results and it didn’t cost me much
CIRCLE CUTTING ROUTER JIG
(10/2017)

So I finished my big project and needed something to keep me busy so I scoured the internet and my workshop to do list and high on there was a Router Circle Cutting Jig and I needed to use some scrap plywood I had left over.
So I came across so many variation online and thanks to the input of my fellow LJ,s I used what they suggested and came up with my own.
1. I needed a jig that had multiple pivot point this Jig can cut a radius of up to 19”
2. I wasn’t sure whether to use my palm router which I love or use my plunge router.. I decided to use my plunge router for the simple reason of controlling my depth of cut
Materials:
9” wide x 24” long plywood and that’s basically it
The jig came out awesome except I need to figure out why I’m loosing a strong 1/16” on my radius and I think it’s because I only used a nail as my pivot pin I think I’m going to get a 1/4” clevis pin and make my pivot holes 1/4” wide thus removing any play in the pivot swing.
The other thing that annoyed me was that I somehow lost the depth gauge on my router as it’s been buried in my router table so I need to replace that only my local Craftsman store just went out of business..
Anyway I hope you like it and give it a try .. I took my sweet time making it One more thing all the pivots start at 4” radius an increase on the 1” all the way to 19” radius
TABLESAW CROSSCUT SLED
(12/2015)
I made this crosscut sled in 2015 and I hope to be replacing it soon.
Its a very basic design and it weighs a lot, which is one of the reason I want to remake it.
Like any crosscut sled made for a tablesaw:
it has a base which has runners screwed up into the base to guide it along the miter track in your tabelsaw.
A front and back fence that needs to be perfectly accurate otherwise you wont get a 90 degree cut
The fence is very handy so as that you can attach stops when your cutting multiple pieces of the same size.
I use this when I cant cut something on my miter saw as the capacity of that is about 12",
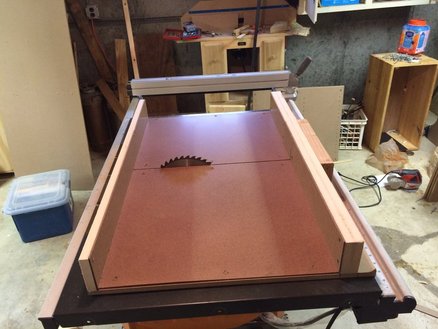
Anyway since I purchased my Rigid tablesaw in 2015 my old crosscut sled didn’t fit it so I built this:
It measures 36” wide x 24” deep
It is made from 1/2” MDF, 1×4 poplar s4s and oak runners and finally a layer of Masonite
It works a lot more efficiently and used up some scraps that were lying around..
TABLESAW MITER SLED
(07/2013)
My workshop bucket list is getting long and Ill need to cross somethings off it.. So I figured I have some scrap plywood and I found some plans from one of my favorite woodworking guys from Woodworking for Mere Mortals host Steve Ramsey
It’s a pretty easy project but take your time with the angles.