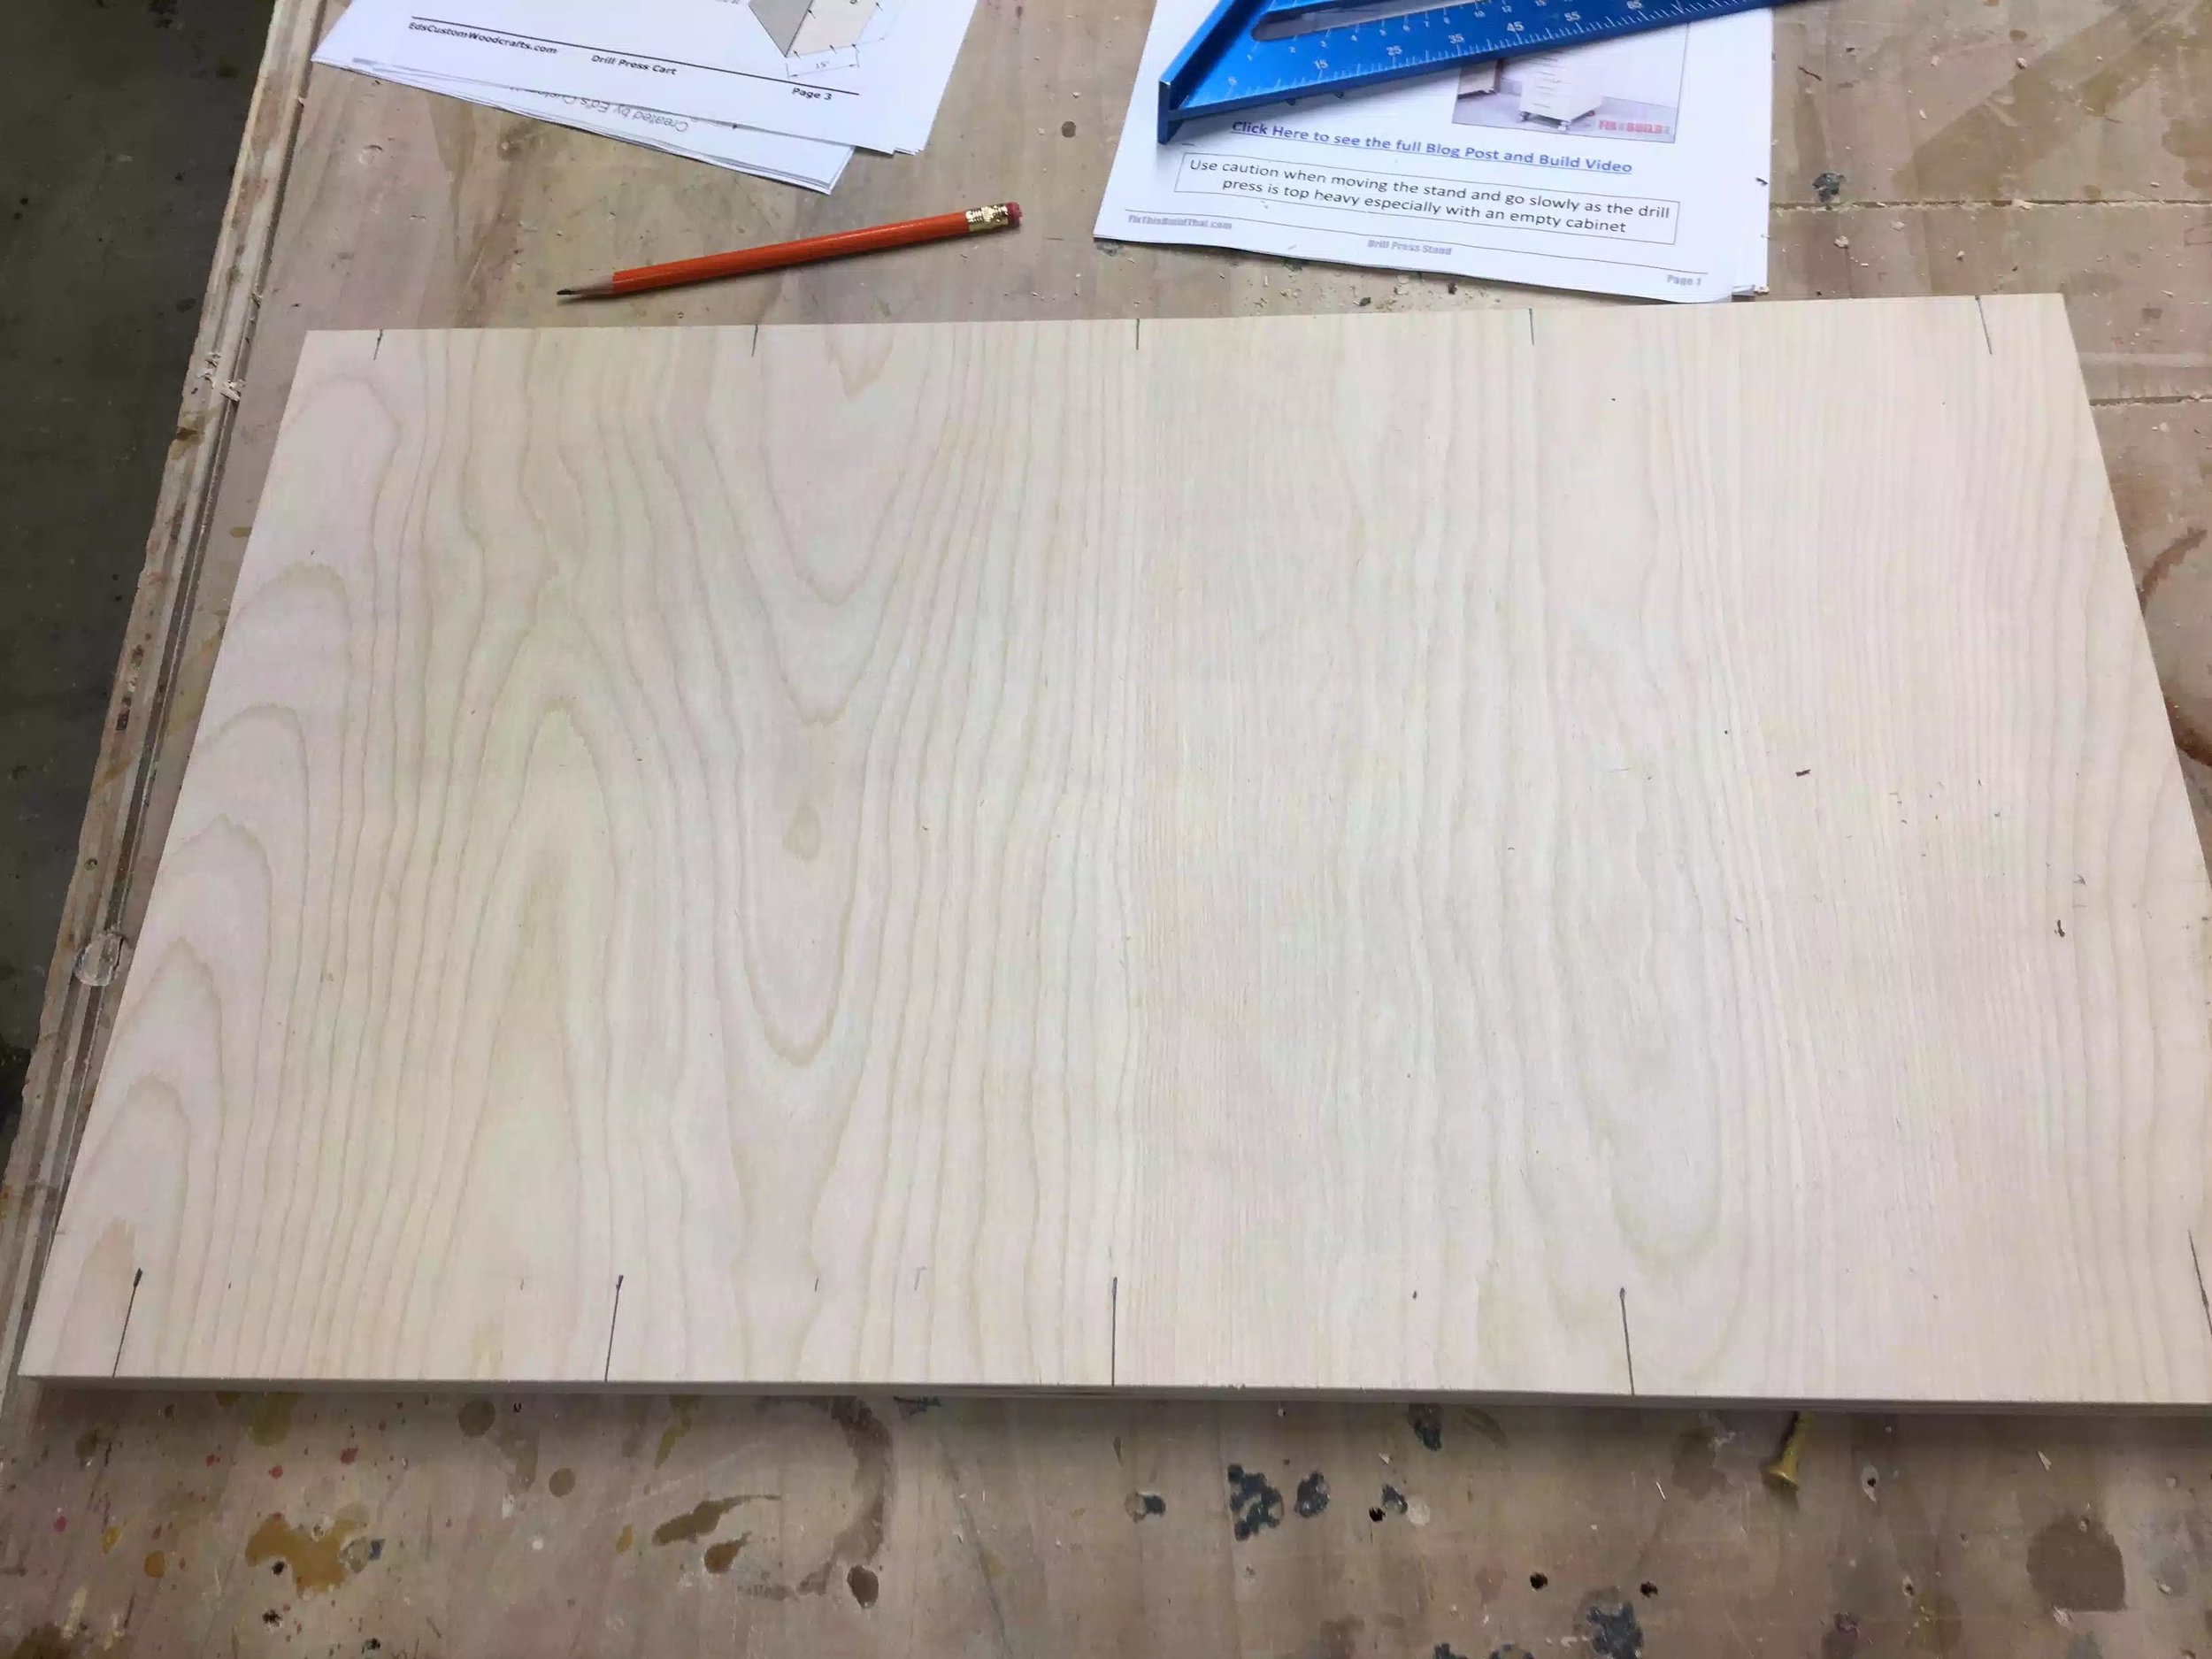
Drill Press Cart

Project Award

badge-daily-top-3.png

I recently received another Daily Top 3 Award on my online workshop where I currently have a membership with www.lumberjocks.com. 

I received the award along with 2 other makers that also made woodworking projects. My award was for the Drill Press Cart that I made for the shop. I have included links below for the project and also links to the other winners.

MY PROJECT

 
Click for details: Drill Press Cart
image-3273.jpg
2121441-438x.jpg
2121433-438x.jpg

DRILL PRESS CART: ALL FINISHED

After a week of fleeting moments in the shop I have finally finished the drill press cart and I have to say that it  looks awesome and even more importantly that that it makes more room and floor space available in that ugly corner of my shop.

SHOPPING LIST

  • Full sheet of 3/4" birch plywood (not baltic birch)
  • A half sheet of 1/4" plywood
  • I purchased some ash hardwood to use for the table top edge banding and I also used the leftovers to make my own drawer pulls that I am very happy about.
  • 3" casters @4
  • 22" full extension drawer slides @5
  • Finished it in polycrylic.

JOINERY

Since this was a shop project I didn't use any fancy joinery for the case I simply used pocket holes and 1-1/4" pocket hole screws to join the case parts together along with glue.

FEATURES

  • 5 full extension drawers which gives me ton of stroage
  • 34" x 22" x 16" 
  • The whole cart is portable which in my opinion is a must in any wood-shop.
  • I made my own drawer pulls out of ash which was a very fun project.

If you would like to make this cart , I have plans available in my shop.

Here is a frontal picture, I have to say that the pulls look great.

Here is a frontal picture, I have to say that the pulls look great.

Here is my drill press in its new home, I also made a the drill press table in a previous project.

Here is my drill press in its new home, I also made a the drill press table in a previous project.

Here she is in her new home.

Here she is in her new home.

image-3121.jpeg
image-3136.jpeg
Lots of storage

Lots of storage

I need to finalise where everything will be stored, but since I have 5 drawers I can put each type of drill bit in its own drawer.

I need to finalise where everything will be stored, but since I have 5 drawers I can put each type of drill bit in its own drawer.

This is what I am moving away from, it worked well for a time but the drill press cart keeps everything I need around the drill press and not a random drawer on the other side of the shop.

This is what I am moving away from, it worked well for a time but the drill press cart keeps everything I need around the drill press and not a random drawer on the other side of the shop.

image-3204.jpeg

Until next time take care.

DRILL PRESS CART : DAY 8

Last night a finished the cart and to be honest it was the most fun I had on this entire project because I made my own drawer pulls which is something I never did before. I used the solid ash that I purchased on that road trip I made last week and I am so glad that I made these pulls because I think I made a total of 25 pulls and it only cost me $6.. but there was a good beat of work needed to make them.

MAKING DRAWER PULLS

  • 3D Model on Sketchup
  • Ripped the ash on tablesaw
  • Router table time
  • Using my Kreg Jig to install them
  • Finished pictures of the cart

3D MODEL

Since I never made drawer pulls before I used my 3D Modeling software call Sketchup to draw up a scaled model from which to work from. Below is that model.

Here is the model I made on Sketchup and all the key dimensions for the pull

Here is the model I made on Sketchup and all the key dimensions for the pull

I nice brand new set of router bits for the project

I nice brand new set of router bits for the project


TABLESAW

I had a piece of  1"X 6" X 30" of ash that I needed to rip into 1-1/4" wide strips, this is how high my drawer pulls would be since that was pretty uneventful I didn't take any pictures.

ROUTER TABLE TIME

The bulk of machining was on the router table, I purchased a new set of router bits that I was dying to use and here was my perfect project to use them on. Now that I had my 30" long blank I figured I could make 5 pulls per strip so everything that I am writing about I repeated 5 times for all the pulls.

I used 3 router bits in making this pull 

  • The first was a 1/4" core box bit to use on the underside of the handle where I would be removing the wood that would form hand grip on the underside of the handle. I did this incrementally because I didn't want to remove so much wood at one time so as to avoid drastic tear-rout.
  • The second bit was 1/8" round-over bit this is where I would add a rounded profile on the outside lip of the pull, this was done very quickly.
  • The last bit I used was a 3/8" round-over that I used on the top outside edge of the pull to ease the look of the handle.


It all starts with the blank that I made my layout lines, these are 3/8" high x 1/2" wide, you can also see a close-up of the router bit I used to remove the material, I used this bit as it left a rounded profile on the top of the material that was …

It all starts with the blank that I made my layout lines, these are 3/8" high x 1/2" wide, you can also see a close-up of the router bit I used to remove the material, I used this bit as it left a rounded profile on the top of the material that was removed as this leaves a nice finish on the pull.

Here is the the final drawer pull .. looks awesome and it was a ton of work that I enjoyed immnsnly. 

Here is the the final drawer pull .. looks awesome and it was a ton of work that I enjoyed immnsnly. 

Another view of the finished pull, just needed to crosscut them on my table-saw.

Another view of the finished pull, just needed to crosscut them on my table-saw.

Here is the underside of the pull, very simple but effective. You can see the 1/8' round-over profile on the top edge of the pull. But the 3/8" round-over is in the router table in this picture.

Here is the underside of the pull, very simple but effective. You can see the 1/8' round-over profile on the top edge of the pull. But the 3/8" round-over is in the router table in this picture.

KREG JIG TIME

I purchased the Kreg jig to install the drawer pulls that way they would all be unifrom on the cabinet, to be honest I usually make my own jigs for this type of project but I got this on sale and thought that I would try it out, thinking that it would remove all the work out of placing them on the false fronts and to a degree it did. But I still needed to do a little measuring to center the pulls. To be honest I didn't read all the instructions for the jig I kind of just opened the pack and started using it.

Here is the jig that I clamped to the drawer fornt, I made a measurement finding the center of the drawer and then I use a 5/16" drill bit to drill throught the drawer and then add screws to secure the pull.

Here is the jig that I clamped to the drawer fornt, I made a measurement finding the center of the drawer and then I use a 5/16" drill bit to drill throught the drawer and then add screws to secure the pull.

Another angle of the jig.

Another angle of the jig.

The grey round knobs are the drill guides that you can adjust depending on the size of the pulls you are using, since mine were shop made I don't think they were a standard size.

The grey round knobs are the drill guides that you can adjust depending on the size of the pulls you are using, since mine were shop made I don't think they were a standard size.

Here is the first drawer pull installed and I have to say that the pulls look awesome and match the solid edge banding on the cabinet top.

Here is the first drawer pull installed and I have to say that the pulls look awesome and match the solid edge banding on the cabinet top.

Side profile of the pull.

Side profile of the pull.

Here is the finished project of adding the drawer pulls

Here is the finished project of adding the drawer pulls

That's a wrap I hope you have enjoyed this project with me, please feel free to leave any comments or comments on the project, I am thinking about making plans avavilavle for this project but I have not decided yet.

DRILL PRESS CART : DAY 7

I am in the final stretch of this project and cant wait to start using the cart, there is so much storage in this cabinet that it will free up a huge drawer in my miter saw station. This post might wander a little bit because I am going to write about my old unit that I am replacing, I also found a different concept for attach the casters and why I like it.

WHAT I GOT DONE TODAY

  • Removed the old casters to be used on the new cabinet
  • Attached the casters
  • Finished the top

REMOVING THE OLD

Since casters are on the expensive side I decided that I would use the casters on the unit that I am replacing, the casters are 3" but they provide 4" up from the ground, they are lockable and they can be turned in any direction as they have 360 degrees roatating ability.

Here is the current cart that I am getting rid off, as you can see it is a lot bigger and takes a lot of space, so I'm going to take the cart apart.

Here is the current cart that I am getting rid off, as you can see it is a lot bigger and takes a lot of space, so I'm going to take the cart apart.

Here were the casters on the old cart.

Here were the casters on the old cart.

I usually use lag bolts and nuts and washers, in order to use these I needed to drill big holes into whatever I was making and when doing this I needed to alter the dimensions of the unit and I was tired of doing that, because the lag bolts passed r…

I usually use lag bolts and nuts and washers, in order to use these I needed to drill big holes into whatever I was making and when doing this I needed to alter the dimensions of the unit and I was tired of doing that, because the lag bolts passed right through the base of the cart and nuts needed to used to attach it.

ATTACHING THE CASTERS TO THE DRILL PRESS CART

So now that I have the used casters off the old cart I am ready to attach them to the new cart and I am doing it differently than I have in the past. 

Instead of using lag bolts / nuts / washers to attach the casters I am using hex head sheet metal screws and washers and the reason I am using these is because I don't need to drill through holes on the vases of what I make and I can secure them in the plywood as they don't protrude through the other side. Then attaching them is very easy I just attached a hex head socket bit in my drill and screwed them home.


This is what I wanted to get away from, protruding lag bolts.

This is what I wanted to get away from, protruding lag bolts.

Here is the new method using sheet metal screws and washers, quick and easy and no protruding lag bolts

Here is the new method using sheet metal screws and washers, quick and easy and no protruding lag bolts

1 secured 3 to go.

1 secured 3 to go.

Here they are all attached and can now be wheeled around.

Here they are all attached and can now be wheeled around.

Here is how the castors look and I am happy that this finished, as I was wondering if the new method would work, and it does!!!

Here is how the castors look and I am happy that this finished, as I was wondering if the new method would work, and it does!!!

FINISHING OFF THE TOP

All that was left was for me to finish off the top and all I needed to do was roundover the edges with my palm router and apply a couple coats of finish on the top where the drill press would be stationed.

Here is my trusted plam router with a round-over bit installed.

Here is my trusted plam router with a round-over bit installed.

Before the roundover is applied.

Before the roundover is applied.

Here is the top after the roundover is done, sorry not a great picture.

Here is the top after the roundover is done, sorry not a great picture.

Here is where I leave the project for today

The cabinet is almost finished all that's needed now is the drawer pulls that I am going to try and make, I have never made drawer pulls before and I am in the process of designing them on my Sketchup program

Here is the cart as I leave it today, most of the work has been completed.

Here is the cart as I leave it today, most of the work has been completed.

Here is the top prior to me adding finish 

Here is the top prior to me adding finish 

Another terrible picture, but its just another angle of the front of the unit.

Another terrible picture, but its just another angle of the front of the unit.

NEXT

  • All that's left now is to make the solid ash drawer pulls and breakdown the old cart

Until next time , take care

.

Drill Press Cart: Day 6

So things have been very crazy and I have not gotten down to the shop in a day or so , please remember that if you undertake this project it will not take almost a week to complete, I might only get 1-2 hours at a time in the shop , this project should only take a weekend in the shop to complete.

So Here is what I done today

  • Made / Attached the top
  • Attached the drawer false fronts

MAKING THE TOP

Making the top is very straight forward thanks to the pocket holes, all it takes is a plywood panel cut to size and some hardwood. Here are the steps I took making the top

  1. I cut the plywood panel to its final size
  2. I took the ash hardwood panel I purchased the other day and cut it into 1-1/2" wide strips
  3. I laid the hardwood pieces around the plywood panel to get length needed, I then used my Japanese pull saw to cut these strips to length
  4. Next I needed to put the pocket holes in the underside of the plywood 
  5. I clamped all the hardwood pieces around the plywood added glue and screwed the hardwood to the panel.
  6. I will still need to sand the plywood top and apply the finish to it but that's next.
  7. Finally I need to attach the supports to the underside of the plywood so as that I can attach the top to the cabinet by screwing up from underneath the stretchers I used when building the cabinet 
Here is my bench top bench holding the ash hardwood before using my Japanese pull saw to cut the piece to final length ( Ireally love this bench top bench, I should make plans available to make it)

Here is my bench top bench holding the ash hardwood before using my Japanese pull saw to cut the piece to final length ( Ireally love this bench top bench, I should make plans available to make it)

Here you can see the underside of the top, its all clamped up and the hardwood is ready to be added. I still need to add the cleats to the left & right of the panel so as that I can attach it to the cabinet.

Here you can see the underside of the top, its all clamped up and the hardwood is ready to be added. I still need to add the cleats to the left & right of the panel so as that I can attach it to the cabinet.

Here is the top almost finished, just need sand and apply the finish.

Here is the top almost finished, just need sand and apply the finish.

Here is another angle of the top

Here is another angle of the top

Here you see the under side of the top, the solid wood edges give the look that it is very thick, but its all an illusiion.

Here you see the under side of the top, the solid wood edges give the look that it is very thick, but its all an illusiion.

ATTACHING THE DRAWER FALSE FRONTS

The last couple of days I have been applying several coats of polycrylic to the drawer fronts and cabinet so today it was time to attach them to the cabinet drawers themselves.

Here are the steps I took to attaching them.

  1. I added a 1/8" thick spacer to the underside of the false front
  2. The keep the false front in position while I screwed them I used clamps and pre-drilled the inside of the drawer to receive the 1-1/4" screws that hold the false fronts in place.
Here you can the spring clamps holding the false front in place, you can also see the 1/8" thick spacer under the false front.

Here you can the spring clamps holding the false front in place, you can also see the 1/8" thick spacer under the false front.

Here is where I attached the screws to hold the false fronts, Im placed the screws to either side of the drawers because I still need to add drawer pulls that I will be making this week.

Here is where I attached the screws to hold the false fronts, Im placed the screws to either side of the drawers because I still need to add drawer pulls that I will be making this week.

Here is what the cart looks like after todays activities

Here is a side view of the cabinet, I just love the look of the hardwood around the top, I also love the full extension drawer slides as I can reach the very back of each drawer, which comes in very handy for utilising all the storage space in each …

Here is a side view of the cabinet, I just love the look of the hardwood around the top, I also love the full extension drawer slides as I can reach the very back of each drawer, which comes in very handy for utilising all the storage space in each drawer.

Here you can see the front of my cabinet, I love how the grain runs from top to bottom on the false fronts.

Here you can see the front of my cabinet, I love how the grain runs from top to bottom on the false fronts.

Here is the top all attached, just need to sand it some more and apply the finish to it.

Here is the top all attached, just need to sand it some more and apply the finish to it.

NEXT

  • Since I am using castors that are currently on a cart that I am replacing this with I need to remove them and attach them to this new cart.
  • I need to make and attach the drawer pulls that I found online. It entails a lot of router work.
  • Finally need to apply the last coats to the top.

Until then take care

DRILL PRESS CART : DAY 5

I am starting to see the end of the project as the whole cabinet is built and the drawers are attached, here is what I did today.

  • Cut & Attached False fronts
  • Used my new Grr-ripper Attachment
  • Applied Finish to the cabinet carcass and drawer fronts

FALSE FRONTS

When I was cutting up the 4x8 panel I put a piece aside so as that I could cut all my false fronts in sequence so as that I could keep the grain pattern on the plywood inline to add a finished touch on the front of the cart, its the little things that make a project pop.

I used my crosscut sled on my table-saw to cut all the false fronts to final size.

I used my crosscut sled on my table-saw to cut all the false fronts to final size.

Here is the bottom false front, I am not attaching them yet as I want to apply the water based finish before I install them.

Here is the bottom false front, I am not attaching them yet as I want to apply the water based finish before I install them.

I used 1/8" spacers to provide a little reveal between the drawers, I used my Grr-ripper to do that but more on that in the next part.

I used 1/8" spacers to provide a little reveal between the drawers, I used my Grr-ripper to do that but more on that in the next part.

NEW ACCESSORY

I own one of the Grrippers which is basically a expensive push stick but it has so many cool features that make table-saw work more safe, so I have been wanting to cut very thin strips for various applications and Microjig the manufacturer of the Grripper have accesories to add to your tool that allow so many applications. 

So I got the 1/8" leg attachment, it basically allows you to rip 1/8" think stock and have it fully supported through the saw blade it also reduces saw burn on the work-piece which reduces the need to sand it it

If you would like to read more about this accessory click the link below.

Here is the 1/8" thick strips that I made, I need these as spacers between the drawer false fronts.

Here is the 1/8" thick strips that I made, I need these as spacers between the drawer false fronts.

Here is the front of the gripper.. (stock photo)

Here is the front of the gripper.. (stock photo)

Here is my Grripper getting ready to cut the strips

Here is my Grripper getting ready to cut the strips

On the left side of this image you can see the accesory I purchased

On the left side of this image you can see the accesory I purchased

APPLIED FINISH

I thought that it would be easier to apply the finish to the false fronts and the cabinet now rather than waiting until the project was finished. For shop projects my go to finish is usually Minwax Polycrylic, I like this finish because its supper easy to apply with a foam brush and is extremely durable for a workshop, it also is good in my opinion at keeping dust away and if it does get dusty a simply damp rag will clean it up nice.

Here is the finish, you can read more about it here

Here is the finish, you can read more about it here

I also usually use props to raise whatever I am finishing up from the bench by putting the work-piece on Painters tripods seen below, but I ran out of them so I made my own quick and dirty using a simple square piece of plywood and put a screw through it.

Here is a painters tripod

Here is a painters tripod

Here is my shop made risers, cheap but effective

Here is my shop made risers, cheap but effective

So I covered my workbench in rosin paper to protect it from drips and dust getting onto my drawer fronts nad Istarted applying the finish, I will be applying a total of 3 coats sanding in between with 220 grit sandpaper.

Applied 1 coat in this picture

Applied 1 coat in this picture

I moved everything to a smaller bench and applied the 3rd coat, I love how the grain popped on the cabinet side.

I moved everything to a smaller bench and applied the 3rd coat, I love how the grain popped on the cabinet side.

THE TOP (tbc)

The top is extremely easy to make, I am still using pocket holes to attach everything. The top is basically a piece of plywood cut to size and and edge banded with some solid ash covering all the plywood edges. The edgebanding give the top a nice thick look but in effect it is only 3/4" thick.

Here you can see the solid ash I picked up from a local lumber yard and the plywood top.

Here you can see the solid ash I picked up from a local lumber yard and the plywood top.

NEXT :

  • Attaching the false fronts 
  • Make and attach the top
  • Attach the castors
  • Make drawer pulls 

DRILL PRESS CART : DAY 4

So today I finished installing the drawers all five of them... Below are the steps I took to install them.

  • Used a spacer block to space the drawer slides on the right side
  • Used a spacer block to space the drawer slides on the left side
  • Set the drawers on the drawer slides
  • Drawer's installed

RIGHT SIDE

I am using full extension drawer slides and like any drawer slide they have two parts, one part goes into the cabinet and the other part attaches to the drawer. In order to make sure that the drawer slides are alighned on both sides of the cabinet I needed to use a spacer block so as that the both sides of the drawer were patrallel with each other otherwise the drawer would not go in.

Since I already installed the lower drawer I started working on the right side of the cabinet, which meant I needed to place the spacer block on top of the last drawer slide I attached and placed the drawer slides one after the other in this way, the pictures below will demonstrate what I did.

Here you can see the spacer block sitting on top of the previously installed drawer slide, with the spacer clamped i put the next drawer slide on top of the spacer, I did this 2 more times until all the drawer slides were in place on the left side.

Here you can see the spacer block sitting on top of the previously installed drawer slide, with the spacer clamped i put the next drawer slide on top of the spacer, I did this 2 more times until all the drawer slides were in place on the left side.

Here is a close up of the spacer block

Here is a close up of the spacer block

LEFT SIDE

I needed to repeat what I did on the left side, what I just did on the right using the spacer block to make sure  both sides of the cabinet were parallel with each other, otherwise the drawer would not line up with the drawer slides.

Here is the left side of the cabinet, I just needed to add one more drawer slide.

Here is the left side of the cabinet, I just needed to add one more drawer slide.

DRAWER INSTALL TIME

Now that all drawer slides were attached to the cabinet it was time to attach them to the drawers themselves, so to do this I put a 3/4" thick spacer strip on top of the last drawer that was previously installed and laid the 3/4" thick spacer on top and then placed the next drawer ... I am using a 3/4' spacer to allow room for me to add the false fronts later. While the drawer was sitting on the spacer block i pulled the drawer out and attached 2 of 3 screws to attach the drawer to the slides, I later pulled out the drawer all the way to put the final 3rd screw at the back of the drawer.

I used this method all the way up the cabinet until the top drawer was installed.

Here you can see the spacer sandwiched between the two drawers.

Here you can see the spacer sandwiched between the two drawers.

ALL DRAWERS ATTACHED

The previous step completed me attaching the drawers to the cabinet and they work awesome I really like the full extension slides as they allow you access to the whole 22" length of the drawer.

Below are some pictures of the installed drawers.

Here is the right side of the cabinet with all five drawers attached.

Here is the right side of the cabinet with all five drawers attached.

Here is the left side view of the drawers

Here is the left side view of the drawers

Finally here is the front of the cabinet, I will be adding false fronts to hide the pocket hole screws and it will also add that nice finished look to the cart.

Finally here is the front of the cabinet, I will be adding false fronts to hide the pocket hole screws and it will also add that nice finished look to the cart.

NEXT:

  • Cut the drawer false fronts to size
  • Make drawer pulls
  • I think I will apply the finish to the cabinet before I attach the drawer false fronts
  • Make the top
  • Attach the castors

DRILL PRESS CART : DAY 3

Since I had already built the drawer frames all I needed to do today was to add the drawer bottoms.

Here is what I got done today

  • I added the drawer bases to the 5 drawers
  • Test fit 1 drawer with drawer slide 
  • Needed to overcome a measurement error

ADDING THE DRAWER BASES

I needed to make 5 drawer bases so as that I could attach them to the drawer frames. So I took the following steps to complete the drawers. I have detailed pictures below detailing each step of this.

  1.  Cut up a 1/4" thick sheet of plywood to the final dimensions to fit the drawer, since I was not doing any fancy joinery the cuts were very quick, I was basically cutting the the 1/4" plywood and using my brad nailer and glue to secure the bottom on the drawer.
Here is a picture of me cutting the plywood into smaller sections to fit the drawer base.

Here is a picture of me cutting the plywood into smaller sections to fit the drawer base.

        2.  Now that all 5 drawer bottoms were cut to size , next I wanted to draw a reference line                       1/2" in from all sides of the panel, to drive brad nails in the bottom securing them to                         the  bottom of the drawer, I used my Incra T-Ruler to accomplish this, I needed the                           brad nails inset a 1/2" because I need to use my router on the edges more about this                           in  a later step.

Here is the Incra T-rule, I used this to mark a 1/2" line around all edges

Here is the Incra T-rule, I used this to mark a 1/2" line around all edges

Here is a close up the pencil line outlining the 1/2'' reference line on the drawer bottoms, I needed to do this to all 5 panels 

Here is a close up the pencil line outlining the 1/2'' reference line on the drawer bottoms, I needed to do this to all 5 panels 

    3.  Next I needed to set -up my assembly table to secure the bases to the drawers, below                           you see what I needed. I used my pneumatic nailer with staples inside, some glue. Using                     the 1/2" line that I did in the previous step I used the arrow on the tip of my brad nailer to               reference where the nails would be entering the drawer being careful not to actually                           shoot a nail through the actual drawer base.

Supplies needed, a nailer, the bottom drawer plywood panel and glue.

Supplies needed, a nailer, the bottom drawer plywood panel and glue.

Here is a view of the bottom. I needed to sand all the bottoms and edges to remove any glue .

Here is a view of the bottom. I needed to sand all the bottoms and edges to remove any glue .

Another picture before assembly 

Another picture before assembly 

Here is a look inside the drawer

Here is a look inside the drawer

Here are all 5 drawers with bases attached one more step before there almost complete.

Here are all 5 drawers with bases attached one more step before there almost complete.

       4 .   Before I can say the drawers are finished I needed to use my palm router to add a                                chamfer to the plywood edges. I saw this trick used online and I think it is a very                                clever method to hide the plywood edges on drawers. You basically use a chamfer bit                          in   a router and go around all edges of the plywood drawer base and it removes the                            material that can be seen when the drawer is sitting in the cabinet or unit. Oh and I                          almost forgot to tell you that the brad nails were recessed because I didn't want my                            router catching the nails as I removing the plywood edges when I was going around                            the drawer base with my router.

Here you can see the palm router ready for action, its installed with a router chamfer bit.

Here you can see the palm router ready for action, its installed with a router chamfer bit.

Here is a close-up of the router with the chamfer bit. I really love this tool. Perfect for applications like this.

Here is a close-up of the router with the chamfer bit. I really love this tool. Perfect for applications like this.

Here is a close-up of the drawer base after I added the chamfer.

Here is a close-up of the drawer base after I added the chamfer.

BEFORE picture, this is the drawer base before I added the chamfer.

BEFORE picture, this is the drawer base before I added the chamfer.

AFTER Here is the drawer base after, see no visable drawer base.

AFTER Here is the drawer base after, see no visable drawer base.

INSTALLING THE BOTTOM DRAWER

Although I didn't have enough time to install all drawers I wanted to at least install one. To my surprise the bottom drawer was a tiny bit shy (short) of engaging the right drawer slide , so I needed to remedy this by installing a shim to close the gap.

  1.  I started by preparing a spacer jig so as that I could space the drawer slides evenly going up both sides of the cabinet, to do this I measured the cabinet and luckily enough I could get away with one spacer would have equal distances between the drawer slides.  I also put a 1/4" thick piece of plywood to raise the bottom drawer up so as that it would not come in contact when the drawer was slid in and out.
  • To be honest I was quite annoyed at the drawer slide and drawer not being wide enough, I measure everything twice and followed all cut-list, I also checked for square, I think the more I think about it my problem arose because my plywood was not exactly 3/4" thick and that was something that I took for granted, usually I buy big box plywood and they are usually 23/32" and not 3/4" but I purchased this plywood else where and they told me that it was full 3/4" but lesson learnt and I am mad at myself at not making sure as I usually do, anyway we live and learn. Everyone makes mistakes, all you can do is learn from them and move on.
Here is the spacer block with the slide sitting on top, I clamped the spacer to the cabinet and pre-drilled and screwed in 3 screws, this was before I realised that the drawer was not quite wide enough.

Here is the spacer block with the slide sitting on top, I clamped the spacer to the cabinet and pre-drilled and screwed in 3 screws, this was before I realised that the drawer was not quite wide enough.

Here you can see how I remedied the bottom drawer slide issue.

Here you can see how I remedied the bottom drawer slide issue.

  • Next I pulled the drawer out on the slide and I could access two holes in the drawer slide to partially secure the drawer to the slide, I did this on both sides of the drawer and then I fianlly removed the drawer with the slide attached to the drawer and finished adding the back screws to each side, and it was complete.
Here is the bottom drawer installed and it moves perfectly now.

Here is the bottom drawer installed and it moves perfectly now.

That is as far as I got this morning thanks for reading and I catch you on the next post.

NEXT

  • I will be installing the remainder of the drawer slides and hopefully the drawers
  • Prepare the drawer false fronts to hid the pocket hole screws on the drawer fronts
  • Make the top
  • Attach Casters
  • Apply finish

Drill Press Cart: Day 2

This morning I got busy finishing up the cabinet carcass by installing the back. After that I turned my attentions to start making the 5 drawers.

HERE IS WHAT I GOT DONE TODAY

  • Attached the back panel
  • Started making the drawers
  • Cut all parts to final size on table-saw using my crosscut sled.
  • Pocket hole time
  • Are the drawers square
  • Assembly time
  • Drawer boxes complete

ATTACHED THE BACK PANEL

To get started with wrapping up the cabinet carcass I needed to rip a 1/4" thick sheet of plywood to its final dimensions, after that was done I lay it on the back of the cabinet and drew a reference line 3/8" for the outside edge so I cut center my screws used to secure the back panel, which adds a lot of rigidity, then added glue to the back of the cabinet carcass and started screwing the panel in place, I also left the panel a little oversize so as that I could flush trim the panel to the cabinet, this is just a little trick I picked up if the cabinet is not 100% square.

Here I am getting ready to rip the back panel to size on my table-saw

Here I am getting ready to rip the back panel to size on my table-saw

Here you can see the over-sized panel screwed and glued to the back of the carcass, I came back with my palm router and using a flush trim bit I finished flushing the back panel to give the back panel that finished look, even if the cabinet is not e…

Here you can see the over-sized panel screwed and glued to the back of the carcass, I came back with my palm router and using a flush trim bit I finished flushing the back panel to give the back panel that finished look, even if the cabinet is not exactly sqaure.

Back all secured, I usually plug the screw holes but because the back is only 1/4" thick I don't have enough meat to add the plugs without blowing through the back panel, its only a shop

Back all secured, I usually plug the screw holes but because the back is only 1/4" thick I don't have enough meat to add the plugs without blowing through the back panel, its only a shop

MOVING ONTO THE DRAWERS

I didn't have enough time to complete the drawers but I did make all 5 drawer frames I will need to come back and add the bases to them.

There are 5 drawers in total and there are 3 different sizes to them. The drawer construction is very basic using only pocket holes and glue and securing the bases with glue and brad nails. I found this concept online on I like to Make Stuff.com and it makes for a quick drawer assembly with very little fuss about joinery, perfect for a shop project.

  • First Up: Cut all the parts to size

Following my cut-list I  cut all the drawer parts to size on the table-saw, then using my crosscut sled I cut them to final size

Here is my table-saw cross-cut sled with a stop block set-up on the fence.

Here is my table-saw cross-cut sled with a stop block set-up on the fence.

Here is the front of the cross-cut sled

Here is the front of the cross-cut sled

Here are all the drawer parts cut to size (accept the bases)

Here are all the drawer parts cut to size (accept the bases)

Another view of the drawer parts cut to size 

Another view of the drawer parts cut to size 

POCKET HOLE TIME

Now that all my drawers front,backs & sides are all cut I needed to add pocket holes to join the box together, I only placed pocket holes on the front and back of the drawer as they would be covered with drawer false fronts later, these fronts and back would be screwed into the sides of the drawer.

Here is the Kreg Pocket hole jig in action, I didnt bother setting up my dust collection on this

Here is the Kreg Pocket hole jig in action, I didnt bother setting up my dust collection on this

Here is all the pocket holed parts completed.

Here is all the pocket holed parts completed.

IS EVERYTHING SQUARE??

I am almost ready to start gluing up and assembling the drawer frames but before I do I need to make sure that everything is at right angles to each other or square, so to do this I do two things I take diagonal measurements and if they are the same then I know they're square, I also use a machinest square in the corners and make sure they are also at right angles.

I use the machinist at the bottom and top of all corners, if I don't see daylight I know they are good, so I am looking good here

I use the machinist at the bottom and top of all corners, if I don't see daylight I know they are good, so I am looking good here

Top of the corner is also looking good, off we go to assembly!!!

Top of the corner is also looking good, off we go to assembly!!!

DRAWER ASSEMBLY TIME

Since there are no fancy joinery techniques being used on this assembly I basically make the drawer my placing the front / back pieces in between each of the sides, use some clamps to tighten things up after applying glue to the edges of the front / back of the darwer and screw the 1-1/4" pocket hole screws into the screw hole I had already prepared.

A clamp on the front and back of the drawer is enough to keep everything alighned.

A clamp on the front and back of the drawer is enough to keep everything alighned.

Sometimes I use a little scrap block and hammer if the pieces are out of alignment just a little 

Sometimes I use a little scrap block and hammer if the pieces are out of alignment just a little 

The pocket hole screws use a special sqaure bit that you put into your driver and then drive the screws home.

The pocket hole screws use a special sqaure bit that you put into your driver and then drive the screws home.

DRAWER BOXES ALL COMPLETE

The drawer boxes are all complete I just need to add the bases to them, below you can see all five drawers assembled and I will return to them when I get a chance.

This birch plywood is nice I really like the color of the wood laminate, but I will be honest I bought the expensive plywood although its not cabinet grade (its a grade b) I found a lot of voids in the plywood.

This birch plywood is nice I really like the color of the wood laminate, but I will be honest I bought the expensive plywood although its not cabinet grade (its a grade b) I found a lot of voids in the plywood.

I am not a hug fan of pocket holes because of how they look, but I will be hiding these with false fronts, the jig has its pros & cons for sure.

I am not a hug fan of pocket holes because of how they look, but I will be hiding these with false fronts, the jig has its pros & cons for sure.

NEXT

  • Put the drawer bottoms on
  • Install drawer slides
  • Make top
  • Install casters
  • Apply finish

Drill Press Cart: Day 1

Today I went out shopping for most of the materials I needed for the build which included.

  • (1) 4' x 8' x 3/4" Birch Plywood
  • (1) 4' x 8' x 1/4" plywood
  • 4' section of 1" x 2" Oak 
  • (5) 22" full extension drawer slides
  • I had (4) 3" casters so I didn't need to but them
  • A box of 1-1/4" pocket hole screws

HERE IS WHAT I DID YESTERDAY

  • Cut the main pieces of the cabinet (Top, Bottom, Sides)
  • Prepared the base to receive pocket holes
  • My Pocket Hole Jig
  • Cabinet assembly time
  • Adding the Cleats
  • Main Carcass finished

CUTTING THE MAIN CABINET 

Using my plans , I used my table-saw with a brand new 80 tooth blade to cut the sides, top and bottom pieces to size. Having a new blade in the table-saw left me with a beautiful edge to the birch plywood. So i laid them out on my out-feed table and used blue tape to label them and to orient them in the way I wanted them to be on the final cabinet. I like using this method because when you are done you just peel the table and don't have to worry about sanding out pencil marks.

Here are the sides of the cabinet, using the painters tape to label them.

Here are the sides of the cabinet, using the painters tape to label them.

PREPARING THE BASE

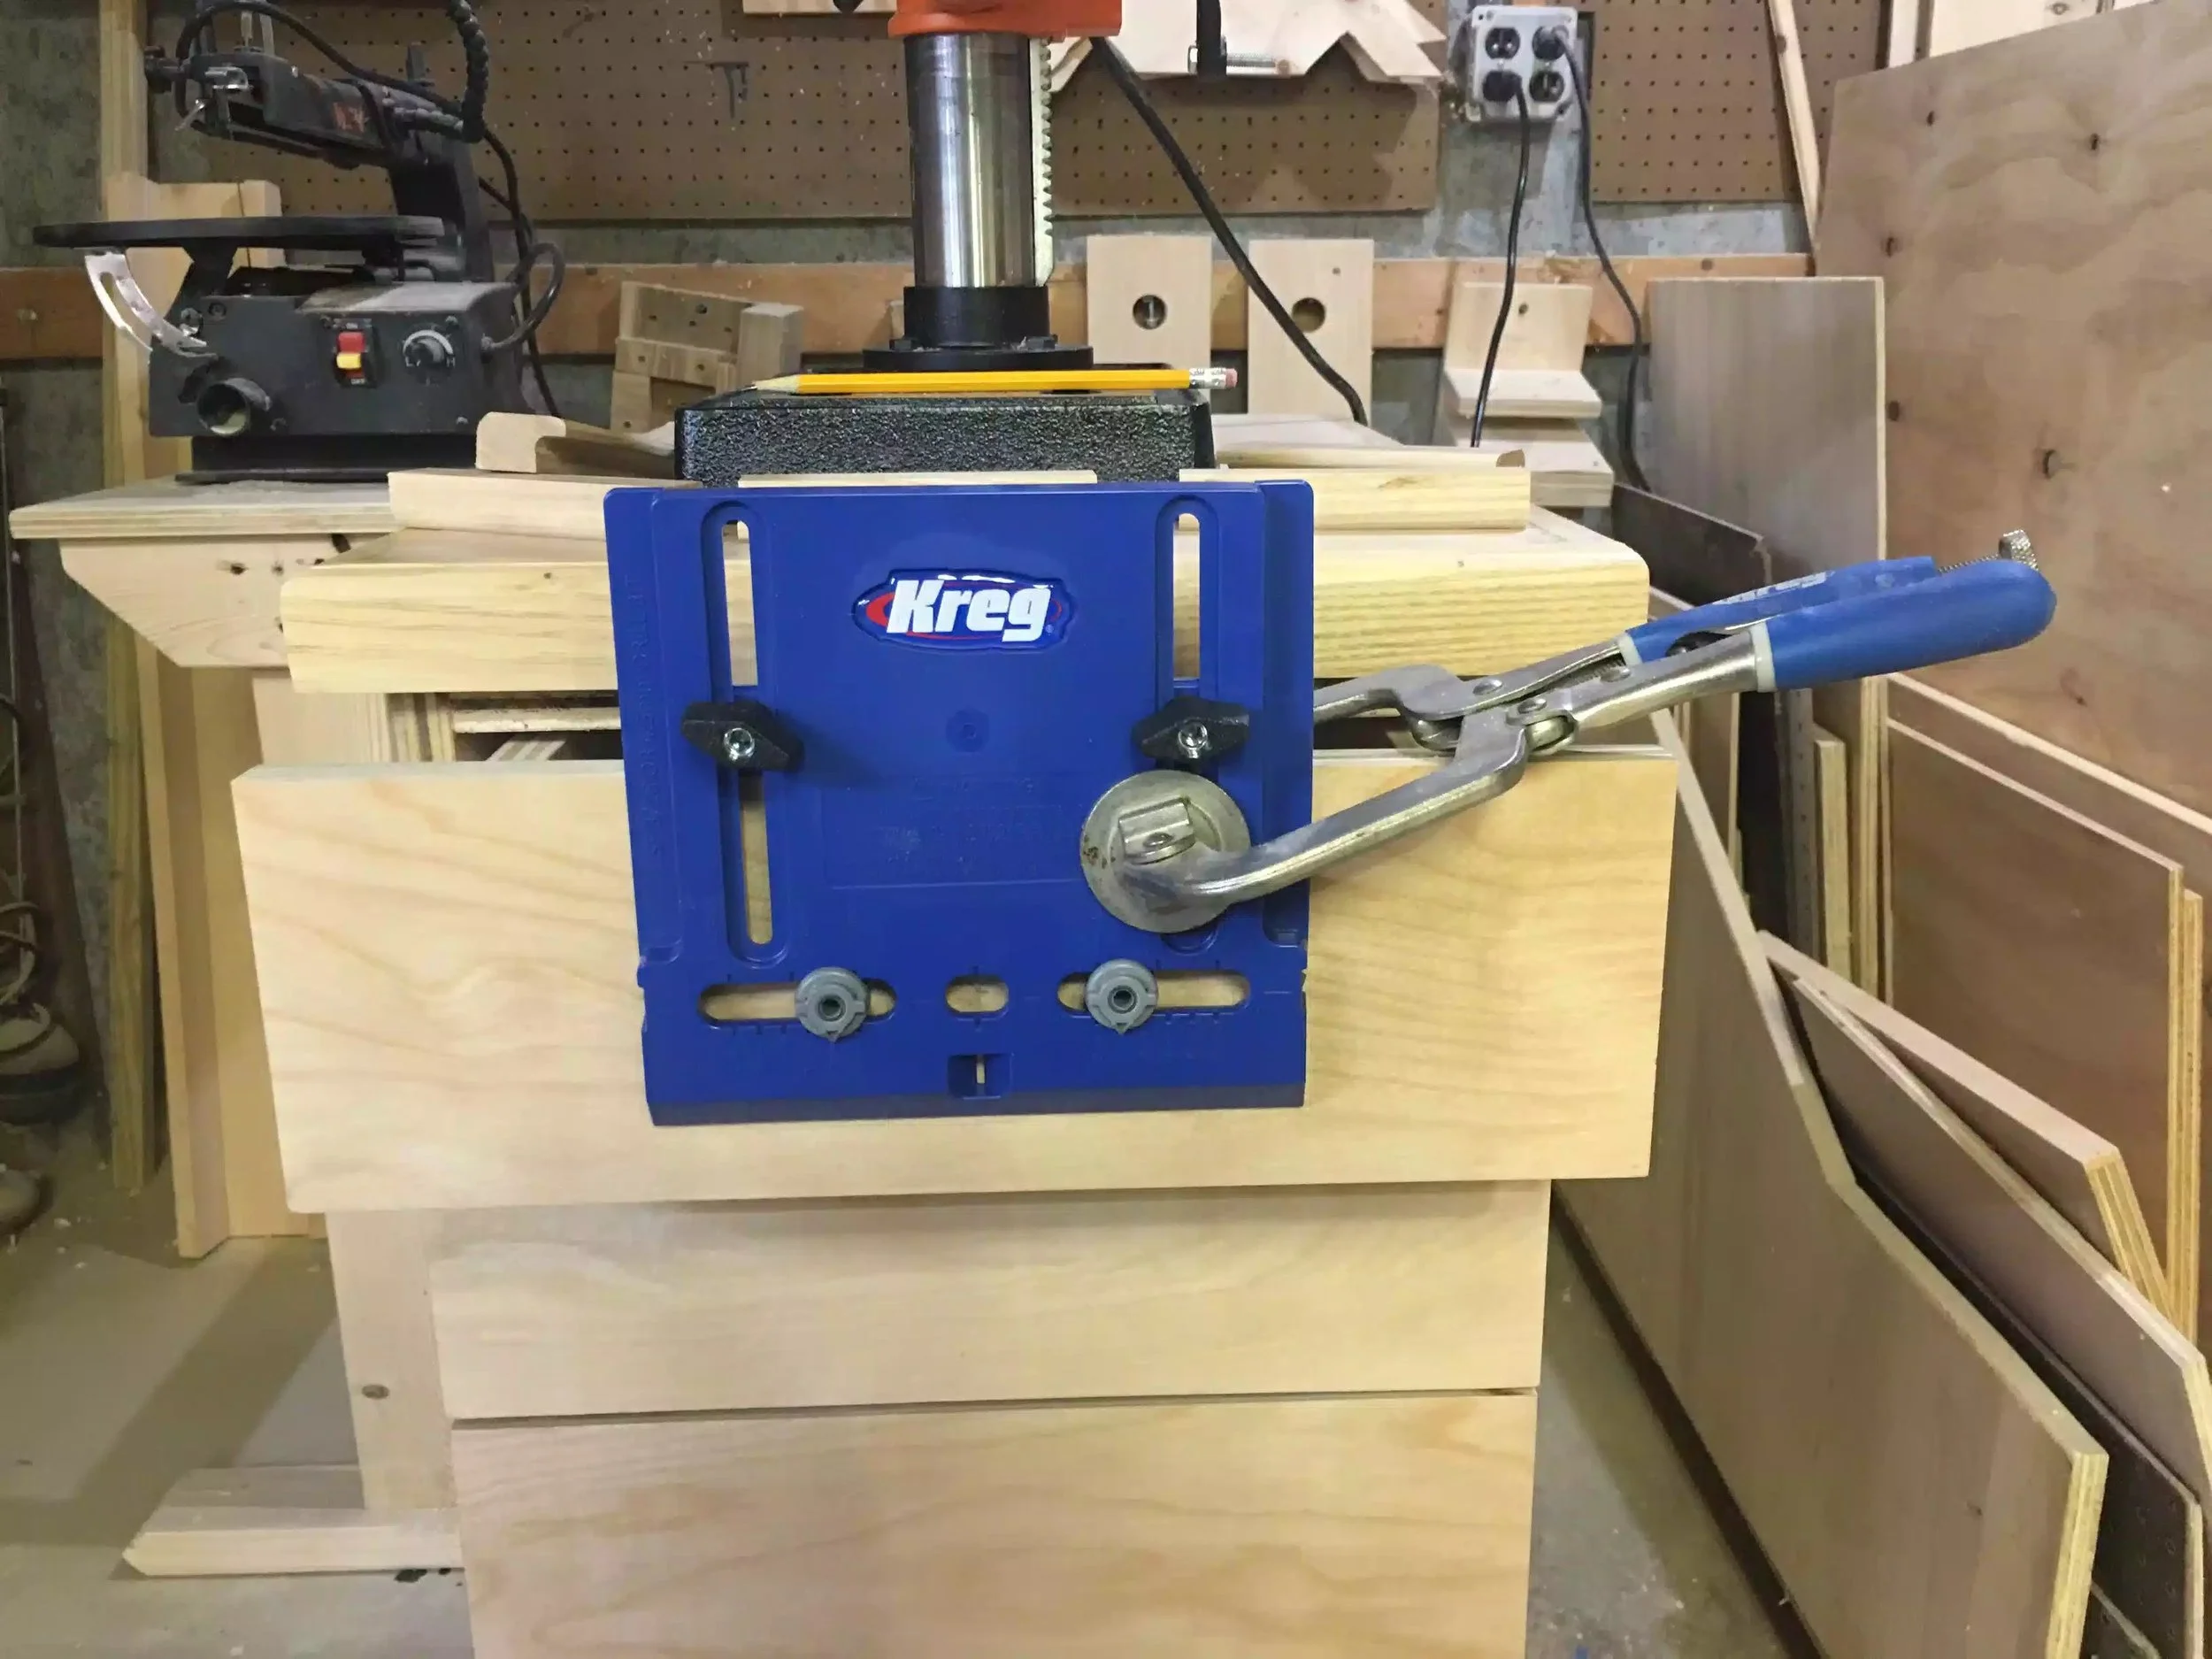
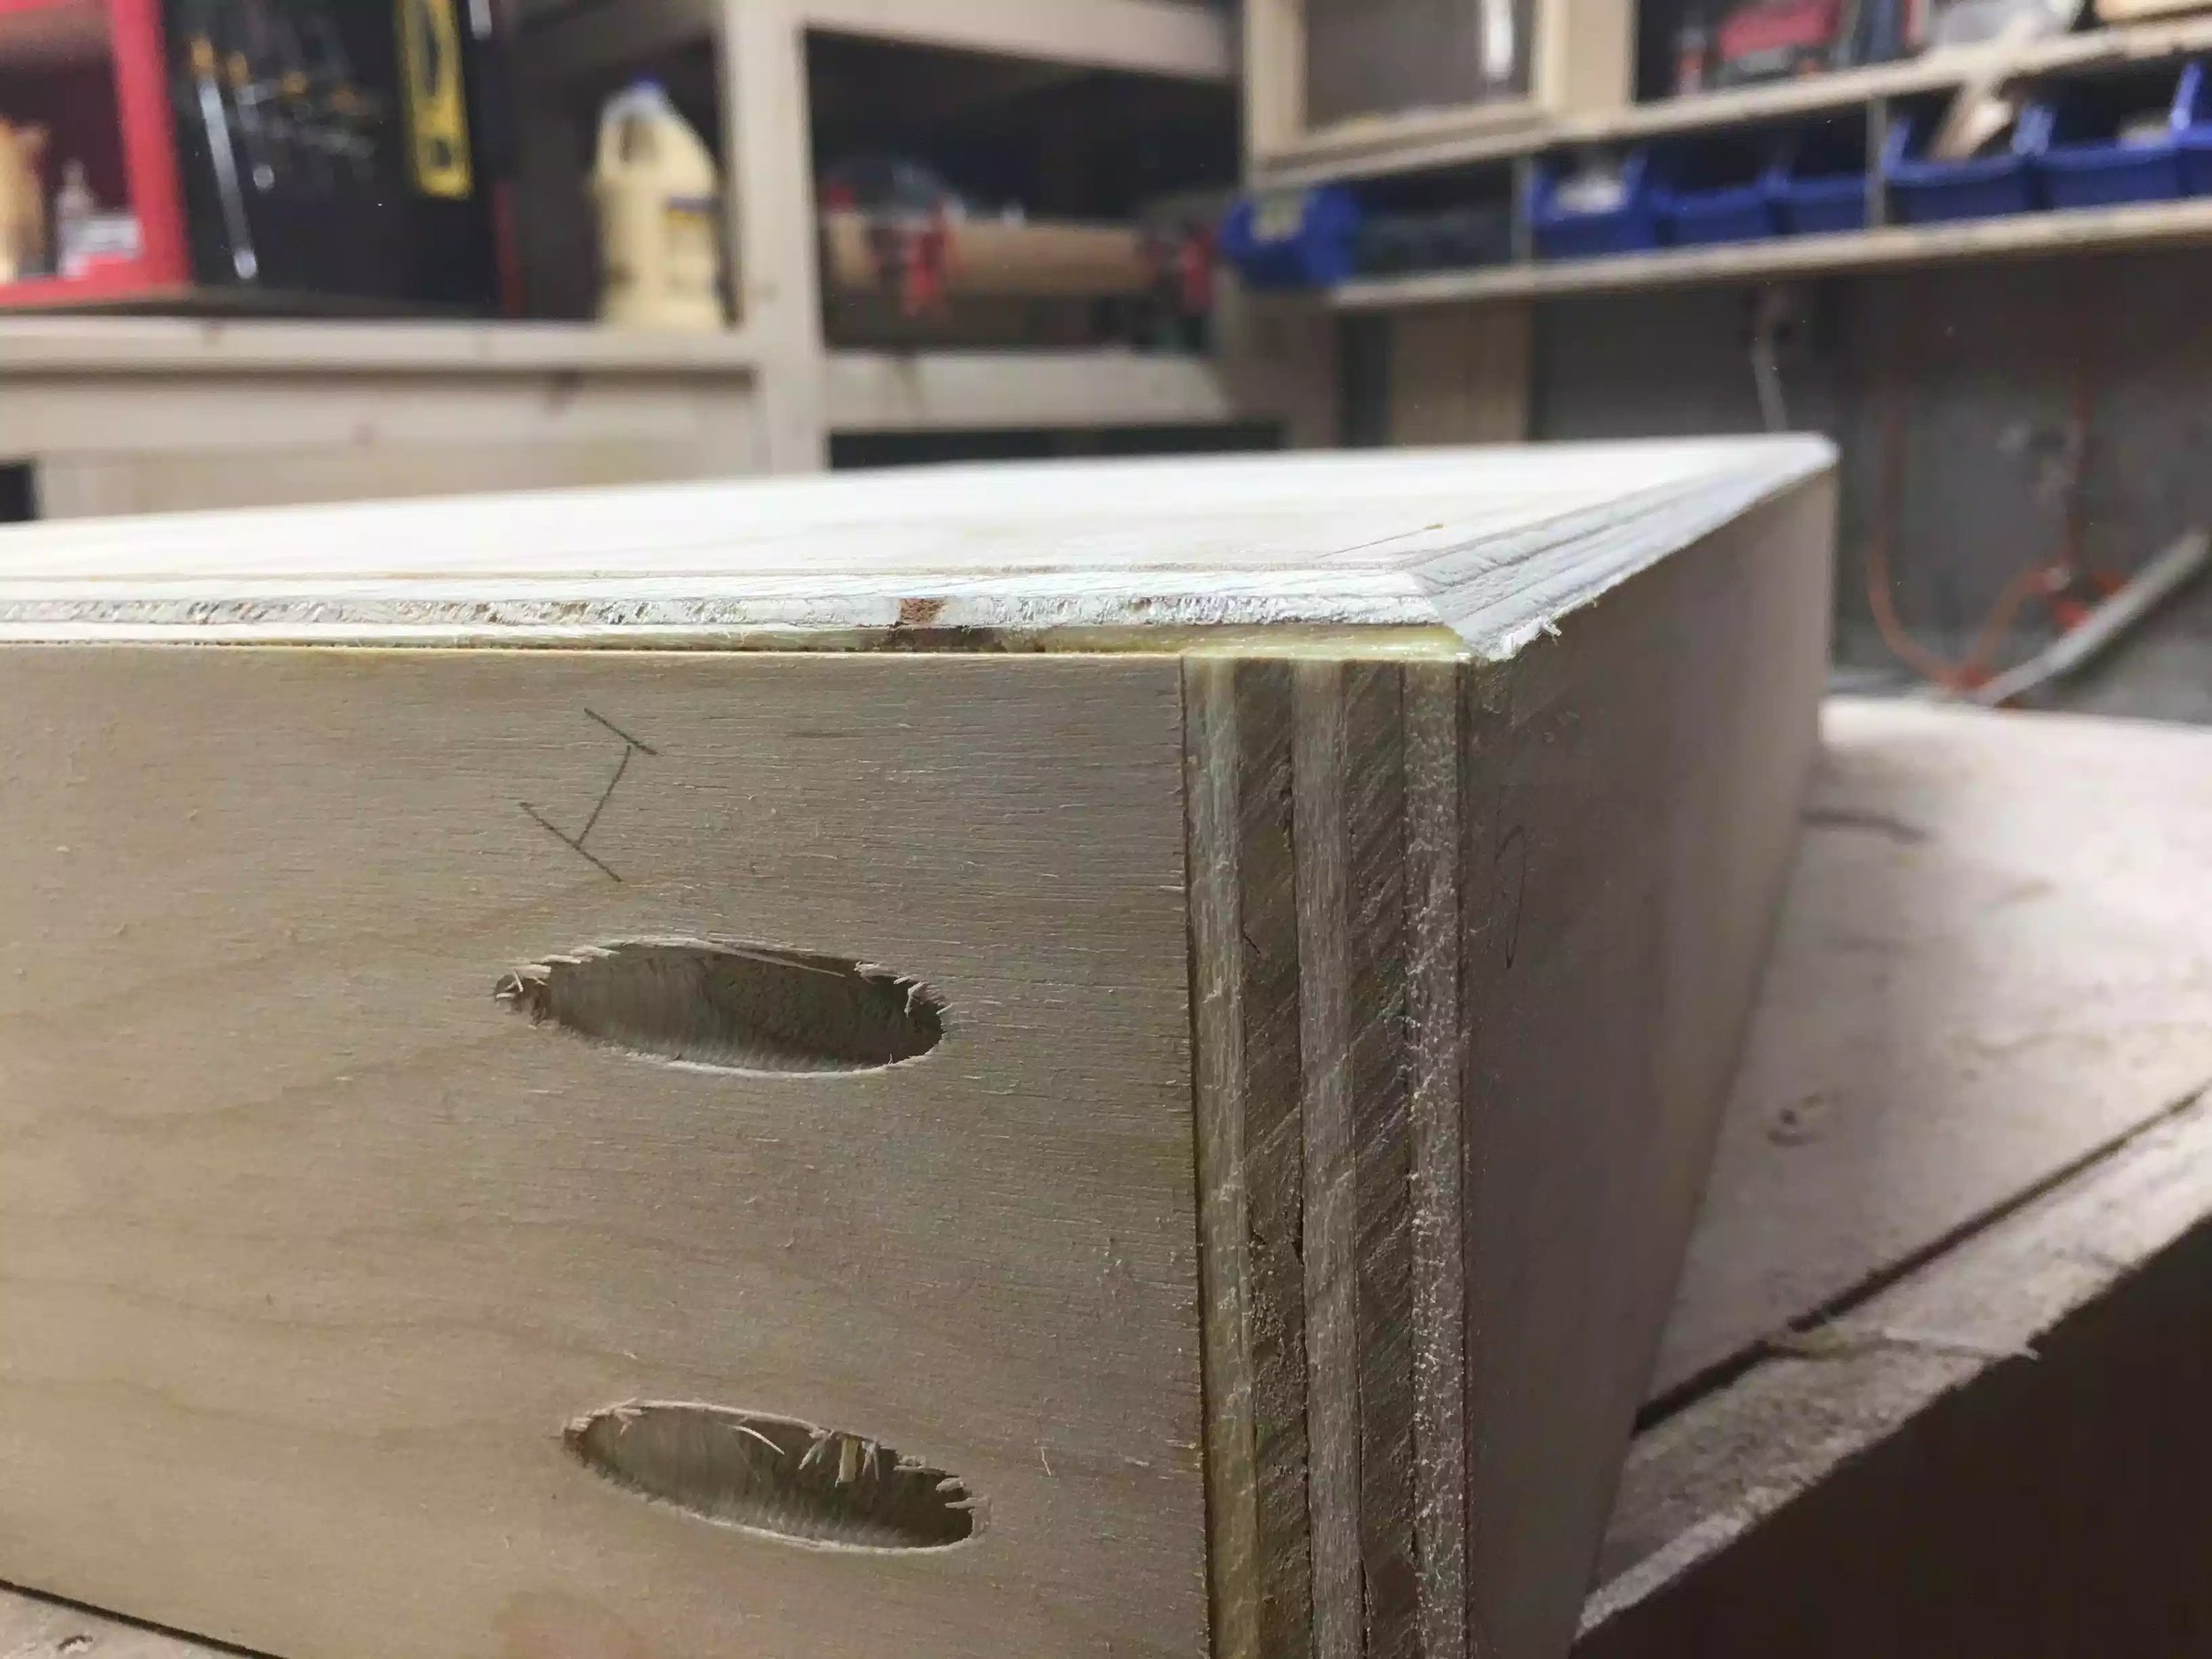
The main method of joinery in this project is pocket hole screws and the way the cabinet is designed the base is very important because all the screws will be added on the bottom side of the base that way you don't see the screws. I used my Kreg pocket hole jig to accomplish but more about that later.

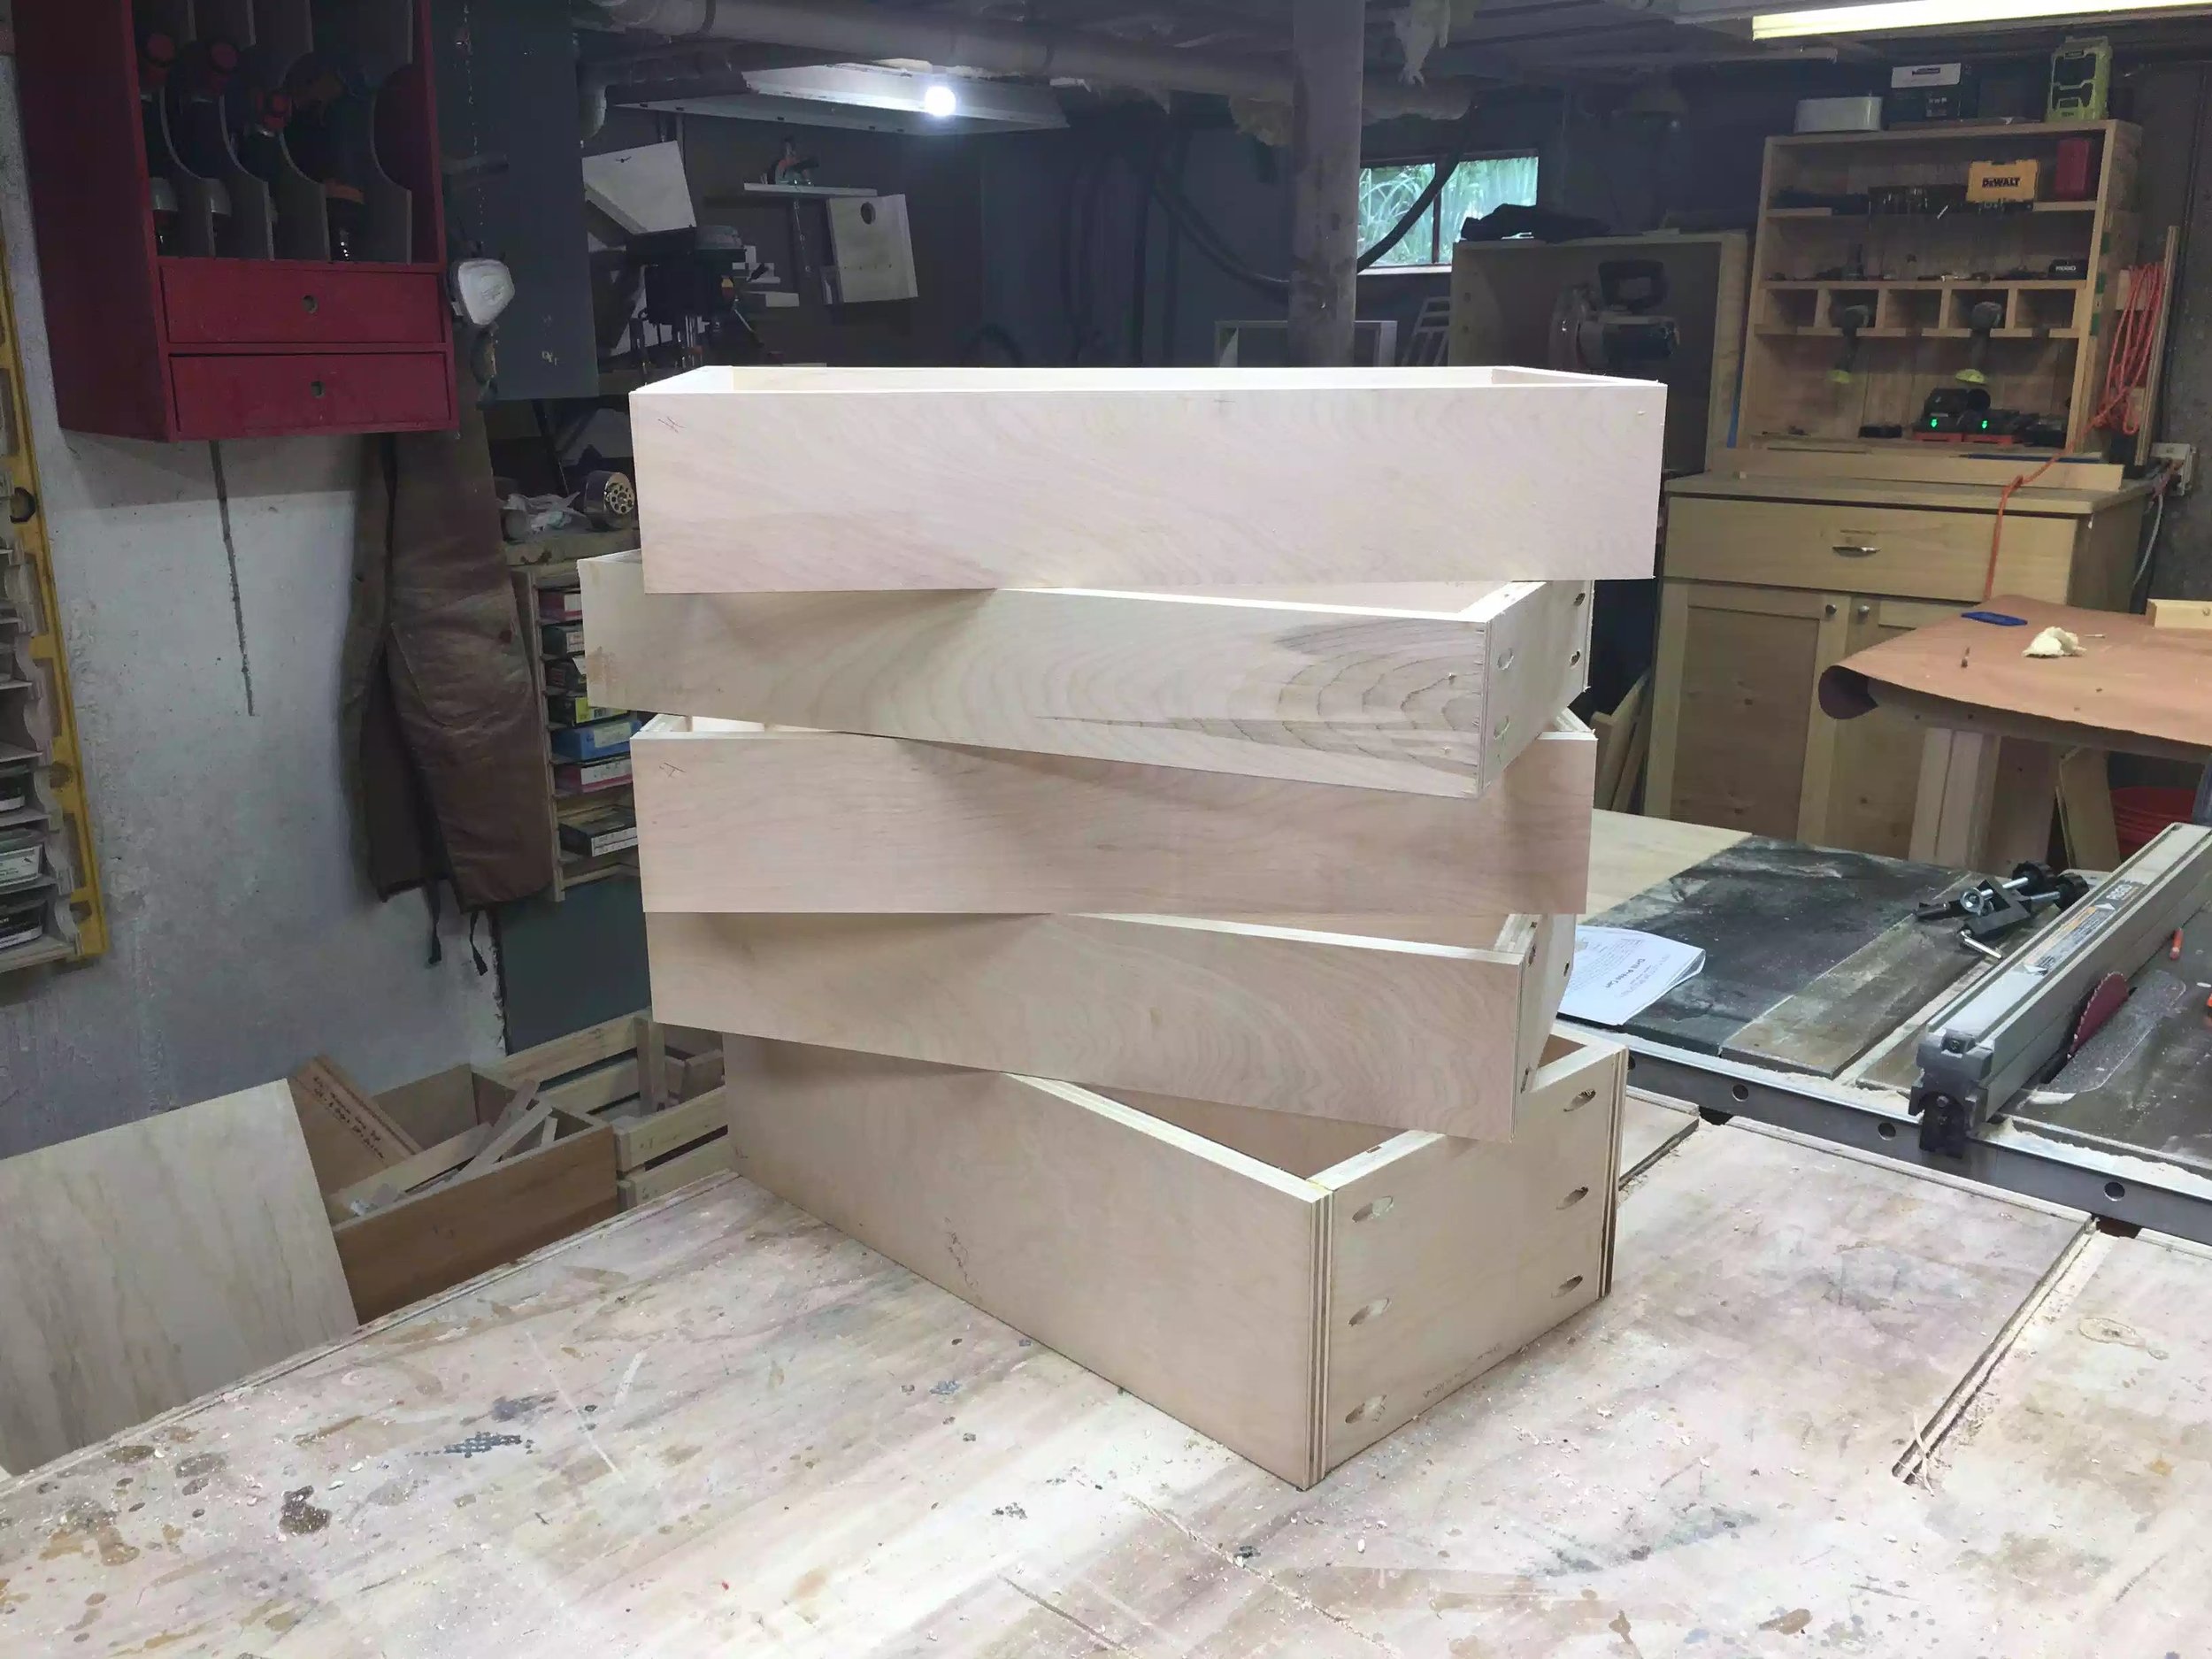
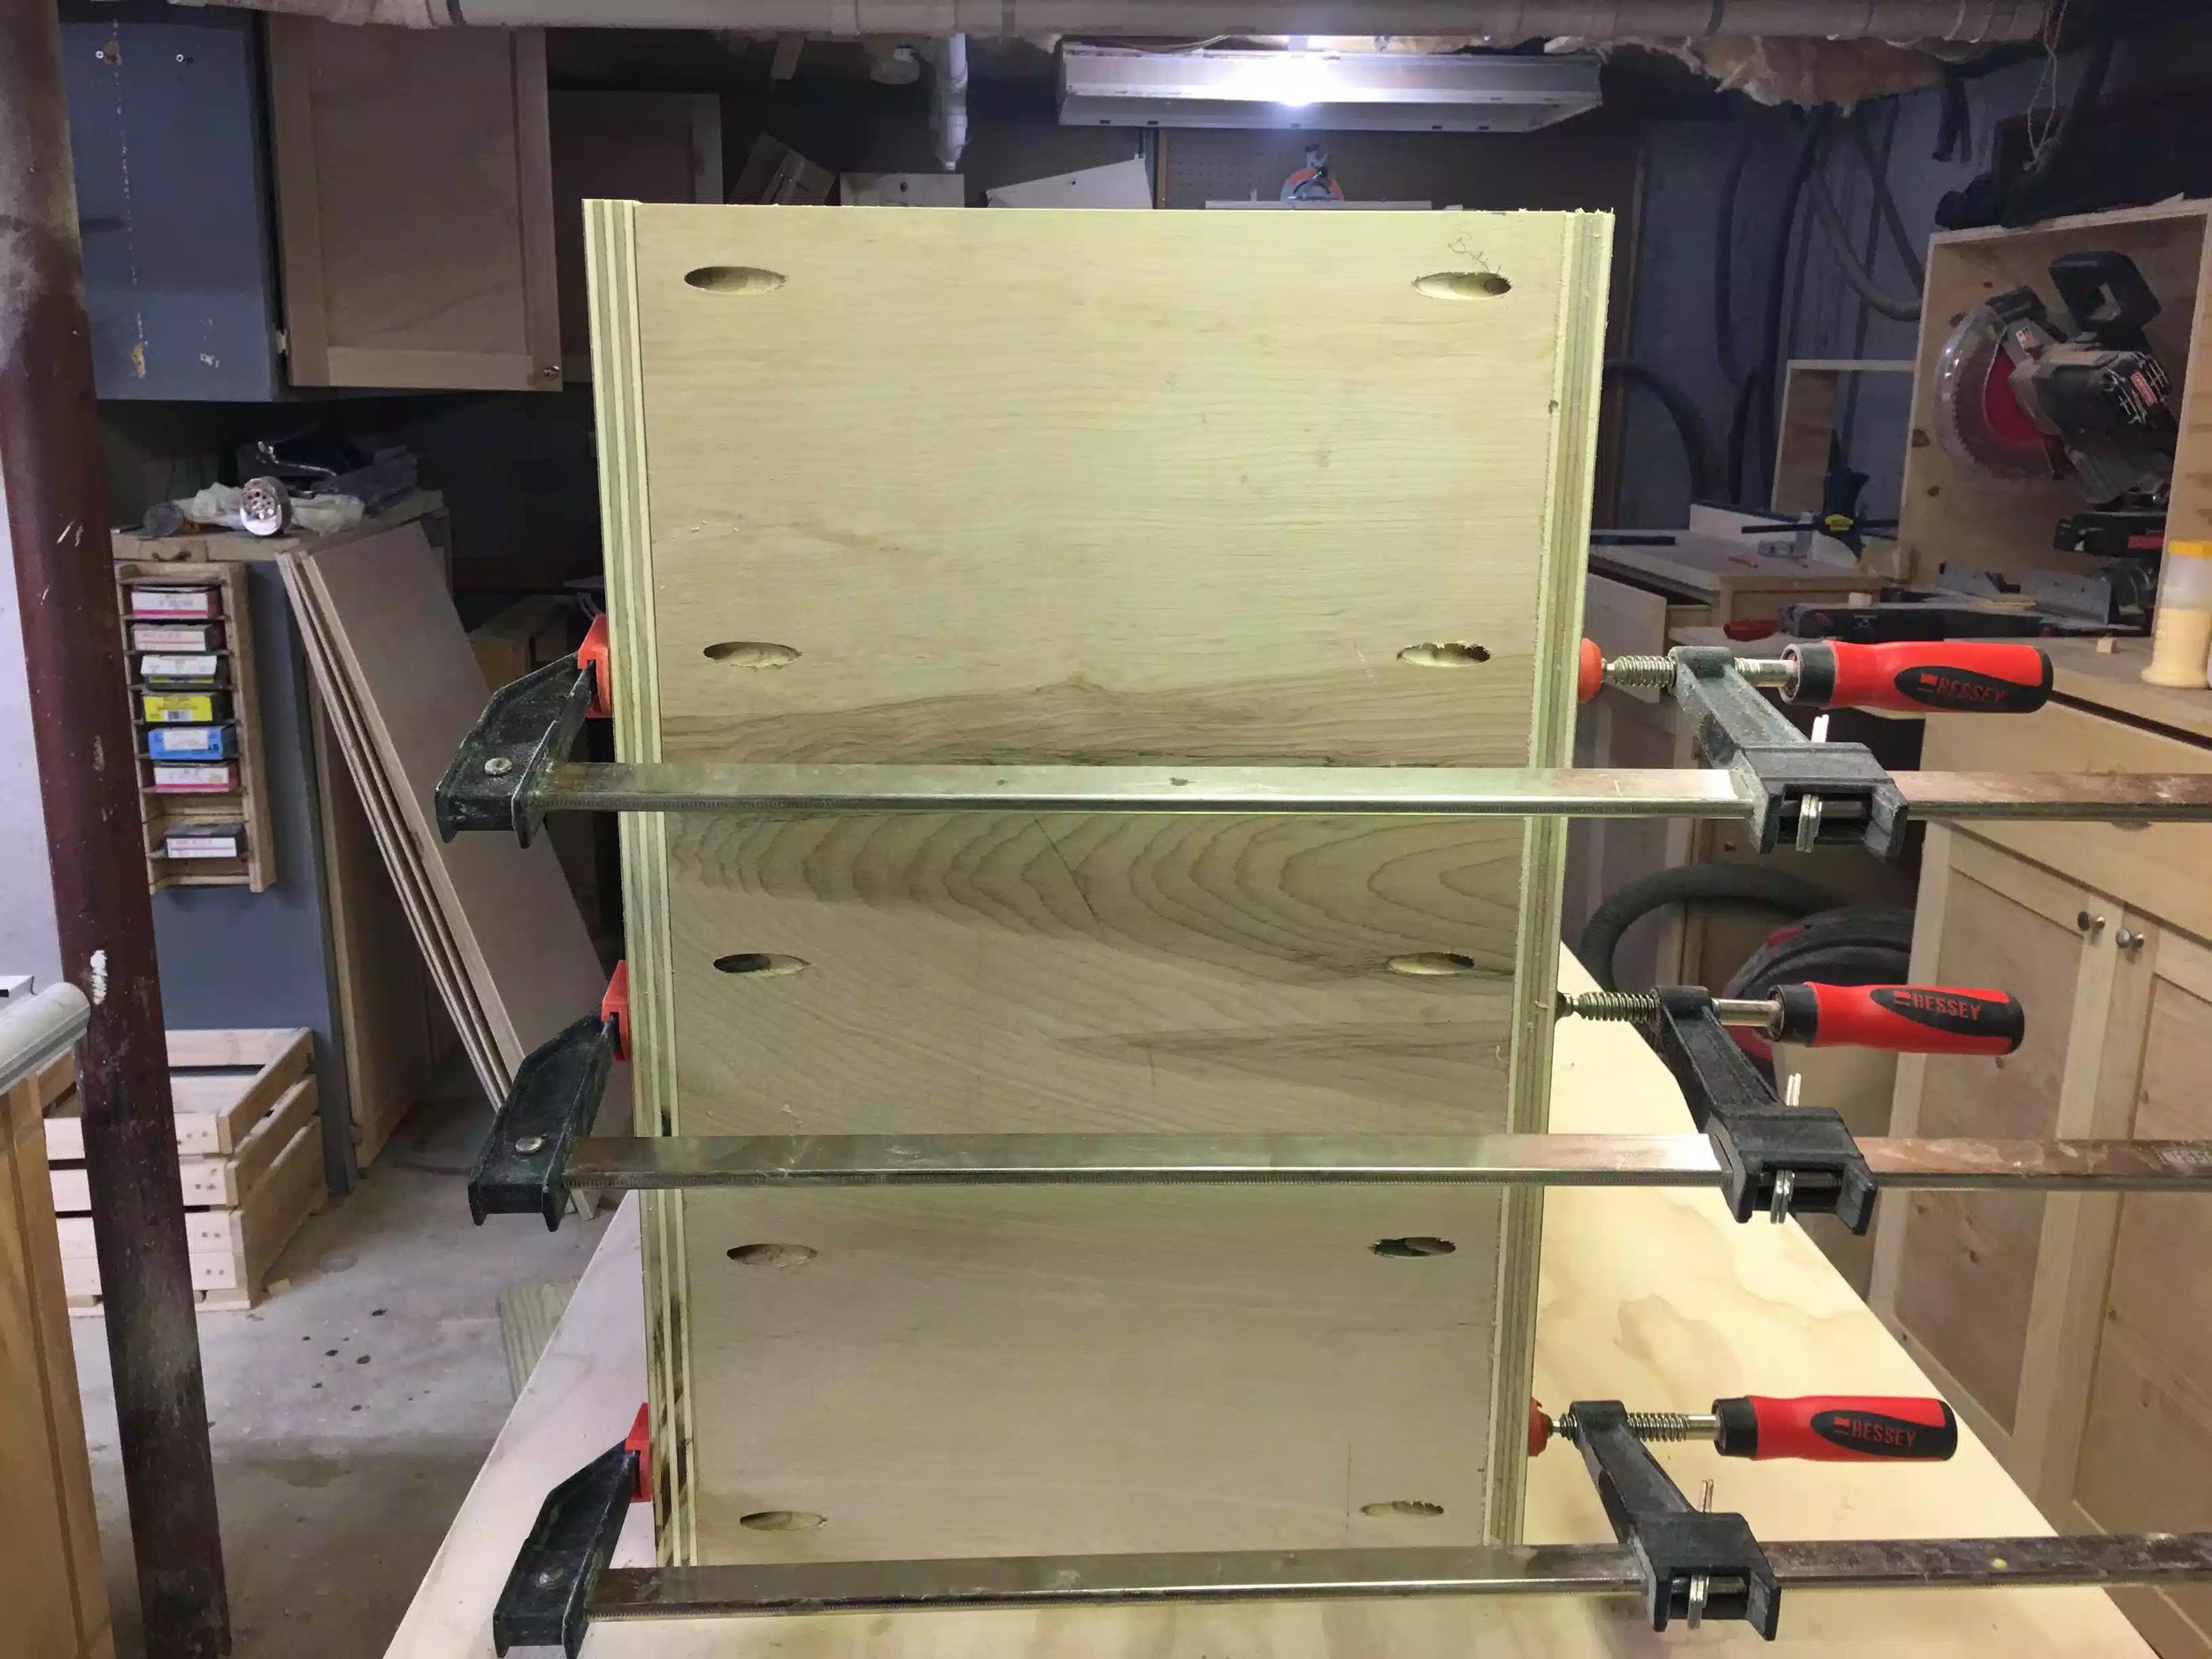
The base will side inside the left & right sides and I will be running 5 pocket screws from either side of the base, Sorry that I didn't take any pictures of the finished base after the pocket holes have been inserted but I will come back and edit the pictures when I am back in the shop.

I spaced the pocket holes 1" from each end of the base and then every 5 inches, I also added glue to strengthen the butt joint. Below are some pictures of me using my pockwet hole jig in inserting the pocket holes.

In this picture I drew lines representing where I want to place the pocket holes. The lines are drawn on each long side

In this picture I drew lines representing where I want to place the pocket holes. The lines are drawn on each long side

Although I didn't take a picture of the finished pocket holes here is a image from the plans showing you how I placed them

Although I didn't take a picture of the finished pocket holes here is a image from the plans showing you how I placed them

Here is another angle of the base, screws have just been added.

Here is another angle of the base, screws have just been added.

In this picture I am getting ready to drill the pocket holes with a special drill bit that drills a tapered hole to receive the screw.

In this picture I am getting ready to drill the pocket holes with a special drill bit that drills a tapered hole to receive the screw.

Here you can see the actual base of the cabinet being clamped together getting ready for the pocket hole screws to be inserted.

Here you can see the actual base of the cabinet being clamped together getting ready for the pocket hole screws to be inserted.

MY POCKET HOLE STATION

Before I move on to the next phase of the project I wanted to show you my pocket hole station and you use it.My version of the Kreg pocket hole jig is the K4 there are other versions of the jig one cheaper and another more expensive

My workstation has 2 main functions 

  • Affords me a platform to lay long work-pieces on and don't need to worry about the long work-piece from moving around while I am drilling the pocket holes.
  • It also has a decent amount of storage for all the accessories that you build up over time owning this jig. 

I made my station out of 3/4" plywood scrap I had lying around, I built two compartments into it that lets me store all my Kreg clamps and screws

Below are several pictures of the jig itself housed on the workstation I made.

Here is the complete workstation, the jig sits flush with the compartments that sit on the left and right of the jig where I store my accessories. The workstation also has a lip on the front that allows me to clamp the workstation to my bench.

Here is the complete workstation, the jig sits flush with the compartments that sit on the left and right of the jig where I store my accessories. The workstation also has a lip on the front that allows me to clamp the workstation to my bench.

Here is another angle of the pocket hole station, its very important that every tool has its place.

Here is another angle of the pocket hole station, its very important that every tool has its place.

Here are the 2 compartments that I store all the accessories for the jig.

Here are the 2 compartments that I store all the accessories for the jig.

Here is a close-up of the jig, you can see the measurement actuation's, these measurements refer to the thickness of the work-piece you are working on, the stepped drill bit can be seen that has a depth stop collar that needs to be set before you st…

Here is a close-up of the jig, you can see the measurement actuation's, these measurements refer to the thickness of the work-piece you are working on, the stepped drill bit can be seen that has a depth stop collar that needs to be set before you start drilling the pocket holes. Finally you can see the clamping mechanism to hole the work-piece in place.

Here is a side view of the jig, the jig has a movable insert block that you need to move that worls in accordance with your stock thickness.

Here is a side view of the jig, the jig has a movable insert block that you need to move that worls in accordance with your stock thickness.

Here is the main reason I designed and made this jig , it can support long work-pieces

Here is the main reason I designed and made this jig , it can support long work-pieces

CABINET ASSEMBLY TIME

So now that my main pieces of the cabinet were prepared and the base has its pocket holes its time to screw these parts together.

I basically set the base in between the left & right sides (as if the cabinet was resting on its back and the base was vertical) and using some clamps to keep things aligned and making sure that everything was square I added glue to the left and right sides of the base , tightened the clamps and screwed the locket hole screws home.

Below you can see an image of where the clamps need to be

Clamps in place

Clamps in place

ADDING THE TOP CLEATS

In order to keep everything square before actually adding the top , I needed to add 2 cleats on the front & back of the cabinet, making sure that the cleats are flush to the top, front & back of the cabinet and again I am using pocket hole screws to secure them to the cabinet, these cleats also gives a place to secure the top once that is made.

The cleats have two pocket holes on each side .

The cleats have two pocket holes on each side .

MAIN CABINET CARCASS ALMOST COMPLETE

So that is as far as I got, the main body of the carcass is almost complete, I still need to add the plywood back which I will do next.

Here you can see the front side of the cabinet, this is where I will be installing the 5 drawers.

Here you can see the front side of the cabinet, this is where I will be installing the 5 drawers.

Here is the top view of the cabinet

Here is the top view of the cabinet

Here is a frontal shot of the cabinet, this is definitely going to be lower than my old cart, that's a good thing.

Here is a frontal shot of the cabinet, this is definitely going to be lower than my old cart, that's a good thing.

NEXT:

  • Cutting the back panel to size
  • Making the drawers 
  • Installing the drawer full extension drawer slides
  • Making and adding the top
  • Adding the casters
  • Seriously thinking about making my own drawer handles and using my Kreg drawer jig
  • Applying a finish

Until next time take care


New Project: Drill press Cart

I have been so busy making projects for around the house it’s time to turn my attentions back to the shop and specifically my drill press setup.

My drill press is currently housed on a very big cart that I used to have other benchtop tools on but I have found other homes for them and now I want to downsize the cart 

so I have been designing with help from online research a mobile cart just for the drill press and all the accessories I have for it.  

It will have the following features:

  • Portable  
  • 5 drawers  
  • A better height to work at
  • A smaller footprint in the shop
Here is a 3D rendering of the project

Here is a 3D rendering of the project